Fusion 360: Virtual Reality GoPro

Dan Banach from Autodesk came into class this week to lead a workshop on Fusion 360. This software is a cloud-based system that allows you to create models for on and off screen objects. I have never used a software like Fusion 360 so this was really new to me. When I first tried downloading the software it did not work because my computer was not updated. I thought this was a little frustrating; it took me 45 minutes to update my computer. Now I am happy it forced me to do that because my computer was way overdue to be updated. We designed an ice scraper and IPhone holder on Fusion 360. I thought this workshop was helpful and informative because Dan walked through each step slowly. He explained where to click and why you click on that function. This made it easy for us to follow along and learn the system. For me, I learn better when the teacher goes through the project instead of working on my own. I think a lot of students would agree with me.

I did not save my Fusion 360 creation so I cannot attach a picture. What I found really cool is that our project would start with three straights lines then you press one button (expand) and it would become a 3D model. It looked so real on the screen. If you hold the shift button and use your mouse to move around you could view all angles of the object. With this you could change one side of the object or make holes on certain sides. I think this software is beneficial to know how to use for class and in the work force. Fusion 360 develops technical skills that are valuable for business jobs. I am always trying to improve my technical skills so I am glad I learned Fusion 360.

I looked up articles on Fusion to read more about it. Every article had the word “engineer” attached to it. I never thought of myself as someone who could understand what engineers learn, but now knowing the basic level of Fusion I feel more confident.

I thought this article was really interesting. It talks about GoPro incorporating Fusion into their camera. They are using it as a virtual reality lens to record 360- degree video. Fusion was picked from an applicant pool of over 20,000 companies. This shows how great of software it is and that it can be used with different items. Check out this article!

http://appleinsider.com/articles/17/07/11/gopro-trials-fusion-360-degree-vr-camera-with-fox-others-ahead-of-late-2017-launch

The link below is an article that provides further detail about Fusion 360. There is information on different features of Fusion 360, such as sculpt.

https://www.engineering.com/DesignSoftware/DesignSoftwareArticles/ArticleID/12675/Fusion-360-An-Integrated-CADCAM-Solution.aspx

Putting Skills Behind The Idea (Week 4)

What happened this week?

This week, Dan Banach from Autodesk led a workshop on Autodesk’s Fusion 360. Fusion 360 is a 3D CAD, CAM, and CAE tool. The software allows modeling for both on and off-screen objects – you can create an onscreen model to share across the cloud or create a model intended to become a physical reality. I’ve used a couple of simple CAD software before, but Fusion 360 has a lot more capabilities than Sketch Up or other beginner CAD programs.


What did I learn?

The workshop was indeed helpful. Sometimes students just need someone to go through the material slowly and work the problem all the way through. This is exactly what Dan did when he taught us how to make an ice scraper and phone charger/holder. Throughout my college experience, I’ve found that there is little I can’t learn myself if I have the material. But as a student in several classes, a member of RSOs, and a student worker, I know I do NOT have the time to teach myself everything I’d like to know! That’s why Dan’s workshop was so effective for me. I technically could have sat down and learned all the beginning commands for Fusion 360 by myself (and I did a bit through looking at the prep videos), but having an instructor take you through step by step kind of forces you to learn it. I have so many programs and things I want to learn about myself, but I never seem to get to it. I guess this commentary lends to the overarching reason I’m taking this class – not only does Vishal and his speakers, students workers, and lab resources provide me with incredible learning tools, it forces me to confront this interest of mine and actually do something about it.


That being said, my ice scraper turned out perfectly, but my phone charger/holder very much did not. I spent the last 15 minutes of class trying to figure out how to change the plane my rectangle (to become the phone rest part) was on. I’ll attach the pictures of both designs below. As you can see, the ice scraper is pretty cool, but my phone charger/holder is not finished. I’ll need to figure out how to move that plane and finish my design, so I know what to do when that problem pops up again in the future. Unfortunately, I do not own a car and when I do get a car this summer when I begin work, I won’t need one (I’ll be in L.A. where it never snows)! So, I won’t waste the material and print out my ice scraper, but I hope to design something I can use out in L.A. in the future.


So what?

Truth be told, I was really inspired by Jeff Ginger’s talk last week and am still thinking about the incredible work he and the FabLab does. The past two weeks, I’ve been more focused on “how can I use 3D printing and the making world to create a job for myself and help others”. But this week was really about adding to my technical skills, so I can make that a reality in the future. I realize I am not an engineer and don’t have the base-level technical skills many people in entrepreneurship and the more technical making world have. So, while I will continue to think about my big, long-term business ideas, I’ll shift more of my focus to adding to my technical skills so I can actually carry out those ideas.


Now what?

My group needs to start narrowing down our product ideas in the next couple weeks. As we learn more about the printers and design programs, it’s becoming clearer which of our ideas can and can’t become realities based off our current capabilities. Next week, our class is centered on design thinking, something I’ve covered in a T&M product design class before. I’m excited to hear about how the 3D printing and making world changes the framework of this lesson.

Learn More about Fusion 360:

Why 360 over other softwares?

The 5 Things That Made Me Take Another Look At Fusion 360

Beginner Projects for Fusion 360:

https://gallery.autodesk.com/fusion360/projects/beginner-project


Fusion 360 Assignment

I used a tutorial to make a lampshade for a cord and light kit I have. Here is the shared link: http://a360.co/2G3q2vS.

I learned how to create a circular pattern, how to insert planes, and how to rotate a parameter to create a 3D image. I hope I can actually print this!


Week 3 Reflection – Fab Lab Presentation

This week in class, we had the pleasure of listening to Jeff Ginger speak about his love for the “making” mindset and everything he has accomplished by working in the Fab Lab with people who listen to him and his instruction and have began to create amazing things in the lab. Something I found very interesting was listening to how he used a child’s game “MineCraft” as a medium to help teach children about the making mindset and get them more attracted to the idea of 3D printing and learning more about it. Some mention of the drag queen Sasha Velour was also mentioned as she has asked one of the many Fab Labs to create a dress for her which I found so amazing since I like to watch Drag and know who that is, it was a really cool moment to think about how this technology is even helping in a fashion setting! Additionally we were able to fool around a bit with tinkercad and begin creating 3D objects. My partners and I put in our first print to be made for our logo or emblem for team GEM and I am excited to see how it comes out!  #Drag #GEM #MakingMindset

Early Beginnings

Starting Tinkercad with GEM’s Logo 

Last week, we were all assigned into a group and were instructed to come up with a team name and logo to print through the 3D printer. Putting our initials together, our group decided our team name was GEM. We were able to create a logo based on this design:

To create our design, we had to go through the process of getting familiar with Tinkercad, an online resource-3D CAD design tool. Getting familiar with this tool was a pleasant experience because how user-friendly everything was. Upon creating a free account, the design tool was easily accessible.


Tinkercad

The picture above shows a quick snapshot of how the tool looks like. A majority of the screen is filled with the workplane (a visual aid of how your 3D print design will look like). Common shapes are easily accessible on the right hand side, as well as: texts, shapes, symbols, connectors, extras, and circuit assemblies.

Fab Lab

Being at the Fab Lab before, I was excited to hear that the director of the lab would be giving us a talk in class about 3D printing. Below is an image of the Fab Lab if you’ve never seen it:

Image result for fab lab uiuc


Unfortunately, I caught the cold and was not able to make it to class for his presentation. I was still able to read parts of his presentation through the different reviews people posted about, and most of what I read was very interesting.


Fab Labs Around the Globe

This week Jeff Ginger came in to talk to us about his passion for 3D printing. Jeff is the director of the campus fab lab. This is a place where any student can use the resources to learn, design, print, and collaborate. The area is open for creativity and experimentation. Jeff emphasized that fab labs are accessible to the public because this way everyone has an opportunity to learn and create. Jeff showed a map of fab labs around the world. Some of the locations were China, Australia, and South America. I thought this was fascinating how the advancement of technology is spreading throughout the world. We are all in this journey together trying to discover the future.

Jeff still identifies as a “librarian”, but not the typical one. He considers himself a modern librarian because he is providing an open space for learning 3D printing, instead of books. I went on the campus fab lab’s Instagram to view the pictures and examples of projects created there.

This picture shows kids at camp in the UIUC fab lab. It is great to see young kids learning and using their creativity in the lab. It creates a different way of thinking. Getting kids involved at a young age will expand their knowledge on the products.

Wow! A 10 year old was able to make this. This shows me all the possibilities that the fab lab has to offer.

Tinkercad:

Also, in class we got time to work with our teams on printing our logo. This was exciting because it was my first time experiencing the printing process. We were introduced to tinkercad. This virtual printing platform made me feel so high tech! I was able to pick designs, shapes, letters, and sizes. It reminded me a little of WordArt. I thought it was simple to navigate and use. We worked on including letters in our design, but had issues with spacing. Once we organized the design, we decided to make it smaller. Our first run through the printer did not work because the material spooled in the printer and got caught on something. This showed me that printing is not always going to be perfect. It is important to have patience.

Finally, the printing worked in just 36 minutes. It was so cool watching the nozzle create the shape. The process seemed very tedious, but came together perfectly. I am very happy with how our product turned out and I cannot wait to introduce the “Money Makers” team to the class.

This is a photo of our final product.

Getting hands on with 3D Printing

This week, we had students lead the class and had a very enthusiastic guest speaker, Jeff Ginger. Jeff shared his vision and aspirations for the FabLab that we have here on campus as well for 3D printing in general. Jeff brought 3D printers into public libraries in hopes of having the younger generations develop a maker mindset. He incorporated the popular video game, Minecraft to peak the interest of the youth and it definitely worked!

Last week, our small groups were left to develop a logo and team name. We came up with “3Dream”, because I believe that if you can dream it, you can print it. We created our first sketch to encompass a dream cloud  with our team name at the center.

With this basic sketch, the foundation of our design was laid and brought to life with Tinkercad which turned our idea into a CAD model. Tinkercad offers only four different font options and I wondered if it was possible to import a font just like you can import a design. After some research, I learned that you could do this by using sketchpad, selecting your font and start typing, export it, save it, and then download. Afterwards, go to an online converter, on there you will change the image to an SVG, and select your SVG image to convert. Once it has been converted, the file can be imported onto Tinkercad! And just like that, our design was created.

We were proud of our design but we were not satisfied, so we made some alterations. By exploring Thingiverse we came upon a  model of a low polygon cloud  that made our 2D design 3D! With this change, we were able to see the differences and difficulties by working with different dimensional designs. Once our design was completed and uploaded onto the Cura software, it took 4 hours to print and it came out great! I was surprised that it took so long to print since the inside is hallow but I assume that is was due to the certain material used.

I learned so much this week and I’m very much excited to continue to learn, practice, and create in the future classes.

3D Printing: The 3D Printing Network & How it Works

This week, our guest presenter was Jeff Ginger, the director of the CUC Fablab. I really enjoyed Jeff Ginger’s presentation. What I found most interesting about the Fablab was the collaborative nature of the workspace. I was exciting to hear about his research focus in community informatics and user experience design. Jeff’s take on education in the public-school system was also quite interesting. I agreed with his perspective that there isn’t enough courses to foster creativity, entrepreneurial thinking, and the maker mindset amongst students.

I think the Fablabs mission to enable all individuals to imagine, design, and create using open source software methodologies is powerful work encouraging more people to adopt a maker mindset. I have visited the Fablab because of my involvement in Illinois Enactus, a project based social entrepreneurship organization. Stay glassy, a project in our portfolio for Enactus owns a wet-saw and utilizes Fablab space to up-cycle leftover glass into viable products for retail. It was also amazing to hear that the Fablab is comprised of a network of numerous spaces across the nation.

The readings and videos this past week refined my understanding of how 3D printers work and reminded me how revolutionizing 3D printing tech is. With Tinkercard and Cura I learned how to design and convert digital prototypes into svg files to be 3D printed. In reading about Tinkercard, I was able to import and edit a png image. The ability to edit the size, color, and shape of an image allowed my team and I the ability to create our customized logo. The logo design is below and it took approximately six hours to be printed.

The how 3D Printers Work video explained how 3D printers use an additive manufacturing process to create objects from nothing. The main types of 3D printing technologies include SLA: Stereo Lithography, SLS: Selective Laser Sintering, and FDM: Fused Deposition Modeling. These methods all utilize lasers to create objects from scratch. The motherboard guides the print head in motions based upon the digital design.

3Ders.org is a website that lays out the basics of 3D printing. It explores what 3D printing is and provides an overview of its history. This digital resource is very easy to comprehend and incorporates videos to explain concepts.

Link: https://www.3ders.org/3d-printing-basics.html

Another resource 3D printing resource I came across is startasys. Stratasys is a 3D printing knowledge center that has instructional videos, case studies, and education materials to learn more about 3D printing. Specifically, the educational resources provide an in-depth curriculum on STL files, adobe Photoshop, and project ideas relating to 3D printing.

Link: http://www.stratasys.com/resources


First 3D Creation

FabLab Guest Lecture

This week our class focused on the extensive possibilities of 3D printing applications and various examples of products created with various machines in the FabLab on campus. We had guest speaker, Jeff Ginger, who is the director of the Champaign Urbana Community FabLab. He shared insights on the various capabilities of the FabLab and example products and projects that have been created within the lab. I was absolutely inspired hearing different stories of several entrepreneurs who launched their businesses with the help of the machinery and expertise of the FabLab. I have visited the FabLab a few times and made laptop stickers using the Silhouette machines and software however I’ve never used any other equipment. Each time I’ve gone in, I’ve always wanted to explore the other machines but was intimidated by them so I look forward to familiarizing myself with more FabLab machines this semester and expanding my “maker” mindset.

3D Printing Process

The next part of the class we got to dive in and play with the Tinkercad and Cura software while finalizing our logo designs and setting up the printers to create our team logos. Our design went through a few different iterations. We decided on the name 3Dream inside a cloud to represent the endless capabilities of 3D printing and the many dreams that can be achieved through this technology. Our first logo was a flat rendition, as shown below, although after loading it into Cura we decided it would be neat to make it into a 3D cloud shape. We found a useful model for a 3D cloud on thingiverse which we then tinkered with in tinkercad adding our logo and stars.

One of the most challenging parts for us was adjusting our logo to fit perfectly onto the 3D model of the cloud. We utilized a few different tools within tinkercad in order to rotate and adjust the logo to lay flat onto the surface since the surface was angled. Below I have included images of our design in the Cura software as well as the final product. I was very happy with the final product. It took about 4 hours to print.

3D Printing Resources

Looking further into different resources available for people new to 3D printing, I am amazed by what the internet has to offer. I have included a variety of different resources I will be using this semester.

Models Library: Cults3D: https://cults3d.com/

This platform is similar to that Thingiverse and Pinshape however more selective. There are professionals who ensure the uploaded models are of the best quality whereas Thingiverse allows anyone to upload their designs even if they have not been printed. Additionally, many of the curated models on Cults3D are created by professional designers.

3D Scanning: Trnio: http://www.trnio.com/team/
This is a free IOS App that allows you to convert photos from your phone into 3D models. I am hoping to try out this app to see how well it works.

3D News: http://3dprintingindustry.com/

This website shares news about the 3D Printing Industry such as hardware and software but also discusses related industries that are impacted by 3D Printing.

Week 3 Reflection

Jeff Ginger came in to talk to us about how he got involved with the FabLab. He truly enjoys everyone he works with and it was nice to hear him speak so passionately about different projects he’s been involved with over the years. He spoke a lot about the artistic entrepreneur which I found particularly interesting. He talked about people who took their creativity and used 3D printing to really make their passions come to life. I loved hearing about the different ways people were displaying their artistic abilities.  He also mentioned his own initiatives to help the community through the use of 3D printers. He helped some young adults channel their passion for minecraft into something tangible and constructive. I thought it was a very inspiring story of the use of creativity in the community.

In class, my team and I created our logo. Some nice gentlemen, Billy and Dash, showed us how to use Tinkercad as well as the actual printers. My team created a ‘Money Makers’ logo which was a dollar sign with the word ‘maker’ engraved in it. I also took the opportunity to make a dog key chain that doubles as a phone holder. I found this particular keychain on thingiverse and decided to print it as a side project.

I hope to print this woman next because I think it’s an interesting piece of artwork.

https://www.thingiverse.com/thing:2778580


The Importance of Curiosity and Creativity

This week Jeff Ginger came into our class to speak to us about the FabLab and the importance of 3D printing. He spoke a lot about the importance of exposing children, especially in their early teens, to creativity and curiosity. Jeff made this realization when he was working at a library and discovered some teens playing Minecraft. Minecraft is a video game that allows players to create and build their own world using blocks. Jeff made the connection between Minecraft and 3D printing and decided to introduce 3D printing to their young minds. As Jeff says, I believe this can be extremely beneficial for the community, allowing young teens to imagine and create things from their developing minds. In addition, Jeff speaks about the Fablab and how it is one of the only ones that is still open to the public. This not only allows the public to have a creative outlet, but also allows people from different areas and backgrounds to share their ideas and hopefully come out with something amazing. Overall, Jeff was an excellent speaker and got me even more interested in the creative and art aspect of 3D printing.

Also, in class, my group had the opportunity to create our logo. When thinking of what we wanted our team name to be, we wanted it to be something cohesive and collaborative. We then thought of the phrase, “The whole is greater than the sum of its parts.” This made us think of a puzzle piece. Therefore, we created a puzzle piece and named our team, Team Synergy.

In order to make this 3D print, we had to first learn Tinkercad. Tinkercad is the system that allows you to create your print and scale it. The two students, Billy and Dash were extremely helpful and energetic in teaching us how to use it. Tinkercad was pretty easy to play around with and my group and I quickly figured out the best way to make our puzzle piece. We printed it and it turned out well the first time! We were super interested in watching how layer by layer the printer created the design we created just minutes before. It was pretty incredible.

When searching online for other resources that could help me learn more about 3D printing, I stumbled upon this DIY Weather LED Light Display. This 3D printed LED lamp shows the weather through colors. For example, if it’s snowing, white lights will come down the lamp. If its raining, blue lights will come down the lamp. If its warm, red, if its cold, blue, etc. Prints like these make me realize how much you can do and how limitless 3D printing really is. Overall, this week was great and I am happy we finally got to use the printers!

http://www.3ders.org/articles/20180204-this-diy-3d-printed-lamp-shows-real-time-weather-with-amazing-led-light-display.html

3D Printing Take One

I found the guest speaker for week 3, Jeff Ginger, very interesting and fun to listen to. His passion for making things was contagious and got me even more excited to visit the fab lab and make things of my own this semester. It was exciting to see the different things he has made in the fab lab as well as what some of his students have made. I was really interested in the backpack with the solar panel. I thought it was a really good idea and definitely something I would use.

In class we began using Tinkercad and exploring ways to design things. We did basic things like adding shapes and figuring out how to maneuver through the website. I did a few of the tutorials and learned how to make holes in shapes, change the size of the shapes, and the basics of moving the shapes around.

My group was able to create our logo on Tinkercad and print it at the end of class. I have not seen it yet since the print time was longer than the class period, but I am excited to see how it turned out.  We made a diamond like shape with our team name ‘GEM’ on the top of the diamond. We also learned how to change the different categories in Cura like quality, shell, and infill before printing to make a successful print more likely.

I have found a lot of different websites online that share a lot of information about 3D printing. I actually found different video tutorials posted on LinkedIn that were interesting to watch. As I become more inquisitive about 3D printing I foresee myself using these online resources to learn more about the 3D printing world.

Learning 3D Printing Programs

Overview

Hi again! This past week our class had the pleasure of having Jeff Ginger join us. Jeff is the director of the Fab Lab that we have on campus. The Fab Lab is “an open and collaborative workshop space for computer-driven innovation, design and fabrication” (http://cucfablab.org/). Essentially, this establishment allows individuals of all ages to utilize making resources to bring their creative ideas to fruition. Our class will be visiting the Fab Lab sometime in the coming weeks, so I will have an entire post dedicated to the Fab Lab coming soon!

I am so grateful to have been able to learn how to use both Tinkercad and Cura this past week. Our class’s steps in 3D printing include first creating an object on Tinkercad and then bringing that file into Cura to get the proper 3D printer settings applied to the object. Diving into these programs allowed me to see what it really means to be able to design a 3D print (from either a template or the bottom-up). Creating is an activity that I genuinely find to be fun, challenging, and rewarding. So let me tell you a bit about each of these programs:


Tinkercad

Tinkercad is an online site that allows us to create our own 3D models. This program really speaks to me as a creator because it truly allows me to create any print from the ground up. The user is allowed to put different shapes together, add text to designs, and even import designs from other sources. The interface is also extremely intuitive, and it almost feels like a game when creating the different designs.

One of my favorite features of this program is that we can access our designs from any computer due to the cloud platform that it is on. This is great because I was able to get my account set-up online while at home and play around with the software before logging on when in class. When I got to class, all I had to do was log into my account and then I was able to jump right back into my work. Here is a picture of an Illinois-shaped keychain that we were able to import into Tinkercad (from a template in Thingiverse). It was fun to add different text to the keychain and customize it to our liking.


Cura

Cura can appear to very intimidating when first launching the program. However, as the user starts to look deeper into each of the settings, it becomes a much more comfortable program. This is the program that we use to get the proper file needed for the 3D printers. I will have to dive into a deeper explanation of this program in a later post because as of right now, I only know the basics. Our instructors let us know which specific settings to select when printing our objects, but I still need to understand the program better and how each selection in the settings (see image below) affects the final print.

My team, Fast Forward, was also able to create our team logo. We designed it on Tinkercad, set the proper settings in Cura, and then printed it. Below you can see the final product.


Thank You

As always, thank you so much for taking the time to read my post. I cannot wait to continue learning more advanced features on Tinkercad, Cura, and other 3D printing softwares over the coming weeks, and I look forward to updating you along the way!


-Scott Provenzano


Source:

http://cucfablab.org/

A First Taste at 3D Printing

This week we got the pleasure to hear from Jeff Ginger, the director of the Champaign-Urbana Community Fab Lab as our guest lecturer. It was incredibly interesting to listen and learn about all the different types of equipment that the fab lab and what all that equipment allows them to do in that space. Jeff also talked a lot about the work the fab lab does in the community and how he’s helping people of all types become makers in their own way. I was especially drawn to all of the programs they do, such as the summer camps and after school library programs, to introduce students into being more creative and giving them that ability to make things. Even using the popular video game Minecraft to develop kid’s ability to model objects on a computer was a cool thing to see and is something I would’ve never even thought of. The work that the fab lab does with students in this community is important and has inspired me to try to bring some of the programs Jeff talked about to my local community once I graduate and improve the education system that I went through as a kid.

This week in class we also got our first taste at making something and 3D printed our team logo using tinkercad and Cura. This was my first time 3D printing in 3 years but I was ready to get back at it. Once we got into tinkercad, I realized that our original logo (shown above) was going to be a little too difficult to model in the time we had in class so we decided to modify it to make it easier to print. Making the dollar sign was as simple as adding a line through the letter “s”.  We decided to add the word “maker” on top of the dollar sign instead of our original design.  Modeling this on tinkercad was easy and did not take long.

As shown above, our first attempt to print our logo failed because the material spooled in the back of the printer got caught on something and stopped following to the nozzle. This really hammered home the idea that 3D printing is not a perfect science and there are tons of things that can go wrong at any time.  This failure was quick to fix as all we had to do was reprint it after checking to make sure the material would not get stuck again.


Overall, I liked how it came out for a first print. I think the reason the “E” didn’t come out all the way due to how small of a print it was but it was still cool to see how something we made quickly on a computer could be physically in front of us in only 36 minutes. I can’t wait to develop my skills with 3D printing as the semester continues.


Week 3 Reflection

This week, we spoke with Jeff Ginger who walked us through the 3D printing process. From idea to modeling to creation, Jeff presented numerous accounts of creations in the FabLab. I had no idea I was walking by the FabLab every day to get to BIF, but now I know all the cool things that the FabLab has helped create. Although the artistic creations intrigued me, I was most enthralled by the open atmosphere of the FabLab. While 3D printing has been available for architecture, business, and engineering students for a few years, community members have often missed out on the 3D printing opportunities available to students. Nothing exemplifies the openness of the FabLab quite like this picture from Instagram of a Grandmother and Grandson creating a Cubs t-shirt.

Because I am a lifelong Cubs fan, this picture inspired me to combine my love of baseball with my new 3D printing abilities. 3D printing technology is already helping athletes recover from injuries, when will it start affecting gameplay? 3D printed football helmets, baseball bats, tennis rackets, and hockey sticks could soon become the norm.

In this week’s session, we learned the basics of the 3D printing execution phase. Billy and Dash showed us how to use Tinkercad to imagine and design 3D printable objects using geometric shapes. One of my group members made a heart keychain with her name on it, and I created the team logo with the help of the other members. Billy helped me perfect the puzzle piece design with our team name inscribed on the top. Dash taught Team Synergy how to export .stl files to Cura. Billy then showed the class how to choose the right setting for our builds. Although this was very useful, the bottom wall thickness was far too great, leaving some extra building material at the bottom. In addition, the word “SYNERGY” was not well written by the machine. I suspect the .8 mm nozzle or layer height is the cause of this discrepancy.

This week’s class was a humbling experience as I came to a far greater appreciation for some of the magnificent creations on Thingiverse. Rotating structures, world wonders, and puzzles all seem far grander and more intricate. I have come to appreciate the masters of this craft by trying it myself. I look forward to improving my 3D printing skills in the coming weeks.


Jason

Making Things | Week 2 in Review

In a corner room of the Business Instructional Facility at the University of Illinois – a group of about 20 students meet weekly to learn how to change the world with 3D printing. Just two weeks into the course, we’ve already had our ideologies about 3D printing  flipped upside down by a guest lecturer, learned the basic mechanics of the process, and explored free designs we want to innovate during the semester. We are off to a fast start – welcome to BADM395: Making Things (Spring 2018)!

Guest Lecturer

At the start of week 2, the class was privileged to hear from John Hornick, a Finnegan lawyer who isa  litigator and counselor with broad experience across the intellectual property practice. More than that, he authored the book, “3D Printing Will Rock the World.”   John closely follows the 3D industry and advises his clients about the intellectual property issues surrounding this rapidly developing technology and how they may affect their businesses. Though we were only able to video-conference him, we all learned a great deal from this expert.

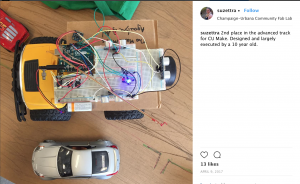
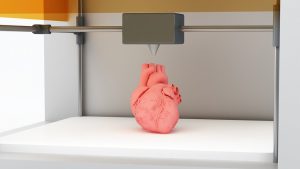
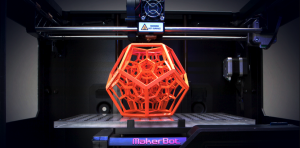
John taught us how 3D printing is flipping traditional manufacturing’s business model on its head. This model depends on mass production, economies of scale, and low labor costs, which are major barriers for competitors. 3D printing, however, eliminates these barriers because just one machine can produce an entire product and needs only a fraction of the labor. Furthermore, it brings the marginal cost down to nearly zero – John taught us that whether you print 1 jet engine, or 100,000 bolts for jet engines – the fixed cost of production would stay the same. He showed us how modern-day innovators were printing actual engines, full-sized cars and motorcycles, and even human organs. It was truly insightful to John’s wisdom. He taught us that given the highly unregulated and complex nature of securing intellectual property rights for virtual design, it’s nearly impossible to control who prints what.

Learning & Skills Objectives

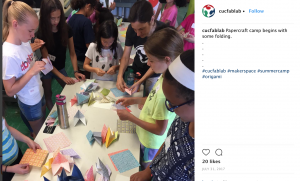
During this week, our learning objectives included learning from what others have made/shared, as well as forming team names and brainstorming logo ideas.

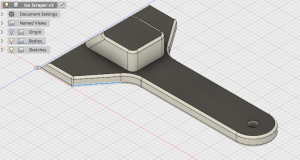
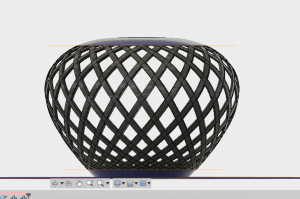
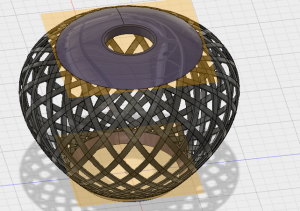
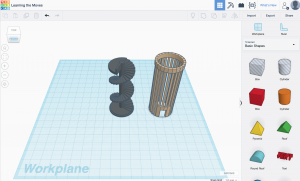
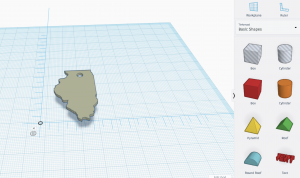
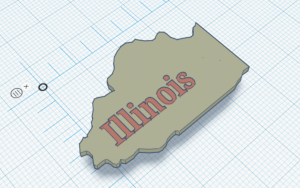
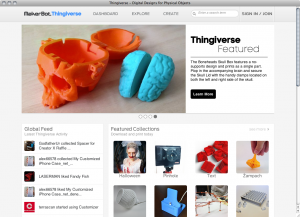
The class spent time on a variety of online design databases: including Thingiverse, TinkerCAD, and Pinshape, just to name a few. We found that each site had a particular theme to it. For example, TinkerCAD had a lot of complex mechanics/tooling designs. On the other hand, Thingiverse was much more light-hearted, with models much more accessible to kids of all ages. As a class, we pored through these sites, finding interesting designs and sharing what we liked, what we disliked, and how we would further innovate with each other.

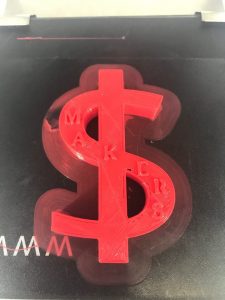
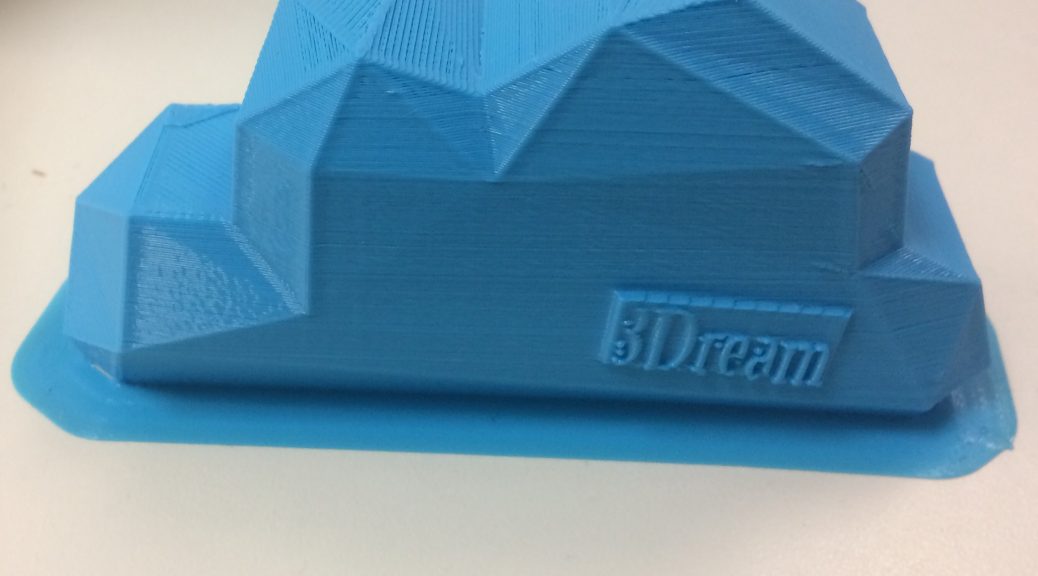
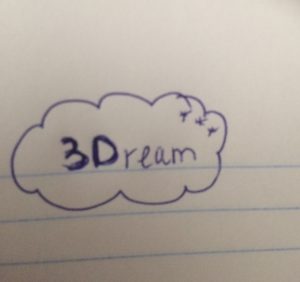
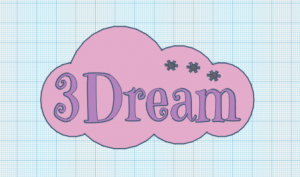
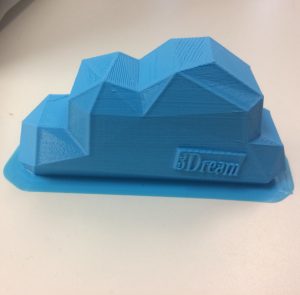
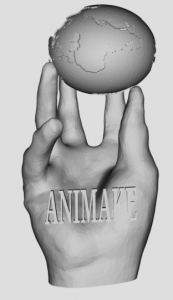
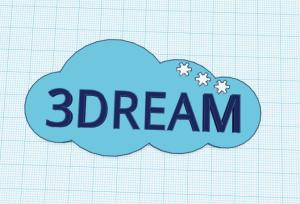
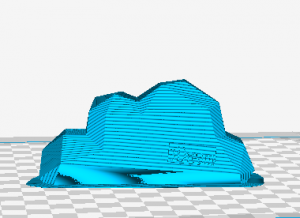
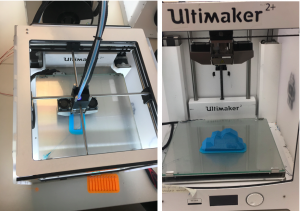
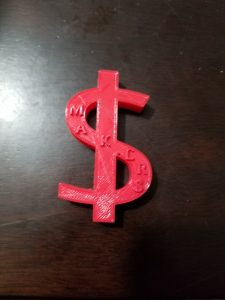
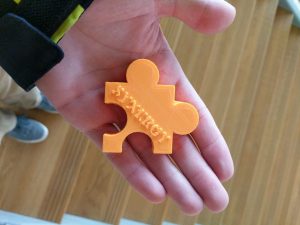
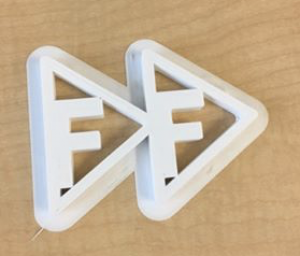
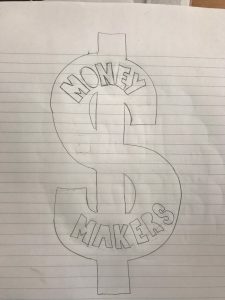
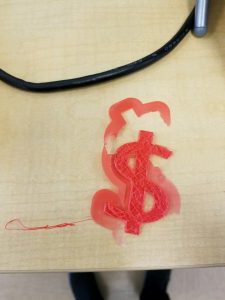
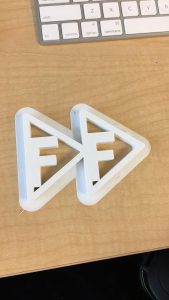
Finally, Professor Sachdev sorted us into our semester project teams. Many of us had to take a few days to come up with our team names. We have a lot of creativity in the class – just to name a few: Synergy, Money Makers, Fast Foward, Animakers, etc. Beyond simply naming our team, we were all tasked with creating a logo to 3D print in the following week. This was easy enough on paper, but we will see what happens when we upload onto an actual printer!

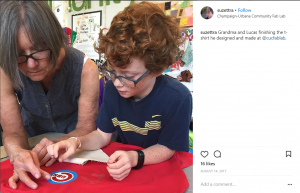
(PC: Aubrey Haskett)

Readings Reviewed

We had three readings that we reviewed this week. The first was entitled “How to Make Almost Anything” by Neil Gershenfeld. Neil discusses the newest digital revolution that is coming upon us, in fabrication. He writes about how communities should not fear or ignore digital fabrication – they can be used to educate, innovate, and breathe life into communities. Next, we read “The Maker Mindset” by Dale Dougherty. Dale discusses a crucial mentality that our class needs to develop – the Maker Mentality.

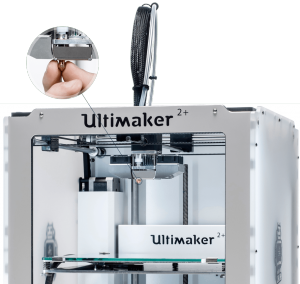
This is a kind of mindset that teaches people – especially students – to few problems not as static, but dynamic. This mindset creates a platform for students to ‘create’ new solutions to problems using innovative thinking strategies – all made possible through the 3D-printing revolution! Finally, we watched a video called “The Birth of Desktop Printing” with Matt Griffin which highlights the slow process that brought desktop printers (ex: Ultimaker) to the forefront of the consumer markets.

Overall, the three resources for Week 2 helped lay a solid foundation us to understand what 3D printing is, where it came from, and where it can go.

Student Reflections

As a class, we found Week 2 of BADM395: Making Things to be incredibly insightful. One student’s sentiments captures our thoughts well, “I don’t understand how these milestones have been happening under my nose. Owning the means of production used to be a privilege reserved for the rich, but now everyone can print from their home with this technology. The consumer’s changing relationship with traditional manufacturing is fueling the maker movement. (Rindler). Traditional consumers are evolving into prosumers all around us – we are now a part of this revolution.

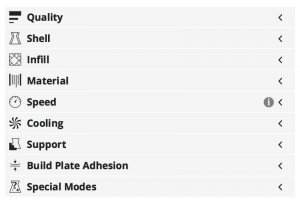
As we progress into this class, the class is collectively excited to gain more hands-on experience as we expand our ‘maker mentalities’. In class to date, we’ve gained a lot of contextual and expert information on the industry and trends. Starting next week, we will have a crash-course in online modeling, the Cura software, and have a chance to actually print the team logos we planned this week.  We will have the opportunity to use our minds (and our machines) to bring something forward from nothing. Who knows, we may all end up with only melted piles of plastic after our first print – either way, we are extremely excited to see what the future holds this semester!

Jeff Ginger and Fablab’s Mission

It was a pleasure to learn from Jeff Ginger in class this past week. His enthusiasm for 3D printing, and what it can teach us, are unmatched in any previous conversation I have had on the subject. In my eyes, Jeff presented 3D printing in a light akin to some of the topics discussed in “The Maker Mindset” article. The purpose of the Fablab, as Jeff noted, is to give access to 3D printing (and its capabilities) to the public for the greater good. Jeff linked this concept to that of a library – a free and open space from which to learn from an endless list of subjects. Most notably, Jeff talked about how there really isn’t a way for 3D printing (as an activity) to make money off of itself. That is to say, there is no sense in buying a 3D printer and then charging users of that printer large sums just to be able to use it. The idea is that for 3D printing to work, we need people to discover the endless possibilities that the subject can offer. In order to get those people to discover those possibilities, the space of 3D printing must be as free and open as our libraries. The way it gets paid forward is through the learning and advances made in the labs. Ideally, someone invents a product in the lab and then use the money to build another Fablab for the next person to discover the endless possibilities of 3D printing.

In class, we worked a little bit with Tinkercad – I can tell based on the ease of use of the application that this will be a great tool for us to discover our 3D printing creativity. I haven’t had the opportunity to see our team’s logo yet, but am excited to do so on Wednesday in class. Finger’s crossed that it went well!

In the news, I found an interesting article on how 3D printing has disrupted the architecture and design industry (https://newatlas.com/3d-printing-housing-architecture/53083/).

Within the article, I found several amazing pieces of 3D printed art

The article discusses the fourth industrial revolution and the internet of things at length. Most notably, the author believes that 3D printing will change the way we think about buildings as unchangeable objects, in allowing us to permeate the way objects react to external factors such as the weather. These are exciting times in the world of architecture.

Makers in the Community (Week 3)

This week, Jeff Ginger, director of the CUC Fablab, spoke to our class about the Fablab, its global network, open-source software, and how the Fablab enhances maker education in the community. We also began making! My group designed our logo and successfully printed it. But more on that later – let’s jump back to Jeff and the incredible work he is doing with the Fablab and the CUC community.

Jeff received his PhD from the University of Illinois at Urbana-Champaign in Library and Information Science. His research focus is digital literacy, community informatics, public engagement, makerspaces, learning, and user experience design. In addition to his position at the Fablab, he is an adjunct lecturer at the university as well as the program coordinator of the Illinois Informatics Institute. His background and current jobs allow him to be perfectly poised to tie the maker world and his local community together – something he does very well.

Jess spoke on the public-school system and how many schools “teach to the test”, disallowing children to develop a more creative, “maker” mindset. Public schools receive government funding based on standardized test scores. Meeting the grade threshold, making certain yearly improvements, and ensuring a set number of children pass the tests becomes the primary goals of many teachers and their schools because the school’s future (and inadvertently, the teachers’ salaries) relies on these metrics. So, while Jeff is currently offering 3D printing workshops at the Champaign Public Library after school hours, his long-term goal is to get the 3D printing and other maker lessons into the curriculum of the schools themselves.

Illinois Enactus, a group I am heavily involved with on campus, has a space in the Fablab. We own a wet-saw and use the lab for glass-cutting and laser etching. The lab is a great space to receive advice from the employees, work on our projects, and get inspired by the amazing work that is taking place there. Each Fablab around the world has a standardized set of equipment and software – you should be able to visit a Fablab across the world and be able to create the same things. I hope to utilize the Fablab this semester more for my personal development and experience in the maker space.

Also, in class this week, my group created and printed our logo. We named out group “FF” or Fast Forward, to signify our focus on the future and how 3D printing is becoming more necessity than a novelty. 3D printing is a disruptive technology that will continue to change the world, and my group hopes to learn all we can about how we can use 3D printing and the maker space to make the world a better place. Our logo is a fast forward symbol (two arrows) with a capital F inside each of them. We used a transparent png file of the symbol we found online and converted it into svg (one of the files Tinkercad and Cura can use). We learned how to scale and group our objects and how to orient the text within our design, so it printed out with proper supports on Tinkercad. We also learned how to set up our 3D printer and transfer the files from Cura to an SD card. I didn’t know that the sizes of the nozzle and other little settings were so important! I got a better sense of how finicky the 3D printers can be and how using them does require trial and error.

The first time we printed our logo, the edges curled upwards and the plastic couldn’t quite grip the receiving plate on one part of the print. We were on the mini printer right next to the door and I suspect the strong draft had something to do with it. The second time we printed, we used a larger printer further into the lab and our design was nearly flawless! In the picture you see below, we just have to peel the supportive skirt off and ta-da! My group was really excited to see how well this turned out.

Through the videos we had to prepare for the class this week, I learned more about the materials 3D printers can use – I was surprised to learn that PLA is derived from corn. I hope to be able to print with the wood-based filament sometime. At the Engineering Open House a few years ago (when I was a prospective student), I was able to make a Lego block using stereo lithography. I explored this primitive 3D printing-type process again in the materials science and engineering course I took through The Hoeft T&M Program. I think this was a really good basis for me to understand how 3D printing works with all the layers it breaks the design into.

This was a packed week! I hope to get more acquainted with Tinkercad, Cura, and other 3D printing software next week. Until then, here are some sources I’ve found that can help myself and other students learn a bit more about 3D printing:


Week 3 Reflection

This week in class, we had a guest speaker from the “Fab Lab” on the University of Illinois’ campus. Jeff is not only an energetic and exciting public speaker, he is also very knowledgeable on all of the different tools and machines that his lab offers. I was very shocked to find out how many things one could do in the fab lab- I am especially interested in the digital embroidery machine. I used to be an Irish Dancer, and our costumes are extremely intricately embroidered and bedazzled. Having access to a digital embroidery machine and knowing how to use it could save Irish Dancers literally thousands of dollars on one single dress.

Jeff also showed us how many employees the Fab Lab has- I was shocked! For such a small and unassuming building on campus, and one that doubles as a dance studio, I couldn’t believe how many people are involved in running it. I suppose it makes sense in that one person would have trouble being an expert on all of the machines that are available. It was also cool to learn that many of these employees and volunteers are from all walks of life, all ages, all different jobs (artists, engineers, writers, etc). Jeff himself is a Library Science and Informatics guy, but is heavily involved in the Fab Lab.

In class, I learned how to use a 3D printer, at last! The people who were leading the class were very knowledgeable and helpful with all questions we had. Not only that, but Scott (who is in my group) has been to free printing days before, so had some experience with the printers. We spent a little time designing our logo on the computers before trying out a print. Our first print didn’t stick to the plate very well, so we had to retry it again before it worked. We are very proud of how it ended up looking!

Another thing I found online, which I found to be interesting, is an article about a company who is looking to raise at least 50 million dollars in order to finally get a 3D printed heart to the market. This is what most amazes me about the 3D printing and digital making world- the fact that we are becoming advanced enough to make things like human organs that are functional and can save lives, or to at least improve lives (like with 3D printed ears). It always made me slightly sad (even though it’s the circle of life) to know that for every person that is saved by a transplant, someone else had to die. It also is sad that so many people are on the waiting list for organs and may die before any become available. This new 3D printing organs idea can change all of that, which I find truly astonishing. I’m excited to continue to learn, in class and through my own research, about the useful or simply fun things that are coming out of this new phenomenon.


BIOLIFE4D Seeking to Raise $50M For Bringing 3D Printed Heart Transplant System to Market