All posts by Norman Reyes

Team Money Makers Final Reflection

Hello everyone! Our team spent this semester creating a smart vertical garden. We were inspired the Growing Local Community project posted on Ultimaker’s website in which the challenge was to design and incorporate 3D printing into vertical garden. We decided to take this challenge even further and design a vertical garden that would be tailored towards college students as often times college students do not have access to a location that they can grow their own produce or flowers and therefore are less likely to eat healthy and participate in gardening in general. In addition, college students also are incredibly busy and do not have time to constantly monitor the status of something they are trying to grow so making this garden “smart” would make it even easier for students to be involved in growing their own food.

This idea led our group to the How Can We statement of “How can we give college students a convenient way to grow their own produce, leading to a healthier diet and lifestyle”. We decided to move forward and attempt to solve this problem because we are all college students and understand how busy our lives can and how constraining it can be to live in campus housing such as a dorm, apartment, or rental house. We were also interested in creating a vertical garden that was cheap and easy to maintain and was also easy to replicate. The idea is that any regular college student can walk into a maker space, such as the Maker Lab, and recreate our project without having any prior experience in 3D printing or small electronics at all.

Design Sketch

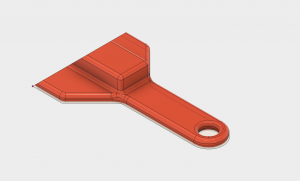
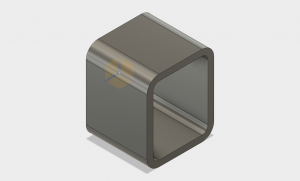
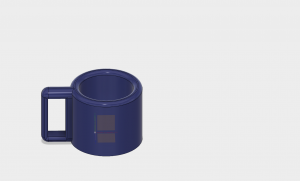
We started off our design process with a simple drawn sketch consisting of 2 planter boxes and some support beams with a box next to it to hold the electronics going into the garden. This sketch ended up really guiding our design as we began to model it in fusion as it gave a clear understanding of what we wanted our vertical garden to look like. We then began the process of prototyping our design by printing our a smaller scale of our first garden box. Needless to say, it did not go very well as we learned that we would need a brim to keep the print flat on the printer and that our design would need some changes so that it would print correctly. At the same time, we began tinkering with the sensors that we wanted to include in the garden by figuring out how to connect soil moisture sensors to an Arduino Uno and getting them to read values in real time and also connecting an LDR ( a sensor that detects light) and getting it to display values on the computer as well. The original concept of the smart aspect of this garden is that it would connect to the internet and send a text message to the user whenever the garden needed something but we soon found out that it would not be possible to acquire one in our given time frame and we had to adjust our plan. As we printed out the second version of our planter boxes, we connected a simple red LED to the arduino so that if the garden needed water or sunlight, the red light would illuminate. With that, it was time for user testing.

We decided to test out our prototype with 2 University of Illinois students since they were our primary focus. We showed the test subjects sketches of our design as well as the models we had created in fusion as well as demonstrating how the Arduino technology works. Both test subjects were impressed with our prototype and stated that they would use a finished version of our vertical garden if possible. The biggest take away from the user testing was that they both expressed interest in a display that told them more information about the status of the vertical garden instead of the simple LED. With that suggestion, we decided to add a 3 digit seven segment display to our garden that would display if the garden needed water, sunlight, or a combination of the 2. With the knowledge gained from user testing, we were ready to create our final product.

Seven Segment Display Test 

Final Prototype of Vertical Garden 

This entire process led to the creation of a 2 tiered vertical smart garden. Our final version came out to be 6in by 6in and 4in deep with an overall height of around 12 in. This size is perfect for a desk or window sill but this design can also be scaled up or down and be printed out at whatever size the user desires and can include more planter boxes if desired. The smart features of the garden include 2 soil moisture sensors, 1 LDR (light dependent resistor),  and a 3 digit seven segment display, all powered by an arduino uno. These sensors allow the garden to display to the seven segment display if it needs water (H20), sunlight, (Sun), or a combination of them (All). If all variables are satisfied, the display will be blank.

We hope that in future versions of this project we can include the things we learned throughout this process and things that we did not have time for. Some of these additions would include a WIFI Shield to make it a true internet of things device,  using a pcb to make the electronics alot more organized, a bigger seven segment display so that we can display more information, and a better enclosure for the electronics.

The process of taking an idea and turning it into a functional prototype was very rewarding for us. We learned that prototyping really is an iterative process and that a project will come together step by step over time. We also learned that the maker community is incredible. All the knowledge that we used to create our garden was found online through people who documented their own journeys of creation. Lastly, we learned that 3D printing is the future. Over the course of this process we became familiar with just how powerful this technology is and understood the scope of how many problems 3D printing can solve.

Overall, we enjoyed learning so much in this class and we would like to thank you all for a wonderful semester!

– Team Money Makers

Instructable Link: https://www.instructables.com/id/3D-Printed-Smart-Vertical-Garden

Presentation Link: https://docs.google.com/presentation/d/1IDzFDHrQp4gE23HTlMCCMBqrQyKVJB0DUkna7VQseQ8/edit?usp=sharing

Final Reflection

I came into this class extremely excited to learn how to make things. My original course plan left me without the ability to take this course but, like most plans, things did not work out and I was lucky enough to have the ability to enroll in Digital Making Seminar. I had originally thought that this class would focus mostly on 3D printing and getting hands on experience through structured assignments that maybe let us explore different technologies a little. What I did not expect was how much this class would teach me about the entire process of making something from simply coming up with a concept to turning it in to a functional object and the wide range of skills that this class would leave me with. My experiences in this class definitely exceeded my original expectations

My favorite part of this class was all of the things that I learned. To start, I was able to refine my skills with 3D printing and become familiar with a more powerful modeling tool than I had ever used before. As I described in this post, Fusion can be an incredible software to use once you have mastered all of the tricks that come along with using it. In the future I definitely hope to continue refine my skills in modeling in hopes that I can eventually design my own replacement parts for my cars and my professional audio equipment. I also learned about design thinking and how creating something is an iterative process. I enjoyed the class activity that I described here because it showed how it is possible to take a problem and work through it to come up with a solution and especially how creating a How Can We statement helps you stay focused on the problem you are trying to solve.

My time at the Fab Lab was also full of learning. Over the course of those 3 weeks, I got to experience three different ways of making things that I never thought I would have learned. The first of those was embroidery as I got to see how simple it was to take a concept and create a colorful piece of art. This is a skill I hope to teach to my mom as she’s always wanted to learn how to embroider. Laser Cutting was also really cool to learn because it was surprisingly easy to design objects to be laser cut and it was a great experience working with a machine that costs thousands of dollars. Getting to learn about e-textiles difficult but extremely rewarding. This was one of those skills that I had no idea I would learn about in this class but was happy to get hands on experience in. I will admit that although I have plenty experiences in sewing, adding lights on to the embroidery was pretty difficult as I was working with pretty small parts. I also hope to show my mom how this works as she enjoys arts and crafts.

Finally, one of the biggest skills I learned was how to work with Arduinos and small electronics. I have had experiences working with electronics in the past but the components that I needed for our final project was all new to me. I was excited to get hands on experience with Arduinos. I learned pretty early on that it is important to take working with an Arduino slowly and step by step so that you don’t get overwhelmed. I also discovered that the maker community has an incredible presence online that that everything I needed to learn was available. That being said, I also learned that it is incredibly important to really understand what a piece of code does or what a particular pin in a sensor or display does. Otherwise, you’ll be stuck trying to piece together other people’s work and will never truly learn anything useful. Getting to use what I learned about Arduinos to create a fully functional prototype of a vertical garden that let the user know if the plants needed water or sunlight was an incredible experience and extremely satisfying.

Overall, I think the biggest thing that I learned from taking this class is that I am more capable than I think I am. Having learned all of these skills myself, I have gained the confidence that I can pick up whatever knew skill or technology that I am interested in and drive myself to master that skill. This class will by far be one of my most favorite classes that I have taken during my undergraduate career and I am thankful for the opportunity to have taken it.

Prototype Refinement

This week in class we continued to work on our projects. As I am focusing on the electronics of the vertical garden, I continued to work on the Arduino and visited the Fab Lab on Monday in search for an Arduino WIFI shield and a little help on how to use it. Unfortunately, the Fab Lab did not have any WIFI shields for me to use on our project. I did speak with one of their experts on small electronics and he did suggest that I use a specific Arduino that can connect to the internet without the need of a shield.  After asking him a couple questions about the Arduino I found out that it has only 1 Analog data input which would not work for our project as I would need at least 3 or 4.  He then suggested that I could potentially connect that Arduino to the Arduino Uno that I am using and connect to the internet that way but in the end we agreed that it would probably be too complicated in the short time I had. I then decided to connect the sensor to a series of status lights as a temporary solution and I will attempt to set up a 3 digit display that will show the status of the vertical garden. I am also working on an issue with the LED lights flickering a little when the soil moisture sensors are triggered. I am confident I can figure out these issues with the Arduino in time for our final presentation.

Prototype Testing Picture

In class we also evaluated 2 other group’s projects. The first group’s project was the adaptable steering wheel attachment. Overall I really liked the progress they had made and attachment really felt like it would attach to a steering wheel well. I did give them some advice on testing the strength of the clamp. The second group we evaluated is working on a people counter. I ended up spending a good amount of time helping them out with their Arduino and showed them how to connect their motion sensors to the Arduino in order to make sure that they work. That group is also working on getting a 3 digit display to work so we will be sharing any successes that we might have.

Prototype Progress

This week was an incredibly productive week for our project. In class we were basically given time to work on our projects with an emphasis on beginning to print parts of our prototypes if needed. Luckily my group already had a good amount of the top half of our vertical garden done so all we had to do was add some holes to screw the top piece so that we could mount the top to support beams. In a matter of minutes, we were able to upload that segment of our design and uploaded it into Cura where we decided to print a half size prototype due to the fact that a full-size version of just the top half of the vertical garden would be over a day and a half to print. The print itself started off rough as the material would not stick to the platform for the drainage holes we had in our design and it got messy. Fortunately, after a couple of layers the plastic started forming the circles good enough so that we let the print continue. Our other big issue we had with this print was that we did not scale our design properly and our screw holes ended up looking like ovals. Obviously, we will fix this in the final design but for now we will use washers to attach it to the rest of the prototype.

Picture of Arduino setup

I also had a lot of time to work on the electronics for our vertical garden and figured out how to hook up both soil moisture sensors to the Arduino and was able to get them to send their signals to the serial monitor at the same time. I then got to work on setting up the logic required that dictates when the sensor will print or send a signal to the Arduino only when the moisture level gets to a certain point. I was able to use simple logic to create an if statement that prints the moisture level if it hits a certain point but ran into some issues as I tried to add that logic to the second sensor. From my research on the problem it looks like I can’t have both sensors active at the same time and that I will have to program it so that they operate one at a time. Even after finding out this potential solution I still ran into some issues but I know that it is all code based and that the hardware works as planned. I have also figured out a way to connect the light sensors to the Arduino and will be working on that as soon as the soil moisture sensors are working properly. After that I will focus on using these sensors to send a text message to the user.


3D Scanning is the Future

This week in class we explored the technology of 3D scanning and the process of taking 3D scan from a raw scan to a finished product that is ready to print. To start off the class, Professor Vishal gave us a quick presentation about the technology involved with 3D scanning as well as the various applications that 3D scanning can be used in. He then showed us a cool video from Jay Leno’s Garage where they use a powerful 3D scanning tool to recreate a part for an engine on a 1920’s car that is impossible to find a part for. The video showed how they were able to scan the piece of the engine and print and exact replica. This was especially really cool for me to watch because one of the main reasons I’ve always wanted to learn how to use a 3D printer all along is so that I can print my own replacement parts for the cars I work on. I often run into the issue when I work on older cars where I cannot find OEM parts and typical replacement parts sold in stores don’t work. My dream is to eventually own my own 3D scanner (similar to the Ipad one in class) and printer so that I can scan and modify parts myself and don’t deal with a massive headache every time I can’t find a part I need.

https://uofi.box.com/s/ebetbvsowwyd6f9mequg7o8ye5jkwnjj

For the next part of class, we were able to play around with 3D scanning and make busts of our own heads. Unfortunately, I did not get to make one yet but it was really cool to see how some of the scans turned out.  Hopefully I get to make my own next week in class. We were also given time to work on our class projects in which we were extremely productive. I finalized all of the parts that I need for the electronics aspect of our vertical garden and was able to grab most of what I needed from the lab. We also began to design the vertical farm in Fusion and got almost half way done with the rough design just in that time. Overall it was a very productive week and I can’t wait to see how our class projects comes along.

Prototyping is Key

This week in class we had the pleasure of hearing from an employee who works for Shapeways. I had always wanted to learn more about how these 3D printing factories work so this presentation was really interesting for me. Right away I thought it was cool that she took us on a quick tour of the production area and I was surprised by how industrial their facilities look. Listening to the employee describe all of the different types of prints that they do and the different types of people and organizations that they service was very enlightening to hear. It seems like 3D printing technology is well on its way to becoming the preferred method of mass production for a lot of industries and that the technology will likely further revolutionize the manufacturing industry. After seeing all that Shapeways does, I can expect 3D printing manufacturing services like Shapeways to will be the norm in the distant future.

After the guest lecture, we were given time to work on our projects and begin prototyping.  For us that meant getting our design finalized. One of the key takeaways that I took from the readings this week was from the Edison nation article that talked about prototyping. It says that one of the best ways to start prototyping is to simply grab a pen and some paper and draw it out and that’s exactly what my group did. We spent about an hour just drawing out potential designs and seeing what we liked and disliked about them. Drawing multiple prototypes really helped us figure out our overall design and what we ended up with looks a bit different from our original concept. I am sure as we continue to prototype our design and begin to model it in CAD, it will change many times over. Additionally, I have spent a lot of time this week figuring out how to add sensors to our vertical farm in order for it to give the user information about the plants being grown. So far, I have changed my original idea to include sensors that, based off of my research, will better detect if a plant needs to be watered or not and will be creating a prototype of the electronics soon to see how everything will work put together. Overall it was a productive week and I am excited to see the progress of all of the projects in our class.

https://uofi.box.com/s/ga7h6767164gvzs8nipgkj4m88on15mb

(Picture of our design on paper)

Putting It All Together

This week in class was the conclusion of our three weeks at the Champaign Urbana Fab Lab. In this week’s session, we got to learn how to use sewable electronics by sewing small LED lights into our embroidery designs. I was excited to see how this worked exactly because the concept of adding LEDs to textiles can create endless possibilities in the wearable technology space. I was also excited to see how adding lights would make my embroidery cooler.

https://uofi.box.com/s/8nsatdmgbr524rohltko63w7th9cgc6g

(Above: Picture of embroidery with LEDs on)

To start, we were given a quick lesson in circuitry and given the task of drawing out a diagram of our design and where we wanted our lights to go. I chose to add LEDs to the eyes of the bison and drew my circuit accordingly. Next were shown how to use steel conductive thread to sew the LEDS into the design and connect it to the battery holder. It was really important to make sure that the conductive thread looped through the LEDS and battery holder multiple times to ensure that it had a good connection. I have had plenty of experience sewing before but it was actually pretty difficult to thread the needle I was given and to pierce through the tough embroidery. I also had to think a lot about how I was going to hide the conductive thread in my design not only so that it did not look bad but that the positive and grounds did not touch at all or else the LEDs would not turn on.

https://uofi.box.com/s/k0uqmkyqkmz4sidl83wvpqgkh8krb705   

(Above:  picture of box put together)

Overall, I am pretty happy with the way it turned out even though I was given different color LEDs. It was neat to get that hands-on experience with e-textiles and I already have a couple of ideas that I am thinking of pursuing on my own. It’s a bitter sweet feeling knowing that our time in the Fab Lab is coming to an end. I have learned a lot of new skills and have learned an even bigger appreciation for what the Fab Lab does for this community.  I hope to be able to use the Fab Lab for our final project and even for some side projects that I have. Hopefully I can even start my own maker space back home when I start working full time.

Week Seven Class Summary – Introducing the Fab Lab

Week seven marked the start of a very exciting couple of weeks for the class as we begin our three-week stint at the Champaign-Urbana Community Fab Lab. Seeing everyone’s reactions as they walked in, I could tell that this was a new type of space for most of us and that we were all in for a great experience. To start off the day, Jeff Ginger, the director of the Fab Lab, gave us a quick tour of the different types of spaces the lab has and showed us all of the different types of projects and items that could be created and examples of cool things that have come out of the Fab Lab. We were then spit up into two groups to gain experience on either embroidery or laser cutting as a part of our overall project for our time in the Fab Lab.

Embroidery

For this section of our class, we learned how to design and create embroidery designs using computer software and a specific type of sewing machine. To start, we were shown how to use the computer software to create an embroidery design. We all found it very simple to create and import images into the software and transform them into embroidery designs. Our instructor was incredible at giving us a lot of tips on how to get the most out of the software and how to customize the design to exactly what we wanted.  We were then shown how to load our design into the sewing machine and the tedious process of loading the thread into the machine.  After some time, we were all able to get our machines set up and watch them create our designs in front of us. Admittedly, many of us were surprised at how cool it was to watch the needle rapidly punch through the cloth and quickly create a physical representation of what we had designed on a computer. As with any type of machine, some of us did experience some issues with our embroideries and were forced to try again. In my case, I had to restart it twice after the cloth bunched up and got stuck the first time and an issue with the thread caused a failure the second time. Overall, we were amazed at what this technology could do. For example, Ajie said “I slowly started to see my lion come to life and I was amazed – though this wasn’t a 3D printer like I was used to, I was still creating ‘something’ from ‘nothing!’ The finished product was actually amazing – the lion looked exactly as I imagined it, and I never expected that I would have loved using a sowing machine so much. This session truly showed me that ‘making’ is much more than meets the eye”.  (Post Link)

Laser Cutting

The second of three parts for our three-week project involves learning how to design and laser cut a box for the embroidered design to go on. We first used a program to input the dimensions of our box and create a file that we could then edit. Then our instructor showed us how to use a program called Inkscape to edit some of the edges of the box and then add images. Once we all had our boxes customized, our instructor showed us how to change the lines of the box to tell the laser cutter what to cut versus what to engrave. Overall this process was much more difficult than we had thought. Scott put it in a good way in his post as he says “One of my biggest takeaways from utilizing Inkscape was understanding the amount of time and attention to detail that the creator must have in order to successfully create an object. While the programs that we utilize are powerful, there is still tremendous room for human error.” (Post Link)  Once we had all of our designs finished our instructor taught us about the safety precautions of the laser cutter and then we got to watch as a powerful laser cut through wood like it was butter and engrave images with such incredible precision. It dawned on me then how incredible laser cutters are and how lucky we are to have access to one let alone learn how to use one.

Summary

Overall this was an amazing week for the class as we got our first taste at incredible things that the Fab Lab can produce. Some of us got to create our own laser cut boxes while the others were able to create their own embroidery designs.  The next few weeks will be filled with even more learning and experimentation as we see what potential technologies we can use for our final project.

Trying My Hand At Laser Cutting

This week in class, we continued our exploration of the Champaign-Urbana Community Fab Lab.  It was my turn to try my hand at laser cutting. I have always had a huge interest in woodworking and woodcarving but I have never been able to get a chance to work with a laser cutter before so I was extremely excited. For this week, we would be making a box that would be put together without any nails or glue. The first step was to design the box on a computer. Using a specific software to make these types of boxes, we put in the specifications for the box we wanted and saved them as a file we could then edit. We then used a program I have never used before called Inkscape to edit the box and add images to it. I found it very easy to use the image editing software after our instructor gave us some simple tips to navigate it. Adding images to the box was as simple as finding an image online and dragging it into the software. I decided to stick with the Bison theme I chose last week with my embroidery and added different images of bison to each side and I put the coolest picture I found on the bottom side of the box because it was the biggest surface. We were then taught how to prepare the file so that the laser cutter could read it. In seemingly no time we were ready to see the laser cutter in action.

I found watching the laser cutter fascinating. It seemed to cut plywood with ease and etch virtually any image we chose with incredible accuracy. I was also surprised at how quickly it would create a cut. My box only took about ten minutes. If I were to attempt to create it by hand, it would’ve taken my hours of work and it would not look half as good. While cutting my box, I got to talk to our instructor a little more about the laser cutter and everything that it could do. He told me that the machine we used easily cost as much as a car which led me to think of how lucky we are that we get to use such an expensive piece of equipment. The Fab Lab really does remove a lot of barriers for the people in this community and allows us opportunity to create endless ideas.


Introducing the Fab Lab

This week in class we had our first of three sessions at the Champaign-Urbana Fab Lab. I have been looking forward to having class at the Fab Lab and getting some hands-on experience and this week did not disappoint. We were fortunate to get a tour from Jeff Ginger, the director of the Fab Lab, and shown some of the cool stuff that had come out of the lab and each space the lab had. I was the most excited about the wood working space and the electronics room they have because those are two of my biggest passions and just seeing all of the equipment that is available already has me thinking of all of the possibilities of things I could do in that lab. After our tour, we were split up into teams to begin the three-week project that would give us experience in different aspects of the lab. I was put in the group that got to gain experience in embroidery. This is something I had never done before nor had any interest in doing but after getting hands on experience in it, I do find it fascinating.

In our group, we were introduced to a software that allows you to create designs to be embroidered and send them to a sewing machine that also acts as an embroidery machine. I thought it was really cool to see how easy it was to create a design with that software and to see all the different types of embroidery patterns it can make and how the feature it has where it will give a mockup of exactly how the embroidery machine would create the design.  I also learned that like 3D printers, embroidery machines are not perfect and do not always work as intended. I decided to take an image of a bison I found online and create an embroidered version of it. My first attempt ended up failing because the canvas somehow bunched up and the needle just kept going in the same spot.  My second attempt also ended up failing after something went wrong with the second color. Unfortunately, I did not have time to try it a third time so I will try it again during some of their open hours to see if I can successfully complete my embroidery. Overall, I had a really great time learning how to use this technology and I’m excited to see how it all turns out.

Ideas Stem From Need

This week in class was a very interesting and productive. We first had a guest presentation from Alan Amling, who works for UPS. He talked about how UPS has started creating 3D printing factories so that they can custom print parts for a variety of companies and how their research into 3D Printing materials. I had heard about UPS’s endeavors into 3D printing in a class I took last semester about Logistics so it was really cool to hear from Alan about how they have accepted this technology because they realized that 3D printing is going to revolutionize the industry that they operate in. It was also very insightful to hear Alan’s thoughts about how the industry landscape is changing and why we have an advantage being able to take a class that embraces 3D printing and the maker culture.

Our next guest lecturer was from Dot Silverman who talked about her work in Biohacking. This is an area that I have always read about the cool stuff that has been going on but don’t really have a lot of knowledge of. It was really cool to hear from someone with a lot of knowledge and excitement about biohacking. It was also great that she brought in example of some of the things that she has worked on and allowed us to look at them. My favorite has to be the Mini PCR because I was able to figure out what it did before she even talked about it.

In class, we also had time with our groups to start coming up with an idea for our semester project. The night before class, both my basement and Chelly’s basement flooded due to the intense rains that we had that week. I was forced to stay up all night to deal fight the 8 inches of water in my basement. That got us thinking about our first idea which is a low-cost mat that someone would place in an area that is prone to flooding that would give the user an early warning of the presence of water. Vishal gave us some good guidance and asked us to think of a solution that would alert the user that a flood was going to happen even before the presence of water. Our other main idea is a vertical farm solution that would be tailored towards college students. The idea is that college students often don’t have the time or space to grow their own produce. This concept would give students an opportunity to grow plants that would be used in cooking in their own living rooms. We even thought about adding sensors that track the amount of water in the plants or even a tank of water that waters the plants automatically. Vishal again gave us good advice and challenged us to make it a product that can be easily replicated by regular college students.

Design Thinking to Solve Problems


This week in class we had guest speakers from Design For America give a presentation on a way of thinking about design that helps create solutions to problems. I had never heard of this organization before but after listening to their presentation and seeing some of the projects that they have done I think they are a great organization. They have helped create a stuffed animal called Jerry that helps kids who have diabetes understand the lifestyle that they have to live and also worked with Fiat Chrysler Automobiles to create a steering wheel that helps drivers focus and transition to autonomous cars. This group really takes design to the next level and I wish I had heard of them a few years ago because I would have loved to be in.

For the workshop that we did in class, we were given a scenario in which we chose to help out Jess, a blind University of Texas student who feels disconnected from her peers and avoids football games, tailgates, and other large gatherings because of the disorder and unreliability of these types of events. My group then went through a series of steps in which we eventually created a How Can We statement that helped us focus to just helping Jess feel safer at a football game yet still involved with the student section. After brainstorming a variety of different ideas, we came up with a system of pads that could be installed on the floor of the stadium that had patterns that described each section of the stadium. For example, the end of each row of seats would have a specific pattern that would let Jess know she was about to enter or leave a row. There would also be patterns on stairs, doorways, bathrooms, and others that would help guide Jess around the stadium without having to have a guide. We were then given a bunch of different materials and we actually created a mockup of our concept. It was cool to see how this process helped us go from wanting to help someone to a physical representation of a product in about an hour or so.


https://www.youtube.com/watch?v=M66ZU2PCIcM

https://www.ideo.com/post/reimagining-the-shopping-cart

The process we went through in class reminded me of what IDEO does. They are a design firm that is very famous for using the same type of design thinking and have created countless innovations. Above is a video of IDEO redesigning the shopping cart and a link to their website that describes the shopping cart in detail.

Week 4: Fusion 360 Introduction

This week in class we had a guest presentation on Fusion 360 from Dan Banach, who has more years of experience with modeling software than most of us have been alive. Although I have some experience with modeling objects on a computer before, Fusion 360 was a completely new software for me and by far the most complex. Going through the process of modeling an object with Dan was incredibly helpful because he showed us how simple it is to create something on Fusion and a lot of tips and tricks that make Fusion much easier to use. His presentation made me a lot more comfortable with my ability to effectively use Fusion.

http://a360.co/2BTNxcA

The ice scrapper we modeled together in class was really cool to go through. For the most part I kept up with Dan as he moved through the steps of creating the object but I did learn that it is easy to make a simple mistake that will essentially stop your progress. As I was creating the 2D shape of the ice scrapper, I forgot to put a restriction on one of the lines and that prevented me from being able to create the thumb grip that goes on top of the ice scrapper. Luckily, due to the ability to go back to previous steps in the design in Fusion, Dan was able to figure out what I did wrong and help me fix it quickly. I also struggled with getting some of the edges to fillet as I kept getting an error telling me it was not possible. Somehow I got it to work although I still don’t know how I got it to work. Overall, this ice scrapper is something I definitely want to print because I can see myself using it a lot.

http://a360.co/2BU36RK

While attempting to make the phone shelf, I struggled with getting the actual shelf to merge to the charger mount. For some reason it kept going into the middle of the mount and would not sit on top. Unfortunately my laptop died before I could finish it so all I have is the shape of the mount.

http://a360.co/2BsHGtA

When thinking of an everyday object to make I immediately thought of a coffee mug because I drink at least 4 cups a day and tend to collect mugs. I also figured it would be relatively easy to model. I’m not sure how effective a 3D printed coffee mug would be but modeling one is great practice.  While making this I used a lot of the steps that Dan showed us and it really made a difference.

https://forums.autodesk.com/t5/autocad-forum/view-cube-stops-working/td-p/3026626

While researching some issues I had with Fusion 360, I found that the forums on the Autodesk website are very useful for finding solutions for bugs or other issues. There are hundreds of people out there that use Fusion so if you have a problem there’s a good chance someone else has it and already found a solution.

A First Taste at 3D Printing

This week we got the pleasure to hear from Jeff Ginger, the director of the Champaign-Urbana Community Fab Lab as our guest lecturer. It was incredibly interesting to listen and learn about all the different types of equipment that the fab lab and what all that equipment allows them to do in that space. Jeff also talked a lot about the work the fab lab does in the community and how he’s helping people of all types become makers in their own way. I was especially drawn to all of the programs they do, such as the summer camps and after school library programs, to introduce students into being more creative and giving them that ability to make things. Even using the popular video game Minecraft to develop kid’s ability to model objects on a computer was a cool thing to see and is something I would’ve never even thought of. The work that the fab lab does with students in this community is important and has inspired me to try to bring some of the programs Jeff talked about to my local community once I graduate and improve the education system that I went through as a kid.

This week in class we also got our first taste at making something and 3D printed our team logo using tinkercad and Cura. This was my first time 3D printing in 3 years but I was ready to get back at it. Once we got into tinkercad, I realized that our original logo (shown above) was going to be a little too difficult to model in the time we had in class so we decided to modify it to make it easier to print. Making the dollar sign was as simple as adding a line through the letter “s”.  We decided to add the word “maker” on top of the dollar sign instead of our original design.  Modeling this on tinkercad was easy and did not take long.

As shown above, our first attempt to print our logo failed because the material spooled in the back of the printer got caught on something and stopped following to the nozzle. This really hammered home the idea that 3D printing is not a perfect science and there are tons of things that can go wrong at any time.  This failure was quick to fix as all we had to do was reprint it after checking to make sure the material would not get stuck again.


Overall, I liked how it came out for a first print. I think the reason the “E” didn’t come out all the way due to how small of a print it was but it was still cool to see how something we made quickly on a computer could be physically in front of us in only 36 minutes. I can’t wait to develop my skills with 3D printing as the semester continues.


Week 2 Reflection: The Power of 3D Printing

The main takeaways for me this week revolves around just how powerful 3D printing can and just how incredible this technology has gotten in the last couple of years in really transforming from something a few hobbyists would play around with to a full-blown industry that welcomes everyone. We have seen countless examples the past 2 weeks about how people have taken 3D printing and built not only full on businesses but entire communities where people can share and learn from each other. This community especially resonates with me because I was introduced to 3D printing by my brother in law back in 2014 when he purchased a Printrbot Plus and started to show me what the technology could do and the communities around 3D printing. We would spend hours browsing on thingiverse.com looking for cool stuff to print and just seeing how creative people got in designing and creating solutions for problems that I didn’t even realized existed. Granted, most of the stuff we printed revolved around designing our own versions of NASA satellites and space ships as well as some other stupid stuff, I saw then the potential that 3D printing is showing now and it makes me want to dive into it even more.

Another thing that struck out to me from the reading was one of the main points in the “The Maker Mindset” by Dale Dougherty about how one of the biggest challenges to the maker movement is education and how giving students the resources to be able to explore the realm of making things is incredibly important. This really resonated with me because as a kid I took apart everything I could get my hands on to learn how stuff worked and how to put it all back together. Although my parents were often pissed off at some of the things I “borrowed”, they realized that they needed to support my curiosity.  They gave me a large workspace in the basement so that I could tinker with things and bought me my first set of tools and even gave me old electronics and appliances and challenged me to get them to work again. When I wanted to learn a new skill, whether it be soldering or carpentry or electrical work, they went out and found people that could teach me these kinds of skills. Students these days need the kind of space and support I had so that we can continue to generate makers and people whose tinkering will lead to the next great invention.

Looking on Thingiverse and Shapeways, I found 4 objects that I would use in my everyday life.

  1. DJ Headphones Holder

https://www.thingiverse.com/thing:1054504

I’ve been running my own Professional DJ and production company for about 8 years now and one of my biggest pet peeves is where to leave my headphones so that they are out of the way but I can get them when I need them easily. This item is just a simple holder that hooks on to a fly case. I’m going to have to print this.

  1. Audio Equipment Mixer Faders and Knobs

https://www.thingiverse.com/thing:547185

Another item I would use while DJing. These are knobs and faders that are used on a variety of music equipment. After a while, they can either break or become worn and buying new ones can be a hassle. I love the idea of being able to print your own instead. While this design is based off of Pac-Man, I would likely make them more suitable for my style in terms of grip type and weight.

  1. Small Tools Holder

https://www.thingiverse.com/thing:754395

This is just a small tools holder that is designed to sit on a desk or work space that would be perfect for me because I have a bunch of small tools like this that I am always misplacing when I work on things.

  1. Vehicle Cable Wrap

https://www.thingiverse.com/thing:2395941

This is a simple cable wrap that would keep my aux cord and phone cable in my car nice and organized instead of always been tangled up. I would most likely mount it in a different place in my car.