All posts by Cristal Tinajero

Prototyping & Feedback

Prototyping  

This week, 3Dream worked very efficiently and we made allot of progress with our final project (Vertical hydroponic drip system). There were multiple complications with 3D printing the voronoi bottle cages and it failed 3 times. At last, with some tweaks on Cura and removing all the supports and only including a brim, the four bottle cages turned out beautifully! Initially, I was worried that the bottle cages would fail without supports but it turns out that they were completely unnecessary. The four drip nozzles were also successful when printing.

vvv

ll drip nozzel

Another milestone was better understanding and getting the sensors to work while attaching them to the bucket which will serve as the reservoir. My Teammate learned how to use an electric drill & caulking gun while building it.

mmm

Now that we have tangible prototypes and received feedback, 3Dream has been able to develop a new sketch of what we imagine our final project to be.

v

Feedback

In class, we met with two other groups and both sides presented their project and we shared options/suggestions. Further, we were expected to conduct an interview to gain additional information on how to better our project. Our group interviewed 3 separate people and plan on coming to together to share what we have learned and also to present our individual possible alterations of the prototype. I interviewed a post-graduate computer science male. Age 25, lives in a studio apartment, and is familiar with a hydroponic system but has never owned/maintained a plant before. The main takeaways that I gathered was that the bucket was not visually appealing and should definitely be remodeled. Users who do not have any experience in  caring for a plant are highly interested in our project and would own one if we made it more visually appealing and included a pH sensor.

Overall, after getting feedback from numerous sources, I deeply understand the importance of getting user feedback in all trials of development. I hope to hear more thoughts on our project in the comments below! Thanks for taking the time to check out my blog, see you next week!

Initial prototypes and Designing

Bust

Last week, I was not able to create my 3D Printed bust but I was able to do so this week! A classmate took a scan of myself that I uploaded onto Meshmixer. The original scan had some creaks and empty spaces but Meshmixer did a great job editing the scan. I was able to close the STL file by simply selecting a function called Make Solid and Close Cracks. Afterwards, I exported the file and opened it in Cura. The file was to small to be seen so I then selected all and scaled the item up (10000). After making some other edits in Cura, I then began the 3d printing process. In total, by bust took 45 minutes to print and I am thrilled with the results!

FaceBack
Project: Hydroponic Vertical Garden

This weeks class was mainly devoted on creating the initial prototypes of our final project. My part in the project is to create a voronoi patterned bottle holder to fit a 2 liter as well as drip nozzles.  I spent most of the weekend researching this history of voronoi diagrams and the results of my findings can be found in my last blog.

https://publish.illinois.edu/digitalmaking2018/2018/04/09/once-a-semester-project-voronoi-pattern/ 

I went to the FabLab in hopes of finding someone skilled in Meshmixer to help me with parts I found difficult, but the students there were more familiar with other softwares. Thus, I went to Youtube and found great tutorials! After familiarizing myself with Meshmixer, I really enjoyed working with the software and created a wonderful bottle cage that I initially felt apprehensive about.

Bottle Cage

I was able to print the drip nozzle and the bottle cage. The drip nozzle was printed in less than an hour. Whereas, the bottle cage holder took nearly 20 hours to print! Initially, our team 3Dream wanted to have 8 plants but after taking into consideration how long it takes to print one bottle cage holder, we will now print 4 of them and 4 drip nozzles.

Thank you for taking the time to check out my blog and see you next week!

Once a Semester Project: Voronoi Pattern

History

Geroge Voronoi, for whom these patterns are named, was a Russian mathematician who made several important discoveries in the geometry of numbers and polygons. This makes sense that the creater of voronoi patterns is a mathematician since the pattern it self is a partitioning of a plane into regions based on distance to points in a specific subset of the plane… These regions are called Voronoi cells. The Voronoi diagram of a set of points is dual to its Delaunay triangulation. In 3D printing, Voronoi designs utilize this same formula to create quick printing, hollowed, strong structures which are aesthetically pleasing as well. In mathematical terms, the pattern would be seen as the following:voronoi

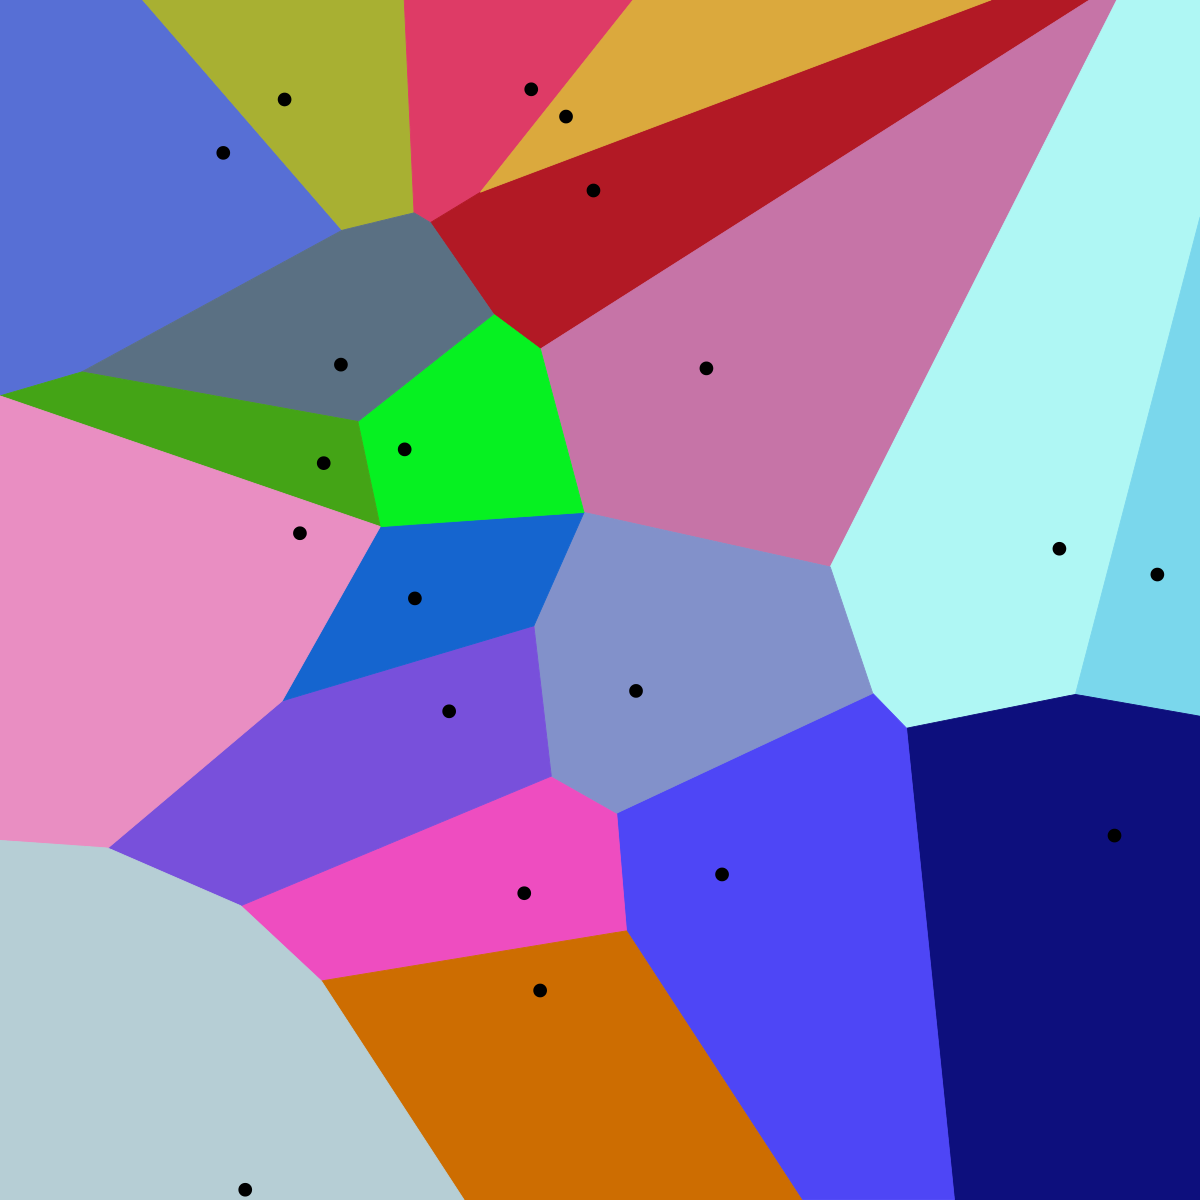
Aside from mathematics, the voronoi patterns have become very popular in the additive manufacturing industry and have a wide range of different uses.

Voronoi Patterns in 3D Printing

The patterns have expanded into different segments within the 3D Printing industry. In one article, I found the Voronoi pattern being used for the development in a 3D Printable orthopedic cast that takes patient heat sensitivity into account. A team of faculty researchers from Delft University of Technology (TU Delft) and Boston University have formulated a hollow Voronoi tessellation pattern to represent the covered region for a web-like cast design. The pattern is further optimized according to the thermal-comfort sensitivity calculated from thermal images. Working together with a thickness variation method, they generated a solid model for a personalized cast maximizing both thermal comfort and mechanical stiffness.

cast

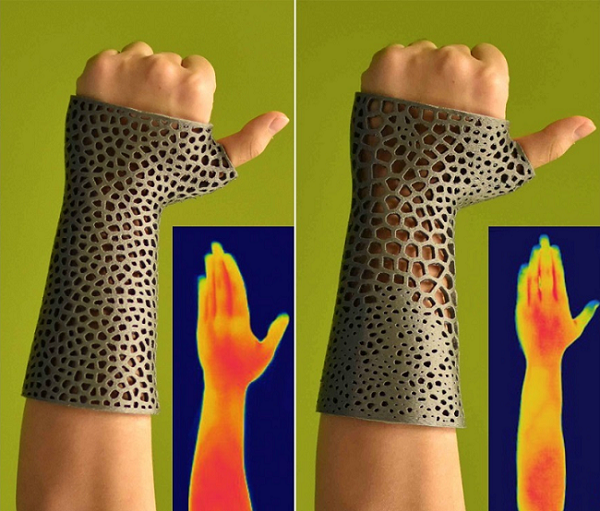
https://3dprint.com/192877/3d-printed-cast-thermal-comfort/

Similarly, in another article the voronoi pattern were used in the development of a waterproof cast by a company called ActivArmor. The company created a solution to the hassle of not getting a traditional cast wet and ActivArmor casts are 3D printed in a voronoi pattern, allowing air to circulate and keeping sweat and bacteria from getting trapped. They’re designed so that the wearer can still be active, doing all the things he or she normally would while still healing properly.

waterproof cast

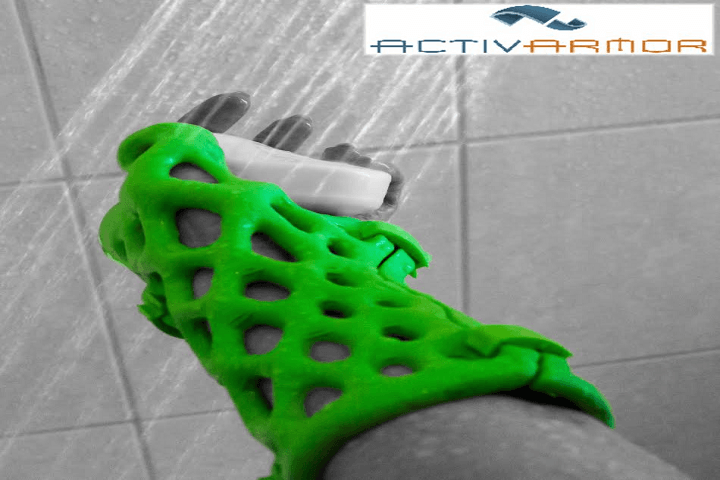
https://3dprint.com/197582/activarmor-aniwaa-funding/

The voronoi pattern has also been used by a middle school robotics team to help restore Kentucky’s bat population. The middle schoolers got advice when designing their project from from Louisville-based engineering and 3D printing company 3 Space and suggested that they use Autodesk Fusion 360 and that they should investigate using a Voronoi pattern as the cling wall. The team took this information and in a few weeks the octagon shape with Voronoi cling-wall was born. They knew they wanted something that could be printed on most 3D printers available to middle school kids so they kept their design small but modular. The final design allows for multiple middle sections to be combined to create a taller bat house to hold more bats.

bbat

bat

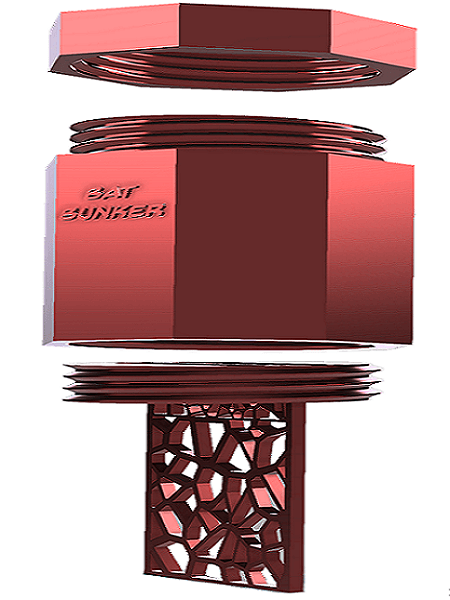
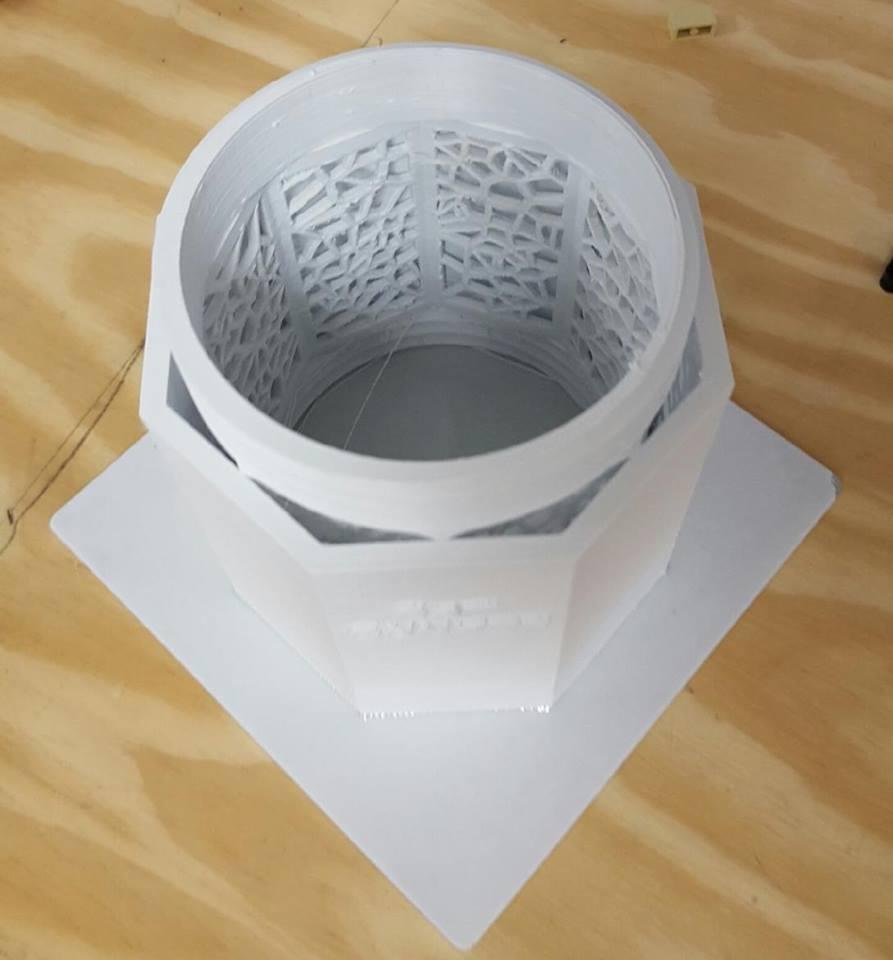
https://3dprint.com/162756/students-3d-printed-bat-house/

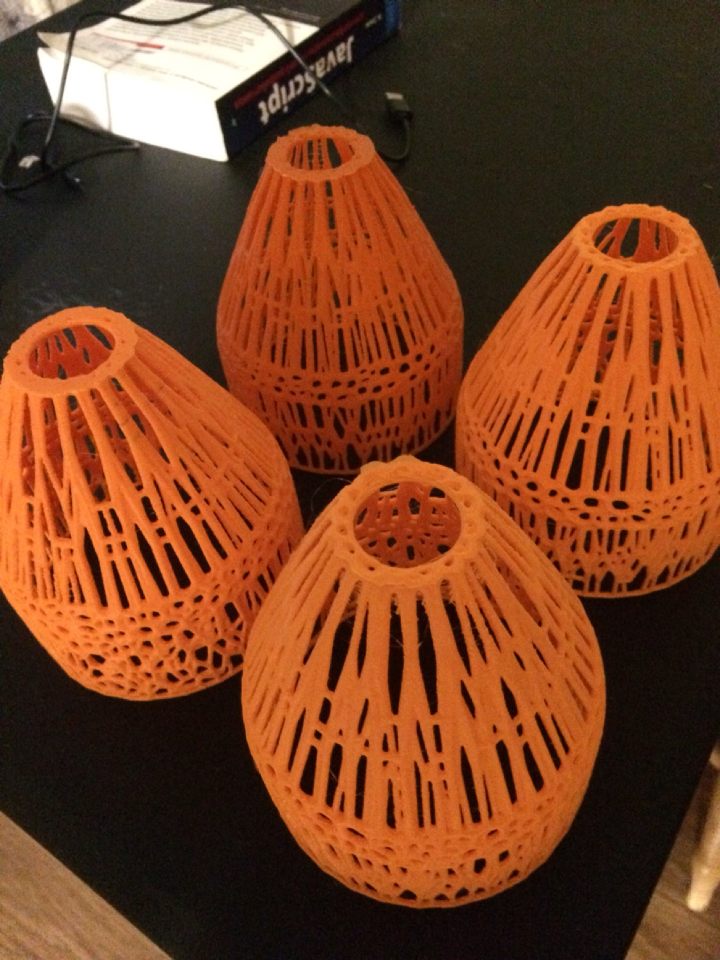
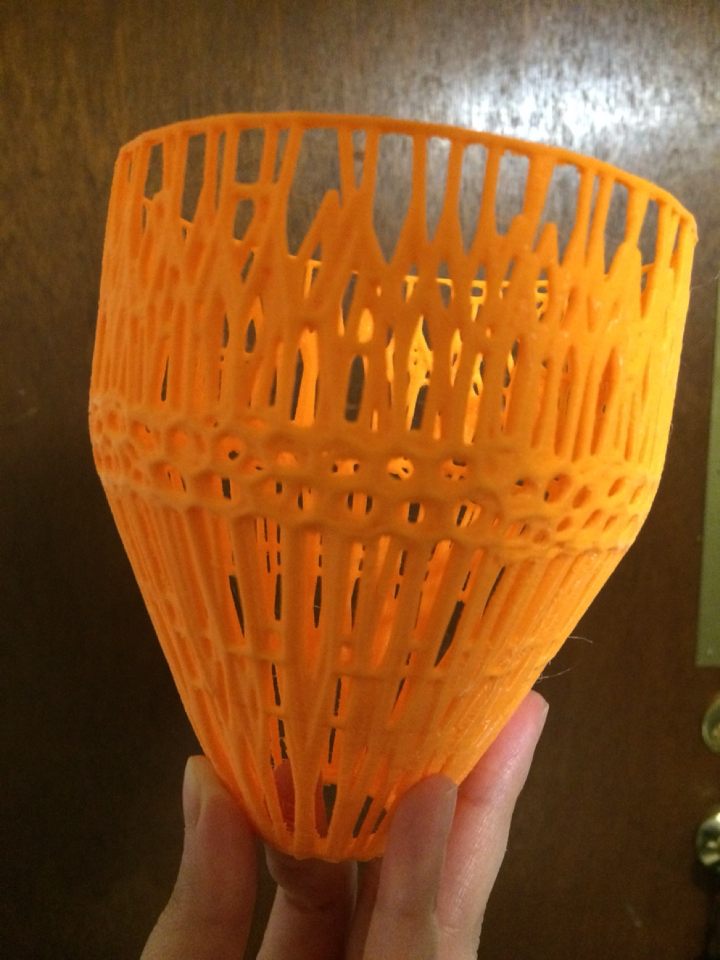
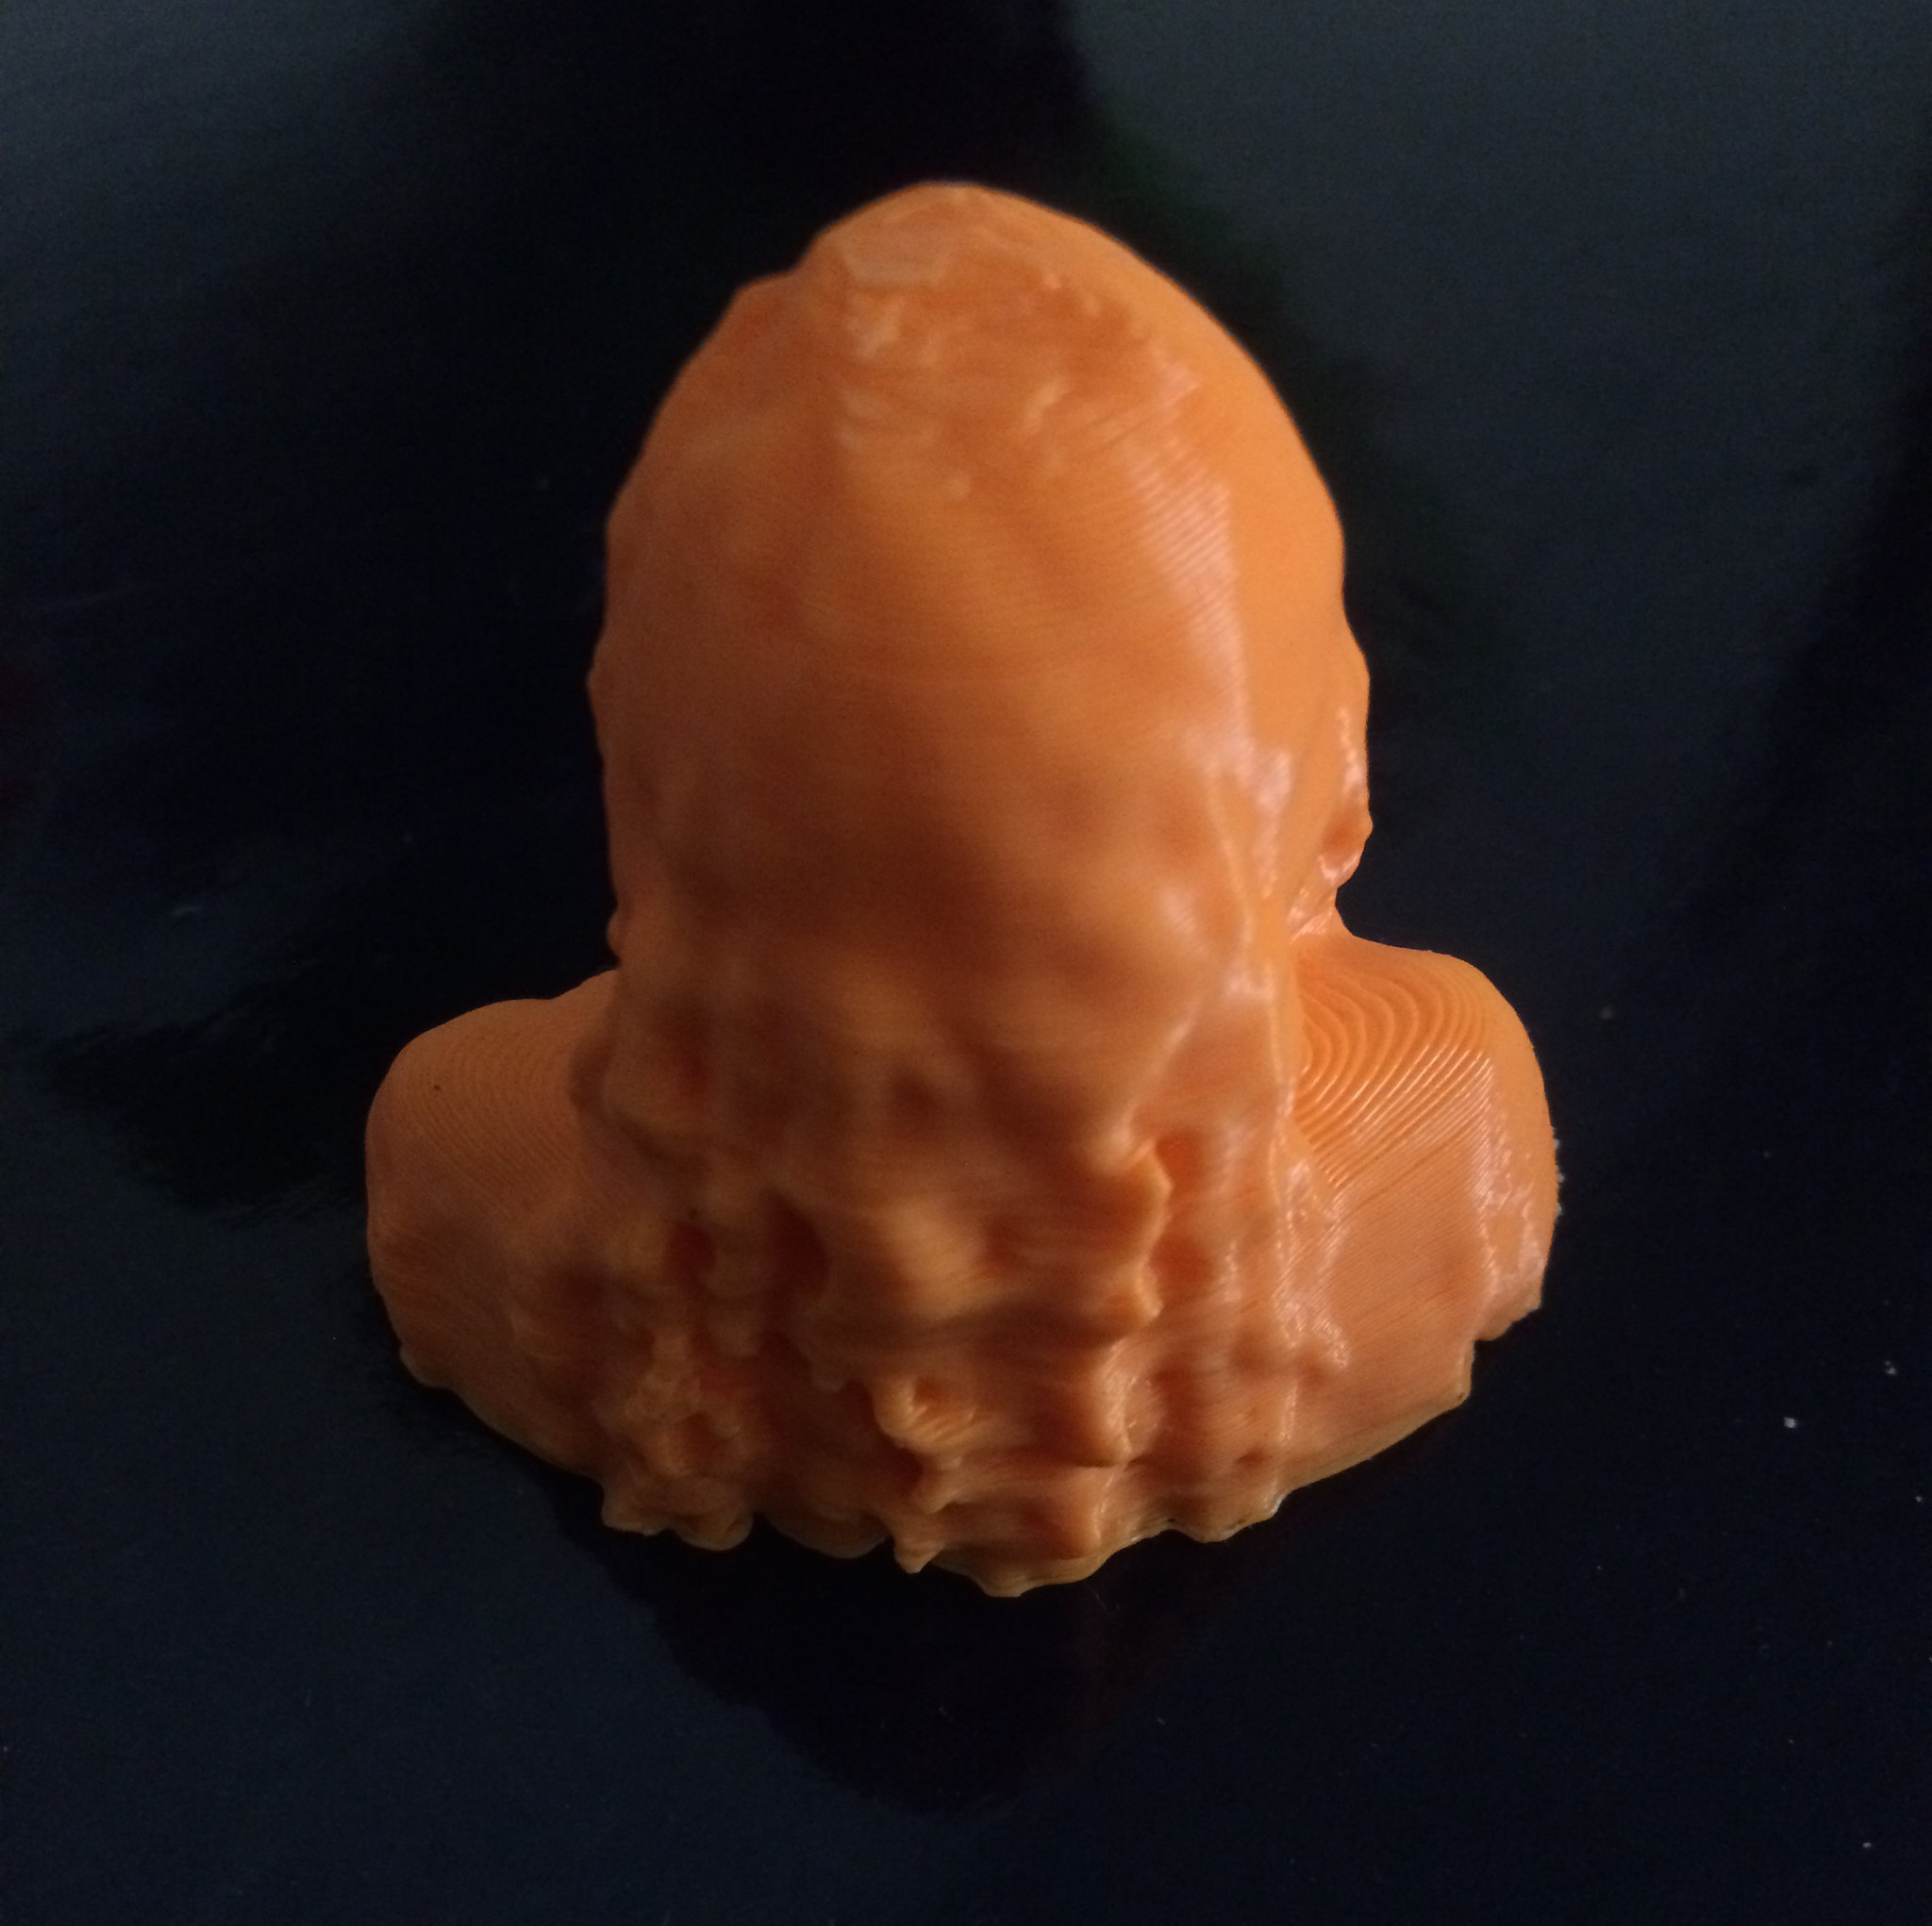
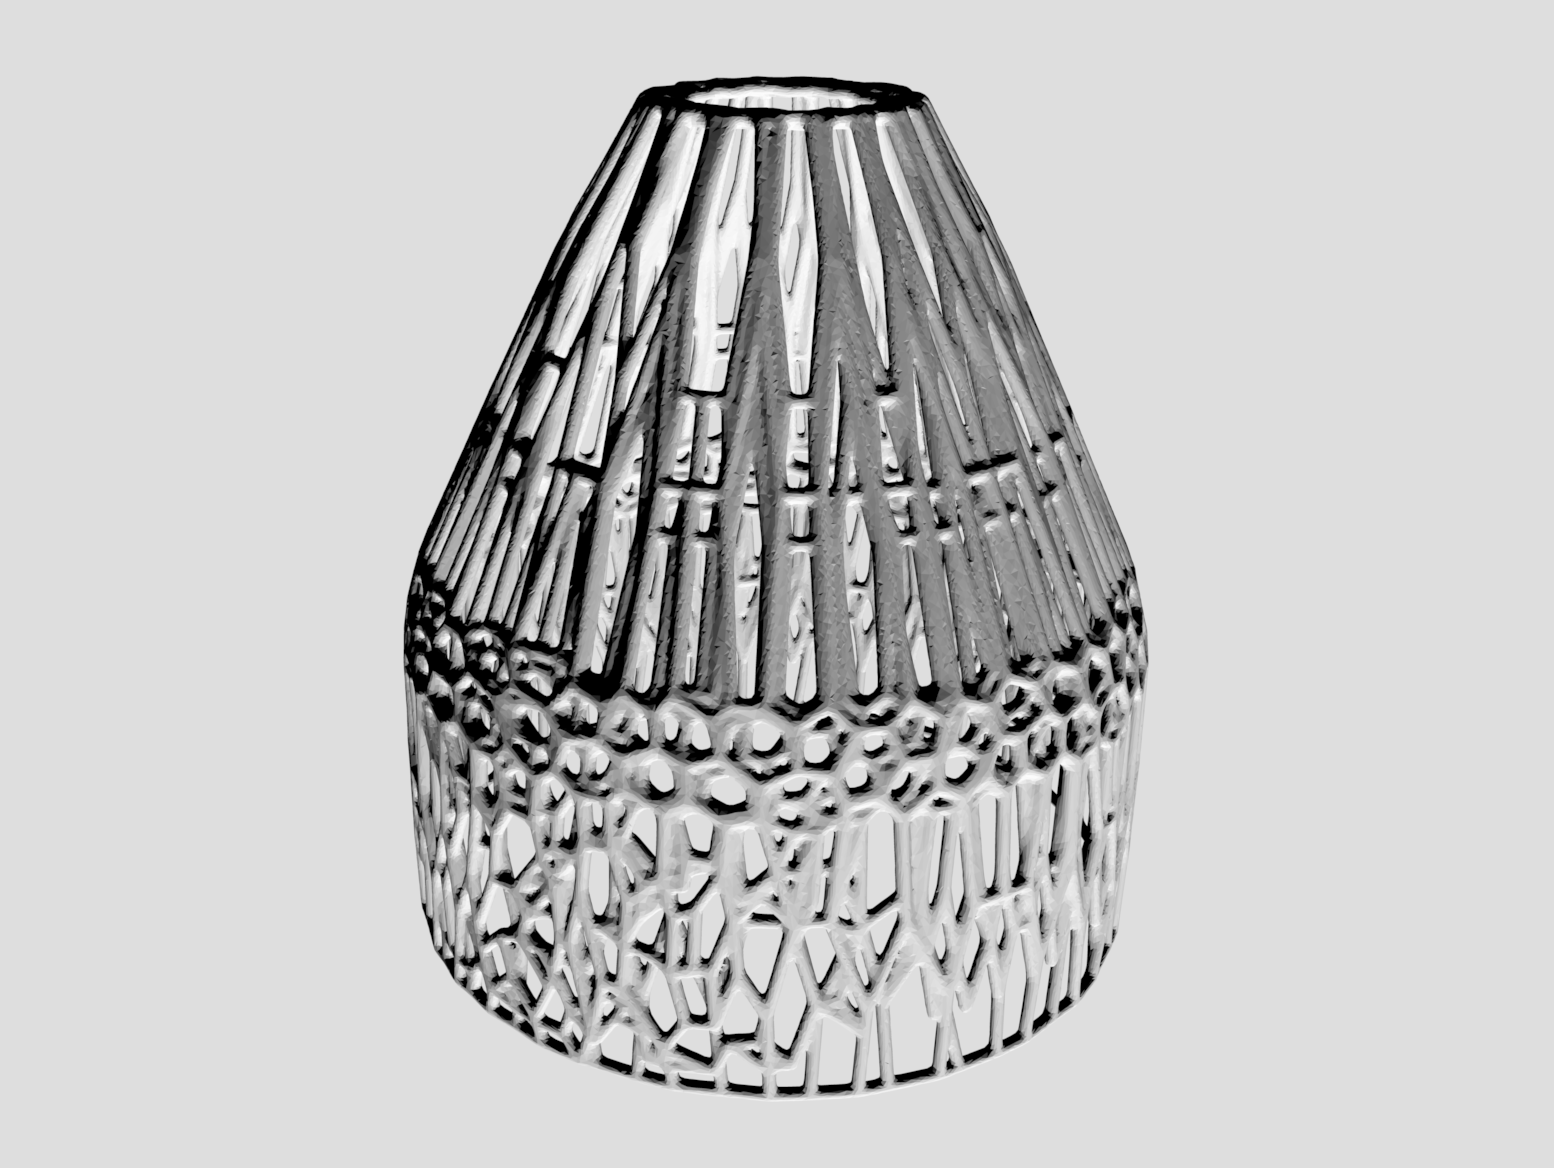
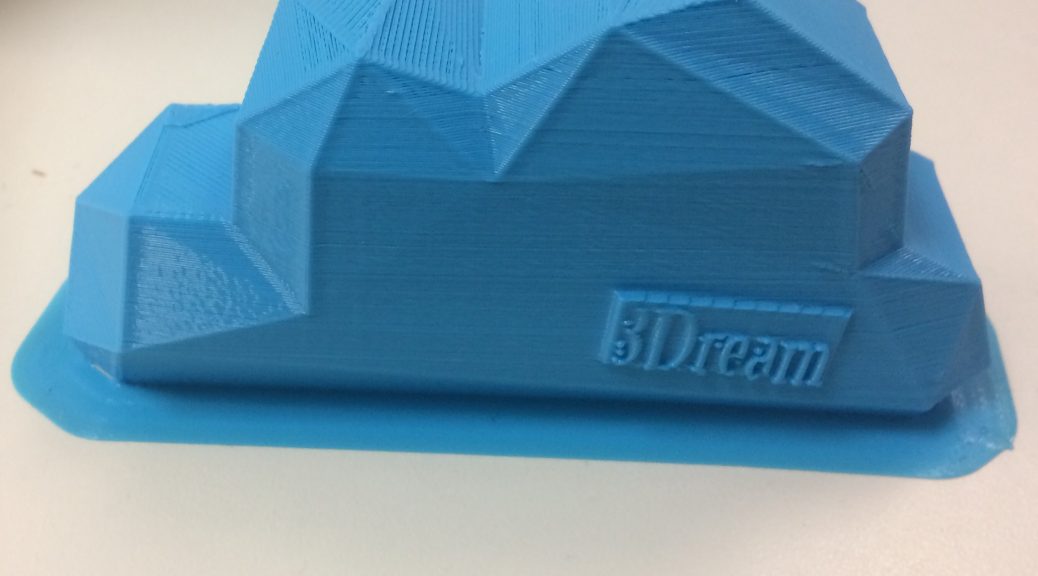
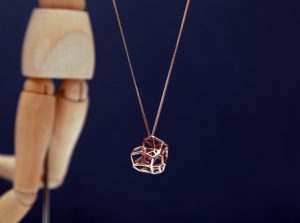
Finally, a very popular use for the voronoi patterns would be in fashion, jewelry, and basically creating any object more visually appealing. A company named 3D-ZAKAZ, specializes in developing 3D printing and modeling of Voronoi style designs to a whole new level, by releasing dozens of designs files for these interesting creations. The believe that the lattice structure of the surface makes people look at the world from a different perspective, giving the illusion of penetration into the essence of the image. Currently, 3D-ZAKAZ has over 60 different models in the Voronoi style, with the design files being disseminated on 3D printing repositories such as Thingiverse, MyMiniFactory, and their own website. Some of their creations can be seen below:

kh
hulk

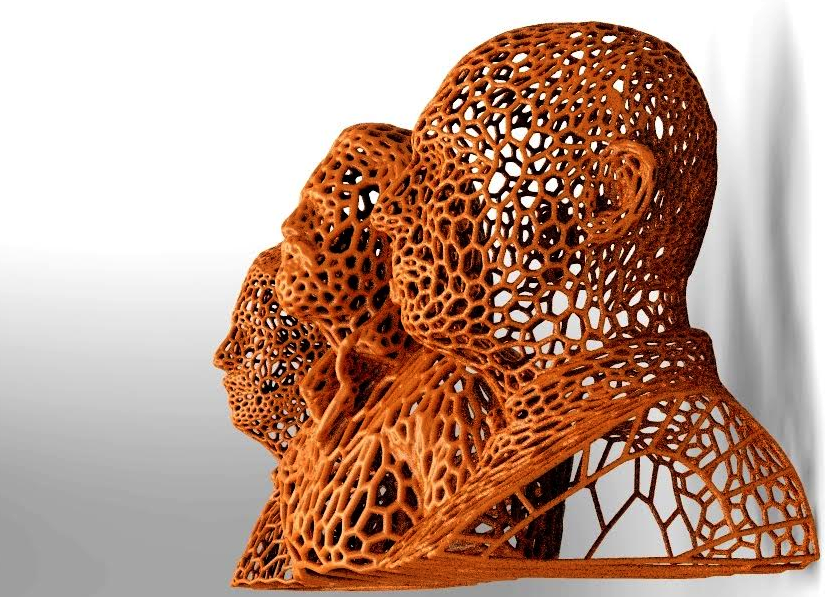
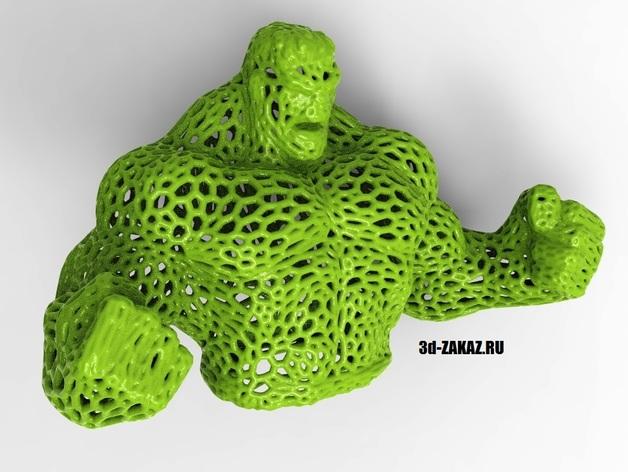
https://3dprint.com/91649/voronoi-style-3d-prints/

Creating a Voronoi Pattern

Although it might be easier to find an object with a voronoi pattern on Thingsverse or similar sites, it is always good to know how to make something yourself. Especially, if it is a beautiful pattern that can be incorporated into nearly any structure. After doing much research on the pattern, I will try to incorporate it into my final class project and create the pattern using the following tips:

“Tips for Removing 3D Print Support Structures.”

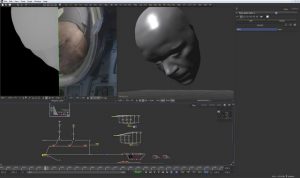
Step 1: Import Model and Reduce Polygons

1) Import model into Meshmixer [Import icon] or [file] > [Import]
2) Select entire model using keyboard Ctrl+a or use the [select] tool to click-drag certain parts you want to edit.
3) Click [Edit] > [Reduce] (Menu appears at top after selecting).
4) Increase the percentage slider or change drop down to lower triangle / polygon count. Less polygons result in larger openings in your final model. It may help to try a very low polygon count.
5) click [accept].

Step 2: Apply and modify the Pattern

1) Click [Edit] menu icon > [Make Pattern]
2) Change the first drop down to [Dual Edges] (pattern using exterior only) or [Mesh + Delaunay] Dual Edges (generates pattern inside model). Changing [element dimensions] will make thicker or narrower tubes.
3) To save model: File > export .STL

*Adjusting certain pattern settings may require intensive CPU usage.

*After clicking accept, you may want to reduce the new mesh polygons slightly for easier 3D printing or importing into other programs.

http://www.instructables.com/id/Make-Voronoi-Pattern-with-Autodesk-Meshmixer/

Thank you for reading and I hope you learned something new!

3D Scanning

This week, our class learned the basics of 3D scanning and I realized how there is no longer a limitation of representing 3D in 2D.

Why is 3D Scanning important

3D Scanning can be used when it is difficult to model an object, adding  or fixing items that already exist (eg. Alma Matter), and in aiding to preserve items.  Museums are using the scanning to preserve old artifacts and to make the print look like the original for an exhibit! Additionally, it allows for a documentation and preservation analysis that were not available before. Researchers can get a much better understanding of the historic artifact using this technology.

Check out the link below to see what the University of Iowa is doing to preserve artifacts with 3D scanning:

https://archaeology.uiowa.edu/preserving-artifacts-3d-scanning-blumberg%E2%80%99s-unusual-iowa-celt

Scanning in class

After learning the basics of 3D Scanning, some of my classmates were able to make a 3D printed bust of themselves! They did that by having another classmate take a scan of them from an iPad that had an attachment. I am not quite sure what the attachment was but I believe it was a structure sensor which is essentially a strip of cameras and sensors you strap to your iPad that can be used to scan, measure, and project things into the world around you.

Ipad

Afterwards, there are a couple more steps before the busts can be created and MeshMixer was the new modeling software  introduced to assist us with the project.  MeshMixer is a prototype design tool based on high-resolution dynamic triangle meshes and is a part of Fusion 360. We are primarily using this software to clean up our 3D scan if needed. Next week, when I am able to create my bust, I will go into the steps and processes required to make a personalized bust! I am very excited to get to do this project and enhance my skillset in this field.

Putting pen to paper: Prototyping

This week really put things into perspective on how much detail will be required for our final project. That being said, our team 3Dream put pen to paper and started prototyping! By completing all of the readings and watching the videos, it was clear that prototyping is a must even if you are not sure on all of the details.

Why prototype?

Creating a prototype is crucial to the design process. It allows for the users to put their ideas into a model and make revisions if needed, omit aspects, keep others, and include additional components. Futhermore, by prototyping before production begins, it is possible to see what specifics parts, materials, and additional resources will be needed and be ordered in advance.

3Dream’s prototype

We created a lo-fi prototype which was a quick and simple hand-drawn sketch to demonstrate the core functionality of our project. We actually developed two sketches. The first prototype really helped us get a sense of what we wanted out project to look like.  It was a rough sketch but really helped in the process of fine tuning and simplifying our project to a cleaner model. We got an idea of what materials will need to be purchased as well as which can be found at the FabLab or even printed ourselves! Below, you can get a sense of what our project will look like and see the differences in our first model to the second one.

Prototype 1

Prototype 1 Continue reading Putting pen to paper: Prototyping

Dazzling the Embroidery with Lights

This week,  I was able to finish my embroidery at the FabLab. It was recommended that I select an image with not many colors.  I went with a  classic rose and I also included a customized design with my initials on the lower right hand corner.

The final product came out better than I could have expected! The design did come out smaller then anticipated and at times, the machine would pucker. In order to prevent puckering, click on the link to watch a shot video for what to do! https://www.youtube.com/watch?v=EA-90RzIGhs

Putting it all together

Now that the laser-cut wooden box and embroidery were completed, it was time to add some lights to it! This was the portion that I imagined would be the most difficult, but with great instructors and my skillsets growing, it wasn’t too bad! We were given a battery, an LED light, and a controller switch.

With these three objects and some conductive thread, you make light! But, it is very important that crossing wires are not different charges (+/-). This can become a issue with additional lights being added, I just had one so I didn’t have to worry about that. I placed my light behind the flower to create a glow and have a Beauty and the Beast effect.

The part that I enjoyed the most out of this project was the stitching. I have never stitched before, so it took some time getting used to. I was a little worried about poking myself, but I came out without a scratch! This is a skillset that will  come in handy someday.

Thank you for reading!

Fab Lab and Laser Cutting

This week I went to the Fab Lab that we have on campus.  I never realized that this place existed, but I am so very glad that I now know of it. I plan to visit it later this week to create customized stickers for an organization that I am a part of! The FabLab is opened to the public and is a space that encourages people to be makers and try out different techniques and processes.  With the wide range of tools being offered, I worked with the universal laser system X-600.

The goal was to make a customized wooden box that would use the system mentioned above. But, first I needed to create and design the different parts of the box on a software known as Inkscape which is a free and open-source vector graphics editor similar to Adobe Illustrator. As any new software, it took some time getting used to it, but it wasn’t too difficult! For my box, I wanted it to capture the highlights of my senior year. I also wanted to test how well the laser would would construct the details of a digital photo image that I took. I included that image on the bottom of the box for safe measures. Next, I needed to transfer the design to the laser system software, select my material as well as brighten the digital photo for better quality.  I placed the ply wood into the system and then began the laser process.  I was really impressed by how the final product came out and I am pleased with the overall quality of the shadow box.

One thing that I did noticed when the plywood was being lasered, was the small fire that emerged from time to time. I wondered if this was problematic with the system or if it is considered to be hazardous.  I found out that laser safety standards are well established and relatively harmonized internationally. And that those standards establish four broad classifications of laser safety for products. The classifications range from Class 1, in which the laser energy is fully contained within the laser system and the operator is not exposed to any laser energy, to Class 4, in which the laser system does not have containment provisions and the operator can potentially be exposed to high levels of laser energy.

https://www.ulsinc.com/

Final Project

Ultimately, we have decided that for our final project we would like to incorporate 3D printing into window farms. We would like to create a window farm that uses various sensors and a micro-controller to sense its environment and adapt accordingly. After doing some more research,  we would like to work with vertical hydroponic gardening systems. These plants do not use soil to grow but rather use mineral solution nutrients. I am very exciting for our project and I am looking forward of the development of it.

That concludes my blog for this week,

Thanks for reading!


Biology meets 3D Printing

Alan Amling

This week was filled with great guest lecturers. We got to hear from Alan Amling on UPS’s business model with 3D printing. UPS has included additive micro manufacturing which is essentially taking 3D printing factories and integrating them into their model. UPS currently has 23 makerbots for prototypes and models which are typically used by small businesses. They have done this to stay at the forefront of this disruptive technology and to fit demand manufacturing since people will soon be shipping and storing less, some of UPS’s main services.

Alan discussed two interesting usages for 3D printing. He mentioned how smaller factories are building parts , prototypes, and mass personalized goods. An example would be printing customized tools to prevent slippage and injury at the work place. Another example Alan used was Nike’s matrix structure sole being 3D printed for an exact fit. Later this year, they are going to use a scan for your foot ( measure weight, etc) and create a customized shoe.

Nike’s first 3D-printed football cleat prototype.

Dot Silverman

Our next guest lecturer was Dot Silverman, who introduced me to the topic of biohacking. The use of biohacking materials to create 3D structures, and using special bioinks made up of living cells to print messages and patterns. A product of biohacking may be seen below:

Human cells cultured into a decellularized apple slice (left) and an apple carved into an ear shape (right)

Fascinated by the human ear prototype, I looked into other Apple ears and found Pelling Lab’s creating them with existing 3D structure as a scaffold for cells. Andrew Pelling describes the process: “You slice an apple, wash it in soap and water, then sterilize it. What’s left is a fine mesh of cellulose into which you can inject human cells — and they grow.”

Pelling Lab’s “Apple ears” during the decellularization process.

Final Project

Additionally, my team is considering the incorporation of 3D printing into vertical gardens, window farms or urban farming solutions. I am drawn to this project because I believe that air pollution is a major problem and plants can assist with making the air cleaner. As a college student, I found it to be difficult owning and caring for plants with the limited backyard space and found window farms to be very appealing and manageable.  I would like to create a window farm that uses various sensors and a micro-controller to sense its environment and adapt accordingly.  I will have to do additional research to better understand window farms  if my team selects it for the final project.
Thank you for reading and see you next week!

Design Thinking

This week, the required reading titled “Design Thinking”  by Tim Brown addressed how businesses are requiring innovative thought processes in order to stay at the forefront of its competitors. A firm that specializes and is often used by companies to acquire innovations is IDEO. IDEO is a global design and innovation company that hopes to create a positive impact through design.

IDEO is so innovative because they do not have a standard way of creating solutions…

Design for America 

To get a better understanding of design thinking, we had workshop from the University’s Design for America team. The team consisted of a diverse group with different majors and different ages. We were tasked to create a product for a visually impaired university student who wanted to feel more connected to her peers and attend social events held by the university. In order to to create a product, we had to go through a design process.  The first stage was to understand our consumer, then create the product.

This design thinking was foreign to me, and I found it challenging not to create a product after hearing the problem from our “client”. But, DFA’s process allowed for a much better understanding of our client and to dive deep into their world and struggles.

Create /Prototyping 

Our team brainstormed and wrote out potential solutions on sticky notes until we were ready to create.  We focused on making football stadiums more of a friendly environment for the the visually impaired and decided to add brail all around the sports arena. It doesn’t sound that innovative, yet it has not been done. One thing that the DFA’s team kept reminding us was that if helped at least a few people, then that was good enough. So, we stuck with our brailed railing at the sport arena since we figured it could be easily implemented around the facility and braille could be added to the existing railing for a tactile experience.


Readings 

Fascinated by IDEO, I looked more into the firm and its current projects centered on design thinking. Recently, the challenge they faced was to expand Zalando’s human-centered design capability. The outcome was “The Studio”, a jointly run innovation lab that prototypes and builds digital products.

https://www.ideo.com/case-study/cultivating-creative-competitiveness-for-europes-biggest-fashion-platform

Thank you for reading my blog and I hoped you learned something! See you next week!


3D Modeling with Fusion 360

Another software has been learned!

This week, our class focused on gaining the skillset and an understanding of the Fusion 360 software. We did this by watching beginners tutorials and learning the interface of Fusion before class which made it easier to follow the guest lecturer Dan Banach. Dan is an instructor  from Autodesk and he is very much experienced with this software. He did a great job at explaining the locations of each function, shortcuts to reach them, the purpose of each tool, as well as providing an understanding of the capabilities that Fusion has to offer. Fusion is the first 3D CAD, CAM, and CAE tool of its kind. It connects your entire product development process in a single cloud-based platform that works on both Mac and PC. ( I recommend using a mouse, I assume it’s easier than my touchpad).

Now, onto the fun stuff! Dan displayed two objects that we would be creating in class: An ice scrapper, and a wall outlet shelf. At first, I didn’t think it was going to be possible to create two objects given the time constraint, but I’m glad to say that we were able to design, test, and fabricate them both.

Ice Scrapper 

The Ice Scrapper was the first object we created and I was very proud of myself for how it came out! I ran into one complication designing it since I created the object on the wrong plane. With assistance from Dan, and a little arithmetic, the ice scrapper is on par and  ready to get 3D Printed.

Wall Outlet Shelf

As for the Wall Outlet Shelf, I had much more difficulties creating it and unfortunately did not complete it. But, I do have an image on what it was intended to be. The shelf fits around most standard outlet charger adopters but it can be customized on Fusion. It is a very clever design with a practical benefit.

The Making of The Martian

One thing that stood out to me during Dan’s lecture was when he mentioned how the film, The Martian incorporated Fusion.  Apparently, there were work flow challenges in creating the stereo 3D world of The Martian which was  fixed using Fusion Studio!

“The shots would come from our artists as EXRs, and we would then run them through our Fusion script which would bake in a new color grade and a heavy sharpen. This meant I could view not only the plate version as provided by the client, but also a heavily graded and heavily sharpened version in the theatre, so I could easily identify any of these small edges. What we produced really hit the nail on the head for the client.”

Prime Focus World, the company tasked with creating post 3D conversions for the film.

Fusion is a very powerful software that I never thought I would learn, but I’m glad that I did. I hope you enjoyed reading,

See you next week!

Getting hands on with 3D Printing

This week, we had students lead the class and had a very enthusiastic guest speaker, Jeff Ginger. Jeff shared his vision and aspirations for the FabLab that we have here on campus as well for 3D printing in general. Jeff brought 3D printers into public libraries in hopes of having the younger generations develop a maker mindset. He incorporated the popular video game, Minecraft to peak the interest of the youth and it definitely worked!

Last week, our small groups were left to develop a logo and team name. We came up with “3Dream”, because I believe that if you can dream it, you can print it. We created our first sketch to encompass a dream cloud  with our team name at the center.

With this basic sketch, the foundation of our design was laid and brought to life with Tinkercad which turned our idea into a CAD model. Tinkercad offers only four different font options and I wondered if it was possible to import a font just like you can import a design. After some research, I learned that you could do this by using sketchpad, selecting your font and start typing, export it, save it, and then download. Afterwards, go to an online converter, on there you will change the image to an SVG, and select your SVG image to convert. Once it has been converted, the file can be imported onto Tinkercad! And just like that, our design was created.

We were proud of our design but we were not satisfied, so we made some alterations. By exploring Thingiverse we came upon a  model of a low polygon cloud  that made our 2D design 3D! With this change, we were able to see the differences and difficulties by working with different dimensional designs. Once our design was completed and uploaded onto the Cura software, it took 4 hours to print and it came out great! I was surprised that it took so long to print since the inside is hallow but I assume that is was due to the certain material used.

I learned so much this week and I’m very much excited to continue to learn, practice, and create in the future classes.

3d Printing Will Rock The World!

Hello! This is blog post #1 and a recap of what I learned, found interesting, and further researched on 3D printing.

First off, “3D printing” is a current buzzword that  seems to be making the biggest headlines in innovative technologies. But, to my surprise, 3D printing is not a new concept! From the article, “How to Make Almost Anything” by Neil Gershenfeld, he discusses how 3D printing was first introduced in the 1980’s.  After reading the article, I was inspired at what 3D printing could accomplish but he also presented a dark outlook on 3D printing that isn’t always at the forefront of peoples minds. This technology has already resulted in weapons being printed, the development of counterfeit money, and potentially in  “gray goo” – self reproducing machines that multiply out of control and consume all of the earths resources! I don’t know how realistic gray goo is, but one thing I comprehended from this reading is that laws and regulation of 3D printing are a must. 

Aside from that, the other reading, ” The Maker Mindset”, and the guest speaker/alum interested me into the wonders of 3D printing. They presented numerous possibilities of what 3D printing has to offer and how this technology can develop a wide range of items! Thus, the foundation of what 3D printing  was set, and that bar was very high. Our class then broke down into small groups and we started thinking of items to create. I had plenty of ideas, but the problem was that they were already  created. So, I went to find inspiration on 3D printing platforms and I found 4 items that I would like to make during the class sessions. Those include:

  1. Webcam Privacy Screen

https://www.shapeways.com/product/8V5DCZ3GZ/webcam-privacy-screen?optionId=3405835&li=marketplace

In a time were infringement of privacy seems oh so popular, I would love to create a webcam privacy screen. Many students, including myself, use stickers or cut up sticky notes to cover their webcams. This object would be very useful to have but I would make a sliding screen to open and close the cam.

2. Cube Nails 

https://www.shapeways.com/product/TCF7N3VQH/cube-nails-size-0?optionId=17107908&li=marketplace

I was excited to see 3D printed nail art being developed because the classic gel nails are so damaging as well as expensive. This is a flexible polish with richly colored nylon plastic with a smooth finish. Comes in multiple colors! I would like to make different designs that are more flat and add images if possible.

3. Robbie and Bird

https://www.shapeways.com/product/XP82VDBGP/robbie-and-bird?optionId=42049009&li=marketplace

I would like to make something fun like a creative vase! In addition, this vase has nice detail that I would like to see a 3D printer construct.

4. The Little Meteor

https://www.shapeways.com/product/UD6ULCFWV/the-little-meteor?optionId=56493089

I would like to create a pendant that is polished brass plated with 14k Rose Gold! Many people are hesitant to get things 3D printed because they fear that the quality will lessen. I want to see if that is true by printing this item.