All posts by rherna45@illinois.edu

All great things come to an end

Expectations vs. Reality

Coming into the course, as I mentioned in my first blog post, I was expecting to make and create 3D prints and objects similar to the things that I saw my friend who was an art major from freshman year was creating in his art class such as 3D busts of myself and other small devices and contraptions to teach us the basics of 3D modeling and printing. Looking back throughout the semester and past blog posts I see that those expectations were met to a degree that was much higher than I thought. I was not only taught beginner skills of 3D modeling and printing but was also thought to have a maker mindset! Through the structure of the course, I felt as though I hit the ground running as we moved from learning designing skills such as using software like Fusion 360 and Cura to having real physical prints made in the classroom at a quick pace. It helped keep the entire class on their toes as well as very engaged and attentive considering the next step would be coming just as fast so there was very little time to waste.

Throughout the semester there were class days that were used as workshop days in which there was an experienced user or professional of a specific 3D designing software would teach us how to use the software by designing a variety of objects that we could actually print out on technology in the MakerLab or the FAB lab on campus if we wanted to. At the FAB lab we were able to do this and actually print out what we designed each step of the way to have a physical ending prototype or in some people’s cases an actual finished product to take home after putting in the time to design it. These workshops were very beneficial and helped mold us into makers more than just thinkers.

The class continuously fed into the idea of us having making mindsets through all the presentations and articles that we were exposed to that taught us about different ways of integrating modern technology into different career fields to speed up processes and develop new innovative creations. We heard from an alum who was in the course that took their semester project and turned it into a business, from a very intelligent scientist about biohacking and bio-fabrication that can be done through the use of 3D designing and modeling software and hardware, from experienced members of the FAB lab that make use of modern technology including things such as embroidery software, electrical lighting, laser cutting, etc and many other influential and intriguing speakers that are making a difference using their making mindset out in the real world. Through exposure to content like this, we realize that modern technology can be integrated with nearly any field there is and were able to begin to think of something we were each passionate about that we could creatively incorporate the use of modern technology to improve.


Internal Enlightenment

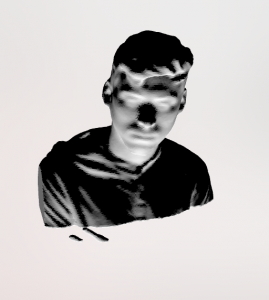
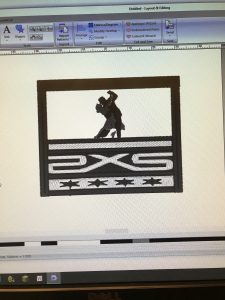
Throughout the course, being exposed to all the content of the material and presentations as well as having a semester project to work on where I had to make use of the skills I was learning about made me realize that I am a lot more capable of making a difference than I thought. Many of my other classes focus a lot on analyzing the situation and coming up with recommendations that could improve a process of situation, but this class goes past the design process and more into actually creating the solution. I was able to learn about so much amazing technology that we have at our disposal and use it to make things like a team emblem for our project team, an embroidered and light up wooden box that was custom carved with a laser-cutter, and a pour-over coffee assistant. Most important for me, I was able to scan a 3D printable model of myself to create a 3D printed bust of myself like the one I saw my best friend make of himself my freshman year! Through the fulfillment of creating these things, I gained a sort of confidence to go past just thinking and move towards making solutions. And with that I thank and chuck the deuces to this class as I did in this 3D scan of myself:

Prototypes Galore

During this week’s class, everyone was able to meet in their groups to work on the design of their projects. After meeting with our team, we were to look over each other’s designs and critique them with constructive criticism. We first met with a team that was working on creating a simple 3D printable device that would count the number of people inside and outside of a building for businesses to use. This team was currently struggling to get the device to display on a 3 digit display screen. Although we weren’t able to give much feedback as we do not know much of the mechanics for the wiring of this device, we were able to give some adjustments for the future to consider like the actual storing of this data as opposed to just displaying it that can be implemented in the future to add value to this product.

We then met with a group that is working on a sort of smart plant holder. It was a very interesting design for a plant holder that would make the use of a pump to raise water to the top of the holder so it trickles down to the rest of the plants as this is a vertical plant holder. One concern the group had was on how to split the water evenly among the plants, we advised them to check in with the FAB lab to see if they had anything that could help as well as got them to think about how to not only distribute the water evenly but the nutrients in the water as they plan on putting plant food in the water. As the water trickles down to the next group of plants, there will be less nutrients in the water  since the higher plants would soak it up.

Additionally, both groups gave us substantial feedback on our design in terms of the physical design as well as improvements to think about. Most feedback involved the design of the legs for our coffee contraption as the current prototype does not allow for a cup to be placed under it to catch the coffee. This is something for us to look in further prototype versions. We were thinking of potentially taking another group’s advice and making a tri-pod design for the contraption.  Tune in next time to see what direction we went in!

Workshops and Busts

This week in class we had a workshop day where we got in our groups and worked on getting a prototype in for our project to begin printing! My group and I got together and we began to finalize some small details on our base design for our pour-over coffee contraption design. We were able to split our design into two parts: the base with funnel part and the water reservoir section. We were able to get two printers running with each of the two parts of the contraption printing. We were able to watch over the prints while in class and as we left the room the last time we saw the prints they were doing well. I was not able to get a look at the prints but cannot wait to see how it came out tomorrow when I visit the lab to get a look at them.

Additionally, I was able to fool around with the scanning technology that I unfortunately missed in the last class and scan a part of me to make a printed bust of myself. I was very impressed with the detail that the scanner was able to get from the scan in order to make a 3D image that resembled me pretty well! I was very impressed and thought it was so cool that I was using the technology that first got me interested in 3D printing in the first place! When I was a freshman here on campus, my best friend (who since then has transferred out) was working on a project for his art class that involved using a Kinect scanner to make a 3D printed bust of himself. So for me to be able to use the technology that got me interested in it in the first place was so satisfying and so much fun!

Shapeways and Shaping The Way to Our Project

We had the privilege of hearing from an employee at Shapeways and even got to get an inside view of the company! While we set up to have a presentation, the employee showed us around the company and the different things they were working on. It was really amazing to see people working with 3D printing in so many ways and different methods of coming up with the same product. She mentioned how there is an efficient way to print multiple projects at the same time using some sort of 3D printing using compression and cohesion of some sort of dust or powder using the Binder Jetting Technology available.

Its great to find out that improvements are still being made within the 3D making industry that can make things more efficient and faster and waste less of our resources that make it more of a possibility for future projects and developments to make use of 3D printing!

After the presentation from Shapeways, we went into our groups to begin the actual specific blueprinting for our project! We began with the base design which we intend to be a sort of 3 part design for the pour over coffee project we are working on that will ease the process of making pour over coffee as well as making it a lot more time efficient. Once we got the base design we started thinking of modifications and improvements for the design that include resizable base legs for different sized cups and mugs as well as screens that we can slide into the design that will help control the speed at which the hot water from the pour-over coffee contraption is falling through to the actual coffee and mug.

After designing our device, we went to discuss with Vishal more specifics including the issue of using hot water with the PLA material we have in class. He gave us the idea of using thin sheets of metal to use inside of the PLA printed structure to withhold the heat of the water. We are planning on meeting with people from the FAB lab to help us with our design as well as with the idea of using the thin metal sheets in our design!

Sewing Constellations

This week we had another visit to the FAB Lab in order to continue with the workshop where we are creating a box with a canvas that has an embroidered design all designed by us. This class was focused on the final step of the workshop where we are to sew on a design to place lights onto our embroidered canvas where the lights will add to the creativity of our design.

In order for us to successfully create a piece with lights in it, we first learned a bit about circuits and how the battery and lights we are sewing on to our piece are working together. One of the students from the FAB Lab that was assisting with the workshop named Duncan began to teach us about circuits a bit before we began sewing. We learned about the difference between parallel circuits and series circuits, where parallel circuits have lights that are independently connected to a power source and do not need each other to light up and series circuits have lights connected to each other and the power source, so they all need to work in order for them to light up. We also learned about the dangers of crossing negative and positive ends of the battery as they can cause the entire circuit to not work. Once we understood that, we were able to design our lighting plans for our canvas on paper, which we then used as the foundation for the actual sewing design for our piece.

Once we had our design and understood how the battery and circuits worked, we were handed some LED lights (2 or 3 depending on our design/preference) and some conductive string that can pass an electric current through itself in order to reach the lights and light them up. We thread the needle and proceeded to sew in our design. Many people in the classroom had amazing and creative designs. One of my favorites was a student who had the embroidered design of a lion’s face from the lion king and had placed the two lights perfectly on the spaces for the eyes of the design. After a lot of trial and error and many mistakenly crossed negative and positive wires, I too, was able to finish my design and place two lights at the top of my embroidered design. Since my design for my canvas was a couple dancing together on a sort of stage, I decided to place the two lights on the top right and left corners of the “stage” to seem like stage lights and complete the theme of my design. I was overall very happy with my design and grateful to have learned as much as I did from the workshop.

What Could’ve Been

This week I was feeling very under the weather after all the climate changes that have been occurring on campus as well as both of my roommates contracting Pneumonia and was unfortunately not able to attend class on Wednesday. Upon reading some of the other posts, I am very sad to know what could’ve been done in class and the awesome box I would’ve created (and will hopefully have the chance to create later).

The class learned how to design a small wooden box that will be then used as a base for the canvas that we embroidered last class. The box was to be created following the same theme as our original embroidery piece that we created last week. The embroidered piece that I made last week was one that depicted a couple dancing some sort of Latin dance, therefore, for my box I would’ve loved to design it with images of silhouettes of couples dancing to further fit the original theme as it is to represent the dance team that I am currently the artistic director to called “Dance2XS: Caliente”. If the silhouettes design did not look nice on the box I would go for maybe some sort of star design with little star shapes to go along with dancing to feel like a “dancing under the stars” theme.

The design would then go from the computer to a physical object with the help of the CnC Machine that seems to be the new technology that was introduced to the class that etches images and laser cuts them into wood. Having had worked at a carpentry as my first job growing up was sanding wood, I got to see a lot of carpenters shaping wood and turning it into some sort of furniture and this technology sounds like it could be so much more fun and interesting to have used at this workplace if the technology was available to them at that time that could’ve led to furniture that was a lot more aesthetically pleasing or creative and innovative designs that could even give the carpentry a competitive advantage up until others were to discover the technology. Furthermore, it could’ve made shaping and forming the wood into furniture more efficient as well if the laser cutter was large and powerful enough to cut through wood at the carpentry.

Week 7 Reflection: BADM 395 takes the FAB LAB

This week in class we took a trip to the FAB LAB that is located on campus right by the ACES library. Although a lot of us were late because we didn’t know of where the lab was (or if they were like me, had just opened the announcement that we had class in the FAB LAB right before leaving to class), it was a very fun and interesting workshop where we learned a lot about the capabilities that the FAB LAB has when it comes to 3D-making and other sorts of making.

We began the class with a tour of the lab led by Jeff who had previously spoken in our class. He showed us the different rooms and sections in the FAB LAB and what was created or experimented with in each section. We learned about 3D printing, laser cutting, sewing and embroidery, as well as about all the projects that were currently being worked on in the lab. One thing that was mentioned again which I got excited for was the project that some people in the lab are working on where they are creating a dress for the famous drag queen Sasha Velour (who her father happens to teach at this university).

After the tour, we went on into two separate rooms where  we had a workshop on how to use the embroidery tools that were available for us at the lab and had to use them to create a design to be embroidered and then later used to cover a laser cut box we will make in the next visit. I was amazed at the possible images and shapes that could be embroidered after fooling around with some tools and I began to get very excited to make this object! I wanted to make a design for the dance team that I am currently a part of on campus called Dance2XS: Caliente

After multiple attempts and many many many changes of thread to change colors, I was able to embroider a box with my dance team’s logo on it as well as the Chicago flag as we perform in Chicago and I am also born and raised there, then there is a dancing couple on top (which was so small some thought was a pigeon, but I think is great!). Although in text this does not sound like a fun design, it is actually really nice! To prove such, here is a picture and a video I got on my snapchat of it:

Snapchat Video of Embroidery

Week 6 Reflection

Speaker 1 –Alan Amling:

This week we had the pleasure of having Alan Amling present to us about how 3D printing is making an impact in UPS where he currently works. He explained to us how UPS delivers some tools and hardware to many companies and locations that was becoming difficult to maintain as these items had to be kept in storage until needed. He mentioned, however, how the company is beginning to partake in the use of 3D Printing in order to make it more feasible to have these tools and hardware available when needed by just creating them upon request. This is very interesting to hear as it shows that not only are pieces going to be more affordable thru the use of 3D printing but how the company will be more efficient altogether by also maximizing the efficiency of their storage spaces.

Speaker 2 –Dot Silverman:

We then had another speaker, Dot Silverman, who came in and spoke to us  about biohacking and a lot of interesting forms of biohacking/physiology with 3D printers and “Biofabrication”. One thing that really stayed on my mind after this presentation was her section on how organs and bones are now beginning to be 3D printed that have substances that can actually promote the regrowth of bones and organs which can be an amazing substitute to the current use of metal plates for current health issues. It was really interesting to hear about the biological science side of 3D printed that is not as publicized.

After the speakers presented, we were able to pitch some potential ideas for our projects, and although there wasn’t as much peer critiques as I expected, it was still a very beneficial exercise to get our ideas out there and see how people reacted to them. It was even more helpful to hear other people’s ideas as they can give other groups a little more motivation to challenge ourselves and make a more complicated pitch to kind of match the level of complexity as another team’s pitch.

Additionally, we were given time in class to attempt to 3D print something that we would like and I took that time to create a design as well as 3D print a dog tag for my dog, Toby.  It was printed pretty quickly as it is a small object and is now hanging around my dog’s neck. It is so cool for me to be able to say that I designed his dog tag even if it is not the most complex. Here is a link to the design:

http://a360.co/2GzLGI3


Week 5 Reflection

This week in class we had a group of guest speakers from an RSO on campus called Design For America (DFA) come in and lead a workshop that focused a lot on the idea that we have been emphasizing all semester of having a making mindset. In this workshop, we were given multiple situations and issues and then taken through some steps to come with viable solutions based off of a lot of questions we were coming up with that describes the main problem we want to solve. For instance, my team took on a problem that a visually impaired mother had about not being able to see or locate her children at times. We then came up with the question “How can we help visually impaired parents locate their children in groups of many children or unknown locations?” to represent the problem we are trying to solve more specifically to hone in on potential solutions. After coming up with a focus question to base our ideas off, we began to bounce off each teammates ideas until we finally came up with an idea to which we then had to create a mock prototype out of supplies at hand such as play-doh, pipe cleaners, magnets and some others. From this workshop, my team came up with the idea of a sort of locator jewelry that can be worn by the parent that is visually impaired as well as his/her children that can use some sort of magnetic technology or location system that will sort of pull or put pressure in the direction of the child. We also thought of some potential ear buds that can also be synced to the device to offer audio directions to the child as well. We then used pipe cleaners to form a bracelet to be worn by the parent and a necklace for the child to wear and used magnets as a design for the necklace and bracelet as well as for its attractive properties.  Lastly, we coated the magnets in blue play-doh to make them appear like actual jewelry pieces.


This was a very interesting workshop that helped give us an idea of things we can do to help us come up with an idea for our semester project. Focusing more on a problem to solve then branching out to potential solutions we found is very efficient for our team and got us thinking of possible project ideas. It also helped me learn a lot about DFA, which is a very interesting RSO that I wish I would have known about earlier in my college career and cannot wait to hear what great projects they work on in the future.

Week 4 Reflection: Fusion 360

This week in class we had Dan Banach present to us and host a workshop on using AutoDesk’s software Fusion 360 to create 3D models of objects and things we can later potentially print out on a 3D-Printer. This session was very informative and hands on which I really enjoyed because we all got to fool around with the software and learn its capabilities as well as mess up a lot but having Dan Banach there, we were able to learn how to fix our mistakes which can be very beneficial for our future mistakes that are bound to happen.


Ice-Scraper (http://a360.co/2H8bCMj):

One of the objects we worked on in the workshop was an ice scraper for when there is a lot of ice stuck on the windows of your vehicle. This was a very neat object to start with as it had us make use of a lot of different tools within Fusion 360 such as the extrude function, sketch tools, fillet tools, how to make a hole and chamfer tools. Many functions that will be used for a lot of future projects. We even got to mess around with the material type for the object and the colors to show the design as a UIUC Scraper for my object.


Wall Outlet Shelf (http://a360.co/2H8cWyL):

The second object we worked on during the workshop was a wall outlet shelf that you get to use when you are charging something small like a phone, you attach this object on your wall charger, then you have a shelf located directly on top of the charger for you to lay your phone or other small device that’s charging. I really likes this object because it taught us about the shell function in Fusion that was really interesting. I also thought it was funny that this object was chosen since I originally wrote about this one from the pinshape website on an earlier reflection.

Dog Bone Cookie Cutter (http://a360.co/2G2wcfq):

This object was one that I worked on individually after the workshop. This is a dog bone cookie cutter. I thought it was something fun for me to make that would not be too complicated as I am still new to this but also let me explore how to make rounder objects and taught me how to use the arc functions under sketch and further practice the shell functions.


Fusion Shortcuts

Link: http://help.autodesk.com/view/fusion360/ENU/?guid=GUID-F0491540-0324-470A-B651-2238D0EFAC30

I found this article from the AutoDesk Website that can help make using this software a lot more simple/time efficient with the use of keyboard shortcuts. I personally find the use of keyboard shortcuts very beneficial and I hope others find this link as helpful as I did.


Week 3 Reflection – Fab Lab Presentation

This week in class, we had the pleasure of listening to Jeff Ginger speak about his love for the “making” mindset and everything he has accomplished by working in the Fab Lab with people who listen to him and his instruction and have began to create amazing things in the lab. Something I found very interesting was listening to how he used a child’s game “MineCraft” as a medium to help teach children about the making mindset and get them more attracted to the idea of 3D printing and learning more about it. Some mention of the drag queen Sasha Velour was also mentioned as she has asked one of the many Fab Labs to create a dress for her which I found so amazing since I like to watch Drag and know who that is, it was a really cool moment to think about how this technology is even helping in a fashion setting! Additionally we were able to fool around a bit with tinkercad and begin creating 3D objects. My partners and I put in our first print to be made for our logo or emblem for team GEM and I am excited to see how it comes out!  #Drag #GEM #MakingMindset

GETTING STARTED WITH 3D PRINTING (WEEK 2)

Hello world,

My name is Roger Hernandez, and I am very excited for this course as I have been hoping to learn more about 3D Printing and making physical things as opposed to just thinking and discussing about concepts like we do in most classes. Ever since I saw my friend who happens to be an art major make a bust of himself with a 3D printer I have been very intrigued with learning more and more about it.

Something that further sparked my interest in what we are going to begin to work with and learn in class was what the guest speaker Arielle Rausin showed us in our first class about the 3D printed racing glove she made that began as just a class project but blossomed into her career. Its just so amazing to think about all the doors that 3D printing can open and how things will become more easily accessible, easy to create and easy to replicate with more accuracy in the future with this new technology at our disposal. Additionally, as professor Vishal has mentioned, this software and physical technology is becoming more affordable and will continue to become more affordable in the future.


Some exciting creations from the website Pinshape that I found that can be 3D printed are:

  1.  iCable Guards (https://pinshape.com/items/17951-3d-printed-icableguards-free-4-eva)

    This is a very interesting creation that is basically a protective cover for the ends of charging cables that helps remove the issue of charging cables ripping and not working from folding it incorrectly. It is a great design that I can’t think of changing to better but potentially adding some length to it would be beneficial as currently it is a very short guard that may not remove the issue completely but will delay the ripping from the cable for some time which is still very helpful.

  2. Wall outlet shelf (https://pinshape.com/items/6272-3d-printed-wall-outlet-shelf)

    This design is for a shelf that you can place over a wall outlet when using a charger for some device that is great for when you have short charging cables but do not want to leave your phone or device on the floor. You can put this above the outlet and lay your device on it while the outlet is in use. One modification I would make for this design is adding some protective bumpers on the sides of the shelf for the device to not fall off from the shelf while being used.

  3. Smartphone hugger (https://pinshape.com/items/34527-3d-printed-smartphone-hugger)

    The design is a U-shaped object that acts as a stand for phones or devices that is great for not only those iphone video watchers who need a stand for optimum viewing, but also for those who need a safer and easy way to wrap wired headphones that are not being used. I would try to change the design to be foldable in order to be stored easily.

  4. Violin (https://pinshape.com/items/24608-3d-printed-violin)

    This is a design of a life sized violin that according to reviews can actually be used which is very impressive to think about as these instruments many times costs an immense amount of money to purchase. I would modify this design to different usable sizes since some reviews mentioned that they could not make the violin if they did not have a big enough 3D printer.