Overview
Hi again! This past week our class had the pleasure of having Jeff Ginger join us. Jeff is the director of the Fab Lab that we have on campus. The Fab Lab is “an open and collaborative workshop space for computer-driven innovation, design and fabrication” (http://cucfablab.org/). Essentially, this establishment allows individuals of all ages to utilize making resources to bring their creative ideas to fruition. Our class will be visiting the Fab Lab sometime in the coming weeks, so I will have an entire post dedicated to the Fab Lab coming soon!
I am so grateful to have been able to learn how to use both Tinkercad and Cura this past week. Our class’s steps in 3D printing include first creating an object on Tinkercad and then bringing that file into Cura to get the proper 3D printer settings applied to the object. Diving into these programs allowed me to see what it really means to be able to design a 3D print (from either a template or the bottom-up). Creating is an activity that I genuinely find to be fun, challenging, and rewarding. So let me tell you a bit about each of these programs:
Tinkercad
Tinkercad is an online site that allows us to create our own 3D models. This program really speaks to me as a creator because it truly allows me to create any print from the ground up. The user is allowed to put different shapes together, add text to designs, and even import designs from other sources. The interface is also extremely intuitive, and it almost feels like a game when creating the different designs.
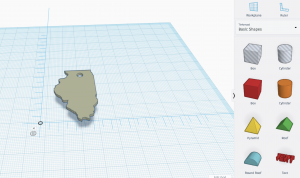
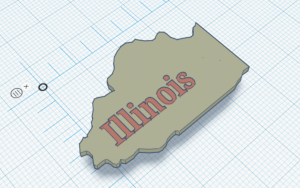
One of my favorite features of this program is that we can access our designs from any computer due to the cloud platform that it is on. This is great because I was able to get my account set-up online while at home and play around with the software before logging on when in class. When I got to class, all I had to do was log into my account and then I was able to jump right back into my work. Here is a picture of an Illinois-shaped keychain that we were able to import into Tinkercad (from a template in Thingiverse). It was fun to add different text to the keychain and customize it to our liking.


Cura
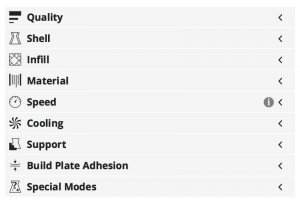
Cura can appear to very intimidating when first launching the program. However, as the user starts to look deeper into each of the settings, it becomes a much more comfortable program. This is the program that we use to get the proper file needed for the 3D printers. I will have to dive into a deeper explanation of this program in a later post because as of right now, I only know the basics. Our instructors let us know which specific settings to select when printing our objects, but I still need to understand the program better and how each selection in the settings (see image below) affects the final print.

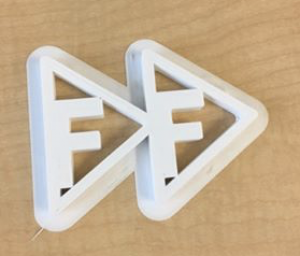
My team, Fast Forward, was also able to create our team logo. We designed it on Tinkercad, set the proper settings in Cura, and then printed it. Below you can see the final product.

Thank You
As always, thank you so much for taking the time to read my post. I cannot wait to continue learning more advanced features on Tinkercad, Cura, and other 3D printing softwares over the coming weeks, and I look forward to updating you along the way!
-Scott Provenzano
Source:
http://cucfablab.org/

Hey Scott,
I really enjoyed reading your post. Your team’s logo is awesome – I think you created a wonderful design. I also found Cura to be a bit intimidatingly vast in terms of its number of options. One great thing about the application was that the very base level of the functionality of Cura was very easy to pick up on right away. As we use it more, we will be able to create more complex designs of greater use. I’m excited to dig in deeper.
Hey Scott!
I agree that is was super useful to learn Tinkercad and Cura this week. I think with our basic understanding of these softwares, we will now be able to create almost anything!
Your logo turned out really well! I remember I was watching it print and your group wasn’t sure it would turn out, so I am happy it did! Looking forward to seeing more prints you make!