This week in class, we had the pleasure of listening to Jeff Ginger speak about his love for the “making” mindset and everything he has accomplished by working in the Fab Lab with people who listen to him and his instruction and have began to create amazing things in the lab. Something I found very interesting was listening to how he used a child’s game “MineCraft” as a medium to help teach children about the making mindset and get them more attracted to the idea of 3D printing and learning more about it. Some mention of the drag queen Sasha Velour was also mentioned as she has asked one of the many Fab Labs to create a dress for her which I found so amazing since I like to watch Drag and know who that is, it was a really cool moment to think about how this technology is even helping in a fashion setting! Additionally we were able to fool around a bit with tinkercad and begin creating 3D objects. My partners and I put in our first print to be made for our logo or emblem for team GEM and I am excited to see how it comes out! #Drag #GEM #MakingMindset
Category Archives: week3
Early Beginnings
Starting Tinkercad with GEM’s Logo
Last week, we were all assigned into a group and were instructed to come up with a team name and logo to print through the 3D printer. Putting our initials together, our group decided our team name was GEM. We were able to create a logo based on this design:
![]()
To create our design, we had to go through the process of getting familiar with Tinkercad, an online resource-3D CAD design tool. Getting familiar with this tool was a pleasant experience because how user-friendly everything was. Upon creating a free account, the design tool was easily accessible.
Tinkercad
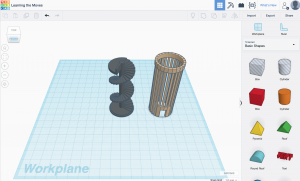
The picture above shows a quick snapshot of how the tool looks like. A majority of the screen is filled with the workplane (a visual aid of how your 3D print design will look like). Common shapes are easily accessible on the right hand side, as well as: texts, shapes, symbols, connectors, extras, and circuit assemblies.
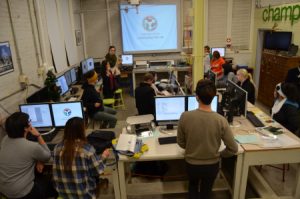
Fab Lab
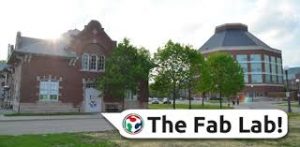
Being at the Fab Lab before, I was excited to hear that the director of the lab would be giving us a talk in class about 3D printing. Below is an image of the Fab Lab if you’ve never seen it:

Unfortunately, I caught the cold and was not able to make it to class for his presentation. I was still able to read parts of his presentation through the different reviews people posted about, and most of what I read was very interesting.
Getting hands on with 3D Printing
This week, we had students lead the class and had a very enthusiastic guest speaker, Jeff Ginger. Jeff shared his vision and aspirations for the FabLab that we have here on campus as well for 3D printing in general. Jeff brought 3D printers into public libraries in hopes of having the younger generations develop a maker mindset. He incorporated the popular video game, Minecraft to peak the interest of the youth and it definitely worked!
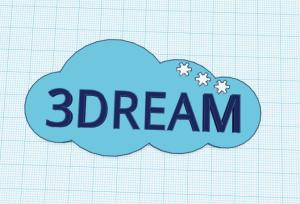
Last week, our small groups were left to develop a logo and team name. We came up with “3Dream”, because I believe that if you can dream it, you can print it. We created our first sketch to encompass a dream cloud with our team name at the center.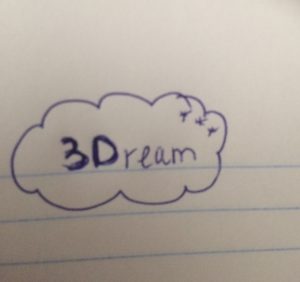
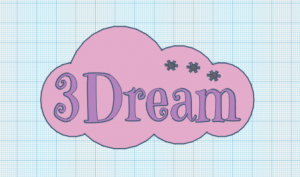
With this basic sketch, the foundation of our design was laid and brought to life with Tinkercad which turned our idea into a CAD model. Tinkercad offers only four different font options and I wondered if it was possible to import a font just like you can import a design. After some research, I learned that you could do this by using sketchpad, selecting your font and start typing, export it, save it, and then download. Afterwards, go to an online converter, on there you will change the image to an SVG, and select your SVG image to convert. Once it has been converted, the file can be imported onto Tinkercad! And just like that, our design was created.
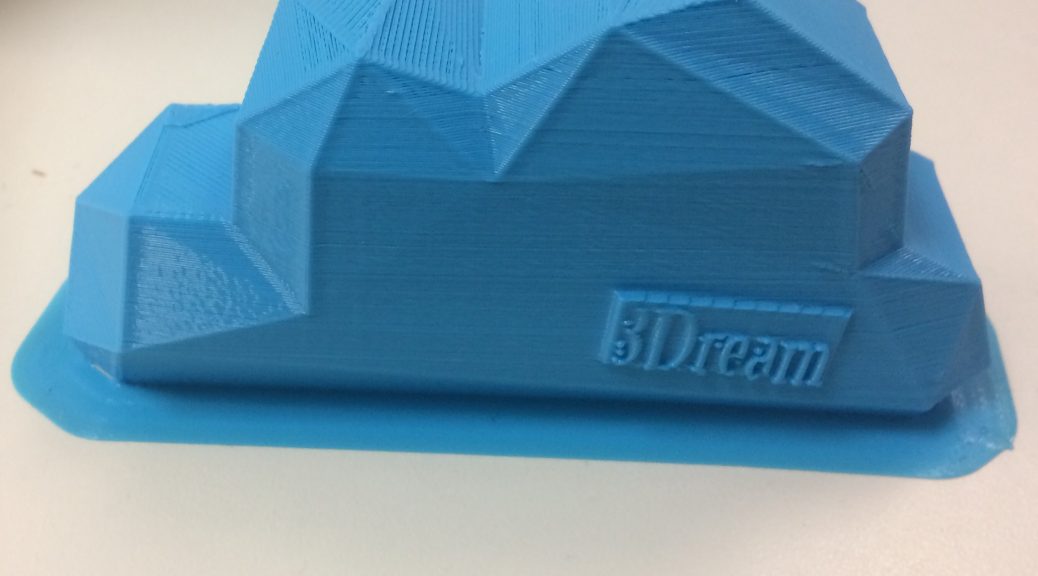
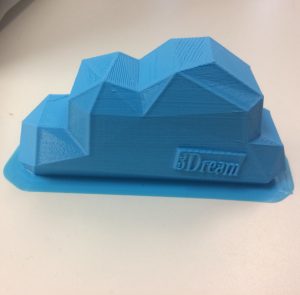
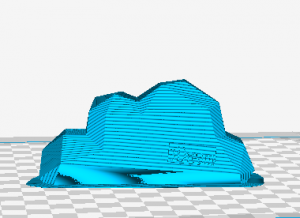
We were proud of our design but we were not satisfied, so we made some alterations. By exploring Thingiverse we came upon a model of a low polygon cloud that made our 2D design 3D! With this change, we were able to see the differences and difficulties by working with different dimensional designs. Once our design was completed and uploaded onto the Cura software, it took 4 hours to print and it came out great! I was surprised that it took so long to print since the inside is hallow but I assume that is was due to the certain material used.
I learned so much this week and I’m very much excited to continue to learn, practice, and create in the future classes.
3D Printing: The 3D Printing Network & How it Works
This week, our guest presenter was Jeff Ginger, the director of the CUC Fablab. I really enjoyed Jeff Ginger’s presentation. What I found most interesting about the Fablab was the collaborative nature of the workspace. I was exciting to hear about his research focus in community informatics and user experience design. Jeff’s take on education in the public-school system was also quite interesting. I agreed with his perspective that there isn’t enough courses to foster creativity, entrepreneurial thinking, and the maker mindset amongst students.
I think the Fablabs mission to enable all individuals to imagine, design, and create using open source software methodologies is powerful work encouraging more people to adopt a maker mindset. I have visited the Fablab because of my involvement in Illinois Enactus, a project based social entrepreneurship organization. Stay glassy, a project in our portfolio for Enactus owns a wet-saw and utilizes Fablab space to up-cycle leftover glass into viable products for retail. It was also amazing to hear that the Fablab is comprised of a network of numerous spaces across the nation.
The readings and videos this past week refined my understanding of how 3D printers work and reminded me how revolutionizing 3D printing tech is. With Tinkercard and Cura I learned how to design and convert digital prototypes into svg files to be 3D printed. In reading about Tinkercard, I was able to import and edit a png image. The ability to edit the size, color, and shape of an image allowed my team and I the ability to create our customized logo. The logo design is below and it took approximately six hours to be printed.
The how 3D Printers Work video explained how 3D printers use an additive manufacturing process to create objects from nothing. The main types of 3D printing technologies include SLA: Stereo Lithography, SLS: Selective Laser Sintering, and FDM: Fused Deposition Modeling. These methods all utilize lasers to create objects from scratch. The motherboard guides the print head in motions based upon the digital design.
3Ders.org is a website that lays out the basics of 3D printing. It explores what 3D printing is and provides an overview of its history. This digital resource is very easy to comprehend and incorporates videos to explain concepts.
Link: https://www.3ders.org/3d-printing-basics.html
Another resource 3D printing resource I came across is startasys. Stratasys is a 3D printing knowledge center that has instructional videos, case studies, and education materials to learn more about 3D printing. Specifically, the educational resources provide an in-depth curriculum on STL files, adobe Photoshop, and project ideas relating to 3D printing.
Link: http://www.stratasys.com/resources
First 3D Creation
FabLab Guest Lecture
This week our class focused on the extensive possibilities of 3D printing applications and various examples of products created with various machines in the FabLab on campus. We had guest speaker, Jeff Ginger, who is the director of the Champaign Urbana Community FabLab. He shared insights on the various capabilities of the FabLab and example products and projects that have been created within the lab. I was absolutely inspired hearing different stories of several entrepreneurs who launched their businesses with the help of the machinery and expertise of the FabLab. I have visited the FabLab a few times and made laptop stickers using the Silhouette machines and software however I’ve never used any other equipment. Each time I’ve gone in, I’ve always wanted to explore the other machines but was intimidated by them so I look forward to familiarizing myself with more FabLab machines this semester and expanding my “maker” mindset.
3D Printing Process
The next part of the class we got to dive in and play with the Tinkercad and Cura software while finalizing our logo designs and setting up the printers to create our team logos. Our design went through a few different iterations. We decided on the name 3Dream inside a cloud to represent the endless capabilities of 3D printing and the many dreams that can be achieved through this technology. Our first logo was a flat rendition, as shown below, although after loading it into Cura we decided it would be neat to make it into a 3D cloud shape. We found a useful model for a 3D cloud on thingiverse which we then tinkered with in tinkercad adding our logo and stars.
One of the most challenging parts for us was adjusting our logo to fit perfectly onto the 3D model of the cloud. We utilized a few different tools within tinkercad in order to rotate and adjust the logo to lay flat onto the surface since the surface was angled. Below I have included images of our design in the Cura software as well as the final product. I was very happy with the final product. It took about 4 hours to print.
3D Printing Resources
Looking further into different resources available for people new to 3D printing, I am amazed by what the internet has to offer. I have included a variety of different resources I will be using this semester.
Models Library: Cults3D: https://cults3d.com/
This platform is similar to that Thingiverse and Pinshape however more selective. There are professionals who ensure the uploaded models are of the best quality whereas Thingiverse allows anyone to upload their designs even if they have not been printed. Additionally, many of the curated models on Cults3D are created by professional designers.
3D Scanning: Trnio: http://www.trnio.com/team/
This is a free IOS App that allows you to convert photos from your phone into 3D models. I am hoping to try out this app to see how well it works.
3D News: http://3dprintingindustry.com/
This website shares news about the 3D Printing Industry such as hardware and software but also discusses related industries that are impacted by 3D Printing.
Week 3 Reflection
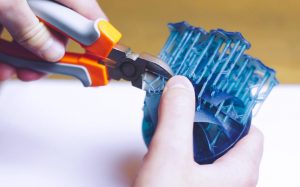
Jeff Ginger came in to talk to us about how he got involved with the FabLab. He truly enjoys everyone he works with and it was nice to hear him speak so passionately about different projects he’s been involved with over the years. He spoke a lot about the artistic entrepreneur which I found particularly interesting. He talked about people who took their creativity and used 3D printing to really make their passions come to life. I loved hearing about the different ways people were displaying their artistic abilities. He also mentioned his own initiatives to help the community through the use of 3D printers. He helped some young adults channel their passion for minecraft into something tangible and constructive. I thought it was a very inspiring story of the use of creativity in the community.
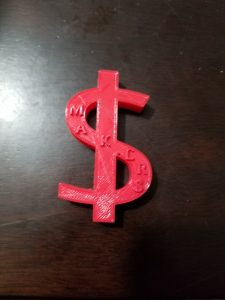
In class, my team and I created our logo. Some nice gentlemen, Billy and Dash, showed us how to use Tinkercad as well as the actual printers. My team created a ‘Money Makers’ logo which was a dollar sign with the word ‘maker’ engraved in it. I also took the opportunity to make a dog key chain that doubles as a phone holder. I found this particular keychain on thingiverse and decided to print it as a side project.

I hope to print this woman next because I think it’s an interesting piece of artwork.
https://www.thingiverse.com/thing:2778580
Learning 3D Printing Programs
Overview
Hi again! This past week our class had the pleasure of having Jeff Ginger join us. Jeff is the director of the Fab Lab that we have on campus. The Fab Lab is “an open and collaborative workshop space for computer-driven innovation, design and fabrication” (http://cucfablab.org/). Essentially, this establishment allows individuals of all ages to utilize making resources to bring their creative ideas to fruition. Our class will be visiting the Fab Lab sometime in the coming weeks, so I will have an entire post dedicated to the Fab Lab coming soon!
I am so grateful to have been able to learn how to use both Tinkercad and Cura this past week. Our class’s steps in 3D printing include first creating an object on Tinkercad and then bringing that file into Cura to get the proper 3D printer settings applied to the object. Diving into these programs allowed me to see what it really means to be able to design a 3D print (from either a template or the bottom-up). Creating is an activity that I genuinely find to be fun, challenging, and rewarding. So let me tell you a bit about each of these programs:
Tinkercad
Tinkercad is an online site that allows us to create our own 3D models. This program really speaks to me as a creator because it truly allows me to create any print from the ground up. The user is allowed to put different shapes together, add text to designs, and even import designs from other sources. The interface is also extremely intuitive, and it almost feels like a game when creating the different designs.
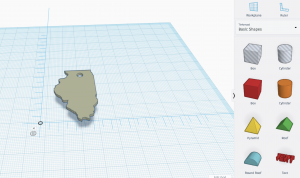
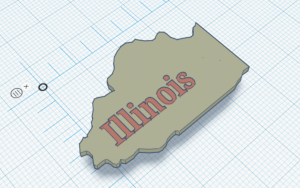
One of my favorite features of this program is that we can access our designs from any computer due to the cloud platform that it is on. This is great because I was able to get my account set-up online while at home and play around with the software before logging on when in class. When I got to class, all I had to do was log into my account and then I was able to jump right back into my work. Here is a picture of an Illinois-shaped keychain that we were able to import into Tinkercad (from a template in Thingiverse). It was fun to add different text to the keychain and customize it to our liking.
Cura
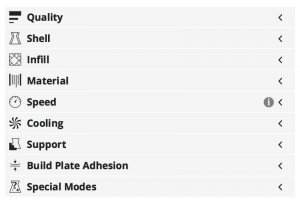
Cura can appear to very intimidating when first launching the program. However, as the user starts to look deeper into each of the settings, it becomes a much more comfortable program. This is the program that we use to get the proper file needed for the 3D printers. I will have to dive into a deeper explanation of this program in a later post because as of right now, I only know the basics. Our instructors let us know which specific settings to select when printing our objects, but I still need to understand the program better and how each selection in the settings (see image below) affects the final print.
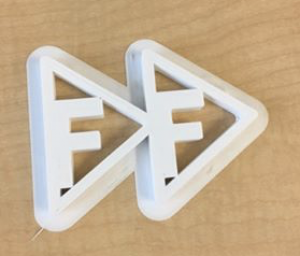
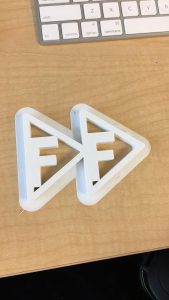
My team, Fast Forward, was also able to create our team logo. We designed it on Tinkercad, set the proper settings in Cura, and then printed it. Below you can see the final product.
Thank You
As always, thank you so much for taking the time to read my post. I cannot wait to continue learning more advanced features on Tinkercad, Cura, and other 3D printing softwares over the coming weeks, and I look forward to updating you along the way!
-Scott Provenzano
Source:
http://cucfablab.org/
A First Taste at 3D Printing
This week we got the pleasure to hear from Jeff Ginger, the director of the Champaign-Urbana Community Fab Lab as our guest lecturer. It was incredibly interesting to listen and learn about all the different types of equipment that the fab lab and what all that equipment allows them to do in that space. Jeff also talked a lot about the work the fab lab does in the community and how he’s helping people of all types become makers in their own way. I was especially drawn to all of the programs they do, such as the summer camps and after school library programs, to introduce students into being more creative and giving them that ability to make things. Even using the popular video game Minecraft to develop kid’s ability to model objects on a computer was a cool thing to see and is something I would’ve never even thought of. The work that the fab lab does with students in this community is important and has inspired me to try to bring some of the programs Jeff talked about to my local community once I graduate and improve the education system that I went through as a kid.
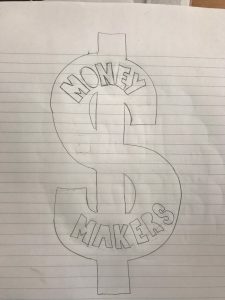
This week in class we also got our first taste at making something and 3D printed our team logo using tinkercad and Cura. This was my first time 3D printing in 3 years but I was ready to get back at it. Once we got into tinkercad, I realized that our original logo (shown above) was going to be a little too difficult to model in the time we had in class so we decided to modify it to make it easier to print. Making the dollar sign was as simple as adding a line through the letter “s”. We decided to add the word “maker” on top of the dollar sign instead of our original design. Modeling this on tinkercad was easy and did not take long.
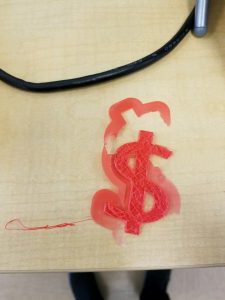
As shown above, our first attempt to print our logo failed because the material spooled in the back of the printer got caught on something and stopped following to the nozzle. This really hammered home the idea that 3D printing is not a perfect science and there are tons of things that can go wrong at any time. This failure was quick to fix as all we had to do was reprint it after checking to make sure the material would not get stuck again.
Overall, I liked how it came out for a first print. I think the reason the “E” didn’t come out all the way due to how small of a print it was but it was still cool to see how something we made quickly on a computer could be physically in front of us in only 36 minutes. I can’t wait to develop my skills with 3D printing as the semester continues.
Makers in the Community (Week 3)
This week, Jeff Ginger, director of the CUC Fablab, spoke to our class about the Fablab, its global network, open-source software, and how the Fablab enhances maker education in the community. We also began making! My group designed our logo and successfully printed it. But more on that later – let’s jump back to Jeff and the incredible work he is doing with the Fablab and the CUC community.
Jeff received his PhD from the University of Illinois at Urbana-Champaign in Library and Information Science. His research focus is digital literacy, community informatics, public engagement, makerspaces, learning, and user experience design. In addition to his position at the Fablab, he is an adjunct lecturer at the university as well as the program coordinator of the Illinois Informatics Institute. His background and current jobs allow him to be perfectly poised to tie the maker world and his local community together – something he does very well.
Jess spoke on the public-school system and how many schools “teach to the test”, disallowing children to develop a more creative, “maker” mindset. Public schools receive government funding based on standardized test scores. Meeting the grade threshold, making certain yearly improvements, and ensuring a set number of children pass the tests becomes the primary goals of many teachers and their schools because the school’s future (and inadvertently, the teachers’ salaries) relies on these metrics. So, while Jeff is currently offering 3D printing workshops at the Champaign Public Library after school hours, his long-term goal is to get the 3D printing and other maker lessons into the curriculum of the schools themselves.
Illinois Enactus, a group I am heavily involved with on campus, has a space in the Fablab. We own a wet-saw and use the lab for glass-cutting and laser etching. The lab is a great space to receive advice from the employees, work on our projects, and get inspired by the amazing work that is taking place there. Each Fablab around the world has a standardized set of equipment and software – you should be able to visit a Fablab across the world and be able to create the same things. I hope to utilize the Fablab this semester more for my personal development and experience in the maker space.
Also, in class this week, my group created and printed our logo. We named out group “FF” or Fast Forward, to signify our focus on the future and how 3D printing is becoming more necessity than a novelty. 3D printing is a disruptive technology that will continue to change the world, and my group hopes to learn all we can about how we can use 3D printing and the maker space to make the world a better place. Our logo is a fast forward symbol (two arrows) with a capital F inside each of them. We used a transparent png file of the symbol we found online and converted it into svg (one of the files Tinkercad and Cura can use). We learned how to scale and group our objects and how to orient the text within our design, so it printed out with proper supports on Tinkercad. We also learned how to set up our 3D printer and transfer the files from Cura to an SD card. I didn’t know that the sizes of the nozzle and other little settings were so important! I got a better sense of how finicky the 3D printers can be and how using them does require trial and error.
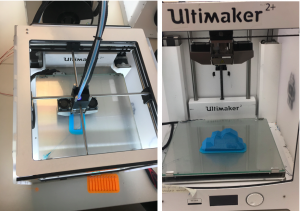
The first time we printed our logo, the edges curled upwards and the plastic couldn’t quite grip the receiving plate on one part of the print. We were on the mini printer right next to the door and I suspect the strong draft had something to do with it. The second time we printed, we used a larger printer further into the lab and our design was nearly flawless! In the picture you see below, we just have to peel the supportive skirt off and ta-da! My group was really excited to see how well this turned out.
Through the videos we had to prepare for the class this week, I learned more about the materials 3D printers can use – I was surprised to learn that PLA is derived from corn. I hope to be able to print with the wood-based filament sometime. At the Engineering Open House a few years ago (when I was a prospective student), I was able to make a Lego block using stereo lithography. I explored this primitive 3D printing-type process again in the materials science and engineering course I took through The Hoeft T&M Program. I think this was a really good basis for me to understand how 3D printing works with all the layers it breaks the design into.
This was a packed week! I hope to get more acquainted with Tinkercad, Cura, and other 3D printing software next week. Until then, here are some sources I’ve found that can help myself and other students learn a bit more about 3D printing:
- What software do 3D printers use? https://www.shapeways.com/creator/tools
- Will 3D printing change how/what we eat? https://www.techrepublic.com/article/heres-how-3d-food-printers-are-changing-the-way-we-cook/
- 3D printing and CDC machinging. http://astromachineworks.com/difference-cnc-machining-3d-printing/
A Print-Sharing Economy
Jeff Ginger
This week in class, we had a guest speaker come in a give us fascinating presentation. Jeff Ginger is the director of the Champaign-Urbana Community Fab Lab. When he was speaking though, I got the impression that he truly embodied the “maker mentality” we’ve discussed in class. He embodied the idea of a print-sharing economy, where community members had free access to the designs, hardware, and assistance needed to make their dreams a reality. I appreciated his vision – he was truly passionate about enabling another generation of future-makers. I enjoyed seeing the real-life examples of community members that utilize the Fab Lab to grow their small businesses. I also learned that there is a global fabrication lab network! I had no idea that you could visit a different country, and find a lab with a standardized set of fabrication tools. I found it fascinating that there are both regional and national conferences, where makers all over the world get together to share ideas, get critiques, and collaborate on projects. I am very excited to visit Jeff Ginger’s Fab Lab (just right across from ACES…I passed this building every day my freshman year and had no idea what it was!) and learn how to best utilize these free resources.
Considering that our MakerLab only had 3D printers, I look forward to learning how to truly ‘fabricate’ products using a variety of tools: laser cutters, sower machines, circuitry, etc.
Class Takeaways
This week in class, we finally got out hands on the the Cura software and the Ultimakers! Admittedly, it was an unfortunate week to not have our actual professor teaching (Vishal had the flu); the students were a little frenetic and not the best teachers. However, a lot of group-learning and collaboration happened – and we were able to make things happen!
We started by learning how to use TinkerCAD – it was a surprisingly usable tool. The user interface reminded of an iPhone game – very fluid, logical, and responsive. In just a few moments, I was able to import an Illinois keychain and render my name on top of it. Though I did not print this, I was pleased with how smooth the process went.
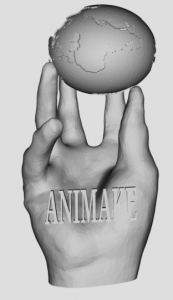
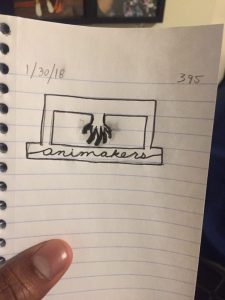
My team’s name is “Animakers” – a combination of ‘animate’ and ‘make’! My team spent the second half of class trying to render our logo. It was more difficult than we expected with our original creation (we needed a lot more experience on TinkerCAD) so we modified our original design. Instead of a 3D Printer with a hand for a nozzle (see original mock-up below), we decided on an outstretched hand holding the world on it’s fingertips – literally representing the world at our fingertips to make.
After a lot of self-learning, we were able to initiate the print! It was scheduled for over six hours, and we have yet to return to the MakerLab to see how it went…either way, it will have been a learning experience! Things will only get better from here.
One topic I want to continue learning about is supports – the process of printing temporary structures to support a complex design that cannot initially stand on its own. I found this 3D Hubs resource to be incredibly insightful…I suspect mastering the art of supports will be key to creating unique and powerful prints!