All posts by Jason

Final Remarks

Hi everyone!

With this being my last reflection for this summer, I want to say that it has been a pleasure working with all of you throughout the semester. Having the opportunity to interact with students and faculty in various making spaces has encouraged and inspired me to adopt a “making” mindset in all things I do now. I am grateful and thankful to have taken this class during my final semester here at the University of Illinois.

Below are my final thoughts regarding my experiences and takeaways from taking this course.

 My Expectations

When I first entered this course, I had no idea what to expect. My knowledge of 3D printing was very limited, and I had no prior experience with 3D printing. My first real experience with 3D printing occurred during my sophomore year when I went on a trip to Argentina to study the effects of subsistence marketing. During that trip, I sat in on a presentation from a professor to Argentinian high school students on the benefits of 3D printing. Since that trip, I have been absolutely absolutely fascinated by the applications of 3D printing which is what led me to enroll in this course.

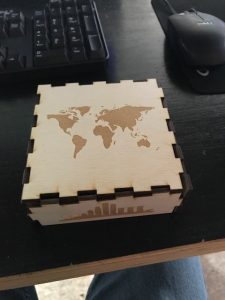
After the first day of class, I was most excited to learn about the various design software and to create tangible products with 3D printing. Looking back at everything now, I can definitely say that my expectations were met. Through this class, I learned how to utilize two new types of software, became more familiar with resources at the Makerlab and the Fablab, and collaborated with two other students to design and create 3 prototypes for a final project.

Additionally, I was blown away by the size and communal environment of the maker community. The people I have met at the Fablab and the Makerlab are all innovators and creators who are more than willing to help others with their endeavors. The tightknit community I was exposed to these past few months was something very inspiring to see.

Speakers

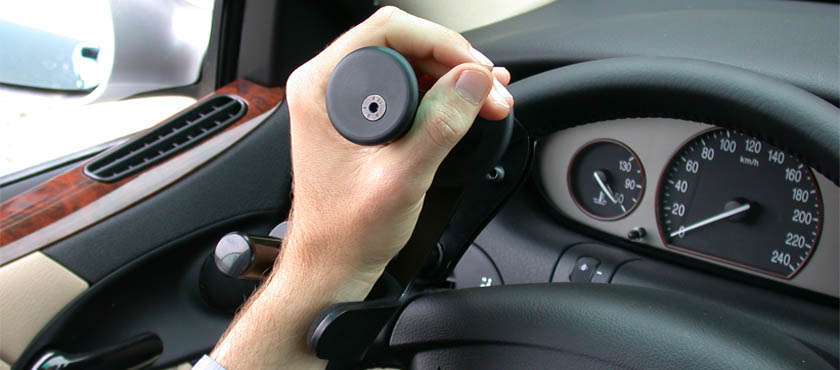
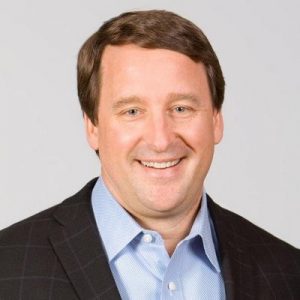
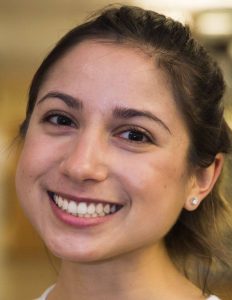
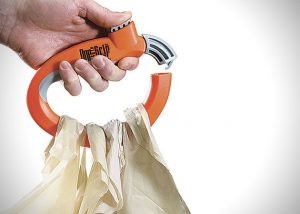
For me, the most impactful speakers this semester were Jeff Ginger and Arielle Rausin. I’ve had the opportunity to work closely on a few entrepreneurial projects during my time here at Illinois, so I really enjoyed hearing about all the resources at the Fablab and Arielle’s business. Here is my post about Arielle Rausin’s business and here is my post about Jeff Ginger and the Fablab. I think both of these speakers an amazing example of the creativity and entrepreneurial spirit of the making community.
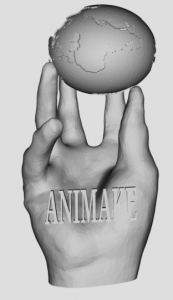
Animakers

Besides the speakers, my absolute favorite part of this class was working with team, the Animakers. The Animakers comprised of me, Jake price, and Ajie Matthwes. Jake is incredibly bold with his ideas and always brought an entrepreneurial vison and perspective to our brainstorming discussions. Ajie is someone who is extremely detailed oriented and phenomenal with media. He was the one who put together an awesome video for our final presentation which can be found here.  It has been an absolute privilege working with this team, and I have learned so much from them.

Key Takeaways

This class served as a reminder to me about how innovation and collaboration can help solve some critical problems in the world. The ingenious solutions that come out of collaboration is powerful and holds the power to change the world. Learning about 3D printing constantly inspired me to think about how concepts like 3D printing can be applied to create solutions to some of today’s most pressing issues.

Additionally, I learned the important of embracing failure and acting more. The fear of not getting it the right the first time is something that definitely held me back when working with my team to create prototypes for our final project. In the future, I want to use the experience I have gained from this course as a reminder to take more calculated risks and to be more action-oriented.

Lastly, I was reminded to think more about the type of impact I want to make in my future career. The Yellowdig activity I participated in throughout the semester led me to read and discover so many cool things people are doing with 3D printing. I have come to realize that even if my future career does not directly relate to 3D printing, I still hope to make a meaningful difference through my work.

Thank you all for a great semester and to Professor Sachdev for bringing in so many wonderful speakers!

Team Animaker Final Reflection

Our team, The Animakers, shared an incredible experience in building “The Steering Buddy” this semester. As we embarked on our first journeys in Digital Making, the group set a goal of improving the safety of our roads – and the experience of the drivers on them. We began working on a concept for a steering wheel attachment that would serve as a turning and steering assistant for drivers driving any type of vehicle. Our first step was to craft a “How can we” statement. We drew from the knowledge we gained from when Design for America held a workshop for our class. Once we identified the problem that steering a car be immensely difficult if you have any type of physical impairment, we created the following how can we statement: How can we build a customizable steering solution for these individuals in a way that is cheap, easy to add/remove, and safe for any and all drivers to use.

Next, our focus was directed towards identifying who would use this attachment. We envisioned a driver with low muscle tone, arthritis, carpal tunnel, or other physical disabilities around the hand that needs a bit of extra help in maintaining control over their vehicle. If “The Steering Buddy” can help this driver steer their vehicle more easily then we will create not only a better experience for the user, but for other drivers on the road as well. The road requires significant trust that other drivers are equally capable and alert – our purpose in creating “The Steering Buddy” was to improve upon this level of trust in both our users and other drivers on the road.

After coming to a shared understanding of our problem and solution, the three of us began to work on designing and building “The Steering Buddy”. The process, though sometimes challenging, gave each of us new knowledge in Digital Making which will serve as an excellent foundation for how we approach problem solving moving forward.

Our first step was to see if there were similar products already out there. We didn’t get too far along in our search before discovering The Brodie Knob, an attachment quite similar to the one we originally envisioned. Nonetheless, we used this new information to think about how we can improve upon The Brodie Knob. We set out to find the biggest issue with Brodie Knobs which we ultimately determined was its price point. Standard Brodie Knobs cost an individual roughly $60 to purchase. Additionally, the Brodie Knobs currently out on the market are not customizable nor seamless to add and remove from the steering wheel. In light of this new understanding of what is already out there, we set out to create an attachment that was cheap, easy to add and remove from the wheel, and customizable for the given driver.

Even after achieving this, our number one priority remains the safety of all drivers on the road. We understood this even more clearly after receiving some insightful feedback from our fellow classmate, Scott. Scott mentioned to us early on that we would be wise to ensure the strength of our product – we wouldn’t want a driver using “The Steering Buddy” to steer only to have it come off the wheel. Users of our attachment will likely be relying heavily on its sturdiness as the whole point of the device is to create leverage for physically impaired drivers. We used Scott’s feedback and our own ideas in order to create the base of our design. We decided that the best way to ensure durability (while also achieving our other goals for the product) is to utilize a 3D printed screw to bind each part of the attachment. Creating this screw became quite tricky as we had to find exact measurements just to get the parts to attach. When we tried to widen, elongate, or shrink the screw, it also impacted the distance between the grooves on the screw. As a result, the other pieces of “The Steering Buddy” were also impacted by these changes because the screw connects each piece of the whole attachment.

The last part our team focused on was prototype creation & user testing of our prototypes. Utilizing Meshmixer and Autodesk Fusion, we were able to design, create, and 3d print out all of our prototypes. Our prototypes included a bracket that universally fit on a steering wheel of any size, a flat surface with a strap, and a sphere attachment. For testing, we utilized an SUV and Camry. We created a short video documenting the process and made sure to only test our prototypes in parking lots for safety reasons. After testing, we noted a lot of changes we wanted to make. Although we were not able to get to it this semester, we noted that more testing needed to occur. Not only did we want to create more prototypes and conduct more testing with motor vehicles, we also wanted to test or prototypes with individuals who have physical impairments. This type of testing would allow us to get valuable user feedback and better understand how we can customize our products to match our target consumer’s needs.

 Overall, our group found this entire product design and reaction process very iterative. We learned to focus less on planning and more on action. Working with each other and our classmates taught us to dare to fail, and to continue to push forward even when we do fail. It has been a wonderful experience taking this class! Thank you for a great semester!

–       Team Animakers

Link to Instructables Post: https://www.instructables.com/id/3D-Printed-Steering-Wheel-Assist-Tool/

Link to Final Presentation:

https://docs.google.com/presentation/d/1Mk5LTaeoe7tPeTP-s16lD4H_yJgSGnD75fxEf6rCN-4/edit?usp=sharing

Final Stages of Prototyping & Testing

This past week, my team and I really focused our efforts on finalizing our prototypes. My team’s project is to create a customizable steering wheel knob that can be twisted on to a universal handle. We are planning to create two final prototypes: 1) A knob that is the shape of a small sphere; and 2) A knob with a strap that individuals who do not have all five fingers can use. So far we have created two iterations of prototype one and also a universal bracket, bushing, and screw to attach onto the knobs.

We are working to create our final prototype that will be useful for individuals who do not have all five fingers. Our team is planning to head to the MakerLab on Monday and Tuesday to design & 3D print this last prototype. So far, we have had the chance to test our universal bracket and bushing on a steering wheel. It fits all steering wheel types. Because it attaches to any steering wheel, the knobs can be customized and attach to any bracket/bushing.

With our final project heavily dependent on designing & then 3D printing – I have been using MeshMixer and Autodesk Fusion a lot to create our designs. In Autodesk I have learned how to create, modify, and thread shapes. It has been great to experiment and learn more features of each of the two softwares.

Meeting with other teams in the audit process and presenting to the class also allowed us to get feedback on our idea and prototypes. We received feedback to include finger print indents on our sphere knob to make it easier to hold. Additionally, we received multiple ideas on new knob prototypes to create in order to better help individuals who do not have all five fingers.

The last step in finalizing our prototype is to create and finish our new prototypes based on feedback we got. We have tested the bracket/bushing, but we will need to test the new prototypes with other individuals on other vehicles. I am excited to finish up our new prototype designs and to test them. Our team is planning to finalize and test our prototypes in the next few days. Lastly, we have also been taking videos and photos of the process and are preparing media to share to the judges in our final presentation. Overall, this project has been very hand-on and given me the opportunity to apply concepts that I have learned in this class.

Advancements in Prototyping

This past week, our learning lessons were focused on understand the purpose of iterative prototype design and testing. The prototype assessment and test plan article emphasized that the primary reason “to create a high-fidelity prototype are to help you gain a much deeper understanding of your product so that you can actually test your ideas with real users before you build it.” My team and I started applying this principle during our last class and shifted our focus to creating more prototypes. Our shift to an action-based approach has allowed us to make more tangible progress with our final project.

This learning lesson is something I believe will be applicable no matter what career I go into. The idea to be more action-oriented rather than complacent is an important learning lesson for me. I definitely think that in the future, I want to adopt this type of approach and encourage myself to take more action.

Here is the link to an image of what my team and I were able to 3d print this past week. We printed out the bushing needed to serve as the foundational attachment for a steering wheel knob. The bushing is what will be directly attached to the steering wheel and the screw will serve as the bolt to lock everything in place.

Upcoming things that my team still needs to prototype include:

  1. The ball attachment to twist on to the bushing and bracket.
  2. The handle attachment.

Our plan is to prototype these and have them printed before class on Wednesday so that we can get feedback from our peers and design plans to test our prototypes. This whole final project has been an experience learning how to continue to iterate in order to make tangible progress. I am excited and looking forward to getting back into the lab with my team to test out our design!

Review of Week 10

As my peers and I begin to learn more about various 3D printing software and the various capacities of it, we are also delving deeper into our final projects – and making some fantastic progress! I am truly seeing the three pillars of this course come to life. The reflections of my classmates this past week really embodied the learn, make, and share culture of this course. The weekly reflection posts provide an opportunity for my classmates and I to share what we’ve learned and to also digitally collaborate with our peers to confirm and share new learning experiences.


This past week there were a lot of learned objectives. The first main one was to learn and use the Autodesk Meshmixer software. We did this by engaging in an activity of utilizing scanners from a company called Sense 3d. In class, the scanner was attached to an iPad. From there, our instructor demonstrated how to use the software to scan a human face. Although not perfect, the quality and efficiency was surprisingly high. One of my classmates Ajie noted that “it was amazing to see the shape of the scan appear in real time, as we circled around our classmates’ faces.” Introducing the software now, after all the hands-on experience we’ve already had with 3d printing software, allowed us to more deeply appreciate the power of the scanning software. Here is what a scanner attached to an iPad looks like:

The learning objective to learn the capabilities of Meshmixer and how it works was definitely achieved through the activity of scanning and 3D printing our faces. Scott noted that we learned how to “use cameras/sensors to scan physical objects and create digital representations of it” and Helen stated that “scanning technology opens up the possibilities for so many neat projects.” These are some of the few reflection statements taken from from my classmate’s posts highlighting how we learned and were inspired by 3D printing scanning technology.


The next major learning objective was to make tangible progress and improvements on our final project. In addition to having time in class to meet with our project teams and work on our final projects, we also dedicated time to presenting updates to the entire class. It was neat to first hear about the progress other teams were making and then to read about it later in the form of reflection posts online. I wanted to highlight where some of the final projects are at.

  1. Hydroponic Vertical Window Farm:

I am very excited to see how this project turns out. I am absolutely fascinated by the capabilities of hydroponics. The project team behind this has already taken multiple trips to the Fablab to gather materials to begin building a prototype. In her post, Helen noted that the team “gathered an Arduino and other components needed to start programming the sensors.” Some of the software and resources we have learned about that this project team plans to use is Fusion 360 and the Fablab.

2. Steering wheel Knob

I am currently one of three students working on this project. We have made progress in finalizing our need group and our plan to go from design to creation. We plan to make customizable knobs that can be twisted onto an attachment that could be placed on any type of steering wheel. The bottom attachment (part that goes directly onto the steering wheel) would have an indentation jutting out of it that would allow for any knob to be twisted onto it. Here is a picture of what we are modeling our prototype after.


3. Pour Over Coffee Project

This project is focusing on creating a design that will make it easier to pour over coffee. The team noted that they want to be able to “create a design that can help control the speed at which the hot water from the pour-over coffee contraption is falling through to the actual coffee and mug.


So far, this course has been a wonderful learning experience. My classmates and I have definitely learned the power of 3D printing and all of its wonderful capabilities. I am beyond excited to see everyone’s final prototypes come to life in the coming weeks!


Prototyping & Scanning Human Faces

We started off class this week discussing the capabilities of Kinect hardware. Our instructor demonstrated the ability to to scan by connecting the Kinect hardware to an iPad. The Kinect software incorporates motion-sensing technology to be able to easily scan an image and digitally load it onto a device.

Using the Kinect attached to the iPad required a lot of patience and good lighting. In order to digitalize high quality pictures ready to 3D print, it was important to make sure there were no other objects in the background that would detract from what you’re trying to scan.

Another software we learned about was called Meshmixer. Meshmixer allows you to clean up or design an object to fit into something else. It is a very powerful editing software. Just being able to scan was not enough – it was also important to be able to refine an image. I described the software as possible because it allowed us to create a more natural depiction of what a person looks like. Overall, Meshmixer enabled us to refine images to make them look more natural and of higher quality.

Lastly, we also spent a lot of time in class working on our final project. My group is working on designing our prototype in Autodesk. We want to design our steering wheel knob so that it can be twisted onto a clamp. In turn, this will allow for us to design customizable attachments that can be replaced/screwed on to any attachment. My team and I are projecting that our final deliverables for the semester will include: 1) 3-4 different types of steering wheel knobs that can be attached to a clamp via twist; 2) a clamp with a screw like indentation allowing for a steering wheel knob to be attached. Our current timeline is to have our designs finalized within the next two weeks and to have working prototypes printed the week after.

We are in the midst of designing the different parts that goes into this, I’m excited to start printing out our prototypes as we begin to finalize our designs.

Shapeways & Prototyping Software

Shapeways:

Although I wasn’t able to attend class this week, I was able to read more about Shapeways online and connect with my peers to learn more about the amazing things Lauren and the rest of the Shapeways team are working on! Shapeways is a New York based 3D printing marketplace and service company that provides users the ability to design and upload 3D printable files. It was interesting to see how easy the marketplace platform was to utilize. To 3D print an object, users simply have to upload files to their site and then select what materials to use. From there, users pay and input their address and then Shapeways will ship the product right to the customer. Shapeways can make products out a wide variety of material ranging from plastic to stainless steel.

The layout of Shapeways is very structured and easy to follow. In addition to offering customers the ability to 3D print products, Shapeways also offers material sample kits. They range from color & finish to kits with metals at a price range from $19.99 (color & finish) to $79.99 (Metals).

Prototyping/Final Project Work:

My team and I are in the midst of prototyping our project. Some of the team is focused on conducting desktop research to identify what features are desirable to drivers in regards to a customizable steering wheel attachment. Currently, I am working to parametrize the potential model we are looking to create. I am modeling it after what is done on thingverse. I have been experimenting with OpenSCAD software to code printable designs for a steering wheel attachment. Learning the software is taking some time, but it is an extremely powerful and useful tool. Our team is focusing on creating a flexible design and this will be one of the main deliverables of our final project.


Final Touches @ the FabLab

This past week was our last session at the Urbana-Champaign Fablab. It was very rewarding to assemble the wooden box design and combine it with my embroidery design. My embroidery design turned out really nicely. I was amazed at how high quality the embroidery turned out. The Illini Logo looked strikingly similar to the original image I modeled it after, and I was very happy with how it turned out!

The next step this week in the FabLab was to design the layout of our circuit. It was important to draw it out before we started stitching. I learned that for the LED lights to work, the positive wires could not cross with the negative wires. In the image below, the squares represent LED light while the lines connecting them represent the magnetic wire that I used to stitch the lights and battery to the embroidery.

Key Takeaways from stitching:

Once I understood how the battery, lights, and wires needed to be placed on the embroidery I began sewing them in by hand. As someone who has never sewed before this course, I learned how much precision and strong fine motor skills it requires.

1) Use Beeswax & Have Patience

One of the hardest parts of sewing is getting started. Threading the needle took me multiple tries and required the use of beeswax. By taking the string and rubbing it against the beeswax, I was able to “thin out” the string and successfully thread my needle.

2) Over-Under through the same stitch

My next big takeaway was to make sure that once I had stitched something onto the embroidery, I needed to take the thread and sew it back through the same stitch. This prevented the string from showing on the design side. It also allowed me to tie the knot on the right side when ending my stitch.

Overall, learning to sew was a unique experience. Unfortunately, I was not able to successfully finish my design during class. Although my I was able to connect my LED lights to the battery, I ended up sewing my lights on backwards. Regardless, it was a neat hand-on making experience these past few weeks! I have learned a ton and am excited to apply what I have learned towards our final project!


Embroidery Software & Design at the FabLab

This past week, I continued working on my design for last week. Last week, I designed and created the wooden box. I decided to incorporate designs based on my passion for international travel. Below is my box design, I am extremely happy with how it turned out!

This week, I worked on designing and then sewing the embroidery pattern. I created a blue and orange “I” to represent University of Illinois. It was amazing to design the pattern and then digitally sew it by connecting a sewing machine to the computer. It was a reminder of how powerful technology is!

The software we used allowed me to manipulate an image at all levels. I was able to import various images, edit the color schemes, and control the steps in which the threading process occurred. After finalizing the design of my logo, I threaded the sewing machine. Because my design had multiple colors, I had to use blue, orange, and white thread. Below is the image that I based my design on:

Next week, I will be adding in LEDs into my design. I still have not decided where on my fabric I want to add lights. I am excited to examine my fabric design this upcoming Wednesday and figure out where to place the LEDs.

Furthermore, my group has decided to make a steering wheel ball for our final project. We plan to make a customizable, low-cost, and easy to attach product. We envision our product being used by beginner drivers and drivers over the age of 60. Below are a few designs we are considering:

As we continue to work with various technology in the FabLab, I did some more research on technology in the lab. Computers in the lab are equipped with software such as Garageband and Inkscape. All computers in the alb are capable of AV production, productivity, electronics and coding, and 3D rendering and routing.

I am excited to get back in the FabLab and complete my design this week!


3D Printing is Changing the World One Industry at a Time

This past week our class had two guest speakers, both of whom spoke about how 3D printing is revolutionizing the areas they operate in. In addition to learning more about the applications and power of 3D printing in these areas, we also collaborated with our teams to finalize our final project ideas.

Guest Speakers

Our first guest speaker was Alan Amling, the VP of Corporate Strategy for the United States Postal Service (UPS). Amling has extensive experience working in logistics, product development, and distribution. He talked abut how 3D printing has become an integral part of UPS’s operations. Opening of a 3D printing factory in Kentucky is going to allow them to streamline the manufacturing and logistics processes.

I researched some more about ow 3D printing is impacting UPS operations, and I came across a Forbes article explaining how in 2016 UPS started on a mission to be abel to print out plastic parts and ship them to any location the world. It was quite interesting to see that two years later UPS now operates its own 3D printing factory. Another part of Alan’s talk that I found really interesting was the idea he mentioned of “best fit.” He used the example of shoe sizes and explained that they currently only exist in 0.5 increments (i.e. 8, 8.5). However, with 3D printing technology Alan stated that in the future, for all products, exact sizes and measurements will be able to be made for all products.

The next guest speaker we had was Dot Silverman. Dot is a graduate student studying education at the University of Illinois. Her interest in 3D printing started in her undergraduate career at Pomona College where she studied Physics. Dot has worked for instructables and Autodesk, and has also worked on projects through Harvard University. I really enjoyed her energy and passion for Bio-Hacking. It was interesting to learn about Bio-Hacking and how anyone can learn more about it(even if you are a non-technical person) with today’s online resources.

Out of all the various Bio-Hacking projects Dot talked about, I was most intrigued by the Backyard Brains project. The tool is extremely powerful and it allows anyone to learn more about neurology and the science behind it through the study of electrical impulses and brains.

Readings

From the readings this past week. I really enjoyed “Ten Ways to Evaluate a New Business idea”. The article’s explanation of the ten key tips needed to assess how “sticky” your idea is was very helpful to read about. Specifically, the question “Does this business idea meet a need or solve a problem?” the article posed was quite interesting. I think this idea of impact and value created is often lost when going through the process of starting a business venture.

From the article about “Generating New ideas”, I was reminded about how important creativity is in the workplace. Often times, I believe that creative ideas and innovation are often overlooked as we get into routine. The article’s point about breaking patterns by rewording problems and challenging assumptions are two ways I found to be effective in challenging yourself to be more creative.

Project Idea

  1. Grocery bag holder

Our team came up with the idea of creating a holder capable of carrying multiple grocery bags. The problem we identified was the struggle to move multiple bags of grocery in one trip. This item would help solve that problem and make the grocery shopping process easier for everyone.

2. Steering wheel knob

My team’s second idea is to 3D print a ball that will make it easier to turn a steering wheel. This product would help older individuals who no longer possess the strength to easily turn a car. The ball would make it extremely easy to make a turn and it would require very little power.


Designing to Change the World

This past week we learned about the concept of design thinking. Design for America (DFA) at Illinois, is a student organization part of a  national network of creators and innovators seeking to revolutionize the way college students engage with the world around us. DFA focuses on utilizing the design process to generate ingenious solutions to various challenges in our communities.  Before this workshop, I have heard about the amazing work DFA through my involvement in Illinois Enactus. Design thinking is a powerful tool to that allows an individual to structure and channel their ideas to form a positive impact in the world.

Key Takeaways from DFA Workshop

From the DFA workshop, I learned how the design process is not a linear process. Although it can be separated into two stages, the design process over time is very iterative. It’s broken up into an understanding phase and then a create stage. I learned how imperative it is to first understand in order to design. I was surprised to learn how in-depth the understanding process is.  DFA talked about how you need to go beyond just identifying a problem, you need to immerse yourself to truly understand all of a problems nuances.

What I really enjoyed about the DFA workshop was the hands on activity. It was a neat opportunity to collaborate with my peers to engage in design thinking. The problem we examined was blindness in the urban environment. We chose to design a problem for Jess, a legally blind college student who felt disconnected from many of her peers. First, we identified and made some assumptions about our user. Assumptions like “Jess knows how to navigate her surroundings as a legally blind individual” helped us begin the process of attempting to understand our user. From there, we made additional assumptions about how Jess hears, sees, and feels. I thought the most beneficial part of this process was when we started to create “How Can We” statements. This allowed us to narrow our focus from broad to specific. Ultimately, my group and I came up with the idea of a “smart cover” for blind walking sticks. Key features we incorporated into our idea was Bluetooth and GPS functionality, and rubber material so that it could be a one size fit all attachment.

When reflecting on the workshop led by DFA, I was reminded about Tim Brown’s, IDEO’s CEO, approach to design thinking. Brown discusses how close observation combined with brainstorming and rapid prototyping can streamline information shifts and produce more efficient an effective results. I noticed that the iterative process to come up with an end product idea required much collaboration and flexibility in thought. Furthermore, it was important to set time limits for each stage and to not get caught up in one part of the process for too long.

Other Design Thinking Resources

Other resources I examined this week associated with Design thinking was a podcast published by McKinsey titled The power of design thinking and a Ted Talk given by Joe Gebbia, the founder of Airbnb. In the McKinsey podcast, Hugo Sarrazin, a McKinsey director and the digital vice president of McKinsey Digital Labs talk about the impact of design and how it can drive positive change within an organization. Joe Gebbia’s Ted Talk explores how the design process can be tailored to address specific  issues. Gebbia discusses how he founded Airbnb with the principle of trust in mind. This principle led him to tailor the design process to design for trust, resulting in the successful creation and expansion of Airbnb. The Ted Talk and McKinsey podcast are listed below. I am excited to continue using this framework as my team and I finalize our project idea.

https://www.mckinsey.com/business-functions/digital-mckinsey/our-insights/the-power-of-design-thinking


How powerful software can help you design for an idea

This past week, Dan Banach, a representative from Autodesk led a hands-on workshop on how to design in Autodesk’s Fusion 360 software. Fusion 360 is a powerful tool that allows individuals to model out their ideas. Models can be shared digitally or designed with the intent to be physically produced. Although I was not able to attend this past week’s session in-person I was able to connect with some of my peers to review what I missed from Dan’s workshop.

Completing the fusion 360 tutorial really helped me gain a better understanding of how to use the software. I was able to first-hand experience the various nuances of the software and functionalities. For me, there was a big learning curve to learn the software because I do not have very many technical skills. This was a nice way to learn another technical skills and reinforced how beneficial it is to have software knowledge.

Here’s what I learned:

I learned to take my time and understand what I was doing. From connecting with my peers who sat in on the workshop and completing the Fusion 360 Youtube tutorial, I learned that it was more important to understand why I was doing what I was doing and its role in creating the end product.  Additionally, the step by step instructions made it extremely easy to follow along and it also strengthened my understanding of the Fusion 360 design process. The neat part about learning from others and engaging in self-learning through instructional videos was that it compelled me to learn something new. By collaborating with my peers, and utilizing broad resources available on the internet, I have been able to develop a new technical skill.

Although I was unable to attend the session in-person, I was still able to learn how to create the ice scraper. It was difficult to piece everything together, but below is what my design ended up looking like.

http://a360.co/2BUCb8b

This week, I watched a tutorial and learned how to build a lampshade. It was exciting to see that I have now developed a base-line understanding of Fusion 360. Although the directions and terminology used in the instructional video I watched differed from another one I saw, I was still able to follow along. The design I created can be found in the link below.

http://a360.co/2Bnu3Mp


3D Printing: The 3D Printing Network & How it Works

This week, our guest presenter was Jeff Ginger, the director of the CUC Fablab. I really enjoyed Jeff Ginger’s presentation. What I found most interesting about the Fablab was the collaborative nature of the workspace. I was exciting to hear about his research focus in community informatics and user experience design. Jeff’s take on education in the public-school system was also quite interesting. I agreed with his perspective that there isn’t enough courses to foster creativity, entrepreneurial thinking, and the maker mindset amongst students.

I think the Fablabs mission to enable all individuals to imagine, design, and create using open source software methodologies is powerful work encouraging more people to adopt a maker mindset. I have visited the Fablab because of my involvement in Illinois Enactus, a project based social entrepreneurship organization. Stay glassy, a project in our portfolio for Enactus owns a wet-saw and utilizes Fablab space to up-cycle leftover glass into viable products for retail. It was also amazing to hear that the Fablab is comprised of a network of numerous spaces across the nation.

The readings and videos this past week refined my understanding of how 3D printers work and reminded me how revolutionizing 3D printing tech is. With Tinkercard and Cura I learned how to design and convert digital prototypes into svg files to be 3D printed. In reading about Tinkercard, I was able to import and edit a png image. The ability to edit the size, color, and shape of an image allowed my team and I the ability to create our customized logo. The logo design is below and it took approximately six hours to be printed.

The how 3D Printers Work video explained how 3D printers use an additive manufacturing process to create objects from nothing. The main types of 3D printing technologies include SLA: Stereo Lithography, SLS: Selective Laser Sintering, and FDM: Fused Deposition Modeling. These methods all utilize lasers to create objects from scratch. The motherboard guides the print head in motions based upon the digital design.

3Ders.org is a website that lays out the basics of 3D printing. It explores what 3D printing is and provides an overview of its history. This digital resource is very easy to comprehend and incorporates videos to explain concepts.

Link: https://www.3ders.org/3d-printing-basics.html

Another resource 3D printing resource I came across is startasys. Stratasys is a 3D printing knowledge center that has instructional videos, case studies, and education materials to learn more about 3D printing. Specifically, the educational resources provide an in-depth curriculum on STL files, adobe Photoshop, and project ideas relating to 3D printing.

Link: http://www.stratasys.com/resources


3D Printing – The Making Mindset and Entrepreneurial Applications

Hi Everyone!

My name is Jason Ho, and I have really enjoyed the last two sessions of class. During the past two weeks, I have been focusing on learning as much as possible about how 3D printing works and the various applications of it. I am greatly interested in the applications of 3D printing and hope to gain skills and knowledge throughout the rest of the sessions that I can utilize in my future career.

The major takeaways I have had from class so far have been from discussion with my teammates and from guest lecturer Arielle Rausin. Arielle’s presentation about her business reminded me how practical the applications of 3D printing really are. It was amazing to listen to her speak about how she took a product she built inside the classroom, and turned it into a business. I learned how easy it was to integrate 3D printing into entrepreneurship. From discussions with my teammates I have begun to adopt a “making” mindset. Collaborating with other students to consider products we could produce for our final project has challenged me to think critically about problems in today’s world. I am seeking to work with my team to design and create something that will help make individuals lives easier. I really look forward to start making with my group.

After examining Thingverse, I found four interesting, everyday objects that really stood out to me.

#1 Multi-Purpose tube rack for falcon, eppendorf and PCR-tubes

https://www.thingiverse.com/thing:2769349

This is a rack designed to hold various types of test tubes. I picked this item because I am interested in how products created from 3D printing can be used in our everyday lives. The tube rack is something that could be used in science classrooms and laboratories. I would improve this object by adding in a handle to make it easier to carry.

#2 Gopro holder

https://www.thingiverse.com/thing:2773101

The second I selected is a Gopro holder. The holder provides support to safely and effectively hold a person’s Gopro. I picked this item because of its practical use. It reminded me that 3D printing is capable of producing items that will improve existing products. I would improve this object by providing enclosed support above and below the holder.

#3 Portable iPhone Stand

https://www.thingiverse.com/thing:2772561

The stand provides support to an iPhone. It allows easy access when watching videos on the go. I would improve this object by re-designing it to be able to support all smart phones. I selected this item because of its practicality. 3D printing can create consumer-based products like this that can reach a large audience.

#4 Zelda Castle

https://www.thingiverse.com/thing:2773221

This castle is modeled after a castle from a video game. I am amazed by the level of detail a 3D printer can produce. This object demonstrates that 3D printers can create objects with extreme detail and precision. I would improve this by increasing its size so it could be even more detailed and realistic.