All posts by ekwak7@illinois.edu

Prototype Feedback

Feedback

This week in class, we were able to share our product idea and prototype with other groups. Many people had a hard time understanding what the practical use for our product was because it did not have a clear distinction between existing pour-over coffee filters, but once we explained how we wanted to make the pour-over coffee filter more autonomous, people understood how efficient our product could be.

Once our product idea was understood, many people gave us feedback about the safety of our prototype. Since our product was fully plastic, people did not know if boiling water would be safe. We explained that our prototype did not have the aluminum sheets that we hoped would insulate and cover the plastic parts of our product.

Another piece of feedback that was consistently given to us was how there was not enough control on the user’s end to how long the coffee grinds would be brewed. We agreed, and in order to change our product, we decided to add more “slots” that could be interchanged with different sized holes to control how quickly the water would drip.

The last piece of feedback that we diverted our attention to was how the base of our structure was designed. Since the legs that held up our coffee brewer was too close together, we found out that most cups were too big to fit between the legs of the brewed. In order to fix this issue, we made another print of the base with legs that were a lot bigger, but a lot further apart from each other. While we are trying to make sure that the product looks aesthetically good, this was a temporary fix in order to let cups fit.

Future

Our next steps now include plating our entire product with aluminum sheets to cover the plastic parts. While we are trying to figure out ways to check the safety and health hazards of our product, we are looking for new materials to insulate the boiling water from the plastic parts.

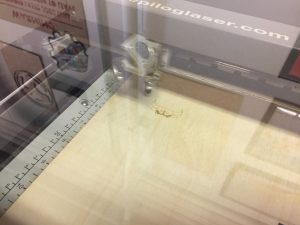
We were able to get in contact with the FabLab and found that they had a laser cutter that would allow us to make precise cuts to aluminum sheets. Our next steps include making these sheets to cover the entire product to make it look more aesthetically pleasing. Afterwards, we plan on giving our new prototype to our two testers to see if there is any improvement in their feedback.

Prototyping

Prototypes

A lot of what we learned for class this week involved prototypes. Different questions that were answered were: What is a prototype? How do you develop a prototype? What should be the minimum requirements for a prototype? Many of these questions were answered by use cases that highlighted the functionality of prototypes.

Coffee First Prototype

As a group, we were able to make our first steps for our coffee pour-over tool project. Finalizing our pour over assistant design, we decided to separate our products into two parts: a top funnel for the water to travel down, and a lower space holder for the coffee grinds.

The way we constructed the top funnel was compartmentalized into two slides. The top slide has several larger holes that makes water easily slide drop through. Right underneath this slide, there is another slide that consists of holes that are significantly smaller. With the addition of the two slide system, the user will be able to determine how fast water drips into the coffee, which determines the strength of the coffee.

An early problem we ran into was determining how our product would be a universal fit for all cup sizes. To avoid this problem, we made sure that our product would be easily editable by any one who would want to print it. Hence, the bottom part of our design, which has four different stands, are easily editable.

Another problem we needed to address was how the 3D printed material would react with boiling water. While we are still working on this issue with the helpers at the LabLab, it seems like this is an area where a lot of discussion takes place.

Planning Ahead

This week, my group plans on going into the FabLab and trying to print various prototypes that will address the boiling water problem. Need be, we will most likely order different printing material that is durable to hot water so that toxins are not leaked into the coffee.

If our slide system does not happen to work out the way we want, we will most likely try to come up with another system that allows users to control how fast water is seeped into the coffee grinds because we believe that is a foundational function of our desired product.

Shapeways and Prototypes

Shapeways

This week in class, we had a guest speaker from the company Shapeways. Shapeways is a company that focuses on big 3D printing projects. The speaker gave us a virtual tour via webcam to show the 3D printers they used. The scale of these printers were very big and definitely looked more industrial.


Prototype

After the guided tour and guest presentation, our group was given a good amount of time to finalize a prototype of our semester project. We finalized to go with the “assisted coffee pour-over” design, so we began to finalize sketches.

Pictured above is a sketch of what a normal coffee pour-over maker looks like. The design we had wanted to incorporate a similar design, but make it so that water could be completed filtered through without the manual pouring of water. This would mean that the contraption would have to be a lot bigger to store the water.

Others things that came to our concern was the durability of the material we choose to print our object. Since boiling water would have to be filtered through plastic, we wanted to somehow make it so that there would be an insulated material between the plastic and water. We found out that the FabLab has aluminum sheets that can be cut by laser to precisely fit our measurements.

Back in the Fab Lab

Laser Cutting

We were back in the Fab Lab for class this week, and we focused on designing a wooden laser-cut box. The objective of making this box was to get familiar with finding silhouette designs that could be etched in with laser onto wood. We also learned how to get familiar with the software used to design specific cutoffs for wooden parts. The open source program we used to design our wooden-box was very user friendly.

The box looked something very similar to this with a finger-lock contraption. We laser cut out 5 pieces of wood with the ‘finger-pegs’ that interweaved with one another to make a secured box.

Pictured above is a real life picture of the laser cutting the plywood. The design I chose was the Chicago Bulls logo, and as you can see, the laser cuts out a very precise replica of the design you choose.

When the actual box came out, there were a lot of sides that needed to be sand-papered down because of the roughness of the wood. Other than that, everything else went great. The print matched the exact measurements I chose on the computer program. With learning how to use the different technology at the Fab Lab, I’m looking forward to go on my own time!

The Catalyst to Imagination

Design for America

This week in class, we had the opportunity of having our University’s Design for America team come in a give us their very own workshop that involved creating potential solutions for real-life scenarios. The scenario that my team chose to focus on was a case involving a visually impaired mom that had a tough time identifying her daughter in crowded, public areas.

The Design for America team walked us through a step-by-step process of understanding and analyzing a given problem. We were instructed to write down all sorts of details on post-it notes. By doing this, we were able to make a poster filled with post-it notes that helped us come up with potential ideas for helping solve the problem. Image result for post it notes board

Our Idea

Image result for compass watch

The idea that we came up with was a product that had a similar function to a Tile with the additional feature of google maps. Ideally, our product would be like the watch pictured above. We envisioned the mom to wear this watch to help locate her daughter. This would mean that her daughter would have to wear a tracker that the watch would sync up with. Through physical and audio queues, the mom would be lead towards her daughter in any public setting through a save route opened by Google Maps.

Intro to Fusion 360


Fusion 360 Tutorial

This past week, we had the opportunity to have Dan Banach, a manager of Autodesk, come in and teach us how to use Fusion 360. While the 3D printing tool did seem intimidating at first, Dan was able to give an excellent in-class tutorial on how to use the program helping us create two of our own designs: an iPhone charging stand and an ice scrapper.

A Closer Look

Below is a brief glance of how Fusion 360 looks like. As you can see, there are a lot of things you can do through the program. I was surprised at how useful and accessible some of the functions were.

What I found most interesting during the tutorial was one of the tools inside Fusion 360 that allowed users to change the material and density of a given object. Not only did the program calculate the estimated weight of the object that was to be printed, it gave exact estimations on how long it would take for the object to be printed.

For those that are interested, here’s a video that walks you through the program:

My Own Creation

Here is a link to the iPhone stand we made in class.

Working with the program also inspired me to try to replicate an object that I could print in the future. I wanted to print something on a smaller scale that had a practical use. The creation that I thought would be most helpful was an object where wires and cords could go in and out to better organize an office desk space.

Below is a picture and here is a link for a closer view.

The idea behind this object is quite simple. There are four openings to a filleted rectangle. Cords and wires would enter into one entrance and weave its way through another to exit. This would help wires and cords to not get tangled up against one another.


Early Beginnings

Starting Tinkercad with GEM’s Logo 

Last week, we were all assigned into a group and were instructed to come up with a team name and logo to print through the 3D printer. Putting our initials together, our group decided our team name was GEM. We were able to create a logo based on this design:

To create our design, we had to go through the process of getting familiar with Tinkercad, an online resource-3D CAD design tool. Getting familiar with this tool was a pleasant experience because how user-friendly everything was. Upon creating a free account, the design tool was easily accessible.


Tinkercad

The picture above shows a quick snapshot of how the tool looks like. A majority of the screen is filled with the workplane (a visual aid of how your 3D print design will look like). Common shapes are easily accessible on the right hand side, as well as: texts, shapes, symbols, connectors, extras, and circuit assemblies.

Fab Lab

Being at the Fab Lab before, I was excited to hear that the director of the lab would be giving us a talk in class about 3D printing. Below is an image of the Fab Lab if you’ve never seen it:

Image result for fab lab uiuc


Unfortunately, I caught the cold and was not able to make it to class for his presentation. I was still able to read parts of his presentation through the different reviews people posted about, and most of what I read was very interesting.


Digital to Physical

The digital is now becoming physical.”


The Clash of the Digital and Physical World

Throughout the world, the emphasis has constantly been on the progressive digital movement: digital currency, data,  communication, media – the list is endless. Everything that was once physical is in the process of becoming digital if it hasn’t already. Hence, a phrase deeply caught my attention during my 3D Printing – Digital Making Seminar lecture. “The digital is now becoming physical.”

If the digital can become physical, then what does this mean for our world today?

How Far Have We Come?

Before I started to explore the world of 3D printing, I was constrained to believe that 3D printing was a concept that was too restricted by its weakness in tangibility. The examples of 3D printed items I had seen in the past were merely too elementary. Yet, upon learning about what has already been accomplished in the 3D printing industry, my view has completely been revolutionized.

I began reading how fully functioning cars, wheelchairs, weapons, everyday items, and even fully functioning hearts had been printed with 3D printers. This further birthed a curiosity in me to find out what the limitations would be for 3D printing technology.

How neat would it be to print out your own car in the future?

Existing Designs

Here are four cool designs of everyday items I’ve found online that is easily accessible:

(1) Measuring Cups 

Need a way to measure specific units, but don’t have the necessary tools? This design allows you to print out different sizes for measuring cubes. One thing that I would change to this design would be the availability to make custom cubes with exact measurements.


(2) Phone Holder

One of my personal favorites, this design allows you to set up a stand for your phone in a tri-pod like fashion. This is great for filming videos and taking still photography. A cool addition to this design would be the availability of making it more portable.

(3) Webcam Cover

Have you ever seen someone cover their laptop webcam with a post-it note? Even Mark Zuckerberg covers up his webcam on his laptop. With this neat tool, you are able to easily cover up your laptop’s webcam to prevent anyone from invading your privacy.

(4) Earbud Holder

Do you ever get your headphones in a bunch? This neat trick allows you to carry around your headphones in a neat and orderly fashion to prevent wires from tearing.