Category Archives: Uncategorized

3D Printing & Education

The use of printing as a tool has gone through dramatic changes over the centuries. From the printing press to the home printer, it has gotten objectively easier for 3D objects to be read across all kinds of platforms. However, with the advent of 3D printing becoming a pipe dream during the 1980’s and now a legitimate form of printing during the 21st century, so too have the ways students obtain access to these tools to further the development of 3D printing.

Many high schools have begun to incorporate engineering into their school curriculum, offering those the opportunity to engage in the field of engineering as a potential career path. Now that 3D printing has become more readily available, so too has the use of the 3D printer in the curriculum of high schools, not just engineering. 3D printing has offered a variety of uses for not only high school students but also K-8 students as well. In an article published by EdTech Magazine, designed to report on news about K-12 across the nation, many teachers interviewed were praising the use of 3D printing as a learning device.

For example, although it is an expensive way to keep up a learning opportunity, Campbell-Tintah Public School District Teacher Richard Osman found a way to incorporate this expensive technology for his school. “Osman incorporates trips to local plants and engineering offices into his classes. The goal: to show students how 3D printing is used in industry. After the tours, students devise 3D printing projects that mimic what they’ve seen. Campbell-Tintah PSD serves 160 pre-kindergarten through 12th-grade students, all in a single school building. The high school students get first crack at the 3D printer. Once they are proficient with the technology, they show the sixth-grade students how to use it,” (Peterson, EdTech Magazine).

My sister, who currently attends Benet Academy in Lisle, IL, says that although she knows a fair amount about the use of 3D printing, she doesn’t know about many practical applications for it in education below the college level. Benet has not begun to incorporate 3D printing into the school’s curriculum, unlike other local high schools like New Trier Township High School in Winnetka, IL. She said, “I’m not sure of many other practical uses of 3D printing currently or how often they are used though. My school doesn’t offer any 3D printing opportunities and haven’t announced any plans to incorporate it into the learning environment.”

Illinois high schools across the state have begun to incorporate 3D printing in their curriculum’s. One way that 3D printing has been incorporated is through the use of STEAM projects encouraging students to think about entering the engineering field in the future. Specifically, these programs target female students as the representation of women in the field continues to grow. One example of this is the “GOT STEAM” program at Glenbrook South High School in Glenview, IL. “A group of girls from Glenbrook South High School in Glenview, IL took it upon themselves to show their younger counterparts—from fifth to eighth grades—just how much fun STEAM can be, creating a mentorship program called Got STEAM. The girls offer workshops once a month, featuring subjects such as 3D printing, robotics, and coding. The sessions are held either at their high school or the Glenview Public Library. Kate Stack is a high school sophomore and acts as a program leader in the new mentorship program, which began during this school year. She states that the program is open to all, with boys welcomed—although the program has primarily targeted membership by girls,” (O’Neal, 3Dprint.com).

Many schools in Illinois have begun to acquire access to 3D printing technology through the use of educational grants and other means. Equipment for 3D printing can be expensive, however as the technology becomes more readily available, the price for the equipment and materials have begun to be more cost-efficient. “Those units can cost around $2,000 each, with metal, plastic, wax and other materials costing 30 cents per gram. Top-of-the-line models cost $7,000 or more with materials at 30 cents per gram,” (Poremba, District Administration). While that might seem like a high cost still, federal and state grants have made the burden of buying expensive equipment and materials a little easier.

3D printing was once thought to be a fad. Now, as 3D printing becomes commonly used to build auto parts and even human body parts, so too does the incorporation in the school. If trends in education continue to go the way they are now, many K-12 schools will begin to use 3D printing for not only engineering curriculums but also math and science, giving the world a whole new generation of engineers, mathematicians, and scientists.


Works Cited

O’Neal, Bridget Butler. “Illinois: High School Girls Mentoring Younger Counterparts in STEAM Technology & 3D Printing.” 3DPrint.Com | The Voice of 3D Printing / Additive Manufacturing, 6 Jan. 2018, 3dprint.com/199443/girls-mentoring-younger-steam/.

Peterson, Tommy. “3D Printers Add a New Dimension to Classrooms.” EdTech, 13 Jan. 2015, edtechmagazine.com/k12/article/2015/01/3d-printers-add-new-dimension-classrooms.

Poremba, Sue. “Finding Purpose for 3D Printers in Schools.” District Administration Magazine, 25 Aug. 2015, www.districtadministration.com/article/finding-purpose-3d-printers-schools.

 

Closing Time

Our class spent the first half of the semester focused on understanding the capabilities of digital making and developing our technical skills.  Many of my classmates, including myself, signed up for this class blissfully unaware of the digital canvas at our fingertips. Vishal did an excellent job helping the class quickly overcome the apparent digital learning curve. I especially appreciated class conversations with industry insiders because I enjoyed learning how digital making is currently being integrated into their business practices. Slowly but surely I began thinking in a digital making mindset.

Reading over my previous blog posts in my current mindset, it’s comical how easily 3d printing impressed me. In my first blog post, I wrote about how I was awestruck by the ways 3d printing is changing the supply chain… years after 3d printing was invented. Part of the Maker Mindset reading that week stated that students at play are the ones actually learning. I agreed with the idea then, and more strongly now having worked on a project with virtually complete freedom to create. This idea also inspired my research paper into digital making educational policy.

My next blog post is titled “creative freedom,” which I believe is one of the most valuable aspects of digital making. With the right technical skills, you can build any 3d object you could possibly imagine. This particular week I was introduced to the Fusion360 software. Despite the user-friendly software, I still struggled to keep up with the demonstrations. I learned that 3d modeling is definitely not one of my strengths. This experienced helped demonstrate the importance of developing your technical skills. for example, you could have a genius idea that will change the world, but it may never be more than an idea without the Fusion360 skills needed to conceptualize it. Learning these technical skills is just as important as learning the alphabet.

In the following weeks, I continued to stay creative at the FabLab. I made a laser cut box, an embroidery lighthouse, and worked with sewable LCD lights. I never imagined I would do any of these activities when I signed up for this class. It seemed like a poor use of my time attempting to master each software program I used for the mini projects. A universal design platform would help minimize time spent learning the same functions on different interfaces. I have learned that collaboration is a pillar of the digital making community, and I believe it would benefit from such a design platform.

At this point, I began thinking about design more and more frequently. It applies to large parts of our lives, but most of the time goes completely unnoticed.  The U of I Design for America presentation was one of my favorite throughout the semester. One of the major learning points was that design affects effectiveness, aesthetics, user experience, practicality, etc.  I learned to take a step back from the surface and focus on the problem I wished to solve, rather than the solution. Innovation happens throughout the entire design process.

During the second half of the semester, the skills I learned were put to the test. Incorporating what I had learned into a project seemed broad at first, but by focusing on a problem my group came up with a legitimate idea.  “How can we” statements helped my group solidify the objectives we were going to tackle head-on.  Our early discussions were focused on our design. There different types of hydroponic systems, sensors, and hardware decisions was overwhelming.

I was still narrowing down these choices the following week. Looking back, I am lucky to have had the ample resources around me at my disposal. Staff at the FabLab saved my group hours of research time because we were able to ask the right people the right questions. Most of our questions regarded feasibility, both technologically and financially.  During this week I also wrote about drafting the testing protocol. I thought it was a unique opportunity to re-evaluate assumptions that we had made up until this point.  The valued the feedback the prototype received because I had taken the time to properly design the questions.  I will try to take advantage of these opportunities in the future now that I understand how valuable a single suggestion can be.

I don’t think this class necessarily met my expectations because I didn’t have any genuine expectations coming into this. I came into this class with an open mind, and I’ve earned a long-lasting learning experience. My favorite part of this course has been the freedom to design and create. When I was building the hydroponic system prototype, I would sometimes think to myself, “I have no idea what I’m building.” My thought process always circled back to the problem at hand.  I would ask myself, “What do I need to do?” and “How am I going to do it?” It seems idiotic, building something while at the same time not knowing exactly what you are building, but don’t be afraid to deviate from your original plans. Think outside the box. There is genuine inspiration inside us all. This mindset truly changes the way you perceive the world. Don’t forget, your digital canvas is always at your fingertips….


Once again, thank you Vishal for the pizza filled semester. This class has been a change of pace that has been long overdue.


All great things come to an end

Expectations vs. Reality

Coming into the course, as I mentioned in my first blog post, I was expecting to make and create 3D prints and objects similar to the things that I saw my friend who was an art major from freshman year was creating in his art class such as 3D busts of myself and other small devices and contraptions to teach us the basics of 3D modeling and printing. Looking back throughout the semester and past blog posts I see that those expectations were met to a degree that was much higher than I thought. I was not only taught beginner skills of 3D modeling and printing but was also thought to have a maker mindset! Through the structure of the course, I felt as though I hit the ground running as we moved from learning designing skills such as using software like Fusion 360 and Cura to having real physical prints made in the classroom at a quick pace. It helped keep the entire class on their toes as well as very engaged and attentive considering the next step would be coming just as fast so there was very little time to waste.

Throughout the semester there were class days that were used as workshop days in which there was an experienced user or professional of a specific 3D designing software would teach us how to use the software by designing a variety of objects that we could actually print out on technology in the MakerLab or the FAB lab on campus if we wanted to. At the FAB lab we were able to do this and actually print out what we designed each step of the way to have a physical ending prototype or in some people’s cases an actual finished product to take home after putting in the time to design it. These workshops were very beneficial and helped mold us into makers more than just thinkers.

The class continuously fed into the idea of us having making mindsets through all the presentations and articles that we were exposed to that taught us about different ways of integrating modern technology into different career fields to speed up processes and develop new innovative creations. We heard from an alum who was in the course that took their semester project and turned it into a business, from a very intelligent scientist about biohacking and bio-fabrication that can be done through the use of 3D designing and modeling software and hardware, from experienced members of the FAB lab that make use of modern technology including things such as embroidery software, electrical lighting, laser cutting, etc and many other influential and intriguing speakers that are making a difference using their making mindset out in the real world. Through exposure to content like this, we realize that modern technology can be integrated with nearly any field there is and were able to begin to think of something we were each passionate about that we could creatively incorporate the use of modern technology to improve.


Internal Enlightenment

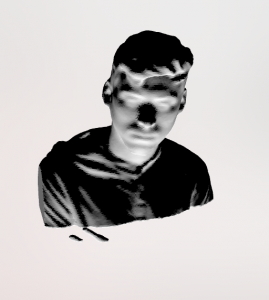
Throughout the course, being exposed to all the content of the material and presentations as well as having a semester project to work on where I had to make use of the skills I was learning about made me realize that I am a lot more capable of making a difference than I thought. Many of my other classes focus a lot on analyzing the situation and coming up with recommendations that could improve a process of situation, but this class goes past the design process and more into actually creating the solution. I was able to learn about so much amazing technology that we have at our disposal and use it to make things like a team emblem for our project team, an embroidered and light up wooden box that was custom carved with a laser-cutter, and a pour-over coffee assistant. Most important for me, I was able to scan a 3D printable model of myself to create a 3D printed bust of myself like the one I saw my best friend make of himself my freshman year! Through the fulfillment of creating these things, I gained a sort of confidence to go past just thinking and move towards making solutions. And with that I thank and chuck the deuces to this class as I did in this 3D scan of myself:

Curtains Down

Course expectations

At the beginning of this course, I expected to work extremely hands-on with 3D modeling software and printing hardware. I’ve only heard really positive things about the course and have taken a class with Vishal in the past. I was expecting to do a lot of self-learning – in a good way! I knew that the online community for MakerLabs was very extensive and that we would rely a lot on teaching ourselves concepts and then applying then. I also expected the course to be a great way to end out my senior year with a class that provided some practical, applicable, hands-on knowledge that could be transferable to industry and beyond. I also expected a great deal of industry knowledge via guest speakers and pizza!

Expectations exceed

Many of my expectations were met this semester in BADM395! Even from the first day of class, we were exposed to online design databases like Thingiverse and were able to tinker with the 3D printers. I found myself doing a lot of self-learning. Most times I had a question about Fusion 360 or modeling software, Vishal would send me a learning resource rather than simply doing it for me (which is what I was expecting)! Though this was frustrating at first, it helped me learn skills in a very impressionable way. Furthermore, we got to hear from some amazing guest speakers including executives from Thingiverse and Shapeways!

Different than what I expected

My experience was different than I expected in that I thoroughly enjoyed attending this class. Most of my classes in college have been about showing up, mindlessly retaining information to score well on exams, and leaving with course credit. However, the unique structure of this class made actual knowledge the end goal, not a simple grade. I truly appreciated that because it allowed the class to really grow and not simply check off assignments. I was not expecting Vishal’s ideology of “it doesn’t matter if it works, it matters if you learned.” I think that ideology is so beneficial for college students as it encourages creativity and higher learning!

Learned about myself

Through this course, I learned that I am capable of doing a lot more than what I expected I could. In all my years of school, I was used to an instructor teaching me an initial methodology and then having me practice it. However, in this class, there were of a lot of guest-lecturers and big ideas. After some brief tutorials on maker software, we were expected to do the majority of the work with our hands, on our own. I initially did not think I had “what it took” to be such a self-driven, motivated learner. Despite this, I found myself looking up tutorials, wikis, and ‘guru’ assistance to accomplish many of my goals in BADM395. I learned that given the right resources, I can develop myself professionally and academically without as much personal guidance as I expected.

Takeaways from the course

At a practical level, I learned many tangible skills in this course. I learned how to navigate and utilize Autodesk Fusion 360 to create custom designs for print. I learned how to export these designs into an .stl and have them printed on an Ultimaker 3D printer. However, some of the most important lessons I take away from this course have to do with the iterative design process as well as prototyping. I never truly understood what iterative design was until taking this class – I would print out model after model, trying to get the correct dimensions for a particular screw, and thought each was a waste. However, in reality, each failed iteration gave me a key insight for the next model. Having this process was essential, because making a physical 3D printed product is never a simple as it seems on a computer. Secondly, I learned that the prototyping process is an incredibly frustrating yet extremely gratifying process. It was maybe 5 iterations before we had a prototype that actually accomplished its original goal – but it was amazing to see our product actually worked. I learned that having a functioning prototype is absolutely essential to gain the buy-in of potential sponsors and clients.

Thanks for a great class, Vishal! Best wishes to you and our class for the future.

Final Team Reflections

Introduction

When deciding what product we wanted to make for our final deliverable, we wanted to make something that we were all interested in and could help other students our age. When brainstorming, we realized we all drink coffee and find ourselves spending hundreds of dollars on coffee. We saw an issue with pour over coffee and thought we could find a way to help people make pour over coffee easier. Thus, we came up with the coffee pour over assistant. Essentially, our product would allow people to pour water into a water reservoir which would then slowly drip the water through the coffee grinds and pour a perfect cup of coffee.

Next, to make sure we were making a product that was useful and had a need we came up with a few ‘How Can We’ statements. The first one we asked was “How can we replicate popular, existing coffee brewing machines for a cost-efficient price?” We wanted to be able to make sure it was cheap enough, especially for college students, to buy. Next, we asked, “How can we make the process of pour over coffee the most efficient for the user?” The biggest issue we wanted to tackle with pour over coffee was the fact that the user has to slowly pour the water over the coffee grinds which can take a long time depending on the flavor you want your coffee. Lastly, we asked, “How can we match the coffee taste to the user’s need?” One of the benefits of pour over coffee is that you can determine how strong each cup of coffee is. We wanted to make sure we replicated this same benefit with our product. After we asked the ‘How Can We’ questions and found a need for our product, we started developing our product.

Product Development

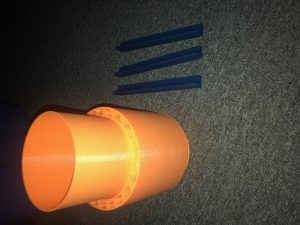
After we identified the need for our product and how can we statements for this product, we started developing our product. The first thing we had to decide was how many different parts we wanted to make. For the first iteration we chose to make it into two pieces. The water reservoir was on top. We made it into a cylinder shape with large holes on the bottom with the hope that it would slow the water down. The bottom section had three legs attached to a cylinder with a funnel on the inside where the coffee grinds go. After testing the first prototype we decided to make a couple changes.

For the second iteration, the first change we made was to make the base bigger and eliminate the legs. The reason for this is because we wanted the person printing the object to be able to change the height of the leg if they wanted it higher for larger cups. We also wanted to make the base bigger so it would be easier for the user to fit more coffee grinds in the base.

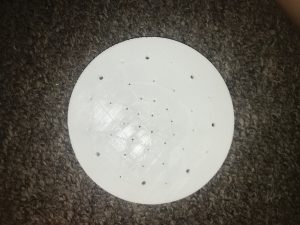
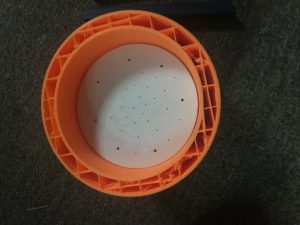
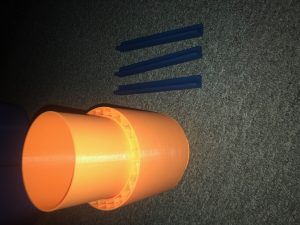
When we were making the different parts for the second iteration, we had to decide how we wanted to fit the top part onto the bottom base. Our options were to make it latch on, slide into the base, or twist on. After we printed the larger base, the water reservoir from the first iteration happened to slide perfectly into the base. Therefore, we decided to keep the water reservoir the same size so it can slide into the base, and just eliminate the larger holes on the bottom since it did not slow down the water at all. After we had our base and water reservoir we just needed to make the legs and the different slides we would place in the base to slow down the water flow. We made the legs 4 inches tall which worked well for an average mug size. The slide we made had several small holes in it which worked well to slow down the water. In the end, we had three legs, the base to hold the coffee grinds and also fit the water reservoir into, the water reservoir, and a slide.


Testing and Next Steps

Once we had developed our product and had a prototype, we had to test it. For the first test, which unfortunately we do not have footage on, there was a lot of leaking from the funnel because there were gaps I and the holes were too big that the water was flowing through. The coffee was very watered down and was not drinkable by users. Granted, this was a very rough prototype, and the goal for our first iteration was to see how users responded to the design of the product and the overall usefulness of a coffee pour over assistant.

When testing the second iteration, we found more consistency in the coffee. The slide that we developed for the second iteration made a huge change to the coffee. We also made the funnel on the second iteration smaller so that the water would not leak as much. Additionally, since we made the legs longer and not connected to the base, it was easier to fit the coffee cup under the funnel. Unfortunately, in the video included in the presentation, we did not have the legs glued on, but it shows the flow of the water through the funnel.

For the next steps of our project, we want to make the design more reliable and eventually make it available to users on Shapeways and other sharing websites so people can print our design with their own material that is more water-friendly. Additionally, make the legs and hole size on the slides easily adjustable so it can fit the user’s needs as closely as possible. Another idea we had was to make an attachment to an existing coffee pour over that would moderate the flow of water, so our product would not actually contain the coffee grinds and filters.

Overall, our team learned so much from this project, and we feel we all came a long way from the beginning when we were discussing project ideas. We had so many different ideas about the product and it could have gone several different ways. The greatest part was seeing our ideas being printed into an actual product. It would be nice to continue to develop our product and make something that users would be excited to make and use!

In the link below, you can find our final presentation and Instructables, respectively!

https://docs.google.com/presentation/d/1pgNcZblkNr9y7woUtYLUW6sKNjogF9PNVlDjK9BPyfM/edit?usp=sharing

https://www.instructables.com/id/Coffee-Pour-Over-Assistant

Endings & Beginnings

I’m really happy I took this class! I knew a lot of people in the class before taking it from other classes, but I feel like I got to know them a lot better through the course. We became friends learning about all the different tools and machinery. I thought it was so interesting to see people’s interests through the work they created and how they customized all their projects.

I’m not really sure what I was expecting from this course. My knowledge on 3D printing was not very extensive, but I have a lot of friends that use it and I always wanted to learn. I had taken a lot of artistic, creative classes through my time at U of I, but never within the College of Business. I consider myself a creative individual and I knew I was excited to try a new form of expression. I was familiar with a lot of machinery like the CNC machine prior to taking the class, but I had never actually used one and created something with it although I have always wanted to! I expected the class to be very technical and maybe a bit hard. I took an industrial design class my Junior year and I had used CAD software so I was expecting the 3D software to be similar to that.


Looking back now, I think that 3D printing is easier than I expected although it can be challenging at times. I loved using Fusion 360 and I’m very grateful Dan Banach was able to come in and teach us how to use it. It’s so much harder trying to learn these softwares just by teaching ourselves and having a professional come in and teach it made it a more meaningful experience for me. Fusion 360 is easy to use and has a nice, aesthetically pleasing interface which I really enjoyed. It makes me want to go out and learn more softwares through other classes or opportunities I may encounter.

Probably my favorite part of the class was the weeks we went to the FabLab. I had heard so much about the FabLab during my four years here, but I never actually ventured there myself. It’s an amazing place! I loved doing digital embroidery. I didn’t ever know that was a thing until we went to the FabLab. I have friends who are clothing designers and they always hand stitch all their embroidery so I was under the impression that was the only low-cost way to do it. My grandma also stitches clothing for fun and I think about all the time and effort she puts into her beautiful designs that could also be done using the machinery. I feel like I could easily make my own designs now leveraging the digital embroidery technology. I also loved learning the CNC machine and seeing it in action was very cool. My dad is a carpenter and I’ve seen wood being worked in all sorts of ways, but he doesn’t need a CNC machine so that was the first time I actually encountered it. It’s so cool! I want to go back and make a more complicated design with the technology and burn it onto a bigger surface. I’m glad we incorporated the lights into our designs as well. I’ve taken a lot of electrical engineering classes over the years and it was nice to literally weave the concept into our design.

I liked when the Design for America kids came in to talk to us too. I am a member of Illinois Enactus and we work to create sustainable change through entrepreneurial action. We actually have a lot of projects that leverage 3D printing and the FabLab so Design for America is really up my alley in terms of interests. I liked hearing about the different projects they’ve sourced and the ways in which they are trying to improve our community. I think anyone can be innovative and more people should use their creative abilities to help people. It was great seeing the Design for America people be so passionate and willing to teach.

Overall, the course taught me a lot of not only technical skills I will leverage, but also how to think like an innovator and creator. I’m grateful I got to experience the ‘maker’ mentality and I will definitely be 3D printing in the future. I enjoyed how open-ended our project was. We got to pick our idea and really leverage all available tools to make it come to life. It was a great time and I will be sure to recommend it to friends in the future. Thanks for a great semester!

Final Reflection- It’s All Over!

Hi everyone! This semester really opened my eyes to a lot of technologies, ideas and concepts. Before coming into this class, I had a strictly logical mind. Creativity and innovation were never at the forefront of my brain. However, this was necessary to do in this class. Walking into class the first day, I was intrigued by the 3D printers and prints around the room.  The printers seemed so foreign and complicated to me. However, after two weeks of class I was comfortable printing a design on the printer.

Getting a “maker mindset” is harder than you may think. Although, being surrounded around my classmates with similar mindsets made it easier to become a “maker.” This is one of the first classes I have been in where the students actually were invested in their projects and actively trying to make their projects better. This wasn’t a forced project; it was something everyone was fully invested in. Being surrounded around this made it easy and fun to get into the class.

The designing aspect of the course was the most difficult part of the course for me. Because most of the classes I have taken have not been focused on building the physical product, I was not aware of all the struggles and roadblocks that can and will happen in the designing process. Learning Fusion 360 was an interesting experience. I was not able to come to class that week, so I learned it all on my own. I watched multiple YouTube videos and learned the basics of Fusion 360.

The first thing I made was a keychain shaped like an ‘M’.  This first print was simple, but it was super cool to see my design come to life. After that, I watched my classmates print more complex things every week. Seeing the final projects BLEW my mind and I was so happy to have been there through the whole process. It is amazing to me how creative a group of students can get.

Exploring thingiverse and pinshape was a fun activity as well. You don’t realize how many things makers have made. Having these websites allow makers to build off of other maker’s ideas and designs. Before this class, I didn’t realize 3D printing was as prevalent as it is and seeing all of these designs made me excited about the future of 3D printing.

The three weeks at the FabLab were my favorite weeks of the whole course. We created a box with an embroidered top with LED lights. Every week we learned a new skill, allowing us to explore all that the FabLab had to offer. Although I had trouble with the digital embroidery, it was my favorite part of the FabLab. Creating something that is unique to you is invaluable and unique.

The guest speakers we had in this course were also very interesting. Not only did I enjoy getting pizza whenever we had a guest speaker, but I enjoyed the unique perspectives of makers across the country.  My favorite speaker was Arielle. She was very inspirational with her entrepreneurship capabilities. She took a small problem that a small group of people had, and created something amazing and effective for it. Arielle was one of my group’s inspirations for our final project. In addition, Jeff Ginger was very enthusiastic about the Fablab and the maker community, which translated to us, making us curious about it as well.

Overall, this class was very beneficial. It allowed me to stretch my imagination and take a class that wasn’t like my regular curriculum.  It allowed me to work with other students and build off of their creative thoughts. I believe this class is beneficial for all future business men and woman because we will eventually be managing engineers and designs. Knowing the design process is helpful in this case. Thank you to all my fellow classmates for taking this journey with me and I wish you all the best!

Final Remarks

Hi everyone!

With this being my last reflection for this summer, I want to say that it has been a pleasure working with all of you throughout the semester. Having the opportunity to interact with students and faculty in various making spaces has encouraged and inspired me to adopt a “making” mindset in all things I do now. I am grateful and thankful to have taken this class during my final semester here at the University of Illinois.

Below are my final thoughts regarding my experiences and takeaways from taking this course.

 My Expectations

When I first entered this course, I had no idea what to expect. My knowledge of 3D printing was very limited, and I had no prior experience with 3D printing. My first real experience with 3D printing occurred during my sophomore year when I went on a trip to Argentina to study the effects of subsistence marketing. During that trip, I sat in on a presentation from a professor to Argentinian high school students on the benefits of 3D printing. Since that trip, I have been absolutely absolutely fascinated by the applications of 3D printing which is what led me to enroll in this course.

After the first day of class, I was most excited to learn about the various design software and to create tangible products with 3D printing. Looking back at everything now, I can definitely say that my expectations were met. Through this class, I learned how to utilize two new types of software, became more familiar with resources at the Makerlab and the Fablab, and collaborated with two other students to design and create 3 prototypes for a final project.

Additionally, I was blown away by the size and communal environment of the maker community. The people I have met at the Fablab and the Makerlab are all innovators and creators who are more than willing to help others with their endeavors. The tightknit community I was exposed to these past few months was something very inspiring to see.

Speakers

For me, the most impactful speakers this semester were Jeff Ginger and Arielle Rausin. I’ve had the opportunity to work closely on a few entrepreneurial projects during my time here at Illinois, so I really enjoyed hearing about all the resources at the Fablab and Arielle’s business. Here is my post about Arielle Rausin’s business and here is my post about Jeff Ginger and the Fablab. I think both of these speakers an amazing example of the creativity and entrepreneurial spirit of the making community.

Animakers

Besides the speakers, my absolute favorite part of this class was working with team, the Animakers. The Animakers comprised of me, Jake price, and Ajie Matthwes. Jake is incredibly bold with his ideas and always brought an entrepreneurial vison and perspective to our brainstorming discussions. Ajie is someone who is extremely detailed oriented and phenomenal with media. He was the one who put together an awesome video for our final presentation which can be found here.  It has been an absolute privilege working with this team, and I have learned so much from them.

Key Takeaways

This class served as a reminder to me about how innovation and collaboration can help solve some critical problems in the world. The ingenious solutions that come out of collaboration is powerful and holds the power to change the world. Learning about 3D printing constantly inspired me to think about how concepts like 3D printing can be applied to create solutions to some of today’s most pressing issues.

Additionally, I learned the important of embracing failure and acting more. The fear of not getting it the right the first time is something that definitely held me back when working with my team to create prototypes for our final project. In the future, I want to use the experience I have gained from this course as a reminder to take more calculated risks and to be more action-oriented.

Lastly, I was reminded to think more about the type of impact I want to make in my future career. The Yellowdig activity I participated in throughout the semester led me to read and discover so many cool things people are doing with 3D printing. I have come to realize that even if my future career does not directly relate to 3D printing, I still hope to make a meaningful difference through my work.

Thank you all for a great semester and to Professor Sachdev for bringing in so many wonderful speakers!

Team Animaker Final Reflection

Our team, The Animakers, shared an incredible experience in building “The Steering Buddy” this semester. As we embarked on our first journeys in Digital Making, the group set a goal of improving the safety of our roads – and the experience of the drivers on them. We began working on a concept for a steering wheel attachment that would serve as a turning and steering assistant for drivers driving any type of vehicle. Our first step was to craft a “How can we” statement. We drew from the knowledge we gained from when Design for America held a workshop for our class. Once we identified the problem that steering a car be immensely difficult if you have any type of physical impairment, we created the following how can we statement: How can we build a customizable steering solution for these individuals in a way that is cheap, easy to add/remove, and safe for any and all drivers to use.

Next, our focus was directed towards identifying who would use this attachment. We envisioned a driver with low muscle tone, arthritis, carpal tunnel, or other physical disabilities around the hand that needs a bit of extra help in maintaining control over their vehicle. If “The Steering Buddy” can help this driver steer their vehicle more easily then we will create not only a better experience for the user, but for other drivers on the road as well. The road requires significant trust that other drivers are equally capable and alert – our purpose in creating “The Steering Buddy” was to improve upon this level of trust in both our users and other drivers on the road.

After coming to a shared understanding of our problem and solution, the three of us began to work on designing and building “The Steering Buddy”. The process, though sometimes challenging, gave each of us new knowledge in Digital Making which will serve as an excellent foundation for how we approach problem solving moving forward.

Our first step was to see if there were similar products already out there. We didn’t get too far along in our search before discovering The Brodie Knob, an attachment quite similar to the one we originally envisioned. Nonetheless, we used this new information to think about how we can improve upon The Brodie Knob. We set out to find the biggest issue with Brodie Knobs which we ultimately determined was its price point. Standard Brodie Knobs cost an individual roughly $60 to purchase. Additionally, the Brodie Knobs currently out on the market are not customizable nor seamless to add and remove from the steering wheel. In light of this new understanding of what is already out there, we set out to create an attachment that was cheap, easy to add and remove from the wheel, and customizable for the given driver.

Even after achieving this, our number one priority remains the safety of all drivers on the road. We understood this even more clearly after receiving some insightful feedback from our fellow classmate, Scott. Scott mentioned to us early on that we would be wise to ensure the strength of our product – we wouldn’t want a driver using “The Steering Buddy” to steer only to have it come off the wheel. Users of our attachment will likely be relying heavily on its sturdiness as the whole point of the device is to create leverage for physically impaired drivers. We used Scott’s feedback and our own ideas in order to create the base of our design. We decided that the best way to ensure durability (while also achieving our other goals for the product) is to utilize a 3D printed screw to bind each part of the attachment. Creating this screw became quite tricky as we had to find exact measurements just to get the parts to attach. When we tried to widen, elongate, or shrink the screw, it also impacted the distance between the grooves on the screw. As a result, the other pieces of “The Steering Buddy” were also impacted by these changes because the screw connects each piece of the whole attachment.

The last part our team focused on was prototype creation & user testing of our prototypes. Utilizing Meshmixer and Autodesk Fusion, we were able to design, create, and 3d print out all of our prototypes. Our prototypes included a bracket that universally fit on a steering wheel of any size, a flat surface with a strap, and a sphere attachment. For testing, we utilized an SUV and Camry. We created a short video documenting the process and made sure to only test our prototypes in parking lots for safety reasons. After testing, we noted a lot of changes we wanted to make. Although we were not able to get to it this semester, we noted that more testing needed to occur. Not only did we want to create more prototypes and conduct more testing with motor vehicles, we also wanted to test or prototypes with individuals who have physical impairments. This type of testing would allow us to get valuable user feedback and better understand how we can customize our products to match our target consumer’s needs.

 Overall, our group found this entire product design and reaction process very iterative. We learned to focus less on planning and more on action. Working with each other and our classmates taught us to dare to fail, and to continue to push forward even when we do fail. It has been a wonderful experience taking this class! Thank you for a great semester!

–       Team Animakers

Link to Instructables Post: https://www.instructables.com/id/3D-Printed-Steering-Wheel-Assist-Tool/

Link to Final Presentation:

https://docs.google.com/presentation/d/1Mk5LTaeoe7tPeTP-s16lD4H_yJgSGnD75fxEf6rCN-4/edit?usp=sharing

Final Project Reflection- Team Synergy

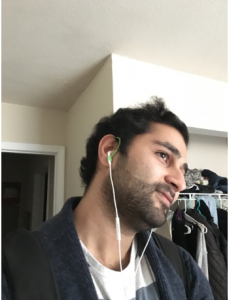
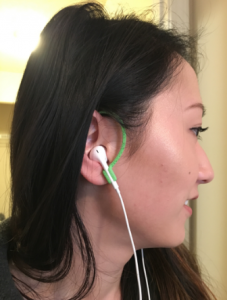
Hello everyone! We are team Synergy. We had a great time this semester working, creating and talking with you all! When deciding on our final project, we had a little trouble. Our first idea of creating a solar powered coffee/tea heater fell through. When in the prototyping stage, e realized that this project wasn’t feasible. Although this was a huge step backwards, we gathered together and decided upon a simple, yet effective design. Airpods are becoming increasingly popular. How can we find a way to keep the pods in the user’s ears even when doing intense physical activity? In addition to this, we wanted to find a way to get more students involved in the making process and 3D printing. If there is anything we learned from this course, it is that 3D printing is on the up and coming and will be very useful and important in businesses in the near future. Therefore, we thought it was important for students to learn the basics of 3D printing to further them in their careers. Our final project of “iClips” allows students to make a customizable headphone clip to fit snug on their ears, allowing them to use Apple Airpods to work out and do any physical activity they would like.  

Designing the iClip was not as simple as you would think. Thankfully, our friends at the Fablab helped us out a lot. They explained the process of splining and sweeping which was the basis of our project. After a lot of tinkering and perfecting was required, but eventually we made our design!


Then, the prototyping process began. We received many useful insights from test subjects during the prototype testing phase. We asked two college of business students and one alum for their thoughts on our initial design. The first respondent, Tanmay, was enthusiastic about the product. He felt that the fit was comfortable and sturdy. He did, however, suggest that the product be modified to clip onto other types of earphones, since he was not an iPhone user himself.


The second respondent, Christina, exercises frequently and was also very excited about the product. While she mainly uses over the ear headphones in the gym, she said that she could see how others might find the product very useful. The product did not provide a comfortable fit over her ear, because it was too large but she said she’d be willing to use it if it came in a smaller size. When asked how much she would be willing to pay for a custom-fitted set, she said she’d pay up to $15.

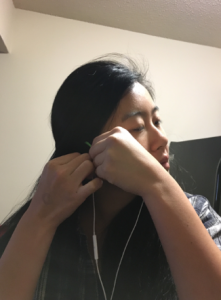
The third respondent, Elsie, had a difficult time figuring out how to wear the ear clips. She said it was a bit confusing to figure out by herself, and suggested providing some sort of illustration to show people how to put on the ear clips correctly. Once she was able to position the ear clips, she thought they were quite comfortable. In order to improve the design, she suggested making sure that the material was sweat resistant, particularly for those who use the ear clips while exercising.

Next Steps

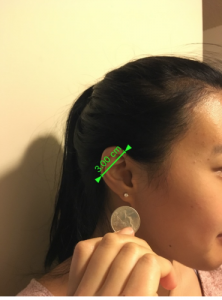
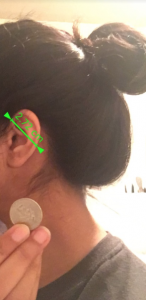
Based off of the feedback we received, we wanted to continue focusing on creating different sizes based on each user’s ear, and on creating a universal clip. We relied on a mobile application called Ruler to try and see if there was a way that people could take measurements of their ears through a photograph. That way, users could send us their measurements and we could determine the size of the ear clip best suited for them.

We found the app to be quite precise in its measurements, which were taken by the user holding up a quarter next to the object they wanted to measure (in this case, their ear.) These photos demonstrate some of the ear measurements of users using the Ruler app:

However, after gathering more test subjects, we found that there wasn’t enough variation in ear sizes to justify creating multiple sized ear clips. Instead, we found that some test subjects prefered a more flexible fit, while others wanted a firmer grip. We were able to create a range of fits by adjusting the infill amount while printing our base ear clip design. We finally selected three infills– 20%, 30%, and 40% and gave test subjects each clip to try. Those who preferred a loose fit liked the 20% clips, while others preferred the 40% clips.

Had we had more time, we would have liked to print our prototype using a natural flexible PLA instead of the regular PLA material we used. This material would’ve not only provided more comfort, but would probably have also been more sweat resistant, to Elsie’s point. We would have also liked to perfect the universal ear clip–however, we found that our design worked well on both Apple earphones and airpods, which was our original intent.  

All in all, we felt grateful for having had the experience of ideating, designing, and testing our prototype, with so many helpful resources at our disposal. We had changed our project idea halfway through this course, so while it was difficult to catch up with the other groups, we were proud of our end product, despite its shortcomings. Our takeaways were:

  • A design is important, even if it solves just one person’s problem
    • While our ear clip design wasn’t nearly as complex as our original solar-powered hot plate idea, it still solved a problem and that was something to be proud of.
  • Design is an iterative process
    • As told throughout this course by multiple guest lecturers, the prototype testing process turned out to be the most useful and necessary step towards creating a better product.
  • Marketing your idea is just as important as designing a good product
    • We wanted this product to be centered around the idea of bringing students into the MakerLab. As seniors who had minimal interaction with the maker community during our 4 years on campus, we felt incentivized to inform unaware students of the resources available to them. Given the simplicity of our ear clip design, we felt that students would be excited to either design or print their own in the future.

Here is the link to our final presentation! Enjoy!

https://docs.google.com/presentation/d/1tJMJYQ2oNmG8JAt3bsAWKwA5LBifzHOZf1OO_OIUYYY/edit?usp=sharing

Final Reflection and Parting Thoughts

I came into this course equipped with virtually zero skills in digital making, and an open mind. I had a baseline understanding of 3D printing and the MakerLab, but I had no idea how many other resources I’d come across over the course of the semester. I was primarily interested in developing modeling skills because I wanted to understand the more technical side of digital making. Thankfully, I had plenty of opportunities to practice modeling across a variety of platforms like Autodesk’s Fusion360, MeshMixer, and TinkerCAD. The tools were more intuitive than I thought, although there were definitely times when I found myself frustrated during the modeling process.

What I did not expect was to develop skills in a range of areas beyond those involving a computer. From digital embroidery to the principles of design, our classes focused on a variety of topics that really opened my eyes to the breadth of the maker movement. I’d always assumed that 3D printing and digital making catered to engineers, but I loved learning about how people across disciplines have pursued their passions or solved problems with the help of the maker community. I have always identified as an artistic person, so I really enjoyed being able to engage my more creative side and see my own designs or ideas come to life.

I think the greatest takeaway from this course for me, personally, was the importance of having a maker mindset. Upon learning what a “maker mindset” is, I thought I had one—however, this course has proven that I still have a long way to go. I only used a fraction of the resources we had available to us this semester, and I often found myself feeling overwhelmed with the possibilities presented to us for our final project. My personal goal is to take the learnings from this course and become more comfortable dealing with the unknown. I would love to become more of a “tinkerer” and problem solver, and this class has really inspired me to keep working towards developing in that regard.

Here are a few of the skills I’ve developed over this semester:

  • Modeling with Fusion360

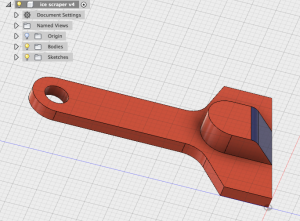
We were lucky to have Dan Banach from Autodesk personally come and provide us with a workshop on Fusion360. I was so nervous about falling behind during the tutorial, but with the help of classmates, I was able to keep up and I realized that I wasn’t so bad at modeling! The very first object I fully modeled out was this Illini-themed ice scraper.

  • Design Workshop with Design for America

This was probably my favorite class of the entire semester. The students from DFA taught us about various design principles and then led us through an activity where we were able to brainstorm ways to solve a certain problem for a user. My group chose to create a solution for a blind user who wanted to participate more in student life at a large university. We came up with the idea of a Wi-Fi and GPS-enabled walking stick to ensure her security and sense of comfort at crowded football games. We learned about the importance of prototype testing and the principle of design as an iterative process. All in all, it was incredibly eye opening and really helped me try to embrace more of a maker mindset.

  • Digital Embroidery, Laser Cutting, Circuits, and Sewing at the FabLab

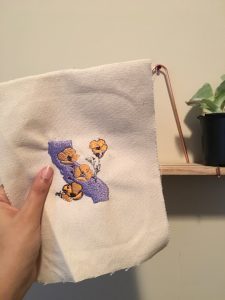
The workshops at the FabLab closely follow the DFA workshop when it comes to my favorite part of the course. I thoroughly enjoyed the digital embroidery tutorial, led by Duncan.


My digital embroidery creation

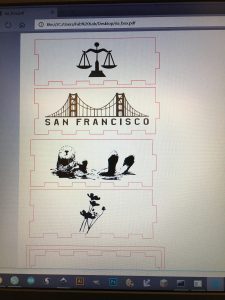
I had no idea that such machines even existed, and I was even more impressed by the speed at which they operate. I also enjoyed learning how to use to laser cutting machine with the help of Clinton.

my laser cutting designs for the wooden box

If there’s anything I didn’t love as much, it was having to sew the LED lights onto our final box covers. I appreciated the quick review of how circuits work, but having to sew those tiny lights onto canvas by hand was no easy feat!

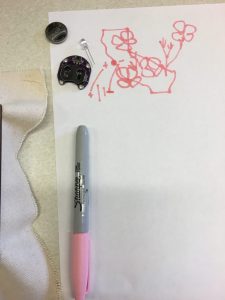
the initial sketch of the circuit layout

As I mentioned before, I really enjoy engaging my more artistic side, and both of these workshops left me feeling satisfied with a beautiful end product. I’d love to revisit these skills—I think they’d help make a great personalized gift in the future!

  • 3D Scanning

This was the tool I was most excited to get my hands on! Our original idea was to use the 3D scanner for our final project of creating customizable earphones. We wanted to scan the user’s ear to print out a mold to use for the shape of the earphones. We quickly realized, however, that the scanner could not capture the depth and detail necessary for this. That didn’t make it any less fun though—I enjoyed scanning various classmates’ ears for half an hour before realizing that it was a futile attempt.

The ear I scanned didn’t quite scale correctly when printed, leaving me with this humorous attempt and end product

I think I’ll stick to scanning peoples’ heads for 3D printed busts in the future.

As you can see, this truly was a semester of learning for me. And there’s so much more I want to explore! I’m glad I decided to take this course—it has really challenged me to seek out a variety of resources I never even knew existed. I couldn’t think of a better way to end my undergraduate journey—thank you Vishal, and fellow makers for a wonderful final semester!

Saying Farewell to the MakerLab

This semester has been a great one! I learned so much about not only the digital making world, but about myself and what I am capable of as well. Reflecting on the semester, I have created a lot of different things and exposed myself to a new side of learning.

My Expectations

Going into the course, I expected to be printing little things every week and learning how to use the printers and the software that is used to 3D print objects. In a way, my expectations were met, but not the way I envisioned them. I not only learned how to 3D print objects, but I learned about the process of creating useful objects to help people. I also learned how to utilize different resources in the FabLab like laser cutting and conductive threading. We even learned how to embroider!

Things I Learned:

Fusion 360

Looking back at my first blog post I realized the things I was interested in making I could easily print in the MakerLab today if I wanted to. I remember thinking in the beginning that there was no way I would be able to make stuff like an ice scraper which I ended up successfully designing in Fusion360.

We had an entire class period dedicated to learning the ins and outs of Fusion360. With this user-friendly software, we were able to learn how to make simple objects. With the skills we learned from making an ice scraper and a phone holder, we could create nearly anything we set our minds to. We were also given the opportunity to extend our knowledge even further by watching youtube tutorials and making things in Fusion360. I definitely expected to learn the software used to 3D print objects, but not to the extent that I did. I thought we would all make the same things together in class each week, but we were given much more freedom than that. It really opened the doors to my creative side of thinking, which is difficult for me to do.

(photo of ice scraper)

Design Process

One of my favorite things we did this semester was have the team from Design for America come into our class and teach us about the design process. I learned that all these great products people have made are developed from a thorough design process that takes a lot of iteration. I learned that we first have to understand a problem and immerse ourselves into it before we can start designing something. After that, you can start ideating and building your product.

This was really interesting for me to learn about. I am not a creative person whatsoever and I loved learning about how to come up with ideas to create products that can actually help people. This is something I did not expect to learn, and will take with me for the rest of my career.

FabLab

The three weeks we spent in the FabLab was something I did not expect to do in this course at all. However, I am so happy that this was part of the course because I learned so much in those short three weeks. We learned how to embroider, use InkScape which we used to create images that could later be cut with a laser, and conductive threading. The first thing I did was laser cut the sides of my box. I chose to cut four things that made me happy. For more details about what those four things are, take a look at my blog post from that week! After the three weeks, we took the things we learned at each station to create our very own box. My favorite thing about the FabLab was that I really had to challenge myself and get my hands dirty.

(photo of final product from the FabLab)

Final Thoughts

Overall, this course exceeded my expectations. I walked into the MakerLab for the first time in my college career on the first day of class and had no idea how a 3D printer worked or what they were capable of. I did not think we would touch on so many different areas of the making world. I enjoyed the final project, but felt like I learned the most when we had our guest speakers and were working with experts in Fusion360 and at the FabLab. Through this course I was able to challenge myself and expand my creative boundaries. Hopefully, this was just the start for me in the Making World!

Once a Semester Activity: 3D Printing and the Apparel Retail Industry

While many will proclaim that “retail is dead,” (in reference to the archaic department stores we all grew up with) I beg to differ. I’d argue that retail is simply changing. My love for the apparel retailing industry began over the course of a summer job as an Anthropologie customer associate. I watched as the brand I loved most had to react to a shifting industry climate. They made strategic decisions to close down locations, and instead, open larger format “experience-based” stores that allowed customers to create custom furniture, shop for clothes, and learn about different types of garden plants, all under one roof. So in a time when traditional brick and mortar retail is supposedly dying, I find myself fascinated by what the future of retail actually looks like. I therefore chose to research the intersection between technologies like 3D printing and the apparel retailing industry in more depth.

Fashion

Most people automatically associate 3D printing and retail with the idea of 3D printed clothing. Luxury fashion designers have toyed with the concept, however, current 3D printing mechanisms have proven better suited for accessories such as jewelry or eyewear. “The evolution of materials for fabrics in 3D printing has been slow and there remains a trade-off between stiffness, robustness and comfort. Because the technology involves fusing layers of melted plastic one on top of another, a 3D printed fabric does not behave the way a woven textile adapts its shape to the body” (Sim, 2017).

Although the idea of 3D printing clothing items may seem impractical or gimmicky to customers, startups like Ministry of Supply are fighting to change that perception. MIT graduates Aman Advani and Gihan Amarasiriwardena cofounded the clothing company that specializes in 3D printed knit garments. They use materials like “Merino wool and NASA-engineered Phase Change Materials, so you literally get the best of both worlds: the best properties of natural fibers and space age temperature regulation” (Leighton, 2017). Their knits are not only more comfortable and movement-enabling, but they also create less waste and are more durable. According to this video, they can print a blazer in around 90 minutes:

Because the garments are printed without seams, they do not have weak points that are more vulnerable to wear and tear. They currently use a Japanese 3D knitting machine called Shima Seiki, which has been used by manufacturers but has yet to be widely adopted by retailers at a storefront level.

Retailing Practices

Looking beyond fashion, it is clear that 3D printing has many implications on the other segments of the apparel retailing industry:

Inventory Management

The most obvious change seems to be in the form of inventory management. Dealing with excess inventory in the face of unpredictable consumer demand is one of the key challenges that retailers face today. “Imagine walking into a store that carried only enough inventory so that customers could try on garments and touch the material to ensure it meets their demands and expectations. Then, images of the garment in various colors and textiles would be made available to the consumer. Perhaps some stores will even carry swatches. Once the shoppers decide which one(s) to buy, they pay for the item and wait for them to be printed” (Sedhom, 2015). This will also impact the supplier-retailer relationship. “We find that cost-sharing contracts can coordinate the supply chains where 3D printing is used in-store and the supplier controls the raw material inventory” (Chen, Cui, Lee, 2017).

Product Customization

In addition to better inventory management, retailers can rely on 3D printing to drive better customization. Companies like Nike have already embraced this by printing custom-fit shoes for world-class athletes, however, it is likely that this trend will catch on among apparel retailers as well. “Indeed, customization will change fashion as we know it, as 3D printing will allow companies and brands to create, in real-time, items tweaked and personalized by the consumer. Imagine yourself walking into a store and changing the length of a handbag strap, lowering the neckline on a shirt, or selecting a color for your dress! The frustrations attendant with shopping from what’s available versus shopping for what you want will end. 3D printing will facilitate contemporaneous customer-designer or customer-store collaboration” (Sedhom, 2015). Customization has long been a trend impacting retailers’ approaches—according to the “State of 3D Printing” report conducted by Sculpteo, retail profits from custom 3D printed goods is projected to increase 91% by 2020.

Intellectual Property Protection / At-Home Printing

            As designs and the overall apparel retail distribution network go digital, intellectual property theft is emerging as a top concern within the industry. When it comes to the overall retail landscape, luxury brands have the most to lose. They already face competition from creators of knock-offs. “With global imports of counterfeit goods already estimated to be worth $500 billion a year, it is likely 3D printing will only add to that figure. The growing threat of counterfeit 3D printing stems from the increasing availability of cheap 3D printers, printing materials and design specifications for items ranging from bags, apparel and jewelry” (Sim, 2017). More affordable brands may also face challenges as 3D printers become more ubiquitous among households. Customers could eventually design and print their own clothes from the comfort of their own home, eliminating the need for retailers at all. Designer Danit Peleg, who has worked extensively with 3D printed fashion designs, foresees a future where this is possible. “In the future, when these printers are in your house, I can send you a file and you can immediately adjust the file to speak to your measurements. You can choose the material, whether it’s cotton or wool. And while you’re getting ready in the morning, you can just press print and have the dress done by the time you’re done getting ready” (GE Reports, 2017).

Takeaways

After conducting all of this research, I’d still stand by my argument that retail is far from dead. I think it’s easy to paint an apocalyptic picture of a future where everything is automated and 3D printing completely takes over. However, even in a world where all clothes are 3D printed, I still believe that retailers will play an integral role because we live in an experience-based economy. They will simply have to differentiate themselves through capabilities like unique designs and customization. Even the most “DIY” oriented customers will want to be able to see designs for themselves, or reference available swatches that retailers can provide. Therefore, they will simply have to rethink their position within the market. Manufacturers and distributors will also have to reposition themselves, perhaps shifting towards cost-sharing contracts. All in all, 3D printing does have the ability to permanently alter the apparel retailing landscape, but it will take time and the outcome is uncertain for members across the value chain.

Works Cited:

https://www.forbes.com/sites/herbertrsim/2017/12/03/3d-printing-in-luxury-fashion-revolution-or-evolution/#55e24ba23f20

http://www.businessinsider.com/ministry-of-supply-3d-printed-knits

https://www.gsb.stanford.edu/faculty-research/working-papers/retailing-3d-printing

https://www.sculpteo.com/blog/2015/12/23/3d-printing-and-retail-industry/

https://digitalcommons.law.scu.edu/cgi/viewcontent.cgi?article=2812&context=lawreview

Design Audits

This past week in class, we actually all physically had working prototypes that we got to share with one another! We all had the chance to work ‘design audits’ with each other – working through and explaining the designs we had with our peers, so that they understood it properly.

I had the privilege of being able to ‘audit’ two of my peers’ designs for their final projects. The first group was the vertical smart garden team. They showed me how they had wired their arduinos to both their soil humidity sensor and their LDS sensor (which detects the presence of light). It was amazing to see how much they had progressed over the course of our short semester! One critique I suggested was to incorporate two separate LEDs for each sensor output, because the one they had was flickering – perhaps because it was too large of a power load.

Secondly, I got to audit the team that created the custom overhead headphone attachments. I loved the simplicity and imitability of this design – I suggested to this group that they actually make a bunch of their product – many colors and sizes – and hand them out during the presentations. Their print time is actually only about 30 minutes so it would work out fairly well.

As for my group, we went forward with presenting our prototype to date, which included the steering wheel bracket, bushing, and custom screw used to add the physical attachments. We feel like we are right on the edge of where we want to be with our project. We are looking forward to printing our actual final parts and continue the final testing phase of the project. We can’t wait to share our idea with the world!

A Look at 3D Printing In the News

I was not in class this week due to a stomach bug from which I am now recovered. Because I cannot personally attest to the design audit and assembly experience, I am going to give a brief summary of my group’s progress before sharing a couple of articles of interest.

My team, the Animakers, made some great progress on our steering wheel attachment device. Ajie and Jason were able to complete the printing of multiple versions of our initial design and successfully formed the base of the product. Initial photos of the designs look great – I’m excited to finish up the rest of the project in the coming days and thoroughly test out the device.

In The News

http://fortune.com/2018/04/22/3d-printed-homes/

This article on fortune.com presents yet another possibly groundbreaking opportunity for 3D printing in a new industry: construction. A home is a place that everyone wants to make their own – customization is the name of the game. 3D printing might make for a natural fit in this industry because it would be much cheaper and faster than home construction today. This company may be on to something.

The next article is quite different, which speaks to the versatility of 3D printing. The United States Army is looking to print soft robots that can easily make their way through the tightest cracks as stealthily as possible. The idea of octopi has long intrigued the robotics industry for the potential of creating desired, unconventional movements. You can learn more in the article below.

The Army is building 3D-printed soft robots


Prototypes Galore

During this week’s class, everyone was able to meet in their groups to work on the design of their projects. After meeting with our team, we were to look over each other’s designs and critique them with constructive criticism. We first met with a team that was working on creating a simple 3D printable device that would count the number of people inside and outside of a building for businesses to use. This team was currently struggling to get the device to display on a 3 digit display screen. Although we weren’t able to give much feedback as we do not know much of the mechanics for the wiring of this device, we were able to give some adjustments for the future to consider like the actual storing of this data as opposed to just displaying it that can be implemented in the future to add value to this product.

We then met with a group that is working on a sort of smart plant holder. It was a very interesting design for a plant holder that would make the use of a pump to raise water to the top of the holder so it trickles down to the rest of the plants as this is a vertical plant holder. One concern the group had was on how to split the water evenly among the plants, we advised them to check in with the FAB lab to see if they had anything that could help as well as got them to think about how to not only distribute the water evenly but the nutrients in the water as they plan on putting plant food in the water. As the water trickles down to the next group of plants, there will be less nutrients in the water  since the higher plants would soak it up.

Additionally, both groups gave us substantial feedback on our design in terms of the physical design as well as improvements to think about. Most feedback involved the design of the legs for our coffee contraption as the current prototype does not allow for a cup to be placed under it to catch the coffee. This is something for us to look in further prototype versions. We were thinking of potentially taking another group’s advice and making a tri-pod design for the contraption.  Tune in next time to see what direction we went in!

Final Stages of Prototyping & Testing

This past week, my team and I really focused our efforts on finalizing our prototypes. My team’s project is to create a customizable steering wheel knob that can be twisted on to a universal handle. We are planning to create two final prototypes: 1) A knob that is the shape of a small sphere; and 2) A knob with a strap that individuals who do not have all five fingers can use. So far we have created two iterations of prototype one and also a universal bracket, bushing, and screw to attach onto the knobs.

We are working to create our final prototype that will be useful for individuals who do not have all five fingers. Our team is planning to head to the MakerLab on Monday and Tuesday to design & 3D print this last prototype. So far, we have had the chance to test our universal bracket and bushing on a steering wheel. It fits all steering wheel types. Because it attaches to any steering wheel, the knobs can be customized and attach to any bracket/bushing.

With our final project heavily dependent on designing & then 3D printing – I have been using MeshMixer and Autodesk Fusion a lot to create our designs. In Autodesk I have learned how to create, modify, and thread shapes. It has been great to experiment and learn more features of each of the two softwares.

Meeting with other teams in the audit process and presenting to the class also allowed us to get feedback on our idea and prototypes. We received feedback to include finger print indents on our sphere knob to make it easier to hold. Additionally, we received multiple ideas on new knob prototypes to create in order to better help individuals who do not have all five fingers.

The last step in finalizing our prototype is to create and finish our new prototypes based on feedback we got. We have tested the bracket/bushing, but we will need to test the new prototypes with other individuals on other vehicles. I am excited to finish up our new prototype designs and to test them. Our team is planning to finalize and test our prototypes in the next few days. Lastly, we have also been taking videos and photos of the process and are preparing media to share to the judges in our final presentation. Overall, this project has been very hand-on and given me the opportunity to apply concepts that I have learned in this class.

Prototyping & Feedback

Prototyping  

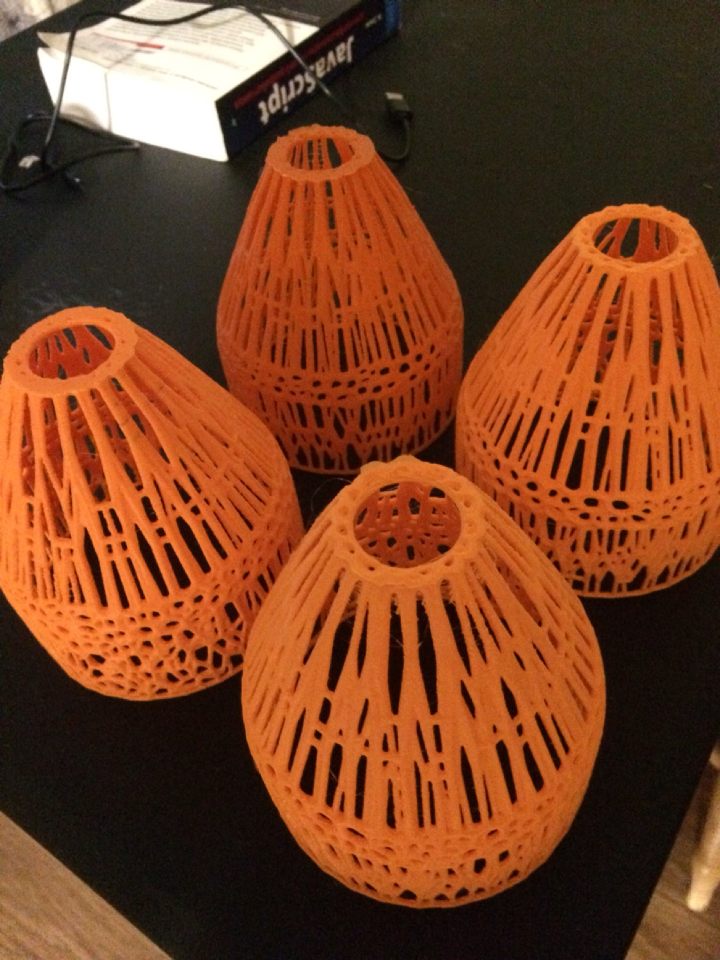
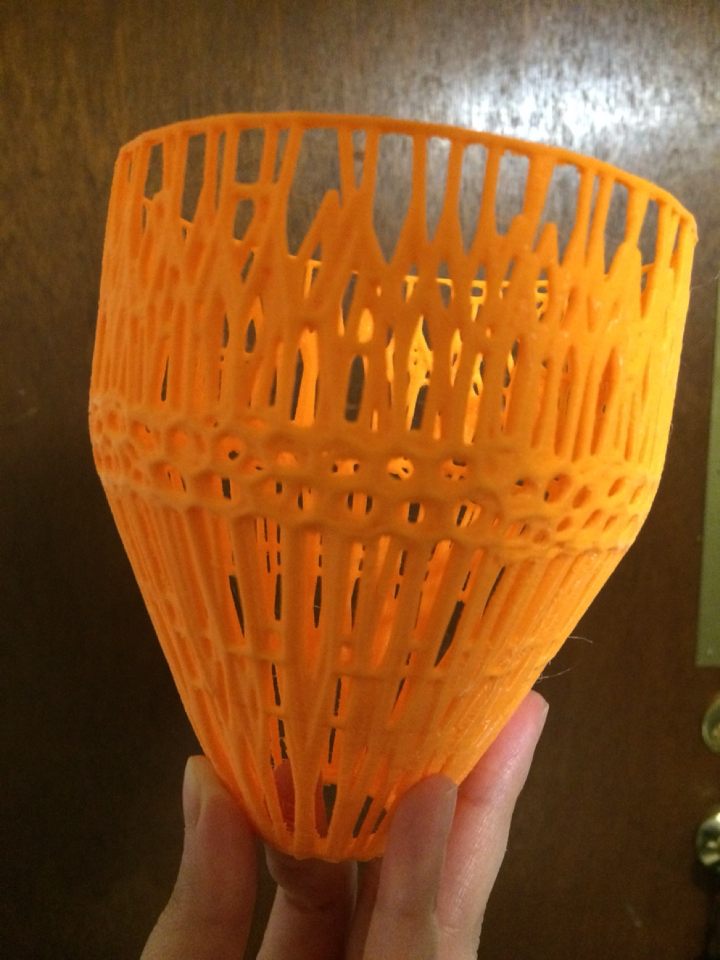
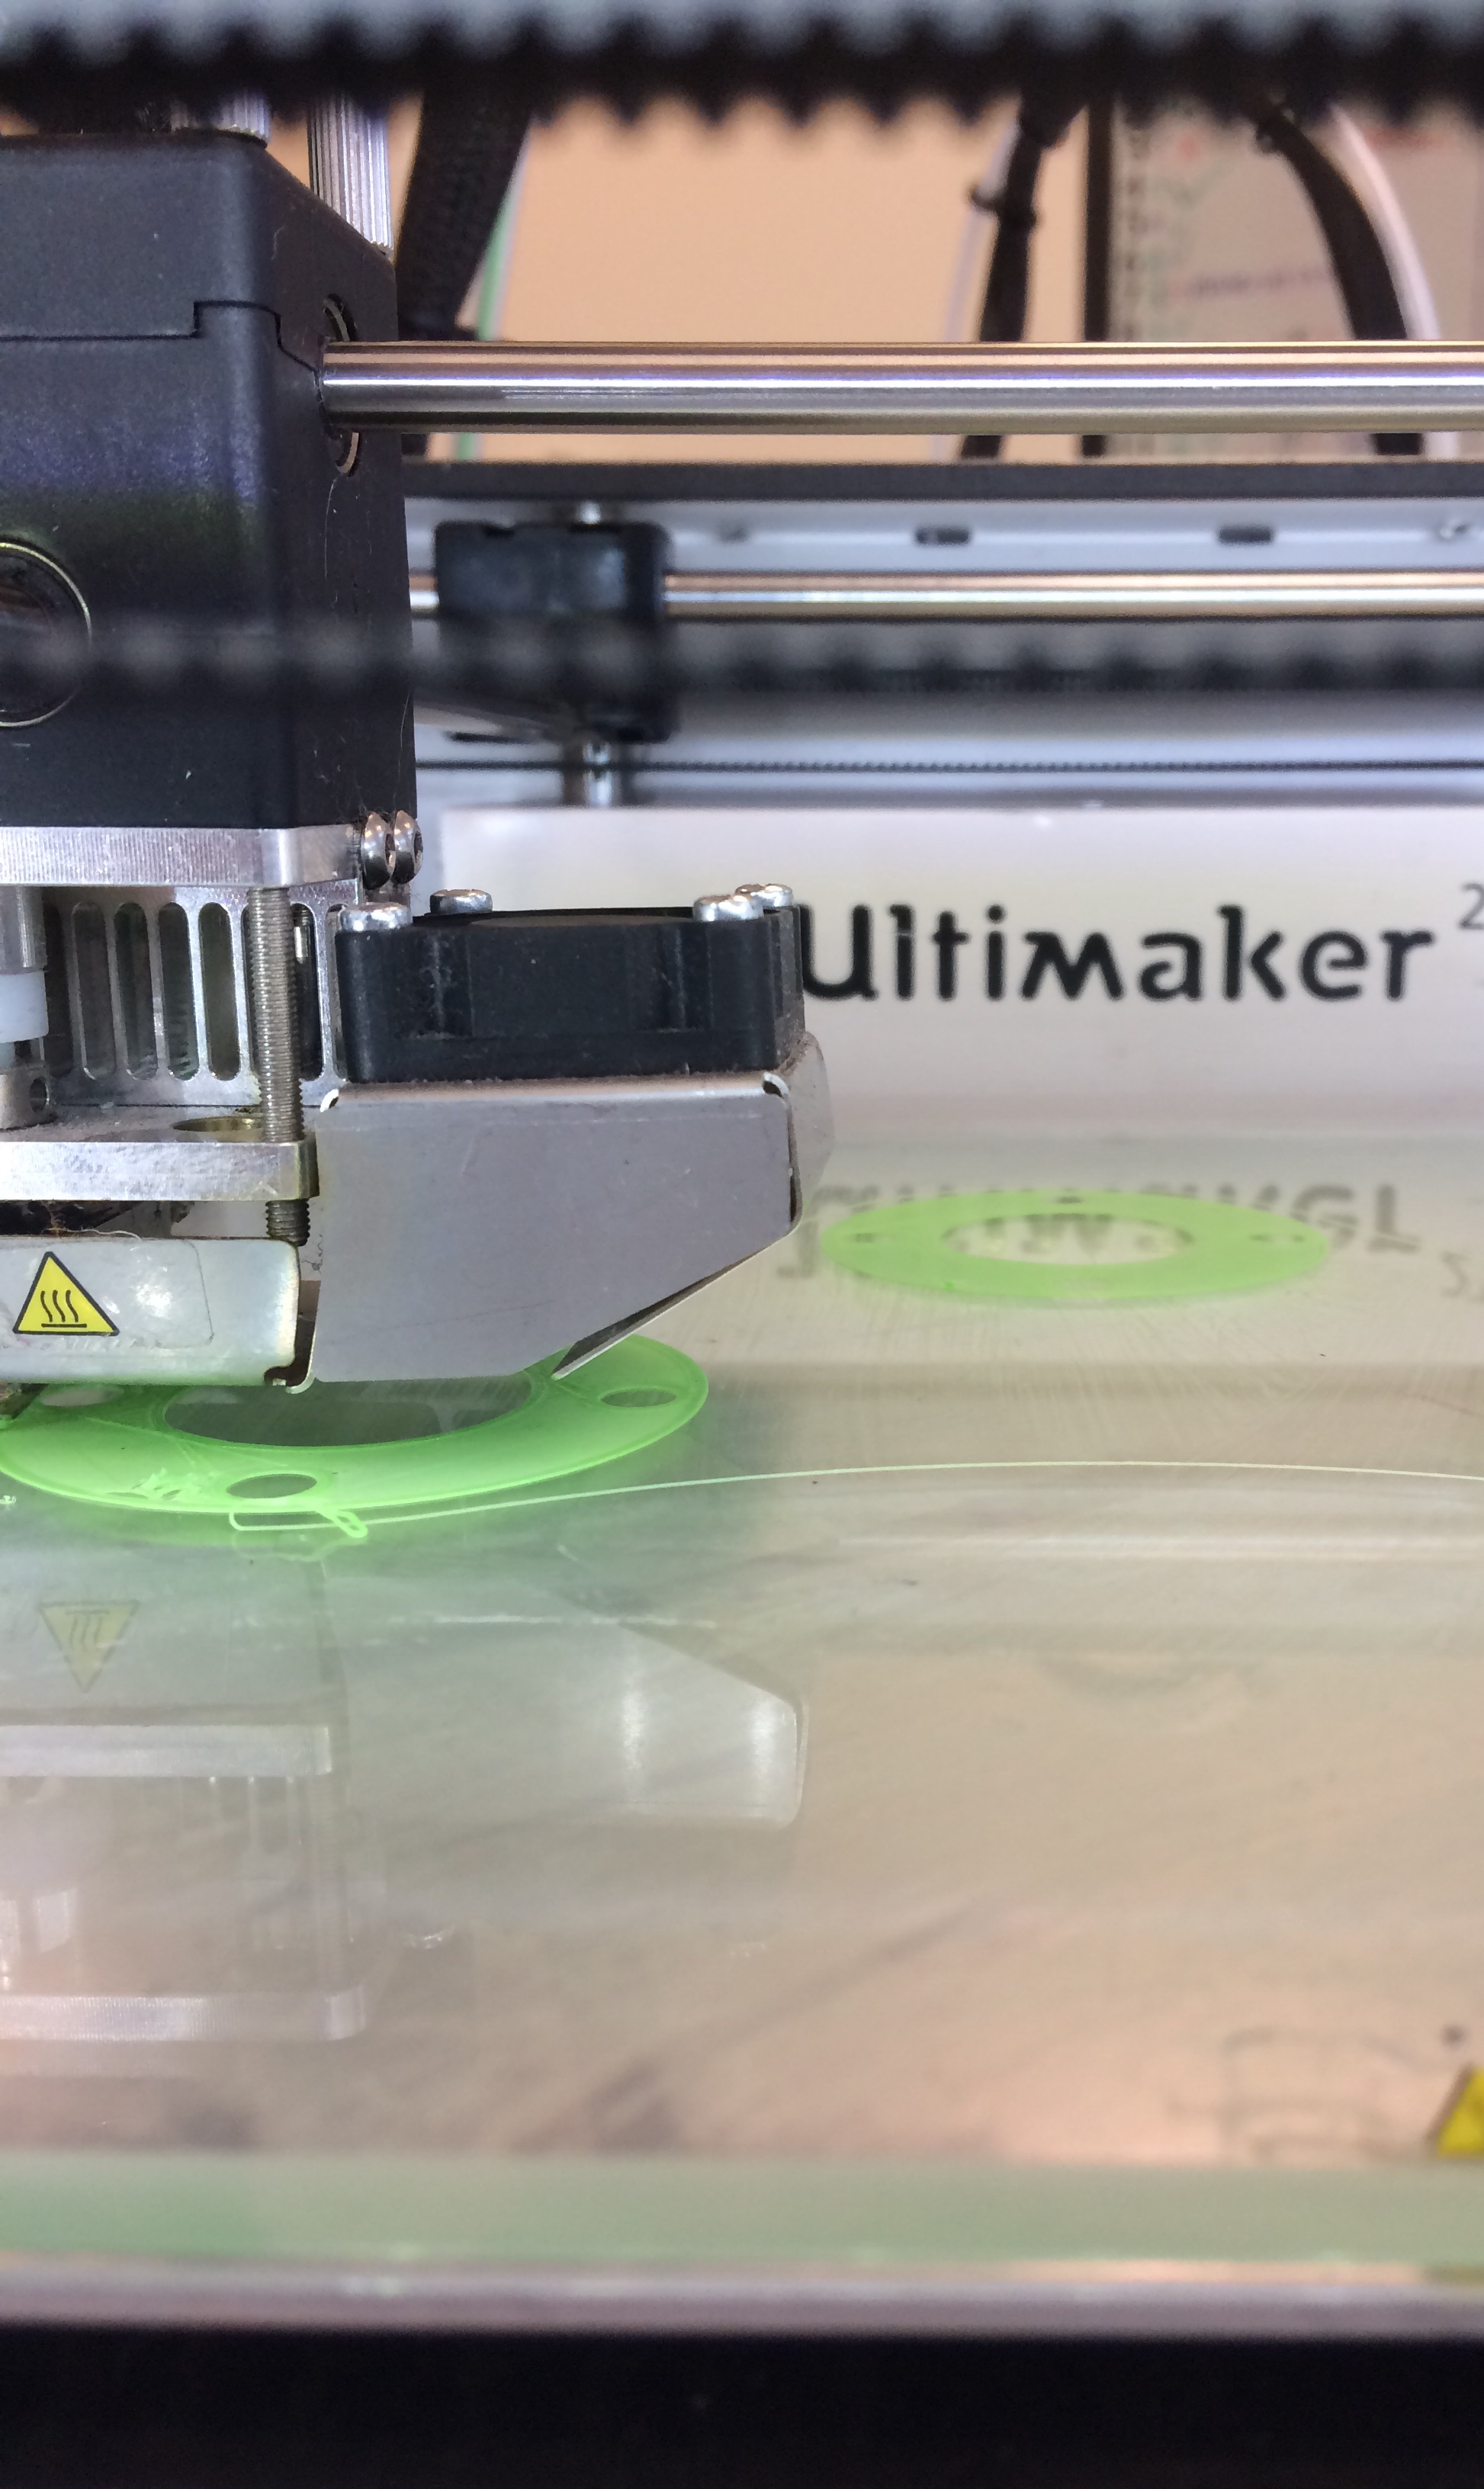
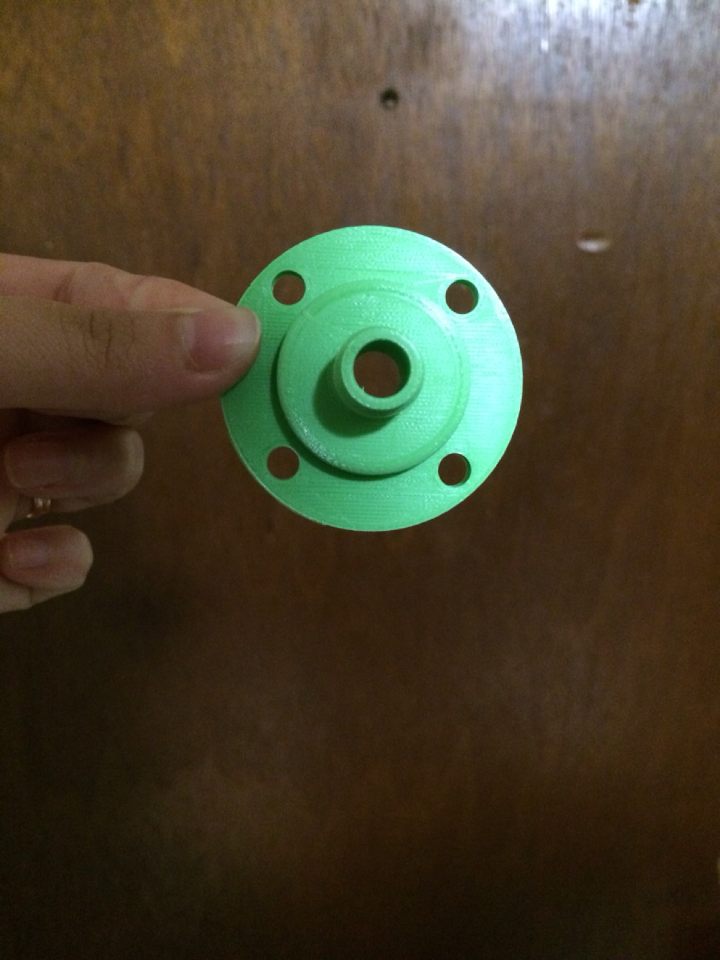
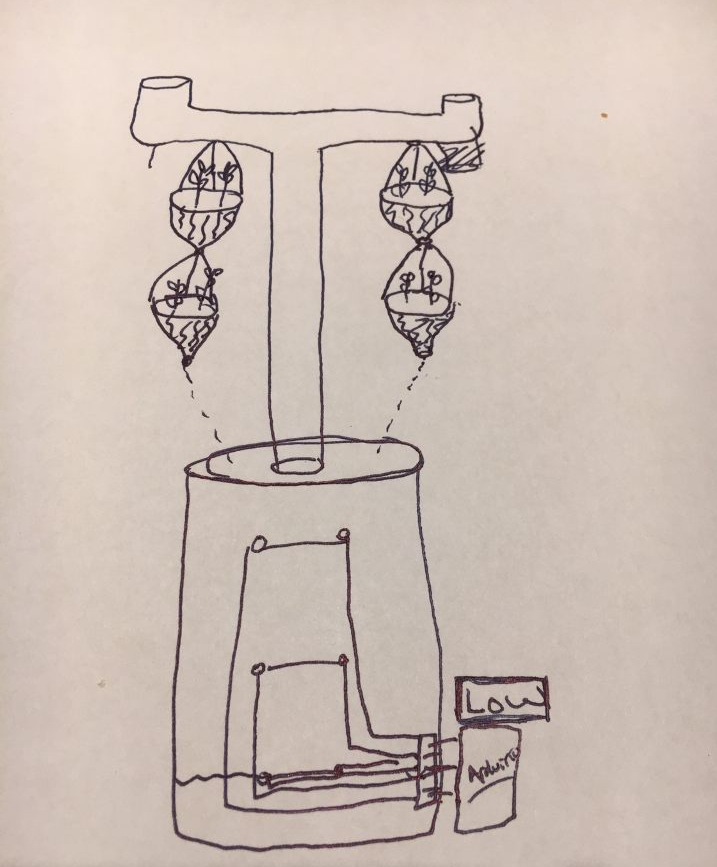
This week, 3Dream worked very efficiently and we made allot of progress with our final project (Vertical hydroponic drip system). There were multiple complications with 3D printing the voronoi bottle cages and it failed 3 times. At last, with some tweaks on Cura and removing all the supports and only including a brim, the four bottle cages turned out beautifully! Initially, I was worried that the bottle cages would fail without supports but it turns out that they were completely unnecessary. The four drip nozzles were also successful when printing.

vvv

ll drip nozzel

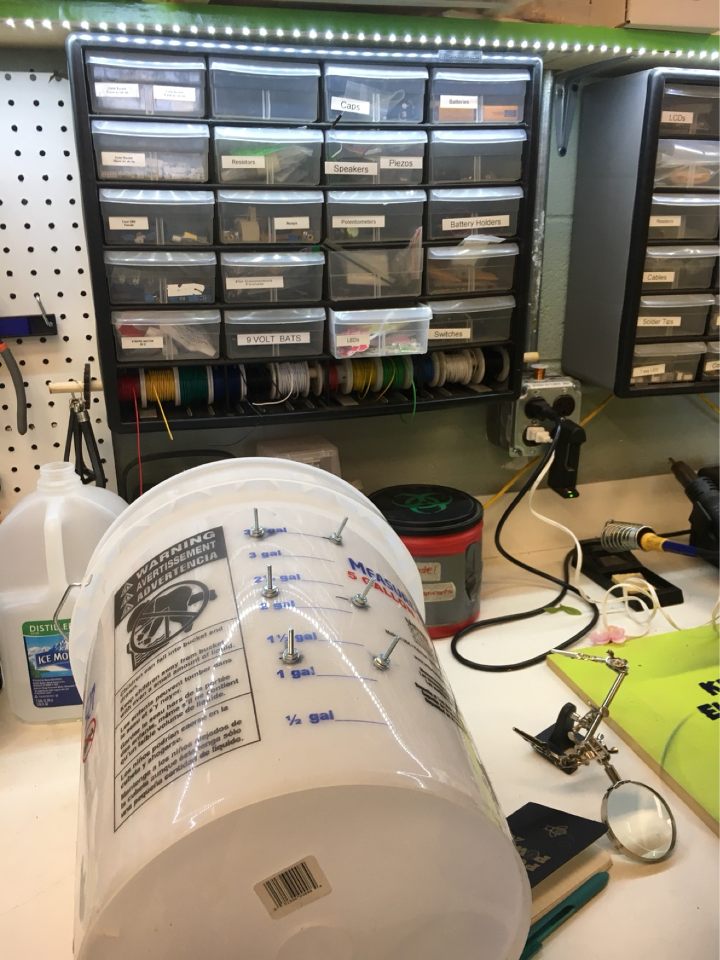
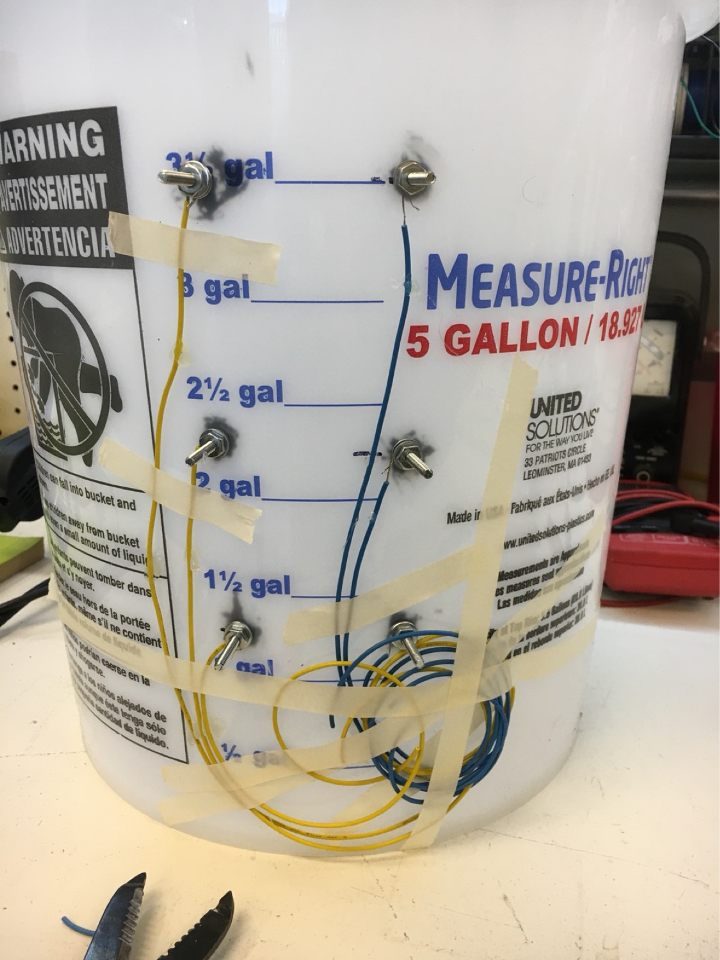
Another milestone was better understanding and getting the sensors to work while attaching them to the bucket which will serve as the reservoir. My Teammate learned how to use an electric drill & caulking gun while building it.

mmm

Now that we have tangible prototypes and received feedback, 3Dream has been able to develop a new sketch of what we imagine our final project to be.

v

Feedback

In class, we met with two other groups and both sides presented their project and we shared options/suggestions. Further, we were expected to conduct an interview to gain additional information on how to better our project. Our group interviewed 3 separate people and plan on coming to together to share what we have learned and also to present our individual possible alterations of the prototype. I interviewed a post-graduate computer science male. Age 25, lives in a studio apartment, and is familiar with a hydroponic system but has never owned/maintained a plant before. The main takeaways that I gathered was that the bucket was not visually appealing and should definitely be remodeled. Users who do not have any experience in  caring for a plant are highly interested in our project and would own one if we made it more visually appealing and included a pH sensor.

Overall, after getting feedback from numerous sources, I deeply understand the importance of getting user feedback in all trials of development. I hope to hear more thoughts on our project in the comments below! Thanks for taking the time to check out my blog, see you next week!