All posts by Maddi

Final Reflection- It’s All Over!

Hi everyone! This semester really opened my eyes to a lot of technologies, ideas and concepts. Before coming into this class, I had a strictly logical mind. Creativity and innovation were never at the forefront of my brain. However, this was necessary to do in this class. Walking into class the first day, I was intrigued by the 3D printers and prints around the room.  The printers seemed so foreign and complicated to me. However, after two weeks of class I was comfortable printing a design on the printer.

Getting a “maker mindset” is harder than you may think. Although, being surrounded around my classmates with similar mindsets made it easier to become a “maker.” This is one of the first classes I have been in where the students actually were invested in their projects and actively trying to make their projects better. This wasn’t a forced project; it was something everyone was fully invested in. Being surrounded around this made it easy and fun to get into the class.

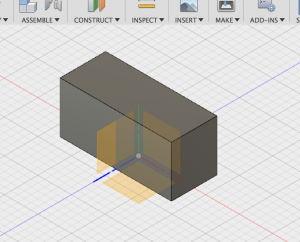
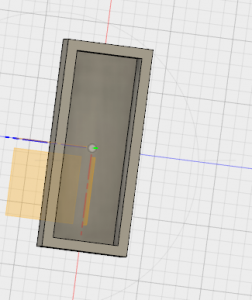
The designing aspect of the course was the most difficult part of the course for me. Because most of the classes I have taken have not been focused on building the physical product, I was not aware of all the struggles and roadblocks that can and will happen in the designing process. Learning Fusion 360 was an interesting experience. I was not able to come to class that week, so I learned it all on my own. I watched multiple YouTube videos and learned the basics of Fusion 360.

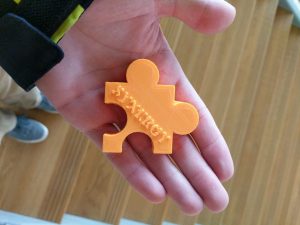
The first thing I made was a keychain shaped like an ‘M’.  This first print was simple, but it was super cool to see my design come to life. After that, I watched my classmates print more complex things every week. Seeing the final projects BLEW my mind and I was so happy to have been there through the whole process. It is amazing to me how creative a group of students can get.

Exploring thingiverse and pinshape was a fun activity as well. You don’t realize how many things makers have made. Having these websites allow makers to build off of other maker’s ideas and designs. Before this class, I didn’t realize 3D printing was as prevalent as it is and seeing all of these designs made me excited about the future of 3D printing.

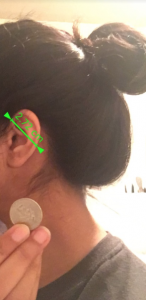
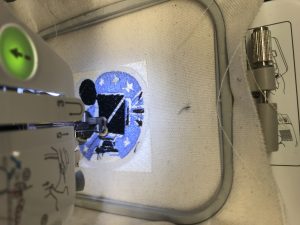
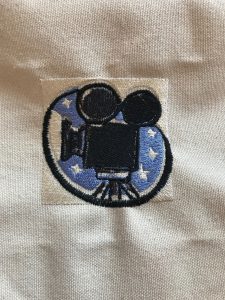
The three weeks at the FabLab were my favorite weeks of the whole course. We created a box with an embroidered top with LED lights. Every week we learned a new skill, allowing us to explore all that the FabLab had to offer. Although I had trouble with the digital embroidery, it was my favorite part of the FabLab. Creating something that is unique to you is invaluable and unique.

The guest speakers we had in this course were also very interesting. Not only did I enjoy getting pizza whenever we had a guest speaker, but I enjoyed the unique perspectives of makers across the country.  My favorite speaker was Arielle. She was very inspirational with her entrepreneurship capabilities. She took a small problem that a small group of people had, and created something amazing and effective for it. Arielle was one of my group’s inspirations for our final project. In addition, Jeff Ginger was very enthusiastic about the Fablab and the maker community, which translated to us, making us curious about it as well.

Overall, this class was very beneficial. It allowed me to stretch my imagination and take a class that wasn’t like my regular curriculum.  It allowed me to work with other students and build off of their creative thoughts. I believe this class is beneficial for all future business men and woman because we will eventually be managing engineers and designs. Knowing the design process is helpful in this case. Thank you to all my fellow classmates for taking this journey with me and I wish you all the best!

Final Project Reflection- Team Synergy

Hello everyone! We are team Synergy. We had a great time this semester working, creating and talking with you all! When deciding on our final project, we had a little trouble. Our first idea of creating a solar powered coffee/tea heater fell through. When in the prototyping stage, e realized that this project wasn’t feasible. Although this was a huge step backwards, we gathered together and decided upon a simple, yet effective design. Airpods are becoming increasingly popular. How can we find a way to keep the pods in the user’s ears even when doing intense physical activity? In addition to this, we wanted to find a way to get more students involved in the making process and 3D printing. If there is anything we learned from this course, it is that 3D printing is on the up and coming and will be very useful and important in businesses in the near future. Therefore, we thought it was important for students to learn the basics of 3D printing to further them in their careers. Our final project of “iClips” allows students to make a customizable headphone clip to fit snug on their ears, allowing them to use Apple Airpods to work out and do any physical activity they would like.  

Designing the iClip was not as simple as you would think. Thankfully, our friends at the Fablab helped us out a lot. They explained the process of splining and sweeping which was the basis of our project. After a lot of tinkering and perfecting was required, but eventually we made our design!


Then, the prototyping process began. We received many useful insights from test subjects during the prototype testing phase. We asked two college of business students and one alum for their thoughts on our initial design. The first respondent, Tanmay, was enthusiastic about the product. He felt that the fit was comfortable and sturdy. He did, however, suggest that the product be modified to clip onto other types of earphones, since he was not an iPhone user himself.


The second respondent, Christina, exercises frequently and was also very excited about the product. While she mainly uses over the ear headphones in the gym, she said that she could see how others might find the product very useful. The product did not provide a comfortable fit over her ear, because it was too large but she said she’d be willing to use it if it came in a smaller size. When asked how much she would be willing to pay for a custom-fitted set, she said she’d pay up to $15.

The third respondent, Elsie, had a difficult time figuring out how to wear the ear clips. She said it was a bit confusing to figure out by herself, and suggested providing some sort of illustration to show people how to put on the ear clips correctly. Once she was able to position the ear clips, she thought they were quite comfortable. In order to improve the design, she suggested making sure that the material was sweat resistant, particularly for those who use the ear clips while exercising.

Next Steps

Based off of the feedback we received, we wanted to continue focusing on creating different sizes based on each user’s ear, and on creating a universal clip. We relied on a mobile application called Ruler to try and see if there was a way that people could take measurements of their ears through a photograph. That way, users could send us their measurements and we could determine the size of the ear clip best suited for them.

We found the app to be quite precise in its measurements, which were taken by the user holding up a quarter next to the object they wanted to measure (in this case, their ear.) These photos demonstrate some of the ear measurements of users using the Ruler app:

However, after gathering more test subjects, we found that there wasn’t enough variation in ear sizes to justify creating multiple sized ear clips. Instead, we found that some test subjects prefered a more flexible fit, while others wanted a firmer grip. We were able to create a range of fits by adjusting the infill amount while printing our base ear clip design. We finally selected three infills– 20%, 30%, and 40% and gave test subjects each clip to try. Those who preferred a loose fit liked the 20% clips, while others preferred the 40% clips.

Had we had more time, we would have liked to print our prototype using a natural flexible PLA instead of the regular PLA material we used. This material would’ve not only provided more comfort, but would probably have also been more sweat resistant, to Elsie’s point. We would have also liked to perfect the universal ear clip–however, we found that our design worked well on both Apple earphones and airpods, which was our original intent.  

All in all, we felt grateful for having had the experience of ideating, designing, and testing our prototype, with so many helpful resources at our disposal. We had changed our project idea halfway through this course, so while it was difficult to catch up with the other groups, we were proud of our end product, despite its shortcomings. Our takeaways were:

  • A design is important, even if it solves just one person’s problem
    • While our ear clip design wasn’t nearly as complex as our original solar-powered hot plate idea, it still solved a problem and that was something to be proud of.
  • Design is an iterative process
    • As told throughout this course by multiple guest lecturers, the prototype testing process turned out to be the most useful and necessary step towards creating a better product.
  • Marketing your idea is just as important as designing a good product
    • We wanted this product to be centered around the idea of bringing students into the MakerLab. As seniors who had minimal interaction with the maker community during our 4 years on campus, we felt incentivized to inform unaware students of the resources available to them. Given the simplicity of our ear clip design, we felt that students would be excited to either design or print their own in the future.

Here is the link to our final presentation! Enjoy!

https://docs.google.com/presentation/d/1tJMJYQ2oNmG8JAt3bsAWKwA5LBifzHOZf1OO_OIUYYY/edit?usp=sharing

Finishing Touches

This week, my team made great progress in our final project. Although we had a slow start, I think our idea for earbud attachments is simple, yet effective. We wanted to create something that everyone could make and also use. Printing these attachments takes less than 30 minutes. Also, we figured out the dimensions for small, medium and large attachments. We have an app that allows us to compare your ear to a quarter, ultimately figuring out what size ear attachment you would need.

Although we aren’t completely and totally “customizing” an earphone attachment for each individual, we market it as such. This has the customer believing they are getting something customizable, creating more value for the product (that’s business for you!).

During class, we tested our product on a couple of our classmates (with all different ear sizes). Our classmates seemed very pleased by the product and said they wanted us to print them a copy! One problem we ran into was the clip was to loose and was falling off the string of the earphone. So, with our final project, we must figure out how to make it flexible enough to hook around the earphone, but not too loose where it falls off.

Overall, this week we made great strides in our project and I am looking forward to finishing it all up!

Switching It Up

Unfortunately, I was too sick to come to class this week. However, my group and I got together today at BIF and The Fab Lab to coordinate and work on our project. We first met in BIF to decide if we do in fact want to switch our final project idea and if it would be feasible. After a lot of thought and research, we decided our solar powered coffee cup warmer wasn’t feasible. Although our switching costs from one project to another may be large, we eventually came to the conclusion that it would be in our group’s best interest to do so.

So, we put our heads together and eventually came up with the fact that air pods (the new iPhone headphones) easily fall out of ears of users. We then decided to create a customizable ear piece that would attach to the headphone and also the ear, allowing the headphone to stay in the ear and not slip out!

First, we researched the best way to fit it into the ear, how to attach it to the headphone and also how to make it customizable. We believe this could be a super easy process for students. They could come into the Maker Lab, get the height and width of their ear and print their customized attachment. This is a simple problem and an even more simple solution that could help a lot of people with this inconvenience.

We had a little trouble coming up with the initial design and had to explore things on Fusion that we had never used before. However, we can up with a basic model that we will be printing tomorrow and testing out on volunteers for specific fits and sizes.

I am happy my group could get together and figure out the new course of our final project! I believe it will be a successful one and I can’t wait to see our prototype tomorrow.

Scanning

This week was one of my favorite weeks in class. We started to learn how to scan and eventually 3D print those scans! We started with learning how to scan ourselves. I got the opportunity to scan one of my teammates, Jason. We used iPads with a Kinect. In order to scan, the person being scanned had to stay completely still while the scanner slowly moved 360 degrees around the person being scanned. After this process, we put the scans on the cloud and downloaded them to the computer. After cleaning the scans, we then got to 3D print it.  Unfortunately, I didn’t get around to printing my face, but I got to see one of my classmates, Shayna’s come to life! The amount of detail the scan created was extremely impressive.

This week we also watched a video on 3D scanning with Jay Leno. He was trying to print a car part that broke/rusted over. He scanned it, then revamped it, and printed a new car part that was the correct dimensions and size! Doing this is less expensive and less tedious than finding a car part elsewhere. An important aspect of scanning is the process of reverse engineering. In the case of Jay Leno’s garage, he had a part that needed fixing because there wasn’t enough ventilation in the part, so after they scanned it, they added ventilation holes to the part, creating a new and improved car part.

In addition to scanning, we moved further along in our project planning. We made our Project Testing Plan and determined our test subjects. However, after some further research and talking to experts at the Fab Lab, we may want to change course for our final project.

Overall, this week was very informative and allowed my group and I to talk out the details of our project.


Week 10- Individual Assignment: The Importance of Prototyping

This week in class, we had a guest speaker from Shapeways. She started off with telling us a little about the company and then showed us around the factory. Shapeways is a company where individuals and businesses can design a product (or products) they want 3D printed and Shapeways does the rest!

Their process is:

1) Design a Product,

2) Upload to Shapeways,

3) We’ll Produce It For You

4) Sell It In The Marketplace

5) Share It With The World.

In order to make a design, you must download a 3D printing app or use your favorite software to design your product. After that, you can hire a designer of your liking. Every designer at Shapeways has a different expertise; so, you can choose a designer that best fits your product.

The key factor that separates Shapeways from other 3D printing companies is the variety of materials available for use. They have over 60 different materials ranging from plastic to precious metals. Not only do they have over 60 different materials, but they have over 100 different colors to choose from. Having this many materials and colors allows you to have full control and customization of your product.

In addition to being able to make a product, you can shop on their website for things other maker’s have made. Here is a link to check out some of their cool products! They have products ranging from jewelry to art to home appliances!

https://www.shapeways.com/marketplace

One of the questions asked by a classmate of mine, Scott, was Shapeways’ thoughts on making weapons. 3D printing weapons is becoming more and more popular in today’s society. I thought this question was very interesting because Shapeways’ main objective is to creative anything and everything their customers design… however, they do draw a line here. Our speaker talked about Shapeways’ choice to not make weapons. Of course they have the ability to, and would probably make a lot of money making customized weapons, however they do not. I am sure this was a big topic of conversation when Shapeways was first forming. Here is a link that explains the process of making 3D printed weapons and the ethics with it.

https://www.3dprint.com/139537/3d-printed-guns/

This week, we focused mostly on the importance of prototyping your product. As the blog post from Edison Nation states, “One of the best ways to start flushing out your idea is with a paper and a pen.” (Losaw, 2014) In addition, a video by David Kelley states, “How quickly you get to the first crummy prototype and show it to people is directly proportional to how successful the product will be.” (Kelley, 2001). After reading all of my classmates’ reflections, I realized that we all had a little trouble prototyping our final projects. This is because when we actually had to think of the technicalities and design, we realize there may be problems with our design or idea. It is easy to think of a creative idea, but actually putting together the product and thinking about the technicalities is the hard part.

Prototyping a product is not only important for your own success in making the product, but the success of the product selling. If you give users a simplified version of the product, this gives them something tangible to look at/feel, allowing them to gain more confidence in your product. Once again, an idea is just an idea and is not relevant until put into action.

After doing some research, I concluded there are four key uses of prototyping. The first use is evaluating and testing the design. This is when you create your prototype and evaluate which parts need to be redesigned or scraped. These things are not necessarily seen simply by drawing your product on a piece of paper. Next, you must clarify production costs and issues. This is where you evaluate the steps in the process of making your product and seeing if you can remove a step or combine two step in order to save money without damaging the end product. The third use is selling the product to others. It is extremely important to keep the customer in mind when prototyping. It is nearly impossible to get a customer to sign a purchase order without having a tangible prototype in their hands. Finally, if your product is new or unique, you should consider getting it patented. If you have a prototype, it is must easier to sit down with a patent attorney and figure out your best option!

Overall, prototyping may seem like a step that can be skipped, but it is by far the most important step!

If you want to check out more on prototyping, check out…

https://www.creativebloq.com/netmag/importance-prototyping-your-designs-81412694

Prototyping- The Most Important Step!

This week we were back in the Maker Lab! For the first hour, we got the opportunity to talk to __ from Shapeways. First, she showed us around their lab.  It was super interesting to see all of the different departments. She then gave us some advice on being a maker. I found her background very relatable because she majored in film and I am very interested in the film industry. She then continued to talk about how she was lucky enough to be a part of the age where film transferred to digital. This is what started her interest in 3D printing, technology and making.  I also found it interesting that Shapeways can print products with over 60 different materials. Overall, the speech was very intriguing and left me wanting more information…

The assigned readings and videos this week really connected nicely to our speaker and Prof. Vishal’s instructions on prototyping. They talked about the importance of drawing out your prototype and getting initial feedback from users.

Our Project:

After the speaker, we then got the chance to start prototyping our final projects. We are making a solar powered coffee cup heater for non-microwavable mugs. We believe this would be useful because a lot of times mugs are non-microwavable, so if you want to reheat your beverage, you would have to transfer it to another container, which is a hassle.  Our first idea for our prototype is displayed below.

After a little thought, we thought it would be more aesthetically pleasing for the product to be in a figure 8 formation. So, we then drew it out and came up with a design and eventually 3D printed a smaller version of what we were thinking.

This is a perfect example of the importance of prototyping. We came up with an initial idea, didn’t like it and changed it on the spot. We then had to think of the actual makings of the product. First, we need a solar panel that would be small enough to fit on our product, but not too small that it wouldn’t attract enough light to be powerful. We are currently in the process of contacting the Fab Lab to see if they can help us out with that. In addition, we need a heating device to put the mug on. Prof. Vishal suggested going to some places around campus and taking apart old devices and products to find what we are looking for.

After some thought and talking to our professor, we came to the conclusion that a single solar panel is not going to create enough energy and heat to heat up a coffee mug. Therefore, we decided it would be beneficial and essential to add a battery pack to the product in order to create more heat.

Overall, we are obviously still in the beginning phases of this process, but I am confident we can create a great final product! Thanks for reading and can’t wait to see all of your projects!

Final Week in the Fab Lab-Putting It All Together

Unfortunately, this was our last week in the Fab Lab. This week we put together our embroidery along with our laser cut boxes. When arriving, we were given our cut out box sides. When putting them together, I had to use great force for them to fit together. I was worried I would break the wood, but it was very durable. The etching on my sides turned out very well and extremely detailed! It still amazes me how precise that laser can get.

After putting the box together, we then were given a battery and an LED light. We were instructed to put the tongs of the LED light on the battery and it lit up! We then were instructed on how to construct our LED light circuit on our embroidery. Because I was so far from the board where Duncan was explaining the process, I was very confused at first. However, after asking a couple questions and learning from my peers, I created a circuit. I made sure to have positive going to positive and negative to negative. We learned that if their paths were to cross, we would short circuit the system.

The next part of the process was by far the most difficult for me. We had to thread the LED lights and battery pack into our embroidery. This had to be done with precision and a lot of thought. After I thread the first LED light in and attached it to the battery pack, I realized I had made the #1 mistake of attaching it to the wrong side. I had attached a positive side of the LED light to the negative side of the battery pack. I then had to undue the thread and start from scratch.

After a lot of rethreading and using the wrench to get my needle through, I had finally finished! Here is a picture of one of the sides of my final box!

Overall, working in the Fab Lab gave me great insight on what is available for my group’s final project and also allowed me to get out of my comfort zone of my regular curriculum.

Fab Lab Part 2: Laser Cutting!

This week in the Fab Lab, we explored laser cutting. We learned the software “Inkscape.” This software was a little difficult to use at first, but once Clinton taught us the shortcut, it was pretty intuitive. Although I got a hold on the software, making the boxes and creating the correct dimensions, angles and colors is more complicated than you think. In order to create a good design, everything must be extremely accurate- there is little room for error.  When choosing pictures to put on my wooden box, I decided to stay with the film and Los Angeles theme. Here is a picture of the sides of my project.

After making sure the silhouettes fit in the frames, we then made the edges red, indicating where the laser should cut. Because the silhouettes are etched black, the laser will not cut through the wood, but rather etch a drawing of it on the wood. Below is a picture of one of my classmate’s projects. You can see that the pictures are lightly outlined while the actual shape of the sides are being completely cut out.

Watching the laser cutting was super interesting. The precision of the laser was impressive. A lot of my classmates selected very intricate designs to put on their boxes and the laser cutter cut them very precisely.

I am excited to put together the box next week and hopefully add some lights to it!

Photo Finish

This week was definitely my favorite week of class. We met in the Fab Lab and got to see all it has to offer (which is a lot)! Before we started working on any hands on projects, we took a quick tour of the building. From the outside, it doesn’t look like there is much to it, but much to my surprise, it had a pretty large interior. There were multiple nooks and crannies filled with an extensive amount of supplies and projects. Below is a fun game that was made in the lab! The colors light up and you press them as fast as you can! Here is a picture of it.

After the tour, we split up into two groups: laser cutting and embroidering. I started off with embroidering. We got to choose whatever image we wanted to embroider. I am moving out to Los Angeles after graduation to work in the entertainment industry, so I chose a camera! After choosing the image, there were multiple steps in making sure it was the right dimensions, colors and shape before you were able to embroider it. We learned how to properly thread the machine and how to put the canvas correctly on the slide (this part is harder than you might think!) Here is my camera during the process.

Although my camera turned out pretty well, there were multiple mishaps along the way. My machine jammed about five times, so I had to ask the Fab Lab employees for help. After the fifth time, I wanted to give up and throw in the towel, but the employee assured me it would turn out fine! And it did! Overall, this process was way more complicated and strategic than I ever realized- but worth the wait and jams! I am super excited to learn laser cutting next week!

Hacking The System

This week we had not one, but two speakers! Both of them were very different but equally interesting. Alan, who was from UPS, spoke to us about how UPS is leveraging 3D printing. Our second speaker was Dot. She is currently getting her masters in education here at the university. Dot came in and told us about biohacking.

Alan talked to us about a 3D printer in their Louisville center than can print a product and have it out to anywhere in the United States the next day! Having this competitive advantage puts them far and above their competitors.  It is common to have to wait 3-5 days for your package, but with UPS’s new 3D printing service, they are hoping eventually they will be able to get the customer’s their packages by that day or the next!

Dot was extremely interesting to me. She talked to us about 3D printing organs and bones (biohacking). When first coming into college, I thought I wanted to major in biology. So, my love for biology along with business was combined nicely during this discussion! 3D printing is obviously cool, but when it could save someone’s life, that brings it to a whole different level. Dot expressed how she believes that 3D printing of organs could save hundreds of thousands of lives because there are just not enough organ donors to fulfill those needs. Dot also talked a lot about the Foldscope. This is a paper magnifying glass that costs under a dollar to make and can be 3D printing to be distributed throughout under privileged schools across the world. Foldscopes could allow students who normally wouldn’t have a chance to work with microscopes!

Overall, this class opened my eyes to different ways 3D printing could not only make people’s lives better, but to change and save their lives as well.

The Importance of the Design Process

This week we had the pleasure of having students from Design for America come into our classroom and teach us the art of design. Being a Business major, designing and creativity is rarely in our curriculum, so this was an interesting and beneficial change. This group is extremely important to have. DFA allows young minds to think of issues going on and how they can fix them. What I found most important the presentation is how collaborative the whole process was. Everything they spoke about involved working with their fellow members to fix a problem; there was little to no solo work.

This organization and the people in it seemed very professional, philanthropic and genuinely interested in helping out. I think a lot of times society points out specific problems but it is rare that they do any further thinking about ways to fix that problem. Design for America is different in the fact that they take these issues one step further and try to fix the initial problem.

During their presentation, we had to choose a person who was blind that is having a specific problem in their life. We chose a young woman, Jess, that goes to UT Austin and is having trouble fitting in in social situations. We know that football games are popular at UT, so we narrowed our focus on that. We created a prototype of a walking stick with a sensor, attached to wireless headphones. These wireless headphones would let the person know where exactly where you are and if there is anything ahead of them that they should worry about (cars, potholes, etc.)

Having this sensor that lets her know where she is and if there is anything she should watch out for will allow Jess to feel more comfortable at football games. I believe students with disabilities can feel isolated when they aren’t able to do the same things students without disabilities can do. Therefore, I believe it is worth it to create these innovative products in order to make them feel more comfortable, even if it only changes one to two lives.

Overall, creating and designing is a much more complicated and collaborative process than I realized.  I think it is beneficial for everyone to understand the design process.

Fusion 360- Fusing Your Creativity

Unfortunately, I was unable to come to class this week because I was sick. However, I was able to learn Fusion 360 on my own through the YouTube videos and found it quite fascinating. It has a lot more capabilities and features than Tinkercad, so I was excited to explore this software on my own time and speed. The YouTube videos were quite helpful and the instructor lead me through, step by step. First, he talked through the basic functions of Fusion and some short cuts. I first made a very simple rectangle and extruded it, allowing it to become three dimensional.

Then, I made a hole in the center, making it semi hollow.

The next part was definitely the most challenging. I had to put two circles on the surface of the rectangle and then put a smaller circle inside that circle and push it through the rectangle. This is the part of the video I had to rewind and pause a couple times, but after doing it fully through, I got a hold of it.

After adding all the final touches, (the fillet and making sure the dimensions are all correct and lined up) I finished the box! Now all I had left was the holes for the screws and the lid. Adding the holes to the screws was simple because I only had to do it once and then I was shown the “mirror” feature on Fusion. This feature allowed me to create the screw holder on one side and then mirror it to the other side using a plane. This would be very useful when creating objects with similar features on all sides. Below is the final product (without the lid).

Then, came the lid. This was simple because all you had to do was select the top face and extrude it farther up. Below is right before I extruded it upwards.

Overall, I liked learning about Fusion 360 on my own time and being able to pause and redo things I didn’t understand. After playing around with Fusion on my own, I created this simple watch.

In order to make this, I had to create a rectangle and put small holes at the end and one “clasp” at the end, extruding the hole.  Then, I added a simple circular face with a smaller circular face in order to create the actual clock part of the watch. Of course this is a rough design of a watch, however with some more training and time I believe I could create a more complicated version.

Overall, I believe Fusion 360 is an extremely useful and easy to use and I am excited to learn more about it in the future!!

The Importance of Curiosity and Creativity

This week Jeff Ginger came into our class to speak to us about the FabLab and the importance of 3D printing. He spoke a lot about the importance of exposing children, especially in their early teens, to creativity and curiosity. Jeff made this realization when he was working at a library and discovered some teens playing Minecraft. Minecraft is a video game that allows players to create and build their own world using blocks. Jeff made the connection between Minecraft and 3D printing and decided to introduce 3D printing to their young minds. As Jeff says, I believe this can be extremely beneficial for the community, allowing young teens to imagine and create things from their developing minds. In addition, Jeff speaks about the Fablab and how it is one of the only ones that is still open to the public. This not only allows the public to have a creative outlet, but also allows people from different areas and backgrounds to share their ideas and hopefully come out with something amazing. Overall, Jeff was an excellent speaker and got me even more interested in the creative and art aspect of 3D printing.

Also, in class, my group had the opportunity to create our logo. When thinking of what we wanted our team name to be, we wanted it to be something cohesive and collaborative. We then thought of the phrase, “The whole is greater than the sum of its parts.” This made us think of a puzzle piece. Therefore, we created a puzzle piece and named our team, Team Synergy.

In order to make this 3D print, we had to first learn Tinkercad. Tinkercad is the system that allows you to create your print and scale it. The two students, Billy and Dash were extremely helpful and energetic in teaching us how to use it. Tinkercad was pretty easy to play around with and my group and I quickly figured out the best way to make our puzzle piece. We printed it and it turned out well the first time! We were super interested in watching how layer by layer the printer created the design we created just minutes before. It was pretty incredible.

When searching online for other resources that could help me learn more about 3D printing, I stumbled upon this DIY Weather LED Light Display. This 3D printed LED lamp shows the weather through colors. For example, if it’s snowing, white lights will come down the lamp. If its raining, blue lights will come down the lamp. If its warm, red, if its cold, blue, etc. Prints like these make me realize how much you can do and how limitless 3D printing really is. Overall, this week was great and I am happy we finally got to use the printers!

http://www.3ders.org/articles/20180204-this-diy-3d-printed-lamp-shows-real-time-weather-with-amazing-led-light-display.html

Week 2: The Power of Creativity

Hello!

My name is Maddi Wethall and before coming to this class I didn’t have much interest in 3D printing or the way it can impact the business world. However, after the two speakers, the multiple videos and the conversations I have had with other students, I am extremely excited to get started and learn as much as I can about 3D printing.

The main takeaway from the readings and discussions in class is the power of experimenting and being creative. The only reason Arielle Rausin has become so successful in her customized wheel chair racing gloves is because she took a chance and allowed herself to think out of the box. I think society today is very logical and straightforward, therefore we are afraid to think out of the box. However, with 3D printing, that is your only choice. Neil Gershenfeld talks in his article, “How to Make Almost Anything,” about the importance of creativity and curiosity.

I also found it interesting when John Hornick was talking about the “Zero Marginal Cost,” meaning that making one print is just as expensive as making one million. This is a huge benefit of 3D printing.  This idea of zero marginal cost allows the consumers to become the makers and designers of their own products. Hopefully, 3D printing can become more popular and allow us to save resources and ultimately helping our environment.

While looking at Thingiverse and Shapeways, I have found four interesting objects that I think could really benefit my every day life.

#1 Tea Helper

https://www.thingiverse.com/thing:2765102

The tea helper lifts up the string from the tea bag, not allowing the tea to leak through the string. This is a simple, yet effective tool that could benefit your every day life. You can customize the grasp of the tea helper to fit your exact coffee mug.


#2 Guitar Mount Pick Holder

https://www.shapeways.com/product/AASRY2NEE/guitar-mount-pick-holder?optionId=5380507&li=featured

This pick holder jumped out to me right when I saw it. When I play the guitar, often times I put the pick in the strings of the guitar when I am done with it. This causes it to easily fall out or get stuck in the guitar’s hole. With this pick holder, it allows you to place your pick on your guitar without the chance of it falling out.


#3 EarPods Attachements

https://www.shapeways.com/product/NT9URUCJ4/earpod-attachments-for-active-people?optionId=43788262&li=featured

This one definitely stood out to me the most because this is what I suggested to my group about making for our project (I guess everything HAS been thought of!). Apple headphones are not customizable and are expected to fit in everyone’s ears, which is obviously not possible. So, these earpod attachments allow you to have customized headphones without the insanely expensive price.


#4 DIY Hue Living Color Light

https://www.thingiverse.com/thing:2773413

This device allows you to add “mood lighting” to any room you’re in! Most college apartments have strong, florescent lights, so it would be nice to have a customized light that allows you to have dimmer, more comfortable lighting.

Thanks for reading and looking forward to reading yours as well!