All posts by Jake Price

Final Reflection

I had a blast learning Digital Making and 3D printing this semester. This course was far more hands-on than any of my previous learning experiences. My experiences with emerging technology to date had been almost exclusively on a screen. Unquestionably, I now have a different understanding of what 3D printing can do for the world around us than I had prior to the course. It was really cool to take Digital Making Seminar at a time when 3D printing is beginning to take off in mainstream society. As the semester unfolded, I became more and more comfortable with making.

Discoveries

3D printing

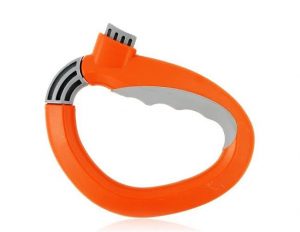
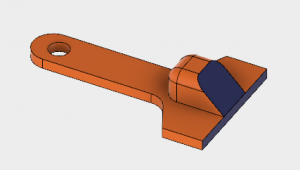
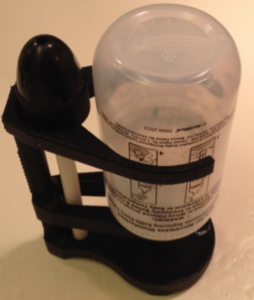
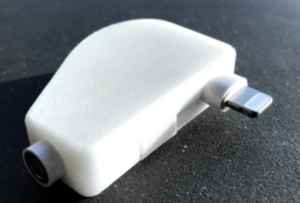
This semester, I had the opportunity to 3D print a wide range of objects ranging from an ice scraper to our final project steering wheel attachment. We learned about 3D printing in the news about everything from the military use of 3D printed smart, soft-robots to a 3D printed bus that communicates with its passengers. I think the most intriguing aspect of 3D printing is its versatility. 3D printing can improve every part of our lives. It can help us get places faster, it can help us defend our country, and it can help us be safer. I have been blown away by everything 3D printing can do for us.

Towards the end of the semester, we learned the seamless act of 3D scanning which allows us to easily recreate objects in the real world. This technology led me to wonder about an application that would take a 3D scan of an individual and create a working digital image of themselves. Then, that person could use their 3D scanned image to create a better online shopping experience by visualizing themselves in the clothing they are about to buy. The process of scanning is so simple that even the least tech-savvy person can perform it with ease.

Overall, 3D printing presents us with endless opportunities to make our world more efficient, customized, and useful. I’m grateful to have had the opportunities to explore its possibilities this semester. But as much as I can learn about 3D printing on my own, there are no people better than the guest speakers who shared their endless knowledge with the course.

Guest Speakers

The most engaging guest speaker that I learned from this semester was undoubtedly Jeff Ginger at the Fab Lab. Jeff’s passion and enthusiasm for digital making will propel the future of the industry and undoubtedly create several entrepreneurial ventures for others. Jeff represents the sharing culture that is living within the digital making space. Most notably, Jeff talked about the idea that for 3D printing to work, we need people to discover the endless possibilities that the subject can offer. In order to get those people to discover those possibilities, the space of 3D printing must be as free and open as our libraries.

Beyond Jeff’s teachings, we had the opportunity to learn from many other wonderful speakers. The entrepreneur in me loved learning from Arielle, who created 3D printed custom gloves for wheelchair racers. Her gloves help racers save hundreds of dollars and achieve a more comfortable ride.  Anytime I see a product that saves people money and improves their experience, I see a winner. It is yet another example of how digital making is going to change the world.

End products and speakers aside, we were given a plethora of tools to enlarge our interest and knowledge in the making space.

Tools

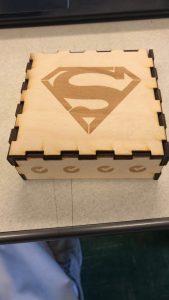
Beyond the Champaign Fab Lab, we had the opportunity to learn multiple different software programs and websites that would ultimately make 3D printing less intimidating and more actionable for me. Some of the resources I found most engaging this semester included, Fusion 360, MeshMixer, Inkscape, and Thingiverse.com. In learning Fusion, we found the quintessential software for digital making. We used Fusion to make our initial Ice Scrapers and smartphone holders which were among the first of our 3D printed creations. Later, we would go on to use MeshMixer in our final project, Inkscape for a laser-engraved box project, and Thingiverse for inspiration for new ideas.

Working with these technologies made 3D making a fun, achievable endeavor. These software applications combined with our guest speakers and hands-on learning were an amazing introduction to digital making.

Key Takeaways

Coming into the semester, I was a bit nervous about digital making seminar as I felt like I didn’t possess the skills required to create some of the things I saw in the Maker Lab on the first day. I’m certainly pleased to say that I feel confident about my understanding of digital making today.

Digital Making Seminar blew away my expectations – I could not have imagined reaching my current level of understanding by the end of my group’s final project. But if there is one thing I will take away from this course it will be my eyes opening up to the infinite possibilities that digital making offers to the world.

A Look at 3D Printing In the News

I was not in class this week due to a stomach bug from which I am now recovered. Because I cannot personally attest to the design audit and assembly experience, I am going to give a brief summary of my group’s progress before sharing a couple of articles of interest.

My team, the Animakers, made some great progress on our steering wheel attachment device. Ajie and Jason were able to complete the printing of multiple versions of our initial design and successfully formed the base of the product. Initial photos of the designs look great – I’m excited to finish up the rest of the project in the coming days and thoroughly test out the device.

In The News

http://fortune.com/2018/04/22/3d-printed-homes/

This article on fortune.com presents yet another possibly groundbreaking opportunity for 3D printing in a new industry: construction. A home is a place that everyone wants to make their own – customization is the name of the game. 3D printing might make for a natural fit in this industry because it would be much cheaper and faster than home construction today. This company may be on to something.

The next article is quite different, which speaks to the versatility of 3D printing. The United States Army is looking to print soft robots that can easily make their way through the tightest cracks as stealthily as possible. The idea of octopi has long intrigued the robotics industry for the potential of creating desired, unconventional movements. You can learn more in the article below.

The Army is building 3D-printed soft robots


Week 11 In Review

Week 11 brought our class a full period of time to work on our group projects. Each group worked diligently on their projects for two hours before coming together and updating the class on the progress made. Each project seems to be coming along nicely for all of our groups, with a wide-ranging spectrum of objectives. Because we had no guest speaker or other new learnings this week, the week’s summary will focus on each group project’s prototype development.

Steering Wheel Attachment

The steering wheel attachment team (my group) began printing the key components of the base clamp for the device designed to ease the steering of physically impaired drivers. The group printed two major components successfully and added attachments to be finished printing after the class ended. Once all parts are printed successfully, the group plans to assemble the pieces and create the first version of the steering wheel attachments. Then, they’ll make modifications as necessary.

People Counter

The people counter team made excellent progress towards a working prototype this week when they successfully uploaded code to an Arduino. The group was able to get lights to blink at the push of a button, one step closer to achieving a light upon the passing by of a sensor. The group is now focusing on tackling that challenge in addition to the storing of values so that entrants may be tracked over time by store owners.

Hydroponic Vertical Garden

The first of our two vertical garden teams worked with MeshMixer to design printable housing parts to hold the indoor plants. The group successfully printed a drip nozzle and bottle cage and is looking forward to completing their prototyping pieces next week. This team realized it should shift their prototype to house four plants instead of eight upon learning how long their prints would take.

Customizable Earphone Grips

Team synergy recently made a pivot in their project direction when they learned that their solar-powered hot plate would not create enough energy to keep a beverage warm. Pivoting is a part of the design process, and this group made an excellent decision in abandoning its old idea once they knew it would not be sustainable.  The team has decided now to create customizable earphone grips that clip onto any pair of headphones and secure onto the ears of the user.

Coffee Pour Over Assistant

The coffee pour team is creating a system to easily pour coffee without human assistance. This week they decided to divide their system into two halves, top and bottom. They printed slides that the coffee can flow through as a placeholder until they can find a material that can better withstand hot water.

Vertical Garden

The second vertical garden team is building a garden to grow small plants and printed a base that will catch water. There are multiple pots in this garden with columns to hold up each pot and a box for Arduino sensors. They completed some of the wirings for their box as well as the printed base for the entire product during the week and are moving forward in their prototyping phase nicely.

Weekly Reading

Our weekly reading ties in quite closely with our work in class. The article discusses the many steps of prototyping: Finding test subjects, preparing the test, the test environment, testing, and updating the prototype.

As a class, we are in the ‘preparing the test’ phase during which we are printing the necessary materials and determining the testing subjects needed in order to successfully begin the test. Last week, each group finalized a project testing plan outlining who their subjects are, and how they would administer the test. In highlighting the ‘preparing the test’ phase, Marty Cagan writes about making assumptions and asking the right questions. These two ideas go hand-in-hand because asking the right questions allows project testers to eliminate their biased assumptions. These assumptions can become the demise of a project, which may not be solving the right problem in the first place.

Cagan also suggests asking initial testers what they might be willing to pay for a product if upgraded beyond the initial prototype. This allows creators to get a gauge of the value of what their product. Later on, the article stresses the importance of updating the prototype once feedback is obtained. Everything we have learned up to this point indicates that the best method to successful prototyping is to do so quickly, without worrying about perfecting the design. The faster we can prototype, the faster we can obtain feedback, and the faster we can improve upon our designs.


3D Scanning and Project Developments

In class this week, we learned about the capabilities of 3D scanning. I didn’t personally have the chance to make my own bust but saw others as they used an iPad to scan themselves. I would equate the process to a much more thorough panoramic photograph. The 3D element, of course, makes us capture the entire depth of the object being scanned. It was cool to see how easy it was for 3D scanners to capture everything in front of it. In class, we watched a video on Jay Leno who demonstrated just how easy 3D scanning can be. We learned that there’s even a low-grade 3D scanner for your smartphone.

The work with scanners reminded me of an idea that a friend and I had worked on. We thought it would be cool if we could capture our own dimensions and upload a graphic image of ourselves into the cloud. Then, as a Google plug-in or other web-based app, we would use our dimensions to view ourselves in clothing when shopping online. This could help shoppers find clothing that fits them more assuredly than the current method of guessing what will fit and returning the clothing if it doesn’t. 3D scanning could make this idea a reality, though there would be much more to launching a sound business beyond the technological capabilities.

That sounds like a project for another time so I’ll turn the focus to the project that our group is working on – the steering wheel attachment. It was our group’s first opportunity to work as a whole for some time, so we took the time to iterate on some designs that make the most sense for our target users. After downloading MeshMixer, we generated a design for a screw that would be a printed locking mechanism for the printed modular steering wheel clamp. Finally, we developed our project testing plan for our product. In planning, we determined who were specifically our target users in addition to what they would be doing in testing our attachment. Looking forward to keeping the ball rolling!


A Shapeways Experience

This week’s class gave us an opportunity to further explore the possibilities of 3D printing in addition to spending time iterating our project idea.

Our guest speaker from Shapeways showed us the amazing capabilities of the company through a swift “office” tour. I put the word office in quotes because the Shapeways place of business acts much more like a lab, or an art studio. The capabilities of their sleek machinery were astounding, as their printers use everything from ceramics to strong metals. Coming from a business perspective, I found it interesting that it is supremely difficult to capture economies of scale in the 3D printing industry. Economies of scale is a competitive advantage for any business: it means that with more items produced, the cost of those items decreases. But it is the unique nature of each product of a 3D printer that makes the industry so appealing. The ability to customize something exactly to our liking is what 3D printing is all about. On the site, I found a cool looking moon lamp that I thought I’d share.

https://www.shapeways.com/product/TDDWUNVVF/moon-lamp?optionId=41593801&li=featured

After learning about Shapeways, we had an opportunity to meet with our project teams to move our idea further along. Our group decided to modify our steering wheel attachment to many different grips that attach to a common, minimalist base. One classmate offered some excellent feedback for us in suggesting that it is imperative that we ensure our design is extremely strong, because drivers will be counting on it to hold firm while turning their vehicle. If the product were to break, it could be detrimental to the safety of the driver. Please see Ajie’s week 10 post for photos of our updated design. We are excited to continue work on our project!

Feedback is tremendously helpful throughout the entire design process. Among this week’s resources was an engaging video on Design as an Iterative Process, from David Kelley at IDEO. He spoke about the necessity of rapid prototyping when we produce our first designs. It makes sense that the faster we produce designs, the faster we allow feedback. After just one presentation of our group’s design, we received some helpful feedback that rings that idea true.


Lightening Up

What? 

In week 9, we had the opportunity to put the finishing touches on our boxes. In order to liven up our designs, we strategically sewed a conducive thread into the fabric which connected to our light’s battery. Like other new skills, picking up on the sewing did not come naturally for me. But also like other new skills, I saw myself go from complete novice to fairly competent as the class continued on. As I mentioned in my previous post, I created a baseball field design for my box top, leaving a space for a light on each one of the bases. After working for the entire class, I was ecstatic to see each base lighting up. I credit the lighting success to Clinton and Duncan who walked us through the mapping and building of a circuit, teaching us common errors we would surely make along the way. Unfortunately, I didn’t get a picture of my finished design this time around – and it is left at school until I return from break.

So What?

Adding circuits to our otherwise lifeless designs gives us the power to bring the designs to life. This is certainly a useful skill when it comes to making. The ability to add light allows us to call attention to certain features of a design – such as the bases on my baseball field. Makers can use this skill to their advantage by highlighting critical aspects of their designs and reach their users more effectively. More broadly speaking, our classroom activity shows us that we can animate previously inanimate objects. Using fairly basic technology on 3D printed creations gives us the ability to create something truly unique. (Little did we know when we created our team name, The Animakers.)

Now What?

The first several weeks of this course have been intensive on building new skills – it seems that we’ve learned at least one new skill or software every week since the class has begun. After spring break, we will have the opportunity to take in all that we have learned and use our new skills to create our project. Our team has chosen to make a customizable steering wheel attachment for those who have difficulties turning or steering their vehicle. We are excited to use our newfound skills in 3D printing to make the world more comfortable for our users and safer for the other drivers on the road!

The Fab Lab Experience: Part 2

What?

This week, we engaged in part 2 of our box making project. I experienced learning yet another new tool and software, this time picking it up a bit easier than the last. After creating the physical structure for the box last week, I had the opportunity to design my stitched cloth that will serve as my box’s top. After a few design iterations, I came up with a design that speaks to my love for sports. My ‘logo’ is a baseball field with my initials and a Nike ‘swoosh’ at the center. I must admit, I did experience some difficulty in actually getting the sewing machine to stitch my design at first – but I would attribute this to a lack of familiarity with both sewing and the machine. I left a hole where each base would normally lie on the field and plan on filling those holes with lights. I’m super excited to see how it turns out when we go back into the Fab Lab this week.

A photo of my box top cloth

Additionally, my group decided on a final project of a grocery bag holder. I think this project will force us to think outside the box in creating value from an ordinary, easily replicated object. Each of us immediately saw the value in having some sort of device to make carrying several grocery bags less strenuous. Our task will be to find a way to create the most efficient object possible. It must be optimized for comfort in carrying, maximize the capacity of bags it can hold, and be both not easily lost, nor too big to carry around. I think the 3 of us will agree on a design that meets these criteria and eventually creatively market to the target customer group.

So What?

After two consecutive weeks of learning new machines and software, we have grown comfortable with learning new technology and immediately implementing our knowledge. One of the best aspects of 3D printing has got to be the trial and error element. Making gives us the opportunity to design, create, test and evaluate extremely quickly. If at first you don’t succeed, try again. 3D printing embodies this mantra as the risk in creation is so minute that it makes all too much sense for rapid prototyping.

Now What?

Taking in what we know about 3D printing, new technologies and machines, and trial and error, I am more confident and comfortable than ever in making. After we learn the final components to completing our boxes, we will have all the tools and skills necessary to create our final project. Our skills have been learned – now, they are ready to be applied.


New Tools, Skills at the Fab Lab

Class Summary

In class this week, we had our first opportunity as a group to explore the community’s Fab Lab making space. I was pretty surprised to find some extraordinary machines and creations in what looked like the oldest building on campus. Our day started off with a tour guided by Fab Lab director (and former guest speaker) Jeff Ginger. We saw several cool creations including a backpack that acted as a turn signal with a face for students who ride their bikes to school. It was empowering to hear that those students were far younger than us and that we would soon be able to create something even more complex. The Fab Lab was much larger and more complex than what we are used to in the MakerLab in the BIF. Yes, the Fab Lab has its own 3D printers, but it also has a plethora of other technology including a wood laser cutter, raspberry pi, and threading machines.

After the tour, the group was split into two groups. Each group was given a different task. Mine was to create a box with no top to it. First, we created the dimensions of the box before importing it into Inkscape, a software that works similarly to Adobe Illustrator and other design tools. We created our box, manipulating various-sized rectangles so that there were interlocking pieces. Then, we were given the chance to import designs onto our box. I chose the Superman logo as well as the logo of my startup, Cover’d. I happily volunteered to be the guinea pig and print my box first. I attached a photo below – I was pretty pleased with the way it came out!

It was really cool to see the laser cutter in action as my box began to take shape.  One mistake that I made was in not mirroring the small logos on the top part of my box. Because the top and bottom sides fit in such a way onto the box, it caused my logos to appear upside down on the unseen side of the box. It was most definitely a lesson learned for next time.

I’m excited to get back to the Fab Lab this week for part two of our learning. It seems that with each week in this course, we unlock new and more powerful learning tools that further widen the possibilities of 3D printing technology.

Business and Biology in 3D Printing

Class Summary

This week’s class brought us even more examples of 3D printing in the real world. We heard from two individuals heavily involved in 3D printing, in completely different worlds. One was seeking how 3D printing could be used in business, the other in human biology.

First, we heard from Alan Amling at UPS. I thought it was really cool to see 3D printing being used to drive big businesses in the real world, today. Alan spoke of many of the challenges he faces in trying to implement this technology into the business. He noted that his greatest challenge is convincing firms that they won’t be sacrificing any of their intellectual property by making the switch to 3D printing, which confirms the challenges we have previously discussed in class.

Next, we had the opportunity to learn from Dot Silverman’s journey through biohacking and 3D printing. Dot opened my eyes to the possibilities that 3D printing can have on humanity beyond business. Being a business major, I often only think of things from a certain perspective. Dot showed us that 3D printing can change how we live – with the potential to custom print pieces of the human anatomy. Transplants will become much safer as 3D printing will allow some of these transplants to take place without the need of another human being. There is even a 3D printed heart that actually pumps blood. It seems like the possibilities that this technology can bring the world of medicine are endless.

Towards the end of class, our team came up with several ideas for what we want to make for our project. Overall, there was a definite theme of practicality to each of our ideas. We thought of a headphone untangler and a steering wheel attachment before settling on a grocery bag holder that looks something like this:

This holder will allow someone to simply slide the bags onto the little slot and hold from the top, grey grip. This would allow one to easily carry several bags at once.

In the News

Miami University Researchers Work Together to 3D Print Better Bones

This article dives into more of the discussion on 3D printing and bones that Dot detailed in her talk. The article describes how broken bones are being mended with the use of 3D printing through ‘scaffolds’ and ‘bridges’ that better mend the broken bone.

This video outlines how 3D printing can create human tissue in an easy-to-follow way. I thought it broke down the process of printer to person quite well and the speakers were quite engaging.

Understanding your user

Class Summary

This week’s class brought an important element to our understanding of 3D printing: design thinking. The people of Design for America helped me to understand the importance of knowing your user – in 3D printing and in problem-solving in general. This is a fundamental concept of business. Any strong business will be a solution to a problem. It should be no secret that the best way to solve any problem is to take on the perspective of those experiencing it. The solution must be designed for these people in order to be most effective. I experienced this lesson in full when we began the assumptions phase of our model solution for the visually impaired.

Building a Solution

When building a product for Jess to better navigate through large crowds (and lead a more typical independent college life), there were many details left unanswered. Is Jess completely blind? Are her other senses heightened? Is Jess used to her blindness? Without being able to interview Jess and discovering the answers to these questions,  we cannot build an adequate solution to her problem. If you make assumptions about the general population with evidence to support your claims, it can be easy to design a product that does not solve the user’s problem in the most effective way.

Ultimately, we made a model of an attachment device to a walking stick. The attachment would allow Jess to quickly send her location to friends, or send out a distress signal. I wish I had a photo of our model but I never took one.

In Class Readings

In our reading, Tim Brown discusses design thinking from a business perspective. We need to design effective products that address our customers needs better than any competition. The best way to grasp this, Brown writes, is through examining the pain points at a close level and prototyping solutions quickly to address them.

External Knowledge

https://www.interaction-design.org/literature/article/5-stages-in-the-design-thinking-process

I thought this was an interesting breakdown article of design thinking in which the author breaks down design thinking into 5 steps: Empathize, Define, Ideate, Prototype, Test. This is essentially a summary of everything I’ve written above. Design thinking is basically problem-solving. In order to solve a problem, we must start with understanding it from the perspective of the entity that the problem impacts. Then, after we observe, we define the problem. Then, we ideate solutions, build a model of what we think is the best initial solution, and respond to how our customer engages with it.

I thought this was an excellent video on design thinking by Airbnb. Airbnb took quite some time to take off from the time it launched. Much of its newfound success should be attributed to a deeper level of design thinking. I think you’ll find the video to be intriguing.

Patience and Exploration Are the Keys to Mastering Fusion

Class Summary

In class this week, we began working with Fusion 360 software to design our own 3D models. At first, I was skeptical of the prospect of drawing our own models given the multitude of resources at our disposal on websites like Thingiverse. But as the class moved along, I began to see why having these design skills will be critical to our advancement in 3D printing. The ability to truly customize something on Fusion stuck out to me as a major advantage of using the software. On Fusion, there are endless possibilities of not only what we can make, but how we can make it. The software has a plethora of features that I have grown more and more comfortable with as I use them more frequently.

Speaker Notes

I thought Dan did an excellent job keeping us moving and engaged throughout his lecture. Though I must admit, I struggled to keep up with the pace a bit. That being said, I think that my struggling to keep up with the speed of teaching was actually beneficial as it allowed me to do some tinkering and screw a few things up before getting it right. Through this process, I feel that I learned more from Fusion than I would have if I was blindly following directions at full speed. I think I was most interested in the parallel and perpendicular lines tool that Dan showed us because they are quite forgiving of unequal designs and allow us to create and draw and then go back and edit later. I didn’t quite finish the iPhone stand in class, I got a little bit behind and then class was finishing up and I wasn’t able to catch up in time.

My Designs

Below, I’ve posted a photo and link to my ice scraper design. As the first thing I have truly designed using Fusion, I am quite proud of my ice scraper.

http://a360.co/2H4MMN4

When I went to make my own design, I definitely struggled with coming up with something to make. What could I make with relatively low skill in Fusion that would actually be something I could use practically. I came up with a sunglasses clip for my car that I saw on Thingiverse last week. Using the existing model as a reference was extremely helpful in making my own design. A relatively simple structure still forced me to use many if not all of the tools that Dan showed us in class. Below is a photo and link to my design:

http://a360.co/2Bp95wv

Learning More

http://www.learningfusion360.com/lesson-0-before-getting-started/

I found this website to be a helpful refresher of what we learned in class, as well as providing some useful information about when things go wrong. It was cool to see how the author was messing up a lot of the same things that I messed up, and learn how to correct those mistakes with ease.

I’m excited to continue the making process and begin printing!

Jeff Ginger and Fablab’s Mission

It was a pleasure to learn from Jeff Ginger in class this past week. His enthusiasm for 3D printing, and what it can teach us, are unmatched in any previous conversation I have had on the subject. In my eyes, Jeff presented 3D printing in a light akin to some of the topics discussed in “The Maker Mindset” article. The purpose of the Fablab, as Jeff noted, is to give access to 3D printing (and its capabilities) to the public for the greater good. Jeff linked this concept to that of a library – a free and open space from which to learn from an endless list of subjects. Most notably, Jeff talked about how there really isn’t a way for 3D printing (as an activity) to make money off of itself. That is to say, there is no sense in buying a 3D printer and then charging users of that printer large sums just to be able to use it. The idea is that for 3D printing to work, we need people to discover the endless possibilities that the subject can offer. In order to get those people to discover those possibilities, the space of 3D printing must be as free and open as our libraries. The way it gets paid forward is through the learning and advances made in the labs. Ideally, someone invents a product in the lab and then use the money to build another Fablab for the next person to discover the endless possibilities of 3D printing.

In class, we worked a little bit with Tinkercad – I can tell based on the ease of use of the application that this will be a great tool for us to discover our 3D printing creativity. I haven’t had the opportunity to see our team’s logo yet, but am excited to do so on Wednesday in class. Finger’s crossed that it went well!

In the news, I found an interesting article on how 3D printing has disrupted the architecture and design industry (https://newatlas.com/3d-printing-housing-architecture/53083/).

Within the article, I found several amazing pieces of 3D printed art

The article discusses the fourth industrial revolution and the internet of things at length. Most notably, the author believes that 3D printing will change the way we think about buildings as unchangeable objects, in allowing us to permeate the way objects react to external factors such as the weather. These are exciting times in the world of architecture.

Creativity in Education

This week’s class got me very excited to start using and learning about 3D printers. At first, the initial idea of 3D printing struck a chord with the creative side in me – but I definitely questioned its ease of use and practicality in the real world. After just two classroom sessions, readings, and exploring, I am inspired by the possibilities that this technology will bring to my world.

I think the greatest source of my inspiration comes from the article ‘The Maker Mindset’ by Dale Dougherty. Dougherty makes a strong case for 3D printing to take a front seat in education, discussing how the skills gained in a 3D printing lab combine several elements that explore our creativity. He wrote at length about growth versus fixed mindset, its position in today’s education, and outlook towards the future. Having a growth mindset is all about understanding new challenges as opportunities, rather than impermeable obstacles. The idea of 3D printing alone can potentially be overwhelming to people with fixed mindsets. Having a growth mindset allows one to take on the world of possibilities that 3D printing undeniably breeds. We need a world of creators, doers and problem solvers. These people will be foundational to the advancement of our society. Therefore, the case for 3D printing in education is an easy one: to have our students explore the endless possibilities of creating something out of nothing is to give them the tools to solve our world’s most pressing issues. It is not to say that 3D printing will solve global warming, but it is to say that the creative exploration of it may lead to important discoveries.

Below, I have picked out 4 every day items from thingiverse and will discuss each.

https://www.thingiverse.com/thing:2595008

The first thing that caught my eye was this webcam cover for computer security. I feel like it would be a good use of a 3D printer as a tool because it would be relatively simple to make, and represents a large upgrade from those who use a sticky note or other self-created camera cover. The functionality is nice because it allows for a quick cover and uncover without removal. Simple in its functionality, I don’t see anything I would change about this device.

https://www.thingiverse.com/make:439491

The second thing that caught my eye was this movable sinus rinse drying rack. I connected with this creation because I often have a stuffy nose, and use a sinus rinse device that I cannot seem to find a place for (and am often lazy to clean). To improve this device, I might create a handle so that the entire print can be used in the same process as the sinus rinse. This way, it may function beyond the capacity of merely holding the bottle and nozzle.

https://www.shapeways.com/product/2A96R3GDV/buckle-anchor?optionId=42990867&li=curatedproductGroup

The next item I found that resonated was this anchor belt buckle. On Thursday, my only belt’s buckle broke off while I was attempting to reverse the belt from brown to black. It would be so cool to 3D print myself a new, custom belt buckle to replace it. I would improve upon this design by designing my own belt buckle, perhaps with my initials JP.

https://www.shapeways.com/product/4ZVWBNJN3/apple-lightning-to-headphone-cable-protector?optionId=61941632&li=marketplace

This is an example of an improvement on a product that I need more frequently than is available. Commonly referred to as a dongle, this device allows new iPhone users to listen to music with wired headphones, despite the device’s lack of an auxillary input. The device connects to the charging port on one end, and the headphones on another. The shape used by this designer is a little tothick for my liking, so I would create a thinner, smaller version of my own. Still, it makes perfect sense to use a 3D printer for this type of gadget because the item is something that I need often, but is rarely available.