All posts by Ria

Final Reflection and Parting Thoughts

I came into this course equipped with virtually zero skills in digital making, and an open mind. I had a baseline understanding of 3D printing and the MakerLab, but I had no idea how many other resources I’d come across over the course of the semester. I was primarily interested in developing modeling skills because I wanted to understand the more technical side of digital making. Thankfully, I had plenty of opportunities to practice modeling across a variety of platforms like Autodesk’s Fusion360, MeshMixer, and TinkerCAD. The tools were more intuitive than I thought, although there were definitely times when I found myself frustrated during the modeling process.

What I did not expect was to develop skills in a range of areas beyond those involving a computer. From digital embroidery to the principles of design, our classes focused on a variety of topics that really opened my eyes to the breadth of the maker movement. I’d always assumed that 3D printing and digital making catered to engineers, but I loved learning about how people across disciplines have pursued their passions or solved problems with the help of the maker community. I have always identified as an artistic person, so I really enjoyed being able to engage my more creative side and see my own designs or ideas come to life.

I think the greatest takeaway from this course for me, personally, was the importance of having a maker mindset. Upon learning what a “maker mindset” is, I thought I had one—however, this course has proven that I still have a long way to go. I only used a fraction of the resources we had available to us this semester, and I often found myself feeling overwhelmed with the possibilities presented to us for our final project. My personal goal is to take the learnings from this course and become more comfortable dealing with the unknown. I would love to become more of a “tinkerer” and problem solver, and this class has really inspired me to keep working towards developing in that regard.

Here are a few of the skills I’ve developed over this semester:

  • Modeling with Fusion360

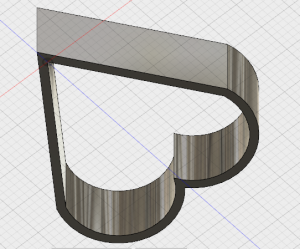
We were lucky to have Dan Banach from Autodesk personally come and provide us with a workshop on Fusion360. I was so nervous about falling behind during the tutorial, but with the help of classmates, I was able to keep up and I realized that I wasn’t so bad at modeling! The very first object I fully modeled out was this Illini-themed ice scraper.

  • Design Workshop with Design for America

This was probably my favorite class of the entire semester. The students from DFA taught us about various design principles and then led us through an activity where we were able to brainstorm ways to solve a certain problem for a user. My group chose to create a solution for a blind user who wanted to participate more in student life at a large university. We came up with the idea of a Wi-Fi and GPS-enabled walking stick to ensure her security and sense of comfort at crowded football games. We learned about the importance of prototype testing and the principle of design as an iterative process. All in all, it was incredibly eye opening and really helped me try to embrace more of a maker mindset.

  • Digital Embroidery, Laser Cutting, Circuits, and Sewing at the FabLab

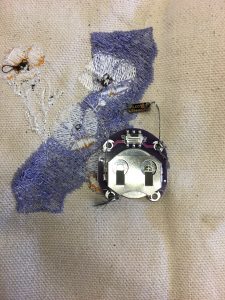
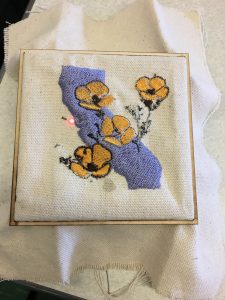
The workshops at the FabLab closely follow the DFA workshop when it comes to my favorite part of the course. I thoroughly enjoyed the digital embroidery tutorial, led by Duncan.


My digital embroidery creation

I had no idea that such machines even existed, and I was even more impressed by the speed at which they operate. I also enjoyed learning how to use to laser cutting machine with the help of Clinton.

my laser cutting designs for the wooden box

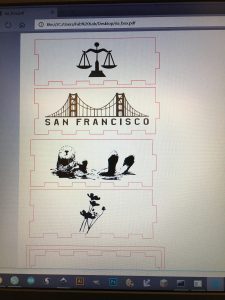
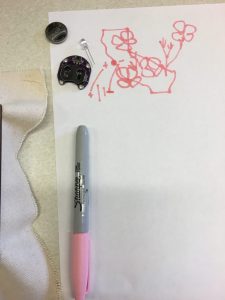
If there’s anything I didn’t love as much, it was having to sew the LED lights onto our final box covers. I appreciated the quick review of how circuits work, but having to sew those tiny lights onto canvas by hand was no easy feat!

the initial sketch of the circuit layout

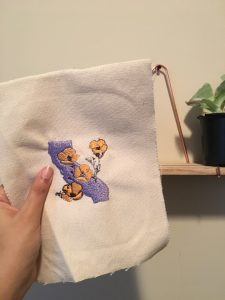
As I mentioned before, I really enjoy engaging my more artistic side, and both of these workshops left me feeling satisfied with a beautiful end product. I’d love to revisit these skills—I think they’d help make a great personalized gift in the future!

  • 3D Scanning

This was the tool I was most excited to get my hands on! Our original idea was to use the 3D scanner for our final project of creating customizable earphones. We wanted to scan the user’s ear to print out a mold to use for the shape of the earphones. We quickly realized, however, that the scanner could not capture the depth and detail necessary for this. That didn’t make it any less fun though—I enjoyed scanning various classmates’ ears for half an hour before realizing that it was a futile attempt.

The ear I scanned didn’t quite scale correctly when printed, leaving me with this humorous attempt and end product

I think I’ll stick to scanning peoples’ heads for 3D printed busts in the future.

As you can see, this truly was a semester of learning for me. And there’s so much more I want to explore! I’m glad I decided to take this course—it has really challenged me to seek out a variety of resources I never even knew existed. I couldn’t think of a better way to end my undergraduate journey—thank you Vishal, and fellow makers for a wonderful final semester!

Once a Semester Activity: 3D Printing and the Apparel Retail Industry

While many will proclaim that “retail is dead,” (in reference to the archaic department stores we all grew up with) I beg to differ. I’d argue that retail is simply changing. My love for the apparel retailing industry began over the course of a summer job as an Anthropologie customer associate. I watched as the brand I loved most had to react to a shifting industry climate. They made strategic decisions to close down locations, and instead, open larger format “experience-based” stores that allowed customers to create custom furniture, shop for clothes, and learn about different types of garden plants, all under one roof. So in a time when traditional brick and mortar retail is supposedly dying, I find myself fascinated by what the future of retail actually looks like. I therefore chose to research the intersection between technologies like 3D printing and the apparel retailing industry in more depth.

Fashion

Most people automatically associate 3D printing and retail with the idea of 3D printed clothing. Luxury fashion designers have toyed with the concept, however, current 3D printing mechanisms have proven better suited for accessories such as jewelry or eyewear. “The evolution of materials for fabrics in 3D printing has been slow and there remains a trade-off between stiffness, robustness and comfort. Because the technology involves fusing layers of melted plastic one on top of another, a 3D printed fabric does not behave the way a woven textile adapts its shape to the body” (Sim, 2017).

Although the idea of 3D printing clothing items may seem impractical or gimmicky to customers, startups like Ministry of Supply are fighting to change that perception. MIT graduates Aman Advani and Gihan Amarasiriwardena cofounded the clothing company that specializes in 3D printed knit garments. They use materials like “Merino wool and NASA-engineered Phase Change Materials, so you literally get the best of both worlds: the best properties of natural fibers and space age temperature regulation” (Leighton, 2017). Their knits are not only more comfortable and movement-enabling, but they also create less waste and are more durable. According to this video, they can print a blazer in around 90 minutes:

Because the garments are printed without seams, they do not have weak points that are more vulnerable to wear and tear. They currently use a Japanese 3D knitting machine called Shima Seiki, which has been used by manufacturers but has yet to be widely adopted by retailers at a storefront level.

Retailing Practices

Looking beyond fashion, it is clear that 3D printing has many implications on the other segments of the apparel retailing industry:

Inventory Management

The most obvious change seems to be in the form of inventory management. Dealing with excess inventory in the face of unpredictable consumer demand is one of the key challenges that retailers face today. “Imagine walking into a store that carried only enough inventory so that customers could try on garments and touch the material to ensure it meets their demands and expectations. Then, images of the garment in various colors and textiles would be made available to the consumer. Perhaps some stores will even carry swatches. Once the shoppers decide which one(s) to buy, they pay for the item and wait for them to be printed” (Sedhom, 2015). This will also impact the supplier-retailer relationship. “We find that cost-sharing contracts can coordinate the supply chains where 3D printing is used in-store and the supplier controls the raw material inventory” (Chen, Cui, Lee, 2017).

Product Customization

In addition to better inventory management, retailers can rely on 3D printing to drive better customization. Companies like Nike have already embraced this by printing custom-fit shoes for world-class athletes, however, it is likely that this trend will catch on among apparel retailers as well. “Indeed, customization will change fashion as we know it, as 3D printing will allow companies and brands to create, in real-time, items tweaked and personalized by the consumer. Imagine yourself walking into a store and changing the length of a handbag strap, lowering the neckline on a shirt, or selecting a color for your dress! The frustrations attendant with shopping from what’s available versus shopping for what you want will end. 3D printing will facilitate contemporaneous customer-designer or customer-store collaboration” (Sedhom, 2015). Customization has long been a trend impacting retailers’ approaches—according to the “State of 3D Printing” report conducted by Sculpteo, retail profits from custom 3D printed goods is projected to increase 91% by 2020.

Intellectual Property Protection / At-Home Printing

            As designs and the overall apparel retail distribution network go digital, intellectual property theft is emerging as a top concern within the industry. When it comes to the overall retail landscape, luxury brands have the most to lose. They already face competition from creators of knock-offs. “With global imports of counterfeit goods already estimated to be worth $500 billion a year, it is likely 3D printing will only add to that figure. The growing threat of counterfeit 3D printing stems from the increasing availability of cheap 3D printers, printing materials and design specifications for items ranging from bags, apparel and jewelry” (Sim, 2017). More affordable brands may also face challenges as 3D printers become more ubiquitous among households. Customers could eventually design and print their own clothes from the comfort of their own home, eliminating the need for retailers at all. Designer Danit Peleg, who has worked extensively with 3D printed fashion designs, foresees a future where this is possible. “In the future, when these printers are in your house, I can send you a file and you can immediately adjust the file to speak to your measurements. You can choose the material, whether it’s cotton or wool. And while you’re getting ready in the morning, you can just press print and have the dress done by the time you’re done getting ready” (GE Reports, 2017).

Takeaways

After conducting all of this research, I’d still stand by my argument that retail is far from dead. I think it’s easy to paint an apocalyptic picture of a future where everything is automated and 3D printing completely takes over. However, even in a world where all clothes are 3D printed, I still believe that retailers will play an integral role because we live in an experience-based economy. They will simply have to differentiate themselves through capabilities like unique designs and customization. Even the most “DIY” oriented customers will want to be able to see designs for themselves, or reference available swatches that retailers can provide. Therefore, they will simply have to rethink their position within the market. Manufacturers and distributors will also have to reposition themselves, perhaps shifting towards cost-sharing contracts. All in all, 3D printing does have the ability to permanently alter the apparel retailing landscape, but it will take time and the outcome is uncertain for members across the value chain.

Works Cited:

https://www.forbes.com/sites/herbertrsim/2017/12/03/3d-printing-in-luxury-fashion-revolution-or-evolution/#55e24ba23f20

http://www.businessinsider.com/ministry-of-supply-3d-printed-knits

https://www.gsb.stanford.edu/faculty-research/working-papers/retailing-3d-printing

https://www.sculpteo.com/blog/2015/12/23/3d-printing-and-retail-industry/

https://digitalcommons.law.scu.edu/cgi/viewcontent.cgi?article=2812&context=lawreview

At Last, A Real Prototype!

This week’s session entailed printing our initial prototype of our earphone clips and receiving feedback from fellow classmates through a design audit. I was simultaneously excited and nervous to see if our print would be successful, considering that we had to model it in a relatively short amount of time. We used Fusion360 to create the initial design and I’ve included a photo of the first iteration here.

The earphone clips were roughly a 20-minute print, so we are now focused on marketing this as an experience for students to easily participate in. One point of feedback we received from Vishal was to utilize some photo measurement mobile application that would allow users to send us a photo of their ear, and then we could automatically use the measurements from the app to determine what size clips they would need. We were able to find an app called Ruler that allows users to take pictures of various objects and then compare them to the scale of various objects like credit cards or US quarters to determine the actual dimensions of the object. We are still testing the accuracy of this app across various conditions, but if it proves to be successful, it would be a great way for students to print their ear clips without needing to set foot in the MakerLab.

I was quite happy with the first version of our ear clips. Here is what they looked like on my teammate Jason, who was busy at work. They were surprisingly flexible, so we agreed to increase the nozzle size (from 0.4 to 0.6) as well as the layer height to make the final product more durable. Through our design audit with various other teams, we also received the feedback to make the clip-on portion of the product tighter so that it won’t slide off of the earphones. We are also looking into creating clips that will work for non-iPhone earphones, given that our base design worked quite well. I’m looking forward to tweaking our model some more, and testing our prototype with various volunteers over the weekend—I’ll be sure to provide updates as it all starts to come together!

Prototyping After a Pivot

After some deliberation, my group (Team Synergy) has decided to pursue a different project idea. We realized that our original design for a solar-powered hot plate would not be able to generate a sufficient amount of energy to keep a beverage warm, so we decided to switch gears and try to make customizable earphone grips instead.

We’ve begun the prototyping process in efforts to catch up with the rest of the class, and are playing around with multiple ideas as of now. While we don’t have photos to share as yet, we’re trying to create something that will clip onto any pair of earphones and then wrap around the user’s ear to hold it in place. We were hoping to get the exact measurements of each users’ ear so that the grip has a customized fit. The original idea was to use 3D scans of each ear to come up with the right size grip to print, however, we realized that the scans have to be re-scaled anyway so there was no point in adding an additional step. We are now thinking of coming up with a base design and then tweaking it according to measurements we take by hand for each user.

Despite the fact that we’re behind schedule, I am trying to remind myself that our prototype does not need to be perfect when we test it for the first time. As the “Prototype Testing” article from SVPG advises, I think we’re going to have to rely on a highly iterative process of getting feedback and implementing changes before quickly retesting the product. It’s also very important for us to keep the test subjects in “use mode” as opposed to “critique mode” as the article suggests. We want to identify what will help make the product serve an actual use case, and then reposition it accordingly.

I’m looking forward to the next few days of prototyping and testing—we will certainly have more updates to share by next week!

3D Scanning and Prototyping

This week’s class on 3D scanning was much-anticipated. Since the beginning of this class, I’ve been eager to test out the technology myself, and learn more about its various applications. We were able to actually see the entire process with the help of a few class volunteers who had their heads scanned. On the actual application, users specify what they’re scanning, and then the camera adjusts to detect edges accordingly. It then gradually fills in the object with more precision as the user moves the camera around the object. I was amazed to see the amount of detail that the scanner was actually able to capture, and after looking at the final products of other classmates’ scans, I’m amazed by how clearly the prints came through as well.

While it was fun to play around and explore the recreational side of these tools, I also enjoyed learning about how large corporations are using 3D scanning for prototyping and manufacturing processes. In one of the videos for this week, Jay Leno was able to create an exact copy of an auto part by scanning and printing it. After scanning the part, he could even modify it to make it more functional by adding a ventilation system prior to printing. Being able to scan and print allows users to make objects that might no longer be on the market, or could be quite expensive.

The video also mentioned that NASA actually has a 3D scanner and milling machine on their space station. I was intrigued so I did a bit more research—this article details how the first object (a wrench) was printed using the 3D printer on the space station, and was completed in 4 hours in zero gravity! Clearly, there are numerous applications for 3D scanning across industries and various parts of the value chain.

Prototyping: Not Always a Work of Art

Unfortunately I missed this week’s lesson and Shapeways guest lecture, but I truly enjoyed going over the assigned readings and seeing what my teammates came up with for our initial prototype sketches. While we’ve heard about various makers’ approaches towards prototyping over the course of this semester, I was surprised to hit so many mental roadblocks when thinking of the prototype for our own product, a solar powered food/beverage heater. I could think of the individual components that would be necessary for the product to function, and I could think of ways that existing models could be improved, but I had a hard time actually starting.

Much like the Edison Nation blog post described, I had stored all of these ideas in my mind but was having a hard time translating them into an actual prototype concept. I think the idea of starting off by drawing with pen and paper is great—my teammates sent me photos of the sketches they came up with, and while they were different from what I would’ve designed, it was cool to map out their thought processes through the drawings.

While sketching is a great first step, I’m eager to generate a physical prototype for user feedback. As David Kelley discussed in his videos, the process of “enlightened trial and error” seems to offer a lot of value. I think this is especially true given some of the technical ambiguity with our project—I’m not too familiar with the various requirements of optimizing solar power, and although I’ve been trying to research as much as possible, I often find myself feeling too intimidated to design a prototype. I think I will take David’s advice, however, and remind myself that early, unfinished prototypes can be the source of valuable user feedback, which in turn helps the project move along in the right direction. In other words, it doesn’t need to be a work of art in its first iteration, but it does need to materialize in some capacity.

LEDs and Stitching: The Final Touch

This week, we finally got to put our wooden boxes together. These past three weeks have been a wonderful learning opportunity, and it felt good to come up with a finished product. I thought it would be a simple process- put the wooden pieces together, stick a light somewhere on the canvas, switch some button on, and see the pretty light glow on top of a perfectly constructed box. Little did I know, there’s a lot more to it than that.

We first received an introduction from Duncan on how circuits work—the basics of it made sense to me: connect the positive LED side to the positive battery side, and connect the negative LED side to the negative battery side. However, if the two wires touch at any point, it’ll cause the device to short circuit and the light won’t work. In order to make sure that we were connecting the right wires to the right sides, we sketched out where we wanted to sew the LED light and where we wanted to place the battery on our designs. I decided to place the light by the location of my hometown in California:


Once we identified the positioning, we used conductive thread to actually sew the various components onto the canvas. I think I speak for everyone when I say that this was a challenge. After 30 minutes of trying to tug the thread through the canvas and trying to tie knots to hold the finished stitches in place, I was finally ready to test out the light by inserting the battery. On my first attempt, I couldn’t get it to work and I was terrified that I had crossed the wires accidentally—it turns out that a part of the thread was touching the metal portion of the battery where it shouldn’t and that was causing it to malfunction. Once I moved the thread over, my LED lit up and the box was complete:

If there’s anything I’ve learned throughout these past few weeks, it’s that I should be patient with technology, and with myself. I came into this workshop with the expectation that the machines would take care of everything, but in reality, there is still a ton of trial and error that goes into making anything worthwhile.

Laser Cutting at the Fab Lab

Week two at the Fab Lab certainly did not disappoint—in order to complete our projects, we learned how to laser cut wooden boxes and add our own designs as decoration. I was a bit nervous about the workshop after last week’s challenging embroidery lesson, but it was surprisingly straightforward (mostly because Clinton was such a patient instructor.)

We used a combination of Adobe Illustrator and PE Design to come up with the specifications for our boxes, starting with the dimensions. We then had to remove the “teeth” of the cutouts, since we needed the top portion of the box to be completely flat—this proved to be somewhat tricky because the software can be a bit finicky (apparently there’s a difference between double and triple clicking) but with Clinton’s guidance, I was able to modify the box the way I wanted to. We outlined the things we wanted cut out in red, and then objects filled with black were meant to be shaded in on top of the wood as a design.

Finally, we added various silhouettes to the sides of our boxes as designs. I chose images of things that were significant to me, like my hometown of San Francisco, and the otter, my favorite animal. Here’s what the final version looked like:

We uploaded our designs to a flash drive, and Clinton fired up the machine—I was amazed to see how quickly it moved back and forth to replicate the designs originating from our computers. While I couldn’t stay to see my own finished product, I was able to watch another classmate’s design come to life:

I’m looking forward to putting together my box next week, along with the embroidered top. It’s been a wonderful learning experience and I feel like I’ve gained two new skills which could serve useful in a variety of ways. I’ll be sure to post photos of the end result once it’s done next week!

Digital Embroidery- More Challenging Than I Thought!

This week’s trip to the CU Fab Lab was highly anticipated–after hearing so much about it, I was eager to work on a hands on project and use the various tools that are available. We started off with a workshop on digital embroidery–I was so confident that I’d be good at it, but the overall experience was humbling, to say the least.

We got to learn more about the software SewArt, which allows users to upload photos of designs and then provides a preview of what the final sewn product will look like. It was difficult to find a logo that was simple enough for the software to pick up every detail on. I’d originally chosen an otter logo (since otters are my favorite animal) and it seemed quite simple given the fact that it had only two colors, which were highly contrasted.

However, when the software revealed the print preview, the poor otter’s face was somehow mutilated by its own whiskers—it seems as though there were too many fine details, so I opted for a simpler design instead. I ended up choosing the California state outline and then overlaid some California golden poppies to add some color and complexity.

After settling on the design, the next step was to thread the actual machine—sadly, this part has yet to be automated. It took a couple tries and some help from my peers, but I finally mastered the art, and was able to hit “go.” Within minutes, the California state outline was finished and it was time to switch the thread color for the flowers.

A quick video of the machine working its magic: IMG_2439

What I learned in the process, however, is that there is a difference between embroidery thread and sewing thread, which happens to be much thicker. Blissfully ignorant of that difference, I happily watched my design come to life until I heard a terrible noise come from the machine. The sewing thread was too thick and was causing the machine to jam. On top of that, I had forgotten to “remove the overlay” from my design on the California state outline, so the embroidery on that portion was really thick as well, and made it difficult for the machine to move across it.

Since I was running short on time, I decided to call it a day and settled for this final product.

Although there were a few hiccups, I’m happy with how it turned out. I now know that like everything else we’ve learned about design so far, working with digital embroidery machines is an iterative process, prone to mistakes and unexpected challenges. That being said, I’m looking forward to the laser cutting workshop next week—hopefully, I’m better at it than I was at embroidery!

Accessibility Across Industry Lines with Digital Making

Our class was lucky to have two guest speakers this week—Alan Amling from UPS spoke about how the company is leveraging 3D printing technology in new ways in order to grow its business and cater to the growing demand from its clients, and Dot Silverman spoke about biohacking, and its various applications from education, to industry.

It was really interesting to learn about how UPS has integrated additive manufacturing into its offerings to clients, and has consistently been able to stay ahead of the curve. Their services now enable anyone from a large manufacturer to a solo entrepreneur to order prints and access technology that they might not be able to invest in themselves.

In addition to speaking about how the technology has impacted UPS, Alan shared insights about other companies that now rely on digital making to customize for or deliver additional value to their customers. One example I thought was quite interesting was that of Nike, which is using 3D printing to create customized shoe soles based off of a scan of one’s foot. After doing additional research, I learned that several other footwear companies are using the same approach. This Fortune article talks about how New Balance, Adidas, and Nike are all investing in on-demand manufacturing processes for the long term.

I also really enjoyed hearing from Dot, because I thought her background was quite unique. She studied physics during her undergraduate years and has worked at several research labs, but is currently pursuing a graduate degree in education. Many of the projects she highlighted within the biohacking realm had to do with making science education more accessible for all, and it was really inspiring because she seemed to perfectly exemplify someone with a maker mindset. I was particularly impressed by the Foldscope, which is essentially a microscope that can provide up to 2000x magnification, and costs less than $1 to make. It was invented by two Stanford graduate students, and has now fostered a global learning community across 135 countries. I found the Microcosmos page of their website to be quite touching– it features stories from various users who have documented their learning processes while using the Foldscope.

The Foldscope

In summary, I’d say that this week’s learnings offered a lot of practical insight as to how the maker community is so deeply rooted in making learning via technology far more accessible. While one might expect this from academia/educators, the same holds true for large corporations like UPS, who are actually able to drive profitability by adhering to the same principle.

Design Thinking: Where Empathy is an Asset, not a Weakness

It’s been a while since I’ve gotten to engage my inner child and toy with playdough and pipe cleaners! This week’s workshop with Design for America gave us a chance to channel our creativity into solving problems and truly practice “design thinking,” as Tim Brown from IDEO conceptualized.

The theme for the workshop’s design activity was centered around the blind population in Austin, who were facing various challenges adapting to the rapidly urbanized environment. My group chose to focus on Jess, a college student at UT Austin who was excelling academically, but felt isolated from the campus social scene due to her blindness. We wanted to find a way to ensure that Jess felt safe and comfortable getting to and from football games on her own. We brainstormed all sorts of design ideas—from the most outlandish to the most obvious—and came up with an initial prototype for a smart walking stick that had GPS and paired with Bluetooth earphones. The walking stick could send GPS data to smartphones as well, in case Jess’s friends wanted to locate her, or in case Jess lost her walking stick somewhere.

While I enjoyed playing with the various art supplies and brainstorming, I think what really resonated with me was the process of empathizing. Quite often, problem solving is exclusively viewed as a highly analytical activity, and of course, that aspect is equally important. However, design thinking really emphasizes the importance of being able to put yourself in someone else’s shoes, and I think that’s a skill that’s often overlooked or taken for granted in many fields. Speaking from my own experience of interning at a large bank last summer, I feel as though “having empathy” is often synonymous with showing weakness or lacking objectivity in parts of corporate America. However, when properly leveraged, I think it can provide keen insights about any user/client and can drive tremendous amounts of change in the positive direction.

We had the opportunity to present our prototypes and receive feedback, which is an incredibly important part of the design process. It was helpful to hear critique of our design, because it forced us to consider things we hadn’t thought about, like how the GPS feature in the walking stick might be redundant assuming Jess’s smartphone already has GPS. Nonetheless, I was proud of the amount of ideating we were able to do within an hour (early in the morning, that too.)

The students from DFA did a great job of relaying the importance of empathizing, failing, collaborating, and communicating—they were also quick to stress that the exercise we did in class was incomplete without real user feedback, which is the most important part of the design process. I felt really inspired after the workshop, and found some other resources on design thinking:

  1. I’m always on the lookout for applications to the financial services industry, and I thought this article on how design thinking is impacting banking was really interesting: https://thefinancialbrand.com/70152/design-thinking-banking-financial-innovation/ 

2. Here is Elise Roy, a disability rights lawyer who happens to be deaf, herself—in her TED talk, she talks about how designing for disabilities often creates better outcomes for everyone.


Fusion 360: A Handy Tool for Just About Anyone

This week, we learned how to use Fusion 360, a CAD design software created by Autodesk. Dan Banach from the Education group at Autodesk was really helpful in showing us the ropes and walking us through two designs using the tool. We had the chance to build a custom Illini ice scraper, as well as a really handy iPhone charging tool—I was able to build upon my knowledge of Fusion 360 shortcuts and I also got a sense of how to go about designing from scratch, which is what I really wanted to learn. One of the coolest features of the software is its ability to conduct stress testing—while I didn’t get the chance to actually implement this tool, I’m sure that it will be useful in the future.

The iphone tool I created
My ice scraper ended up looking a bit different from the original model, but it’s still functional

With this newfound confidence, I attempted to recreate one of the design ideas I had seen on Thingiverse. I made a simple heart cookie cutter- even though it wasn’t that complex, it still gave me an opportunity to apply the skills I learned during the workshop. I started with the line and arc tools to create the basic heart shape, and then used the extrude and shell tools to create the hollowed out cookie cutter form.

Heart shaped cookie cutter
I adjusted the thickness to make the shape more suitable for cutting into dough

After doing more research on Fusion 360, I read about how other people used the software to bring their ideas to life. One of the most interesting articles I found was on Fusion 360’s own blog, and it profiled Calvin Lee, who designs kid’s plush toy pillows for Brookstone. He talked about how the software made it simple to sketch soft forms in 3D, and how he planned to use it to design Brookstone’s signature massage chairs as well. The versatility of the software not only allows designers to sketch the electronic or mechanical components with ease, but also enables them to create more ergonomic shapes.

I’d like to experiment with different applications of Fusion 360 further in my semester project, if possible. I’m still getting a hang of the software, but I look forward to discovering more of its infinite capabilities and learning as I go!

3D Printing Meets the Right Brain

This week, we got to learn more about the specifics of 3D printing—everything from how a 3D printer actually works, to how different designs are shared and eventually materialized. While the videos were insightful, I really enjoyed hearing from Jeff Ginger, who talked about the various projects that have taken place at the CU Fablab. What I found most interesting from the discussion we had was his strategy for making the Fablab a very open and inviting environment on campus. He spoke about how other 3D printing labs at Illinois already catered towards engineers and business students for more entrepreneurial or scientific endeavors—as a result, he wanted the Fablab to serve as more of a community-oriented space for newcomers, as well as local artists to tinker around.

In learning more about some of the artists who use the Fablab’s resources, I was excited to think about the various possibilities for my own projects. I explored the CU Fablab’s Instagram tag and found some more art ideas such as:

  1. Laser printed notebook covers:

Notebook laser-ing in progress!

A post shared by Emily DeCicco (@decicco17) on

  1. Embroidered patches:

Making more patches! #sadfood #sadicecream #irononpatch #snacks

A post shared by Mad Maxx (@xxmedium) on

  1. Screen printed apparel:

https://www.instagram.com/p/BZU48kOliYh/?hl=en&taken-at=17728958

As much as I enjoy reading about the various scientific advancements and industry transformations attributed to digital making, I look forward to learning more about how it intersects with some of my own more “right brain” hobbies like painting or sewing.

We also had the chance to 3D print our own group logos during class this week. My team, Synergy, chose a puzzle piece as our logo. Here is the final product of what we printed (which only took 1.5 hours!)

The Culture of Digital Making (Week 2 Reflection)

This week’s reading, combined with the guest lecture from John Hornick, really opened my eyes to the ways in which digital making has evolved, not only on a technical level, but also on a broader, cultural level. As one of the articles illustrated, the so called “Maker Mindset” is essentially that of a growth mindset—students must display curiosity and embrace failure, while facing challenge with a positive attitude.  I’d argue that this attitude is necessary to succeed at anything, but it seems to hold especially true in a community where ideas are quite literally coming to life, and where people can interact and share their ideas with so much more ease.

I think rapid globalization only makes the case for this exchange of ideas stronger. Neil Gershenfeld’s article How to Make Almost Anything talks about the first fabrication lab (“fab lab”) which was launched in the South End of Boston in order to promote education and excitement about technology in urban communities. The concept quickly caught on and was soon replicated in other countries, where students who might not have access to a full college education are now getting the opportunity to put their skills and creativity to good use. I did some additional research, and thought this article about a fab lab in Western Africa was quite interesting: https://www.cnn.com/2017/11/28/africa/3d-printer-electronic-waste/index.html)

Along with this cultural shift towards collaboration to solve problems, I think digital making is transforming the way in which we view the world. John Hornick explained how many of the things people are making today have a unique appearance, and often look like things created by mother nature. They are lighter, more efficient, and force us to rethink the norms of our physical world. I think it will be interesting to see how the field of design changes as a result, given that everyone will have the capability to be their own designer. Personally, I look forward to learning more about design principles and stretching my mind when it comes to what I can create, because I often feel limited or somewhat narrow-minded when it comes to making things.

When browsing Thingiverse, I came across a few prints that I thought would be quite useful:

1. Page holder reading tool https://www.thingiverse.com/thing:144660

I thought this idea of a “book ring” was pretty handy—I often have a hard time keeping books open with one hand, so having one of these would allow me to read more comfortably. I would modify it to fit my thumb properly, and I think it would be beneficial to add a grooved portion that hands under the bottom of the book, so that the rest of one’s fingers aren’t under too much pressure.

2. Self-watering planter https://www.thingiverse.com/thing:903411 

I’ve been on the hunt for a good self-watering pot for a while, since all of the house plants in my apartment sadly died over winter break. This is a basic model, but I would tweak it to make it a little more colorful, and maybe add something with which I can mount it to a wall.

3. Cookie cutter https://www.thingiverse.com/thing:572208 

I’m an avid baker and I thought these holiday-themed cookie cutters were really cute. I often wish I could customize my own cookie cutters, so if I had the chance, it would be cool to create a cookie cutter that resembled my house—it could also make a great holiday gift for families.

4. Earphone holder https://www.thingiverse.com/thing:416992

I thought this idea was really creative and definitely useful- my earphones get tangled all of the time, so it would be nice to have a tool to organize them. I wouldn’t make any modifications to this design—I thought it was quite functional as is.