
This week’s trip to the CU Fab Lab was highly anticipated–after hearing so much about it, I was eager to work on a hands on project and use the various tools that are available. We started off with a workshop on digital embroidery–I was so confident that I’d be good at it, but the overall experience was humbling, to say the least.
We got to learn more about the software SewArt, which allows users to upload photos of designs and then provides a preview of what the final sewn product will look like. It was difficult to find a logo that was simple enough for the software to pick up every detail on. I’d originally chosen an otter logo (since otters are my favorite animal) and it seemed quite simple given the fact that it had only two colors, which were highly contrasted.
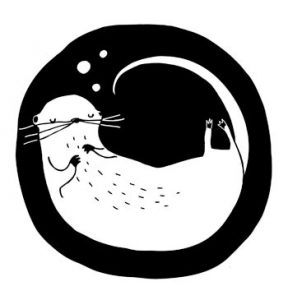
However, when the software revealed the print preview, the poor otter’s face was somehow mutilated by its own whiskers—it seems as though there were too many fine details, so I opted for a simpler design instead. I ended up choosing the California state outline and then overlaid some California golden poppies to add some color and complexity.
After settling on the design, the next step was to thread the actual machine—sadly, this part has yet to be automated. It took a couple tries and some help from my peers, but I finally mastered the art, and was able to hit “go.” Within minutes, the California state outline was finished and it was time to switch the thread color for the flowers.
A quick video of the machine working its magic: IMG_2439
What I learned in the process, however, is that there is a difference between embroidery thread and sewing thread, which happens to be much thicker. Blissfully ignorant of that difference, I happily watched my design come to life until I heard a terrible noise come from the machine. The sewing thread was too thick and was causing the machine to jam. On top of that, I had forgotten to “remove the overlay” from my design on the California state outline, so the embroidery on that portion was really thick as well, and made it difficult for the machine to move across it.
Since I was running short on time, I decided to call it a day and settled for this final product.
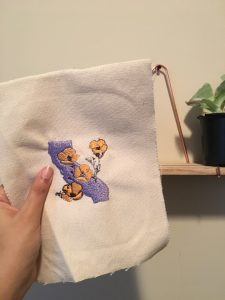
Although there were a few hiccups, I’m happy with how it turned out. I now know that like everything else we’ve learned about design so far, working with digital embroidery machines is an iterative process, prone to mistakes and unexpected challenges. That being said, I’m looking forward to the laser cutting workshop next week—hopefully, I’m better at it than I was at embroidery!
Hey Ria,
I was definitely surprised with how complex digital embroidery could be! I agree that the threading was the most difficult part- I used a ton of different colors in my design, so I felt like I was always changing the thread!
I love your design- I think it is so creative that you added the overlay of the poppies on top of the California outline. I would’ve loved to see the cute little otter embroidered, but with a mutilated face, I think California was the better option.
Hi Ria!
I am glad your project turned out well! I am with you with the fact that you didn’t realize how much work a little embroidery would be, there were definitely times where I felt like giving up! I am glad I had you by my side struggling with me (:
I am excited to see what our projects look like on our laser cut boxes next week!!
Hi Ria,
I really like the design that you created! Thank you for sharing the hiccups that you experienced when creating your object. I think it is important for all of us to share the challenges/lessons that we encounter because as beginning creators we will all inevitably hit some roadblocks. As we continue sharing these experiences with one another, we will greatly reduce the chance that the same challenge will occur more than once since we are all teaching each other and working together!
-Scott Provenzano