Tag Archives: 3D Scanning

Initial prototypes and Designing

Bust

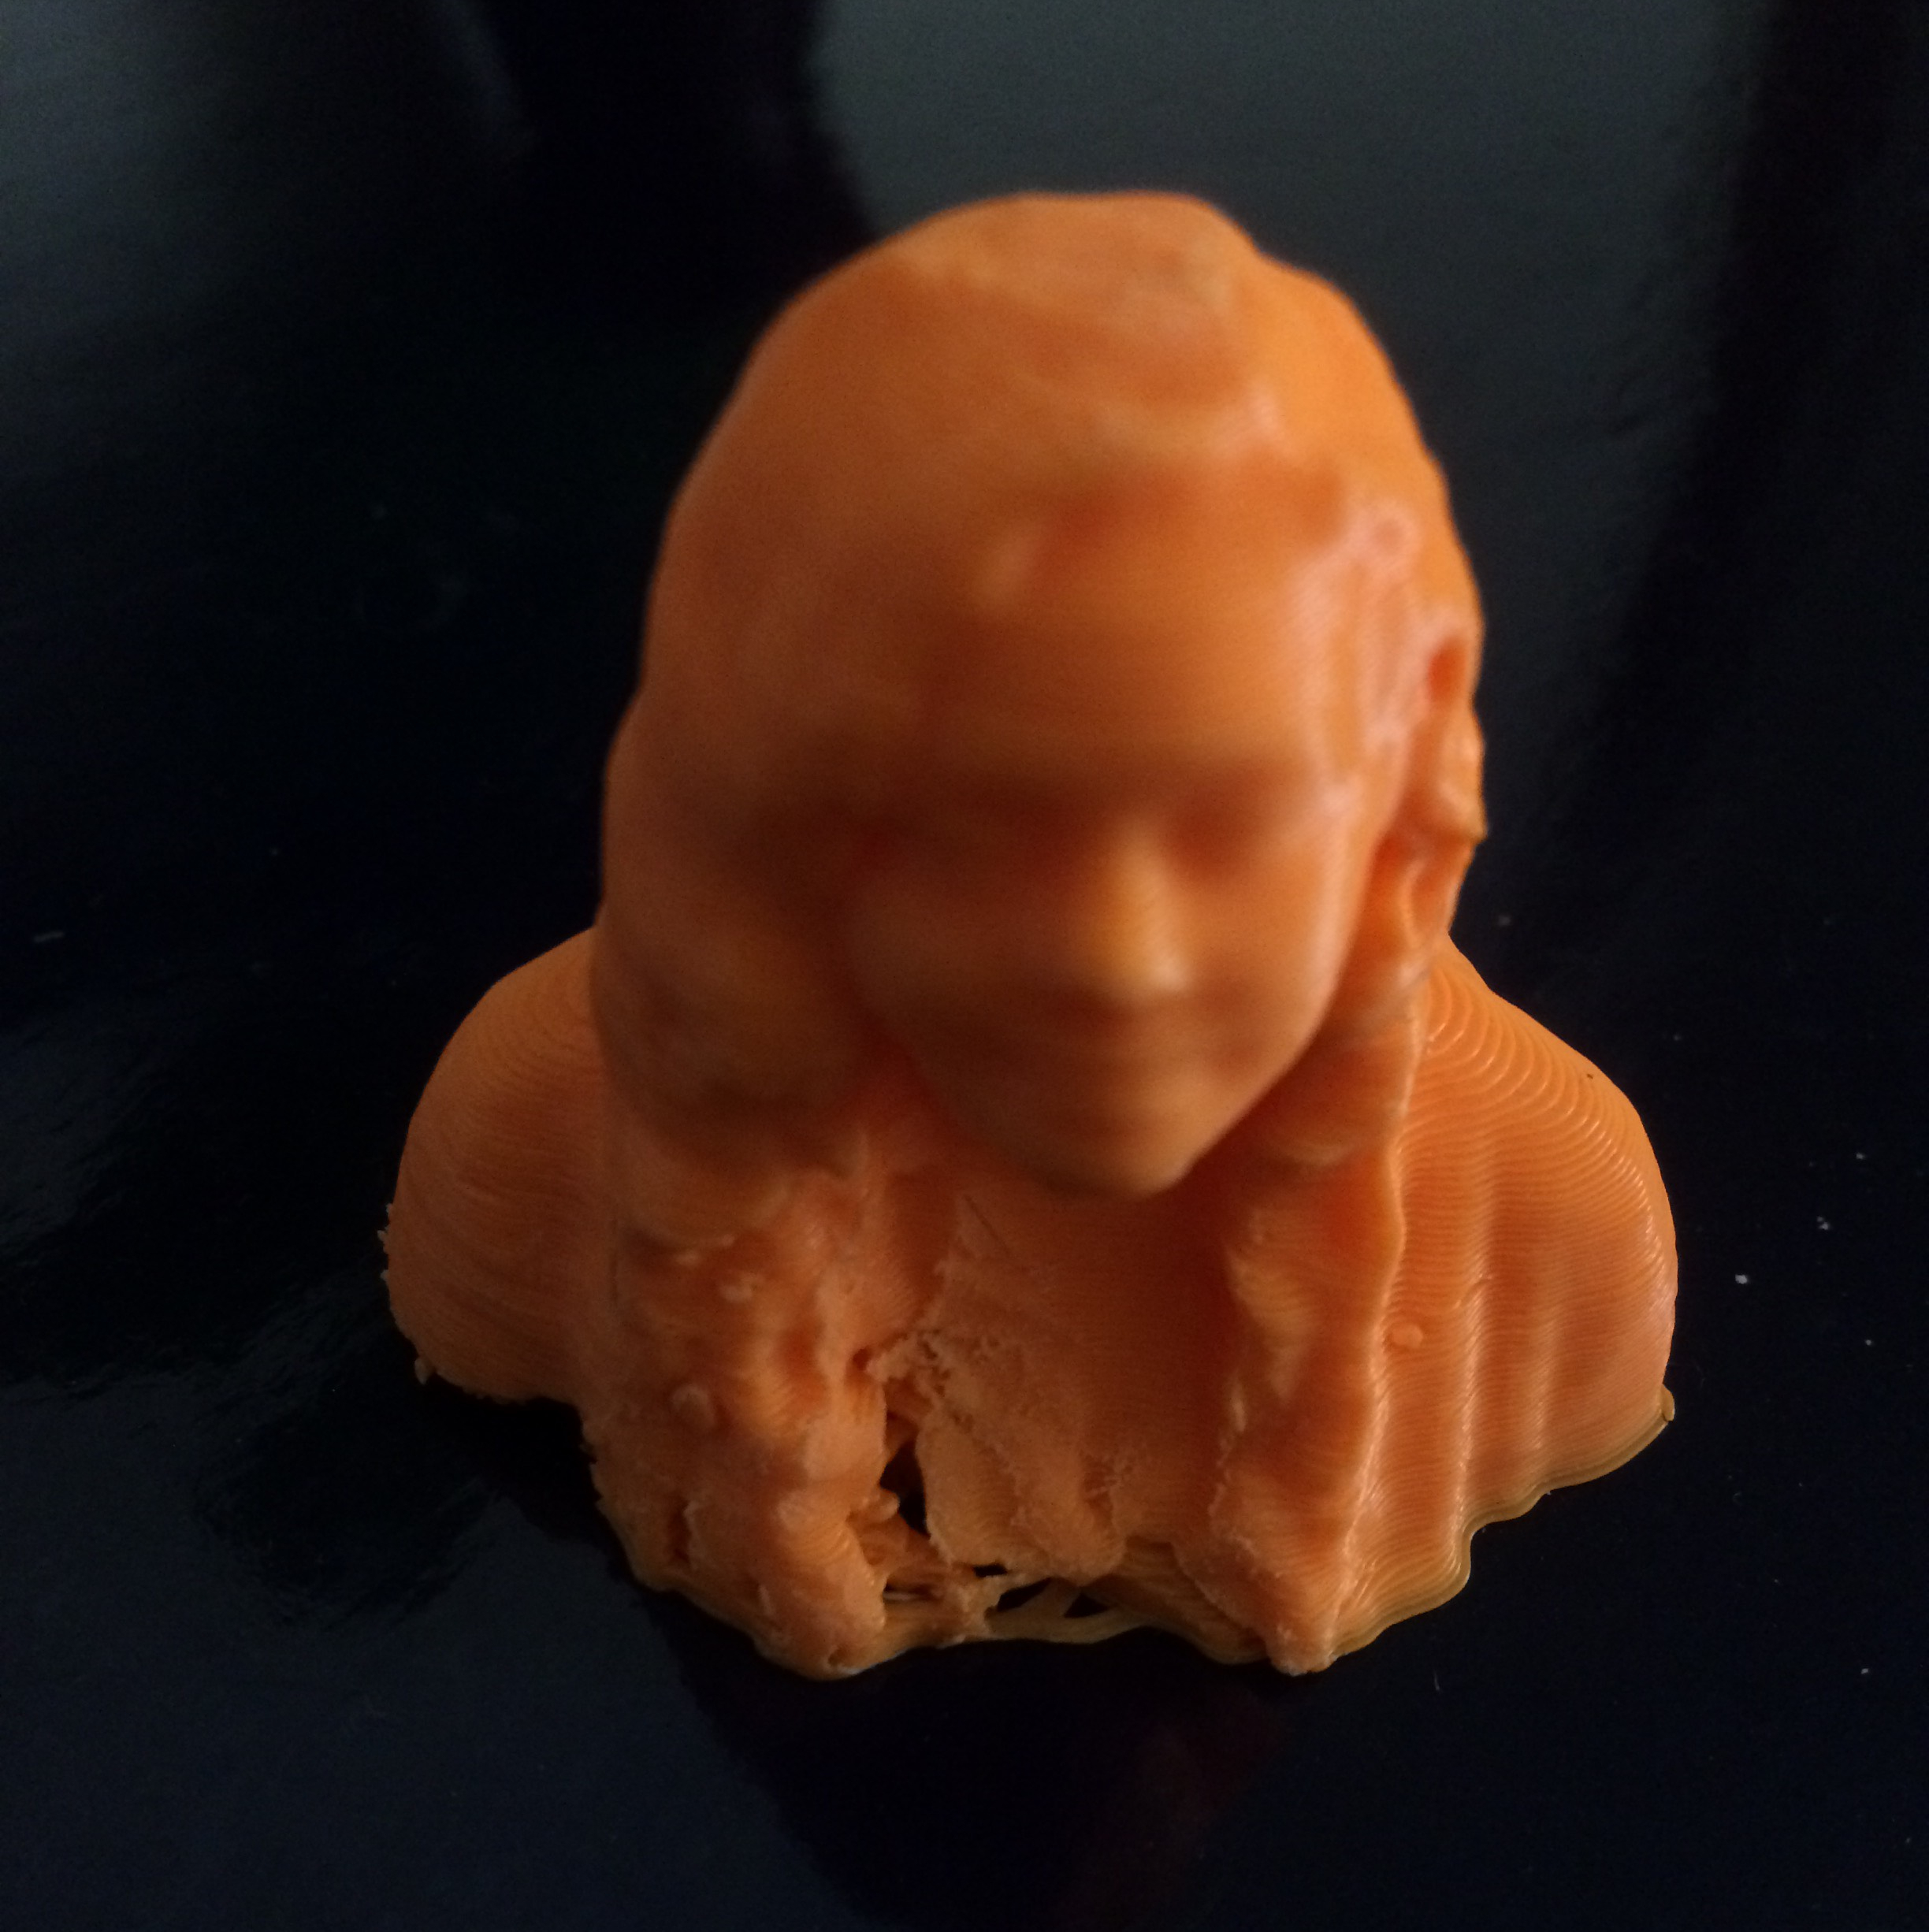
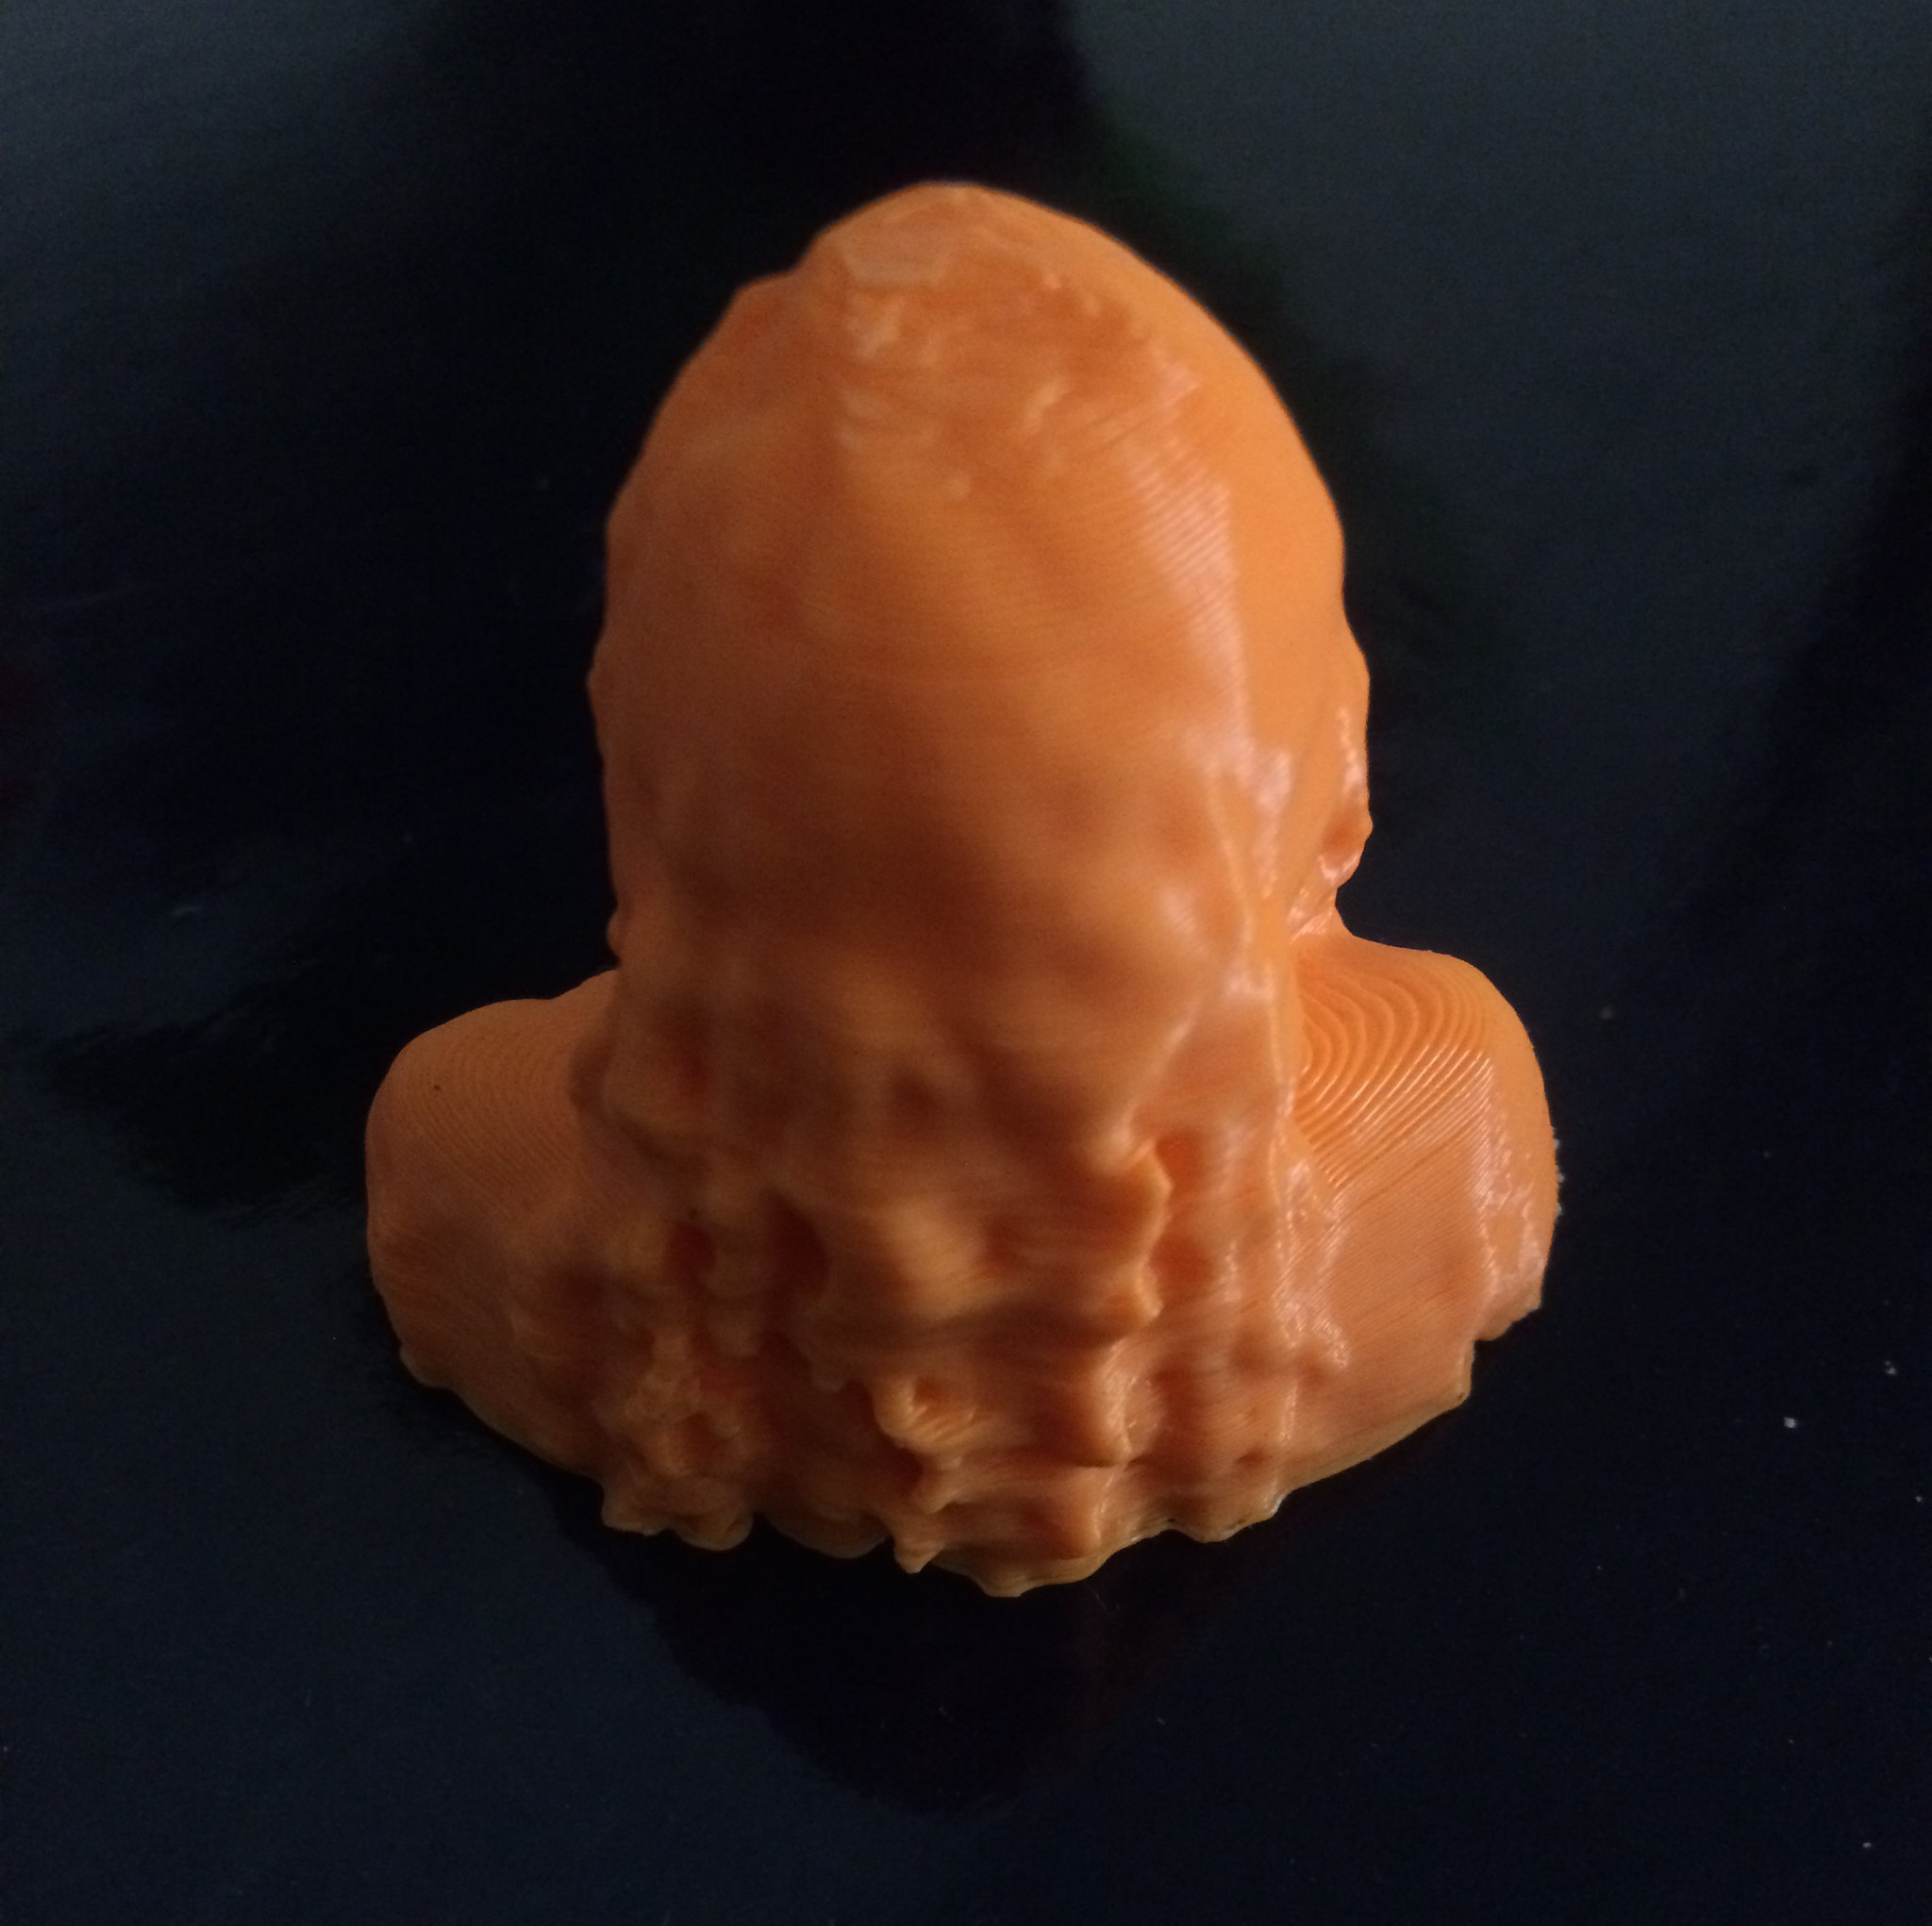
Last week, I was not able to create my 3D Printed bust but I was able to do so this week! A classmate took a scan of myself that I uploaded onto Meshmixer. The original scan had some creaks and empty spaces but Meshmixer did a great job editing the scan. I was able to close the STL file by simply selecting a function called Make Solid and Close Cracks. Afterwards, I exported the file and opened it in Cura. The file was to small to be seen so I then selected all and scaled the item up (10000). After making some other edits in Cura, I then began the 3d printing process. In total, by bust took 45 minutes to print and I am thrilled with the results!

FaceBack
Project: Hydroponic Vertical Garden

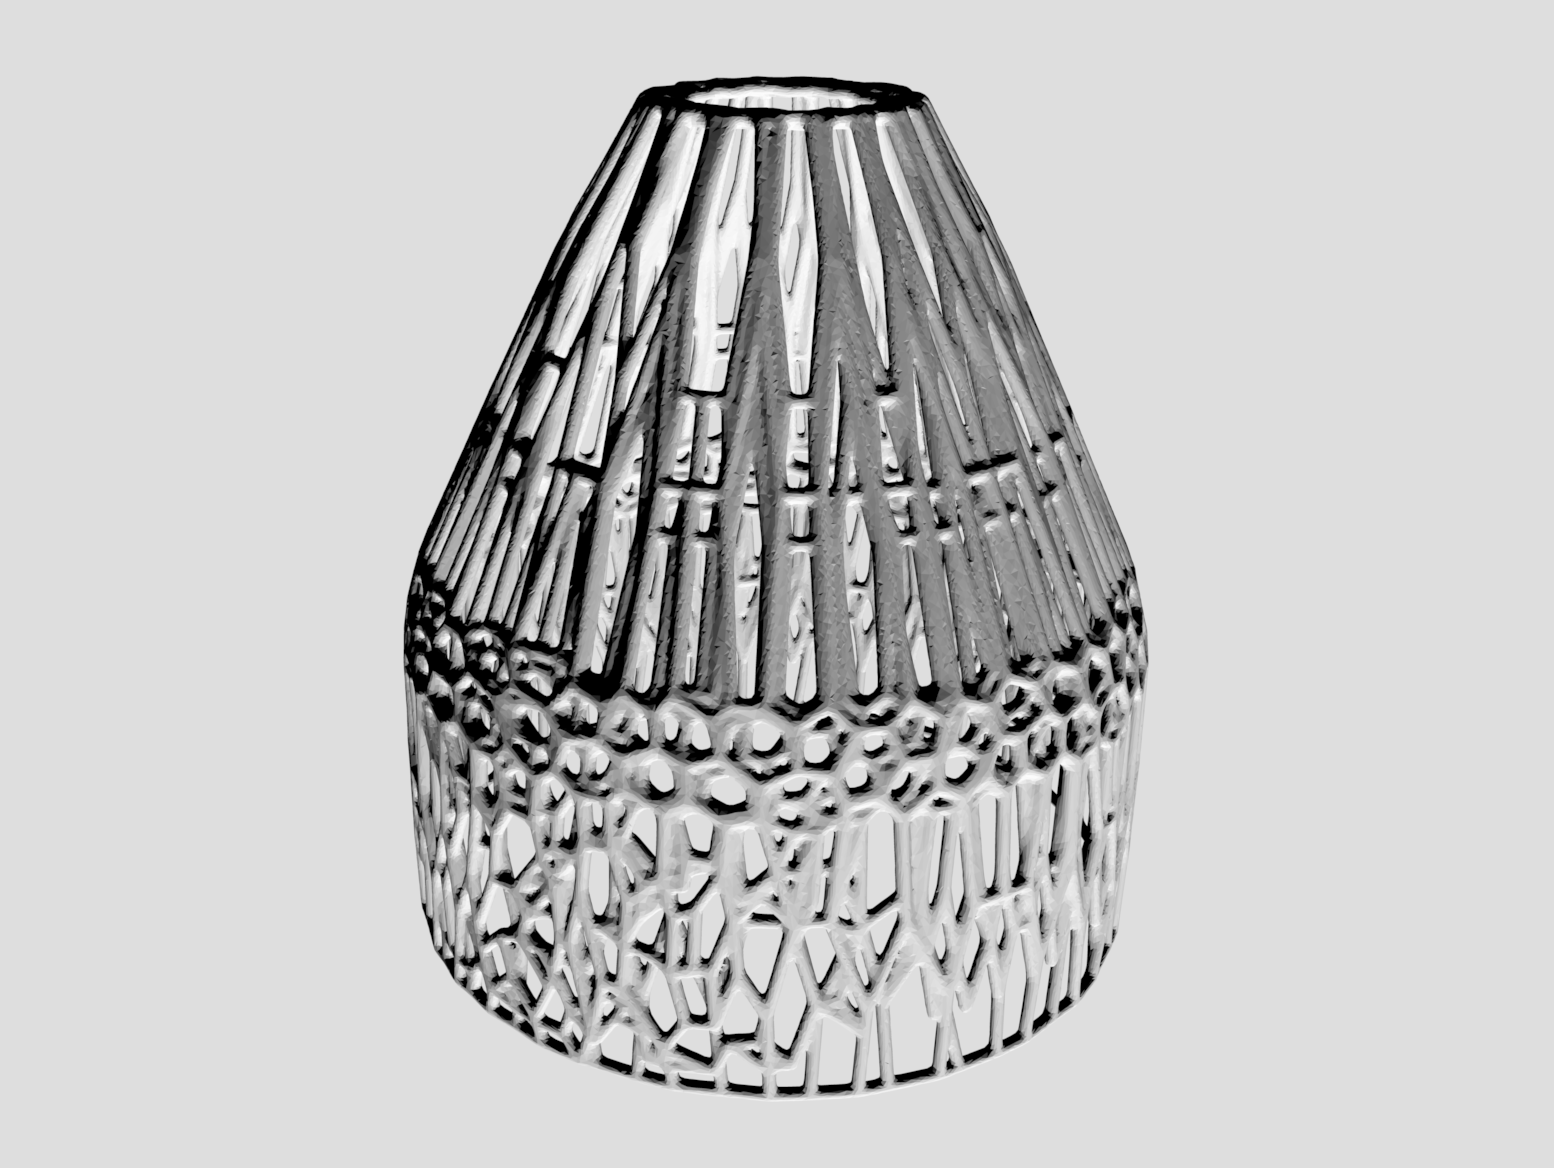
This weeks class was mainly devoted on creating the initial prototypes of our final project. My part in the project is to create a voronoi patterned bottle holder to fit a 2 liter as well as drip nozzles.  I spent most of the weekend researching this history of voronoi diagrams and the results of my findings can be found in my last blog.

https://publish.illinois.edu/digitalmaking2018/2018/04/09/once-a-semester-project-voronoi-pattern/ 

I went to the FabLab in hopes of finding someone skilled in Meshmixer to help me with parts I found difficult, but the students there were more familiar with other softwares. Thus, I went to Youtube and found great tutorials! After familiarizing myself with Meshmixer, I really enjoyed working with the software and created a wonderful bottle cage that I initially felt apprehensive about.

Bottle Cage

I was able to print the drip nozzle and the bottle cage. The drip nozzle was printed in less than an hour. Whereas, the bottle cage holder took nearly 20 hours to print! Initially, our team 3Dream wanted to have 8 plants but after taking into consideration how long it takes to print one bottle cage holder, we will now print 4 of them and 4 drip nozzles.

Thank you for taking the time to check out my blog and see you next week!

3D Scanning

This week, our class learned the basics of 3D scanning and I realized how there is no longer a limitation of representing 3D in 2D.

Why is 3D Scanning important

3D Scanning can be used when it is difficult to model an object, adding  or fixing items that already exist (eg. Alma Matter), and in aiding to preserve items.  Museums are using the scanning to preserve old artifacts and to make the print look like the original for an exhibit! Additionally, it allows for a documentation and preservation analysis that were not available before. Researchers can get a much better understanding of the historic artifact using this technology.

Check out the link below to see what the University of Iowa is doing to preserve artifacts with 3D scanning:

https://archaeology.uiowa.edu/preserving-artifacts-3d-scanning-blumberg%E2%80%99s-unusual-iowa-celt

Scanning in class

After learning the basics of 3D Scanning, some of my classmates were able to make a 3D printed bust of themselves! They did that by having another classmate take a scan of them from an iPad that had an attachment. I am not quite sure what the attachment was but I believe it was a structure sensor which is essentially a strip of cameras and sensors you strap to your iPad that can be used to scan, measure, and project things into the world around you.

Ipad

Afterwards, there are a couple more steps before the busts can be created and MeshMixer was the new modeling software  introduced to assist us with the project.  MeshMixer is a prototype design tool based on high-resolution dynamic triangle meshes and is a part of Fusion 360. We are primarily using this software to clean up our 3D scan if needed. Next week, when I am able to create my bust, I will go into the steps and processes required to make a personalized bust! I am very excited to get to do this project and enhance my skillset in this field.

3D Scanning & Project Tinkering

3D Scanning My Head

Hi everyone! This week was one that I have been looking forward to since the beginning of the semester–we learned about 3D scanning! I have always been intrigued by the capabilities and implications of 3D scanning; it is so cool that we can use cameras/sensors to scan a physical object and create a digital representation of it. We learned about some different consumer-level 3D scanning products and were able to test one out that we have in the lab (we have an iPad attachment). Each of the class members scanned a bust of their head. We were then able to load these files on TinkerCad and fill-in/smooth-out any imperfections in our scans. We then put the edited files into Cura so we could obtain .stl files to then send to the 3D printers! Check out my Cura model and final print below:

Cura Model

Final Print

A fun fact that I learned was that the Xbox Kinect sensor has the same scanning capabilities as the 3D scanners that we talked about in class. This was exciting for me because I have an Xbox Kinect sensor at home! The way it works is the Kinect sensor gets connected to a computer and we can then 3D scan an object with the proper software installed! Check out a video on this topic here: https://www.youtube.com/watch?v=_cKb3oEM47E.


Project Tinkering

My group is waiting on one of our parts (the 7-Segment display) to come in so we can dive into the building of our prototype. However, this did not deter us from making progress on our project this week. We each performed different parts of our research needed, and I also started tinkering with our perfboard and wires (see picture below).

Perfboard/wire tinkering

The picture may look overwhelming with the wires, but this exercise was actually very beneficial in helping me understand the use of perfboards. Physically maneuvering the wires along the board allowed me to see where the different ports connect and which positive/negative currents would be affected by certain connections. I feel much more confident moving forward in the coming weeks when it comes to connecting our 7-Segment display and sensors.

One additional update that we have for our project is that we are going to utilize a push button counter instead of a sensor for our first prototype. This is because we want to be sure that our 7-Segment display is going to work with our creation before we dive into the depths of coding. Utilizing the push button will allow us to ensure that our prototype is properly created because we will be able to see our number on the display go up and down as we knowingly push the button. Alternatively, it would be more difficult to see where our prototype is correct/incorrect if we use the sensors right away because it would be harder to narrow down if an issue is with the sensor, coding, or wiring of our prototype.


Extra Note

While my group’s project most likely will not require soldering, I found a useful video on YouTube that gives further insight on this topic incase we any group does: https://www.youtube.com/watch?v=3N3ApzmyjzE. This video was beneficial because it allowed me to see how another individual used a perfboard and made his own creation. The more that my group learns about these boards and their different functionality, the better off we will be in using our creativity to make the best possible prototype!


Thank you!

Thank you for tuning in this week. More project updates are to come next week once we have all of our parts!


-Scott Provenzano