Tag Archives: 3D Printing

Reflecting on a Semester of Creations

Expectations

Coming into this course, I was excited by the prospect of making a previously foreign idea (3D printing) much more tangible. I expected to learn the ins and outs of creating objects with a 3D printer as well as learning more about the capabilities of 3D printing. Inspired by the first guest lecturer, Arielle, a previous class alum, I was very excited to see what product or creation my team would come up with by the end of the semester.

My Experience

My experience in this class has been much more wholesome than I expected. I would venture to say that I gained a more creative mindset that is no longer limited by the unknown possibilities of maker-spaces. If you had asked me at the beginning of the semester to define a “maker mindset” I don’t think I would have been able to. Each of the guest lectures and workshops we experienced this semester contributed to a growing knowledge of the resources and possibilities out there. I expected to be focused on 3D printing skills and printing items each week, however I was pleasantly surprised to pick up embroidery, Arduino, digital scanning, 3D modeling/ designing, and many more skills! In this post I’ll highlight my favorite takeaways from this course.

Designing & 3D Printing

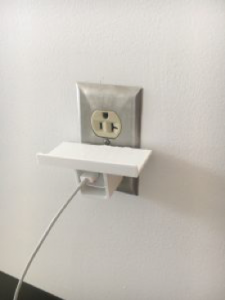
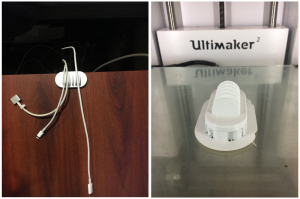
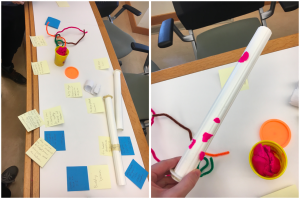
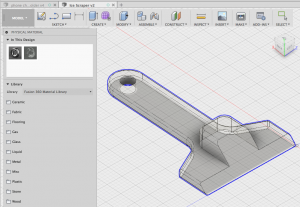
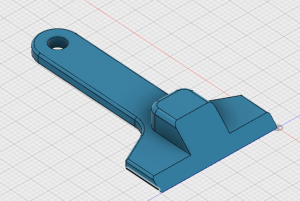
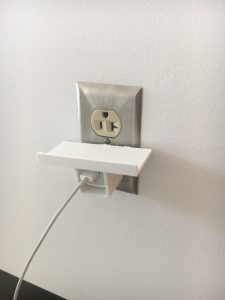
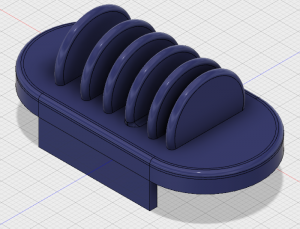
I thoroughly enjoyed the iterative design process that goes into making things. I came into this class with no knowledge on how 3D printers worked so each time I printed something I learned something else to look out for. Taking an idea into Fusion 360 Cad designing software was a new experience for me and taught me that patience is required in order to create the object you are aiming for especially when you are not an expert with the software. One of the first things I printed was a phone stand (shown below) however it was too lightweight to support the weight of a phone. Additionally, I designed and printed a cord organizer for my desk however by reducing the infill percentage (in order to print in less time), it was not as strong and therefore the dividers shortly after ended up breaking off. Read about my experience with Fusion 360 here. With each print there was a new discovery but it was always fun to pick up a freshly printed item and test it out! I am excited to expand upon my 3D printing skills now that I am aware of all of the free resources by which to do so and hopefully utilize some of the things I have learned in my career!

FabLab Laser Cutting & Embroidery

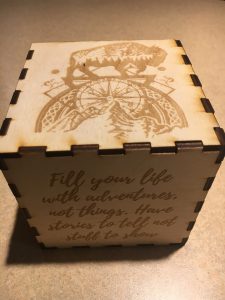
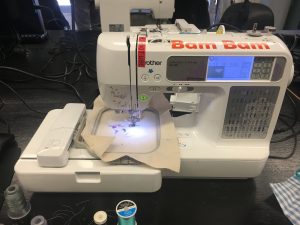
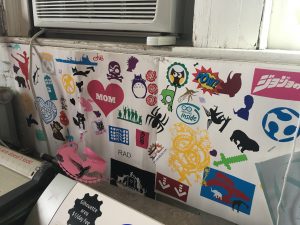
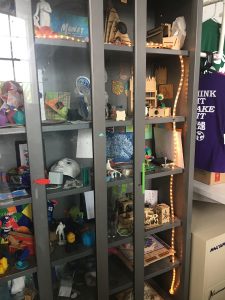
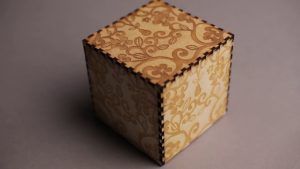
One of my favorite series of courses were the ones at the FabLab. I was constantly inspired by all of the creations on display in this neat makerspace. We had 3 lessons at the FabLab focusing on creating a laser cut wooden box, digital embroidery, and then working with conductive thread. To read more about each creation, check out the three linked blog posts. A big takeaway for me from our time at the FabLab was how much of a resource they can be for any and every idea you may have. They have experts in so many different fields as long as you have an idea, they can help make your idea come to fruition! We spent many hours at the FabLab during our final project and enjoyed bouncing ideas off of the experts and hearing their opinions our project.

Vast Resources for the Maker Community

Each guest speaker we had this semester provided a little more insight into different areas of innovation within the maker community. I had not realized before the vast amount of resources that were available for anyone to use. Some of the online resources that I’ve found most eyeopening and will potentially use in the future are the 3D printing online libraries (primarily https://www.thingiverse.com/ and https://pinshape.com/). Additionally https://www.shapeways.com/ and https://voodoomfg.com/ both provide the machines, materials, and guidance in order to print anything that you design and have it shipped to you. All of these cites help to make 3D printing even more user friendly. A neat resource to learn new skills from that I was made aware of through this course is https://www.instructables.com/ which provides tutorials on almost any DIY project you can imagine.

Final Thoughts

One of my biggest takeaways from this course is that I am so much more capable of building and creating things than I expected. I learned how to program an arduino simply through expert advice at the Fablab and by watching Youtube tutorials. I learned how to design in CAD through a class workshop and then continued online tutorials. We learned how to create a vertical hydroponic garden through hours of online research, Instructible tutorials and advice from fellow makers and gardeners. I learned the iterative process of prototyping and the pride that comes from a final working prototype. The resources are out there and just waiting to be utilized to bring ideas into creation! This class has been one of my all time favorites and I am so happy to have had the chance to learn and grow with such a great group of people!

Thanks for following along on this journey, I hope you’ve been able to learn a little from my experiences or that you’ve gained a new interest as I certainly have!

My Experience in BADM 395, Digital Making Seminar

Reflection on the Past Semester

Hi there! I’m tuning in one last time before ending this semester. Thank you for taking the time to read my posts and being interested in what I have been learning throughout this semester. I can honestly say that this course has taught me the most tangible skills out of any class I’ve ever taken at U of I.

At the beginning of this course, I simply expected to learn how to utilize 3D printers. My advisor told me that that course was all about 3D printing and its implications in business. I had no idea that I would be learning how to code, use laser cutters, use conductive threading, etc. I loved learning more than I had expected because it helped broaden my skill set to areas beyond just 3D printing. It really showed me how 3D printing goes hand in hand with so many other activities, and it can be used a supplement to creating rather than a standalone creation tool.

Additionally, I also expected to heavily focus on 3D printing wheelchairs at the beginning of this semester. I was intrigued by Arielle’s talk that she gave to our class on day 1. She noted that 3D printing in the realm of wheelchairs could use extra support, so I was set on filling that gap throughout the semester. I interviewed Arielle (see post here: https://publish.illinois.edu/digitalmaking2018/2018/02/14/3d-printing-wheelchairs-assistive-devices/), and I quickly realized that 3D printing a wheelchair on our smaller-scale printers was not necessarily feasible. My takeaway from chatting with Arielle is that there are many non-profit organizations that help individuals with disabilities that offer great opportunities to get involved. As for the making aspect, the devices being created must satisfy an individual’s need and be mechanically-feasible to make through 3D printing (wheelchairs are large with complex parts, which is not feasible). While my group did not choose this as our project for the semester, I am still very grateful to have gotten exposure to this area.

Overall, my expectations were met throughout the semester in that I was able to learn more about the implications of 3D printing, how companies are using this technology to improve lives, and also how to build something from the bottom up. My group’s work on the Arduino Motion Sensor showed me how to break down a seemingly-complex device. This break down allowed me to grasp a firm understanding of how electronics/prototypes work, and thus allowed me to fully comprehend the work I was doing.

As I mentioned, my work was different from what I expected in that I originally thought I would only be working with 3D printers over the semester. I am ecstatic with the fact that I was not only able to gain skills with 3D printing but also with coding/modeling/etc. I recommend this course to all of my younger peers because it allows students in the college of business to learn skills past what we are used to (e.g. Business plans that are solely written out and not necessarily executed with prototypes).

Pertaining to myself, I learned that I often become so excited to learn a new skill that I tend to get too far ahead of myself. For instance, when it came to 3D printing, I was so eager to print that I originally rushed through the Cura program to print my item faster. This was not good because it sometimes resulted in my file having incorrect settings, and thus an unsuccessful print. I also noticed this when I was working with the Arduino coding program. I began by quickly trying to write code and getting my prototype to work (which also failed upon first trying). These experiences taught me the importance to slowing down and grasping a firm understanding the basics before trying to reach an end goal. Each time I slowed down and took the time to understand how my work was impacting the final result, my success became much more apparent.


In Summary

Overall, this course taught me how to take an idea and bring it to reality. When first meeting with my group earlier this semester, we were throwing around crazy ideas of what we could create. Each of our ideas seemed very daunting at first as they were all in our minds and we did not have any materials/resources to create. Slowly but surely, our team took the creation process step-by-step. Laying out what needed to be done in steps helped keep us on track and progress forward each week. It was so rewarding when we finally saw successful results after we got our last wires plugged in and our last code typed out. That is when we knew we had successfully gone from the idea to reality.


Thank You

Thank you for sticking with me each week to watch how I’ve progressed through the course. I would also like to give a big thank you to our instructor, Vishal, who has invested so much time and energy into helping us learn. He is hands-down one of the most thoughtful, kind, and intelligent teachers I have ever had at UIUC! It has been a pleasure sharing my experiences with you, and I would love to stay connected! Add me on LinkedIn: https://www.linkedin.com/in/scottprovenzano/


Wishing you all the best!


-Scott Provenzano

Week 13 Progress in Design

This week, Team Synergy made great strides in our final project and we now have a better focus for our next few steps. Despite our initial struggles with other project ideas, designing ergonomic headphone attachments has been a very successful and informative process. The focus of our project will center around the short waiting period for customers to get their Air Pod attachments. We hope to create three different sizes for our Air Pod attachments, small, medium, and large, allowing us to quickly print the design and deliver to the customer. We hope to print each design in fifteen to twenty-five minutes. Upon reflecting with my team, we have decided the best long-term business strategy is to create a website or app to order the prints ahead of time and pick it up from the lab. Thus far, we have created our own design and printed a fully functioning prototype. The first iteration of the making process has been completed and we are now moving on to the crucial processes of perfecting our model. Our first model functions, however, we noticed a few critical changes we could make to improve the design and performance of the Air Pod attachments. First, the base of the holder could be smaller to fit snuggly around the Air Pod. Second, we need to print out of a more bendable material for comfort and aesthetic appeal. Finally, we will lengthen the tail to fit better around the customer’s ear. Here are a few pictures of me wearing the designs and my team members holding them.

PICTURE

PICTURE

Our team entertained the idea of scanning someone’s head and printing a custom fit earphone attachment, however, we have decided against that idea due to technological limitations. Currently, the technology is not readily available to create accurate 3D models using existing consumer technology (However, an article I shared on Yellowdig shows how this is changing). It would take far too much time to render their head and then design the earphone around it. Our current plan features three different designs, small, medium, and large for all customers. We will use Team Synergy Member Ria’s ear to model the small, my ear to model the medium, and another BADM 395 student for the large. We believe that these three designs will help iPhone users of all shapes and sizes use their Air Pods when working out. Look for more next week from Team Synergy!

The Iterative Design Process

Hello everyone!

This week we spent time with our project teams really solidifying our prototype and ensuring we have all the correct materials and skillsets to be able to build and complete the project. Our team is working on building a hydroponic vertical garden since we all enjoy indoor plants and thought it would be a great way to gain a new set of skills not only building a plant watering system/ vertical garden but also incorporating sensors into the product to make it more user friendly and set it apart from the current vertical gardens that many people already have in their homes.

One main takeaway I have from this project so far is that design and prototyping is an iterative process. Many factors play into how the final product actually turns out, some of the factors that have changed our prototype so far have included:

  • Available Materials
  • Skillset Required
  • Timing needed to print certain parts
  • Resources available to learn from
  • Feedback from potential users
  • Personal design preferences

There are many moving parts with our product since we have the structure that will act as the backbone for the watering system and the plants (including the piping and drip water system as well as the base and water reservoir), the cages to hold the plants, and finally the electronics used in making our plant system a “smart” hydroponic system. Our ideas for the structure changed when we visited the FabLab last week and picked up a large PVC pipe that would be ideal as the main support. We then adjusted our prototype to include this since it was free and available material, decreasing our material costs. We also decided to incorporate a water level sensor into the product to track how much water is left in the reservoir over the air quality sensor (dusduino) due to the availablility of materials and user feedback. The water level sensor provides valuable information to the user as to when they need to fill the water whereas the dust sensor would have purely been to see how effective the product was. Our design and idea for the sensor changed again when we visited the FabLab on Thursday and learned that instead of buying a water sensor online, it is easy enough to build one out of wires within our water reservoir bucket for much cheaper than the initial sensor cost. This week we will be focusing on putting all of the moving parts together and testing out our product. After we have the backbones for the system in place, we will be getting the plants and other necessary items for them to present during the final presentation.

I’ve already learned so much from this project and all of the others in the class, I look forward to seeing how the other products progress this week and in the coming weeks! Thanks for reading!

Initial prototypes and Designing

Bust

Last week, I was not able to create my 3D Printed bust but I was able to do so this week! A classmate took a scan of myself that I uploaded onto Meshmixer. The original scan had some creaks and empty spaces but Meshmixer did a great job editing the scan. I was able to close the STL file by simply selecting a function called Make Solid and Close Cracks. Afterwards, I exported the file and opened it in Cura. The file was to small to be seen so I then selected all and scaled the item up (10000). After making some other edits in Cura, I then began the 3d printing process. In total, by bust took 45 minutes to print and I am thrilled with the results!

FaceBack
Project: Hydroponic Vertical Garden

This weeks class was mainly devoted on creating the initial prototypes of our final project. My part in the project is to create a voronoi patterned bottle holder to fit a 2 liter as well as drip nozzles.  I spent most of the weekend researching this history of voronoi diagrams and the results of my findings can be found in my last blog.

https://publish.illinois.edu/digitalmaking2018/2018/04/09/once-a-semester-project-voronoi-pattern/ 

I went to the FabLab in hopes of finding someone skilled in Meshmixer to help me with parts I found difficult, but the students there were more familiar with other softwares. Thus, I went to Youtube and found great tutorials! After familiarizing myself with Meshmixer, I really enjoyed working with the software and created a wonderful bottle cage that I initially felt apprehensive about.

Bottle Cage

I was able to print the drip nozzle and the bottle cage. The drip nozzle was printed in less than an hour. Whereas, the bottle cage holder took nearly 20 hours to print! Initially, our team 3Dream wanted to have 8 plants but after taking into consideration how long it takes to print one bottle cage holder, we will now print 4 of them and 4 drip nozzles.

Thank you for taking the time to check out my blog and see you next week!

Once a Semester Project: Voronoi Pattern

History

Geroge Voronoi, for whom these patterns are named, was a Russian mathematician who made several important discoveries in the geometry of numbers and polygons. This makes sense that the creater of voronoi patterns is a mathematician since the pattern it self is a partitioning of a plane into regions based on distance to points in a specific subset of the plane… These regions are called Voronoi cells. The Voronoi diagram of a set of points is dual to its Delaunay triangulation. In 3D printing, Voronoi designs utilize this same formula to create quick printing, hollowed, strong structures which are aesthetically pleasing as well. In mathematical terms, the pattern would be seen as the following:voronoi

Aside from mathematics, the voronoi patterns have become very popular in the additive manufacturing industry and have a wide range of different uses.

Voronoi Patterns in 3D Printing

The patterns have expanded into different segments within the 3D Printing industry. In one article, I found the Voronoi pattern being used for the development in a 3D Printable orthopedic cast that takes patient heat sensitivity into account. A team of faculty researchers from Delft University of Technology (TU Delft) and Boston University have formulated a hollow Voronoi tessellation pattern to represent the covered region for a web-like cast design. The pattern is further optimized according to the thermal-comfort sensitivity calculated from thermal images. Working together with a thickness variation method, they generated a solid model for a personalized cast maximizing both thermal comfort and mechanical stiffness.

cast

https://3dprint.com/192877/3d-printed-cast-thermal-comfort/

Similarly, in another article the voronoi pattern were used in the development of a waterproof cast by a company called ActivArmor. The company created a solution to the hassle of not getting a traditional cast wet and ActivArmor casts are 3D printed in a voronoi pattern, allowing air to circulate and keeping sweat and bacteria from getting trapped. They’re designed so that the wearer can still be active, doing all the things he or she normally would while still healing properly.

waterproof cast

https://3dprint.com/197582/activarmor-aniwaa-funding/

The voronoi pattern has also been used by a middle school robotics team to help restore Kentucky’s bat population. The middle schoolers got advice when designing their project from from Louisville-based engineering and 3D printing company 3 Space and suggested that they use Autodesk Fusion 360 and that they should investigate using a Voronoi pattern as the cling wall. The team took this information and in a few weeks the octagon shape with Voronoi cling-wall was born. They knew they wanted something that could be printed on most 3D printers available to middle school kids so they kept their design small but modular. The final design allows for multiple middle sections to be combined to create a taller bat house to hold more bats.

bbat

bat

https://3dprint.com/162756/students-3d-printed-bat-house/

Finally, a very popular use for the voronoi patterns would be in fashion, jewelry, and basically creating any object more visually appealing. A company named 3D-ZAKAZ, specializes in developing 3D printing and modeling of Voronoi style designs to a whole new level, by releasing dozens of designs files for these interesting creations. The believe that the lattice structure of the surface makes people look at the world from a different perspective, giving the illusion of penetration into the essence of the image. Currently, 3D-ZAKAZ has over 60 different models in the Voronoi style, with the design files being disseminated on 3D printing repositories such as Thingiverse, MyMiniFactory, and their own website. Some of their creations can be seen below:

kh
hulk

https://3dprint.com/91649/voronoi-style-3d-prints/

Creating a Voronoi Pattern

Although it might be easier to find an object with a voronoi pattern on Thingsverse or similar sites, it is always good to know how to make something yourself. Especially, if it is a beautiful pattern that can be incorporated into nearly any structure. After doing much research on the pattern, I will try to incorporate it into my final class project and create the pattern using the following tips:

“Tips for Removing 3D Print Support Structures.”

Step 1: Import Model and Reduce Polygons

1) Import model into Meshmixer [Import icon] or [file] > [Import]
2) Select entire model using keyboard Ctrl+a or use the [select] tool to click-drag certain parts you want to edit.
3) Click [Edit] > [Reduce] (Menu appears at top after selecting).
4) Increase the percentage slider or change drop down to lower triangle / polygon count. Less polygons result in larger openings in your final model. It may help to try a very low polygon count.
5) click [accept].

Step 2: Apply and modify the Pattern

1) Click [Edit] menu icon > [Make Pattern]
2) Change the first drop down to [Dual Edges] (pattern using exterior only) or [Mesh + Delaunay] Dual Edges (generates pattern inside model). Changing [element dimensions] will make thicker or narrower tubes.
3) To save model: File > export .STL

*Adjusting certain pattern settings may require intensive CPU usage.

*After clicking accept, you may want to reduce the new mesh polygons slightly for easier 3D printing or importing into other programs.

http://www.instructables.com/id/Make-Voronoi-Pattern-with-Autodesk-Meshmixer/

Thank you for reading and I hope you learned something new!

Transforming reality into the digital world

Scanning ourselves

This week focused on learning how to 3D scan objects to create a digital version to  be able to print. We had fun scanning each other’s figures, most people tried to print busts however I was interested in trying to do a full-body scan to look similar to an action figure versus a bust. It didn’t end up working well though unfortunately as the app we were using now requires you to buy the scan. Later in the class I ended up try to do the scan again, I noticed that the new app we were using asked you to hold the sensor still quite a few times as it seemed to be taking individual pictures which it would then later compile. I did not end up having the time to clean up my bust and actually print it although I look forward to using the software next week to finalize the images and then also be able to 3D print the bust of my head.

Projects using Scanning Technology:

The thought of printing our own heads seems a bit strange to me although I am fascinated by the idea that we are able to take scans of real objects and then transform that into a 3D printed object. This opens up the possibilities for so many neat projects. Professor Vishal mentioned the project Scan the World ( https://www.myminifactory.com/scantheworld/ ) which I found very interesting so I did a bit of further research on this. The goal of this project is to be able to archive objects of cultural significance all over the world by using 3D scanning then opening up the possibility for 3D printable replications of these objects. The idea and value behind this archive is to open up treasured art to the public in a much more tangible way. The replication of these artifacts also serves as a way to better preserve them so that the public can interact with them while not deteriorating the ancient art or artifact. This project started in June of 2014 and currently has scanned and created 10,903 printable 3D scanned sculptures and spent 21,000 hours printing these objects.

Project Update:
This week we discussed more about the frame and technical aspects of our hydroponic vertical window farm. We gathered an Arduino and other components needed to start programing the sensors and we plan to head to the Fablab again tomorrow to gather a few more materials to start building a rough prototype and designing the specific parts such as the plant holders/ clips to attach to the structure as well as the drip funnels that will attach to the plant holders/ bottles. We’re looking forward to building a rough structure in the next week as well as designing the plant baskets in Fusion 360 and programming the Arduino and sensors.


Shapeways & Prototyping!

Guest Speaker

This week we had an amazing speaker share insights about Shapeways, an innovative company that created their business as a 3D printing manufacturer run online, and advices with prototyping. Shapeways allows users to upload files to their site, choose the material to print and they will print, finish and ship the item to you! There are also many items designed by people around the world on the shapeways site you can order and they will ship you such as jewelry, pottery, home décor items and even tech devices. At the beginning of the talk,  Lauren gave us a virtual tour of the Shapeways space showing us each of the machines they use to print in and for different mediums. When deciding what material and machine to use to print she discussed knowing your needs. This includes:

  • Scale of the item
  • Strength & rigidity
  • Budget
  • Accuracy of design

After deciding on these 4 aspects, you can move to prototyping. At Shapeways they often say “All products are prototypes, but not all prototypes are products”. This put the idea of prototyping into perspective. With products, there is always something that can be improved upon therefore why it is okay to call it a prototype, however conversely, some prototypes need further iterations and improvements to become a working product.

Prototyping our Project

The second half of the class we spent within our groups working on the prototype of our project idea. Our group, 3Dream has met a few times in the last week to make sure we are all on the same page with our design since we have gone through several ideas for a final project. The last 2 weeks we spent further researching hydroponics, the systems and the feasibility of creating a smart vertical hydroponics garden. During class, our team looked into the details of the structure, where we would place the plants and how they would be held up. We drew inspiration from both a coat rack in the classroom and a Christmas tree stand. For a hydroponic system, there needs to be a large basin of water to pump through the system so we spent time thinking of the best solution to incorporate a tub of water into the system. At the same time, we needed to come up with a base for the structure that would be stable enough not to easily tip over and kill the plants. A combined solution to instability and where to put the water led to incorporating the tub of water into the stand as a way to weight the system down while also concealing the tub making it aesthetically more appealing.


Putting pen to paper: Prototyping

This week really put things into perspective on how much detail will be required for our final project. That being said, our team 3Dream put pen to paper and started prototyping! By completing all of the readings and watching the videos, it was clear that prototyping is a must even if you are not sure on all of the details.

Why prototype?

Creating a prototype is crucial to the design process. It allows for the users to put their ideas into a model and make revisions if needed, omit aspects, keep others, and include additional components. Futhermore, by prototyping before production begins, it is possible to see what specifics parts, materials, and additional resources will be needed and be ordered in advance.

3Dream’s prototype

We created a lo-fi prototype which was a quick and simple hand-drawn sketch to demonstrate the core functionality of our project. We actually developed two sketches. The first prototype really helped us get a sense of what we wanted out project to look like.  It was a rough sketch but really helped in the process of fine tuning and simplifying our project to a cleaner model. We got an idea of what materials will need to be purchased as well as which can be found at the FabLab or even printed ourselves! Below, you can get a sense of what our project will look like and see the differences in our first model to the second one.

Prototype 1

Prototype 1 Continue reading Putting pen to paper: Prototyping

Designing our Project

Shapeways Guest Speaker

Hi All! We began class this week with a guest speaker from Shapeways joining us via webcam. She gave us an impromptu tour of the Shapeways facility (really neat to see all of their equipment!), and she spoke to us about the implications of Shapeways in the 3D printing industry. For those who do not know, Shapeways is a “New York-based 3D printing marketplace and service, startup company. Users design and upload 3D printable files, and Shapeways prints the objects for them or others” (shapeways.com).

After hearing our speaker talk, I was curious to learn more about the safety measures and policies that Shapeways has in place in regard to creating weapons. With gun policy currently being a heated topic in the USA, I figured this 3D printing company must have to make many choices pertaining to creating devices that could function as guns. Thus, I asked her to touch on the safety measures and policies in place. She let us know that ballistic manufacturing is regulated by the US government. However, Shapeways would technically be able to gain a license to be able to legally produce weapons for consumers. That being said, Shapeways has taken a stance to not produce weapons so they do not offer such a service to customers. I found this information alarming because it allowed me to understand that a 3D printing company has the potential to legally obtain a license to create weapons. These weapons could then be customized in such creative ways by the consumer in an effort to inflict the most harm upon other individuals. This worries me because it may someday result in new weapons that we have not even seen yet.


Readings & Project Design

On a lighter note, the assigned readings/videos for this week were spot on for what we did in class. They noted that the best first steps to take are to draw out your design, get prototypes as soon as possible, and get feedback from users (which are the exact steps that we plan to follow!). Check out the three pictures below to see some of our drawings and the different gadgets that we played around with. You’ll even notice that we got some lights to light-up on our Arduino!

Picture 1

Picture 2

Picture 3

We feel confident that we have all of the parts (except one) that we will need in order to create our Person-Counter device. The last remaining part we need is a 7-Segment LED Display that will show how many people are currently in the desired area (picture below). This piece will be crucial to our project because our device is meant to be free standing, meaning it will not need to be hooked up to an external computer once it has the code loaded onto it. Thus, it will need to have the 7-Segment LED Display to communicate to the user the data that it is gathering.

Picture 4

I became even more excited for our project today after tinkering around with the parts. Being able to physically touch the Arduino, perfboard, wires, etc. allowed me to grasp a much better understanding as to how this device will actually function (the circuitry became much more clear to me). One of my group members, Aubrey, noted that she has worked with Arduinos before and that she would be more than happy to help teach me what she knows about coding and how the devices work. This is extremely exciting to me because my mind is always wondering how electronics work at their core, so I believe this project experience will help me learn what I’ve been longing to know for so many years :).


Thank you!

Thank you for taking the time to read my post. See you next week!


-Scott Provenzano


References

https://www.shapeways.com/

Sewing Constellations

This week we had another visit to the FAB Lab in order to continue with the workshop where we are creating a box with a canvas that has an embroidered design all designed by us. This class was focused on the final step of the workshop where we are to sew on a design to place lights onto our embroidered canvas where the lights will add to the creativity of our design.

In order for us to successfully create a piece with lights in it, we first learned a bit about circuits and how the battery and lights we are sewing on to our piece are working together. One of the students from the FAB Lab that was assisting with the workshop named Duncan began to teach us about circuits a bit before we began sewing. We learned about the difference between parallel circuits and series circuits, where parallel circuits have lights that are independently connected to a power source and do not need each other to light up and series circuits have lights connected to each other and the power source, so they all need to work in order for them to light up. We also learned about the dangers of crossing negative and positive ends of the battery as they can cause the entire circuit to not work. Once we understood that, we were able to design our lighting plans for our canvas on paper, which we then used as the foundation for the actual sewing design for our piece.

Once we had our design and understood how the battery and circuits worked, we were handed some LED lights (2 or 3 depending on our design/preference) and some conductive string that can pass an electric current through itself in order to reach the lights and light them up. We thread the needle and proceeded to sew in our design. Many people in the classroom had amazing and creative designs. One of my favorites was a student who had the embroidered design of a lion’s face from the lion king and had placed the two lights perfectly on the spaces for the eyes of the design. After a lot of trial and error and many mistakenly crossed negative and positive wires, I too, was able to finish my design and place two lights at the top of my embroidered design. Since my design for my canvas was a couple dancing together on a sort of stage, I decided to place the two lights on the top right and left corners of the “stage” to seem like stage lights and complete the theme of my design. I was overall very happy with my design and grateful to have learned as much as I did from the workshop.

First Time at the Fab Lab

Overview

Our class had the pleasure of being hosted by the Champaign-Urbana Community Fab Lab this past week. I have mentioned this lab in a previous post, but as a recap: The Fab Lab is “an open and collaborative workshop space for computer-driven innovation, design and fabrication” (http://cucfablab.org/). Essentially, this establishment allows individuals of all ages to utilize making resources to bring their creative ideas to fruition.

We began our class with a tour of the Fab Lab. The space is located in the second oldest building on U of I’s campus, so there was definitely an historical feel to it! We got to see some of the different machinery such as a sticker laser cutter, 3D printers, wood laser cutter, threading machines, etc. (see pictures below with sticker examples and other creations). I am very thankful to have had the opportunity to explore this space before graduating because it exemplifies some of the most technologically advanced equipment available to the Champaign-Urbana community–I only wish I had known about/visited the Fab Lab sooner!


Creating at the Fab Lab

Our class was split up into two groups so half of us could learn a certain skill this week and then another next week, while the other half of the class would learn vice-versa. This week, I was a part of the group that got to learn about laser cutting on wood. We began by learning how to navigate the program called “Inkscape”. Inkscape is essentially a free, open-source version of Adobe Illustrator. We utilized this program to build the design for our boxes (see my design below).

The red lines in the picture above represent where the laser cutter will cut straight through the wood (similar to cutting out a puzzle piece). The black silhouettes represent where the laser cutter will etch the drawing. What this means is that the black silhouette designs will not be cut all the way through the wood like the red lines will be, but rather etched to appear as an image. See the image below to get an idea of how our boxes will look:

I should be able to utilize the laser cutter next week to create my box, so I will include a photo in an upcoming post showing the object come to life! One of my biggest takeaways from utilizing Inkscape was understanding the amount of time and attention to detail that the creator must have in order to successfully create an object. While the programs that we utilize are powerful, there is still tremendous room for human error. I think this takeaway stood out to me because I had the preconceived notion that we would be able to just click a few buttons on the program and have it spit out a box. The reality was that I had to create this box with proper dimensions, modify each of the notches/outlines, and ensure that each of the lines were as straight/aligned as possible (which was a lot harder than expected). I enjoyed learning on Inkscape so much that I actually downloaded the program on my personal computer! Going forward, I plan to explore the different capabilities in this program along with some of the previous softwares we have learned in this class (e.g. Fusion Autodesk 360 & Cura). I firmly believe that this has been the most valuable course I have taken in college to teach me tangible skills. I love that I am genuinely interested in the area of technological making, and I am confident these skills will come in handy next year when I am starting full-time as a Technology Consultant.


Thank You & Looking Forward

Thank you for taking the time to read my post. Next week, we’ll be learning about conductive thread. Specifically, we will learn how to sew conductive thread into cloth, which will allow us to add another feature to our laser-cut boxes. I can’t wait to share pictures of my creations with you next week!


-Scott Provenzano


References

http://cucfablab.org/

Biology meets 3D Printing

Alan Amling

This week was filled with great guest lecturers. We got to hear from Alan Amling on UPS’s business model with 3D printing. UPS has included additive micro manufacturing which is essentially taking 3D printing factories and integrating them into their model. UPS currently has 23 makerbots for prototypes and models which are typically used by small businesses. They have done this to stay at the forefront of this disruptive technology and to fit demand manufacturing since people will soon be shipping and storing less, some of UPS’s main services.

Alan discussed two interesting usages for 3D printing. He mentioned how smaller factories are building parts , prototypes, and mass personalized goods. An example would be printing customized tools to prevent slippage and injury at the work place. Another example Alan used was Nike’s matrix structure sole being 3D printed for an exact fit. Later this year, they are going to use a scan for your foot ( measure weight, etc) and create a customized shoe.

Nike’s first 3D-printed football cleat prototype.

Dot Silverman

Our next guest lecturer was Dot Silverman, who introduced me to the topic of biohacking. The use of biohacking materials to create 3D structures, and using special bioinks made up of living cells to print messages and patterns. A product of biohacking may be seen below:

Human cells cultured into a decellularized apple slice (left) and an apple carved into an ear shape (right)

Fascinated by the human ear prototype, I looked into other Apple ears and found Pelling Lab’s creating them with existing 3D structure as a scaffold for cells. Andrew Pelling describes the process: “You slice an apple, wash it in soap and water, then sterilize it. What’s left is a fine mesh of cellulose into which you can inject human cells — and they grow.”

Pelling Lab’s “Apple ears” during the decellularization process.

Final Project

Additionally, my team is considering the incorporation of 3D printing into vertical gardens, window farms or urban farming solutions. I am drawn to this project because I believe that air pollution is a major problem and plants can assist with making the air cleaner. As a college student, I found it to be difficult owning and caring for plants with the limited backyard space and found window farms to be very appealing and manageable.  I would like to create a window farm that uses various sensors and a micro-controller to sense its environment and adapt accordingly.  I will have to do additional research to better understand window farms  if my team selects it for the final project.
Thank you for reading and see you next week!

A Swirl of New Ideas

UPS Speaker Takeaways:

This week we heard from 2 inspiring speakers on very different topics. The first was Alan Amling who works for UPS on their Corporate strategy and global on-demand manufacturing team. He gave us an interesting look into how UPS is shifting their business model and opening up new 3D printing labs to reach some of the products on-demand market. The part that I found most interesting about his talk was that unlike most of the other speakers we’ve heard from, he admitted that 3D printing is not going to single-handedly take over the world and revolutionize everything. Throughout each of the talks we’ve heard, I’ve had some skepticism about how fast 3D printing is going to take over manufacturing and the ability it has to completely replace certain processes. Alan compared the relationship between 3D printing and manufacturing to microwave ovens versus traditional ovens. When the microwave was first invented, many believed it would replace traditional ovens. It has not replaced traditional ovens however it has become a regular household device alongside the oven. This, Alan believes is exactly how 3D printing and manufacturing will become. 3D printers will become prevalent in most manufacturing processes however will not completely replace traditional manufacturing but rather complement it.

Additionally, Alan had an interesting comment stating that a device or process does not need to be everywhere or take over a space to revolutionize an industry. He brought up Ecommerce and retail discussing how currently Ecommerce accounts for only 9% of all retail however it has still completely revolutionized the way retail businesses operate. The last takeaway I got from Alan was to “Get on a fast-moving train, you’ll excel faster than your peers”. By this, he meant to learn the skills that are becoming more prevalent now before they are everywhere because that will only help excel our careers in the future, specifically this 3D printing course provides a unique skillset that is very marketable to future employers.

Biohacking Takeaways:

The second speaker was Dot Silverman who introduced us to the idea of Biohacking and several amazing projects and products currently on the market or in the works. One of the projects that she had worked with was a material from Ecovative that is a sustainable replacement for polystyrene. This material is grown from a combination of processed agricultural waste and mycelium which then is set in growth trays to grow and take the shape of the trays in which they are set.

This material is incredibly promising as it provides a compostable alternative to polystyrene which takes from 500 years-forever to break down according to this study on biodegradability https://www.sciencelearn.org.nz/resources/1543-measuring-biodegradability. This idea was the most interesting to me as I care a lot about the waste created daily and finding sustainable substitutes to single-use everyday products.

Team Ideas:

Our team has been exploring various ideas for potential final products. For a while we were looking at 3D printing a map of the campus for DRES however this week, inspired by the speakers we decided to change topics and go in another direction. We are interested in exploring the capabilities of the Ecovative polystyrene substitute that Dot introduced and coming up with a common object replacement such as polystyrene coffee cups, plastic bags, or plates made out of this material.  The second idea we are exploring is the potential of using 3D printing on nails combined with a sustainable and healthier nail glue that would be more natural than current nails on the market today. A third idea we are currently discussing is participating in the “Growing Local Community” project led by Ultimaker (https://ultimaker.com/en/blog/52447-growing-local-community-project ) and incorporating the Mycelium material into our 3D printed garden design. We still have quite a bit of brainstorming and going discussing as a team however our goal for this week is to look further into each of these ideas and determine the most realistic and interesting route to take for our project.

UPS, Biohacking, & Final Project

Overview

Our class was spoiled this week with having two very influential people speak to our class. Our first speaker, Alan Amling, taught us about the advancements that UPS is making in the realm of 3D printing. Our second speaker, Dot Silverman, taught us about her work in biohacking and the exciting projects she is working on. During the second half of the class, we were able to meet with our teams to begin narrowing down our ideas for the semester project.


What is UPS Doing?

Alan informed us that UPS is taking major strides in utilizing 3D printing. The company has facilities that are capable of 3D printing on both the small and large scale. Alan mentioned that UPS’s Louisville, KY facility center can print something out by midnight and then be anywhere in the United States the next day. Such a capability is revolutionary for any company. Currently, it is common for consumers to have to wait multiple days before receiving an item they purchase. However, as more and more 3D printing facilities pop up throughout the country, it will be much more likely that future consumers can order custom 3D-printed products and expect to receive them the same day (maybe even within hours).

One of my biggest takeaways from Alan is the importance of consistency. It’s incredible that 3D printers can create almost anything, but Alan noted that if a company wants to be successful, then they will need to be consistent. For instance, many current manufacturing processes are standardized and effective enough to produce identical objects on a large scale. Since 3D printing technology is still relatively new, there are still areas in which errors are made (thus reducing consistency). Moving forward, I will remain conscious of these potential limitations of 3D printers, and I hope to play a part in identifying ways in which consistency can more likely be achieved at the industrial scale.


What is Biohacking?

Dot shared a bunch of exciting projects with our class in the realm of biohacking, which essentially is combining biology with making/3D-printing. One of Dot’s projects that stood out to me was one in which she had previously worked on a team that created human organs-on-chips; these chips emulate organ-level functions. What was really neat was that Dot and her team were able to combine a bunch of different organs-on-chips and connect them to simulate an actual human body. They then were able to simulate cocaine entering the body and the implications that it had on each organ. These devices (pictured below) may be a great alternative to animal-testing (which remains to be controversial among many consumers). Ultimately, these creations are extremely exciting and could lead to incredible breakthroughs in the medical industry.


Progress on Final Project

My group and I have narrowed down our list of final project ideas. Two of the ideas that I feel most passionate about are the creation of assistive devices for individuals with disabilities and a Neopixel Traffic Map. The types of assistive devices we are looking into are for individuals with limited motor-movements. For instance, individuals with arthritis may no longer be able to hold a pen like they used to. Such a disability can be devastating to many people as they may find joy in sending handwritten notes to their friends and family. 3D printing objects are able to extend an individual’s motor capabilities and increase precision. It would be neat for my group to talk with individuals who have arthritis/limited motor capabilities to understand what challenges they face most often in order to develop an all-in-one tool to help them navigate through their days more easily (see an example in the picture below). Another assistive device that we may look into printing would be wheelchairs, and you can learn more about this idea’s potential through one of my previous blog posts by clicking here.


The second idea that I find interesting is a Neopixel Traffic map (example pictured below). Essentially, we would be creating a way for a user to know the traffic conditions of a certain area before leaving their home/work. This would be accomplished through inserting LED lights into a picture map and connecting them to an Arduino board that would relay real-time traffic conditions via a paired Google Maps API (Application Program Interface). This project would involve us learning to code, working with API’s, and utilizing circuit boards–and we know we are up to the test!


Thank you

Thank you for taking the time to read my blog post. As mentioned, my team is finalizing our idea for our semester project, and I can’t wait to share with you what we end up deciding to pursue!


-Scott Provenzano


References

https://3dprint.com/85424/3d-printed-assistive-devices/

https://makezine.com/projects/arduino-neopixel-traffic-map/

https://publish.illinois.edu/digitalmaking2018/2018/02/14/3d-printing-wheelchairs-assistive-devices/

Inspiration, Ideation & Design

This week’s class was made me feel as inspired and creative as I did when I was little and the world was my playground. Design for America came in to give a presentation on the Design Process and walked us through the process for a certain group and issue from understanding the client to crafting a solution.

I have learned and utilized the design process once before in an industrial design class, taught by David Weightman who also introduced the idea of design thinking in our pre-class video. I really enjoyed this Design storm session because it completely encompassed and quickly introduced us to each step of the design process in a condensed form. Below you will see the 6 steps in the design process that Design For America (DFA) follows when working on any of their projects.

They walked us through each of these steps with an example situation by introducing different personal stories who each struggled with a certain aspect of life due to their blindness disability. They had already completed the first step by identifying our target group and users for the design. Our group chose to focus on solving the issue of anxiety when in unknown social situations for Jess, a blind college student. The second step in this process was immersing ourselves in our user’s world by making assumptions about how she sees the world, what she feels, thinks, hears, says, does, wants, and needs. Part of the design process is coming up with a bunch of ideas each on separate post-it notes to visualize and determine the most important ideas. After making assumptions, we were able to build “How Can We… statements” to better narrow our focus for the project. Our group came up with  a few statements focusing on bettering the social environment of Football games for students who are visually impaired.

Ideation

After framing and understanding the issue and potential client, we delved into the ideate portion with an individual and then longer group brainstorm sessions. In this part of class, we came up with as many solutions to the issue as we could find. One of the ideas I came up with was a railing with various textures that would differ depending on the place where you are in the stadium. We ended up adjusting this idea in our group brainstorm session to become our product and mockup in the Build portion of the process.

Prototyping

We ended up designing a railing that would surround the entire stadium and have brail labels for each different area (such as student section, hot dog stand, ect.) to help with navigation throughout the stadium hopefully decreasing uneasiness of the unknown. We presented this to the class and they had mainly positive feedback however during the ideation stage we wished we could ask questions to the user group to determine whether our solution would be useful.

Overall, this class opened our eyes to the design process and I look forward to transferring these skills towards our own ideation process towards our semester project.

Further Learnings from Printing Fusion Design: Nozzle Size

As a side note: Last week I printed the desk cord organizer that I had designed using Fusion 360 and have included pictures of the final product as well. With each print, I learn something new. This, like the phone stand had a balance issue however I could solve that by using a command strip to attach the organizer to my desk so that the cords would not immediately pull it towards the floor and it works quite well.

Additionally, the first few prints I didn’t understand how the nozzle size impacted the print, however I now know that using a 0.4 nozzle is typically the standard however will be much slower to print than the .8 nozzle. This makes sense, thinking about it as the .8 extrudes twice as fast due to the larger size, it is able to cut the print time in half. The down side of this is that it may not be able to capture as many small details if there are thin lines. Additionally, I learned that if using supports, it is quite difficult to remove .8 supports however .4 supports are easy to remove due to thinner lines and less strength in the material. If interested in learning more about how the nozzle size impacts the print you can refer to the 2 links below that I used.

https://craftunique.com/forums/view-thread/1254 

https://rigid.ink/blogs/news/what-3d-printer-nozzle-size-should-i-use-the-pros-and-cons 

Learning the Design Process

Design for America Overview

Hello! This past week our class was able to learn the Design Process from our University of Illinois peers at Design for America (DFA). “Design for America is an idea incubator, a motivated community, and a way of approaching complicated challenges. DFA shapes the next generation of social innovators” (http://designforamerica.com/). The individuals representing DFA were very knowledgeable in guiding us through the process and offering great insight. I have a good friend who has worked closely with DFA; this relationship has actually resulted in a successful startup company: Therapalz. Check out the company’s website here: http://www.therapalz.com/. Essentially, Therapalz creates smart therapeutic companion animals for patients with Alzheimer’s. These customizable animals have realistic heartbeats, lifelike sounds, and calming vibrations to provide additional comfort for patients working through this challenging disease. Please keep this success story in mind as I guide you through the Design Process we learned from DFA because it gives a strong indication about how perseverance through this process can produce great results.


The Design Process

The stages of this process are: Identify, Immerse, Reframe, Ideate, Build, and Test. Identifying involves simply observing or researching a challenge. Once it is identified, we must immerse ourselves into learning every piece of information about the challenge. Then we move into the reframe stage which is where the problem is further narrowed down through the insights we have gained through the previous two steps. Once we understand the specific challenge, we then begin creating in the ideate stage. This means writing down each and every possible solution to the problem. We then begin building prototypes based off of these potential solutions. None of these prototypes should be considered final because they should be built up, torn apart, and iterated to better model a viable solution to the challenge. Finally, we test the model with the end-users. We will go back and forth between building and testing until a final solution is pinpointed.

We were able to go through this process by analyzing a case involving an individual named Brian. Brian is an aspiring entrepreneur in the Austin area who faces challenges when navigating the city due to being blind. My team was able to simulate the Design Process by going through each of the steps with a goal of figuring out the best plan for Brian. We came up with the idea of helping Brian navigate by teaching him with two of his senses other than sight: touching and hearing. This would be accomplished by giving Brian a 3D-printed map of his route with depth features indicating roads, buildings, turns, etc. along the path. The 3D-printed object would allow him to become comfortable with his route before having to take it; his sense of touch will give him further confidence in memorizing the path. Second, we would leverage his sense of hearing to guide him step-by-step in real-time while he is walking his route. This will be aided by his phone-based GPS and headphones. Ultimately, we believe Brian will gain much more comfort and confidence through leveraging two of his stronger senses and the technology we designed.


Wrap up & Thank you

Overall, learning the Design Process helped bridge the gap between the real-world challenges that our class has been identifying and the skills we have learned in regard to 3D printing. Prior to this session, we did not have a specific path to follow when connecting our challenges to 3D printing (we simply 3D-printed without much end-user consideration/prototyping in mind). Now, we have the skills necessary to Identify, Immerse, Reframe, Ideate, Build, and Test our ideas. As evident in Therapalz, a challenge was identified, the Design Process was leveraged, and now patients with Alzheimer’s are living more comfortable lives (see video below). I am excited to use this framework to get started on our class’s semester project with my teammates. Thank you for taking the time to read my post this week.


-Scott Provenzano


Sources:

http://designforamerica.com/

http://www.therapalz.com/

Discovering the Beauty of Autodesk Fusion 360

Overview:
This week we had Dan Banach from the Autodesk 360 company run a workshop introducing Fusion 360 software, the uses for it as well as walk us through creating our own models. We went through and made 2 different items, which I will discuss in detail later, while introducing many different functions and tools within Fusion 360. Dan had a slide discussing the various industries and companies that use Autodesk software, one I was surprised by was the movie industry and special effects. Many films use Autodesk software to design and create special effects. I am absolutely amazed by the capabilities this one software has and look forward to honing my skills in the coming months to be able to better design and create objects of value.

Fusion 360 Creations:

Our first item we designed was an ice scraper. In this workshop we walked through over 20 different tools within the software in order to create the exact look we wanted. One neat feature within Fusion 360 is that you can change the material of your creation. This then allows you to determine the specs, for example how much it weighs, which would then tell you how much it would cost in time and money to 3D print. I was also amazed by how many material options there were to model items in including metals, ceramics, paper, canvas, and even water.

In class we designed 2 items: an ice scraper and an iPhone charging stand. The phone charger I kept as the plastic PET material (since that is typical for 3D printing) thus why it is transparent, while the ice scraper I applied a “paint” layer to color it teal.

Ice scraper: http://a360.co/2snHF7x
Iphone charging stand: http://a360.co/2BpSWas

I thought the iPhone charging stand would be a useful item for my everyday life and was interested in seeing how the fusion file transferred into Cura to 3D print. I ended up printing this model and was excited to try it however, it is not very functional. The section that goes around the charger is too large to stay easily and when you put a phone on the shelf it is thrown off balance and falls to the floor. I was happy that I printed it because I got to see the iterative process, not everything comes out exactly as planned however you are easily able to go back to the drawing board and adjust the design for improvements. 3D printing is a series of trial and errors which makes it that much more exciting when you print something that works exactly as planned.

My Own Fusion Creation:

As for my own creation, I decided to make something to keep my electronic cords organized on my desk. I plug quite a few different cords into an outlet below my desk and have been getting annoyed that they fall off my desk and get tangled thus I’m constantly picking them up. This figure is a way to help keep the charging ends of cords on my desk. I incorporated a small shalf to keep it from sliding all over my desk however I still think it will need to be secured with a command strip. Hope this is of use to others! I’m excited to try printing this this week and will share updates on how it goes!

http://a360.co/2Bov1bl

Resources:

The most useful resource I resorted to throughout this small project is actually Autodesk’s Support & Learning page. They provide wonderful tutorials, explanations and examples of many different tools as well as products that you can use when creating your model. I found the tutorials quite helpful.

http://help.autodesk.com/view/fusion360/ENU/