Tag Archives: Conductive Thread

Finalizing our Fab Lab Creations & Initial Project Steps

What We Did This Week

Hello! This week has been by far one of the most exciting classes because it resulted with us walking away with some complete creations. After laser cutting and sewing for the past 2 weeks, we were finally able to introduce conductive thread to our items and finalize them.

We began class by learning how currents flow in a circuit (which is how our conductive thread would be working). Our instructors let us know that electricity always travels in a circle and follows the path of least resistance. They gave us a battery, battery switch, conductive thread, and LED’s. We were then tasked with drawing out a diagram of how we would be connecting each of these parts on our fabric (it is useful to diagram because of the potential complexities from connecting the positive and negative ports). Below is my diagram:
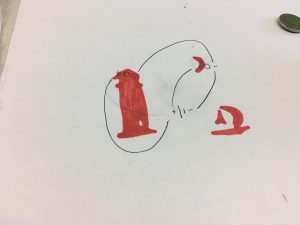
As you can see, I ensured that each of my positives connected with other positives, and my negatives connected with other negatives. There are also not any areas where a positive wire crosses a negative wire (which would cause short circuiting).

After diagramming, we were ready to get to work. We used a needle and conductive thread to stitch the LED’s and battery pack to the fabric (again, being careful to keep the positive wires only connected to other positives, and negatives only connected with other negatives). Below is a picture of the back of my fabric with all of the internal parts sewed on:
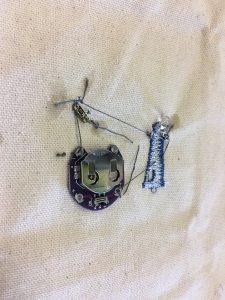
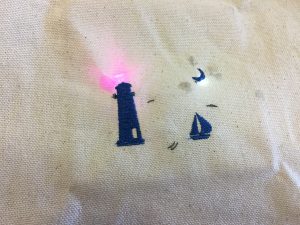
Once I got all of my parts into place, I flipped the On/Off switch and my LED’s turned on! This was nerve-wracking because if they had not turned on then I would have had to go back and potentially unthread/rethread some areas–which would definitely be difficult. Check out the lights turned on below:
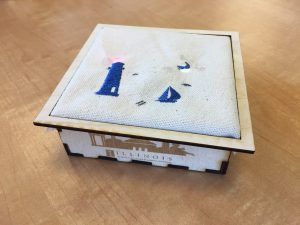
To finish up my box, I cut off the excess fabric that draped over the sides of my box. This resulted in a clean-cut box that you can check out below!
 

What’s to Come?

Now that we are equipped with the proper knowledge, skills, and resources, we are able to begin working on our final projects! This is extremely exciting because these projects are essentially created by our groups from the bottom up. My group (FastFoward) plans to create a Laser Person Counter (example: http://www.instructables.com/id/IR-laser-person-counter/). Essentially, this device would utilize lasers, wires, arduinos, etc. to count the number of people in a specific facility or area. This could be useful for restaurants, bars, and class buildings around our campus because it would give users the ability to understand capacity without necessarily being physically present at a location. Our goal for the next week is to gather the required components/parts and grasp a better understanding of how we can bring this idea to fruition. We are going to need to learn some coding skills in order to make this project work, so we will also be researching around in that realm!


Thank You

As always, thank you for taking the time to read my post. Stay tuned for the coming posts to follow along FastForward’s progress in developing our final project!


-Scott Provenzano

Laser Cutting & Conductive Thread (Week 7)

This week, our class met at the Fab Lab and learned how to laser cut wood and how to sew conductive thread into fabric. Unfortunately, I was sick this week and was not able to attend. Therefore, for my weekly reflection, I’ve researched these two activities and will share what I’ve learned.

Laser Cutting Wood

I am not sure which laser cutter the Fab Lab uses, so I researched a little bit on the machines themselves. Makezine published an article called A Guide to Buying Your First Laser Cutter, which talks about how laser cutters are popular in maker spaces and guides you through the first steps of buying one. A laser cutter can power through many materials with consistent, high precision. This is something drag knife cutters, paper cutters, and vinyl cutters can’t do. And while a CNC router may be able to make the cut deep enough, it cannot do it with precision. Laser cutting requires some design on the computer before printing – just like 3D printing. The laser operates much like the print head in a 3D printer. In fact, MakerBot, Printrbot, SeeMeCNC, Ultimaker, and many other companies started out producing 3D printers made from laser-cut parts. Epilog and Full Spectrum are popular brands for individuals buying their own, smaller laser cutters.

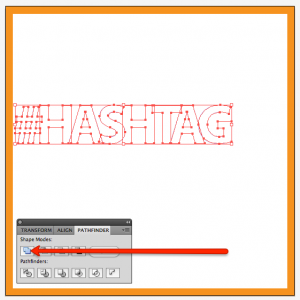
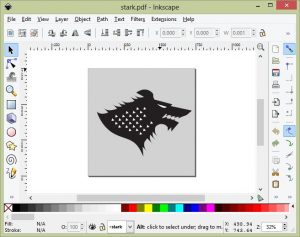
I’ve found that Illustrator’s Pathfinder and Inkscape are popular software programs used to design laser cuts objects. The two pictures below are screenshots of the programs. This website takes you through everything from setup of your laser cutter to designing on Illustrator. It is an article specifically targeted towards makerspace laser cutters.

Conductive Thread

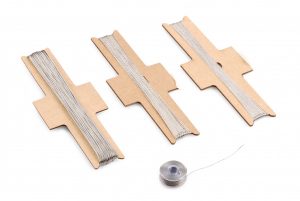
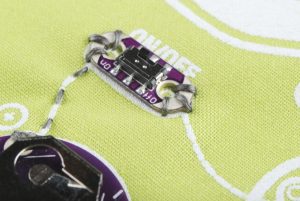
I found an article literally titled Sewing With Conductive Thread, which is very helpful considering that’s exactly what one group learned in class this week. Conductive thread carries current like wires can, so it can be used like a circuit if arranged the correct way. With this thread, you can create a flexible circuit that requires no soldering. There are many types of thread with conductive metals in then, but you should know what size and give you want your thread to have before sewing. 2-ply silver-coated thread is small enough to be threaded in a sewing machine and fine enough to allow fabrics to hang normally. Another popular material for thread is stainless steel.

I know how to sew both by hand and machine, and it looks like sewing with conductive thread is not much different. I’ve read a few warnings about how the ends can fray easily and how the thread is not insulated. It is recommended that thick fabric, fabric paint, or electrical tape be used to cover the thread. You should be very careful not to create a short circuit, which can lead to heat, smoke, scorching, or smoking. Sewable components like LilyPad, Aniomagic, and Flora lines are available to purchase and are made from printed circuit board (PCB).

I’ve used a laser cutter before, so I hope to learn more about conductive threads in class next week (if I get to choose my rotation). I think both of these are important skills to know in the makerspace. I can see immediate uses for laser cut prints and products, but the I believe the application of conductive thread lies in the future where we all have wearable electronics. I’m excited to see how conductive thread will be included with fashion and tech in the future.

First Time at the Fab Lab

Overview

Our class had the pleasure of being hosted by the Champaign-Urbana Community Fab Lab this past week. I have mentioned this lab in a previous post, but as a recap: The Fab Lab is “an open and collaborative workshop space for computer-driven innovation, design and fabrication” (http://cucfablab.org/). Essentially, this establishment allows individuals of all ages to utilize making resources to bring their creative ideas to fruition.

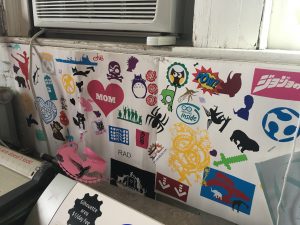
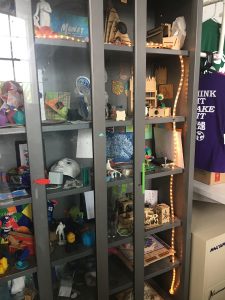
We began our class with a tour of the Fab Lab. The space is located in the second oldest building on U of I’s campus, so there was definitely an historical feel to it! We got to see some of the different machinery such as a sticker laser cutter, 3D printers, wood laser cutter, threading machines, etc. (see pictures below with sticker examples and other creations). I am very thankful to have had the opportunity to explore this space before graduating because it exemplifies some of the most technologically advanced equipment available to the Champaign-Urbana community–I only wish I had known about/visited the Fab Lab sooner!


Creating at the Fab Lab

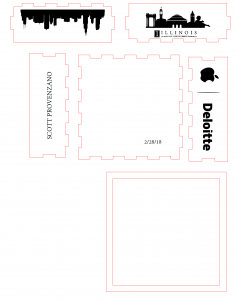
Our class was split up into two groups so half of us could learn a certain skill this week and then another next week, while the other half of the class would learn vice-versa. This week, I was a part of the group that got to learn about laser cutting on wood. We began by learning how to navigate the program called “Inkscape”. Inkscape is essentially a free, open-source version of Adobe Illustrator. We utilized this program to build the design for our boxes (see my design below).

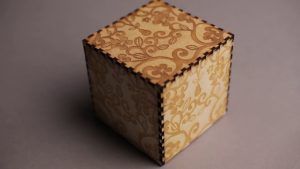
The red lines in the picture above represent where the laser cutter will cut straight through the wood (similar to cutting out a puzzle piece). The black silhouettes represent where the laser cutter will etch the drawing. What this means is that the black silhouette designs will not be cut all the way through the wood like the red lines will be, but rather etched to appear as an image. See the image below to get an idea of how our boxes will look:

I should be able to utilize the laser cutter next week to create my box, so I will include a photo in an upcoming post showing the object come to life! One of my biggest takeaways from utilizing Inkscape was understanding the amount of time and attention to detail that the creator must have in order to successfully create an object. While the programs that we utilize are powerful, there is still tremendous room for human error. I think this takeaway stood out to me because I had the preconceived notion that we would be able to just click a few buttons on the program and have it spit out a box. The reality was that I had to create this box with proper dimensions, modify each of the notches/outlines, and ensure that each of the lines were as straight/aligned as possible (which was a lot harder than expected). I enjoyed learning on Inkscape so much that I actually downloaded the program on my personal computer! Going forward, I plan to explore the different capabilities in this program along with some of the previous softwares we have learned in this class (e.g. Fusion Autodesk 360 & Cura). I firmly believe that this has been the most valuable course I have taken in college to teach me tangible skills. I love that I am genuinely interested in the area of technological making, and I am confident these skills will come in handy next year when I am starting full-time as a Technology Consultant.


Thank You & Looking Forward

Thank you for taking the time to read my post. Next week, we’ll be learning about conductive thread. Specifically, we will learn how to sew conductive thread into cloth, which will allow us to add another feature to our laser-cut boxes. I can’t wait to share pictures of my creations with you next week!


-Scott Provenzano


References

http://cucfablab.org/