Category Archives: week10

Capstone Update

I was able to redesign our garden and reprint it. The other one we printed had the wrong size holes in it for the water drainage. This new one had all the right dimensions and we made the right size screw holes. The print started off a little rough. It was only printing half and in an off manner. Professor Vishal figured out our garden was on its side and we were able to print it. We took out the water drainage holes in the new print because we will be drilling those ourselves. All of our sensors are working which is really great. They sense the moisture level in the soil and send a notification when it is below a certain threshold. Norman was working on having a notification sent when the plant needed water or light, but we opted for having a light change color. We still need to print the pillars for combining the vertical garden pots together. We also have to screw the pillars with the garden and set up the Arduino device on the garden. In addition, we need to find a way to waterproof our plastic material into something that can withstand moisture. We were thinking about using wood glue or some time of aluminum lining.

http://komonews.com/news/healthworks/3d-printing-offers-new-tech-for-replacement-knees

I found this article about how knee replacements are getting more popular and researchers have found a way to make a mold from knee CAT scans. The molds provide the best fit for every individual as it is perfectly molded to fit their knee. This is a convenient way to essentially personally fit your knee replacement. I know a lot of people who have had knee surgery that would have been grateful for that option. I find 3D printing in healthcare to be particularly interesting as it changes people’s lives and makes it more affordable to help everyone.


Prototype Progress & Feedback Session

This week we made significant progress on building the prototype. I went to the FabLab last week to discuss options for the water sensor to detect the level of water in the bucket. Instead of buying a sensor for around $7 and an LCD screen we figured out that it is not very complicated to create our own. The homemade water level sensor would essentially be 2 wires put into the bucket at 3 different points (6 wires in total) and connected to the Arduino.  The way it works is that a current is sent between the two wires and each of the 3 points and when  a change in frequency is noted (the current going through water versus air is noticeably different), a message will be sent to notify user that the water level is high, medium or low and to refill the water or shut off the water pump if it is too low. They also have LCD screens at the Fablab that they do not mind us borrowing for this prototype so we are minimizing our costs of the project as well.

On Tuesday, I went back to the FabLab with the bucket to create the sensor. The process involved a lot of new activities for me as there were several tools I got to use that I had not previously had experience with. We first needed to drill holes in the bucket so I got to use an electric drill and then screw a few screws in with nuts and washers in order to hold the wire on the outside of the bucket (out of the water). The wires will then be able to conduct current through the screws even though they are not in the water. I put caulk on the inside of the bucket around the screws in order to prevent water leaking out through the screw holes. I had never used a caulking gun before so that was also pretty fun to use. We then were able to cut some wires and attach one to each of the screws. I am going back this week to finish attaching the wires to the bucket and soldering them to a couple other parts in order to have a functioning sensor. I will then be finishing writing the code for the Arduino to be able to interpret and send a message to the LED screen of the water level. I am really excited about the progress on our project this week and look forward to finishing the sensor programing this week!

In class we continued working on our hydroponic garden, ensuring that we will have each of the parts ready to construct throughout the week. The second half of the class we split up into small groups and met with another team to pitch our idea/ progress on the project and any current challenge areas in order to receive feedback. The 2 different teams provided a few valuable comments and questions from the perspective of an outside potential user of the product that we had not previously considered. It was definitely an interesting and useful activity. Additionally, we heard updates on all of the other projects and I am excited to see how each of the teams’ work comes together within the next couple of weeks!

Advancements in Prototyping

This past week, our learning lessons were focused on understand the purpose of iterative prototype design and testing. The prototype assessment and test plan article emphasized that the primary reason “to create a high-fidelity prototype are to help you gain a much deeper understanding of your product so that you can actually test your ideas with real users before you build it.” My team and I started applying this principle during our last class and shifted our focus to creating more prototypes. Our shift to an action-based approach has allowed us to make more tangible progress with our final project.

This learning lesson is something I believe will be applicable no matter what career I go into. The idea to be more action-oriented rather than complacent is an important learning lesson for me. I definitely think that in the future, I want to adopt this type of approach and encourage myself to take more action.

Here is the link to an image of what my team and I were able to 3d print this past week. We printed out the bushing needed to serve as the foundational attachment for a steering wheel knob. The bushing is what will be directly attached to the steering wheel and the screw will serve as the bolt to lock everything in place.

Upcoming things that my team still needs to prototype include:

  1. The ball attachment to twist on to the bushing and bracket.
  2. The handle attachment.

Our plan is to prototype these and have them printed before class on Wednesday so that we can get feedback from our peers and design plans to test our prototypes. This whole final project has been an experience learning how to continue to iterate in order to make tangible progress. I am excited and looking forward to getting back into the lab with my team to test out our design!

The Iterative Design Process

Hello everyone!

This week we spent time with our project teams really solidifying our prototype and ensuring we have all the correct materials and skillsets to be able to build and complete the project. Our team is working on building a hydroponic vertical garden since we all enjoy indoor plants and thought it would be a great way to gain a new set of skills not only building a plant watering system/ vertical garden but also incorporating sensors into the product to make it more user friendly and set it apart from the current vertical gardens that many people already have in their homes.

One main takeaway I have from this project so far is that design and prototyping is an iterative process. Many factors play into how the final product actually turns out, some of the factors that have changed our prototype so far have included:

  • Available Materials
  • Skillset Required
  • Timing needed to print certain parts
  • Resources available to learn from
  • Feedback from potential users
  • Personal design preferences

There are many moving parts with our product since we have the structure that will act as the backbone for the watering system and the plants (including the piping and drip water system as well as the base and water reservoir), the cages to hold the plants, and finally the electronics used in making our plant system a “smart” hydroponic system. Our ideas for the structure changed when we visited the FabLab last week and picked up a large PVC pipe that would be ideal as the main support. We then adjusted our prototype to include this since it was free and available material, decreasing our material costs. We also decided to incorporate a water level sensor into the product to track how much water is left in the reservoir over the air quality sensor (dusduino) due to the availablility of materials and user feedback. The water level sensor provides valuable information to the user as to when they need to fill the water whereas the dust sensor would have purely been to see how effective the product was. Our design and idea for the sensor changed again when we visited the FabLab on Thursday and learned that instead of buying a water sensor online, it is easy enough to build one out of wires within our water reservoir bucket for much cheaper than the initial sensor cost. This week we will be focusing on putting all of the moving parts together and testing out our product. After we have the backbones for the system in place, we will be getting the plants and other necessary items for them to present during the final presentation.

I’ve already learned so much from this project and all of the others in the class, I look forward to seeing how the other products progress this week and in the coming weeks! Thanks for reading!

Weekly Summary

As the end of the semester, and the end of college for most of us in the class, draws closer and closer we are working hard on our final projects as well as learning more about Fusion 360 and other applications beneficial to helping us make different objects. This week we focused on the software Meshmixer. We also worked on finalizing our project designs and began working on prototypes. Unfortunately, we did not have a guest speaker this week, but still learned a lot of exciting things in class!

Scanning Ourselves

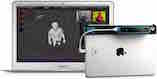
In the beginning of class, we learned a little bit about how to use scanners from a company called Sense 3D. First, we all made scans of our busts. Unfortunately, we ran into a problem when we tried to share them on the cloud which would allow us to edit them in softwares we are educated in like MeshMixer and print a 3D model. It was going to be too expensive to do it for all the students in the class, so Vishal worked on finding a new application. Towards the end of class, a couple students were able to print a bust of themselves. It was exciting to see how we could scan something with a camera and turn it into a physical object just a couple hours later.

Similar to how we were able to scan ourselves and print a bust of ourselves, we watched a video of Jay Leno in his garage scanning an object, sending it to the computer, and then 3D printing a replica of the object. This sort of technology can be very useful, especially for objects that are hard to find or expensive to buy. Overall we achieved our objective of learning how to scan, refining the scan, exporting a cad model, and setting it to print.

(photo)

Here is an example of a man who scanned himself and was able to 3D print himself. Although not all of us were able to 3D print ourselves due to time constraints we did have a few classmates print a bust of themselves and those of us who could not print ourselves were able to watch others.

Attached is a video that dives deeper into understanding 3D scanning.

Final Project Progress

This week was also a big week for all the groups in class to make progress on our final projects. There are a lot of great ideas this semester including a person tracker to aid businesses in keeping track of foot traffic at their business, a coffee pour over assistant, a steering wheel knob to help people with physical ailments drive a car, and many others.

In class, the groups worked on creating a clearer design for their products as well as a physical prototype. Another objective we had this week was to identify any materials we would need to order for our final project if they were not available to us in the Maker Lab or FabLab. Additionally, we were required to start a testing plan for our projects. We pick at least two subjects and develop a testing protocol. Essentially, this covers things that need to be done before the test and instructions for the test.

As for my group individually, we are working on a coffee pour over assistant. This will allow users to pour water into a reservoir and it will slowly drip through the coffee. This eliminates the need for a human to pour the water, saving them a lot of time. We have decided to make it in two parts, making it easier for us to divide the work between the three members in our group. I am making the base of the assistant, and my biggest task is making it adjustable, so it can fit over assorted sizes of cups. We will be making a trip to the FabLab to acquire material that can withstand contact with hot water and will not leak any toxins into the water. Overall, all the groups are making a lot of progress on their projects and will have a prototype this week.

Summary

Based on the updates of each groups’ project, everyone seems to be in a good place on their project. We all have a clear idea of what materials we will need for our objects, a specific design for the ideas, and what the next steps are that we need to complete for our projects. Also, all the students were excited to learn about 3D scanning and attempt to do it on our own by scanning ourselves and 3D printing our busts. We are all looking forward to everyone’s finished projects!

Prototyping & Scanning Human Faces

We started off class this week discussing the capabilities of Kinect hardware. Our instructor demonstrated the ability to to scan by connecting the Kinect hardware to an iPad. The Kinect software incorporates motion-sensing technology to be able to easily scan an image and digitally load it onto a device.

Using the Kinect attached to the iPad required a lot of patience and good lighting. In order to digitalize high quality pictures ready to 3D print, it was important to make sure there were no other objects in the background that would detract from what you’re trying to scan.

Another software we learned about was called Meshmixer. Meshmixer allows you to clean up or design an object to fit into something else. It is a very powerful editing software. Just being able to scan was not enough – it was also important to be able to refine an image. I described the software as possible because it allowed us to create a more natural depiction of what a person looks like. Overall, Meshmixer enabled us to refine images to make them look more natural and of higher quality.

Lastly, we also spent a lot of time in class working on our final project. My group is working on designing our prototype in Autodesk. We want to design our steering wheel knob so that it can be twisted onto a clamp. In turn, this will allow for us to design customizable attachments that can be replaced/screwed on to any attachment. My team and I are projecting that our final deliverables for the semester will include: 1) 3-4 different types of steering wheel knobs that can be attached to a clamp via twist; 2) a clamp with a screw like indentation allowing for a steering wheel knob to be attached. Our current timeline is to have our designs finalized within the next two weeks and to have working prototypes printed the week after.

We are in the midst of designing the different parts that goes into this, I’m excited to start printing out our prototypes as we begin to finalize our designs.

3D Scanning and Project Developments

In class this week, we learned about the capabilities of 3D scanning. I didn’t personally have the chance to make my own bust but saw others as they used an iPad to scan themselves. I would equate the process to a much more thorough panoramic photograph. The 3D element, of course, makes us capture the entire depth of the object being scanned. It was cool to see how easy it was for 3D scanners to capture everything in front of it. In class, we watched a video on Jay Leno who demonstrated just how easy 3D scanning can be. We learned that there’s even a low-grade 3D scanner for your smartphone.

The work with scanners reminded me of an idea that a friend and I had worked on. We thought it would be cool if we could capture our own dimensions and upload a graphic image of ourselves into the cloud. Then, as a Google plug-in or other web-based app, we would use our dimensions to view ourselves in clothing when shopping online. This could help shoppers find clothing that fits them more assuredly than the current method of guessing what will fit and returning the clothing if it doesn’t. 3D scanning could make this idea a reality, though there would be much more to launching a sound business beyond the technological capabilities.

That sounds like a project for another time so I’ll turn the focus to the project that our group is working on – the steering wheel attachment. It was our group’s first opportunity to work as a whole for some time, so we took the time to iterate on some designs that make the most sense for our target users. After downloading MeshMixer, we generated a design for a screw that would be a printed locking mechanism for the printed modular steering wheel clamp. Finally, we developed our project testing plan for our product. In planning, we determined who were specifically our target users in addition to what they would be doing in testing our attachment. Looking forward to keeping the ball rolling!


3D Scanning & Project Tinkering

3D Scanning My Head

Hi everyone! This week was one that I have been looking forward to since the beginning of the semester–we learned about 3D scanning! I have always been intrigued by the capabilities and implications of 3D scanning; it is so cool that we can use cameras/sensors to scan a physical object and create a digital representation of it. We learned about some different consumer-level 3D scanning products and were able to test one out that we have in the lab (we have an iPad attachment). Each of the class members scanned a bust of their head. We were then able to load these files on TinkerCad and fill-in/smooth-out any imperfections in our scans. We then put the edited files into Cura so we could obtain .stl files to then send to the 3D printers! Check out my Cura model and final print below:

Cura Model

Final Print

A fun fact that I learned was that the Xbox Kinect sensor has the same scanning capabilities as the 3D scanners that we talked about in class. This was exciting for me because I have an Xbox Kinect sensor at home! The way it works is the Kinect sensor gets connected to a computer and we can then 3D scan an object with the proper software installed! Check out a video on this topic here: https://www.youtube.com/watch?v=_cKb3oEM47E.


Project Tinkering

My group is waiting on one of our parts (the 7-Segment display) to come in so we can dive into the building of our prototype. However, this did not deter us from making progress on our project this week. We each performed different parts of our research needed, and I also started tinkering with our perfboard and wires (see picture below).

Perfboard/wire tinkering

The picture may look overwhelming with the wires, but this exercise was actually very beneficial in helping me understand the use of perfboards. Physically maneuvering the wires along the board allowed me to see where the different ports connect and which positive/negative currents would be affected by certain connections. I feel much more confident moving forward in the coming weeks when it comes to connecting our 7-Segment display and sensors.

One additional update that we have for our project is that we are going to utilize a push button counter instead of a sensor for our first prototype. This is because we want to be sure that our 7-Segment display is going to work with our creation before we dive into the depths of coding. Utilizing the push button will allow us to ensure that our prototype is properly created because we will be able to see our number on the display go up and down as we knowingly push the button. Alternatively, it would be more difficult to see where our prototype is correct/incorrect if we use the sensors right away because it would be harder to narrow down if an issue is with the sensor, coding, or wiring of our prototype.


Extra Note

While my group’s project most likely will not require soldering, I found a useful video on YouTube that gives further insight on this topic incase we any group does: https://www.youtube.com/watch?v=3N3ApzmyjzE. This video was beneficial because it allowed me to see how another individual used a perfboard and made his own creation. The more that my group learns about these boards and their different functionality, the better off we will be in using our creativity to make the best possible prototype!


Thank you!

Thank you for tuning in this week. More project updates are to come next week once we have all of our parts!


-Scott Provenzano

Transforming reality into the digital world

Scanning ourselves

This week focused on learning how to 3D scan objects to create a digital version to  be able to print. We had fun scanning each other’s figures, most people tried to print busts however I was interested in trying to do a full-body scan to look similar to an action figure versus a bust. It didn’t end up working well though unfortunately as the app we were using now requires you to buy the scan. Later in the class I ended up try to do the scan again, I noticed that the new app we were using asked you to hold the sensor still quite a few times as it seemed to be taking individual pictures which it would then later compile. I did not end up having the time to clean up my bust and actually print it although I look forward to using the software next week to finalize the images and then also be able to 3D print the bust of my head.

Projects using Scanning Technology:

The thought of printing our own heads seems a bit strange to me although I am fascinated by the idea that we are able to take scans of real objects and then transform that into a 3D printed object. This opens up the possibilities for so many neat projects. Professor Vishal mentioned the project Scan the World ( https://www.myminifactory.com/scantheworld/ ) which I found very interesting so I did a bit of further research on this. The goal of this project is to be able to archive objects of cultural significance all over the world by using 3D scanning then opening up the possibility for 3D printable replications of these objects. The idea and value behind this archive is to open up treasured art to the public in a much more tangible way. The replication of these artifacts also serves as a way to better preserve them so that the public can interact with them while not deteriorating the ancient art or artifact. This project started in June of 2014 and currently has scanned and created 10,903 printable 3D scanned sculptures and spent 21,000 hours printing these objects.

Project Update:
This week we discussed more about the frame and technical aspects of our hydroponic vertical window farm. We gathered an Arduino and other components needed to start programing the sensors and we plan to head to the Fablab again tomorrow to gather a few more materials to start building a rough prototype and designing the specific parts such as the plant holders/ clips to attach to the structure as well as the drip funnels that will attach to the plant holders/ bottles. We’re looking forward to building a rough structure in the next week as well as designing the plant baskets in Fusion 360 and programming the Arduino and sensors.


Shapeways & Prototyping Software

Shapeways:

Although I wasn’t able to attend class this week, I was able to read more about Shapeways online and connect with my peers to learn more about the amazing things Lauren and the rest of the Shapeways team are working on! Shapeways is a New York based 3D printing marketplace and service company that provides users the ability to design and upload 3D printable files. It was interesting to see how easy the marketplace platform was to utilize. To 3D print an object, users simply have to upload files to their site and then select what materials to use. From there, users pay and input their address and then Shapeways will ship the product right to the customer. Shapeways can make products out a wide variety of material ranging from plastic to stainless steel.

The layout of Shapeways is very structured and easy to follow. In addition to offering customers the ability to 3D print products, Shapeways also offers material sample kits. They range from color & finish to kits with metals at a price range from $19.99 (color & finish) to $79.99 (Metals).

Prototyping/Final Project Work:

My team and I are in the midst of prototyping our project. Some of the team is focused on conducting desktop research to identify what features are desirable to drivers in regards to a customizable steering wheel attachment. Currently, I am working to parametrize the potential model we are looking to create. I am modeling it after what is done on thingverse. I have been experimenting with OpenSCAD software to code printable designs for a steering wheel attachment. Learning the software is taking some time, but it is an extremely powerful and useful tool. Our team is focusing on creating a flexible design and this will be one of the main deliverables of our final project.


Shapeways and Shaping The Way to Our Project

We had the privilege of hearing from an employee at Shapeways and even got to get an inside view of the company! While we set up to have a presentation, the employee showed us around the company and the different things they were working on. It was really amazing to see people working with 3D printing in so many ways and different methods of coming up with the same product. She mentioned how there is an efficient way to print multiple projects at the same time using some sort of 3D printing using compression and cohesion of some sort of dust or powder using the Binder Jetting Technology available.

Its great to find out that improvements are still being made within the 3D making industry that can make things more efficient and faster and waste less of our resources that make it more of a possibility for future projects and developments to make use of 3D printing!

After the presentation from Shapeways, we went into our groups to begin the actual specific blueprinting for our project! We began with the base design which we intend to be a sort of 3 part design for the pour over coffee project we are working on that will ease the process of making pour over coffee as well as making it a lot more time efficient. Once we got the base design we started thinking of modifications and improvements for the design that include resizable base legs for different sized cups and mugs as well as screens that we can slide into the design that will help control the speed at which the hot water from the pour-over coffee contraption is falling through to the actual coffee and mug.

After designing our device, we went to discuss with Vishal more specifics including the issue of using hot water with the PLA material we have in class. He gave us the idea of using thin sheets of metal to use inside of the PLA printed structure to withhold the heat of the water. We are planning on meeting with people from the FAB lab to help us with our design as well as with the idea of using the thin metal sheets in our design!

Idea Generation and Prototyping

This week we returned to the Digital Making Lab for the first time in three weeks. A guest speaker from Shapeways started the class with a brief virtual tour of their production and fulfillment facility. Shapeways leverages the digital making community platform to custom print and ship designs around the world. The printing machines expectedly dwarfed those I have seen in person, yet I was still impressed by their capabilities. These machines can simultaneously print objects from purchase orders.

I hadn’t considered a need for a dyeing section of the facility. From a revenue standpoint however, it makes more sense for Shapeways to print in one color and dye everything afterward. Changing colors using the Ultimaker or the embroidery machine in the FabLab is a hassle. Repeatedly having to do so would reduce Shapeways productivity and profits. This exemplifies how companies in the digital making space manage to foster creativity while staying profitable. More focused on the creative side of digital making in this class, I’m glad our guest speakers have consistently shown business insight in this industry.

The remaining class time was dedicated towards our final project prototypes. My team and I produced a rough sketch of our hydroponic drip system prototype and the necessary materials. Our early discussions were heavily focused on various design points. I drew upon lessons from the Design for America presentation a few weeks ago, specifically narrowing down the problem and asking “How can we” questions. Currently, the team is looking into ways to feasibly integrate a pH sensor. Hydroponic plants frequently perish at low or high pH levels because owners neglect to monitor it. I’ve reached out to a professor in Agricultural Engineering hoping for clearer direction.

I also returned to Brandon at the FabLab for further design input. I wanted to find a material strong enough to support several hanging plants. Instead of PLA plastic, we are leaning towards using laser cut wood. Adding wheels to the three support prongs is another interesting design aspect emerging from this meeting. The ability to move the hydroponics system to sunnier areas of the house would promote growth and further satisfy customers. Lastly, I spoke to Brandon about an air quality measuring device developed at the FabLab called DustDuino. The device could be attached at the top wooden hook in order to measure the air purification progress over time. There is still much work to be done, but the freedom to explore these options certainly makes this project unique.


Prototyping

This week in class, we first had got the chance to speak with a Shapeways employee. She started off our session by giving us a virtual tour of the manufacturing facility she was at. It was interesting to hear and see how every employee in the business had a specific role to contribute to the 3D making and distribution process. I spent some time looking into the various companies she referenced, specifically HeroForge. It was amazing to see how 3D modeling is now available to desktop machines without any additional software or upgrades. I was able to create a custom figure and see it in live-dimensions on my screen. I’m curious to see how these capabilities will grow the personal 3D-making movement!

Next, we spent time actually creating crude mock-ups and prototypes in class. My group decided to move forward with our steering assistance tool. We looked into products that are actually on the market now, to understand what form factors work best and are most appealing to the public right now. We initially discussed the idea of using OpenSCAD to create modifiable dimensions within our steering assistance tool. However, we decided we wanted to go in a more modular direction. Similar to the way you can attach different heads onto an electric drill – we wanted to create a custom steering tool that can be utilized in a variety of use cases.

We decided to create a standard clamp that would affix to the user’s steering wheel. Then, we want to create at least 2 different attachments that can be utilized with the clamp. One would be a standard sort of knob (circular) that can provide general steering assistance to those with low motor strength. Another would be designed for with severely low motor strength, where the user would put their hand through a handle, and use their palm/wrist to steer the wheel.

The biggest challenges we are facing is safety – understanding how we can ensure that our modular design does not sacrifice design integrity. Since we are entering a product segment that requires products to work 100% of the time (driving a car) we have to make sure that our designs are solid. In the coming week, we plan to design and print actual prototypes of our models.

A Shapeways Experience

This week’s class gave us an opportunity to further explore the possibilities of 3D printing in addition to spending time iterating our project idea.

Our guest speaker from Shapeways showed us the amazing capabilities of the company through a swift “office” tour. I put the word office in quotes because the Shapeways place of business acts much more like a lab, or an art studio. The capabilities of their sleek machinery were astounding, as their printers use everything from ceramics to strong metals. Coming from a business perspective, I found it interesting that it is supremely difficult to capture economies of scale in the 3D printing industry. Economies of scale is a competitive advantage for any business: it means that with more items produced, the cost of those items decreases. But it is the unique nature of each product of a 3D printer that makes the industry so appealing. The ability to customize something exactly to our liking is what 3D printing is all about. On the site, I found a cool looking moon lamp that I thought I’d share.

https://www.shapeways.com/product/TDDWUNVVF/moon-lamp?optionId=41593801&li=featured

After learning about Shapeways, we had an opportunity to meet with our project teams to move our idea further along. Our group decided to modify our steering wheel attachment to many different grips that attach to a common, minimalist base. One classmate offered some excellent feedback for us in suggesting that it is imperative that we ensure our design is extremely strong, because drivers will be counting on it to hold firm while turning their vehicle. If the product were to break, it could be detrimental to the safety of the driver. Please see Ajie’s week 10 post for photos of our updated design. We are excited to continue work on our project!

Feedback is tremendously helpful throughout the entire design process. Among this week’s resources was an engaging video on Design as an Iterative Process, from David Kelley at IDEO. He spoke about the necessity of rapid prototyping when we produce our first designs. It makes sense that the faster we produce designs, the faster we allow feedback. After just one presentation of our group’s design, we received some helpful feedback that rings that idea true.


Prototyping is Key

This week in class we had the pleasure of hearing from an employee who works for Shapeways. I had always wanted to learn more about how these 3D printing factories work so this presentation was really interesting for me. Right away I thought it was cool that she took us on a quick tour of the production area and I was surprised by how industrial their facilities look. Listening to the employee describe all of the different types of prints that they do and the different types of people and organizations that they service was very enlightening to hear. It seems like 3D printing technology is well on its way to becoming the preferred method of mass production for a lot of industries and that the technology will likely further revolutionize the manufacturing industry. After seeing all that Shapeways does, I can expect 3D printing manufacturing services like Shapeways to will be the norm in the distant future.

After the guest lecture, we were given time to work on our projects and begin prototyping.  For us that meant getting our design finalized. One of the key takeaways that I took from the readings this week was from the Edison nation article that talked about prototyping. It says that one of the best ways to start prototyping is to simply grab a pen and some paper and draw it out and that’s exactly what my group did. We spent about an hour just drawing out potential designs and seeing what we liked and disliked about them. Drawing multiple prototypes really helped us figure out our overall design and what we ended up with looks a bit different from our original concept. I am sure as we continue to prototype our design and begin to model it in CAD, it will change many times over. Additionally, I have spent a lot of time this week figuring out how to add sensors to our vertical farm in order for it to give the user information about the plants being grown. So far, I have changed my original idea to include sensors that, based off of my research, will better detect if a plant needs to be watered or not and will be creating a prototype of the electronics soon to see how everything will work put together. Overall it was a productive week and I am excited to see the progress of all of the projects in our class.

https://uofi.box.com/s/ga7h6767164gvzs8nipgkj4m88on15mb

(Picture of our design on paper)

Week 10 Reflection: The First Prototype

This week in class we were back in the MakerLab after three consecutive weeks in the UIUC FabLab. In this class session, we got to speak with an employee of Shapeways. Shapeways is an independent firm that executes 3D printing projects for consumers. Our guest lecturer spoke to us a bit about the process the projects go through before bringing us on a tour. Although she started in an office setting, we were quickly brought to the printing area which looked more like a laboratory or warehouse. She gave us a lot of great insights on the 3D printing process that I look forward to implementing in our final group project.

This was the first week we got a chance to work on our final projects. Working alongside Maddi, we etched out three quick designs on paper. We abandoned the convoluted idea of having the solar panel trace the sun across the sky due to lack of programming experience and starting capital. Thus, our three designs featured a static solar panel. We settled on a figure eight design for the base. One loop would have the warming plate with an induction coil and the other the solar panel. Upon consultation with Professor Sachdev and the class, we are entertaining the idea of adding a nine-volt battery to provide power even when the sun is not out. If we obtain a rectangular solar panel, we will adjust the sketches as need be. We are currently in contact with the FabLab to obtain a solar panel we can work with for the remainder of the project. Although none of our group members have experience in wiring or solar technology, I am highly confident in our ability to produce a functional, ergonomic, and effective creation. In the coming weeks, we hope to build a few more prototypes before building the working model with working coils, wiring, and solar panel.

In 2001, David Kelley, CEO of IDEO, gave a speech pertaining to the iterative process of designing an innovative product. Kelley stressed the importance of reducing the time of each phase in the making process. Kelley advises the listener to make a lot of poor renditions when starting the making process and then consult with people of different backgrounds to gain unique perspectives on your creations. Kelley values the constructive criticism he receives and tries to reduce the problems with the prototype every iteration. This process can help identify core competencies and strategic advantages of your product while also highlighting the potential shortcomings.

Designing a Prototype

Shapeways

This week we had a guest speaker (which meant pizza!) from Shapeways. Shapeways is a 3D printing company where users can design and upload 3D printable files and Shapeways prints the files for them. Consumers are able to make any product they want through their own creativity, very neat!

She gave us a tour of the facility via webcam and I thought this was so cool. We saw the office space transform into the printing warehouse. I liked how the facilities were connected allowing the workers to watch or monitor any printing activity. The Shapeways office was an open creative space.

I decided to watch the video of the Shapeways CEO talking 3D printing. I thought he had a great explanation of the company and what they offer. He talks about using your own creativity and being able to get the product you want. The 3D printed hand was revolutionary. There are so many people who loose their limbs that could benefit from a 3D printed hand, arm, or leg. Creating a body part that functions like real ones would be life saving to so many individuals.

In Class & Readings

This week our team was able to accomplish a lot for our project. We are creating a vertical garden. Each of us were on different pages about how we interpreted our end product, this caused a lot of confusion. We spent time talking specifics about design and focal points. First, we want to have two layers to our garden since this is a prototype. We decided to grow basil and radishes because they can grow in 4-5 inches of soil. It was hard determining our measurements because we wanted space to make a successful garden, but it has to be small enough for a window cell in a dorm or apartment. We concluded that it would be a foot and a half tall and 6 inches wide: keeping it relatively small, but room to grow. Another discussion we had was about the sensors. Our sensors are going to measure water levels and alert the user when water levels are low through a text messages system. We will attach the sensors partially in the soil while the wires maintain on the outside of the pot. We drew a sketch so that visually we all understood. Attached is a picture of our sketch (will not let me upload, no space!). We are excited to continue to develop our ideas.

David Kelley talks about design as an iterative process. Spitting out a crummy first draft of a prototype allows you to build on that idea. It does not matter if it starts out bad, what is essential is the idea behind it. Personally, a lot of my first drafts is writing and now designing usually are terrible, but I have learned to stick with it and evolve it into something better.

Today I am on my way to San Francisco for a job interview with a tech company. They have their own SaaS SEO platform that drives traffic to websites from organic search. I am super excited to see the office and be in San Francisco. I hope to experience the techy and innovative environment that San Francisco is known for.

Arduino, PIR Sensors and more! (Week 10)

Hello all!

Shapeways

This week, we had a guest speaker from Shapeways, a 3D printing service and marketplace company. She took us around the facility and showed us their printers and office space. You can print with anything from ceramic to precious metals! The link to the website is here. I will be attempting to design a necklace for my mom – I’ll post the results in the next blog!

Darwin's Silver Cladogram Tree 3d printed

Our Project

My group is making an Arduino/IR sensor that will count the number of people moving in and out of a building. Our idea is that this product will be a low-cost option for local restaurants, shops, and even places like homeless shelters to count how many customers are in their establishment at a time, as well as store that information and build up historical data that will be useful in predicting foot traffic and demand in the future.

This week, we took a full inventory of the parts Vishal and the FabLab have given us – we have almost everything we need! Believe it or not, our counter requires a lot of tiny senors, lasers, and other parts that are easy to lose (fingers crossed we can keep everything in one place). A large part of our meeting this week consisted of actually understanding what each of these parts do and where they will connect. I was able to teach my group members a few things I learned from my ECE course, but we still had a lot to look up! We are following a rough Instructables outline of the project which I’m infinitely grateful to have. Below are a few pictures of parts.


Above is a 7-segment display and a PIR sensor. The display will work just like that of a digital alarm clock – it will show the number of people present in the building at any time. The PIR sensor measures infrared radiation emitted from a field of view. This is what will “measure” how many people walk in and out. 

STMicroelectronics

Above we have a light dependent resistor (LDR) and a voltage regulator. The LDR has a variable resistance that will change when different lighting falls over it. The voltage regulator will allow us to maintain the proper voltage level when the product is up and running. We will be using a 9-volt battery to run the counter, so we need to make sure the electricity running through it is monitored. 

This is the main part of our project – the Arduino! This is what will make all the parts work. Arduino is an open-source hardware (& accompanying software) company which makes this little, single-board microprocessor you see above. In simple terms, you can code commands in a special software, connect this board to your computer, download the commands you’ve written onto it, then take the board and put it on any project you like! I’ve used it before to makes LEDs flicker and blink in specific patterns.  For our project, we will command it to count every time the lighting (detected by the PIRs and LDRs) changes.

These are not all the components of our project – just a few of the most interesting. I am trying to get some of the coding some this weekend, so we will see if it works next week!