All posts by Bridget Zimmerman

And That Is A Wrap!

Before I start, I want to say that I am happy I took this course. I loved how it was a small group so that we all were friends by the end. I think that made it special and we were all on this journey together.

I thought this class was going to be extremely hard for me because I lack a lot of technical skills. I was nervous that I would not be able to keep up with the pace of the class. I knew it was going to take a lot of work. Also, I do not consider myself very creative so I thought I would be bad at coming up with ideas for the project.

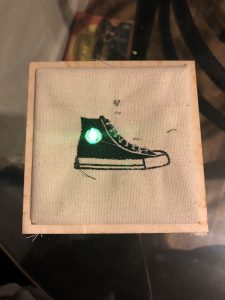
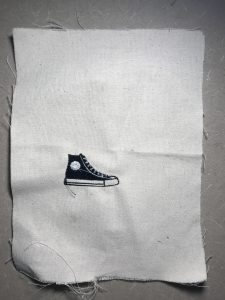
Looking back these expectations were not met! This class was all about learning at your own pace. Each workshop, guest speaker, and project gave me hands on opportunity to learn new skills. For example, Fusion took me a while to understand, but with practice and patience I learned how to create and print my own model. Also, our sessions in the fab lab gave me an opportunity to create a design step by step. I used the platforms to import my personal pictures and all the way up to the final stage of printing and sewing. This freedom at first was scary because I felt lost, but I was able to problem solve through my projects.

I learned that I have very low confidence in my tech abilities. Whenever we were introduced to something new I was easy to give up and depend on teachers or students for help. Usually I get the help I need, but in this class I was pushed to out of my comfort zone and forced to learn new skills on my own. It was then I realized I can take on the task, but my initial mindset is that I cannot do it. I am smarter than I know.

I also learned teamwork in this class. For the past month my team worked together to build an idea from scratch. There were a lot of opinions and ideas involved, but we worked together to create the best prototype we could. I think we all contributed and were dedicated to this class. I hope to utilize these teamwork skills in my next job!

Finally, in this course I learned A LOT! Walking into class was the first time I had ever seen a 3D printer, I did not even know how to turn it on! From 3D printing, to fusion, to the fab lab, the design process, and more I decided to reflect back on my previous posts.

We learned about “The Maker Mindset” which is starting to be integrated into the education system. I learned that everyone learns differently and grasps to ideas in different ways. Personally, I have struggled with a reading comprehension disability and school has always been difficult for me. It makes me so hopeful for the future of students who struggle form learning disabilities that they will be able to demonstrate their knowledge through different ways of learning.

I learned about the six-step process that Design for America taught us. This workshop not only set us up for the remainder of the course, but also for our future careers. This process is a way to take a step back and really break down the problem. It helps you dissect your thoughts, which leads to better outcomes.

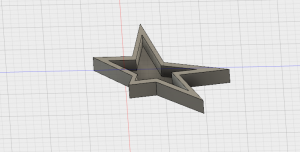
Our week with Dan Banach form Autodesk taught me fusion. He showed me how to build our own ideas. Getting an understanding of this platform has allowed me to try other platforms. What stood out to me about Dan was he teaching style. He made it easy to follow along and learn. I really appreciate that because I feel like I learned more. I am very grateful for learning this tool because I know I will continue to use it.

My most recent blog posts have been about our vertical garden project. I learned how to work with fusion on a more specific level in terms of measurements and shapes. But I also learned the importance of persistence and adaptability. A lot of our project did not go our way, for example the WiFi shield. Instead of putting energy into that aspect, we adapted and used sensors. I am very proud of the progress my team made and happy with our final product.

Thank you again Vishal!! This was a great class; it was unique in the best way. I cannot wait to show off my technical skills next year in Chicago!

Money Makers Making Progress

This week was extremely beneficial for the Money Makers. We were able to make more progress on our final project. Our first prototype did not print how we wanted it to. The screw holes were not proportioned correctly and the bottom was squished. We printed a new prototype with the screw holes at exact measurements. Then we decided to drill the drain holes into the bottom because this will give us more control over placement and size. The next day we saw our prototype and it printed perfectly. The next steps in our project are to get the light detectors to work. Norman, who has been the mastermind behind the sensors, got the light to work. But we need to use a code so it works according to the plants needs. I am looking forward to making more progress next week.

Also this week we were able to meet with other teams and hear about their progress. I really liked this because I saw how far other teams have come and hear what set backs they have had as well. Both groups we met with gave positive feedback about our vertical garden. This gave us a lot of confidence in our project.

I found this interesting article about electric scooters in California. They are made for people to rent and use throughout different cities in California. They are a way of transportation, but also a fun time to feel free. There have been problems with people dropping scooters on sidewalks or in the street. This chaos and clutter is causing a lot of issues with people. Check out the article to learn more!


Prototyping

This week we spent time working on our projects. It was extremely productive as we moved farther along in process. Vishal had us focus on printing our prototypes. We designed our vertical garden on Fusion. It was hard deciding how big to make the garden and we knew we needed a few parts. We uploaded it in to Cura and it said it would take over a day and a half to print. We adjusted our measurements to a smaller size. Instead, we printed a version that was 4 inches by 3 inches. This sample allowed us to get a good idea what it would look like. The printing job did not start off too well. The drainage holes would not stick to the printer. Then the holes for the screws were too big and ovals. We saw immediately that we needed to make a few adjustments. As the printer kept going and layer started piling on the garden looked better. The drain holes were sticking and it grew into the right shapes. I am happy that we had this time to print because it gave us great direction.

Norman also made great progress this week with the soil moisture sensors. He was able to get the sensors to send signals to the monitor. When I put my finger on the sensor I saw how the temperature increased. We will have to do further research about soil temperatures to decide when to alert the owner that the garden needs to be water. I am excited about developing this project.

I enjoyed reading the article this week regarding prototype testing. I think it has very relevant information with our current projects. It talks about updating your prototype by identifying the problems. We clearly identified problems with our screw holes and need to fix this. I think showing other users our prototype will give us valuable information about how to improve our project.

The article I found discusses 3 considerations before prototyping, which I thought could be helpful. Check it out!

https://www.stratasysdirect.com/applications/rapid-prototyping/3d-printing-prototype-considerations

Q Pro Printing

This week I was not in class because I was in San Francisco for an interview. I was able to visit the BrightEdge office. This was a great experience being able to see a tech start-up office environment. Everyone is working very hard to stay competitive in the industry.

The USF Alliance for Integrated Spatial Technologies video was insightful and interesting. It discusses 3D picture capturing and being able to bring the data back and making it tangible. Elizabeth Salusky a marine biology Ph.D. student printed an oyster habit from the Q pro. She is using it to see how it attracts other oysters and how other animals use it as refuge spaces. I cannot believe it is possible to print these habitats. This shows how advanced 3D printing technology is moving and the opportunities for our future. Scientist are able to print their experiments testing beyond what they ever have before. I find printing living creatures/organs the most useful aspect of 3D printing because it will allow us to learn more about our bodies and human kind.

I decided to do further research about this ASIT program. I found another program similar to USF, but as University of California, Santa Cruz. The Center for Integrated Spatial Research is a similar program that uses spatial technology and methods. They do a lot of research with animals such as marine mammals, birds, and turtles. Also with climate change, this could help find solutions to environmental problems such as air pollution, gas leaks, contaminated bodies of water and overall reduce the carbon footprint. I really enjoyed learning more about these two programs. Attached is information about the UCSC program https://ugr.ue.ucsc.edu/CISR.

Designing a Prototype

Shapeways

This week we had a guest speaker (which meant pizza!) from Shapeways. Shapeways is a 3D printing company where users can design and upload 3D printable files and Shapeways prints the files for them. Consumers are able to make any product they want through their own creativity, very neat!

She gave us a tour of the facility via webcam and I thought this was so cool. We saw the office space transform into the printing warehouse. I liked how the facilities were connected allowing the workers to watch or monitor any printing activity. The Shapeways office was an open creative space.

I decided to watch the video of the Shapeways CEO talking 3D printing. I thought he had a great explanation of the company and what they offer. He talks about using your own creativity and being able to get the product you want. The 3D printed hand was revolutionary. There are so many people who loose their limbs that could benefit from a 3D printed hand, arm, or leg. Creating a body part that functions like real ones would be life saving to so many individuals.

In Class & Readings

This week our team was able to accomplish a lot for our project. We are creating a vertical garden. Each of us were on different pages about how we interpreted our end product, this caused a lot of confusion. We spent time talking specifics about design and focal points. First, we want to have two layers to our garden since this is a prototype. We decided to grow basil and radishes because they can grow in 4-5 inches of soil. It was hard determining our measurements because we wanted space to make a successful garden, but it has to be small enough for a window cell in a dorm or apartment. We concluded that it would be a foot and a half tall and 6 inches wide: keeping it relatively small, but room to grow. Another discussion we had was about the sensors. Our sensors are going to measure water levels and alert the user when water levels are low through a text messages system. We will attach the sensors partially in the soil while the wires maintain on the outside of the pot. We drew a sketch so that visually we all understood. Attached is a picture of our sketch (will not let me upload, no space!). We are excited to continue to develop our ideas.

David Kelley talks about design as an iterative process. Spitting out a crummy first draft of a prototype allows you to build on that idea. It does not matter if it starts out bad, what is essential is the idea behind it. Personally, a lot of my first drafts is writing and now designing usually are terrible, but I have learned to stick with it and evolve it into something better.

Today I am on my way to San Francisco for a job interview with a tech company. They have their own SaaS SEO platform that drives traffic to websites from organic search. I am super excited to see the office and be in San Francisco. I hope to experience the techy and innovative environment that San Francisco is known for.

The Grand Finale!

This week was our last Wednesday in the Fab Lab. I really enjoyed the past three weeks in the Fab Lab because it was hands-on learning and experimenting. We learned by “doing”, for example loading a sewing machine with thread colors or sewing LED lights onto fabric. As a class, we were able to develop new skills and learn unique software’s. This introduction to the Fab Lab showed me how much room there is for creativity and imagination in school. My team will definitely utilize the Fab Lab as a resource during our final project.

This week we completed the final stage in our project, which was to sew the LED lights onto our embroidered cloth. We were given a battery pack, a battery, and LED lights. We drew out how we were going to place the lights and battery on the cloth. We were reminded to connect positives together and negatives together to create a functioning circuit. Duncan demonstrated an example of him sewing his cloth. He emphasized that we had to be particular with how we sewed and patient with the process.

At first, I did not understand how we would create an electric circuit with thread. Duncan told me that we were using conductive steel thread, which carried a charge. I thought this was so cool! I did not know this existed. I was excited to start sewing.

I placed my LED lights and battery pack in a circle to ensure no positive and negative circuits crossed paths. Stitching together the pieces was a challenge. It was easy to loose the needle or knot the wrong thread together. Also, I was constantly poking myself!

After carefully sewing on my two LED lights and battery pack I was ready to turn it on. Nervously turning on the control switch I saw one of my green lights flicker on immediately! Woo!! I did it! The light was brighter than I expected and shined through the cloth clearly. Unfortunately, my second light did not work. It was a dud!

Throughout class it was fun watching everyone turn on his or her lights. Everyone’s looked great! I enjoyed seeing what other people in my class designed. Vishal and I spoke about how sewing is a great mechanic to practice. We are always on our phones texting, but this experience we were using our hands in a different way. I thought this was an interesting perspective. This day in the Fab Lab gave our body and mind a break from screens and instead a new challenge using other parts of our brain and body. We were successful in a different way of learning!

Fab Lab: Sewing Machine Creations

What?

This week we were back in the Fab Lab. We rotated projects; my task was to print a design on a piece of cloth for the top of my wooden box. I expected this to be similar to my project last week, but I thought it was more challenging. We were introduced to a software that allows you to create designs such as shapes, symbols, letters, initials, and import your own photo. I thought this software was more complicated than what we used to design the wooden box. I imported a picture and struggled with manipulating it how I wanted too. The picture I chose was a converse shoe and we had to cut holes in areas for the LD lights. The teacher had to help me with creating these holes. I learned that these software’s are extremely delicate. I had to work very slowly to make sure I did not change something. They can focus in on minor details too. For example, I was able to add small shoelaces to my design that did not show up before.

The printing process was quick and accurate. We had to set up the machine, which required a lot of different loops and steps. Once the machine started working it was awesome to watch. The needle works really hard to thread a solid color. My shoe looked really big on the computer screen, but turned out smaller than expected. It is important to pay attention the measurements. Overall, I am happy with my sewed cloth design.

So What?

These past two weeks at the Fab Lab are relatable to my professional experience. The software’s at the Fab Lab were foreign to me at the beginning, but I took time to understand different concepts. I failed a lot designing at the Fab Lab, but I learned from my mistakes and changed moving forward. Next year starting a new job, I will be challenged and I will fail. Adapting from these obstacles and working hard to improve will allow me to grow. This is what I saw in the Fab Lab too. The Fab Lab and at your first job it is important to be persistent and patient with yourself.

Now What?

The Fab Lab has made me more confident in testing out new software’s and technology. Technology can be very intimidating and steer people away. I noticed how it is possible to teach yourself rules and tools on the computer. I will avoid asking so many questions and using trial and error. I am excited to see what we are learning at our final week in the Fab Lab. I know I will be prepared to take on the challenges.

Getting Creative in the Fab Lab

In class this week, we had the opportunity to spend time in the Fab Lab. I did not know what to expect, but this class period was extremely fun and educational. There are art projects in every corner of the Fab Lab. The environment promoted creative and expressive learning. It was a space that I felt very comfortable. Jeff Ginger gave us an entire tour and showed some projects that were made in the Fab Lab. He showed us a backpack that lit up as turn signals to help kids be safe riding bikes. It was an extremely impressive idea and I think it could be very helpful. Overall, my first introduction to the Fab Lab was successful.

We split into groups and I was given the assignment to create a wooden box. We were given the freedom to pick our own designs; this was a time for us to put our creative ideas to work. We created the dimensions of the box then imported it into Inkscape. This platform allowed us to design and shape our box. I thought it was confusing to navigate and I kept missing a step. These tools take time to get the hang of and a lot of practice. Our teacher, Clinton, was very patient and helpful walking us through the steps. I put a mountain range, globe, “lookin good”, and a sea horse on my box. Printing the box is what was really impressive.

The laser cutter was extremely accurate and detailed. It printed every little piece of the image. It was so cool watching it move and carve. Sometimes the laser would catch on fire, but quickly go out. Clinton told us it was important to monitor the printer because it can easily start a fire. My box turned out perfect; accept some of my pictures were upside down. This was definitely an experiment that I really enjoyed. I am looking forward to returning to the Fab Lab next week.

Check out this article I found that talks more about laser cutting. I have never done a project like this before, but it turns out that there was a lot of information on it. You can do many different projects with a laser-cutting printer. The article talks about how it allows products to reach markets quickly on a lower cost. This could be a great tool for the future and a way for companies to save money.

https://www.manufacturingtomorrow.com/article/2017/11/the-benefits-of-laser-cutting-to-the-design-for-manufacturing-process/10581

Six Steps To Success

This week Design For America spoke to us about design thinking and conducted a workshop. This organization works together to create new solutions to problems. They talked us through their six-step process. We learned that identifying a need is an essential step. It is the first step that will lead into immersing, reframing, ideating, building, and testing. This class period was extremely hands on and active because we solved our own problem. The Design For America team walked us through each step and allocated time for us to brainstorm.

We were trying to help Jess, a blind college student, feel more comfortable at school. My group tried to imagine Jess’s world. We thought the social aspect would be the most difficult because in college it is important to meet friends and be apart of the college sports. Football games are a really big part of the college experience and football stadiums can be dangerous. We created an idea of putting pegs on the stairwell and stairs for Jess to navigate. This way at games she can figure out where she is walking and be cautious. We found safety to be most important for Jess.

This brainstorming strategy taught me to be patient and build on ideas. Your first idea is not always going to be your end goal. It is important to start with one idea and develop it into your final project. They gave us post-it notes and told us to use as many as we want. I really liked this because you were able to organize your thoughts on paper. At the end, we put them on a large piece of paper and were able to connect all our steps together. I am a visual person so this design-thinking workshop worked well for me.

This process will be helpful for our final project. I read an article about Mark Zuckerberg creating Facebook. Facebook was first called Thefacebook and he developed it into the site it is now. This is an example of Zuckerberg reframing, building, and testing an idea. I am excited to use what I learned this week for our project.


My Fusion 360 Creation

I was having a hard time creating an object. Dan made it look easy. I tried designing a star shaped cookie cutter, but I could not get the other side to be hollow. I tried using shell, but it continuously prevented me from doing it. Instead, I used the star design to make a little container for jewelry. It is like a little plate that you could put rings, earrings, etc in. I hope with more practice I can get better with Fusion 360.

Fusion 360: Virtual Reality GoPro

Dan Banach from Autodesk came into class this week to lead a workshop on Fusion 360. This software is a cloud-based system that allows you to create models for on and off screen objects. I have never used a software like Fusion 360 so this was really new to me. When I first tried downloading the software it did not work because my computer was not updated. I thought this was a little frustrating; it took me 45 minutes to update my computer. Now I am happy it forced me to do that because my computer was way overdue to be updated. We designed an ice scraper and IPhone holder on Fusion 360. I thought this workshop was helpful and informative because Dan walked through each step slowly. He explained where to click and why you click on that function. This made it easy for us to follow along and learn the system. For me, I learn better when the teacher goes through the project instead of working on my own. I think a lot of students would agree with me.

I did not save my Fusion 360 creation so I cannot attach a picture. What I found really cool is that our project would start with three straights lines then you press one button (expand) and it would become a 3D model. It looked so real on the screen. If you hold the shift button and use your mouse to move around you could view all angles of the object. With this you could change one side of the object or make holes on certain sides. I think this software is beneficial to know how to use for class and in the work force. Fusion 360 develops technical skills that are valuable for business jobs. I am always trying to improve my technical skills so I am glad I learned Fusion 360.

I looked up articles on Fusion to read more about it. Every article had the word “engineer” attached to it. I never thought of myself as someone who could understand what engineers learn, but now knowing the basic level of Fusion I feel more confident.

I thought this article was really interesting. It talks about GoPro incorporating Fusion into their camera. They are using it as a virtual reality lens to record 360- degree video. Fusion was picked from an applicant pool of over 20,000 companies. This shows how great of software it is and that it can be used with different items. Check out this article!

http://appleinsider.com/articles/17/07/11/gopro-trials-fusion-360-degree-vr-camera-with-fox-others-ahead-of-late-2017-launch

The link below is an article that provides further detail about Fusion 360. There is information on different features of Fusion 360, such as sculpt.

https://www.engineering.com/DesignSoftware/DesignSoftwareArticles/ArticleID/12675/Fusion-360-An-Integrated-CADCAM-Solution.aspx

Fab Labs Around the Globe

This week Jeff Ginger came in to talk to us about his passion for 3D printing. Jeff is the director of the campus fab lab. This is a place where any student can use the resources to learn, design, print, and collaborate. The area is open for creativity and experimentation. Jeff emphasized that fab labs are accessible to the public because this way everyone has an opportunity to learn and create. Jeff showed a map of fab labs around the world. Some of the locations were China, Australia, and South America. I thought this was fascinating how the advancement of technology is spreading throughout the world. We are all in this journey together trying to discover the future.

Jeff still identifies as a “librarian”, but not the typical one. He considers himself a modern librarian because he is providing an open space for learning 3D printing, instead of books. I went on the campus fab lab’s Instagram to view the pictures and examples of projects created there.

This picture shows kids at camp in the UIUC fab lab. It is great to see young kids learning and using their creativity in the lab. It creates a different way of thinking. Getting kids involved at a young age will expand their knowledge on the products.

Wow! A 10 year old was able to make this. This shows me all the possibilities that the fab lab has to offer.

Tinkercad:

Also, in class we got time to work with our teams on printing our logo. This was exciting because it was my first time experiencing the printing process. We were introduced to tinkercad. This virtual printing platform made me feel so high tech! I was able to pick designs, shapes, letters, and sizes. It reminded me a little of WordArt. I thought it was simple to navigate and use. We worked on including letters in our design, but had issues with spacing. Once we organized the design, we decided to make it smaller. Our first run through the printer did not work because the material spooled in the printer and got caught on something. This showed me that printing is not always going to be perfect. It is important to have patience.

Finally, the printing worked in just 36 minutes. It was so cool watching the nozzle create the shape. The process seemed very tedious, but came together perfectly. I am very happy with how our product turned out and I cannot wait to introduce the “Money Makers” team to the class.

This is a photo of our final product.

From Fixed to Growth Mindsets: 3D Printing

Hi everyone!

My name is Bridget and I am looking forward to this class. I think it will be unlike any other class I have taken because of the high tech material we are discussing, specifically 3D printing. I am eager to learn more about 3D printing and eventually be able to print my own items. Our class project will be a great way for us to hands on learn and be creative. I think technology can be very intimidating, but after two sessions of class I feel more confident understanding the concepts. The future of technology is scary, but this class will prepare me for all the possibilities that will come in the world and my career.

Takeaways:

“The Maker Mindset” article stood out to me the most. It made a bold point about the education system and how 3D printing can positively influence students. 3D printing allows a growth mindset for kids who thrive in an environment of creativity. Currently, our education system is a fixed mindset that believes our capabilities are set and we need to excel academically. With the current technology trends, it is obvious that people who think more abstractly are succeeding. This is called a growth mindset. It makes me have hope for the future direction of our society knowing that kids are adopting the maker mindset; a can-do attitude.

The “How to Make Almost Anything” article used a microwave as an analogy to 3D printing. It said that microwaves did not replace a kitchen they are just convenient and an addition to cooking. This made a lot of sense to me. I interpreted it as 3D printing will not take over the world, but it will guide us in another direction to be more creative with ideas and develop future innovations. Knowing all the possibilities 3D printing has to offer is exciting. I am most interested to learn about how it can help mankind with health care. For example, John Hornick explained that doctors were able to print a miniature heart. I found that fascinating because 3D printing could change the future of medicine and save lives.

Design 1: https://www.thingiverse.com/thing:2773219

This is multi-use cord holder would be great for students living in dorms or apartments because it helps organize cords. As a student, I feel like I have extension cords all over my room and it would be useful to attach them to a holder. Also, my roommate just got a puppy that loves chewing on everything. This would help keep the cords out of the way. I would add four screw holes to the rectangle to ensure that it holds the cords into the wall.

Design 2: https://www.shapeways.com/product/NT9URUCJ4/earpod-attachments-for-active-people?optionId=43788262&li=marketplace

These are ear pod attachments that help keep headphones in your ear. I would use these everyday for working out, walking to class, homework etc. I think they are a practicable item. What I like about the design is that they are inside your ear. I have used some before that wrap around your ear, which is uncomfortable. These look slick and innovative. From the picture they do not appear too secure, if that were true I would work with this prototype to make them secure and comfortable for the consumer.

Design 3: https://www.shapeways.com/product/JQ6B2VWEG/padfoot-stand-for-ipad-1?optionId=1692859&li=marketplace

This is a very innovative product for an IPad. I constantly have the problem of holding my IPad with my hands or a chunky stand. I remember being on an airplane trying to stand my IPad and the tray area was too small for the stand. High schools would benefit from these stands because a lot of students use IPads and this way they can use it as a laptop in class. If possible, I would connect the piece to the IPad from the back. This would make it even more discrete.

Design 4: https://www.shapeways.com/product/56XNYUS4R/finger-fork-by-j-c-karich?optionId=9747450&li=marketplace

This product is so cool! As a student, I always take lunches to go and I am constantly looking for utensils to eat my food with in class. In the morning when I am in a rush I take a silver utensil, which is a huge pain. This finger fork is small and silly, but would help the environment because it reduces the usage of plastic utensils. I could throw it in my bag and be able to reuse it. I like to bring a yogurt to class, so a spoon would be another good idea.