Category Archives: week9

Shapeways & Prototyping!

Guest Speaker

This week we had an amazing speaker share insights about Shapeways, an innovative company that created their business as a 3D printing manufacturer run online, and advices with prototyping. Shapeways allows users to upload files to their site, choose the material to print and they will print, finish and ship the item to you! There are also many items designed by people around the world on the shapeways site you can order and they will ship you such as jewelry, pottery, home décor items and even tech devices. At the beginning of the talk,  Lauren gave us a virtual tour of the Shapeways space showing us each of the machines they use to print in and for different mediums. When deciding what material and machine to use to print she discussed knowing your needs. This includes:

  • Scale of the item
  • Strength & rigidity
  • Budget
  • Accuracy of design

After deciding on these 4 aspects, you can move to prototyping. At Shapeways they often say “All products are prototypes, but not all prototypes are products”. This put the idea of prototyping into perspective. With products, there is always something that can be improved upon therefore why it is okay to call it a prototype, however conversely, some prototypes need further iterations and improvements to become a working product.

Prototyping our Project

The second half of the class we spent within our groups working on the prototype of our project idea. Our group, 3Dream has met a few times in the last week to make sure we are all on the same page with our design since we have gone through several ideas for a final project. The last 2 weeks we spent further researching hydroponics, the systems and the feasibility of creating a smart vertical hydroponics garden. During class, our team looked into the details of the structure, where we would place the plants and how they would be held up. We drew inspiration from both a coat rack in the classroom and a Christmas tree stand. For a hydroponic system, there needs to be a large basin of water to pump through the system so we spent time thinking of the best solution to incorporate a tub of water into the system. At the same time, we needed to come up with a base for the structure that would be stable enough not to easily tip over and kill the plants. A combined solution to instability and where to put the water led to incorporating the tub of water into the stand as a way to weight the system down while also concealing the tub making it aesthetically more appealing.


Putting pen to paper: Prototyping

This week really put things into perspective on how much detail will be required for our final project. That being said, our team 3Dream put pen to paper and started prototyping! By completing all of the readings and watching the videos, it was clear that prototyping is a must even if you are not sure on all of the details.

Why prototype?

Creating a prototype is crucial to the design process. It allows for the users to put their ideas into a model and make revisions if needed, omit aspects, keep others, and include additional components. Futhermore, by prototyping before production begins, it is possible to see what specifics parts, materials, and additional resources will be needed and be ordered in advance.

3Dream’s prototype

We created a lo-fi prototype which was a quick and simple hand-drawn sketch to demonstrate the core functionality of our project. We actually developed two sketches. The first prototype really helped us get a sense of what we wanted out project to look like.  It was a rough sketch but really helped in the process of fine tuning and simplifying our project to a cleaner model. We got an idea of what materials will need to be purchased as well as which can be found at the FabLab or even printed ourselves! Below, you can get a sense of what our project will look like and see the differences in our first model to the second one.

Prototype 1

Prototype 1 Continue reading Putting pen to paper: Prototyping

Dazzling the Embroidery with Lights

This week,  I was able to finish my embroidery at the FabLab. It was recommended that I select an image with not many colors.  I went with a  classic rose and I also included a customized design with my initials on the lower right hand corner.

The final product came out better than I could have expected! The design did come out smaller then anticipated and at times, the machine would pucker. In order to prevent puckering, click on the link to watch a shot video for what to do! https://www.youtube.com/watch?v=EA-90RzIGhs

Putting it all together

Now that the laser-cut wooden box and embroidery were completed, it was time to add some lights to it! This was the portion that I imagined would be the most difficult, but with great instructors and my skillsets growing, it wasn’t too bad! We were given a battery, an LED light, and a controller switch.

With these three objects and some conductive thread, you make light! But, it is very important that crossing wires are not different charges (+/-). This can become a issue with additional lights being added, I just had one so I didn’t have to worry about that. I placed my light behind the flower to create a glow and have a Beauty and the Beast effect.

The part that I enjoyed the most out of this project was the stitching. I have never stitched before, so it took some time getting used to. I was a little worried about poking myself, but I came out without a scratch! This is a skillset that will  come in handy someday.

Thank you for reading!

Putting It All Together

This week in class was the conclusion of our three weeks at the Champaign Urbana Fab Lab. In this week’s session, we got to learn how to use sewable electronics by sewing small LED lights into our embroidery designs. I was excited to see how this worked exactly because the concept of adding LEDs to textiles can create endless possibilities in the wearable technology space. I was also excited to see how adding lights would make my embroidery cooler.

https://uofi.box.com/s/8nsatdmgbr524rohltko63w7th9cgc6g

(Above: Picture of embroidery with LEDs on)

To start, we were given a quick lesson in circuitry and given the task of drawing out a diagram of our design and where we wanted our lights to go. I chose to add LEDs to the eyes of the bison and drew my circuit accordingly. Next were shown how to use steel conductive thread to sew the LEDS into the design and connect it to the battery holder. It was really important to make sure that the conductive thread looped through the LEDS and battery holder multiple times to ensure that it had a good connection. I have had plenty of experience sewing before but it was actually pretty difficult to thread the needle I was given and to pierce through the tough embroidery. I also had to think a lot about how I was going to hide the conductive thread in my design not only so that it did not look bad but that the positive and grounds did not touch at all or else the LEDs would not turn on.

https://uofi.box.com/s/k0uqmkyqkmz4sidl83wvpqgkh8krb705   

(Above:  picture of box put together)

Overall, I am pretty happy with the way it turned out even though I was given different color LEDs. It was neat to get that hands-on experience with e-textiles and I already have a couple of ideas that I am thinking of pursuing on my own. It’s a bitter sweet feeling knowing that our time in the Fab Lab is coming to an end. I have learned a lot of new skills and have learned an even bigger appreciation for what the Fab Lab does for this community.  I hope to be able to use the Fab Lab for our final project and even for some side projects that I have. Hopefully I can even start my own maker space back home when I start working full time.

Sewing Constellations

This week we had another visit to the FAB Lab in order to continue with the workshop where we are creating a box with a canvas that has an embroidered design all designed by us. This class was focused on the final step of the workshop where we are to sew on a design to place lights onto our embroidered canvas where the lights will add to the creativity of our design.

In order for us to successfully create a piece with lights in it, we first learned a bit about circuits and how the battery and lights we are sewing on to our piece are working together. One of the students from the FAB Lab that was assisting with the workshop named Duncan began to teach us about circuits a bit before we began sewing. We learned about the difference between parallel circuits and series circuits, where parallel circuits have lights that are independently connected to a power source and do not need each other to light up and series circuits have lights connected to each other and the power source, so they all need to work in order for them to light up. We also learned about the dangers of crossing negative and positive ends of the battery as they can cause the entire circuit to not work. Once we understood that, we were able to design our lighting plans for our canvas on paper, which we then used as the foundation for the actual sewing design for our piece.

Once we had our design and understood how the battery and circuits worked, we were handed some LED lights (2 or 3 depending on our design/preference) and some conductive string that can pass an electric current through itself in order to reach the lights and light them up. We thread the needle and proceeded to sew in our design. Many people in the classroom had amazing and creative designs. One of my favorites was a student who had the embroidered design of a lion’s face from the lion king and had placed the two lights perfectly on the spaces for the eyes of the design. After a lot of trial and error and many mistakenly crossed negative and positive wires, I too, was able to finish my design and place two lights at the top of my embroidered design. Since my design for my canvas was a couple dancing together on a sort of stage, I decided to place the two lights on the top right and left corners of the “stage” to seem like stage lights and complete the theme of my design. I was overall very happy with my design and grateful to have learned as much as I did from the workshop.

Week 9 Reflection: Lessons from Failure

Week 9 Creations
This week was our final week at the UIUC FabLab. In the first week, Clinton helped me design a Star Wars themed box using a laser cutter. Last week, Duncan helped me design an X-Wing embroidery using an automated sewing machine. This week, we got to improve our embroidery design by adding lights to the fabric. First, Clinton and Duncan taught us how to create a parallel circuit using a small battery, conductive thread, and a few LEDs. Clinton inspired us by informing the class that the LED was invented at the University of Illinois. I drew my original plan as a parallel circuit with three LEDs. I spoke to Clinton about my circuit, he helped me plan out my stitches, so I wouldn’t cross wires. I had not sewn anything since my Home Economics class in 7th grade, so I was a bit pensive about sewing the LEDs properly. After struggling to thread the needle with the conductive thread, I was able to sew a magenta LED and a red LED to my embroidery before realizing I mistook my positive and negative ends.
After speaking with Professor Sachdev about our group project, I decided to restart my sewing. I sewed my LEDs onto the rocket engines of the X-Wing, with a little help from Duncan. Unfortunately, when I started getting confident in my sewing ability, I made another crucial mistake. I crossed my positive and negative wires, meaning the battery would short circuit. I spoke with Clinton and he told me I could restart again, but we only had ten minutes left in class, thus, I decided to use the last few minutes to draw prototype sketches of our final project. Tomorrow, I will present my box to my youngest cousin, a huge Star Wars fan, in hopes that he will get more use out of it than I will.

Looking Forward

When we return from Spring Break, BADM 395 will reconvene in the Maker Lab to work on the final project. My group will be returning to the UIUC FabLab in the coming weeks to utilize their conductive thread, solar panels, and possibly Arduino boards. Clinton showed me a few sensors they had to detect sunlight. Our group’s idea is to create a solar panel heating unit for warm beverages. I look forward to using the lessons learned from the UIUC FabLab to improve the aesthetic appeal of our final project.

Let there be Light!

This week was our third and final session at the FabLab in which we added conductive thread and LEDs to our embroidery project. I was excited to use conductive thread and review circuits because I have taken an ECE class before and was fascinated by circuits. It’s neat to have my previous knowledge apply in areas I would never expect (ECE knowledge with a creative/ arts project). We started out the class by drawing out designs and figuring out where the conductive negative and positive thread would go into the design. This was important because you could not cross the negative and positive threads and it’s a lot easier to visualize by drawing it out than guessing where the path should go while sewing.

We then sewed the individual sides of the circuit. I did the negative side first and then the positive side. My design halfway through changed as I decided I only wanted to incorporate 1 light in the plane instead of 2 LEDs. One big lesson I learned was that you absolutely cannot have either the positive or negative side touching the other thread. After finishing hand-sewing, I tried to turn on the light and it wasn’t working at all. This was because the negative thread was touching the metal that the negative current goes through at all so the circuit was being shorted. I then hand sewed the negative thread down so that it would not interfere and it worked well!

I had an extra embroidery hoop at my house, so I decided to have this separate from the box we made in previous classes and use it as a small wall hanging. I’m happy with how it turned out and excited about the new skills I gained through this project. Unfortunately, it looks as if the storage on our site is full so I didn’t get to upload a photo but you can imagine it from my previous post!

What’s next?
We are starting to put in more time on our final projects at this point in the class. I went into the FabLab for consulting open hours on Thursday in order to gain more knowledge about the sensors the FabLab has and their experience with hydroponic farming. I talked to Brandon, a sensors expert at the lab who has also made a hydroponics window installation so he helped to clarify many details of the project and I am sure he is going to be a huge resource for us.


Final Touches @ the FabLab

This past week was our last session at the Urbana-Champaign Fablab. It was very rewarding to assemble the wooden box design and combine it with my embroidery design. My embroidery design turned out really nicely. I was amazed at how high quality the embroidery turned out. The Illini Logo looked strikingly similar to the original image I modeled it after, and I was very happy with how it turned out!

The next step this week in the FabLab was to design the layout of our circuit. It was important to draw it out before we started stitching. I learned that for the LED lights to work, the positive wires could not cross with the negative wires. In the image below, the squares represent LED light while the lines connecting them represent the magnetic wire that I used to stitch the lights and battery to the embroidery.

Key Takeaways from stitching:

Once I understood how the battery, lights, and wires needed to be placed on the embroidery I began sewing them in by hand. As someone who has never sewed before this course, I learned how much precision and strong fine motor skills it requires.

1) Use Beeswax & Have Patience

One of the hardest parts of sewing is getting started. Threading the needle took me multiple tries and required the use of beeswax. By taking the string and rubbing it against the beeswax, I was able to “thin out” the string and successfully thread my needle.

2) Over-Under through the same stitch

My next big takeaway was to make sure that once I had stitched something onto the embroidery, I needed to take the thread and sew it back through the same stitch. This prevented the string from showing on the design side. It also allowed me to tie the knot on the right side when ending my stitch.

Overall, learning to sew was a unique experience. Unfortunately, I was not able to successfully finish my design during class. Although my I was able to connect my LED lights to the battery, I ended up sewing my lights on backwards. Regardless, it was a neat hand-on making experience these past few weeks! I have learned a ton and am excited to apply what I have learned towards our final project!


Saying Goodbye to the FabLab… for now


This week marked our last class session in the Fablab. Although I won’t be returning in class, I do plan on coming back for advice on my final project. I have been impressed by our instructors over the past 3 weeks. They demonstrated knowledge and experience with different machines and techniques. I was surprised to learn that one instructor, Clinton, was still an undergrad. I’m not sure why, but I assumed that lab staff were either graduate or doctorate students. I applaud people like Clinton for being involved and inspiring others using his passion for digital making.

The third and final mini-project in the FabLab involved sewing LED lights onto the embroidery I made last week. Before sewing, we listened to a brief lecture on series and parallel circuits. I roughly sketched my cloth and a parallel circuit with wiring to help model my design. A parallel circuit connects the positive ends of the two LED lights to the positive end of the battery. The same is true for the respective negative ends. The wiring must be carefully mapped because the electric current breaks when positive and negative wires cross over one another. This may sound simple, but my extended break from physics classes ran me into difficulties.

The sewing materials included a needle, conductive thread made out of steel, two small LED lights, a lithium battery, and the switch. I placed one light at the top of the lighthouse, and the other illuminated the moon. I didn’t want the LED lights to be visible on the white lighthouse and moon, so I placed them under the cloth. Unfortunately, the small lights had trouble shining through the cloth. I will have to alter my design if I want people to notice the lights.

I thought the conductive thread was pretty neat. I never heard of or realized a use for conductive thread before. I also learned that beeswax can help flatten loose ends of thread through the eye of the needle. The biggest challenge was for me was actually sewing. I connected the positive and negative ends, but random bits of thread ruined the aesthetic. Choosing a darker cloth should easily fix that problem.

Reflecting over the past 3 weeks, I have a better understanding of product design. I think this is partially due to the creative freedom we were given, which we have learned is increasingly rare for students. Even though I have made mistakes, I walked away with lessons I can apply to future designs. Mistakes can be just as important as successes from a learning perspective.

Hope you all have a great spring break!

Lightening Up

What? 

In week 9, we had the opportunity to put the finishing touches on our boxes. In order to liven up our designs, we strategically sewed a conducive thread into the fabric which connected to our light’s battery. Like other new skills, picking up on the sewing did not come naturally for me. But also like other new skills, I saw myself go from complete novice to fairly competent as the class continued on. As I mentioned in my previous post, I created a baseball field design for my box top, leaving a space for a light on each one of the bases. After working for the entire class, I was ecstatic to see each base lighting up. I credit the lighting success to Clinton and Duncan who walked us through the mapping and building of a circuit, teaching us common errors we would surely make along the way. Unfortunately, I didn’t get a picture of my finished design this time around – and it is left at school until I return from break.

So What?

Adding circuits to our otherwise lifeless designs gives us the power to bring the designs to life. This is certainly a useful skill when it comes to making. The ability to add light allows us to call attention to certain features of a design – such as the bases on my baseball field. Makers can use this skill to their advantage by highlighting critical aspects of their designs and reach their users more effectively. More broadly speaking, our classroom activity shows us that we can animate previously inanimate objects. Using fairly basic technology on 3D printed creations gives us the ability to create something truly unique. (Little did we know when we created our team name, The Animakers.)

Now What?

The first several weeks of this course have been intensive on building new skills – it seems that we’ve learned at least one new skill or software every week since the class has begun. After spring break, we will have the opportunity to take in all that we have learned and use our new skills to create our project. Our team has chosen to make a customizable steering wheel attachment for those who have difficulties turning or steering their vehicle. We are excited to use our newfound skills in 3D printing to make the world more comfortable for our users and safer for the other drivers on the road!

The Grand Finale!

This week was our last Wednesday in the Fab Lab. I really enjoyed the past three weeks in the Fab Lab because it was hands-on learning and experimenting. We learned by “doing”, for example loading a sewing machine with thread colors or sewing LED lights onto fabric. As a class, we were able to develop new skills and learn unique software’s. This introduction to the Fab Lab showed me how much room there is for creativity and imagination in school. My team will definitely utilize the Fab Lab as a resource during our final project.

This week we completed the final stage in our project, which was to sew the LED lights onto our embroidered cloth. We were given a battery pack, a battery, and LED lights. We drew out how we were going to place the lights and battery on the cloth. We were reminded to connect positives together and negatives together to create a functioning circuit. Duncan demonstrated an example of him sewing his cloth. He emphasized that we had to be particular with how we sewed and patient with the process.

At first, I did not understand how we would create an electric circuit with thread. Duncan told me that we were using conductive steel thread, which carried a charge. I thought this was so cool! I did not know this existed. I was excited to start sewing.

I placed my LED lights and battery pack in a circle to ensure no positive and negative circuits crossed paths. Stitching together the pieces was a challenge. It was easy to loose the needle or knot the wrong thread together. Also, I was constantly poking myself!

After carefully sewing on my two LED lights and battery pack I was ready to turn it on. Nervously turning on the control switch I saw one of my green lights flicker on immediately! Woo!! I did it! The light was brighter than I expected and shined through the cloth clearly. Unfortunately, my second light did not work. It was a dud!

Throughout class it was fun watching everyone turn on his or her lights. Everyone’s looked great! I enjoyed seeing what other people in my class designed. Vishal and I spoke about how sewing is a great mechanic to practice. We are always on our phones texting, but this experience we were using our hands in a different way. I thought this was an interesting perspective. This day in the Fab Lab gave our body and mind a break from screens and instead a new challenge using other parts of our brain and body. We were successful in a different way of learning!

LEDs and Stitching: The Final Touch

This week, we finally got to put our wooden boxes together. These past three weeks have been a wonderful learning opportunity, and it felt good to come up with a finished product. I thought it would be a simple process- put the wooden pieces together, stick a light somewhere on the canvas, switch some button on, and see the pretty light glow on top of a perfectly constructed box. Little did I know, there’s a lot more to it than that.

We first received an introduction from Duncan on how circuits work—the basics of it made sense to me: connect the positive LED side to the positive battery side, and connect the negative LED side to the negative battery side. However, if the two wires touch at any point, it’ll cause the device to short circuit and the light won’t work. In order to make sure that we were connecting the right wires to the right sides, we sketched out where we wanted to sew the LED light and where we wanted to place the battery on our designs. I decided to place the light by the location of my hometown in California:


Once we identified the positioning, we used conductive thread to actually sew the various components onto the canvas. I think I speak for everyone when I say that this was a challenge. After 30 minutes of trying to tug the thread through the canvas and trying to tie knots to hold the finished stitches in place, I was finally ready to test out the light by inserting the battery. On my first attempt, I couldn’t get it to work and I was terrified that I had crossed the wires accidentally—it turns out that a part of the thread was touching the metal portion of the battery where it shouldn’t and that was causing it to malfunction. Once I moved the thread over, my LED lit up and the box was complete:

If there’s anything I’ve learned throughout these past few weeks, it’s that I should be patient with technology, and with myself. I came into this workshop with the expectation that the machines would take care of everything, but in reality, there is still a ton of trial and error that goes into making anything worthwhile.

Finalizing our Fab Lab Creations & Initial Project Steps

What We Did This Week

Hello! This week has been by far one of the most exciting classes because it resulted with us walking away with some complete creations. After laser cutting and sewing for the past 2 weeks, we were finally able to introduce conductive thread to our items and finalize them.

We began class by learning how currents flow in a circuit (which is how our conductive thread would be working). Our instructors let us know that electricity always travels in a circle and follows the path of least resistance. They gave us a battery, battery switch, conductive thread, and LED’s. We were then tasked with drawing out a diagram of how we would be connecting each of these parts on our fabric (it is useful to diagram because of the potential complexities from connecting the positive and negative ports). Below is my diagram:

As you can see, I ensured that each of my positives connected with other positives, and my negatives connected with other negatives. There are also not any areas where a positive wire crosses a negative wire (which would cause short circuiting).

After diagramming, we were ready to get to work. We used a needle and conductive thread to stitch the LED’s and battery pack to the fabric (again, being careful to keep the positive wires only connected to other positives, and negatives only connected with other negatives). Below is a picture of the back of my fabric with all of the internal parts sewed on:

Once I got all of my parts into place, I flipped the On/Off switch and my LED’s turned on! This was nerve-wracking because if they had not turned on then I would have had to go back and potentially unthread/rethread some areas–which would definitely be difficult. Check out the lights turned on below:

To finish up my box, I cut off the excess fabric that draped over the sides of my box. This resulted in a clean-cut box that you can check out below!


What’s to Come?

Now that we are equipped with the proper knowledge, skills, and resources, we are able to begin working on our final projects! This is extremely exciting because these projects are essentially created by our groups from the bottom up. My group (FastFoward) plans to create a Laser Person Counter (example: http://www.instructables.com/id/IR-laser-person-counter/). Essentially, this device would utilize lasers, wires, arduinos, etc. to count the number of people in a specific facility or area. This could be useful for restaurants, bars, and class buildings around our campus because it would give users the ability to understand capacity without necessarily being physically present at a location. Our goal for the next week is to gather the required components/parts and grasp a better understanding of how we can bring this idea to fruition. We are going to need to learn some coding skills in order to make this project work, so we will also be researching around in that realm!


Thank You

As always, thank you for taking the time to read my post. Stay tuned for the coming posts to follow along FastForward’s progress in developing our final project!


-Scott Provenzano

Better Understanding Circuits (Week 9)

Hello everyone! Since I was not able to complete my full box, I thought I would spend this post brushing up on my circuitry knowledge – I’ve taken an ECE course here at UIUC before, but I feel like I’ve already forgotten all the little technical things you should know about a circuit.

Did you know that the LEDs used in class (and in many other places and in many other things in the world) were invented here at U of I? Light emitting diodes (LEDs) were invented by Professor Nick Holonyak Jr., a PhD student of Nobel Prize winner John Bardeen. Holonyak went on to produce the first version of the LED. There’s a UIUC-published article about him here. Put simply, LEDs use a p–n junction diode that will emit light when activated. I studied the p-n junction in one of my classes, but always thought it was a bit confusing to understand!

A circuit can be in series or parallel. What does this mean? In a series circuit,  the components (a resistor, for example) are connected along a single path. When you look at a drawing of a series circuit, you will see  that you can put your finger on a start point and essentially draw a box around the entire circuit, hitting each component along the way. A series picture can be found below. Try following it around with your finger!

Conversely, a parallel circuit’s components are connected along multiple paths. You can’t trace your finger around the entire circuit without taking a diversion. Look at the image below to understand exactly what I mean by that.

This video does a good job explaining the differences. It’s important to know the differences between series and parallel  because they are both used in real-life applications, from your twinkly lights to the switches in your house. You’ve seen how we used LEDs and knowing how parallel versus series worked as well as ensuring oppositely charged lines didn’t cross were key in ensuring the LEDs behind our embroidery pieces worked.

I hope everyone’s boxes turned out well and hope you all have a great spring break!

Putting It All Together

This week at the Champaign-Urbana community fab-lab, we finally got to put all our skills together from the last couple weeks. Firstly, I was able to assemble my laser-cut wooden box from one week ago – it connected together relatively easily! I loved how it turned out, with a simple lion silhouette on one side and my embroidered design on the front. It slid right over the box, using the square wooden holder I had printed.

Next though, was the most interesting part of the project so far – the circuitry. The fab lab instructors went around and handed us each LEDs (light emitting diodes were first invented at the University of Illinois), a controller switch, and a small disc battery. He explained some general principles of circuitry and currents to us – and the difference between continuous and parallel circuitry. Those frustrating Christmas lights finally made sense! We were all excited when we were first able to get the LED to shine by connecting the right contacts to the controller.

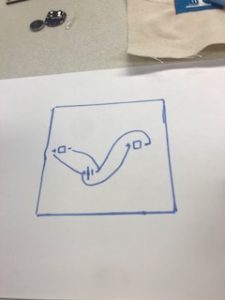
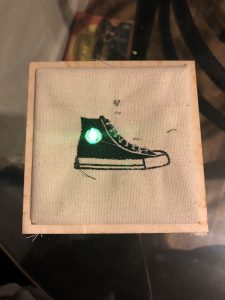
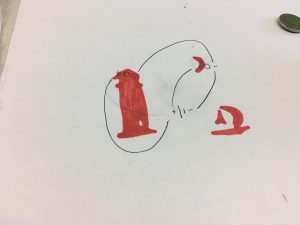
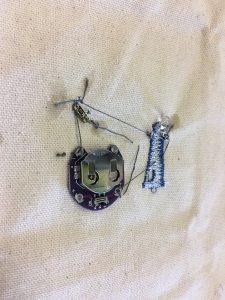
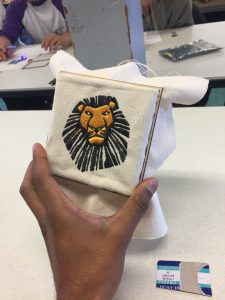
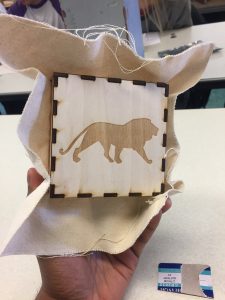
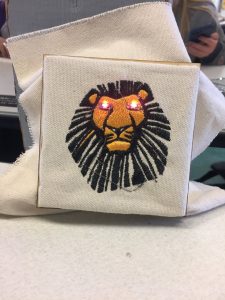
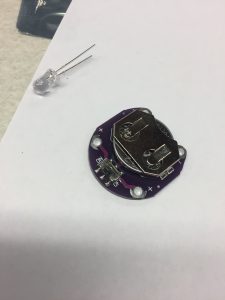
Next, using our intermediate knowledge of sowing circuitry into our canvases, we drew out the schematic of what our stitches would look like. It was like playing a puzzle game – you had to complete the circuit without letting any oppositely charged lines touched. I drew the head of my lion on a page and mapped out where I wanted my circuitry to connect. I realized that I did not have to send every thread back to the battery, but could continue them on to a similarly charged node at another LED, and then send it back (see design below). This saved me a lot of headache in stitching and made the design more efficient.

The actual stitching part was much more difficult than I anticipated. We used conductive steel thread to ensure that a charge was carried. I had a lot of trouble threading this coarse thread into the needle – and found out in class that beeswax serves a lot more purposes than I had initially thought. I decided to leave my LEDs on the outside of my lion, to give it a more mechanic/hybrid look. I didn’t spend as much time as I should have stitching – if I could redo it, I would have made much more stitches, and hidden any excess thread from the front of my lion – but you can’t tell from far away. I felt like an engineer when I had finished my threading, the controller, LED, and battery was in place. Finally, the moment of truth – I held my breath and flicked the controller switch to “on”, letting a current run from the battery, through the thread, to the LEDs, and back.

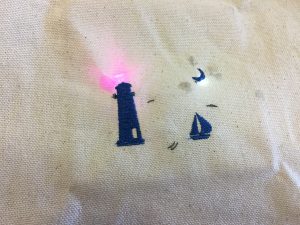
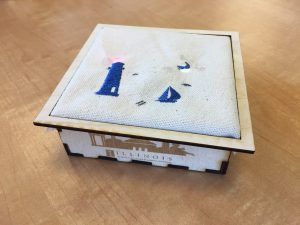
My lion’s eyes blinked to life! It looked even more aggressive than I thought with it’s contrasting pink/purple light. I completed the entire box and cut off the excess canvas around the corners. I absolutely loved how it turned out. My mom will definitely put it next to all my other ‘art’ projects from school,  except this one is actually decent. I learned a lot from these past 3 weeks of hands-on making – my favorite portion of the class so far!