Looking Back

Looking back at this semester and thinking about everything that I have learned is incredible. This class has introduced me to things I was unfamiliar with. It gave me the skills to be able to go about an idea in serveral different ways.

I thought back to some of the speakers that made an impact on what I learned. Even on the first week, when we had two speakers. The video call from John Horlick kicked off the semester. He had written a book on how 3D printing was really becoming more and more prevalent in business and our everyday life. This opened my eyes to Digital Making. I realized that things were constantly changing in how things were being made, but I did not realize how much of an impact innovation was actually making. Even though this presentation was mainly on 3D printing, I felt like it spoke for more than 3D printing. It showed that there is always a better or smarter way to do something. There are also many ways to achieve that goal and I believe that is what Digital Making entailed.

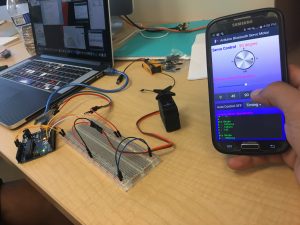
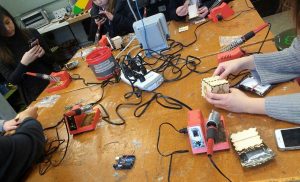
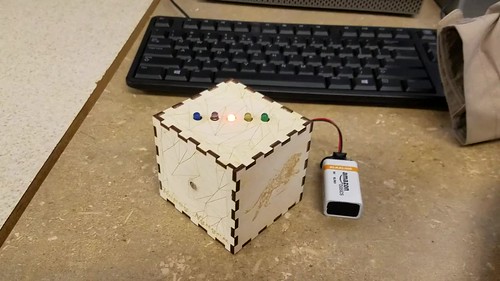
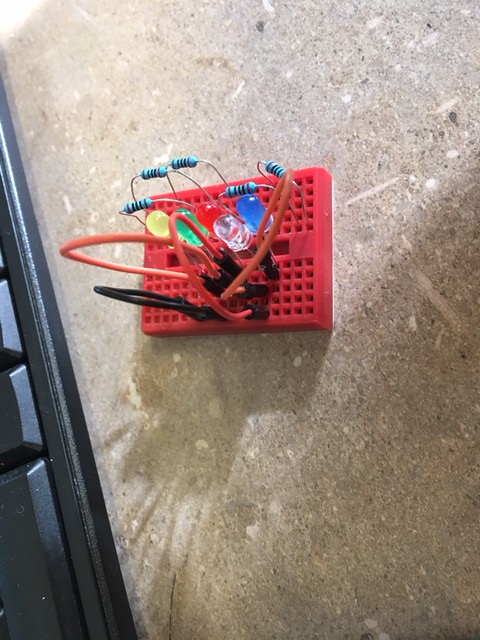
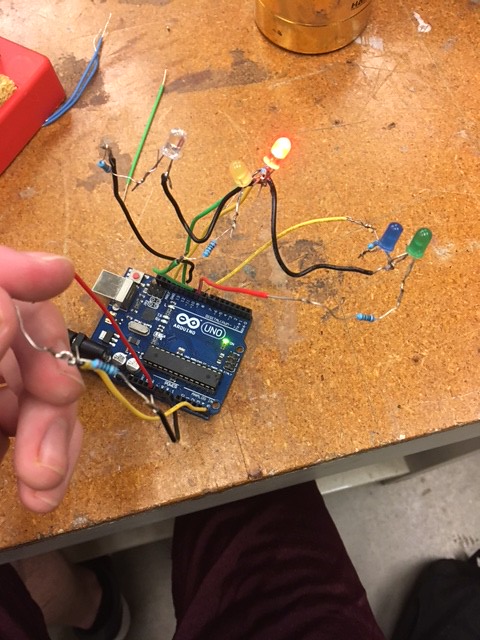
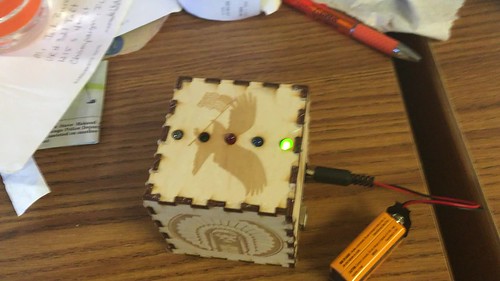
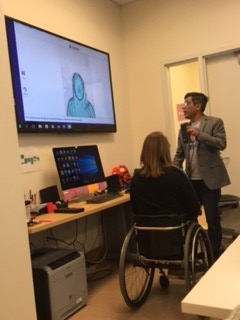
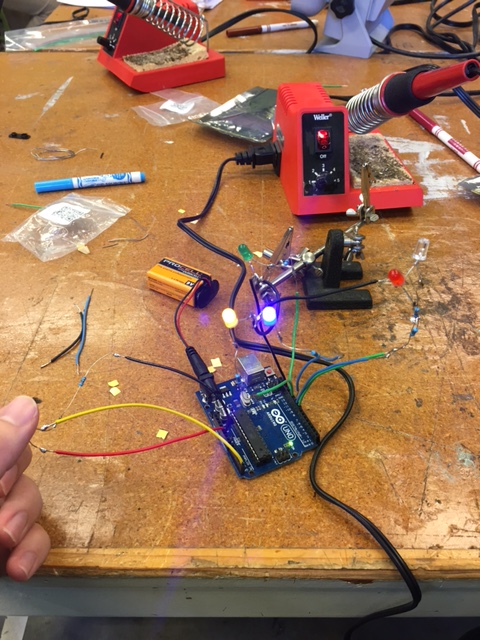
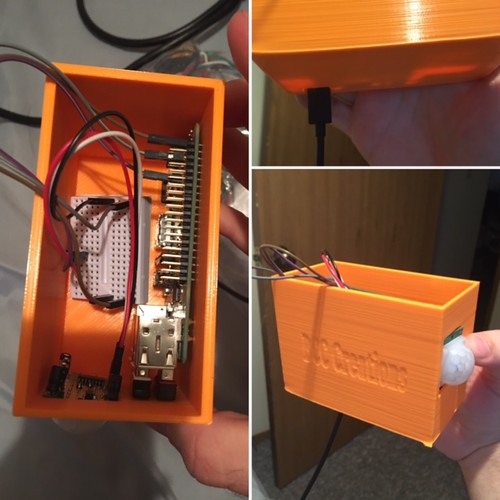
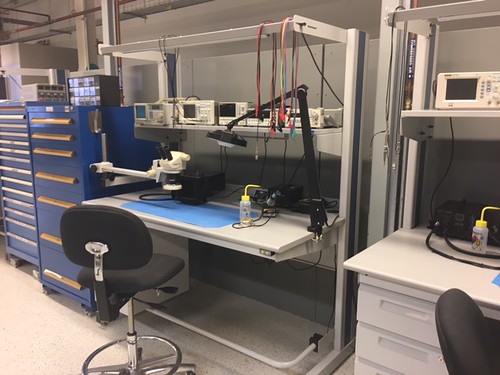
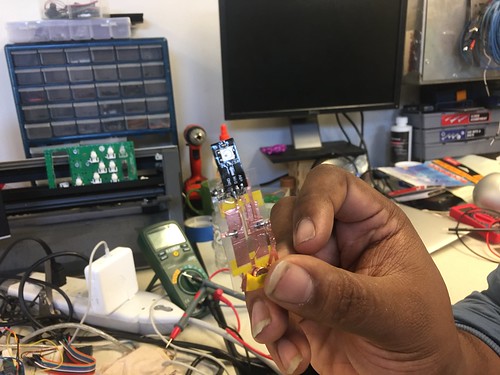
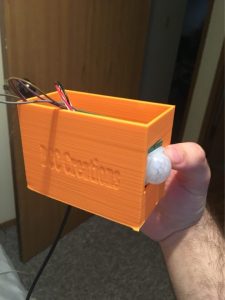
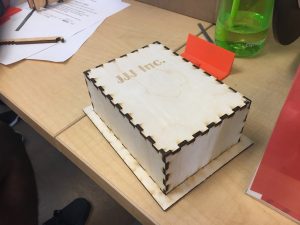
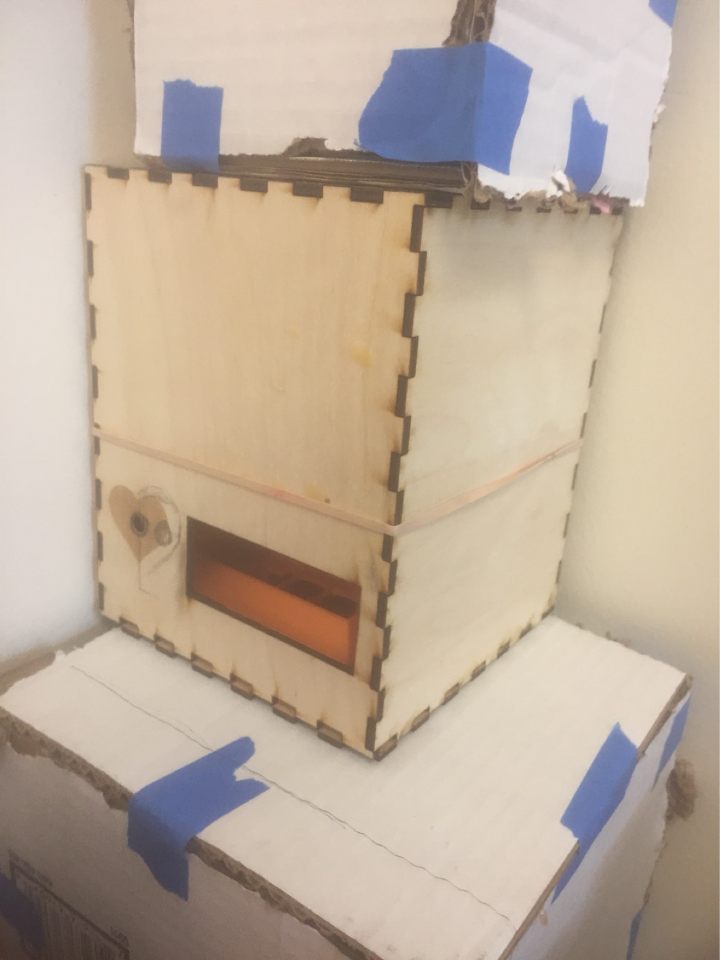
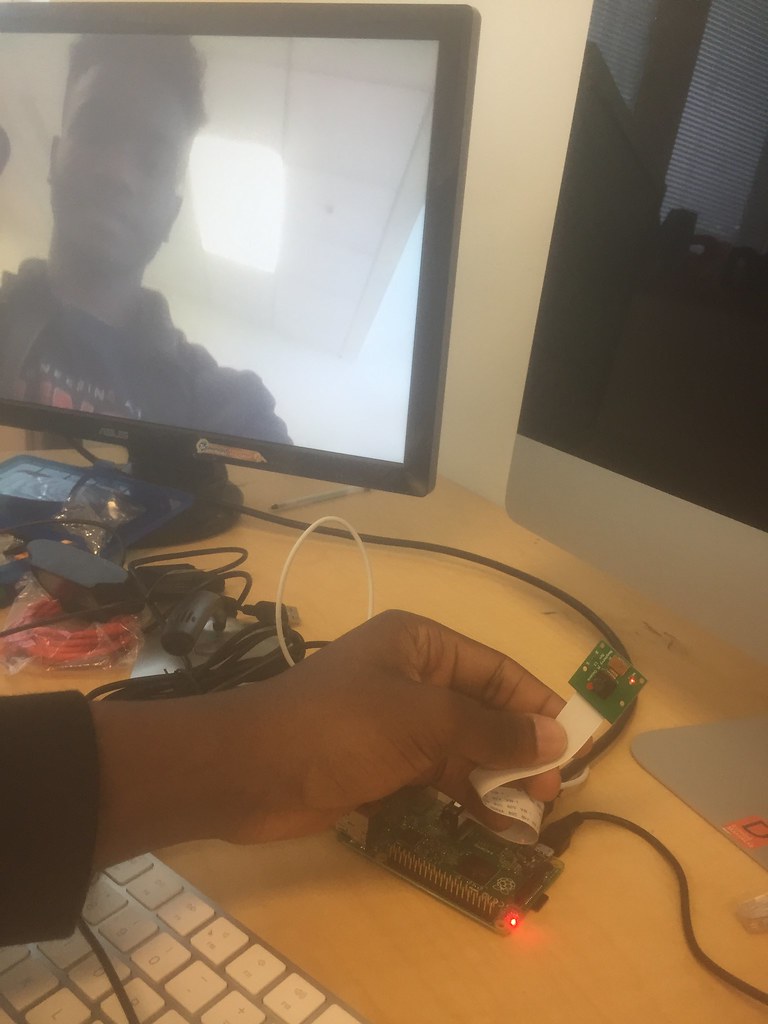
Most of everything I learned in this class, I had not been exposed to before. Something that was really foreign to me was coding aurduinos. I never thought I would mess with that. I had understood some of the code because I had dealt with coding before, but it had only been solely on the computer. I had never used a breadboard before. It was also awesome to see a product come together after our few weeks of class spent at the Fab Lab. Not only did we code Arduinos, but we lasercut wood boxes and soldered wires together. This was great experience that helped prepare us and our teams create and develop a product of our own for our final product.

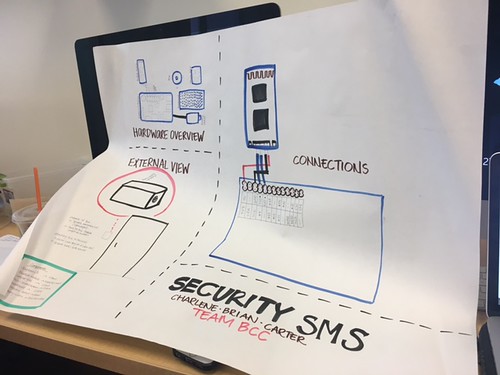
Throughout the entire semester, I felt like each class taught us the skills to tackle a problem or accomplish a task that we would encounter as we did our final project. The guidelines of the final project were for you to create a project that solves a problem.

When I decided to take this class, I was hoping to get a better understanding of using different softwares. I took this class because I really liked the work I did in the lab and I wanted to be able to do more. I only had one class freshman year that I was taught a CAD software, Creo Parametric 3.0. Other than that, the only time I have had experience with other softwares was when I would help out with workshops at the MakerLab. I wanted to be able to learn them well enough to create things of my own.

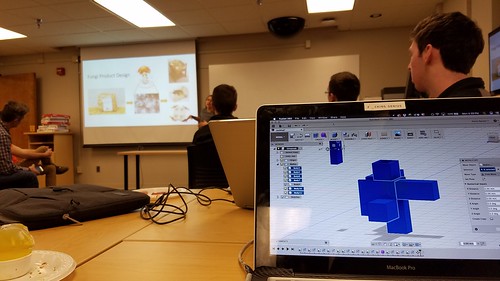
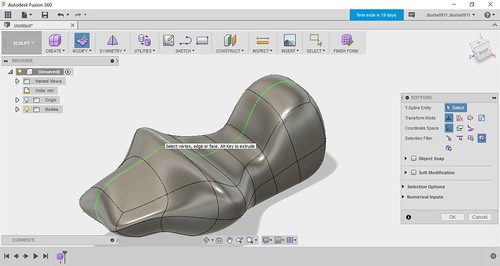
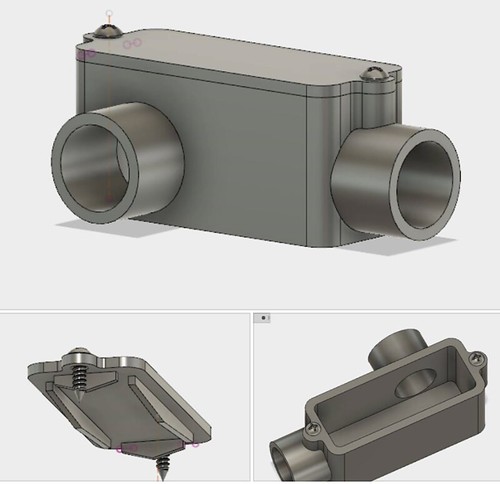
I feel like that expectation I had about the class was met. I was taught various softwares through a workshop type environment in class. That helped with figuring out where to start and what to look at to finish a design. Then I had to apply those skills I learned to the final project. It really tested me on how well I knew how to use them. I used Tinkercad for most of anything I did with the final project including the team logo. I was able to do it from my laptop in my free time. When I was looking at a folder I created on TInkercad and photos of designs I had sent my partners, I could see how my skill had improved throughout the semester. When I started, I did the basic shapes and a lot of things were uneven and had odd proportions. As I practiced, I was able to fix those problems and create more complex things. It was frustrating at points, but I was able to get my designs to how I wanted them to be.

This class opened my eyes to many things.  I was able to explore different ways of making I had never done before. I also, went through the product design process that made me explore every aspect of a design even if it is identifying what you can do yourself and when to seek outside help. In this class, I learned what I wanted to learn and more.

That’s a Wrap! 4 Awesome Things about BADM 395.

Over this past semester, I’ve learned so much in the digital making realm. I came in wanting just to earn a credit for school but ended up gaining so much more out of it. The experience was invaluable and I’ve learned so much more about what this university can offer to its students. I’m sure the knowledge I’ve learned this semester will certainly benefit me in the future and beyond college.

What I learned:

3D Printing

One of the big lessons I learned, of course, was how to 3D print objects at the Maker Lab. Learning how to 3D print was definitely one of my main goals that I wanted to achieve coming into the class. From learning how to load up filament into the 3D printers to how to properly slice an object prior to uploading it to the printer I think I learned a lot about the functional capabilities of 3D printers. I learned the limitations of 3D printing and at the same time what the maximum limit of what they can achieve. For example, one issue we encountered was that our water pump’s exit valve wasn’t properly fitted for the tubing we bought. To resolve this we simply took the dimensions of the current water pump valve and 3D printed a new exit valve that fit more to the dimensions of our tubing. Then we attached it to the valve and it worked!

Below is a small GIF of us working with Vishal on 3D printing.

View post on imgur.com

Watch the full video about BADM 395 here: https://vimeo.com/216385308

Fusion 360

Personally, I didn’t expect at all to learn how to any type of modeling or creation of actual objects in software. When we were exposed to Fusion 360 my mind was thoroughly blown. The software could really achieve incredible things that I had never even thought of. There were seemingly no boundaries to what could be made in Fusion 360, which was absolutely incredible. It even exported your models into Cura ready to be 3D printed just like that! Fusion 360 for our project was absolutely vital because we were making brand new objects that had never been made before. So we were working off from scratch and had to use a semi-advanced software to make what we needed so TinkerCAD was off the table. Pictured below was just one of many iterations of our modular plant holders. Learning Fusion 360 was definitely frustrating at times but honestly, the reward of transitioning a product in your head to a real life functioning object was more than worth the steep learning curve.

View post on imgur.com

Full post on Fusion 360: https://publish.illinois.edu/digitalmaking2017/fusion-360-making/

Prototyping

Learning how to iterative prototype in BADM 395 was a great experience. With how the class is structured you naturally get into the groove of making, testing, and then (most likely) failing. Which is a great way to learn how to iterative prototype. The idea itself we had honestly morphed, changed, and evolved into what we ended up doing. Being able to go through all the stages of prototyping and physically building out different models was extremely helpful for the whole process. Personally, we built everything from paper to cardboard prototypes it was a great experience. Especially when we interviewed people on how they felt about our product using the prototype which was valuable in how we intended on changing or improving our product before the final presentation. Below is a picture of two of our three prototypes. The paper prototype was the first one we made before moving onto a more solid cardboard prototype. The third prototype we made was a water functional one with a $0.98 Wal-Mart bin as our fish tank.

View post on imgur.com

Full post on prototyping: https://publish.illinois.edu/digitalmaking2017/cardboard-fun-near-bif/

Learning About Fab Lab

Exploring the Fab Lab was certainly one of the highlights of the entire class. There our class got to learn about the various resources offered at the Fab Lab and their overall mission. The things that the Fab Lab does for the community is also very incredible. From teaching the art of making things to hosting workshops for kids they do awesome work at the Fab Lab. They also help advise students, just like us, on how to make. For our own personal project, we used the Fab Lab to help us cut out the glass materials we needed to make our final fish tank. Additionally, we used the Fab Lab’s resources to help us order the acrylic in order to make the fish tank in the first place. Overall, they have a ton of resources over at the Fab Lab ranging from physical tools to the great mentors and instructors they have there that can assist you with pretty much anything you want to do.

View post on imgur.com

Full post on Fab Lab: https://publish.illinois.edu/digitalmaking2017/learning-the-fab-lab/

Conclusions & Takeaways:

Honestly, I loved my time in BADM 395. It took a lot of hard work and a lot of time but overall this one of the most rewarding classes I’ve taken in college. In the College of Business there isn’t a lot of opportunities to make physical objects and products but here, in this class, we were able to do just that. It feels very empowering to be able to have thought of something and execute it to that degree of actually making the product happen over just a semester’s worth of work.

Moving on and going to California I really do hope I’ll be able to find similar resources such as the MakerLab or the Fab Lab. They are certainly organizations that I’d like to stay involved with moving forward as their potential to impact people seems almost limitless in scope.

With that, I hope everyone in their life at some point gets to experience the joy of imagining a product and then actually making it in real life because it is just wonderful. That, I believe, is how the future problems of the world will be solved. By regular people who are affected by the world’s problems getting access to tools like these and working to get their ideas made into real world products that can help people.

For more information about any of my projects or the video feel free to reach out to me at szethoian8@gmail.com.

A Semester of Creativity


Having the pleasure of fully immersing myself into the MakerLab this semester with the BADM 395: Digital Making Things class, I can now confidently say that 3D printing has the potential to uproot the basics of how we use and purchase products. The ability to think about something, and then model it on some softwares and then print a physical piece within a few hours means that there are endless possibilities when it comes to what one can create.

Coming into the class, I had no idea what to expect, but I knew that it would be unlike any other class I have previously taken on campus. The knowledge and skills that I have accumulated within the short 16 weeks will last for years to come. I believe that this has been one of the most enjoyable classes I have taken and I would like to thank Vishal for that.

The journey that the class has taken me on started with Design Thinking, specifically human-centered design thinking, where one starts with a problem, a need, for a product and develop it that way. This allows for consistent user feedback and to give the product a purpose rather than being a potential paperweight. Design for America, a student organization on campus, held a design workshop to allow the students to visualize this new idea in action.

Screen Shot 2017-04-02 at 10.58.45 PM

The next step in the course was the introduction to 3D modeling softwares and websites that would be useful for us. This included Fusion 360, Cura and TinkerCad. This process was very crucial as it allowed my team to be able to manipulate our object in a virtual 3D space and it has very advanced skills that gave it a bit of a learning curve but I was soon able to master it.

20170213_163924

The FabLab portion of the class taught me more skills that I had anticipated. From soldering to laser cutting, to coding Arduino, these skills are immensely useful, not only for this course but any future project that could require some fine tuning. This portion we made a press box that had an Arduino inside of it with LEDs and a light sensor to trigger specific lights at different light intensities. This was a really interesting and cool way for us to know and become familiar with the tools and services offered at the FabLab.

20170313_172241

The final portion of the semester was centered around the ability to create our project with the tools and materials that we have had at our disposal for the past few weeks. This was the most time consuming and challenging part but most rewarding as well. The idea we were tackling was to create an aquaponics system for a college student to be able to have plants and a pet. The challenge was big as we were trying to emulate nature within a confined system. We encountered many roadblocks, such as failed prints, delays in shipping for acrylic and leakages. However, with my team’s hard work and determination, we were able to overcome the obstacles and build a product we were proud of.

Snapchat-1849388938

Looking back at the beginning of the semester, I had no idea I would be learning so much, and at the same time being so hands on and developing a working product within 16 short weeks. I believe that my expectations of this class were supremely surpassed. It was different because of the way the class as laid out, it allowed us to learn at a gradual rate all the resources at our disposal and how to fully benefit from them. I learned that I was able to tackle problems as they come and being able to be flexible and having a backup plan is crucial. I learned how important it is to constantly change and adapt, whether its designs in a product or user feedback on functionality. Being able to adapt and change with any issues gave me an edge to think on my feet. I learned a lot about softwares, tools, machines and facilities, all of which I will continue to refine for years to come, in my professional life as well as personal endeavors. If anyone that is reading this and is teetering on whether to take this course or anything similar, do it, it breaks conventional classroom politics and provides a fun and creative atmosphere where students different backgrounds can interact with each other. If you have any questions or concerns, don’t hesitate to contact me at khnguyn2@illinois.edu.

My Semester at Digital Making Seminar

Image

This semester, I got to learn a lot not only about digital making, but the design process and design thinking as well! This post is going to summarize everything that I’ve learned in this past semester, then I will talk about how the class met my expectations, as well as aspects of the class that I enjoyed that I didn’t expect to even learn about coming in.

3D printing

Digital Making Seminar takes place in a 3D printing lab, so it was very fitting that the first thing we learned about in this class was 3D printing. While at first we didn’t model anything, we had a guest speaker come in and talk to us, and even got to print out a small object to see how the printers worked. I printed out a small cover for my toothbrush, as shown here.

IMG_0343 (1)

The Design Process

The next week, DFA (Design for America) came into our class and gave us a presentation on the design process, as well as design thinking. This helped our team out in the upcoming week, as it gave us a structure to follow when thinking of a product idea that we could build for our project. I never realized that there was a structured way to come up with product ideas, I thought that people just came up with random ideas but this truly enlightened me.

Fusion 360

Week 4 provided us with a chance to learn the ins and outs of Fusion 360, which is a CAD modeling system that is compatible with 3D printers. We were required to become familiar with the software before class began and then had an expert on the subject, Jeff Smith, come in and talk to us about it. I got to learn just how powerful Fusion 360 could be, as the sculpting mode allows you to make complex shapes in the blink of an eye on Fusion.

Fusion 360 Picture

Designs like this would take possibly hours using traditional CAD techniques. This is one of the many benefits of Fusion 360 that our class learned about in this course.

Creating a Circuit

We were also introduced to the technique of creating circuits using Arduinos. We were fortunate enough to be able to use our schools Fablab, which is a building created for the purpose of inspiring creative thinking and design. During our class, we were actually able to make a circuit that caused LED lights to blink at a certain rate depending on how much light is picked up by a sensor. While it was a pretty basic circuit, it was cool to see how the process of circuiting worked and I know that this will be helpful down the road if I ever have to take an electrical Engineering class.

IMG_0421

We also learned how to solder a circuit the next week. This took a lot of patience, but in the end everything turned out really well! This is also a valuable skill I could use, and hopefully I am able to use the soldering skills in the future as well.

IMG_0430

Here is a picture of my completed Arduino Circuit.

Laser Cutting

The last week in the Fablab, I was able to learn about laser cutting and how to print designs on wood using a laser cutter. We got to create a box that we would assemble and use as the container for our sensor and circuit board. The final result turned out really cool and the result is shown below.

IMG_0449

3D Scanning

One of the last weeks of the year, we had the opportunity to learn about 3D scanning. A former student of the class, Ariel, came in and demonstrated the technology for us. We then were able to use the scanner ourselves, and even got the opportunity to make 3D models of ourselves. A picture of Ariel demonstrating the scanner to us is shown below.

IMG_0485

Takeaways

Overall, while this course didn’t turn out exactly how I thought it was going to, it was still an amazing and really helpful course. Going in, I thought the course would be exclusively about 3D printing and how to make and design things with 3D printers. While this turned out to be a huge part of the course, there was so much more cool topics that we learned about that I would never have learned if it wasn’t for this class. Everything we learned in the Fablab taught me the basics of some really cool skills that I would not have know if not for this class. Looking back, my expectations of learning about 3D printing were met, and on top of that we learned about some technical skills that I wouldn’t have known about had it not been for Digital Making Seminar. Before this class, I thought that coming up with awesome product ideas or a new invention was only for a select few. However, this class taught me how Design Thinking can help any person who encounters a problem in life come up with a viable solution. This class will hopefully come in handy and may help me create a viable product one day.

To those of you out there considering taking this class, my advice would be go for it! It’s a really cool class and there’s so many skills I have learned in Digital Making Seminar that I would not have learned on my own. I would absolutely recommend taking this class if you have the chance.

If you ever have any questions, feel free to email me at johnhb2@illinois.edu


A Semester of Making

IMG_1015

When I enrolled in the BADM 395 Digital Making class, I was really not sure what to expect. I had learned about the class while enrolled in Professor Vishal’s BADM 350: IT for Networked Organizations class and thought it might be worthwhile to take. Prior to the first day of class, I had never been to the Maker Lab. In fact, other than seeing a quick demonstration several years ago, I had no experience with 3D Printing or really any form of digital making. My main motivations for taking the class were that 1) I wanted to learn more about the Maker Movement which I knew little about, 2) it would introduce me to many of the resources available at the University that few students take advantage of, and 3) I like the emphasis on learning, growth, and sharing rather than cramming and examination. The fact that the class counted towards my IS/IT major was certainly an added bonus.


I was hoping to learn how 3D Printers work, how to design objects for 3D printing, and different types of 3D Printing. However, I learned all of this and much, much more. I learned about the Maker Movement, different types of fabrication, design, product development, and prototyping, just to name a few topics. I have never considered myself a very “creative” person, so this course challenged me to think outside of my comfort zone. Working through the projects helped me develop some creative skills and further refine my problem solving skills. I am now more comfortable working on product development, a skill that is transferrable to many other processes such as project management. In addition to this, I was introduced to and learned about the following topics.


The Maker Movement:

The first few weeks of class served as an introduction to the Maker Movement. We covered topics such as intellectual property concerns and the success of open source software and devices over paid or closed services. It is here where we learned the learning aspect of the Maker Movement and the importance of learning, sharing, modifying, and most importantly: doing.

IMG_1021

Design:

One of the most important facets of making is design. Design for America led us through a workshop to demonstrate the importance of meaningful design. Instead of creating a product and finding demand, we should find a problem and design a solution. Through our readings we learned that products must be desirable, viable, and feasible.

Screen Shot 2017-02-17 at 5.03.53 PM

Tinkercad and Fusion 360:

Learning Tinkercad was very easy. Vishal demonstrated the open source online software and we designed our team logos. Even though the program is pretty simple, it makes it very easy to design objects quickly. Our first experience with Fusion 360 was through tutorials before class. Following this series of videos by Lars Christensen, we are able to create a box/housing with a lid. It demonstrated how powerful Fusion 360 really is. We were lucky to have Jeff Smith from Autodesk teach us even more the features available. For my group’s final project, we ended up using Tinkercad rather than Fusion 360 because of its simplicity.

Electronics

Fab Lab:

We spent three consecutive weeks in the Champaign-Urbana Fab Lab. Although I had soldered in the past, it was my first time in several years. It was a great way to practice making circuits and soldering them together. I was also able to code an Arduino for the first time, which sparked my thought process as we brainstormed ideas for our final project. Finally, I also used a laser engraver for the first time. This introduced me to Inkscape, another open source software (have you noticed a theme yet?) that allowed us to take silhouettes and have them etched into the wood and cut through to form edges.

IMG_1468

IMG_1571

IMG_1526

Prototyping:

The remainder of the semester focused on prototyping. Although I have been through mock product development phases, this was the first time I have gone from identifying a problem to presenting a final, physical working product. David Kelley says “Design is an iterative process” and I found that to be very true. Our prototype went through many versions starting with a sketch on paper to the final version. Between adjusting our coding on the Raspberry Pi to changing the design of the 3D printed housing to adding and removing functionalities, we spent a lot of time refining the project to best solve the problem of a lack of security on campus while addressing the needs of users. Somewhere in the middle of things we were able to learn about 3D scanning, something we could turn into a business idea as Arielle Rausin has. I was able to scan my head and 3D print it. By the end of the semester, we had been able to design, test, refine, and produce a final security system alternative.


An added bonus of the class was being able to go up to Chicago for a day. We visited Deloitte for a presentation on Deloitte’s tech trends and a consulting workshop. We also visited the Deloitte Greenhouse, a space where clients can come in and run through workshops to problem solve and create connections across many levels of their own companies. It was a really unique space and I’m glad I was able to see it. After Deloitte, we drove over to mHUB, a collaborative space where member companies can work on developing and manufacturing products. This is the epitome of the future of making. Members can work together, building off of each others skill sets, have access to collaborative and shared workspaces, and take advantage of a significant amount of expensive, advanced equipment. It was really cool to see Making on a commercial scale.

IMG_1576

IMG_1581

The end of the semester is bittersweet. While I’m excited for the summer and to be interning again, I am going to miss this class. We formed such a great community together and learned a lot from Vishal, all of our guest speakers, and each other. I’m glad I was able to enjoy this class and challenge myself these past few months.


Week 12 Summary: Design Auditing


Week 12 is the design audit for all the groups. This is where teams act as auditors of another teams in the class. Each group will provide an overviews (both visual and verbal) of their current designs of their projects. The auditing team will actively listen and then ask a series of questions regarding the feasibility, functionality and design of the other teams design. Questions commonly asked at the design audit are shown below:

  1. Why did your team choose this particular design?
  2. What issues is your team trying to resolve?
  3. How will the various parts of this design be fabricated?
  4. How will you test your team’s design?

These questions are design to spark conversations regarding design and functionality of the product. Speaking to other teams fosters a collaborative creative thinking space which allows the group being audited to see a view point which is unbiased. This encourages the DIWO, “do-it-with-others” maker mindset.  This gives the mentality that the people around have diverse experience and can be possibly the missing piece to the puzzle. Having an unbiased team audit the design and functionality of another team could raise possible concerns, limitations and improvements to the group’s design which the group being audited had never thought about. Each team learned so much from others and we were able to help each other perfect our designs and solve issues and flaws in our designs. Below are summaries of what each team learned as well as images of them in a design audit.

XNihilo & BCC Creations

Animated GIF  - Find & Share on GIPHY

XNihilo (Ana, Anjali, Yuanzhen “Ben”) – H2Go, the hydration wristband

Feedback: Make the red light blink and then stay red so that the user can still tell that they are dehydrated. Possibly look into vibrations along with light signals or variations of the product in which it can be used as an attachment to a water bottle or just a band for people without a FitBit

“A quick recap of what we did during the past weeks: we are designing a dehydration band to remind the users to drink water. In the last week, we have successfully tested our customized sensor on the regular Arduino and we also generated a hand-made circuit.” – Yuanzhen “Ben”


“According to me, the feedback allowed the groups to get a different perspective on their products. It also gave a sense of how the users would want to change the product and what would benefit them more. We will definitely incorporate the feedback we received and hope to make the product that can be used by everyone.” – Anjali

IMG_4170

XNihilo Circuit Prototype

BCC Creations – Brian K., Charlene, Carter – Home Security

Feedback: Think about possibility of having pets in the home and how that would affect product; looking into a reminder to set a home alarm before leaving the house because people may be in a rush to leave and may forget to set the alarm; look at making product more discrete.

“The feedback allowed our group to think about our product from a different perspective, and to also consider situations that we had not though of when we originally came up with the idea.” – Carter


BCC Creations Prototype


AquaPonics & Supra

Animated GIF  - Find & Share on GIPHY

AquaPonics – Kenny, Ian & John – Fishtank Aquaponics Self Sustaining Garden

Feedback: Make modules for the garden larger for root growth

“This actually gave us some great insight and the feedback that they provided will prove invaluable in the next couple weeks as we are finishing up our project.” – John

Animated GIF  - Find & Share on GIPHY

20170423_213521

AquaPonics Prototype

Supra – Olivia, Ben, Veronika – Doorstop

Feedback: Create a much stronger structural base; Minimize the vibration the stopping component the doorstopper experienced; Utilization of either a stronger adhesive or multiple command strips on our prototype base.

“As Marty Cagan testifies in Silicon Valley Product Group’s Prototype Testing, “testing your ideas with real users is probably the single most important activity” in the prototyping process: and I honestly couldn’t agree more.” –Ben


The MakerLax & JJJ Inc.

Animated GIF  - Find & Share on GIPHY

The MakerLAX – Peter, Chase, Brian X. – Tie Helper

Feedback: Add some physical grooves to the tie helper not only to make it more flexible, but as a method to make it easier for the user to determine where each end of the tie may go; Look into resizing the design and maybe changing the thickness.

“This was different from our usual group sharing in that we actually had the chance to sit down and really delve deeper into another group’s work and vice-versa. ” –Brian

Animated GIF  - Find & Share on GIPHY

JJJ Inc. – Jorge, Jai, Xinlu – Smart Light Switch

Feedback: It is somewhat bulky and maybe arduous to install and/or remove;

“Our team also made huge progress for our own project —  the Smart Light Switch. Based on our experiments in last week, we decided to use a cross-shaped arm instead of gear. We connected the arm to the motor, and connected the motor to the Arduino board. Then, we connected the bluetooth module to the Arduino board. We found a smartphone application that allows us to control the motor to rotate through bluetooth. This app saved us a lot of hassle.” – Xinlu

Animated GIF - Find & Share on GIPHY

Animated GIF  - Find & Share on GIPHY

JJJ Inc Prototype


Zerott – Taofik, Odelia, Tiffany – Robot

Animated GIF  - Find & Share on GIPHY

Feedback: keep our ultrasonic transducer would be better than a button because an ultrasonic transducer would be more interactive and impressive; focus more on the internal hardware versus the outerwear.

“Many of the suggestions that both parties pointed out were important and logical. Obviously, as a team we need to take these suggestions into consideration and figure out if we will use these suggestions.” – Odelia


“My main take away from the design auditing process was to strive for a minimum viable product given the short timeline we have and to learn as much as we can while working on our projects.” – Taofik

IMG_0204

Zerott Prototype

Zerott Prototype


It looks like all the teams are well on their way to presenting their wonderful creations!

Design Auditing

This week has been yet another week of great progress. Since the beginning of the project I have learned more about our product and what is needed to complete the minimum viable product and have since then been stream-lining what features it will need as well as how I will go about doing that. The design auditing process did great work in helping me see some of the ways I can do this as well as give me a few ideas on how to execute the final product iteration. And this final iteration is coming along very well as the last thing to get the fully functioning prototype is the speakers and microphone. I wrote code and setup the electronic circuits to control the led, button, camera and the LCD display and be able to already record the stories (with video without audio). I also got a lot of insight into the JJJ Inc. team who also did a design audit for us as well. They were working on the smart light switch, I found their project interesting and saw they had a different approach to their project. My main take away from the design auditing process was to strive for a minimum viable product given the short timeline we have and to learn as much as we can while working on our projects. We should have our finished product before next monday and that thought excites me greatly. I look forward to seeing everyone’s final products.
IMG_0138
IMG_0204
IMG_0202

Week 12: Auditing

This week, we continued our work with our final projects. However, we added  something a little different this time, in that each group was assigned to audit another group’s design. This was different from our usual group sharing in that we actually had the chance to sit down and really delve deeper into another group’s work and vice-versa. This allowed each group to properly and efficiently critique another design, as well as receive feedback of their own.

Our group was first paired with JJJ Inc., who are currently developing the smart lightswitch; a smartphone-operated device that uses an application to control a motor to operate a lightswitch from a distance. While it may seem relatively simple, the amount of effort and creativity they have put into it is astounding. They designed their own laser-cut casing and have incorporated an Arduino into their project, making full use of the skills they gathered during our time at the Fab Lab. Their project is based off efficiency and aesthetics. Being able to turn the lights on or off from a distance with only a smart-device is something many people would adore, and adamantly use. And the enclosure they’ve created for their device looks neat, as well. It appears to operate  perfectly and serves its purpose. Quite a unique and expertly done take on a classic dilemma. One “issue”, so to speak, that we did foresee however is that it is somewhat bulky and maybe arduous to install and/or remove. Also, their design, as it stands, only works for traditional light switches. Dimmer/rotary switches can’t really be turned by the motor. However, that could definitely be something they could create/improve if they ever choose to take the product to market. Perhaps by making two different designs or adding some features to their existing one.

We also received some much-appreciated feedback for our design. JJJ Inc. recommended that we add some physical grooves to the tie helper not only to make it more flexible, but as a method to make it easier for the user to determine where each end of the tie may go. They also recommended that we perhaps look into resizing the design and maybe changing the thickness. All good suggestions, but we recently just printed an edited version of our prototype in semi-flex filament, which should mitigate most if not all of our issues. After testing this prototype, we should only need to make a few more adjustments to the design to ease use, but the overall structure and plan of the project is complete. It’s been an exciting semester; we have all gained some very enhanced skills that allowed us to create these projects. I’m looking forward to seeing what we all have produced.

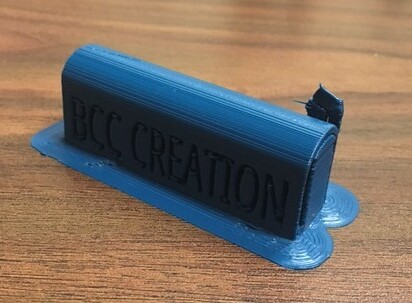
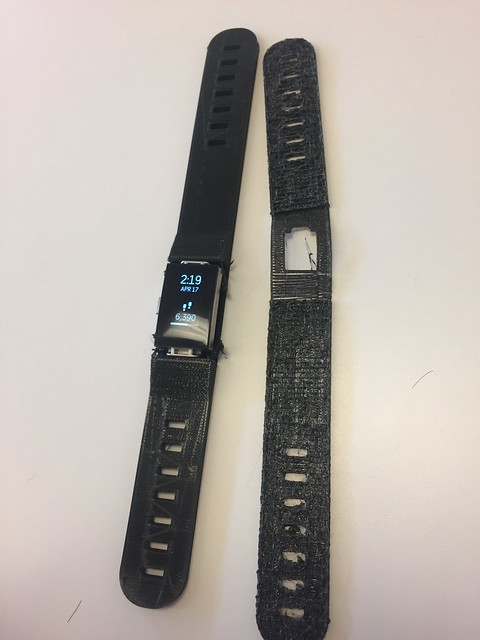
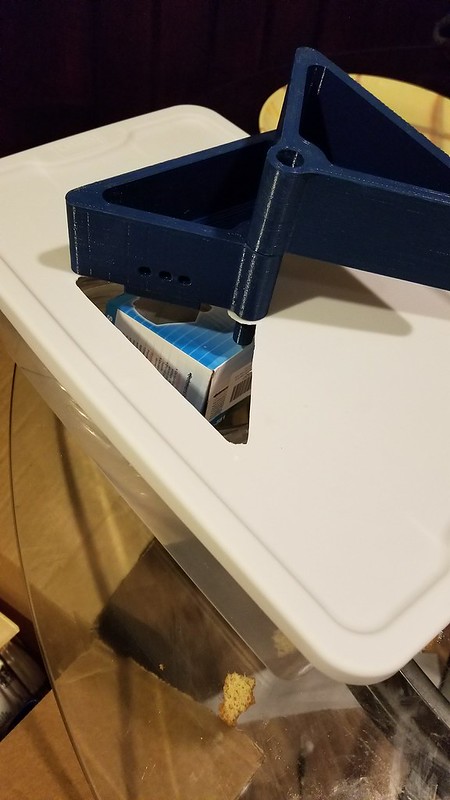
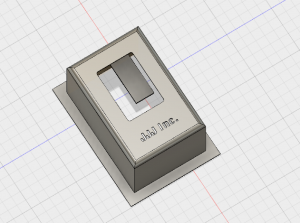
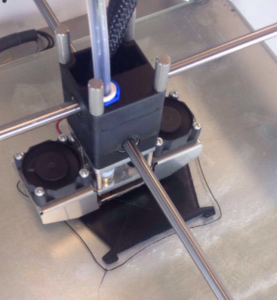
Version of our design printing in black semi-flex filament

Week 12: Auditing and Assessing our Projects

This week was all about getting other’s opinions of our product. We had the opportunity to split into groups and present our product. The other team then listened to us and gave us their opinion on our project. This actually gave us some great insight and the feedback that they provided will prove invaluable in the next couple weeks as we are finishing up our project. We also got the opportunity to look at some other groups projects and see how their progress was going.

The first group we were paired with was working on a door stopper that would attach to your door and slide out when you wanted to make sure your door didn’t close. It was a really cool idea and hopefully the feedback we gave them will help them out down the road. They were still on their first prototype so there was some problems such as how much shock the piece holding the door open could absorb. However, their group figured out that by using a more flexible material that could absorb more shock, the piece wouldn’t shatter as easily. I thought this was a really smart adjustment, as well as a cool demonstration of all the kinds of materials that 3D printers are able to use.

The second group we assessed was making a fitbit for hydration. This device would tell you when you were dehydrated, as well as give you friendly updates to keep drinking water. I found this one especially cool, particularly how they got the sensor to get information back to the Arduino and tell the wristband how often and what color to blink. I am also very impressed at how they learned to make this electronic piece in such a short time with no background.

At the end of the day, we got some minor adjustments but our aquaponics system is looking pretty good and everyone seemed to like it! The next week should include the finishing touches on our project as well as preparation for our presentation on May 1st. I can hardly wait to see our finished product!

Project Audit and Assessment

This week, we conducted project audit for two teams. We first audited The MakerLAX’s project, the tie helper. They have several highly finished model. They are going to use a flexible material in the prototype. We believe that they are on the right track to achieve their goal. Another team we audited was the Team Zerott and their robot designed for the MakerLab. They have completed a significant amount of programming using Raspberry Pi. They’ve also designed and created a decent body with wood board to cover the wires and boards. Overall, both teams are under the right track of completing their prototypes.

Our team also made huge progress for our own project —  the Smart Light Switch. Based on our experiments in last week, we decided to use a cross-shaped arm instead of gear. We connected the arm to the motor, and connected the motor to the Arduino board. Then, we connected the bluetooth module to the Arduino board. We found a smartphone application that allows us to control the motor to rotate through bluetooth. This app saved us a lot of hassle.

For the outer box, we’ve created two versions. One is to laser cut one using wood board. We consider this as a “economy” version since it is cheap and time-saving. However, it might need to be larger than needed. Another version we created is the 3D printed box, which is more time consuming but more polished. Both versions allow customization. After testing our motor using the light switch in MakerLab, we found the position to install the motor. Next, we will be mounting the motor to the box. Overall, we are one step from finishing the product.