3D Printing: A Game Changer for Sporting Good Industry


Hello Class!

As the semester wraps up, I have completed a research paper focusing on the impact that 3D printing can have in my area of Graduate Study: Recreation, Sport, & Tourism. More specifically I focused on the way 3D printing is being used by sport equipment / good manufacturing companies such as Nike, Under Armour, etc… Additionally I analyzed the current capabilities of individual users ability to 3D print sport products. In the long term, increased  domestic printing from consumers themselves will significantly impact  sports industry stake holders such as retail stores and sports manufacturers. The  “maker movement” and increased use of 3D printing, will change the relationship between consumer and the top sport equipment brands.

3D Printing: A Game Changer for Sporting Good Industry

Carter Carroll

University of Illinois


“ 3D printings effect on industry will be profound… it will blur the lines between manufacturer and customer… Markets dominated by a few huge players will be transformed as existing companies, start ups, former customers, and end users start making selling, and using products and services that  never existed before”( Hornick, 2015). The above statement highlights how the increased use of 3D printing technology will likely continue to be a major economic disruptor across industries, as well as society with the “Maker Movement”.  The sporting goods industry is one market in particular that has already started capitalizing on the technology to create innovative products. Participation and enjoyment of sport and recreation activities, permeates everyday life in the United States as well as globally. While most of the professional sports industry revolves around selling intangible products such as event experience or branding of teams and sponsors, the use of 3D printing technology certainly looks to have a major impact on the sports and recreation industry particularly with the manufacturing of sporting goods such as equipment. This paper analyzes the impact of 3D printing in the sports industry through exploring why the technology is valuable to various stakeholders, examples of current uses of 3D printing within the sports industry, and possible future implications the technology will have on the industry. Ultimately it is apparent that 3D printing technology will have a beneficial impact for multiple sport and recreation stakeholders, and its growth in the industry will revolutionize the way sports gear is made.


Value of 3D printing Technology on Sport Industry Stakeholders
Firstly, it is important to recognize how and why the use of 3D printing technology is valuable to stakeholders in the sports industry.  The capabilities of 3D printers will transform traditional manufacturing across all industries primarily because they lower costs, are more efficient, create fully customizable products, and are one machine that creates finished products as users digitally design. IP lawyer John Hornick states in his book 3D Printing Will Rock the World,  that for these reasons, parts manufacturing companies will be the first to be overtaken by 3D printing with consumer products soon to follow (Hornick, 2015).  For the sports industry, most of the manufacturing of consumer products falls under the category of sporting goods and equipment. These include major sporting brands such as Nike, Adidas, and Under Armour.  It should be noted that the creation of sporting goods is by no means a small part of the overall sports industry, “The market for sporting goods in the United States has a projected value of almost $65 billion, and recreational transport and the equipment category accounts for 25 to 30 billion U.S. dollars in consumer purchases” (Jaaskelainen, 2016). The above reasons are just part of why sporting good manufacturers and users see value in use of 3D printing technology. Currently 3D printing can be regarded as a mutually beneficial innovation for sport equipment brands and consumers. Overall it is primarily the customization capability, and low cost accessibility of the products 3D printing technology can create, that provides the most value to industry stakeholders.


Customization

Certainly, the ability to fully customize products with 3D printing is the most prevalent way that the sport industry sector has been using the technology. For sporting goods manufacturing companies, the sporting equipment products they create are primarily for athlete use.  The challenge with making sport athlete centered products is that every athlete is different. Additionally athlete consumers typically desire products that will improve performance, or to which brand they identify with.  Providing athletes with custom equipment that will improve performance is in part what a big draw to what 3D printing manufacturing in sports is doing. In Matt Barker’s research article 3D printing future use in sports, he explains why customized sport equipment can be advantageous, “Shoes, protective padding and mouth-guards are all examples of items which could be improved for each individual user by exact dimension measurements that are customized for each wearer. This will drastically improve performance in certain sports, and be attractive to those who like their own perfectly fitting gear.” (Barker .2016).  The infamous sporting gear / apparel company Nike,  has invested into the broad customization capabilities of 3D printing technology to manufacture better and new types of products such as shoes, shin guards, and duffel bags. According to Keith Nelson with Digital Trends, the use of 3D printing started for Nike back in 2012 when it filed a patent for implementing 3D printing technology to automate the process of affixing the shoes upper to the midsole (Nelson, 2015). Nike representatives have explained that the customization and simplification of creating athletic shoes using 3D printing,  is beneficial to them because “the number of shoe pieces being added has increased, requiring increasingly complicated manufacturing steps to produce shoes.” (Nelson, 2015).
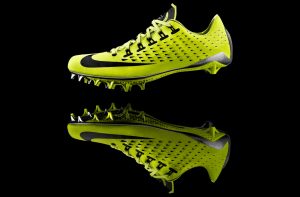
NIKE 1st 3d printed shoe

Although Nike is a relatively early adopter in filing patents revolving around 3D printing, the other major sport equipment brands such as Under Armour, Adidas, and Reebok are by no means lagging behind in using the technology in creating their products. In 2015 Adidas unveiled its Futurecraft 3D initiative (Video Linked), which according to the company is “ a unique 3D-printed running shoe midsole which could be tailored to the cushioning needs of an individual’s foot” (Banks, 2016).  Footwear products are a major source of revenue for sport equipment brands. These sport manufacturers see value in 3D printing technologies broad range of customization capabilities, because they can create solutions that advances the development of innovative sporting equipment. As sport gear companies such as Nike or Adidas continue to develop there 3D printing manufacturing technology, there will likely be an increase in the creation of tailor made equipment for individual athletes.

Adidas Future Craft 4D.. 3D printed shoe using Carbon’s technology, the material is springy and able to bounce back

Moreover, the customization capabilities of 3D printing is also good news for the actual users of sport equipment, as they have the capabilities to print products themselves. As 3D printers become more broadly accessible across communities and into homes, the potential for domestic sports equipment production increases. Sport equipment users will begin to turn into makers of their own. Therefore they will create their own customized products through 3D printing, which has major implications on the sports industry as this begins to blur the lines between the manufacturer and customer. Users 3D printing their own sport equipment is a reality that stakeholders in the sporting goods industry face today, and one that will continue to increase given available access to technology of 3D printing. One such case of this reality is evident with a group of Engineers as they have developed a new 3D printing technique that can “ enable a vast range of composite materials; things like tennis rackets and golf clubs, to be printed easily and at a low-cost in people’s homes ( Barker,2016).  Although some sports equipment such as golf clubs or tennis rackets will be challenging to 3D print domestically with typical consumer printers for most people in the near future.
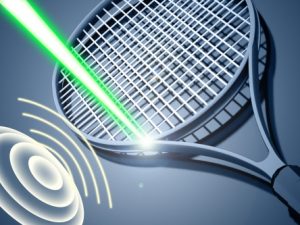
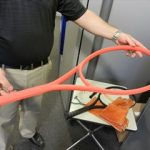
Engineers from the University of Bristol have started processes to 3D print composites. pioneered a way to 3-D print composite structures using ultrasonic sound. This would allow them to print custom golf clubs and tennis rackets

Regardless, there are still athletes as well as ordinary consumers making their own custom sports equipment with access to 3D printers in recent years. One such case is with Arielle Rausin, who is a Paralympic wheelchair-racing athlete at the University of Illinois. Arielle designs and prints her own set of wheelchair racing gloves, by scanning her hand as a digital file so as to print custom fit 3D printed plastic racing gloves. According to Rausin having custom racing gloves are an important piece of equipment in being able to rotate the wheels on the specialized racing chairs, but the main existing option for these gloves cost around $350  and took 12 hours to make each using molds (Beckman, 2017). Ultimately using the capabilities of a standard consumer model 3D printer, Arielle is able to create her own custom fit gloves through her company Ingenium that are “lighter, cheaper at $4 per glove, durable, and take less time to make”(Beckman,2017).
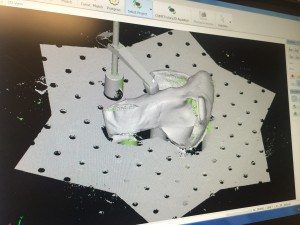
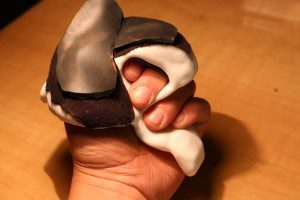
Custom Fit 3D printed wheelchair Racing Glove

Arielle Rausin wearing the custom 3D printed gloves she created

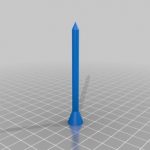
In another similar case, a New York high school senior named Thomas Desimone digitally modified and 3D printed lacrosse stick heads in order to make it possible for special needs players to learn and play the sport. With assistance from his Lacrosse team the Challengers, they were able to successfully print custom plastic material lacrosse stick heads by “Manipulated the lacrosse stick head design using CAD software to make it larger and lighter,  so as to be easier to use for kids with special needs (Sims, 2016). In both Thomas and Arielle’s case, they made completely custom made sports equipment domestically. More intriguingly both of them created types of equipment that did not technically exist and were not possible at an individual user level before 3D printing. Outside of the cases where new types of custom products are created, users with 3D printer access can also print and customize their own sport equipment through existing files that are shared to  community sites such as Thingiverse. Although most of the sports equipment that users can print themselves is limited by factors such as the type of 3D printer or material required. Even so the ability of the public to be able to print  sport equipment files such as golf tees to lacrosse stick heads without the need of a retailer,  is still of great value to users.
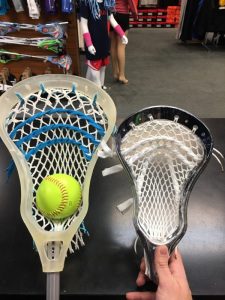
Thomas Desimione: 3D printed Modified Lacrosse sticks

Sporting equipment is a broad term, and there are many different types of equipment for specific sports and recreational activities. Some types of equipment will be more challenging and expensive to 3D print than others. Eventually 3D printing of files of advanced sports equipment at the user level is not implausible, and will likely revolutionize the way consumers, retailers, and manufacturers interact in the sport equipment industry.  The capabilities to create customized sport products is a primary reason as to why the use of 3D printing technology is valuable to sporting good brands as well as users alike.  Customization is clearly a factor that makes 3D printing technology of value to multiple stakeholders in the sport gear and recreation industry.  Use of 3D printing to create customized sport products will likely continue to increase in sport product manufacturing, and on the individual maker side as 3D printers continue to become accessible to consumers.

Low Cost & Accessibility

Secondly, the ability for 3D printing technology to create sport gear at a lower cost is another major reason to why the technology is valuable to sport brands and users alike.  For sport manufacturing companies 3D printing technology is simply more cost effective. 3D printing technology typically lowers costs for manufacturers because it is able to have products be designed and created quickly, it is efficient in not wasting material, and it eliminates many costly expenses such as human labor and use of multiple machines. Alex Mcglenn a 3D printing researcher states in his article“How 3D Printing Has and Will Affect Sports”, that all major sport equipment manufacturers have implemented 3D printing into their manufacturing process.   “ The ability to quickly and easily design, create, and test a product is invaluable and rapidly speeds up the production timeline… the opportunity to easily alter the design and functionality of items, makes it invaluable to concept creators” ( Mcglenn,2016). In 2012 when Nike initially started implementing 3D printing into the manufacturing process for their new football cleats (Nike 3D printing manufacturing Video), 3D printing “simplified the increasingly complex process involved in manufacturing athletic shoes and reduced human labor for Nike” (Nelson,2015).  It is important to note that presently Nike and other major sport equipment manufacturers typically still use a combination of human labor and existing machines when it comes to creating the broad variety of products they produce.  Even so it is clear that these companies are all continuing to move towards further implementing 3D printing technology in part because of how cost effective it can be.

Meanwhile from a user or athlete’s perspective, the capability of 3D printers to potentially lower the cost of creating certain equipment is beneficial in that it could make certain sports more accessible to participate in. This is particularly true when it comes to the manufacturing of adaptive sports equipment such as wheelchairs or prosthetics. In order for disabled athletes to play in particular sports, they typically require adapted equipment to allow them to participate. In the Sport Techie research article “3D Printing Technology Looks To Increase Participation In Adaptive Sports”,  Howard Brodwin founder of Sports and Social Change found that 3D printing manufacturing provides a great deal of value to the sport. In his research involvement with a wheelchair sports team at UCLA, he found that high cost of current adaptive equipment was a huge barrier to entry for many disabled athletes. In regards to the impact that 3D printing capabilities has on adaptive sports, Howard stated that it “…gives athletes the ability to be provided service for their broken or damaged equipment almost immediately, without the trouble of waiting for new parts from a manufacturer. This innovation would not only help lower the cost of new equipment, but give more people who are disabled the ability to both afford, as well as take part in the recreation” (Wistreich, 2015).
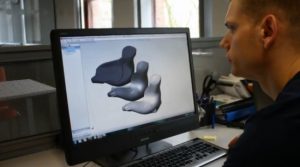
3D printed Custom Sports Wheel Chair Seat

Additionally a 2015 Sports Digest research article titled 3D Printing: A Future in the Sports Industry, further elaborated that the impact from 3D printing is beneficial to removing financial barriers for a user to participate in adaptive sports such as with the printing of custom prosthetics.  “ The affordability of 3D printing can now reach those who normally would not be able to incur the cost of a more expensive and sometimes clunky prosthetics. The prosthetics have been completely customized for maximal comfort and offer the same usability as a pricey “traditional” counterpart” (3D Printing In Sports, 2017). In her interview Ariel Rausin the creator of custom 3D printed racing gloves, reiterated a similar sentiment regarding the importance of the value of low cost and accessible adaptive sport equipment that 3D printing provides. “If it was easy to make and produce these gloves, it might be one less barrier people have to enter into wheelchair racing.” (Beckman,2017).  Accessibility and breaking down barriers to enable participation is an area that 3D printing is clearly having a positive impact for participants in adaptive sports. Adaptive Sports is certainly not the only sport that is more accessible by potential of 3D printing technology minimizing barriers to entry by lowering equipment costs.  Sports such as Ice Hockey, Lacrosse, Golf, and any sport that limits participant entry with high cost equipment, will find value in the low cost manufacturing that growth of 3D printing technology provides.

3D Printing and Adaptive Sports. Prosthetic can be custom made, and are higher quality with 3D prints

Current and Dynamic Uses of 3D printing in Sports Products

Unsurprisingly, there are much different type of ways that 3D printing technology is used within the sports industry. As covered above, sport manufacturing companies and users find value through 3D printing technology mostly because of the limitless product customization capabilities, and cost efficiency of making that the technology can provide. Because of the technology capabilities, 3D printing is being used in almost every type of sports product manufacturing capacity currently.  It is innovating tangible sporting equipment at every level, and even creating sport products that have not existed previously. Some examples of 3D printing currently being used by sport companies and users to innovate sport specific equipment include

  • Baseball Bats: “Rip-It Sports created the Smart BAT. The bat is made with a combination of 3D printing and smart  technology giving it the ability to provide the hitter with real-time data, swing speed, and contact analytics for each swing and hit made”  ( Ryan,2017)
  • Snowboard Bindings: “ Creation of more flexible alternative, gives snowboarders more control, comfort and flexibility in binding” (Ryan, 2017 )
  • Golf Clubs: “ US golf club manufacturer, Ping, produces a stronger golf club than traditional casting methods. The 3D printing process is also actually easier and quicker compared with traditional processes” (Ryan, 2017) Ping creates VIP customized golf clubs for $8,000-$10,000. Price will come down as 3D printing gets cheaper
  • Small Parts: Insoles (worn down shoes), bicycle handlebars, recreation machine parts, etc…
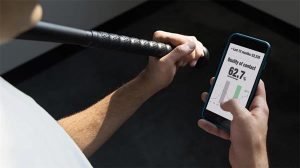
3D Printed Bat with computer data chip to track swing data such as MPH, bat speed, contact, etc.
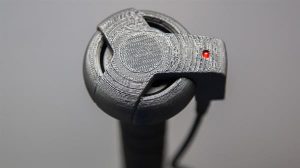
In terms of Sport gear and apparel companies, Nike has been one of the first and best sport manufacturers to implement 3D printing technology for a variety of uses (Why Nike Invests in 3D printing Video). Although Nike and most major sport gear brands do not use 3D printing exclusively in manufacturing quite yet, their president of innovation Tom Clarke stated in Dec 2016 how Nike plans to increase use of the technology with their athletic footwear. “ We’ve been using 3D printing to create new performance innovations for footwear for the past several years. Now we are excited to partner with HP to accelerate and scale our existing capabilities as we continue to explore new ways to manufacture performance products to help athletes reach their full potential.” (Banks, 2016). Nike has made 3D printing technology a major part of innovating their shoe line from the creation of the Nike Vapor Cleats in 2014, which were developed to increase athletic agility for football.  Nevertheless, shoes have not been the only major product Sport Apparel companies have used 3D printing for. In 2014 Nike also developed 3D printed lightweight duffel bags, and more significantly the Mercurial FlyLite shin guards which provide “a revolutionary lightweight and shock-absorbent material for use in sport protection” (3D Printing: A Future in the Sports Industry,2015). The 3D printed shock absorbent material innovation is something that can even be extend to protection equipment product lines such as helmets and other padding. In addition to equipment, Under Armour and Reebok have even been 3D printing “preliminary models” of accessories and apparel for their products.
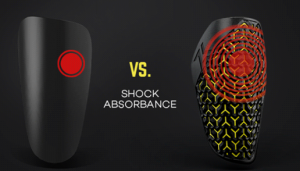
Nike 3D printed Shin Guard. Improved High Impact Absorbing Material

Finally, there are several medical / sport related products that are using 3D printing capabilities. As has been extensively covered, 3D printing is beneficial in providing equipment for disabled individuals to participate in adaptive sports. 3D printing technology provides lower cost access for participants through the creation prosthetic limbs that are lower cost and better quality, as well as custom adaptive wheelchair parts. Similar to Nike’s innovative 3D printed impact shin guards, the technology also could offer potential solutions with protective gear such as helmets. Currently mouth guards used by many athletes for contact sports, are increasingly made with 3D printing technology where they are custom fitted to players mouths to provide extra levels of comfort and safety (Takao, 2015). Finally, 3D printing technology has revolutionized the improvement of sports medicine machines and training processes in recent years, by making them  “intrinsically better…The machines used in sports medicine help rehabilitate injured players can be fixed quickly and easily using the technology. The 3D printers are able to create the medical equipment so a team or medical facility never has to wait weeks for a single component ( Mcglenn,2016 ).

3D printed mouth guards. One of many examples of custom fitted gear that is used for improved impact protection.


Future implications for 3D Printing and Sports Manufacturing 

3D printing already has, and will continue to revolutionize how sport equipment is made. The technology is being used  to benefit multiple areas of creation of sport products, including equipment, gear / apparel, and sport medicine. It is also revolutionizing who is making the sports equipment as well. Sporting good companies are investing in 3D printing to create equipment that is custom tailored to their consumers and increase the quality of their products. For sport product manufacturers 3D printing technology is currently, and looks to be the way of the future in terms of creating and delivering innovative products to consumers. For sport product consumers, they will likely continue to see an increase in mass customization of tailor made products. As 3D printing becomes cheaper and accessible to more people, it is also highly likely that sport products will become less costly and more accessible to users to print themselves.

Sport Retailers will be forced to adapt to the maker movement. At some point in the future, users will be able to much more easily access files to print the products they need

Most importantly, the spread of the maker movement with increase in sharing of design and domestic making of things such as sports equipment, will have major implications on the sports industry entirely. Even average athletes starting to create and 3D print their own equipment; will further blur the lines between sports product manufacturers and customers.  Sports Retail businesses will likely face many challenges ahead. As the maker movement increases with at home domestic creation of sport products, the sports retail stores purpose will come into question, since users can download a file and print equipment at home or a local 3D print business. The Sports Digest Journal predicts a bright future for the sports industry and 3D printing, where retail stores adjust to  “ printing customized sports equipment on demand for an athlete’s specific needs could soon sweep across stores like Academy Sports, Nike, or Dick’s Sporting Goods”( 3D Printing: A Future in the Sports Industry,2015).  Sport Equipment retail stores such as Dicks Sporting Goods embracing 3D printing may be the first step into the future of sport product making and consumer purchasing. However Nike’s COO  Erick Sprunk stated in 2015, that the industry will get to a point where “ Consumers will one day be able to buy a shoe design file from Nike and 3D print the shoe themselves” (Nelson, 2015).

Eventually 3D printing of files of sports equipment at the user level is not implausible, and will likely revolutionize the sport equipment industry. The end users of sport products will likely become sellers, and creators of more sport products themselves. 3D printing technology and the maker movement, by all evidence, is set to continue to make a tremendous impact on the sporting goods industry.


For additional resources and information on developments within the sports product industry and 3D printing,  please see the below 3D print website for articles, designs, and case studies https://3dprint.com/tag/3d-printed-sports-equipment/


References


3D Printing: A Future in the Sports Industry (2015)

http://thesportdigest.com/2015/07/3d-printing-a-future-in-the-sports-industry


Ryan, Matthew. 3D Printing In Sports. (2017, May 08)., from https.hwtrek.com/lifestyle-technology/3d-printing-in-sports


Banks, A. (2016, December 16). 3D Printed Shoes: Here’s Who is Winning the Battle & Why?, from http://www.highsnobiety.com/2016/12/15/3d-printed-shoes-nike-adidas/


Barker, M. (2016, January 27). A Glimpse Into The Future Of 3D Printing In Sports., from http://www.sporttechie.com/a-glimpse-into-the-future-of-3d-printing-in-sports/


Beckman Institute for Advanced Science and Technology. (2017). VIDEO: Rausin Creates 3D Printed Wheelchair Racing Gloves for Paralympians. Retrieved May 11, 2017, from https://beckman.illinois.edu/news/2016/08/wheelchair-racing


Hornick, John F. 3D Printing Will Rock the World. North Charleston, SC: CreateSpace Independent Platform, 2015. Print.


Jaaskelainen, L. (2016, November 01). Topic: Sporting Goods Industry, from https://www.statista.com/topics/961/sporting-goods


Mcglenn, A. How 3D Printing Has And Will Affect Sports. (n.d.). from http://www.fabbaloo.com/blog/2016/9/14/how-3d-printing-has-and-will-affect-sports


Nelson, Keith. (2015, October 15). Nike was just granted a key patent for 3D printed shoe technology., from https://www.digitaltrends.com/cool-tech/nike-patents-3d-printed-shoe-technology/#ixzz4gimyKF30


Sims, G. (2016, November 08). Advancements in 3D Printed Sports Equipment. from https://3dstartpoint.com/advancements-in-3d-printed-sports-equipment/


Takao, K., Tetsuya, T., Hidetoshi, T., Shingo, K., Chika, S., Toshimasa, O., & …

Daisuke, K. (2015). The Possibility of Fabrication for Sports Mouthguards Using a Three-Dimensional Ink-Jet Printer. Japanese Journal Of Sports Dentistry, 18(2), 65-69.


Wistreich, B. (2015, August 09). 3D Printing Technology Looks To Increase Participation In Adaptive Sports, from http://www.sporttechie.com/3d-printing-technology-looks-increase-participation-adaptive-sports/


Takeaways from a Semester of Making

This semester I had the privilege of absorbing all that the Digital Making Seminar had to offer. Whether it was working with laser cutters in the Fab Lab or tinkering with Fusion 360 in the Armory, this class gave me unprecedented exposure to the making process.

Expectations Before the Course

Heading into this semester, I was under the impression that the content of this course would strictly deal with 3D printing and the technology associated with it. In that regard, our class had countless opportunities to explore Cura, TinkerCAD, and Fusion 360, among a few others. What I was not expecting – and something that I was pleasantly surprised about – was that we also gained insight into numerous making techniques. In other words, while I believed the class was going to delve a deep into one certain aspect of the Making Revolution, in reality it actually spanned a multitude of types, and some that I had never even heard of prior to the course.

I believe that I, as well as the rest of the class, benefitted more from this sort of kitchen sink approach since every week we were constantly learning something new and different from the week prior. Relating this observation to our final semester projects, having the ability to draw from a wide spectrum of making techniques allowed each group to develop incredibly unique products. Some groups utilized the programming aspects (such as with Arduino Unos and Raspberry Pis) while others incorporated the more manual techniques we learned, like laser cutting and soldering wires. Through this process, I learned that I greatly enjoy the constant learning. Also crucial to my enjoyment of the class was the fact that it was composed of not just College of Business students, but rather a conglomeration of engineering majors, art and design majors, business majors, and entrepreneurs in general. For me, I found this to be very beneficial. While the majority of times I struggled in the ideation part of the process in terms of devising practical and applicable products, students with more creative minds were able to fill the knowledge void. Similarly, if at times I struggled with certain technologies, the majority of the engineering majors in the class had previous coding, programming, or making experience and were more than willing in helping me to succeed.

3 Main Takeaways

1)The Maker Movement is for Real

Before beginning this class I had an inaccurate understanding of the Maker Movement. I thought it was still in its infancy, and I had no idea it was on the immense scale that it currently is. The applications it has on modern society are truly incredible, and I look forward to following its growth over the long-term future.

2) 3D Scanning and Printing

3D Printing has exploded and an exponential rate, and the possibilities it has, from at-home printing to construction, are limited only by one’s imagination. For example, just over the duration of this semester, 3D printing has been used to build homes in Russia, as well as the building turbines for GE. In the case of the house in Russia, it was 3D printed in under 24 hours, at a cost of only $10,000. Although some houses have had 3D printed parts printed remotely and then brought to the construction site, this house was built completely on-site, using a mobile printer. The GE turbine, on the other hand, is able to withstand higher temperatures and pressure than current market offerings. These are just two examples of the immense potential that 3D printing presents.

3) An Introduction to the Design Process

This semester definitely opened my eyes to the design process. From the ideating stage to rapid prototyping to receiving user feedback, our team learned a great deal about how to design a product, from beginning to end. I personally found the ideation stage to be the most difficult, as I struggled to devise creative yet applicable and practical solutions to everyday problems that we encounter. Overall, this class was a great introduction to the skills and technology used by makers around the world, and I look forward to cultivating this interest after college.


e-Portfolio: The End of the Beginning

When I first walked through the doors of the MakerLab in late January, my expectations were limited only by the farthest reaches of my imagination. I was vaguely familiar with some of the recent applications of such technologies in modern society, particularly those of a medical nature based on my parents professions, but truly had very little background or context for the subject as a whole. Little did I know that this exact mentality acts at the definition, or lack thereof, of the entire maker movement. The ideology behind 3D making is founded in this approach of creating regardless of traditional boundaries or barriers. Therefore, in the early steps of the process, the only true limits that one encounters as a creator are our own predispositions and what we believe is and is not possible.

We explored this mindset through a series of creative exercises with representatives from the UIUC chapter of Design for America, a session which afforded me a new outlook on the ideating process. Through a variety of untraditional scenario prompts, we were asked to innovate freely, without binding ourselves to what we know as feasible or even remotely possible. Although many of the products that resulted would likely never succeed in the market if they were indeed even able to be produced, it was our first introduction to the type of mindset necessary in order to break down the mental boundaries that prevent even the smartest individuals from acting as true inventors. This translated well into our next lecture, where we were introduced to the concept of biohacking – I had never even imagined many of the projects before, and was fascinated by the idea of utilizing organic materials to create everyday products in a more sustainable and environmentally friendly fashion.

After harnessing the true power and breadth of the maker movement through these various presentations and experiences, we then began to take a more hands on approach to innovating, as we learned how to implement Arduinos, coding, soldering, and laser engraving to create interactive wooden boxes that we designed and compiled individually, with the help of the Champaign Urbana Fab Lab staff. These sessions were my favorite part of the course, as they not only afforded me new skills (ones which I admittedly may not have pursued on my own) but introduced many simple yet effective ways in which they could be implemented in one’s daily life, both as a maker and otherwise. Although the product that my team created did not have any practical application for these particular skills, they are certainly ones that I would like to further develop on my own time (especially soldering.) Finally, we were introduced to the capabilities of 3D scanning by Arielle, a former student who has been able to utilize this technology in her own business, one which she started based on her final project for the course. The ability to scan opens up a new dimension to iterative creating and also improves one’s ability to make slight adjustments to a pre-existing physical item.

The final leg of the course was devoted to the development of our team projects, during which time my team, SUPRA, developed a new take on a door jar (inspired by the constant disruptions during our class sessions that result from the heavy, auto-locking doors on the MakerLab.) Although the concept behind our product was simple, we went through several iterations of designing and prototyping before coming to our final model. One unexpected twists from my perspective was the importance of material selection – a design can be completely faultless, but a product can still fail if the selected material is not compliant with the function it needs to serve. In our case, we encountered issues both functionally and aesthetically when using the normal plastic from the 3D printers, as it was too brittle for our needs. For this reason, a portion of our final design was printed using flex, a decision that greatly improved the quality and performance of our product.

Overall, my experience in the course was eye-opening, and left me with the vaguest sense of dissatisfaction – not with the course, but with myself, for not accomplishing more throughout the course of the semester. With such amazing and innovative technologies at my fingertips, I wish I did not have to deal with time, financial, and other types of constraints that have prevented me from what I otherwise may have been able to create. I am so excited to be working for a company next year that not only has access to similar technologies, but utilizes them to implement creative business solutions each and every day. From where I stand now, I can see that this course has only been the beginning – I hope that it serves as a springboard into a career where I can constantly challenge myself to utilize these technologies in new and innovative ways to provide solutions that did not exist before.

A Semester into Digital Making

What were my Expectations?

I heard about this class through a professor of mine that saw my passion for making things. He knew that I was looking for a means to do that and wanted me to explore this passion so he pointed towards Vischal’s BADM 395: Digital Making Seminar. From what I heard about the class, I had great expectations on learning solely the technical skills listed on the brochure such as 3D printing, laser cutting, digital embroidery, and using Arduinos. I came focused and expecting the individual aspect of making but got so much more from this class. These all changed throughout the semester. I learned and gained insight beyond this.

What did I learn?

Maker Movement and “3D Printing Revolution” 

We were first taught about the maker community on and around campus, many applications and potential for 3D printing in our futures, daily lives and industries as well as education through the utilization of 3D printing in maker spaces for classes. This instilled the collaboration aspect of open source platforms and projects such as thingiverse.com

Design Thinking

We then went into more hands on things such as going From Design Process to Design Thinking. Starting off with perceiving and questioning the consumers’ world/perspective. After which we worked on an idea, sketch, a model prototype out of arts and craft material available. We came up with so many questions and scenarios for the consumers. The deign thinking process first pushes you to identify a problem or need. Then immersing my self, empathetically, relating to the world of the consumer encountering that problem or need, reframing the problem to avoid assumptions, coming up with an idea from the perspective of the consumer – this is where the human centered focus is crucial, then building the idea to those constraints and finally testing as in any product development cycle. Target specific problems and consumer responses to products as well as identifying new market potentials as in the examples given in Tim Brown’s articles. This also included the What/SoWhat/NowWhat template, a brainstorming method that can help ideators immerse themselves in the problem/situation to be able to empathize with the user and then come up with a solution – the missing piece. This template allows people to have a structured way of being creative, innovative and problem solving. It gives a broadly scoped problem a structure, a frame and a regularities

Computer Aided Drawing

We delved into another tool that you can use to create and make innovative products and how powerful and unique this software is and different ways of designing with the help of computer software. Throughout the class we learnt how to use several software and different methods of Computer Aided Drawing to be able to 3D print at the end of the CAD process. We got to learn about AutoDesk, TinkerCAD and Fusion360 as well as Cura.

3D Scanning

we were introduced to the idea of bringing physical/tangible product into their digital/cad model form. Kind of like the opposite of 3D printing where you already have the digital and turn that into something tangible. The way these work is that, the scanner/camera takes pictures and combines them together as meshes, it is then uploaded through software like MeshMixer to be able to turn into a 3D cad model. Its application include reverse engineering, duplicating, utilizing the interacts

Prototyping

This was by far one of my favorite parts of the class because it taught me the very skills I was looking to learn from this class to get trained on and work with the many great tools and resources there ranging from 3D printing, to digital embroidery and every thing in between such as the biohacking space and laser cutter.. We were introduced into the world of maker spaces through the CUC Fablab. We started off with learning how to make circuits and soldering, then led into coding arduinos in conjuction with the circuits and ended off with learning about laser cutting/engraving using inkscape to provide housing for the electronics. After this series, my technical skills were far above what I had come in with and my mind opened up to much more potential. After that we had these skills and were familiar with these resources to apply them to our own group projects due at the end of the semester. At the end of this series we created the Light box which was a culmination of hardware and software. We were then challenged to think of ways of using these tools to create and make changes to things already available. This taught me the implication of having so simple do something so complex if you used imagination for your needs.

Final project, team Xerott and the Makerlab Bot

At the end of the semester it all came down to how could we use all we learned to solve a problem by creating a product to address that user need and that is what we did. That is what drove me and team xerott to create the approachable Maker Lab bot that records people’s ideas and stories or any feedback they have for the lab. The bot will also have the ability to sense when someone gets close to greet the person. The video/audio recorded by the Maker Lab bot will be saved to an SD card/USB which could help in keeping a record of the things that are going on in the lab as well as collecting data for future use. This will help create interactivity within the lab and help with sharing what goes on in the lab to the world. We combined most of the things we learned in class to create this such as 3D printing, coding and electronics, Laser cutting and so on through various iteration, testing and feedback/auditing sessions. Since the beginning of the project I have learned more about our product and what is needed to complete the minimum viable product and have since then been stream-lining what features it will need as well as how I will go about doing that

Individual Research

We were also each challenged to cover a topic of interest that we believed was worth sharing and worth learning. I decided to talk about Where 3D Printing Meets Opensource Electronics where I discussed the power behind merging technologies of electronics and 3D printing to create amazing products that impact consumers, the industry and future/potential technologies such as 3D printing electronics already embedded in the product.

Take Aways

In the end I greatly enjoyed this class, it was a pleasure learning from everyone else in this class and all the stakeholders in this experience. I finally found the technical skills that I sought and more with the community and outlet that is the Makermovement and I look forward to keep working with the Makerlab and Fab lab in bringing out my inner maker as well as creating products that will impact many users. I have been opened up to many more possibilities and how to share my ideas with the world.


Below are videos to my final project. Feel free to reach out to me for any questions regarding it or my great experience in this class.

https://drive.google.com/file/d/0B1fEmDfFtC3pVGZtRFZYODdGQkE/view?usp=sharing

https://drive.google.com/file/d/0BwfM-5nVQPFieEUzOGlna0w4YzQ/view?usp=sharing

ePortfolio Reflection

Expectations

As an Information System/Information Technology, there are a bunch of electives we can choose from. After living with Gian Luis in Barcelona, he highly recommended this class with Vishal. I actually first applied to be in this class in the Fall of 2015, but the class ended up getting cancelled. When I heard about this class starting up again, I immediately applied. Looking back at the semester, I came a long way. The biggest surprise in this class was how many skills we were going to gain other than just the basics of 3D printing. Coming into this class, I thought we would only learn about 3D printing and computer aid design software. This all begin in week 3, when we started learning about design thinking. I would have never guessed we would do something like that in a 3D printing class. In addition, I would have never guessed we would have multiple workshops in the fab lab either. I’m extremely grateful for that, as I now know how to solder, laser engrave/cut, and program an Arduino.


Class Experience

Overall, I absolutely loved this class. Like stated in one of my earlier post, I wish the BADM department would invest in more technical classes for IS/IT majors. I’m positive many would agree with me but I would much rather take a technical class versus a class that has nothing to do with technology but still counts towards my degree.

Before taking this class, I really wanted to purchase a 3D printer, but I was intimidated by how complex it seemed. With the help of this class, I quickly realized that 3D printing is not that hard. Using Fusion 360 was frustrating at times, but definitely doable. We learned the entire process of 3D printing. From creating an object in Fusion 360/TinkerCAD, to slicing the object up in Cura. Luckily for me, using Fusion 360 wasn’t terrible. I did have experience with a difference CAD software, which is why my experience with Fusion 360 was overall a positive one.

For me, the coolest thing we learned how to do was use the Laser Engraving/Cutting machine over at the FabLab. I enjoyed my experience there so much that I actually ended up taking a project for my business fraternity of laser engraving paddles for when the pledges got initiated. Needless to say, everyone in the chapter loved it. I do have to thank the entire staff over at the FabLab. They are extremely patient with everyone and are always ready to help with any problem. Moreover, we also learned how to solder, learned the basics about circuits and wiring, and Arduinos. For our semester long project, we actually used an Arduino as our microcontroller controlling a servo motor via Bluetooth connectivity.

In addition to all the technical skills I learned throughout the semester, another thing I learned was the power of the internet. What I mean by this is how much open source there is out there. We got lucky with our project. The code to controlling a servo motor via Bluetooth was already out there. Then, we found an app that worked perfectly with our Arduino. The only thing we had to do is connect the phone to the Bluetooth and the app did the rest of the work (this is in terms of controlling the servo motor). It’s crazy how much information there is out there. Sometimes we don’t have to create stuff from scratch. One could simply do some research and just work with what’s already out there.


Conclusion

I’m extremely happy I took this class. I do wish there was a class one could take following this one to continuing perfecting those technically skills. After taking an AutoCAD class in high school, I forgot all of my inventor skills about a year later. I don’t want that to happen with everything I have learned this year. Vishal, I highly recommend creating a different class the revolves around 3D printing and the FabLab. I will most definitely recommend this class to all of my friends. Doesn’t matter what major they are, I think everyone has a lot to benefit by taking this class. Thank you all for such an amazing semester!

Digital Making Reflection

Before the class started this semester, I expected to learn 3D printing and work in a team with students from different interdisciplinary fields. Initially, I also thought that the course would be more technical; however, the course instead focuses more on design thinking and problem solving. The more technical offerings were found in the workshops we took at the Champaign-Urbana Fab Lab along with the AutoDesk Fusion 360 demonstration. Throughout the semester, I learned more about working in a team and more about the 3D printing terms and industry.

Here are the top things I learned through taking the course:

  1. Design Thinking is Key – Coming up with a great idea takes inspiration and hard work. How can we statements are helpful guidelines during the ideation phase. Try to find a problem that consumers are facing and create a prototype using that.
  2. Make Lots of Prototypes – There’s always a way you can improve on your product, so keep making prototypes. Test out new materials or new designs until the produce no longer runs into issues.
  3. Feedback is important – Receiving feedback from people on your designs is a crucial process throughout all phases. With constructive criticism, you can make adjustment to your designs and work on more ways to improve them. Learning how to provide feedback to others is also a great skill to have.
  4. Working with teams – In any jobs, you’ll be put in teams to tackle projects. Being a team player is a bulk of the work, be engaged during meetings to move the project forward and give constructive criticism. It’s also important to listen to the opinions of team members.  
  5. Technical Skills – Every time I use the 3D printer, I am still mind blown. I am greatly to have dabbled in soldering, coding, Fusion 360, and other software. I definitely want to explore deeper into the software and skills I have acquired from the workshops.
  6. The Future is 3D Printing & Innovation – the potential of 3D printing is limitless. They are already being implemented in various field: tech, medicine, and fashion. It’s especially great to see the technology being used children to stimulate their problem solving skills and education. The same could be said for minorities and developing communities, where 3D printing is used to improve quality of life and educate.

It’s sad to know that the class has ended, but I will continue to utilize the skills and things I have learned in this course and apply them to future projects and in my career. I highly recommend other students to take this course and become a part of the Maker movement. Stop by and visit the Maker Lab or Fab Lab on campus!

Team Zerott Project Reflection

For our project, we decided to create a bot that will help the MakerLab. The main feature of the bot is to greet people when it senses someone walking up to it and record the person’s idea/story or any feedback they have and send the video/audio to a an SD card/USB so Vishal can receive feedback on things going on in the Makerlab. When people enter the Maker Lab for the first time, they may be overwhelmed by all the things that are going on, including the 3D printing machines buzzing while at work and people making their own designs on the computers. And when they leave, there is little to no interaction with them after they have created their ideas or made their products. The goal is to capture that as feedback for future improvement of the MakerLab and also for publication of these stories. The droid will increase the efficiency of collecting data in the MakerLab by using its cute appeal and its enticing ability to speak, record audio, and record video.

To do these we came up with multiple ideas and had to learn from different perspectives by testing, different ideas like blabdroid and different technologies like the IBM TJ bot/Watson Services. All these culminated in our final product called the Makerlab bot which works mainly through a raspberry Pi Model 2 board that runs python 3 code that Taofik wrote up. This code runs the electronics setup which consists of a camera module that performs the two functions of detecting motion using ‘Blob Detection Image Matching’ and also recording the video of the user’s responses. The hardware setup also includes a USB microphone to record the audio that goes with the video, there is a speaker to draw the user’s attention and then play the prompt to the user. We also got user feedback to include a way to let users know what is going on with the bot so we made the bot play a startup sound and included a green LED light and an LCD 16X2 display to let the user know what is going on and what mode the Bot was in such “Motion Detection Mode” and “Recording mode”. We had a couple more materials that we used to make all the connections to the components such as jumper cables, pins, T-wedge pin I/O and its pin extensions for the raspberry Pi, and a breadboard.  So it would record the user’s response and go back into motion detection mode as a continuous loop. We had intended to include a button or two to allow the user to turn off/stop the bot mid but the connection came apart. On the raspberry pi is a wireless USB keyboard to send the bot commands, a wifi dongle to allow a computer connect to it headlessly/wirelessly, a USB drive to save the video and audio which can easily be removed for Vishal to go through all the user responses at the end of the day of recording user interactions.

In the first step we started out making sketches. Our first sketch was more rudimentary and includes only a box. As basic as it is, we already had a rough idea on what to include as outer material and a jist of what was needed inside to make the bot function. However, we also had a rough idea of where each item would go, such as the arduino on top, or that we wanted to use laser cut wooden box for material. The second sketch we made it more friendly-looking and added a more cute appeal to increase the efficiency of interactiveness. We rearranged the materials to better fit the shape of the bot.

After brainstorming and putting together our ideal design, we started prototyping. In the first segment of our prototyping, we used cardboard cutouts for the head and body of the bot. Initially, we 3D printed the inner frame of the bot. However, due to the frame being too thin, it became warped when it cooled down from the printing. We foresaw that it could cause problems by being too fragile and inflexible and decided against using it for our final product.

Here is a video of us testing the product out:

Here are our slides:

MakerLab Droid

If the link above does not work:

https://docs.google.com/presentation/d/1isyvJkLPwCmRHM2kKYCwS3qcsUCf8dkUi7VeSK8skCI/edit?usp=sharing


e-Portfolio: Final Words

Expectations:

Coming into this class I did not any expectations on how this class would turn out. I was recommended this class by an upperclassmen friend who had previously taken this class before. When Professor Vishal started describing the class, I was taken aback on the project that we had to do for the class. I was certainly not expecting it and I had little confidence that I would even be able to create a product that would be plausible to use. I was expecting that this class would be a disaster for me. However, I did expect that I would learn more about designing and digital making.

Looking back, I must say that this class went above and beyond my expectations. This class taught me not only create something, but be a better thinker. This class definitely taught me how to design different products or solutions, as well as digital making. However, what really stroked a cord with me was how I improved in such a short period of time and that I was able to, by the end of the semester, successfully create a product that functionally worked and was plausible. I learned that most problems have solutions. If you just stopped to think, many problems could be solved. I also learned to always have confidence in your own abilities. In the beginning, I was scared and I really did not know if I could be successful in any way during my time in the class. But the class was set up so that if you fail at something, you still have multiple chances to get back up on your feet and try again.

What We Learned:

3D Printing

In the second week of the class, we started to learn how to 3D print. We used the open source software Cura, as well as open source websites to download blueprints of things we could print such as a Chip Bag Clip, a Phone Holder, and even a Selfie Stick. Personally, I printed a USB cord rack. I have so many cords around my room that it’s not only dangerous for me if I stepped on one, but it could also potentially damage the cord. This rack helps separate one cord from another and keeps the cords organized. We also learned to 3D Print through Autodesk Fusion 360.  To be totally honest, I had a hard time with Fusion 360, even now I still cannot fully understand and figure out how it works. However, I must admit that it becomes more user-friendly as one gets to understand the functions more and the program is quite effective. What I do admire about Fusion is its ability to help the user be more productive. It helps users create more complicated objects with different layers that would normally take hours on end to create in a normal CAD program at a faster pace with the same amount of quality. Finally, Autodesk, the company behind Fusion 360 offers this program, as well as many others, free to students for 3 years.

Design Thinking

In the third week, Design for America, an organization, came to talk about design thinking. Personally, I really loved the presentation and this 3rd week of class. It really gave me insight on how much design and innovation was used in our daily life for all types of products we used and how it was the beginning steps to a product. I also learned the important three steps in design thinking: inspiration, ideation, and implementation. During class, as a group, we had to design a type product centered around senior citizens in their day to day life. This was very memorable because we were able to go through these steps to make something that had potential to become reality.  Design thinking is taking an innovation or activity and changing it to fit human needs. In this day and age, a design must keep up with current technology.

Laser Cutting

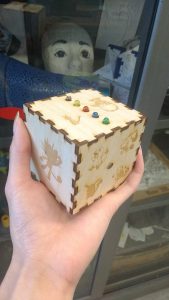
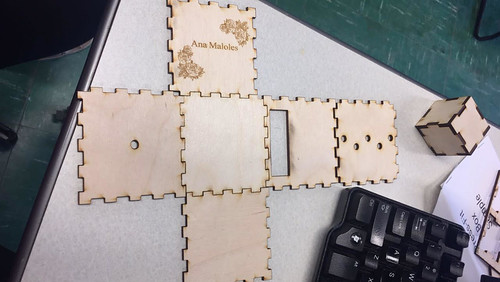
During our time at the FabLab workshops, laser cutting was my favorite station. We learned first what laser cutting is: when a laser etches or cuts into the material to make a design or object. We also learned that laser cutting can be used to make boxes and almost anything. The box we are currently designing and making will be a box with 5 LED lights that will blink when the sensor which is attached to an Arduino is triggered. We used Inkscape, an open source software designed to make laser cutting easier. We then were given a “class”/tutorial on how to build a box through Inkscape. My box’s design (pictured below) uses pictures that are black and white in which the laser cutter etches onto wood.

Coding and Circuits

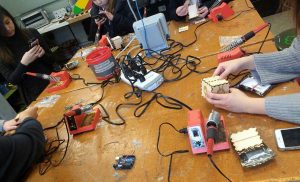
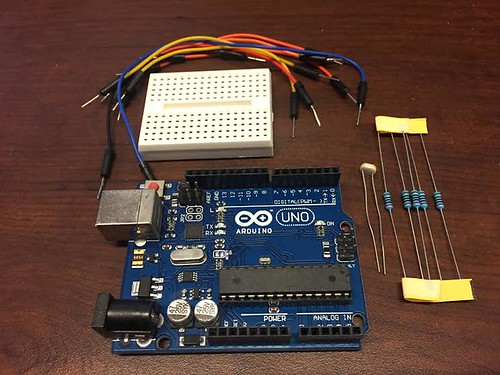
We also learned how to code for the Arduino during our workshops at the FabLab. Honestly, coding is not my strong point. Aside from some experience in JavaScript, C++, and MySQL, I was inexperienced with using Arduino. Business students do not normally have a lot of experience with coding or even hardware, but it was safe to say that the FabLab staff really helped us walk through the process of connecting the breadboard to the Arduino which incorporated code to enable our lights to blink. However, soldering was the most frustrating and difficult area for me. The whole process was stressful and having to be detailed and delicate with the wiring was not for me. By the end of the soldering session, I felt ready to give up and never touch soldering again. To add fuel to the fire, because of my twisting and turning of the wires, the connections constantly broke to a point in which some of the connections were unrepairable. Because of this turn of events, I was unable to successfully created the LED box that included the soldering of the lights and photoreceptors. Since I broke most of my connections toward the end of the class, I had no time to redo the soldering and was forced to create a prototype LED box with the breadbox and the Arduino. As much as I don’t like soldering, this skill is very important to have knowledge of and I learned about it through the FabLab

Project Managing

Lastly, I learned by the last three weeks on project management within the team. Our team was very busy from the get-go. We all had our own academics and extracurriculars to deal with aside from this class. So finding time to work on this project together definitely needed compromise and leadership. As a team, all three of us had to step up and manage not only the project, but also team members and ourselves. We had to keep each other accountable. Only by doing so did we manage to pull through and successfully complete this project. We also learned how to audit other teams and take constructive criticism and use it to better our project.

Conclusion:

All in all, this class was fun and exciting. It was a nice breather from my regular day-to-day class, and each week, I was looking forward to class and getting my hands “dirty” for my project or the assignment that week presented. Thank you so much for this opportunity. If I had to do this all over again, I would have done the same thing because this experience was priceless.

Smart Light Switch

We designed a smart light switch that allows you to control the light with your cell phone and can be installed hassle-free. Want to know how we came to this idea and realized it? Please keep reading and find our demo in this post!

  • Ideation

In the brainstorming process, we came to a consensus that we all want smart home appliances, such as remote light control, in where we live. However, as renters, we can’t install most of the devices because they require major modifications to the room plus they are expensive. It came to us that although smart home is becoming trendy these days, it is still very costly. Thus, we decided to work on the statement of “How can we make smart home cheaper?”

We further broke down our statement into three design objectives. First, the installation process should be hassle-free. Second, the device can be controlled in distance and no extensive technological knowledge should be required. Third, it should be universally applicable. Bearing those objectives in mind, we decided to make a device to control light. The device can be adhered to the wall on top of the switch and control the switch through mechanical movement. Besides, the device will need to be connected to our smartphones through Bluetooth or Wifi.


  • Market Analysis

Based on our idea, we identified three target customer groups. The first group is short-term home owners, such as college students and young working adults. They won’t own the same room/house for many years, and most likely be unable to make major modifications to the house. Our device will also benefit the large home owners who don’t want to reengineer their house for installation. The third group will be the the elderly and disabled people. The smart light switch can make their lives easier without breaking the budget. Those who are disabled would have the ability to control the light switch without getting up from their seat. In addition to the accessibility, it would also just make it very convenient for pretty much anyone.


  • Initial Design

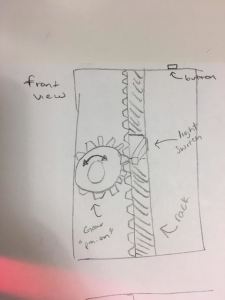
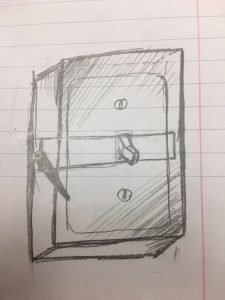
In our initial design, we planned to make a box that could be adhered to the wall with mechanical structures inside to move the switch up and down. We figured out two possible arrangements of the mechanics. The first is to use a combination of rack and pinion (Figure (a)). The rack will have a hole in the middle to fit the switch in. Another design is to have a motor pushes two rods in order to move the switch. The rods are also connected to a lever outside so the switch can still be controlled by the lever. We quickly realized as a team that this would be harder to actually make than we expected.

                                    (a)                                            (b)

Figure (a) illustrates the initial rack and pinion design.

Figure (b) is a crude preliminary ideation sketch with a lever on its side.


  • Iterations

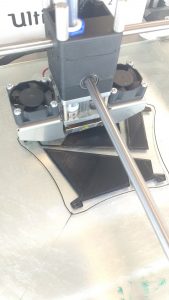
We decided to go with the first design initially. The graph below shows the process of 3D printing an enlarged model of rack and pinion.

http://gph.is/2qQJvIC

Although the model came out well, when we tried to print the gear in the actual size that we were going to use in our design, we realized that the 3D printer is not able to reach the level of precision we need.

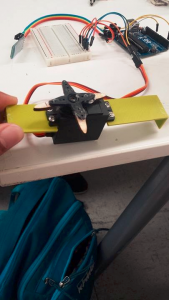
Alternatively, we found out that we could adhere the blade, instead of the pinion, to the motor and pushes the switch directly. The picture below is the motor with the blade. We extended the blade so it adds more contact surface area, making it easier to actually flip the light switch up and down.

  • Final Project Delivery

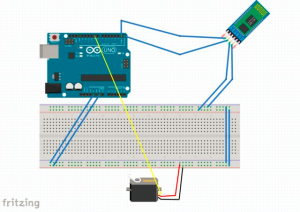
As our final design concept was based on making smart homes cheaper, we had to integrate a system which could control the Motor remotely. By integrating and Arduino Uno and  HC -05 Bluetooth module we programmed the motor to turn to our specifications and also control it remotely.

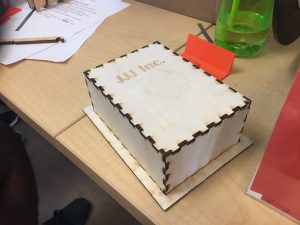
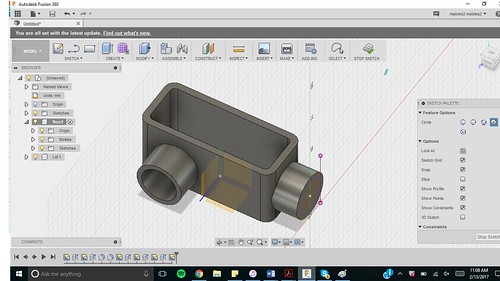
On the picture on the top you can see a Sketch of the Circuit wiring which includes the Motor, the module and the arduino. This sketch was done using Fritzing. The second image is of our final design housing of the light switch. This box was laser cut in the CU Fab lab with our team name embedded in the front! This box was designed in a way so that it mounts directly on top of the light switch and at the same time contains all the wiring inside of it.

In the top most GIF, we successfully were able to wire the Bluetooth module to control the movement of the motor blades!

These two GIFs illustrate our prototype at work; switching the light switch on and off with ease.

  • Feedback and Future Work

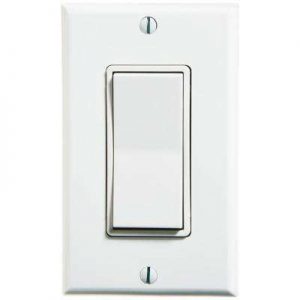
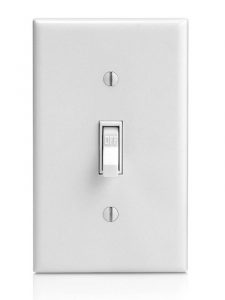
Some of the feedback we received from friends and some students who used our prototype was geared towards a prototype which could allow the user to not only control the switch remotely but also have an option to manually turn it off and on. Some other suggestions were to make the housing a little bit smaller and easily portable to fit any toggle switch. After thorough research about the types of switches in and around homes, university buildings we found that the toggle (up and down) switch was the most common followed by the rocker as shown in the figures below. Hence, our future work aims towards redesigning the motor blades to increase our usability across all formats. For the research we have done, we have concluded that creating a motor blade to accommodate for the rocker switch would not be incredibly difficult to make, given our current setup.

Figure : Rocker switch (left) and the toggle switch (right)

Some of the other future iterations is to use small circuitry by using a custom microprocessor and a watch battery instead of a large 6V battery. This will help us reduce the size of our housing and make our prototype even more user friendly.

Our presentation slides are available here.

As Digital Making Comes to a Close

As Digital Making comes to a close, I would like to reflect on how much I have learned and changed as a person due to this course. I had never expected a course to take up a lot of my time and make me still love every bit of it in the end. Through this class, my skill set has been taken to another level as I have learned so much about the maker movement and mindset, a set of workshop and design skills, and the ideating/prototyping process.

The Maker Movement and Mindset

Maker Movement

The Maker Movement was the center of discussion for the first few weeks of classes. This movement focused on individual or collaborated effort to produce new products or enhance existing products. The movement encourages and supports the use of open source softwares/hardwares and engineering oriented interests such 3D printing and electronics. Although the movement encourages the use of engineering-oriented pursuits, participants also could have hobbies in non-technological activities which can range from woodworking to traditional arts and crafts. It was in this first few weeks that we not only learned what the movement was, but what it was about. The movement is all about creating, innovating and and sharing, which is why we began these blogs, to share what we have made and learned!

Maker Mindset

The maker mindset is the way in which makers think. There’s many different ways of thinking of a product design. However, in this class we focused  on Design for America’s thought process and Tim Brown’s method of Design Thinking. These two processes shared the similar idea of designing to meet an identified need in a technologically feasible way. You can read more about how we used our new maker mindsets in a Design for America workshop here.

Workshop and Design Skills

3D Modeling

Animated GIF - Find & Share on GIPHY

fusion360 tutorial

In this class, we learned how to use TinkerCAD and Fusion 360. I have never 3D modeled before and it took me a lot of time and practice to get used to it. The more I kept trying to use the programs, the more I realized that the controls are actually very intuitive. My learning curve improved with Jeff Smith’s Fusion 360 workshop, but this skill was still in development for me and was probably my weakest skill.

Lasers and Woodworking

Animated GIF - Find & Share on GIPHY

unnamed (2)

My first workshop in the FabLab was working with wood, Inkscape and laser cutters. Inkscape which was very similar to Adobe Illustrator.  I’ve had experience with Adobe Illustrator , so I didn’t struggle too much with it. I found it so interesting that so much work came into preparing an image to be cut with a laser. From this workshop, not only have I learned how to cut and engrave with lasers, I have also realized how flexible these laser cutters are and how these laser cutters have a tremendous amount of applications and uses in product design. I found it very fun and expressive to work with lasers. Read more about the designing and laser cutting here.

Circuitry and Coding

unnamed (1)

Animated GIF - Find & Share on GIPHY

Coding was something I was familiar with from my computer science years in high school. Circuitry however was a whole different area. I found it absolutely satisfying to be able to program something and see a physical response in the form of a blinking light. These two skills became increasingly important in creating our final project of a hydration wristband. Read about my first circuit experience here.

Soldering

 satisfying macro pcb component soldering GIF

1unit

Soldering was actually really interesting and fun to do once I got over my fear of being burned. The process of soldering was quite tricky at first bu once I realized that the led solder should be fed into the soldering iron rather than using the iron to put the led onto the object to be soldered. You can read more about my soldering experience here.

Ideating and Prototyping for our Final Project

This project first taught us how to identify problems and do research to help understand the consumers who we are trying to solve the problem for. We learned how to turn that research into smart product designs for the consumer and start prototyping using what we learned in design workshops at the FabLab to bring those designs into reality. We also learned how design audits can foster an innovative learning environment and help reveal flaws in function or design to help perfect a product. Finally, we learned that the process of bringing an idea to fruition is an exhausting and difficult process which takes time. In all, it was a learning experience that we would remember in the coming years of our lives. Read about our experience here, here and here.

Reflection

At the beginning of the course, I was hoping to be able to create something that was meant to help people. Looking back, these expectations were met with our groups prototype of the H2Go. This experience was much more difficult yet easier than I had expected. The difficulty came from putting it all together but what I found surprisingly easy is the skills which we learned in our mere semester in Digital Making. From this one semester, I learned more about myself than I thought possible from a class. I learned that I was capable of learning and creating incredible things. If I could learn how to do this, so can anyone. Being a part of the Maker Movement is so empowering.