Creating With Fusion 360 and DIY Biology

Jeffrey Smith from Autodesk held a workshop in class teaching us about the company and the Fusion 360 software. Autodesk’s Pier 9 is located in San Francisco Bay and is a facility that houses collaborations between artists, engineers, and technologists. One of their latest projects is a 3D-printed model of downtown San Francisco.

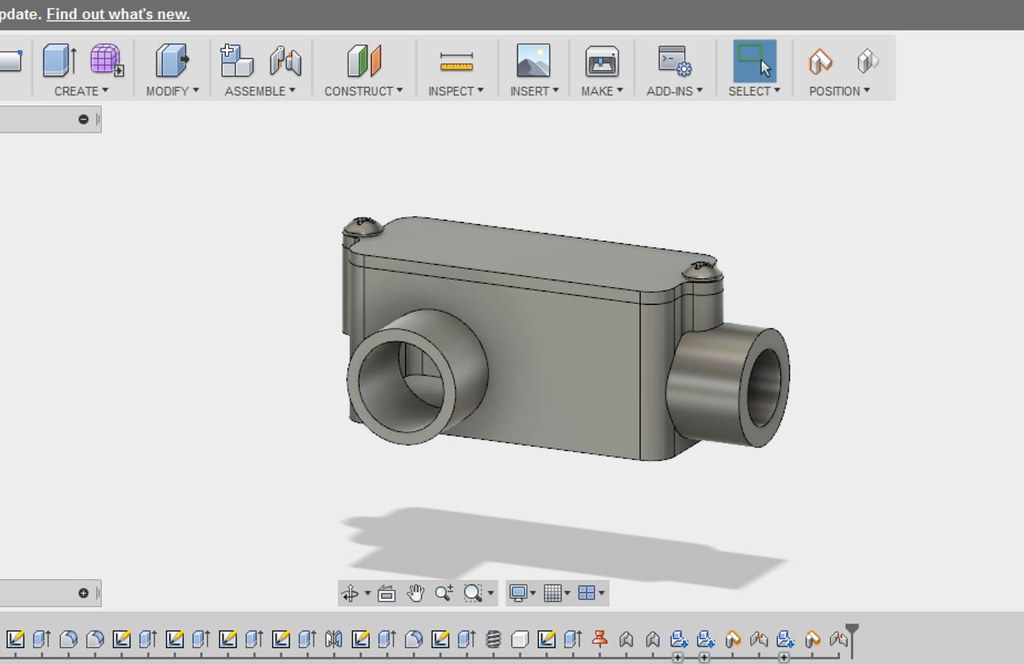
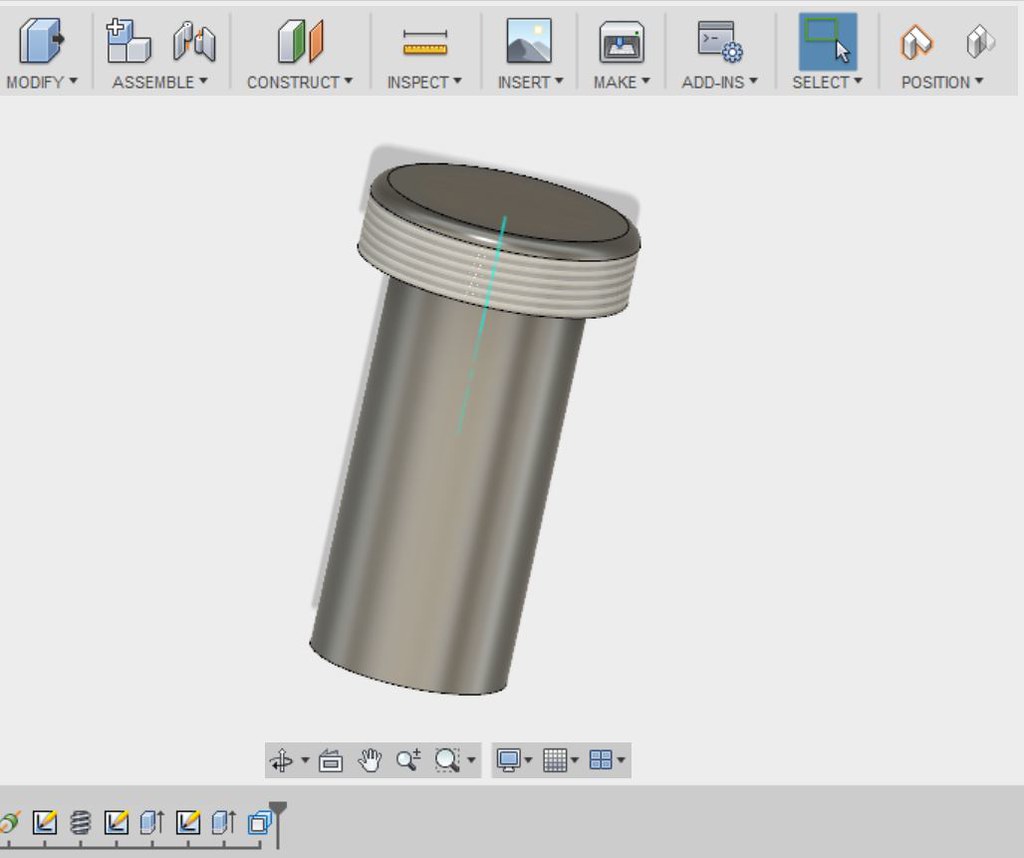
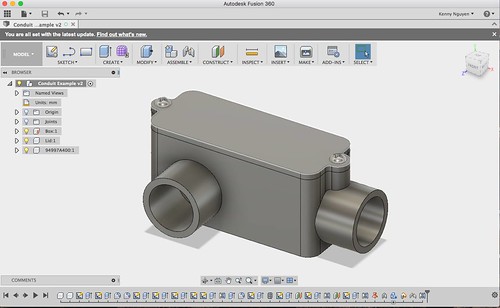
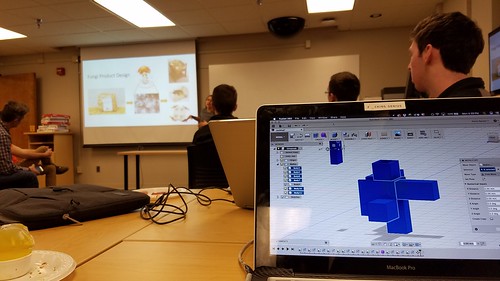
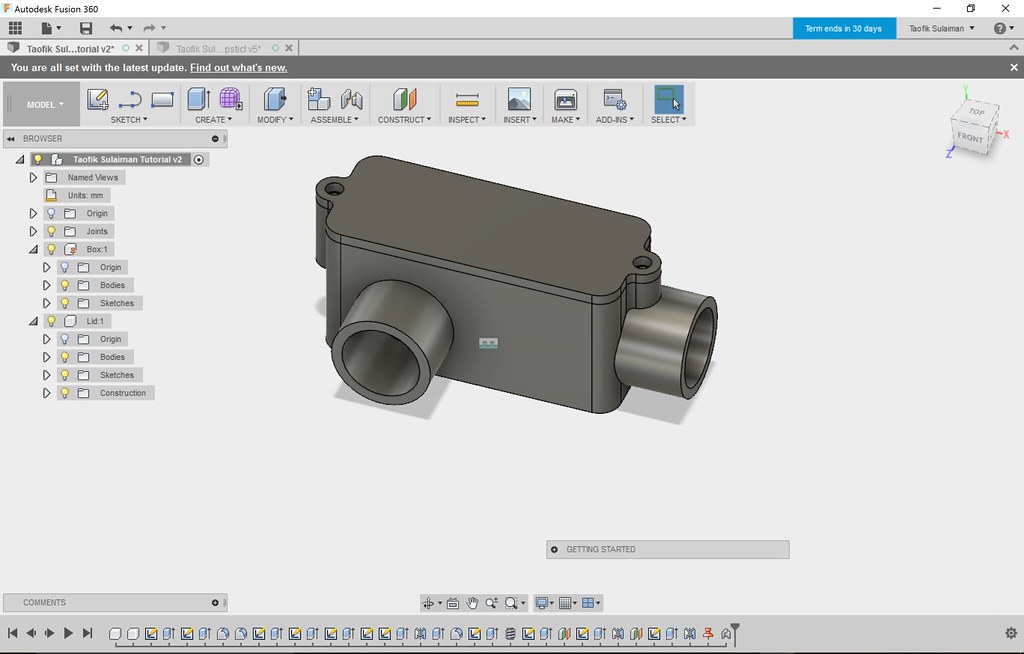
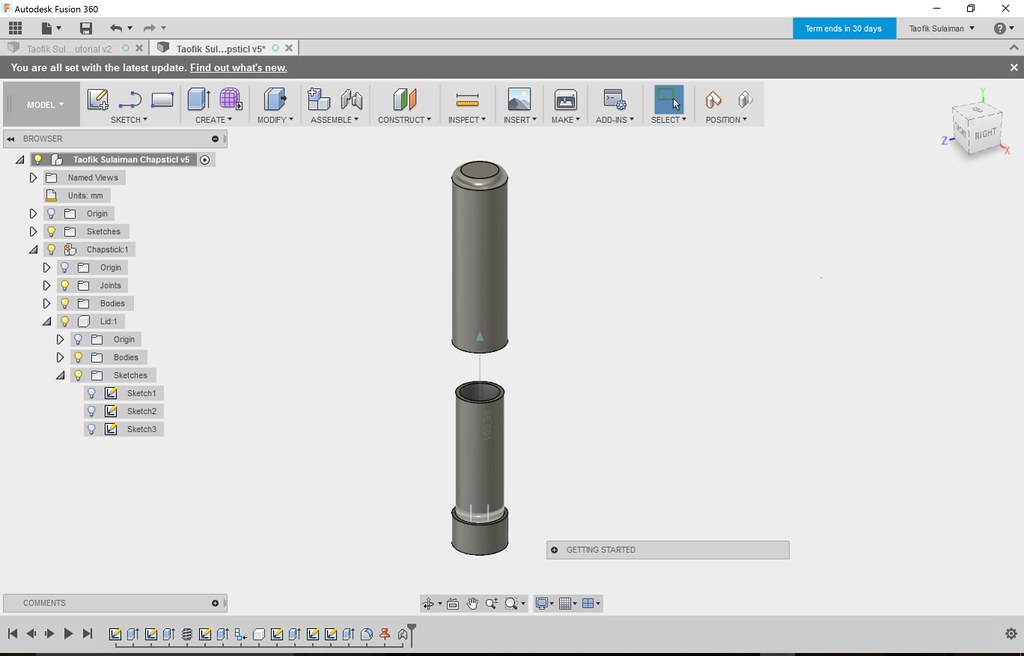
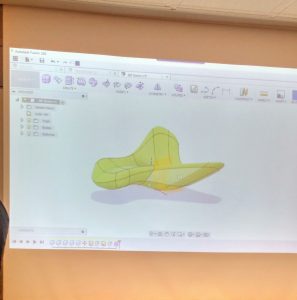
During the workshop session, we learned about the different tools on Fusion 360. I found the workshop to be incredibly helpful since I have never used Fusion 360 previously. Using the software, I tried creating a pipe that connected with a rectangular body. Other tools we experimented with were the sketch, modify, and assemble functions. Saving the best for last, we learned about the purple create tool. The tool allows us to deal with multiple faces and build complex, organic shapes. Jeffrey Smith create an aircraft design out of a rounded cube in a matter of minutes. I definitely want to practice using Fusion 360 more and utilize it in semester projects.

Dorothy Silverman presented on Biohacking, which manipulates the genes of organisms to usually create a product. Biohacking can also be thought of as DIY biology, where people of all backgrounds work together in small labs. Projects worth mentioning include using chitin to create biodegradable cups and plates and using fungi spores to grow furniture. I believe that the Biohacking movement is similar to the Maker Movement in that all sorts of people work together to create; however, Biohacking incorporates more sustainability in creating their products.

Merging Biohacking and fashion together, Suzanne Lee created BioCouture, a process in which clothes are grown using microbes. Biohacking is an exciting way to learn about biology and create things at the same time. I definitely want to experiment with the various processes involved to create sustainable products.

First Attempt at Autodesk Fusion 360

Autodesk Fusion 360TM, a phenomenal tool for designing, engineering, and simulating 3D models, turned out to be more challenging but at the same time simpler than I had imagined. As self-contradictory as that statement sounds, that was exactly how I felt after playing around with the program for hours and following Lars Christensen’s video tutorials to create the model shown below.
model 1
There were times when I felt excited that with a simple click, I could quickly mirror a specific part of the model to the opposite side. While other times, I would sit in frustration, cracking my head trying to figure out how to do something as simple as changing the view of the model. Overall, I felt pretty happy with what I was able to do with the program on my first attempt and know that through practice, I’ll be able to familiarize myself with Fusion 360 and create even more advanced models down the road. Of course, it’s not easy just watching videos and trying things out myself. This past week, our class was fortunate to have guest speaker, Jeff Smith, come in to share with us not only his life experience as an industrial designer at Autodesk and working overseas, but also an extensive introduction on how to use the Fusion 360 program. We first started out sketching simple 2D shapes such as lines, squares, and circles. Then, we created 3D objects such as cylinders and boxes and learned how to join them together.

Here is a very simple model of a prescription vial that I created, something I get to handle a lot at my job (I work at a retail pharmacy).
what
Just like how Jeff said that back in his college years Photoshop was barely in beta version and how I personally experienced the disappearance of Dreamweaver, a program I was taught to use back in high school, something that got me thinking was that due to the rapid development of technology, would a program that we learn today be quickly replaced by other more advanced software by the time we get into the workplace?

Week 4: Fusion 360

This week in class, Jeff Smith, a speaker from Autodesk introduced and showed us how to use Fushon 360. Fusion 360 is one of the more powerful CAD programs out there that enables users to be innovative. To be totally honest, I had a hard time with Fusion 360, even now I still cannot fully understand and figure out how it works. However, I must admit that it becomes more user-friendly as one gets to understand the functions more and the program is quite effective. What I do admire about Fusion is its ability to help the user be more productive. It helps users create more complicated objects with different layers that would normally take hours on end to create in a normal CAD program at a faster pace with the same amount of quality. Finally, Autodesk, the company behind Fusion 360 offers this program, as well as many others, free to students for 3 years.

Personally, I still have so much to learn within Fusion 360, but as someone that has had previous background in design software such as Photoshop and InDesign, I must say that I am very surprised and have great respect for this program no matter how frustrated I get with it. Jeff really dove in and taught us the full potential of Fusion 360 and each function has a blurb that loosely summarizes each functions’ capabilities and actions. I think that applications like Fusion 360 really pave the way for people to understand that design is something that anybody can come up with and that anybody can make their own objects. For the students in this class, Fusion 360 will eventually assist us in designing our concept and plausible ideas for our projects.

This object/figure would have taken a longer time in a normal CAD to shape.

Another speaker we had was Dot Silverman. Due to time, Dot could not really go into depth about her topic on biohacking, but we did learn about the basics of biohacking, a “do-it-yourself” type of biology. She introduced fungi product design in which products such as sturdy chairs were made out of fungi and were environmentally friendly.

Designing in the Digital Realm

This week we had the pleasure of meeting Jeff Smith, an AutoDesk representative, as he taught us how to utilize the Fusion 360 Software. This intuitive software allowed us to create complex geometries and objects in a digital space. This also allowed us to easily manipulate the object and even allow us to test for the integrity of the object and much more. Prior to utilizing the software, we had to watch a Fusion 360 tutorial on youtube by Lars Christensen, which was nice as we could go at our own pace and rewind when necessary. This model was to create a conduit box for electrical equipment that will be used in house remodels or construction.

16716285_10209965964360755_6354479055401809627_o
Our next assignment was to create anything and everything you can think of during the presentation that Mr. Smith gave us and so it was reassuring that we had an expert in the room in case there was any difficulty with the software.  We first started by learning the fundamentals of the software, such as lines and then shapes and then 3D shapes.  We then proceeded to utilize the create form tool and that was very interesting since it allowed for complex shapes of all sizes.

20170213_163924

The next stage was to build our own model of something that we use on a daily basis with 2 or more components. The object I created was my Hydro Flask water bottle. I was able to shell it for the double walled aluminum construction as well as create the necessary threads for the cap to fit in the mouth. The images below reflect my actual bottle and the rendering.


20170219_190921

Kenny_-_HydroFlask_Water_Bottle_2017-Feb-20_12-45-13AM-000_CustomizedView16624508959

Link to the A360 Model http://bit.ly/2lxACnS

This exercise made me think of everyday objects as different elements that needed to be joined together and thoroughly designed. Every aspect of every object you use has been analyzed and reiterated until it was ready for consumer markets. This means that there are elements of design everywhere in everyday objects and this exercise gave me the insight to develop a product for the class. Each component of each object is as important as the one prior, this means that as we begin to design our product, we must be able to think in terms of each element of the product and how it all fits together like a puzzle.

Week 4: Fusion 360 and the basics of not-so-basic CAD

In the prior week, we we participated in a workshop that outlined the basics of the design process. This week, we given a visit by Jeff Smith, an industrial designer working for Autodesk, who explained the basics of Fusion 360 and demonstrated the capabilities of the software. Jeff was trained in the “analog” method of design, in which all the blueprints and 2D models of a products were handmade with paper and pencil, a stunning but arduous process. In this digital age, one can do the same and more with CAD software like Fusion 360.

The base of CAD software is relatively straight forward: by using computerized tools, one can create a model of their choosing in real-time without the crutches of actual drawing such as drawing utensils or having to start from scratch every time. Jeff demonstrated that Fusion 360 can be utilized to create models in a variety of formats using a variety of methods. These range from organic to inorganic shapes, sketches, revolutions, scaling, etc. Fusion 360 possesses an extensive amount of tools and edits at the user’s disposal, giving the user a plethora of options. This also, however, makes using the software quite difficult, especially if one has never used CAD before. Fusion 360 is a intermediate-to-expert level software, unlike TinkerCAD (https://www.tinkercad.com ), which is a beginner software. The interface is rather unconventional, and there are many “hidden” tools throughout Fusion that make it uncomfortable for even experienced CAD users. Even with the plethora of tutorials out there (https://www.youtube.com/playlist?list=PLTuzDPYYeEeJ9E-xBX2n-dUo6p8fQeA_b&jct=Ae3fFWiQBw0JsXyUzPflRHCUzfNjKQ), adjusting to Fusion can be cumbersome. However, once one gets used to these quirks, the software can be more easily used to its full potential.

In Jeff’s workshop, he portrayed how many of the characteristics of 3D modeling, while used in a different manner, were very similar to real life drawing and design. You can use a pencil-like tool to sketch shapes, if you made mistakes you didn’t necessarily have to start all over, but would have to do something similar to erasing. It really depends on the person on whether designing on paper or in CAD is more difficult. The main core similarity  of the two is that they are both an art form. One can translate their creativity and design thinking onto a platform that allows them to portray it to others. The reason why CAD such as Fusion 360 is arguably better is that others can both observe AND edit your designs easily, all of which is saved through the cloud. This makes prototyping and customizations significantly easier, all through a single abstract. It allowed me to design a mockup of a mechanical pencil and it’s components. I can also use this to explain to someone how it functions without actually needing a physical one. CAD is wonderful tool for both expression and creation. Many believe it to be exclusively for engineering purposes, which maybe true, but in reality it is for portraying your technical expertise and creative process.


Harnessing the Powerful Tools At Our Disposal

Diving into Fusion 360 during this week’s class session was not unlike jumping into the deep end of the swimming pool in an attempt to learn how to swim; needless to say, there was initially quite a bit of floundering. Over the course of two and a half hours, Jeff walked us through the various functionalities of the program in a hands on demonstration that gradually built our comfortability and proficiency in the software.  We were exposed to far more advanced capabilities than we had previously been able to utilize in Tinkercad, which will permit us to develop far more sophisticated designs and products moving forward in the class. We were also exposed to the extremely fascinating prospects of biohacking, an initiative that is being led by Dot Silverman at the Fab Lab in Champaign. The use of these natural materials in lieu of traditional plastics, fabrics, etc. in production present a new element to consider when developing our capstone projects for the course.

Both portions of this class were equally important in the development of our final projects. Our work with Fusion 360 afforded us a basic level of skill in the software that we can utilize and continue to expand upon in our efforts to design our products. Without this basic level of knowledge, we would lack the fundamentals necessary to execute certain concepts. Dot’s presentation was pivotal, as it encouraged us to consider the materials that will be required to produce our designs, and the various implications of material choice. The biohacking movement is pivotal in the world of 3D making, as environmental concerns are at the forefront of issues facing production of all varieties, traditional and otherwise, in today’s society. If able to harness the technologies devised through this movement on a large scale, the standards for materials utilized in production could be revolutionized.

With my newfound knowledge, I plan to sharpen my skills in Fusion 360 in order to capitalize on all the program has to offer, and to ensure that I have a solid foundation with which to go about developing my product once we finish the brainstorming stage. While it is difficult to discern whether the biohacking aspect of 3D making will fit well with my team’s product until our design is better defined, I would love to explore this concept more. I am fascinated by the idea of utilizing biodegradable materials for short term and/or disposable products, such as packaging. I believe that creating a design that aligns with sustainability efforts is crucial to a product’s longevity and ability to best serve the community. Furthermore, it will be important to understand the interaction between the Fusion 360 design and the material selected; for example, I will need to consider whether, if selected, a biodegradable material has any restrictions or limitations as to which designs it can be implemented in.

Overall, this week’s instruction provided clarity on several powerful tools that are at our disposal moving forward in this design process. I was able to scratch the surface of these resources while replicating a side table lamp from my apartment, as per Jeff’s instruction as the conclusion of our last class. While I struggled at first, as I hadn’t used the software in several days, I eventually became much more comfortable, and was able to create this design utilizing Fusion 360.

An Exercise on Materializing Ideas

The Power of Design Software

Jeff Smith’s presentation on the features of Fusion 360 as a tool to not only visualize products but also as an avenue to create and design new ideas was truly inspiring. As someone who completed all of his college major in industrial design without the use of a computer to now being an expert on all Autodesk products is a testament to the both the continuous growth of the industry as well as the ability to quickly adapt to the revolutionary technology. Besides enlightening us with a rapid and intense beginner’s tutorial on Fusion 360, one of the most innovative features of the software is its “Sculpt” feature, which allows the user to create incredibly complex objects in mere seconds that would otherwise take countless hours using legacy technology. I also enjoyed his spotlight of Autodesk’s revolutionary state-of-the-art initiative in called Pier 9. Located in San Francisco, this workplace is dedicated to exploring and connecting ideas from software to the real physical world, in order to best test, build, and use. In the picture below, Jeff utilized the sculpt feature to create an incredibly complicated yet visually appealing model, which he then rendered and displayed with a full 360-degree panoramic background.


Before class, as a result of watching the Fusion 360 “Absolute Beginners” series of YouTube videos, I was able to make this model.

After class, I was playing around with the software and attempted to create a model of an everyday object that I use quite frequently. Although I struggled mightily at first, take a look at the screenshot below and see if you can determine what object I was attempting to make.

It’s a water bottle! The link to the Fusion 360 file can be found here. The msot difficult part of the design was instructing the software as to what parts were components, bodies, joinings, cuttings, etc. Albeit at first it was frustrating, I gradually began to understand how the software functions.

Biohacking

The second presentation we received was from Dot Silverman, an extremely motivated and ambitious PhD student from the University of Illinois. She introduced us to leading edge enterprises that intertwined the design aspect of 3D printing and additive manufacturing with solving biological and natural problems. She described a variety of projects, however, there were two that particularly stood out. The first was the use of fungi to create bricks for construction. After inserting flour, water, and the fungi into a certain mold, within two weeks the mixture turns into a compound that, once baked, is especially conducive to use as bricks. The other initiative I found to be ground-breaking was the development of soft robotics. As a growing field, soft robotics offers designers and doctors alike a common ground to collaborate and create solutions to some of humanity’s most complex health problems. The article described below gives some insight into this topic.

Food for Thought

This article from WIRED magazine details new developments by researchers who claim to have developed a “robotic sleeve”, which will supposedly assume the functions of pumping blood in the event the patient enters cardiac arrest. Created using silicone as the primary material, this innovative product is a prime example of the literal power soft robotics can have on the healthcare industry. The soft feel of the silicone is less irritating than metal or other materials, which adds to its effectiveness.


References

Further information on Pier 9: click here

Simon, Matt. “The Robots Are Coming for Your Heart.” Wired. Conde Nast, 31 Jan. 2017. Web. 15 Feb. 2017. <https://www.wired.com/2017/01/robots-coming-heart/>.


Using Autodesk 360: A powerful CAD tool

Another day, another tool that you can use to create and make innovative products. This week in lecture we were not in our usual maker space but in the Armory to hear from Jeff Smith, an expert in AutoDesk Fusion 360 and an industrial designer for Autodesk. He gave us an overview of the Autodesk work environment, including their innovative makerspace called Pier9 which is for making digital into real. He also showed us how powerful and unique this software is and different ways of designing:

  • Parametric designing which entails specific constraints and dimensions, and
  • Free-form designing or sculpting using the Tee-Spline Body

The way Fusion 360 is setup is in order of the different design phases: model, patch, render, animation, simulate, etc. They use a top-down componentry/modeling system system unlike other CAD software such as Creo Parametric or SolidWorks which use bottom-down modelling. You could even type code and create a model instead of clicking around the tools. He also introduced the new and powerful concept of having the computer learn and design your product for a more efficient design. Learning from about Fusion 360 was a great experience the way he likened designing with time-travelling. I really felt inspired more to be a maker and get more into modeling. Using the skills that we learnt from him and the Fusion 360 tutorial, i was able to replicate the model of the wire conduit below,

Screenshot (4)

and go further to design a model of a product I use on a daily basis – A Chapstick:

Screenshot (2)

If you would like to dive into this powerful tool, Autodesk offers Fusion 360 free for students at their website.

After Jeff Smith, we had a representative from the CU Biolab, Dot Silverman, tell us about the various creative endeavors they do in combining Biology and making into what she called “BioHacking”. There are so many endeavors involving biohacking going on around the country such as the MIT Silk pavillion and so many others included in the picture below.

1280x720.png

The Power of Fusion 360

This past week has been my favorite week so far. This is most likely because we finally started learning and using Fusion 360. From what I remember of Inventor, another CAD software, it’s extremely similar to Fusion 360. One thing that makes Fusion 360 such a great CAD program is the whole cloud system they are using, hence the title Fusion 360. We are currently shared on a class folder that allows us to save our project to that folder and let other students see what other students are doing. This is also great for collaboration with team members. I can see this being extremely useful when working on our semester-long project. We won’t have to email different versions back and forth. It will all stay in one place. In addition to their cloud system, the timeline at the bottom is fascinating. This timeline lets the user play to see their product from start to finish.

Jeff Smith, an instructor from Autodesk, gave us a workshop on the basics on Fusion 360. Personally, I believe he did a great job selling Fusion 360 to our class. He also taught me multiple things about Fusion 360 that I did not know about. I think the craziest, most mind blowing tool Fusion has to offer is the “create form.” I don’t remember Inventor having this tool so I wasn’t sure what this tool was all about. After Jeff’s demonstration on this, I was mind blown. The possibilities of creating objects are endless.

We all have different learning styles. I definitely prefer to be hands on versus learning from a text book and this is exactly what Lars Christensen’s tutorials are all about. Lars is the maker of the video we had to watch last week. I went ahead and watched his other videos and he’s been extremely useful. I enjoy how he takes the time to explain why we do certain things and how it works. Thanks to Lars, I have definitely been trying to learn the keyboard shortcuts and it has made my experience significantly better thus far. Click here to watch another useful video. I really enjoyed learning about saving and versions. Although this may sound simple, it’s important to know about this collaboration tool. Like stated before, I’m sure it will come in handy when our group members are modeling our idea. I was able to use what I learned from his tutorials to make my own product. I honestly had no idea what to make. I thought about making a water bottle but I figured many would be doing the same thing. I ended up making a flash drive. Here’s a gif from the start to finish. I haven’t had any complications when making this flash drive and the box. This is probably because of the exposure I had with inventor in high school.

View post on imgur.com

View post on imgur.com

View post on imgur.com

Overall, I’m extremely happy with this course. I can’t wait to keep using Fusion to make some complicated objects, like a Lego car made from scratch!