
From the conception of our idea to the final presentation and prototype, our group has grown and learned so much from this project. This project first taught us how to identify problems and do research to help understand the consumers who we are trying to solve the problem for. Then we learned how to turn that research into smart product designs for the consumer and start prototyping using what we learned in design workshops at the FabLab to bring those designs into reality. We also learned cooperation and design audits can foster an innovative learning environment and help reveal flaws in function or design to help perfect a product.. Finally, we learned that the process of bringing an idea to fruition is an exhausting and difficult process which takes time. In all, it was a learning experience that we would remember in the coming years of our lives.
Prototype 1
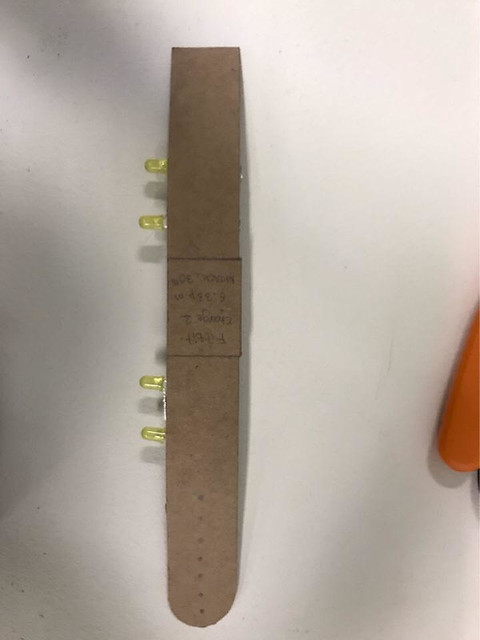
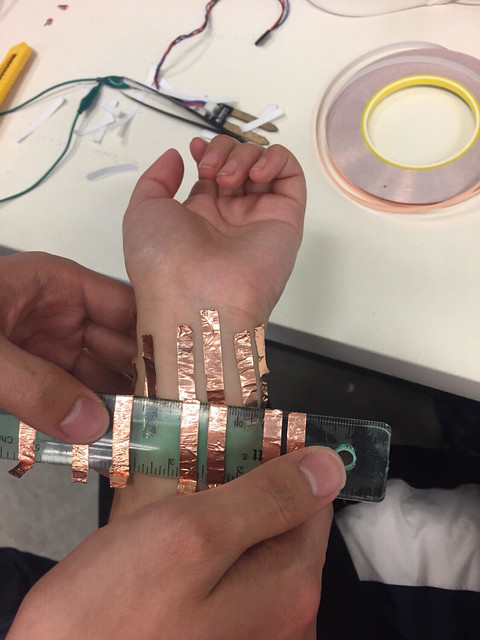
At the very beginning, we did a feasibility test based on the resource we could access to. The band essentially consists of two parts. One was the band and the other was the circuit. Because the band should be wearable on the wrist, we chose to use the 3D-printer with semi-flex material to print the band. For the sensor, we planned to buy a humidity sensor from the market. However, to minimize the size of the sensor, we decided to make the sensor by ourselves. The logic behind the self-made sensor was very simple. A person’s hydration level would affect the humidity level of the skin and the humidity level of the skin would affect the skin’s resistance. Thus, measuring the resistance of the skin can help estimate whether a person is dehydrated or not. None of us were electric engineering student, so we need to outsource the circuit design. Fortunately, we found a full-time staff, Mr. Rice, at Fab lab to assist us.
The first step for us was to make the sensor. Based on the design logic, we placed two copper tapes on the skin and measure the resistance between them. We did a lot of experiments to test the sensitivity of the copper tapes with different distances to find the best distance. At the end, we determined that 2 mm was the best parameter and we also made a cardboard prototype with basic circuit wires soldered together. The first prototype was non-functional but it gave us a direction to improve our prototype for the rest of our project.
Prototype 2
Prototype 2 was functional and realized our idea. We designed and cut the circuit by our hands. We also integrated the mini-Arduino controller to our handmade circuit with the help of soldering technique. One giant improvement we did for prototype 2 was replacing the LED light by RGB-LED light. RGB-LED light could flash red, green, and blue three colors, which means that we could send three different signals to our users. As you can see from the picture below: Flashing red means “dehydration”; flashing blue means “functioning well”; flashing green means “sweating”.
Below is the picture for prototype 2


Prototype 3
Although prototype2 is functional, it is not stable and would malfunction from times to times. Thus, we adopted silhouette technique to improve the precision. More specifically, we designed our circuit on the laptop first and then used the laser machine to print our circuit. Another giant improvement we did was the battery integration. We also designed the circuit to power both the controller and the sensor. The design could not only compress the space for the whole circuit, but also make the sensor contact the skin seamlessly.
After making our 3rd prototype, we were design audited by other teams who gave us many suggestions to improve our product. Some of these suggestions included LED blinking edits, vibrations and possibly a redesign of our product to fit as a water bottle attachment. Additionally, we prototype tested our 3rd prototype with Brandon and he had also suggest having vibrations to notify the user along with the flashing lights.


Following the feedback provided via the design audit and the prototype testing, we had to reevaluated our acceptance criteria for our design. One of the group’s suggestions was to make sure that the user is able to realize they are dehydrated after the blinking, so we reprogrammed our product to blink 6 times and then stay red for as long as the user is considered dehydrated. Additionally, we made circuit backing must be non-conductive. We discovered we needed to make this amendment after we tried to solder the original plastic backing and it burned. Additionally, we decided to remove the fitbit so that the sensor would be able to lie flat on the wrist.
For our fourth and final prototype, Ana reprogrammed the product to follow the new acceptance criteria. Additionally, we changed the plastic backing to a silicon backing on the circuit since silicon is non-conductive. Unfortunately, during this prototyping session, we lost our original mini Arduino and had to replace it with an Arduino Gemma. Furthermore, we redesigned the band to only house the sensor.
The challenges throughout the entire project included finding time which coincided with the FabLab and MakerLab hours, failed prints due to issues with semi-flex material, time constraints and the lost Arduino. The lost Arduino and time constraint heavily impacted our final prototype because unlike the mini Arduino, the Gemma had no serial monitoring capability which had allowed us to set parameters to detect dehydration.
If our group had more time to develop this project, we would consider the suggestions given to us such as making various versions of the H2Go as well as looking at simultaneous vibration notifications. We would also try testing out different ways of detecting dehydration and different materials for a more flexible circuit and band.
From this project, we have all learned not only how to have a maker mindset, but how to utilize it, problem solve and be patient. Although our final prototype did not fully function, we knew that with time, patience, hard work and perseverance, this prototype could be fully functional. In the end, there were a few changes which we could have done but we were very proud at the effort we put in and the presentation we gave with our product.
Please enjoy our presentation and video of our project efforts: