Team Zerott Project Reflection

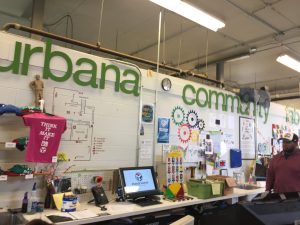
For our project, we decided to create a bot that will help the MakerLab. The main feature of the bot is to greet people when it senses someone walking up to it and record the person’s idea/story or any feedback they have and send the video/audio to a an SD card/USB so Vishal can receive feedback on things going on in the Makerlab. When people enter the Maker Lab for the first time, they may be overwhelmed by all the things that are going on, including the 3D printing machines buzzing while at work and people making their own designs on the computers. And when they leave, there is little to no interaction with them after they have created their ideas or made their products. The goal is to capture that as feedback for future improvement of the MakerLab and also for publication of these stories. The droid will increase the efficiency of collecting data in the MakerLab by using its cute appeal and its enticing ability to speak, record audio, and record video.

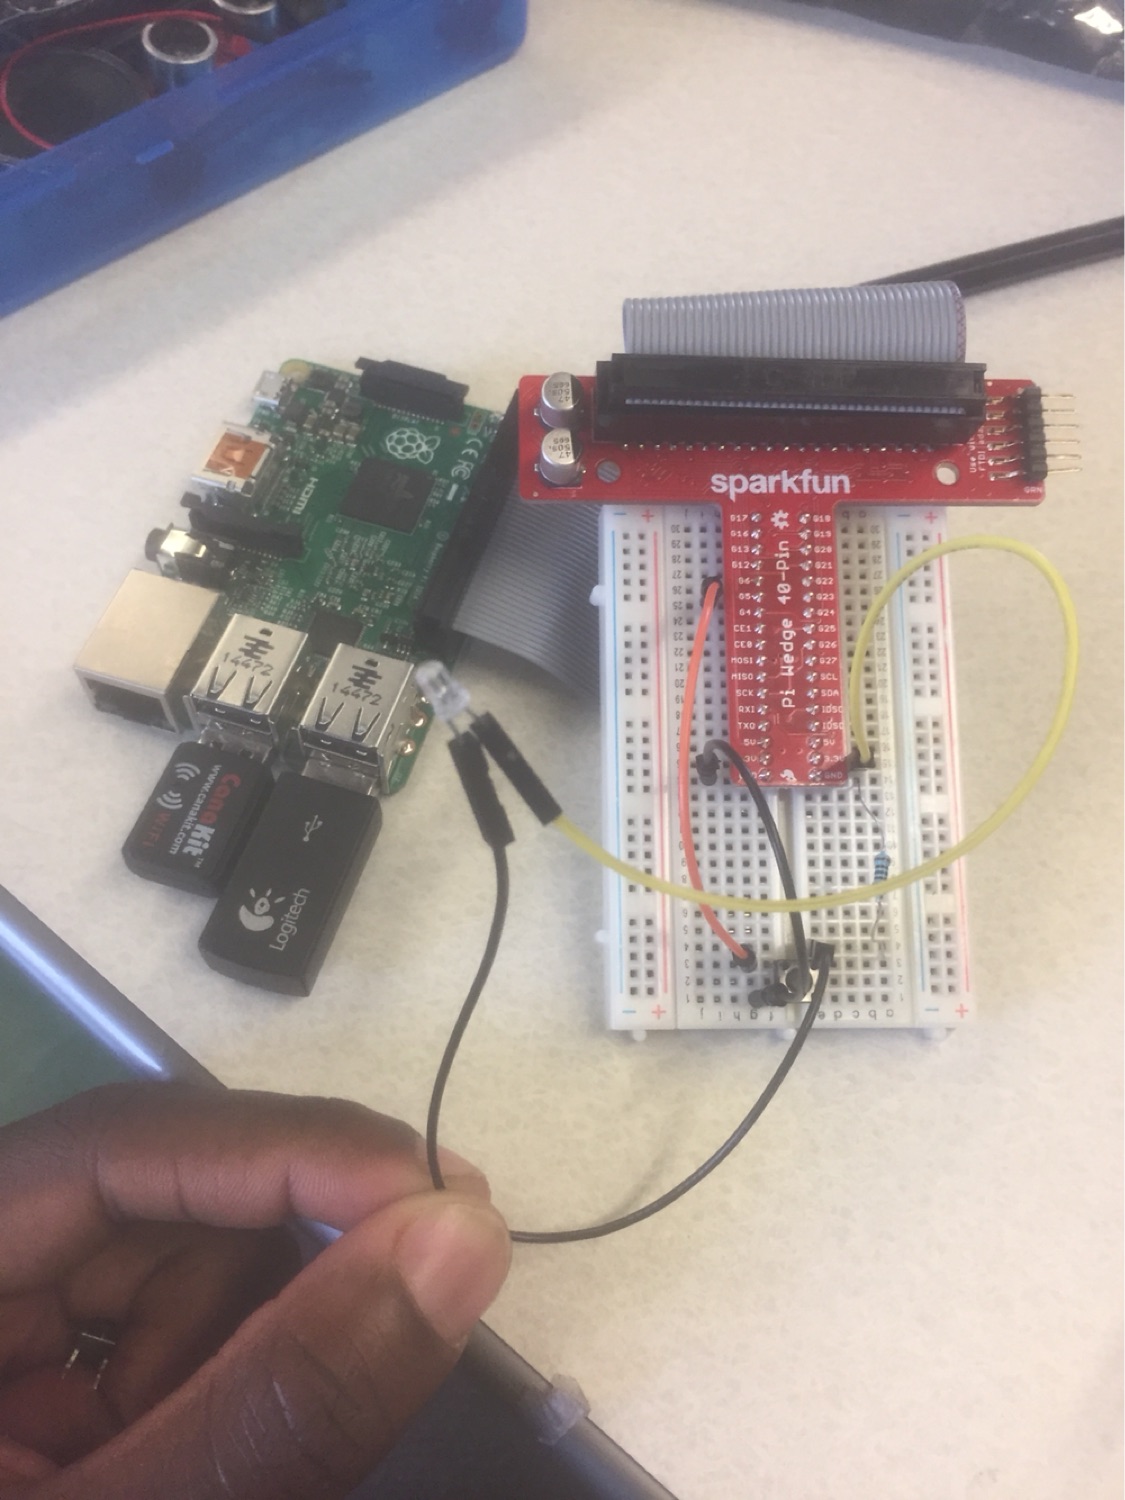
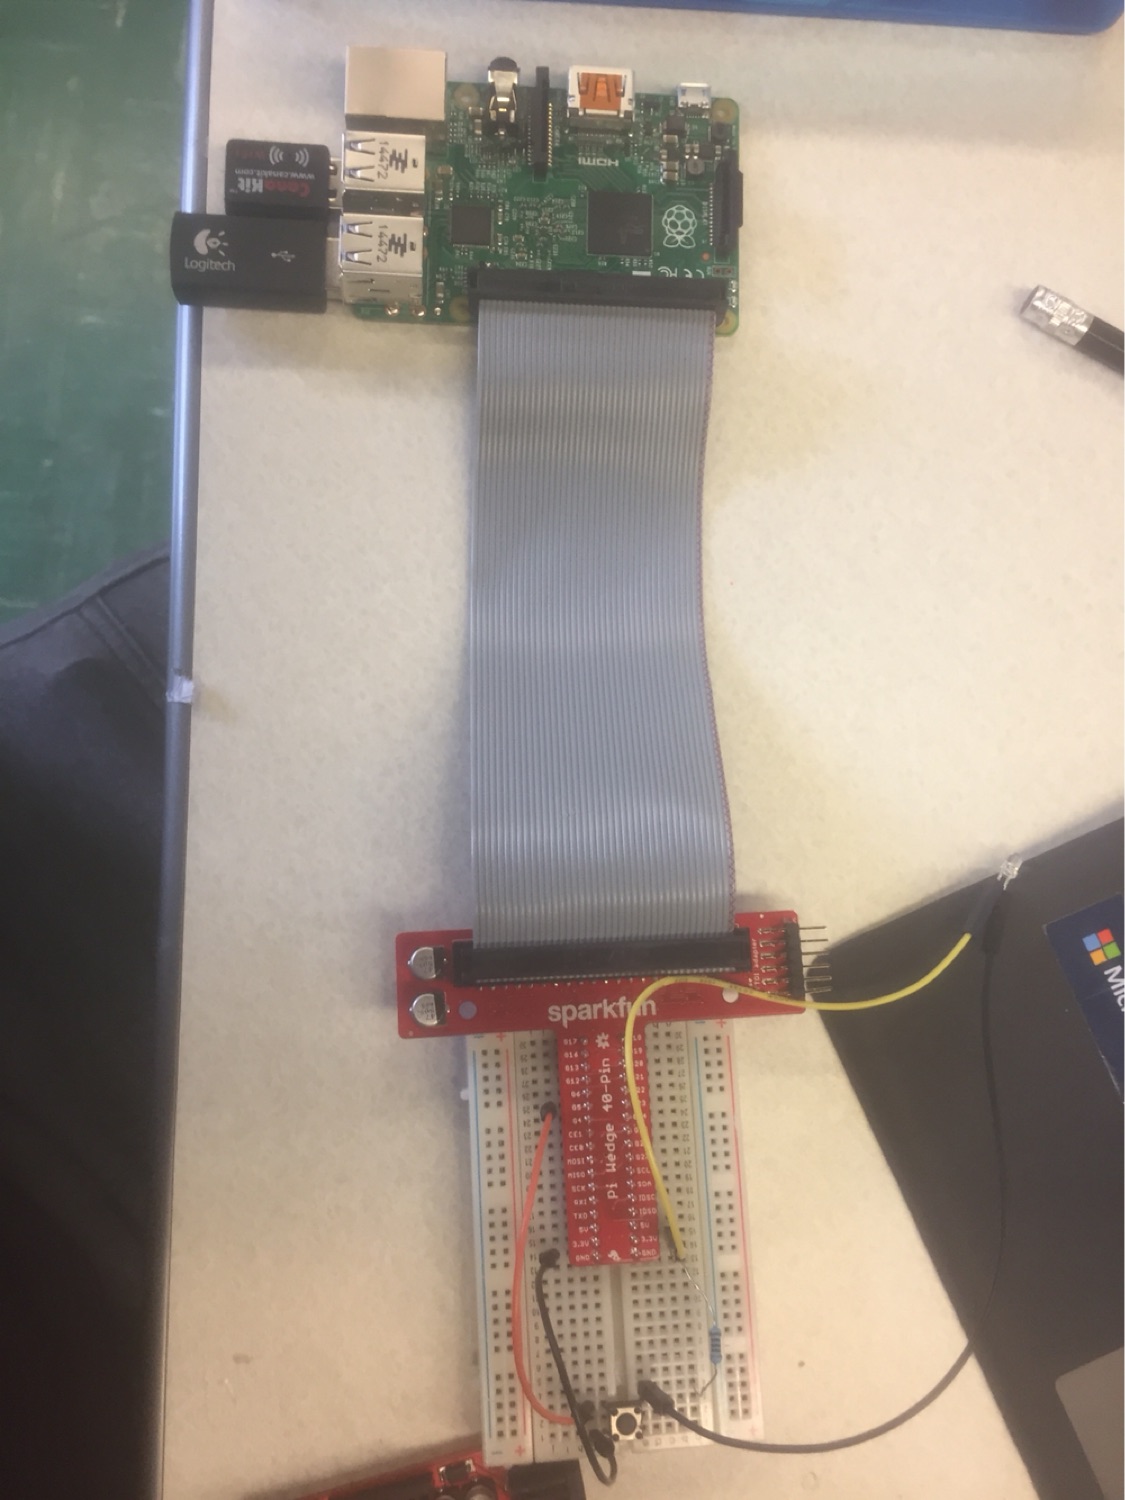
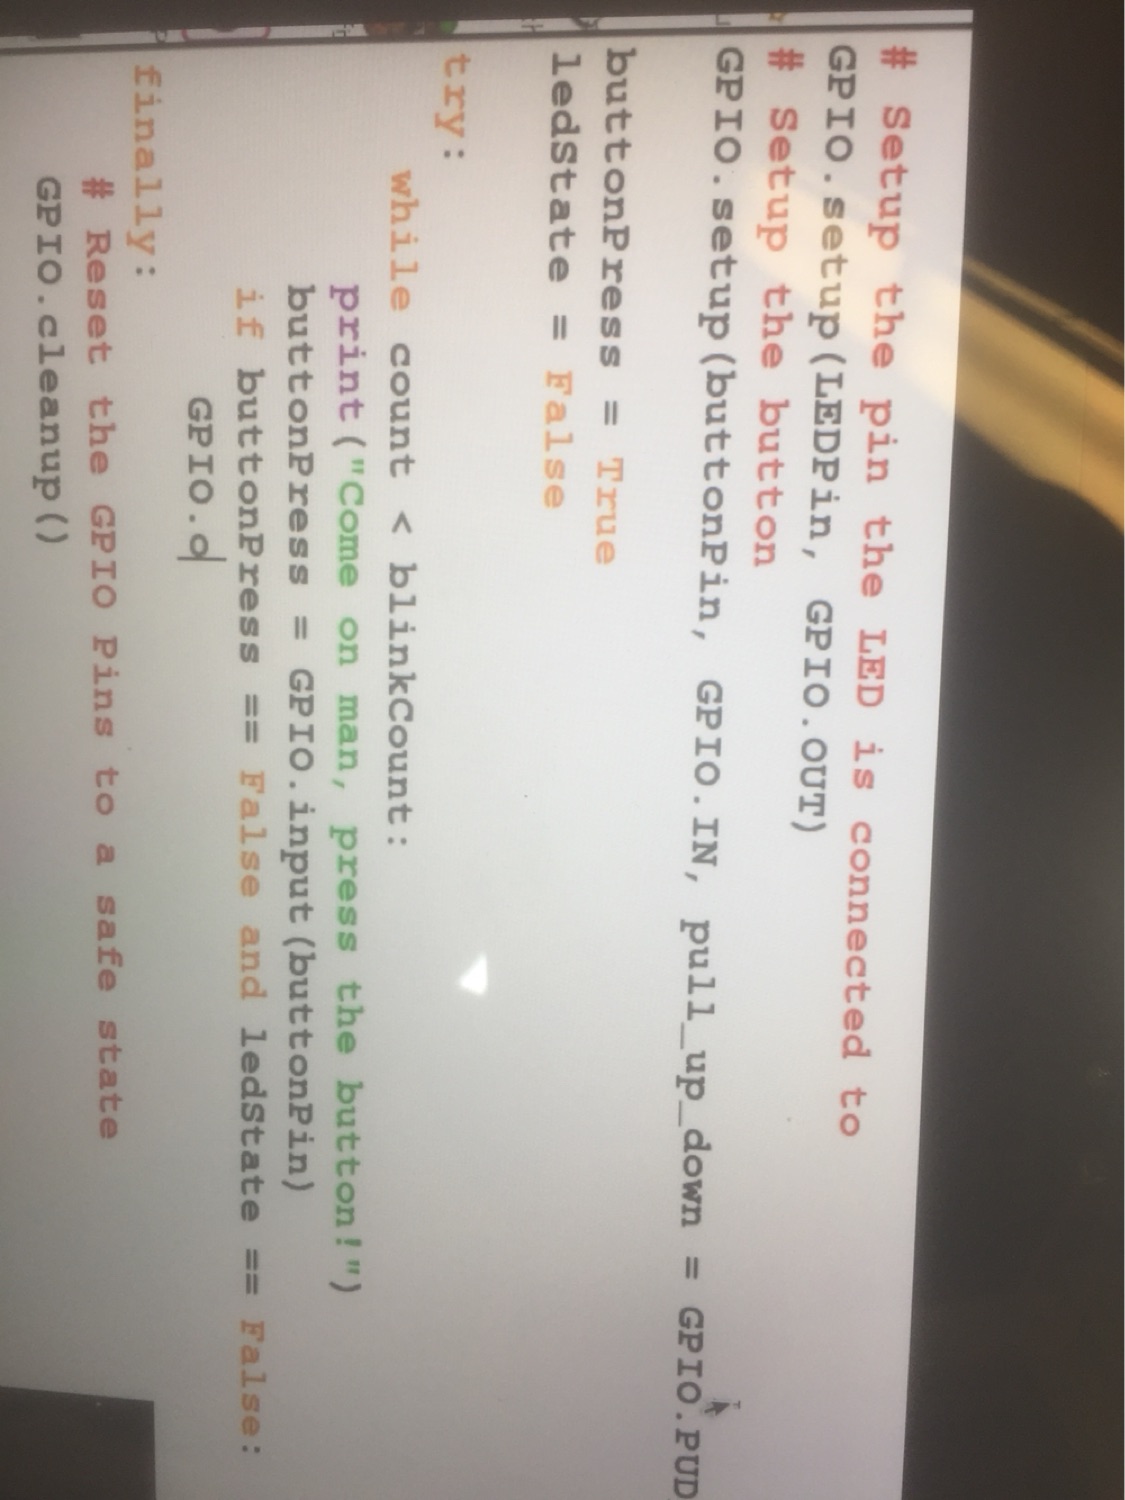
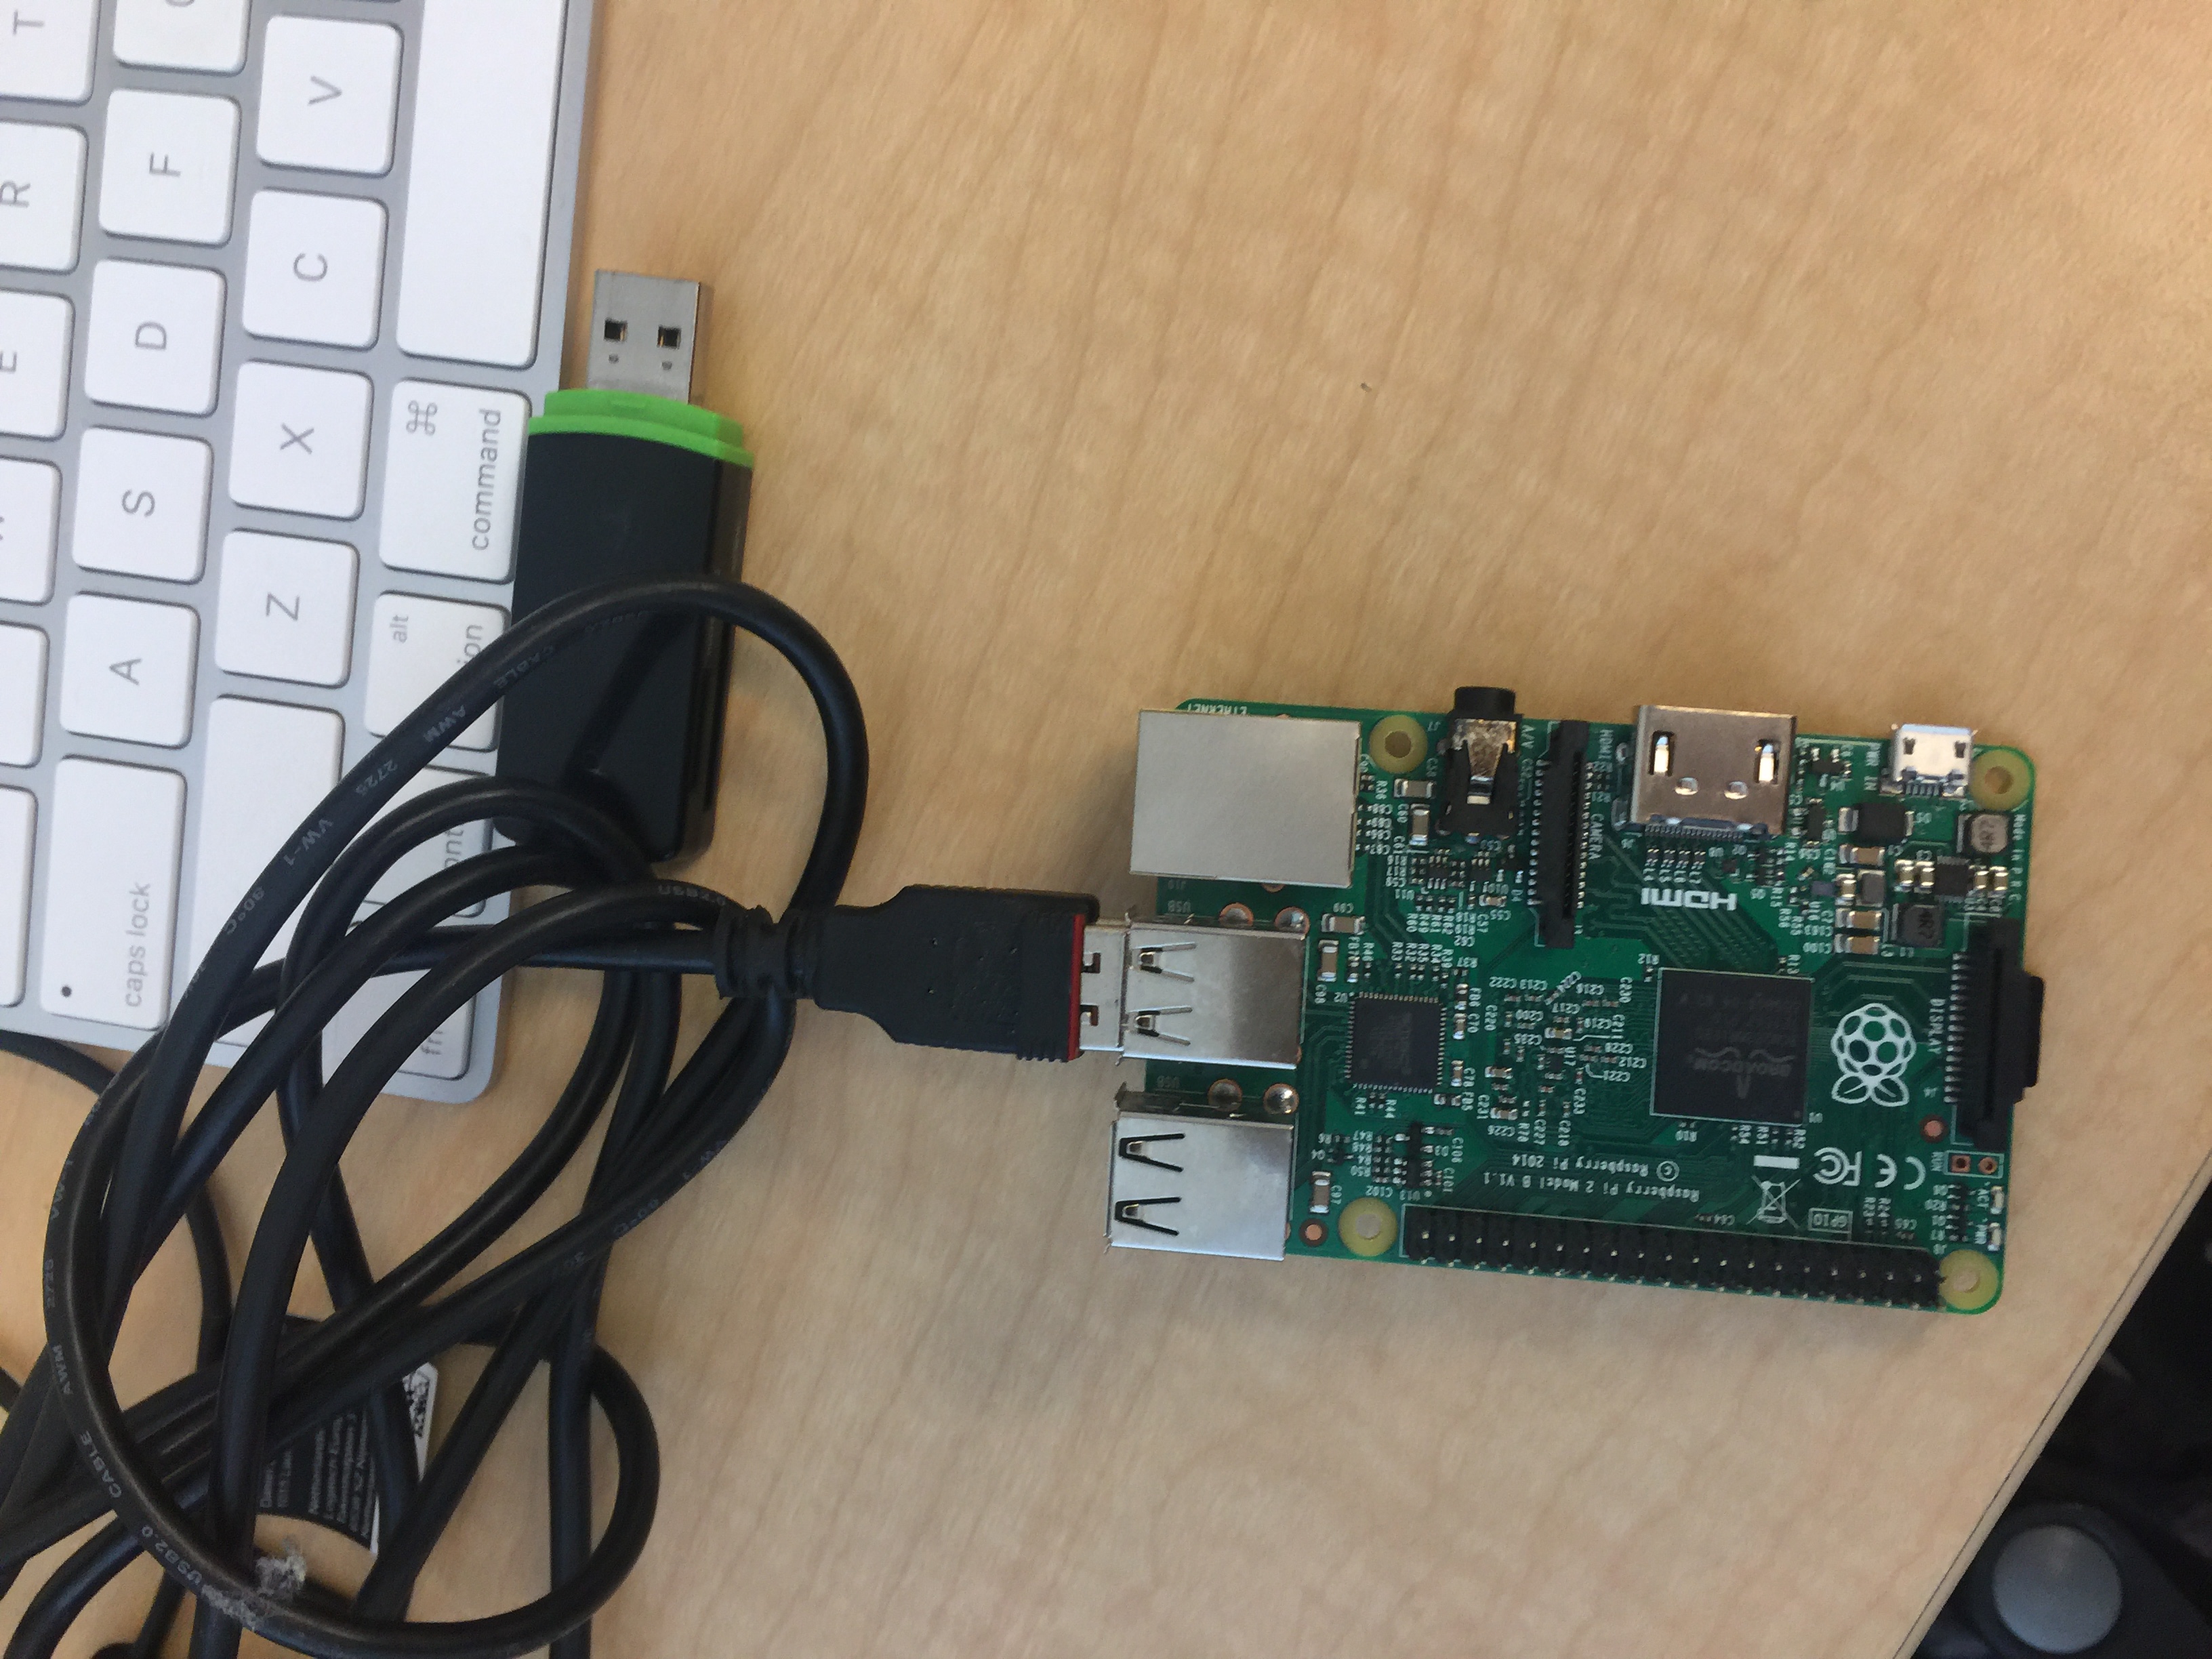
To do these we came up with multiple ideas and had to learn from different perspectives by testing, different ideas like blabdroid and different technologies like the IBM TJ bot/Watson Services. All these culminated in our final product called the Makerlab bot which works mainly through a raspberry Pi Model 2 board that runs python 3 code that Taofik wrote up. This code runs the electronics setup which consists of a camera module that performs the two functions of detecting motion using ‘Blob Detection Image Matching’ and also recording the video of the user’s responses. The hardware setup also includes a USB microphone to record the audio that goes with the video, there is a speaker to draw the user’s attention and then play the prompt to the user. We also got user feedback to include a way to let users know what is going on with the bot so we made the bot play a startup sound and included a green LED light and an LCD 16X2 display to let the user know what is going on and what mode the Bot was in such “Motion Detection Mode” and “Recording mode”. We had a couple more materials that we used to make all the connections to the components such as jumper cables, pins, T-wedge pin I/O and its pin extensions for the raspberry Pi, and a breadboard.  So it would record the user’s response and go back into motion detection mode as a continuous loop. We had intended to include a button or two to allow the user to turn off/stop the bot mid but the connection came apart. On the raspberry pi is a wireless USB keyboard to send the bot commands, a wifi dongle to allow a computer connect to it headlessly/wirelessly, a USB drive to save the video and audio which can easily be removed for Vishal to go through all the user responses at the end of the day of recording user interactions.

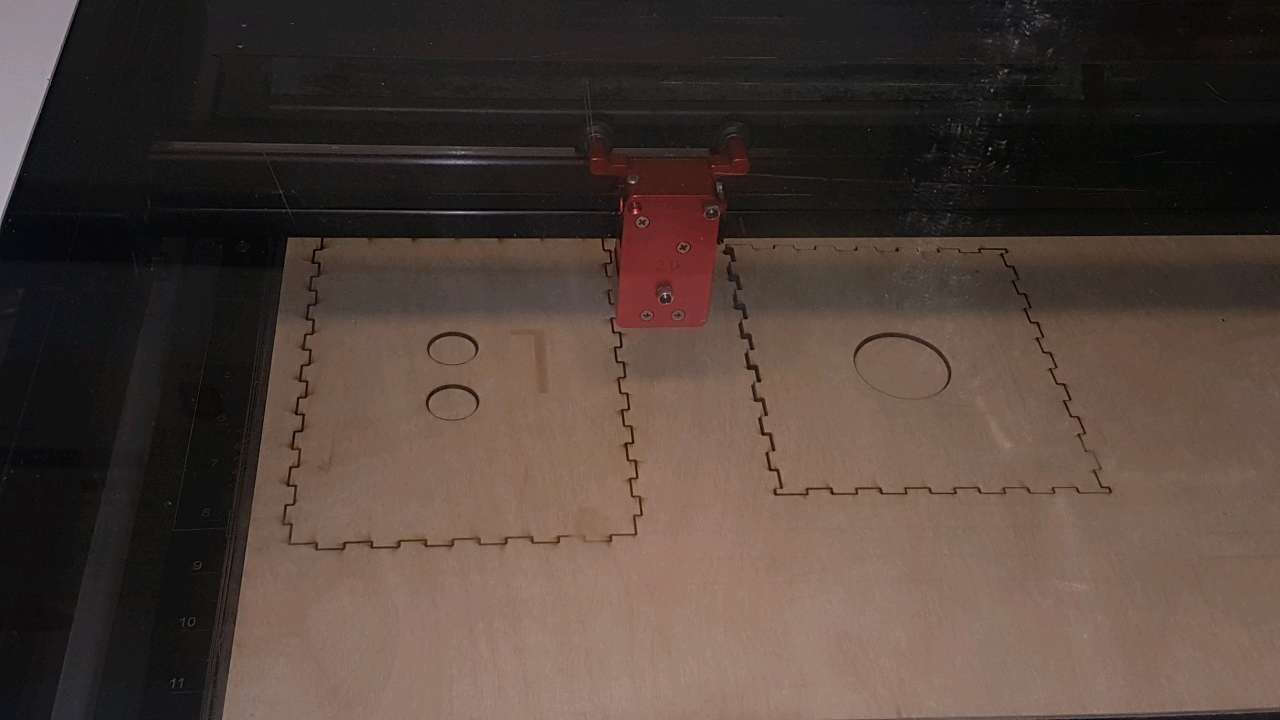
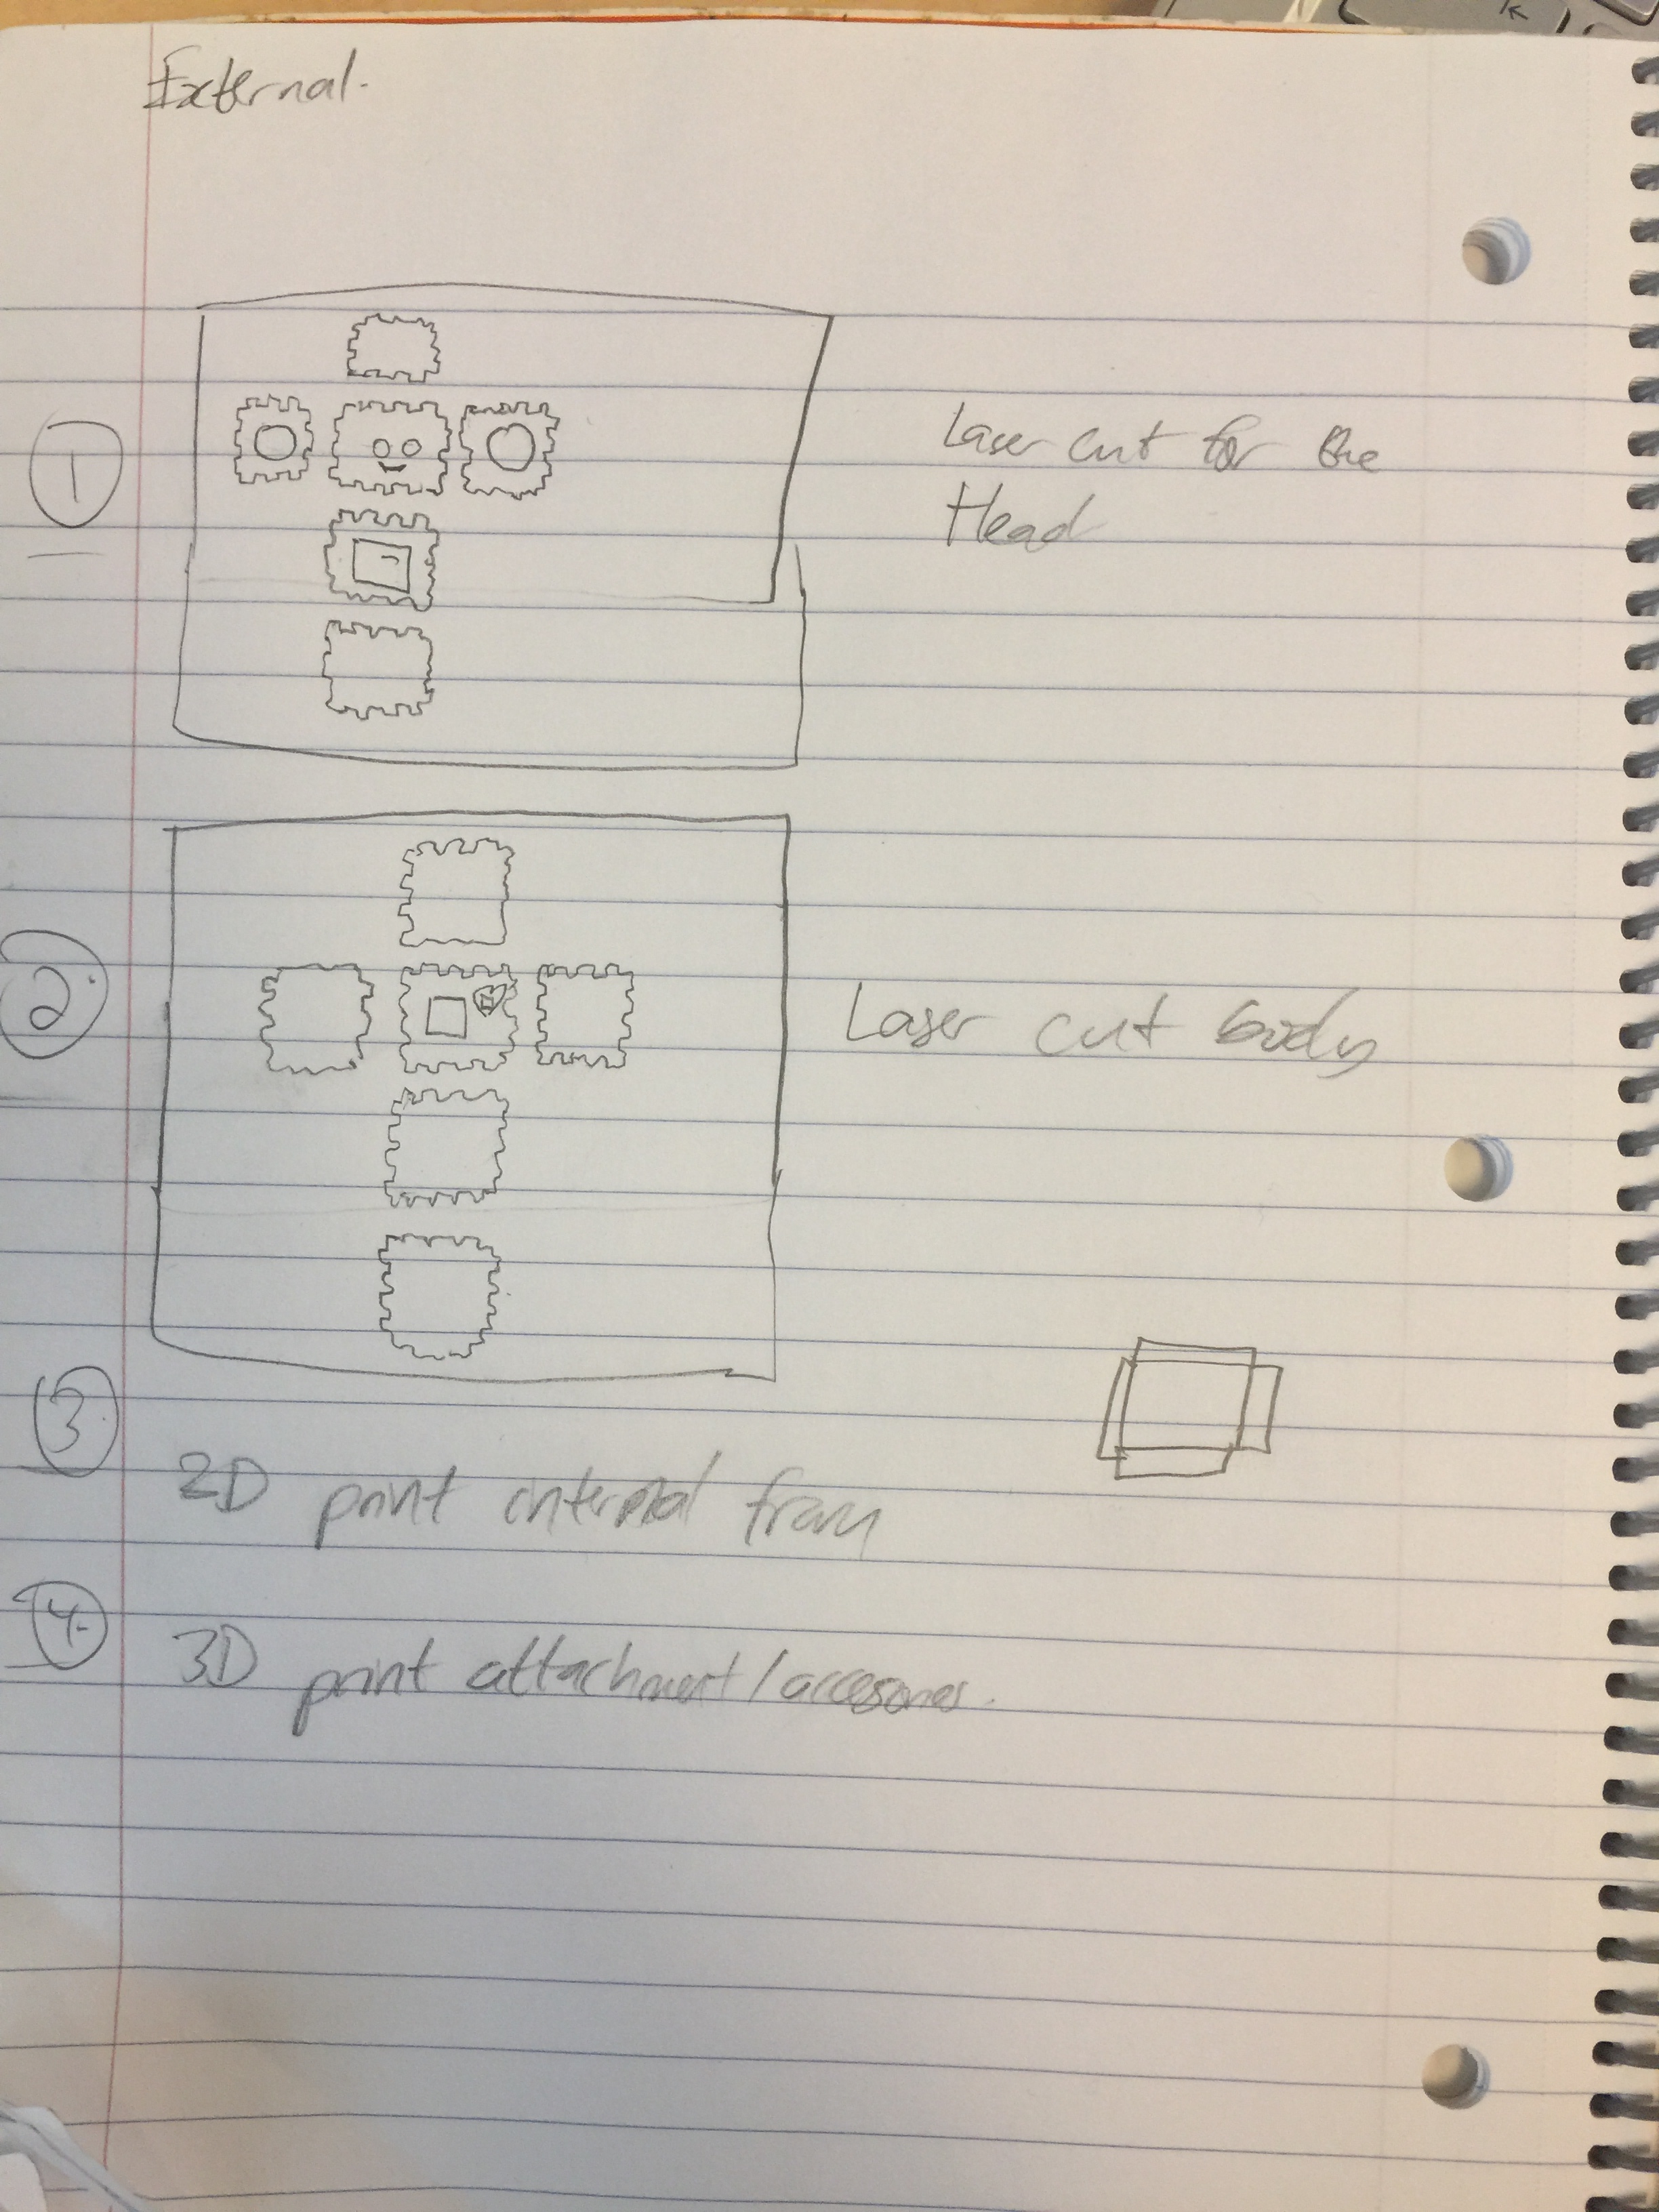
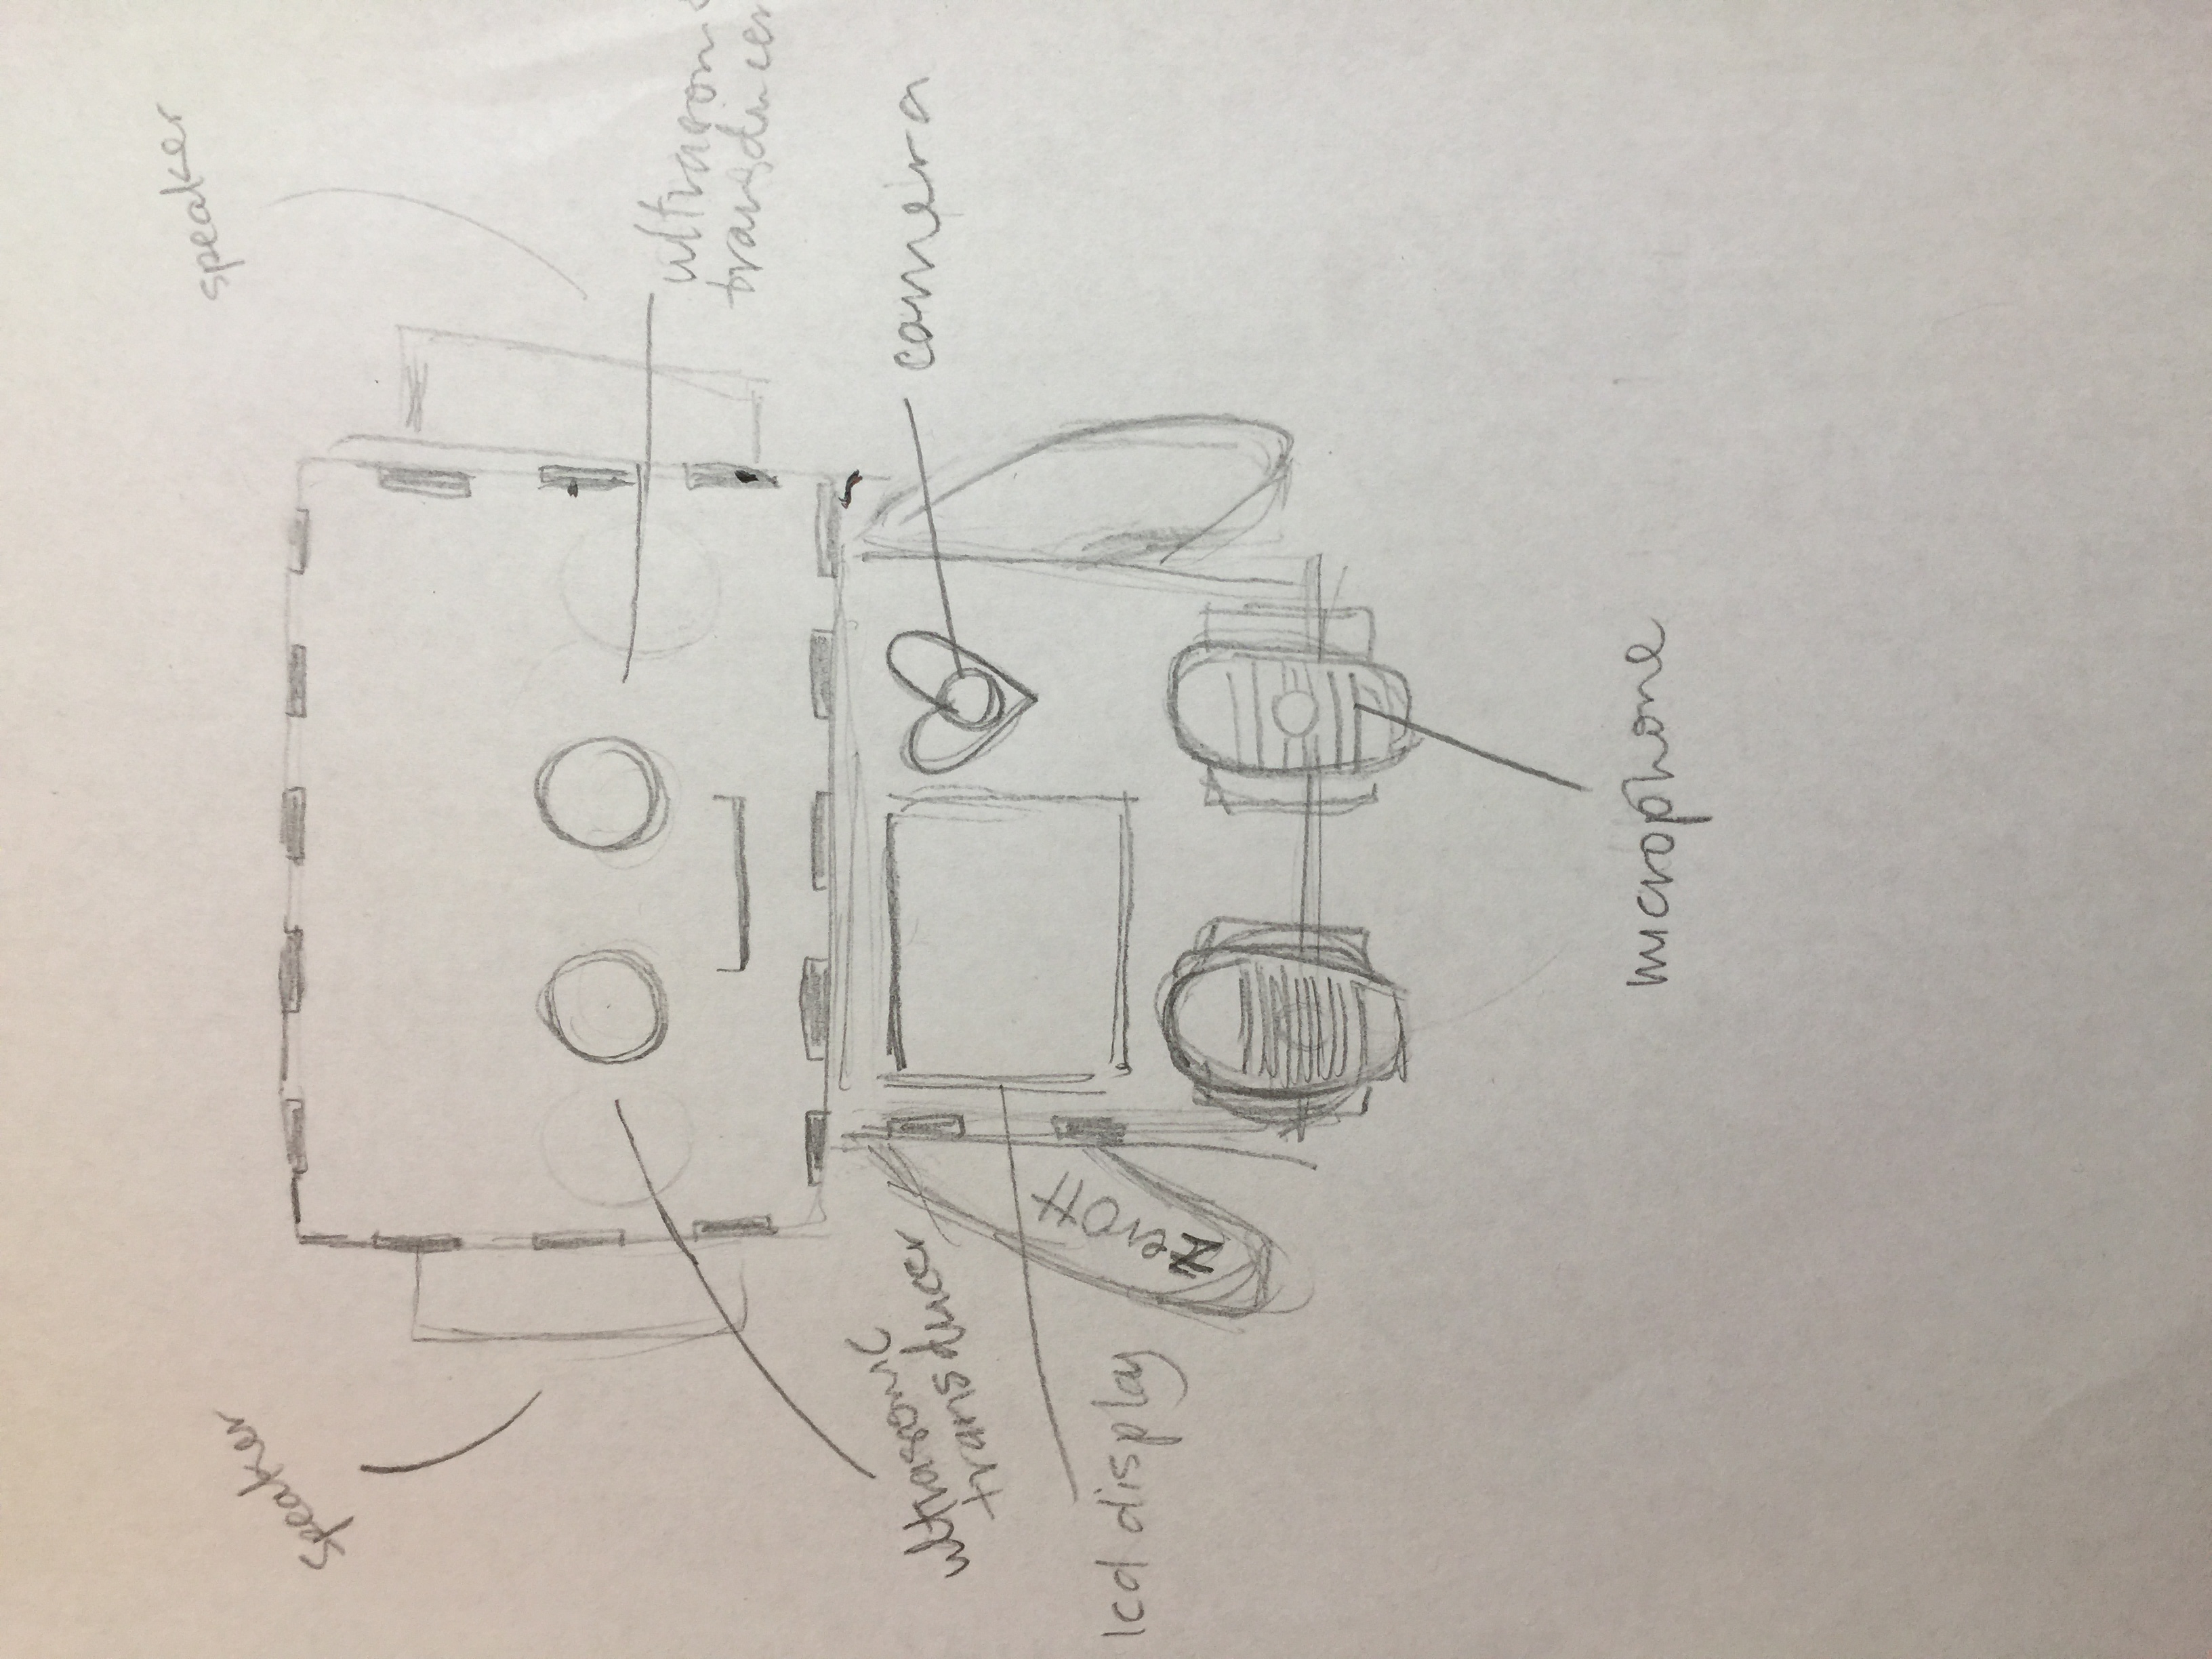
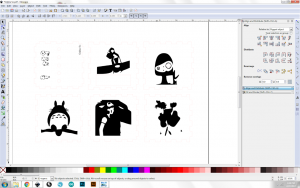
In the first step we started out making sketches. Our first sketch was more rudimentary and includes only a box. As basic as it is, we already had a rough idea on what to include as outer material and a jist of what was needed inside to make the bot function. However, we also had a rough idea of where each item would go, such as the arduino on top, or that we wanted to use laser cut wooden box for material. The second sketch we made it more friendly-looking and added a more cute appeal to increase the efficiency of interactiveness. We rearranged the materials to better fit the shape of the bot.

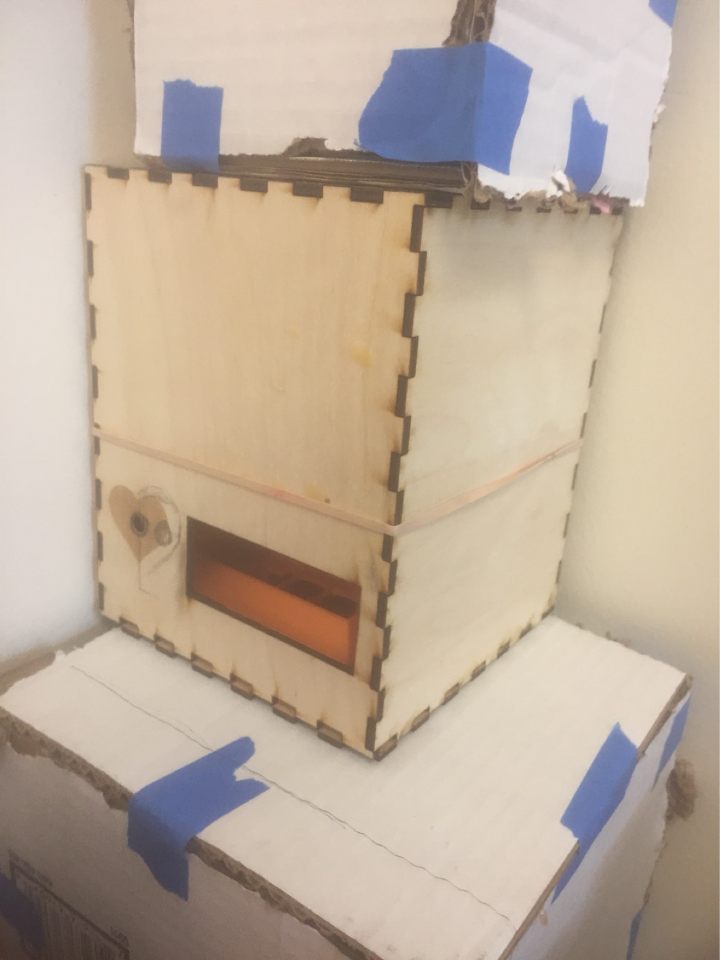
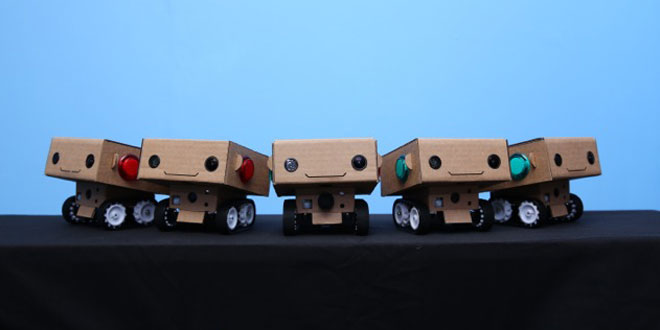
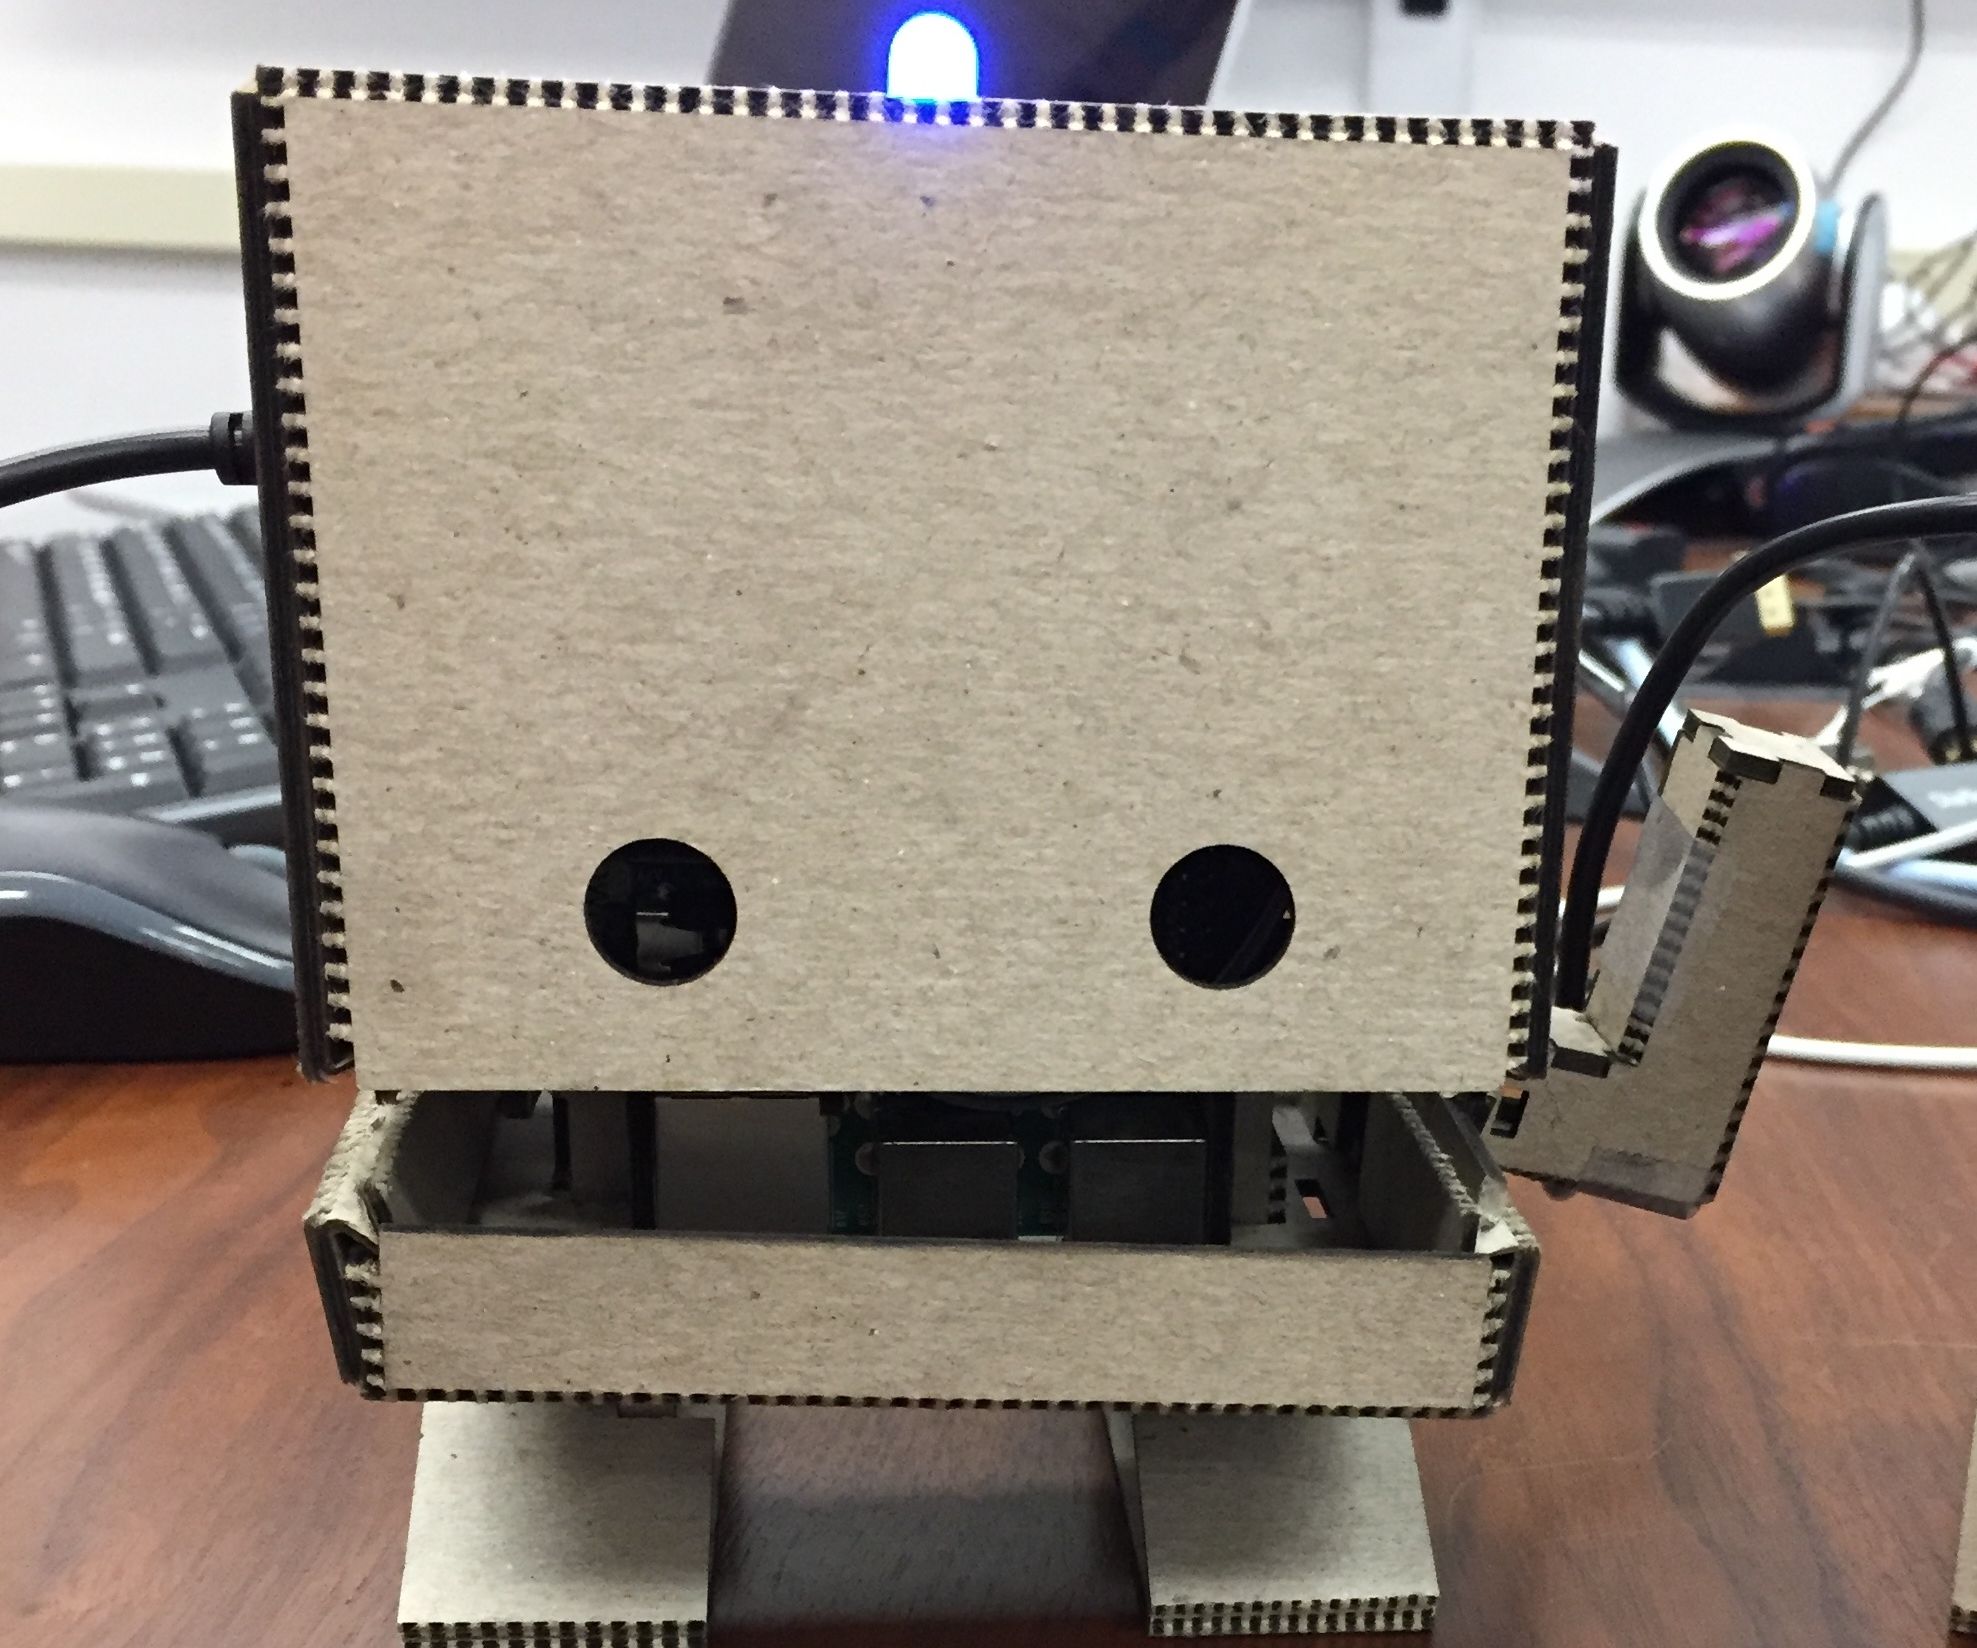
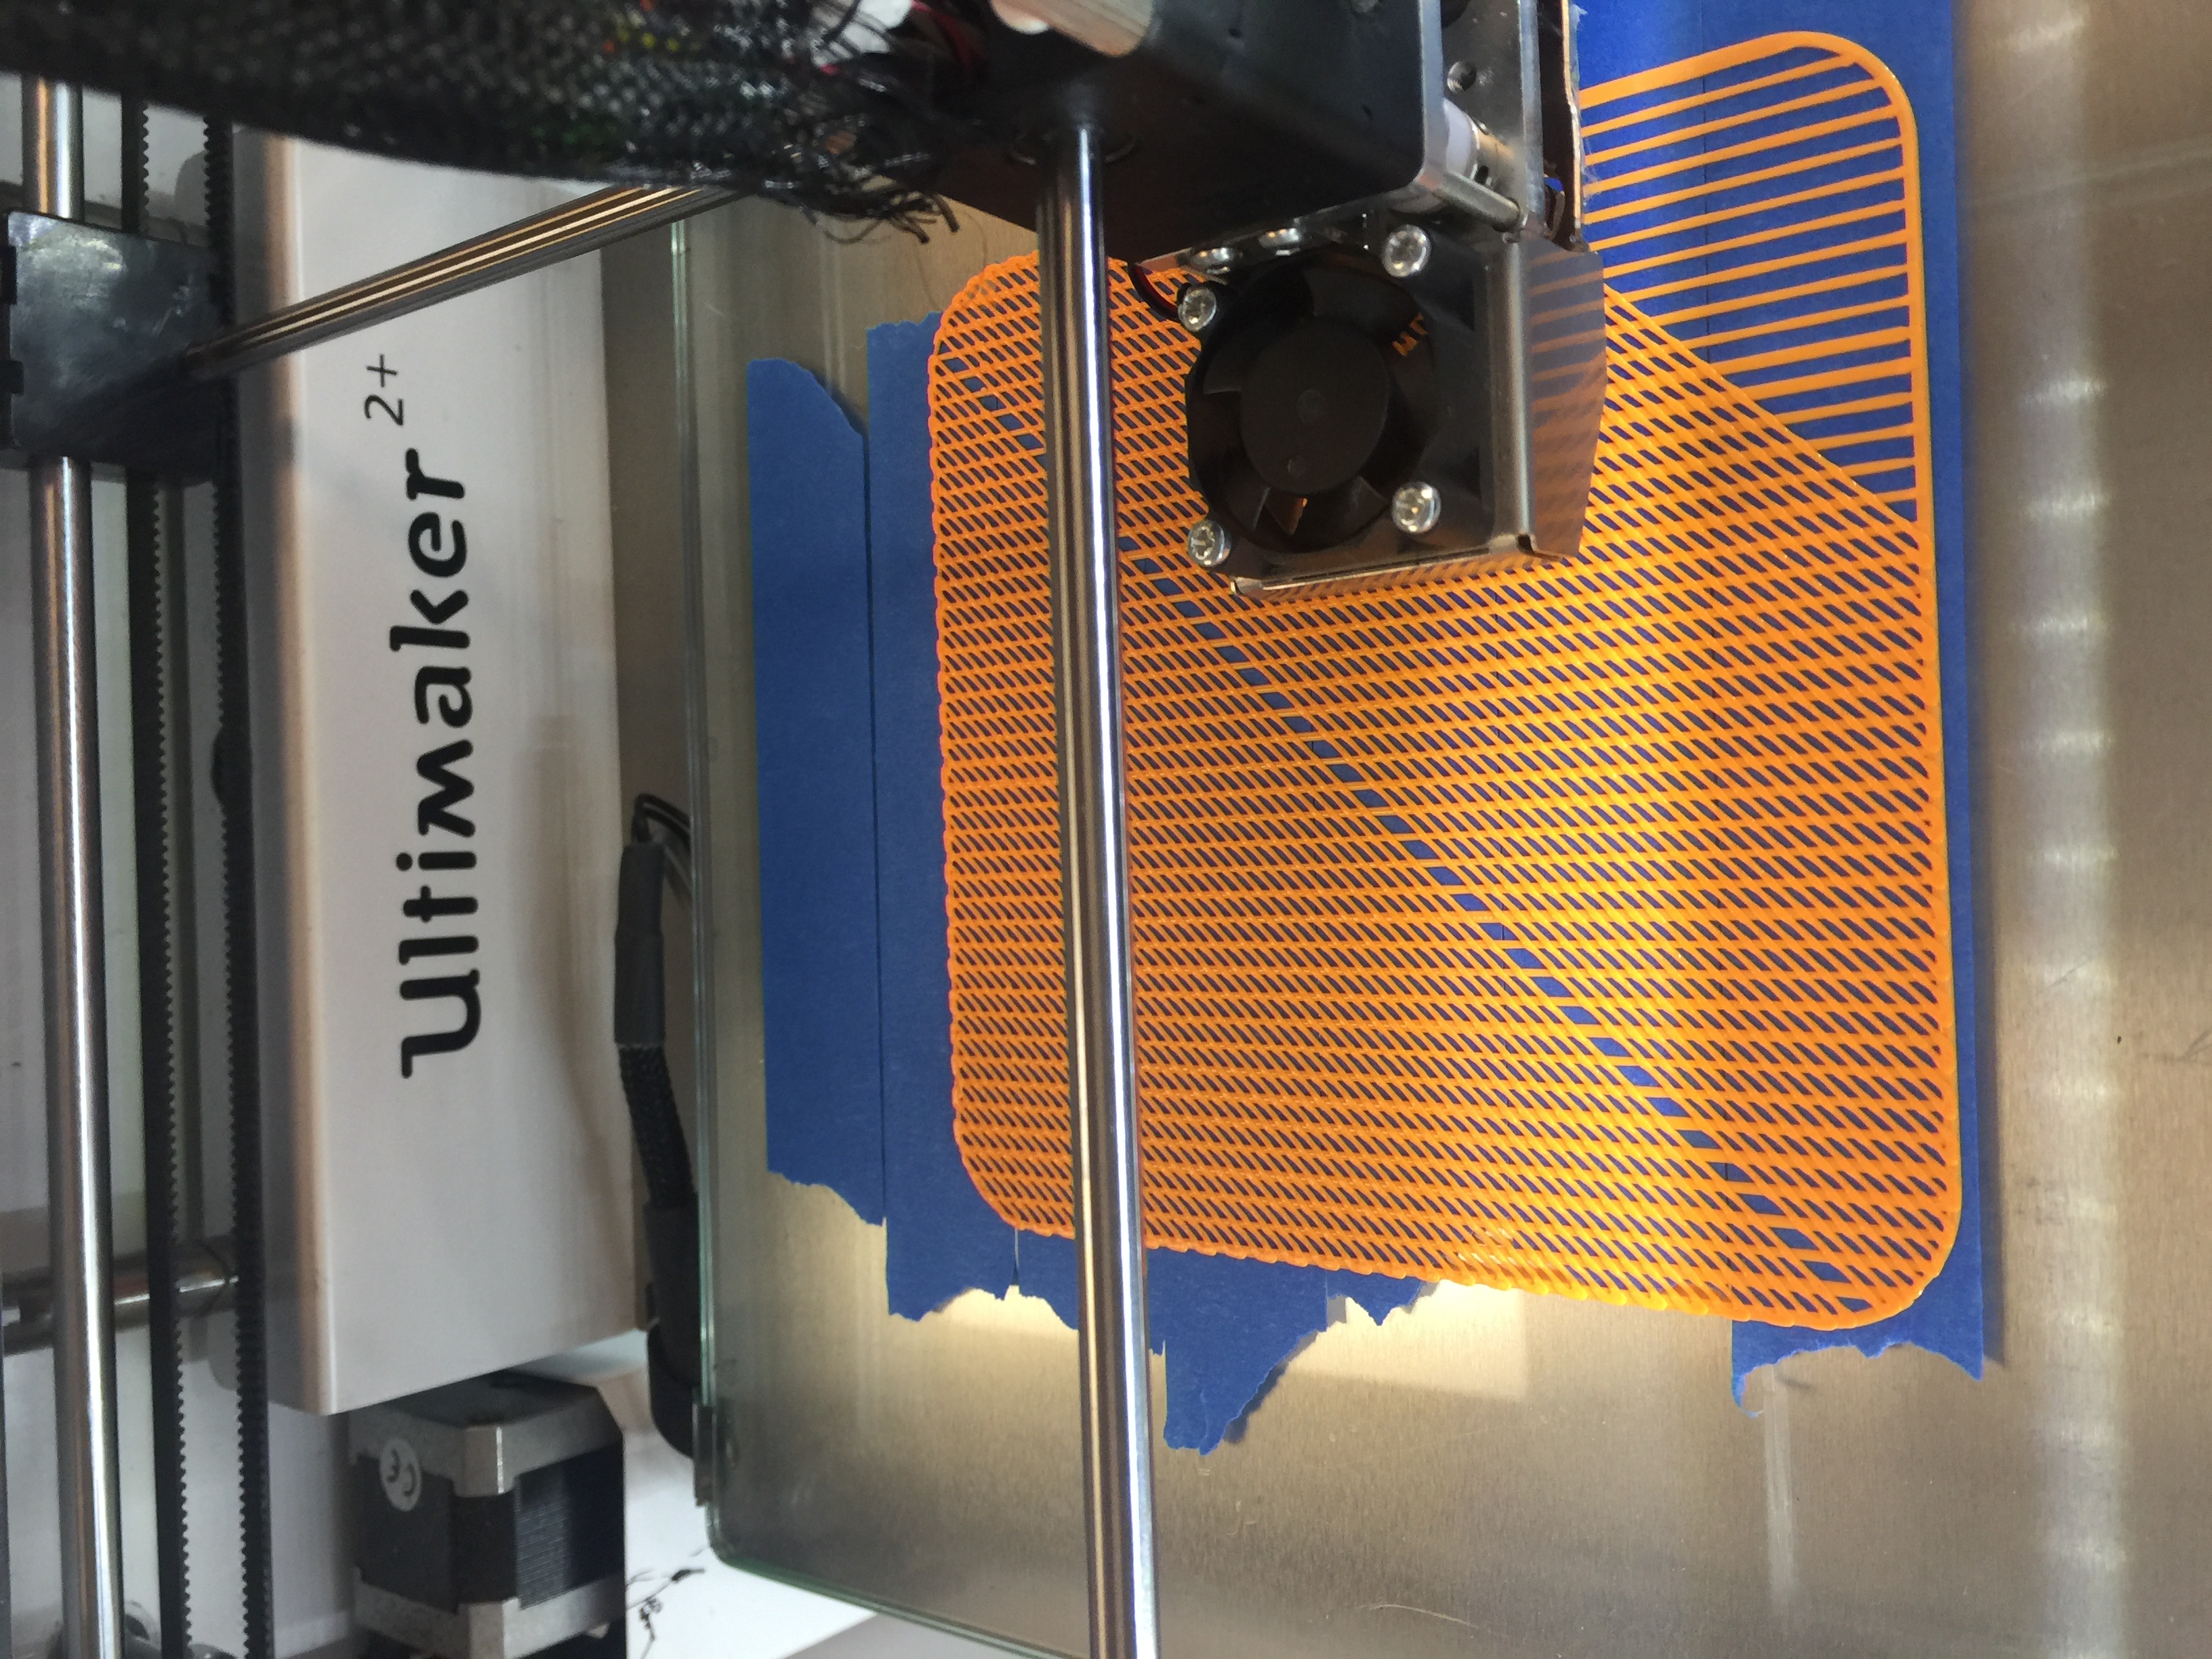
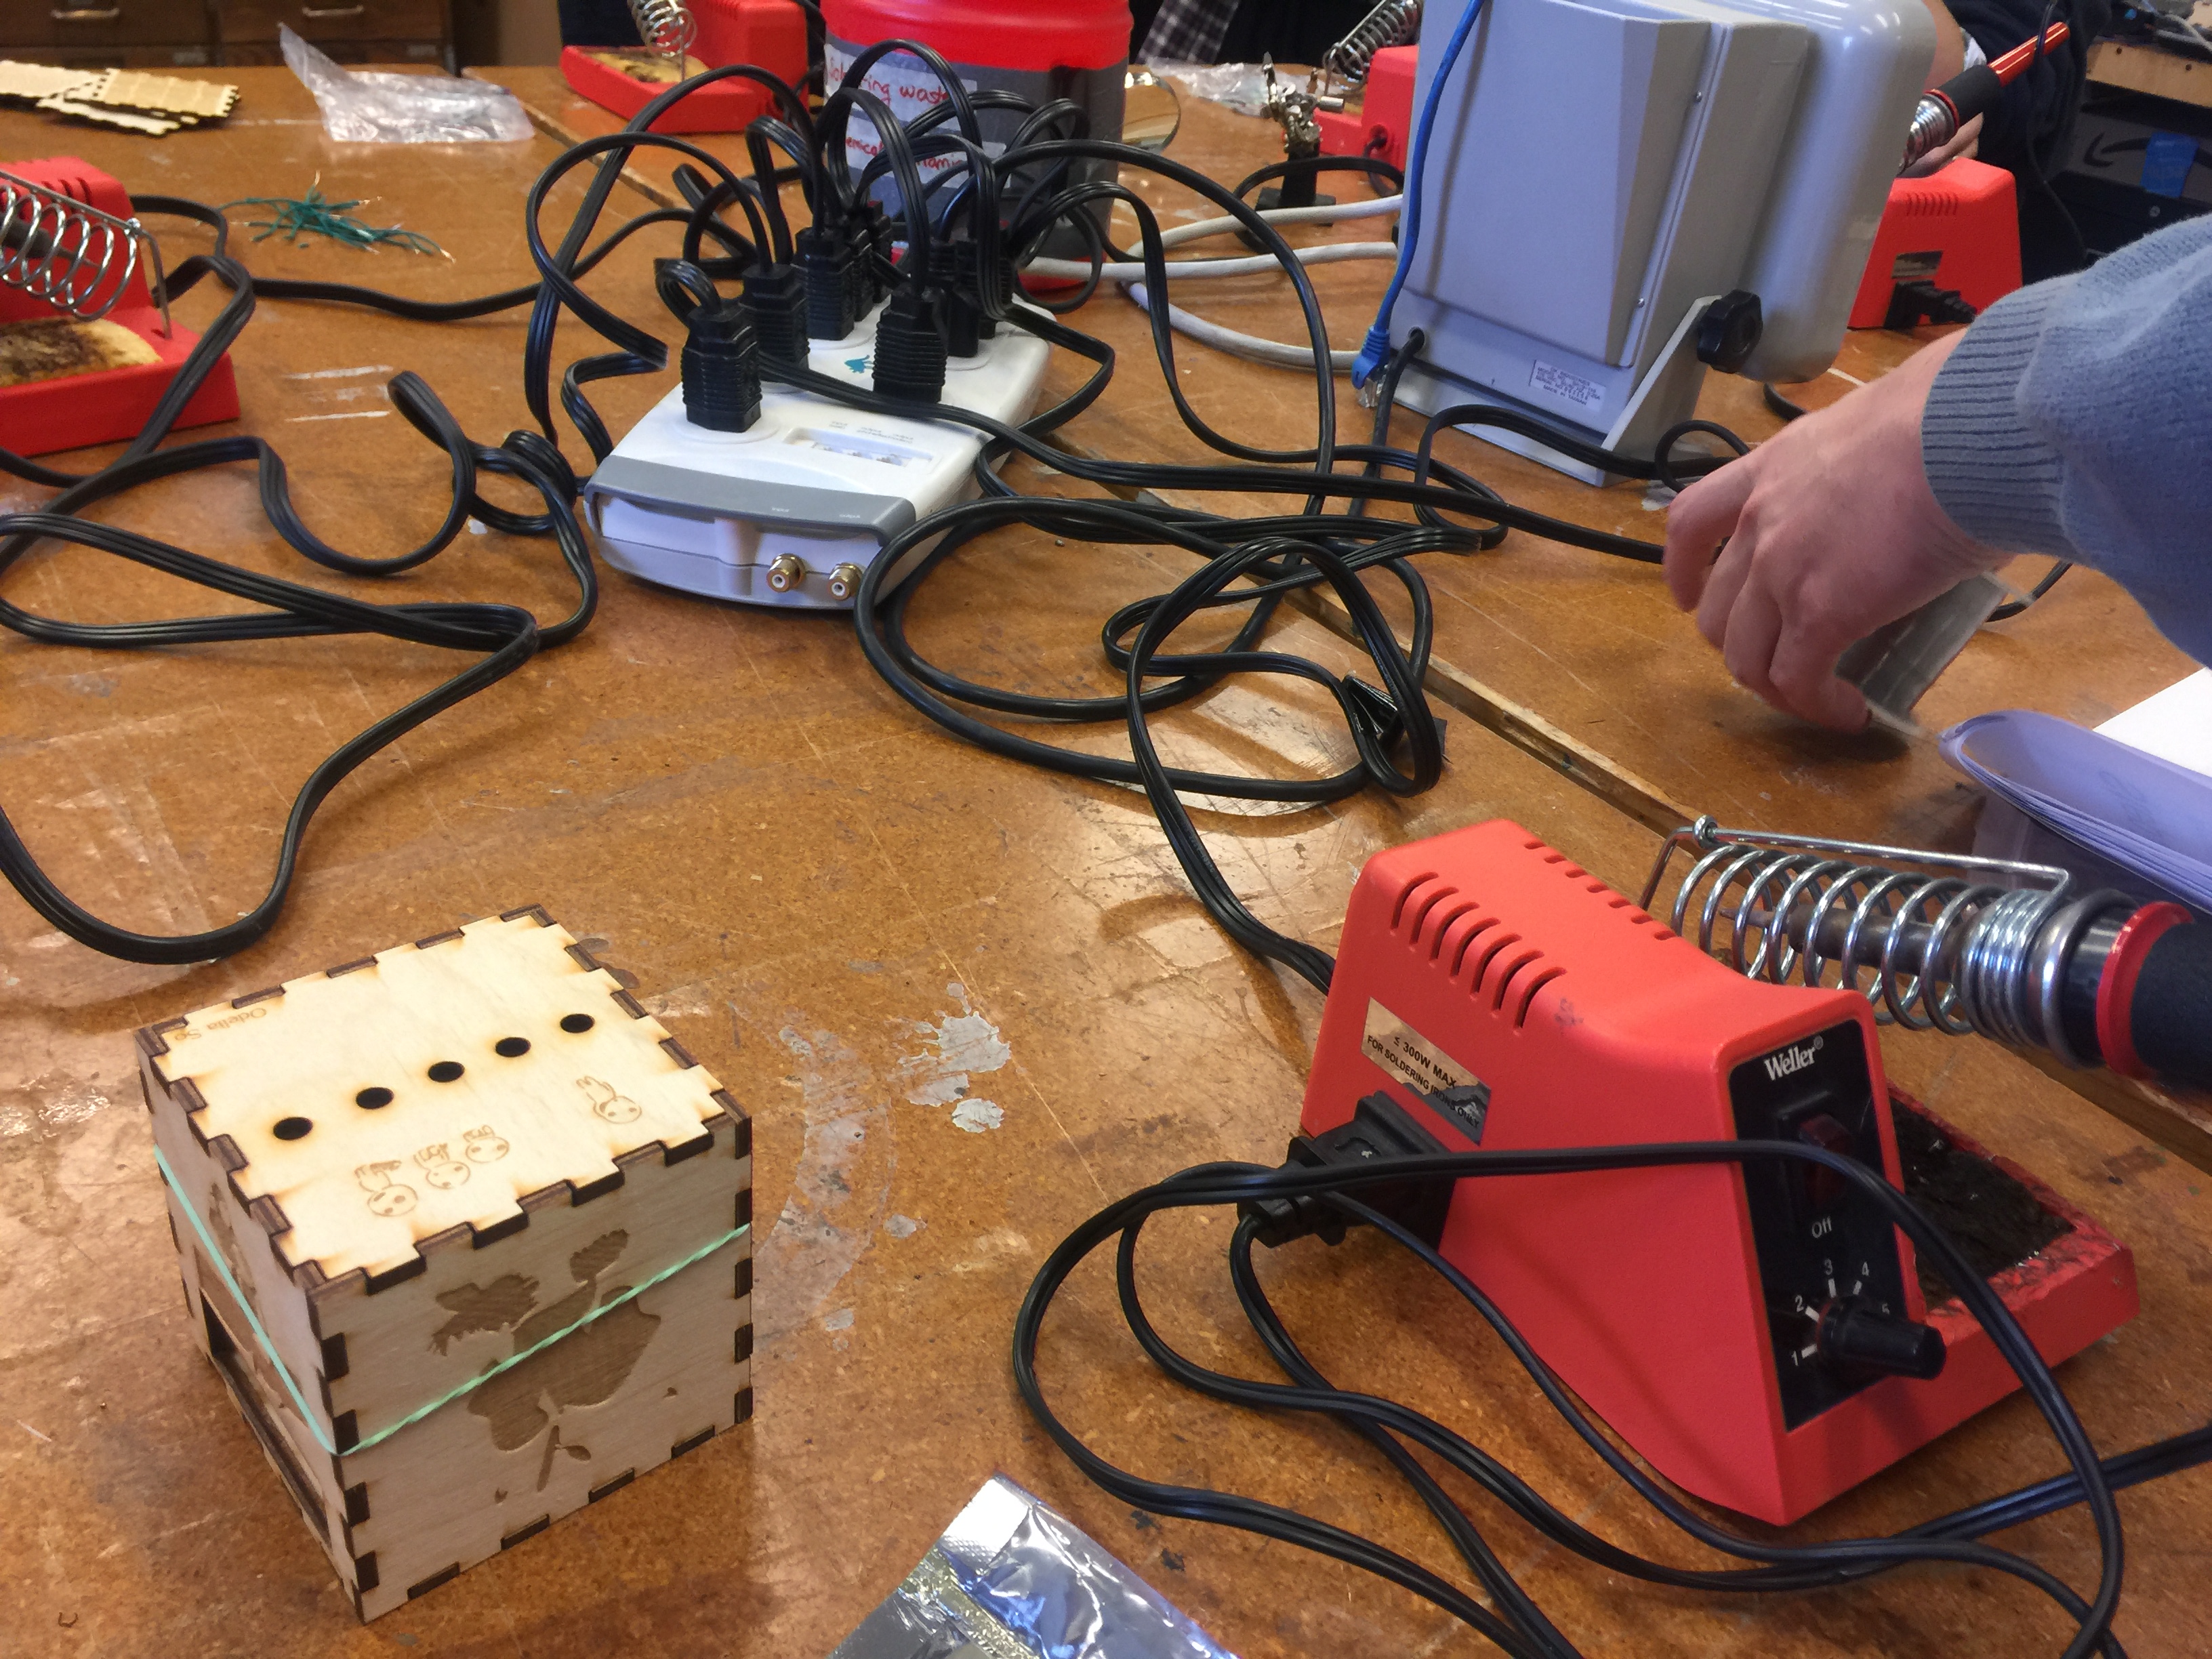
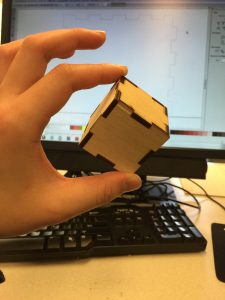
After brainstorming and putting together our ideal design, we started prototyping. In the first segment of our prototyping, we used cardboard cutouts for the head and body of the bot. Initially, we 3D printed the inner frame of the bot. However, due to the frame being too thin, it became warped when it cooled down from the printing. We foresaw that it could cause problems by being too fragile and inflexible and decided against using it for our final product.

Here is a video of us testing the product out:

Here are our slides:

MakerLab Droid

If the link above does not work:

https://docs.google.com/presentation/d/1isyvJkLPwCmRHM2kKYCwS3qcsUCf8dkUi7VeSK8skCI/edit?usp=sharing


e-Portfolio: Final Words

Expectations:

Coming into this class I did not any expectations on how this class would turn out. I was recommended this class by an upperclassmen friend who had previously taken this class before. When Professor Vishal started describing the class, I was taken aback on the project that we had to do for the class. I was certainly not expecting it and I had little confidence that I would even be able to create a product that would be plausible to use. I was expecting that this class would be a disaster for me. However, I did expect that I would learn more about designing and digital making.

Looking back, I must say that this class went above and beyond my expectations. This class taught me not only create something, but be a better thinker. This class definitely taught me how to design different products or solutions, as well as digital making. However, what really stroked a cord with me was how I improved in such a short period of time and that I was able to, by the end of the semester, successfully create a product that functionally worked and was plausible. I learned that most problems have solutions. If you just stopped to think, many problems could be solved. I also learned to always have confidence in your own abilities. In the beginning, I was scared and I really did not know if I could be successful in any way during my time in the class. But the class was set up so that if you fail at something, you still have multiple chances to get back up on your feet and try again.

What We Learned:

3D Printing

In the second week of the class, we started to learn how to 3D print. We used the open source software Cura, as well as open source websites to download blueprints of things we could print such as a Chip Bag Clip, a Phone Holder, and even a Selfie Stick. Personally, I printed a USB cord rack. I have so many cords around my room that it’s not only dangerous for me if I stepped on one, but it could also potentially damage the cord. This rack helps separate one cord from another and keeps the cords organized. We also learned to 3D Print through Autodesk Fusion 360.  To be totally honest, I had a hard time with Fusion 360, even now I still cannot fully understand and figure out how it works. However, I must admit that it becomes more user-friendly as one gets to understand the functions more and the program is quite effective. What I do admire about Fusion is its ability to help the user be more productive. It helps users create more complicated objects with different layers that would normally take hours on end to create in a normal CAD program at a faster pace with the same amount of quality. Finally, Autodesk, the company behind Fusion 360 offers this program, as well as many others, free to students for 3 years.

Design Thinking

In the third week, Design for America, an organization, came to talk about design thinking. Personally, I really loved the presentation and this 3rd week of class. It really gave me insight on how much design and innovation was used in our daily life for all types of products we used and how it was the beginning steps to a product. I also learned the important three steps in design thinking: inspiration, ideation, and implementation. During class, as a group, we had to design a type product centered around senior citizens in their day to day life. This was very memorable because we were able to go through these steps to make something that had potential to become reality.  Design thinking is taking an innovation or activity and changing it to fit human needs. In this day and age, a design must keep up with current technology.

Laser Cutting

During our time at the FabLab workshops, laser cutting was my favorite station. We learned first what laser cutting is: when a laser etches or cuts into the material to make a design or object. We also learned that laser cutting can be used to make boxes and almost anything. The box we are currently designing and making will be a box with 5 LED lights that will blink when the sensor which is attached to an Arduino is triggered. We used Inkscape, an open source software designed to make laser cutting easier. We then were given a “class”/tutorial on how to build a box through Inkscape. My box’s design (pictured below) uses pictures that are black and white in which the laser cutter etches onto wood.

Coding and Circuits

We also learned how to code for the Arduino during our workshops at the FabLab. Honestly, coding is not my strong point. Aside from some experience in JavaScript, C++, and MySQL, I was inexperienced with using Arduino. Business students do not normally have a lot of experience with coding or even hardware, but it was safe to say that the FabLab staff really helped us walk through the process of connecting the breadboard to the Arduino which incorporated code to enable our lights to blink. However, soldering was the most frustrating and difficult area for me. The whole process was stressful and having to be detailed and delicate with the wiring was not for me. By the end of the soldering session, I felt ready to give up and never touch soldering again. To add fuel to the fire, because of my twisting and turning of the wires, the connections constantly broke to a point in which some of the connections were unrepairable. Because of this turn of events, I was unable to successfully created the LED box that included the soldering of the lights and photoreceptors. Since I broke most of my connections toward the end of the class, I had no time to redo the soldering and was forced to create a prototype LED box with the breadbox and the Arduino. As much as I don’t like soldering, this skill is very important to have knowledge of and I learned about it through the FabLab

Project Managing

Lastly, I learned by the last three weeks on project management within the team. Our team was very busy from the get-go. We all had our own academics and extracurriculars to deal with aside from this class. So finding time to work on this project together definitely needed compromise and leadership. As a team, all three of us had to step up and manage not only the project, but also team members and ourselves. We had to keep each other accountable. Only by doing so did we manage to pull through and successfully complete this project. We also learned how to audit other teams and take constructive criticism and use it to better our project.

Conclusion:

All in all, this class was fun and exciting. It was a nice breather from my regular day-to-day class, and each week, I was looking forward to class and getting my hands “dirty” for my project or the assignment that week presented. Thank you so much for this opportunity. If I had to do this all over again, I would have done the same thing because this experience was priceless.

Week 12: Auditing our Design

This week, we took a break from actually working on our prototype, and stopped for some constructive criticism on it. Professor Vishal assigned each team to another team that was similar or used similar ideas/ materials in their project. The teams sat down with each and provided an overview of the current design, and how it was currently functioning. The team that was critiquing would ask about the design, the issues that needed to be resolved, and other questions as well.

Our team was evaluated by JJJ Inc. They realized that our design was very complex, and overall they didn’t have a lot of suggestions for us. They understood that our prototype was already on track. However, they did suggest we should keep our ultrasonic transducer would be better than a button because an ultrasonic transducer would be more interactive and impressive. Our team was also evaluated by Professor Vishal. Professor Vishal told our team to focus more on the internal hardware versus the outerwear. Although Taofik is the one managing and coding for our project, Professor Vishal pushed and encourage Tiffany and me to understand the terms and functions of each of the technical components within our droid/bot.

After the evaluations, we continued to work on our projects. Many of the suggestions that both parties pointed out were important and logical. Obviously, as a team we need to take these suggestions into consideration and figure out if we will use these suggestions.

Week 11: Moving Forward

This week was one of the biggest weeks in which results were finally tangible and felt like our project was actually leaping forward and taking shape. We went back to the FabLab to use what we learned during the workshops. Since this is our 2nd prototype, we used the laser cutting machine to create the two boxes (essentially these two boxes will become the body and head). The body was 120mm by 150mm by 120mm while the head was 135mm by 150mm by 120mm.

Within the body, we engraved a heart, with a hole in the middle that was for the camera, and a cut out a square so that the user can see the LED display. The head has two eyes for the ultrasonic transducer (possibly, still debating if we have enough time for it) as well as holes on the side of its head for the speakers.

There is definitely a lot of room to grow for our prototype. For example, the speaker holes could be shrunken by approximately 3 cm, and the depending on what kind of way we are going to start our droid, the eyes will also be extensively different. We approximated the area of each of these two parts and we’re planning to perfect the measurements as we continue further.

hile Tiffany and I were working on the specifics of the laser cutting, Taofik was programming the Rasberry Pi and connecting the breadboard and circuits to it.


As a Business major with not as much experience in coding or hardware, it truly is an advantage and positive to have someone that is an Engineering student on our team. One obstable we were presented with was that our 3D printed inside was warped because the layers were too thin, so not all pieces fit together perfectly. We are currently rethinking how we can prevent the warping from happening.

In the next couple week, we will need to know the specific measurements of every piece we have and finish are list of wanted utilities.

Week 9: Progress through Prototyping

This week our class split up into our individual project teams to start working on our initial sketches and/or first prototypes. If necessary, teams worked with CAD to design necessary parts to print.

Our team decided to create a bot and after multiple discussions and sessions of brainstorming, we wanted the bot to be used at MakerLab to record a person’s idea/story/feedback. The goal for our bot is for it to capture that as feedback for future improvement of the MakerLab and also for publication of these stories. Our bot will mostly likely be triggered by a push of a button (sensors if we have enough time) that will start a series of different actions that will enable it to serve its purpose. Our bot comes from several ideas, including the blab droid, as well as the TJBot.


Our team had already worked on initial sketches that were already quite detailed. We also already had the design needed for the parts that needed to be 3D printed (blueprints and design from the TJBot). So we were able to start printing out the inside parts for our prototype (possibly will be used in our future). We have already started looking for our needed parts and have acquired some of what we need (Raspberry Pi), LED display, camera, SD card for the Raspberry Pi. We do still need to figure out what type of materials we want for the outer structure of our bot.

Our team, this coming week will need to go to the FabLab to figure out the dimensions of our bot, as well as the how the laser cutting design will work out. Taofik has been playing around with the coding of the bot, while Tiffany and I have been figuring out the logistics of the design and how we’ll go through with the design (as well as the material needed).

I’ve learned this week that prototypes do not and should not be perfect. The more flaws and imperfections your prototypes have, the better it will be and have the potential to be better. Prototypes should continue to change and give the creator an opportunity to make a better product.

Week 8: Skill Set and Soldering

This week at the FabLab we wrapped up the workshop sessions. My team, the white team did soldering this week. Before this week’s workshop, I’ve seen my dad solder wires together to improve “circulation” of the wires, so I already felt like I did have some knowledge in this area. However, in truth, this week was my first week in getting hands-on experience with it.

Soldering station

To be totally honest, out of all three workshop stations, my favorite was the laser cutting station due to my overall familiarity with the concepts of the machine, as well as the usage of the software. This week’s station was probably the most frustrating and difficult area for me. The combination of needing nimble, yet sturdy fingers to twist the wires together, the potent smell of the metals melting together, as well as the fragile and easily breakable wires made the whole process mentally straining. The constant need to be mindful of the positive and negatives of the LED lights, as well as the much-needed patience really took a toll on my attitude towards soldering, and by the end, I felt ready to give up and never touch soldering again. To add fuel to the fire, because of my twisting and turning of the wires, the connections constantly broke to a point in which some of the connections were unrepairable. Because of this turn of events, I was unable to successfully created the LED box that included the soldering of the lights and photoreceptors. Since I broke most of my connections toward the end of the class, I had no time to redo the soldering and was forced to create a prototype LED box with the breadbox and the Arduino. As much as I don’t like soldering, this skill is very important to have knowledge of. Thanks to CUC FabLab, I am now able to solder wires together (even if I’m terrible at it).

In the end, no matter how must frustration or hatred I had for a specific “step,” the workshops that we learned from were definitely really helpful in our group projects and will help us start finalizing what process and skills are needed for the project. Furthermore, not only did we gain three new skill sets to use but also gained insight to our abilities in each skill. By analyzing these interactions, we were able to tell which part of building our future project prototypes was our strong point and which was our weak point. For me, it was obvious that designing and laser cutting was my strong suit, while soldering was hands-down my weak suit.


Week 7: Arduino and Lights

This week, I got back my laser cut box and I was so excited on how my design came out.
The design that was laser cut.

Furthermore, this week the white group was assigned to the main lab in order to learn how to program an Arduino board. This was my first time actually seeing a computer board up close and I was definitely quite surprised by how it looked. Personally, I thought that it seemed quite fragile and easily breakable. However, it was quite sturdy and it could hold quite a bit of force. Along with the Arduino board, the following things were included: The Arduino packet FabLab provided.

Using the package, we connected power and ground to the board by connecting pins. By doing so it helps “power” and enables the user to correctly use the Arduino board. For example, we connected the pins and linked power and ground together so that later on we could “power” and enable the LED lights to blink and turn on. One of the steps to put together the blinking LED lights.

After assembling all the parts of the hardware, we had to “assemble” the software together and make the LED light blink by coding on the Arduino software. Here is one of the activities that we did:

The Arduino code in which sends a SOS through Morse Code.

This example was coded so that the LED lights would emit a Morse Code for
“SOS.” After coding for the LED lights, we had to add sensors. Personally, the sensor was the hardest part of building the hardware. Because the breadboard was so tiny, it was hard to find empty rows and columns to use for the sensor. However, with some help, I was successfully able to make the LED lights blink when I waved my hand over it. After completing and successfully doing so I felt such a sense of pride because, through my first attempt, I was able to successfully complete such a feat.The completed assembly for the workshop.

This week will be very applicable for our group project. Our group project is going to be a feedback droid in which there will be sensors, so learning how to connect the breadboard to the Arduino board through the pins. The coding as well using the Arduino software was very informative and will help us in the coding for our droid. I am excited to be using such new skills in my future group project. Next week, the white team will be soldering so that the LED lights will fit into the box well.

Week 6: Fabulous FabLab

This week, we finally visited the FabLab. After Jeff Ginger, the director at the CUC FabLab came to talk about the facility, I was definitely hyped and excited to personally see where all the magic happens.

Firstly, we got a tour around FabLab and got to see the different “sections” of creation happened whether it be textiles, growing material (image below), laser cutting, or using soft circuits.

After our tour around the facility, we were separated into three groups, one for laser cutting, one for soldering, and one for coding. I was assigned with several other classmates to the upstairs lab and got to learn more about laser cutting. We learned first what laser cutting is: when a laser etches or cuts into the material to make a design or object.

IMG_6732 (time-lapse of the laser cutter at work)

We also learned that laser cutting can be used to make boxes (shown below). The box we are currently designing and making will be a box with 5 LED lights that will blink when the sensor which is attached to an Arduino is triggered.

We used Inkscape, an open source software designed to make laser cutting easier. We then were given a “class”/tutorial on how to build a box through Inkscape. My box’s design (pictured below) uses pictures that are black and white in which the laser cutter etches onto wood.

We will start coding the Arduino and installing the LED lights in later weeks. While reflecting, I understand now that that laser cutting objects are just as important as learning to 3D print. While both create something, in the end, 3D printing builds something, while laser cutting cuts the material. I realized that laser cutting can be even more time efficient than 3D printing. For example, if you want to make a box, 3D printing could possibly take hours, but laser cutting a box probably take 30 minutes or less. By knowing how to create and make objects through laser printing, our team can determine whether 3D printing or laser cutting should be used to make the project more efficient.


Week 5: Brainstorming with Passion

This week we began to brainstorm for our semester projects. We started the class by splitting into our groups and began coming up with different possibilities and outcomes to solve problems. Our group used a top-down approach in which we started with a big picture and broke the problem down into smaller pieces. Firstly, we picked out what our target audience would be (students, mainly high school and college). Then, we analyzed what type of problems that students faced (bullying, time management, stress, mental health, etc.). Using such categories we analyzed what the underlining cause of these problems was and what were some common and generic ways to fix them. Through that, we came up with some complex products that we might want to design for such issues. Our innovative products were not quite tangible and definitely too hard to build at our current level. Personally, I believe that our ideas were too broad and too complex. I believe that going forward, our team needs to pinpoint a SPECIFIC and simple problem. We need to keep in mind that though it would be amazing to solve BIG problems, we are not here to solve the world’s problem, but just a little bit of our lives.

After all the groups (using approximately 20-30 minutes) finished their brainstorming, we came up with “How can we” statements that formulate a problem so that it could be tangibly solved in the future. We went back to the lab to present our ideas to the rest of our classmates. Then after all the groups presented, one person from each group was randomly chosen to critic another group’s ideas and give them suggestions. Olivia listened to our pitch about time management and a possible design and gave us several suggestions to make it better and more plausible. The presentation, as well as critiques, were very helpful because our group did have some trouble forming tangible and plausible ideas so listening and seeing other groups kind of gave us a better idea of how we should think.

Recently I read a Forbes article and I started to ask myself questions such as, “Will our design really solve a problem?” or “Will people ACTUALLY buy this product?” or even “Am I really passionate about this problem?” These questions really hit home because honestly, some of the problems that aroused were not things that I was really passionate about and I was quite hesitant about using some of the problems. Furthermore, I realized that the indecisiveness of not minding what type of project we would do really took a toll on what our possible outcome or ideas were.

I never realized how difficult it was to come up with tangible and plausible ideas were. This class has definitely been pushing me to be a better version of myself, starting with becoming less indifferent with what type of project we should do.

Week 4: Fusion 360

This week in class, Jeff Smith, a speaker from Autodesk introduced and showed us how to use Fushon 360. Fusion 360 is one of the more powerful CAD programs out there that enables users to be innovative. To be totally honest, I had a hard time with Fusion 360, even now I still cannot fully understand and figure out how it works. However, I must admit that it becomes more user-friendly as one gets to understand the functions more and the program is quite effective. What I do admire about Fusion is its ability to help the user be more productive. It helps users create more complicated objects with different layers that would normally take hours on end to create in a normal CAD program at a faster pace with the same amount of quality. Finally, Autodesk, the company behind Fusion 360 offers this program, as well as many others, free to students for 3 years.

Personally, I still have so much to learn within Fusion 360, but as someone that has had previous background in design software such as Photoshop and InDesign, I must say that I am very surprised and have great respect for this program no matter how frustrated I get with it. Jeff really dove in and taught us the full potential of Fusion 360 and each function has a blurb that loosely summarizes each functions’ capabilities and actions. I think that applications like Fusion 360 really pave the way for people to understand that design is something that anybody can come up with and that anybody can make their own objects. For the students in this class, Fusion 360 will eventually assist us in designing our concept and plausible ideas for our projects.

This object/figure would have taken a longer time in a normal CAD to shape.

Another speaker we had was Dot Silverman. Due to time, Dot could not really go into depth about her topic on biohacking, but we did learn about the basics of biohacking, a “do-it-yourself” type of biology. She introduced fungi product design in which products such as sturdy chairs were made out of fungi and were environmentally friendly.