Takeaways from a Semester of Making

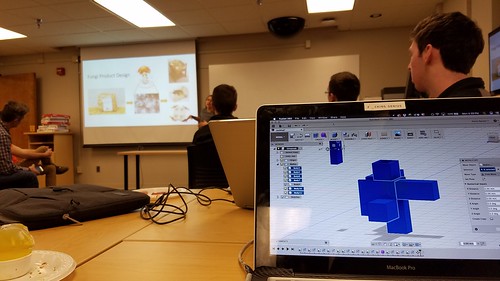
This semester I had the privilege of absorbing all that the Digital Making Seminar had to offer. Whether it was working with laser cutters in the Fab Lab or tinkering with Fusion 360 in the Armory, this class gave me unprecedented exposure to the making process.

Expectations Before the Course

Heading into this semester, I was under the impression that the content of this course would strictly deal with 3D printing and the technology associated with it. In that regard, our class had countless opportunities to explore Cura, TinkerCAD, and Fusion 360, among a few others. What I was not expecting – and something that I was pleasantly surprised about – was that we also gained insight into numerous making techniques. In other words, while I believed the class was going to delve a deep into one certain aspect of the Making Revolution, in reality it actually spanned a multitude of types, and some that I had never even heard of prior to the course.

I believe that I, as well as the rest of the class, benefitted more from this sort of kitchen sink approach since every week we were constantly learning something new and different from the week prior. Relating this observation to our final semester projects, having the ability to draw from a wide spectrum of making techniques allowed each group to develop incredibly unique products. Some groups utilized the programming aspects (such as with Arduino Unos and Raspberry Pis) while others incorporated the more manual techniques we learned, like laser cutting and soldering wires. Through this process, I learned that I greatly enjoy the constant learning. Also crucial to my enjoyment of the class was the fact that it was composed of not just College of Business students, but rather a conglomeration of engineering majors, art and design majors, business majors, and entrepreneurs in general. For me, I found this to be very beneficial. While the majority of times I struggled in the ideation part of the process in terms of devising practical and applicable products, students with more creative minds were able to fill the knowledge void. Similarly, if at times I struggled with certain technologies, the majority of the engineering majors in the class had previous coding, programming, or making experience and were more than willing in helping me to succeed.

3 Main Takeaways

1)The Maker Movement is for Real

Before beginning this class I had an inaccurate understanding of the Maker Movement. I thought it was still in its infancy, and I had no idea it was on the immense scale that it currently is. The applications it has on modern society are truly incredible, and I look forward to following its growth over the long-term future.

2) 3D Scanning and Printing

3D Printing has exploded and an exponential rate, and the possibilities it has, from at-home printing to construction, are limited only by one’s imagination. For example, just over the duration of this semester, 3D printing has been used to build homes in Russia, as well as the building turbines for GE. In the case of the house in Russia, it was 3D printed in under 24 hours, at a cost of only $10,000. Although some houses have had 3D printed parts printed remotely and then brought to the construction site, this house was built completely on-site, using a mobile printer. The GE turbine, on the other hand, is able to withstand higher temperatures and pressure than current market offerings. These are just two examples of the immense potential that 3D printing presents.

3) An Introduction to the Design Process

This semester definitely opened my eyes to the design process. From the ideating stage to rapid prototyping to receiving user feedback, our team learned a great deal about how to design a product, from beginning to end. I personally found the ideation stage to be the most difficult, as I struggled to devise creative yet applicable and practical solutions to everyday problems that we encounter. Overall, this class was a great introduction to the skills and technology used by makers around the world, and I look forward to cultivating this interest after college.


Digital Making Reflection

Before the class started this semester, I expected to learn 3D printing and work in a team with students from different interdisciplinary fields. Initially, I also thought that the course would be more technical; however, the course instead focuses more on design thinking and problem solving. The more technical offerings were found in the workshops we took at the Champaign-Urbana Fab Lab along with the AutoDesk Fusion 360 demonstration. Throughout the semester, I learned more about working in a team and more about the 3D printing terms and industry.

Here are the top things I learned through taking the course:

  1. Design Thinking is Key – Coming up with a great idea takes inspiration and hard work. How can we statements are helpful guidelines during the ideation phase. Try to find a problem that consumers are facing and create a prototype using that.
  2. Make Lots of Prototypes – There’s always a way you can improve on your product, so keep making prototypes. Test out new materials or new designs until the produce no longer runs into issues.
  3. Feedback is important – Receiving feedback from people on your designs is a crucial process throughout all phases. With constructive criticism, you can make adjustment to your designs and work on more ways to improve them. Learning how to provide feedback to others is also a great skill to have.
  4. Working with teams – In any jobs, you’ll be put in teams to tackle projects. Being a team player is a bulk of the work, be engaged during meetings to move the project forward and give constructive criticism. It’s also important to listen to the opinions of team members.  
  5. Technical Skills – Every time I use the 3D printer, I am still mind blown. I am greatly to have dabbled in soldering, coding, Fusion 360, and other software. I definitely want to explore deeper into the software and skills I have acquired from the workshops.
  6. The Future is 3D Printing & Innovation – the potential of 3D printing is limitless. They are already being implemented in various field: tech, medicine, and fashion. It’s especially great to see the technology being used children to stimulate their problem solving skills and education. The same could be said for minorities and developing communities, where 3D printing is used to improve quality of life and educate.

It’s sad to know that the class has ended, but I will continue to utilize the skills and things I have learned in this course and apply them to future projects and in my career. I highly recommend other students to take this course and become a part of the Maker movement. Stop by and visit the Maker Lab or Fab Lab on campus!

BCC Creations – Door Sitter: Our Experience in Making

Our journey of creating the Door Sitter was challenging yet intuitive. Though the three of us in BCC Creations were not engineers, we had used our resources, research and knowledge to create an efficient product.


Prior to choosing to create the Door Sitter we went through a couple of ideas in our brainstorming process. We had first started out with identifying problems that were occurring in our own lives or to those around us. Vishal had stressed on using the Design Thinking Method which was a problem-solving process that allowed us to build up ideas with no limitations. Our first idea was based on our teammate, Carter’s experience with the recreational facilities on the U of I campus. He had noticed how many of the sporting balls were not at the correct PSI and having a decide to test it rather than manually doing it would be efficient. Thus, we decided to create a product to regulate a sporting balls PSI and pumping the ball to the correct amount. However, the more in-depth we got and furthered our research we realized that the product itself would be very complex and the pricing of it may not be suitable for the target consumers. Furthermore, we thought the product would worsen the problem and reduce the efficiency and we wanted to create a product that would be beneficial for more consumers.

Our next idea had helped lead us to our final idea, a Chores Alert System. We thought it would be useful to those in the dorms with roommates, they would be alerted through a text whenever a chore needed to be accomplished. Though we all liked the idea we had continued brainstorming for more possibilities which led us to the Door Sitter. All three of us lived in apartments and had the realization that when we left during school breaks we had no way of checking for breaking and entering which had happened to many of our friends. So we came up with the idea of creating an affordable yet efficient alarm for an apartment that would be able to detect an intruder and sent a text message to the roommates of the apartment.

Making


Once we finished brainstorming and settled on our problem to solve, it was time to determine how we were going to solve that problem, and how we could actually make that solution work.  Fortunately for us, we had the MakerLab and Fab Lab at our disposal, not only for the physical components but also their expertise.  

We knew that we wanted to 3D Print the housing for the system since we were familiar with the MakerLab, knew we could have multiple iterations, and the general low cost of 3D Printing.  Before we could start designing the housing, we had to know what physical components our alarm system would need to function.  Only after we settled on the technologies and hardware we were using could we design the housing.

Hardware

IMG_1514

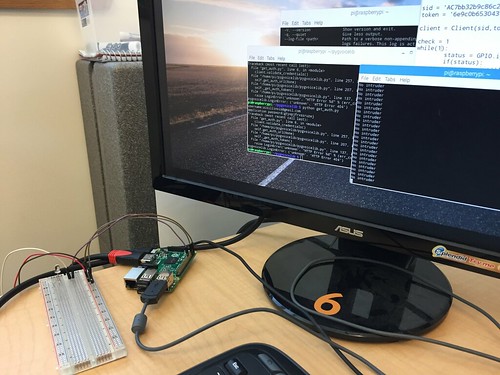
Initially, we planned on using an Arduino since we had used one and had experience programming it from our Blinker Boxes during our time at the Fab Lab.  We thought we could use an Arduino with a bluetooth module to send notifications, but later decided to use a Raspberry Pi with Kootek Wifi adapter from the Maker Lab.  To detect motion, we used an ultrasonic sensor from the Fab Lab.  This allowed us to detect motion within a specific range that we were able to physically adjust to about 10 feet at a 120 degree angle.  We also picked up male to female jumper wires to connect the Raspberry Pi, sensor, and breadboard together.  We powered the device through mini-USB rather than a battery, and ultimately decided against the piezo sound buzzer.  To interact with the Raspberry Pi, we used a keyboard, mouse, and monitor from the MakerLab.

Software
2r7wkes

Once we acquired all the hardware for the security system, it was time to make the system actually work.  We first had to load an operating system (Raspberrian) onto the device so that we could put in the Python code.  We were fortunate to have Charlene’s friend lend us his technical skills with the programming.  We used Twilio as a service to send the text message notifications to our phones when triggered by the motion sensor.  To design the housing, we initially started using Fusion 360 since we had used it for the tutorial homework and our in class workshop with Jeff Smith, but we instead used Tinkercad for its simplicity.  Although it is a relatively simple program, Tinkercad provided all the functionalities we needed, with far less complication.  

The entire “making” process flowed very well.  As the software was being programmed, we were simultaneously physically putting the hardware together.  Once we knew how much space the hardware was taking up, we were able to design, print, and refine the housing.  The MakerLab provided a great meeting place to work on the project together in addition to supplying the Arduino, wifi adapter, keyboard, monitor, power cord, and mouse.  The Fab Lab was also a great outlet to receive advice from and supply us with the sensor, breadboard, and jumper wires.

Feedback & Testing

Given that security product solution is heavily user dependent, receiving feedback and testing the security “door sitter” was vital to allowing us to make adjustments to make the product function properly. The initial tests we ran ourselves focused on getting the device to accurately function as we created it. Functions such as the sensor detecting motion, ensuring the programmed Python sent the text message to a phone, and even connecting to wifi internet connection were processes that were refined by our testing. The range at which our ultra motion sensor detects motion was one capability we spent hours adjusting on our product. The ultra motion sensor has the capability to detect motion for a  120 degree 30 feet radius. We ultimately adjusted the sensor to only detect within 8-10 feet after much consideration about how our product is practically used. Since our the product is meant to run perpendicular with the entryway of a door,  we did not want it to trigger a false alarm from movement far away. Taking  practical considerations such as false alarms, how the product is used, and what makes most sense for the user were our primary goals when testing the security door sitter.

Furthermore, we tested the door sitter ourselves, collaborating with class members, and finally our team member Brian had his roommates test the door sitter within their daily routine. The feedback we received focused on two aspects of the door sitter. Firstly, where to install the product was something that was not intuitive to users outside of our team. It was not necessarily clear what location to velcro the door sitter box worked best. Another point that was brought up with the door sitter sensor location, was “what if a user has pets such as cats in the apartment? Would that trigger false alarms? “.  We resolved this issue by creating an installation instruction manual, that would be given with the product for users who purchase the door sitter. The instructions tell the owner to use the provided velcro to put the door sitter on a wall perpendicular of the entry way that the user wants to be detected. It also has recommendations such as to install it high above if a user has pets.

Secondly, our classmates suggested that a user could easily forget to arm the door sitter before leaving there room / apartment.  Our product is currently armed by simply plugging in the power cord. As in once a user wants their residence to be monitored they simply plug in the power, and after a 1 minute delay there motion sensor is monitoring the entry way. Although we could not figure out a low cost way to arm and disarm the door sitter remotely in the event that a user forgot to power it on, we did create a notification system that texts a user to let them know the system is on. This way a user can know based on their message history that the security system is armed, and the text message becomes a part of their daily routine


The feedback we received was generally positive, in that the Door Sitter was helpful in providing peace of mind and information regarding college students area of residence. Most importantly the critical feedback we received was beneficial, because it led to us improving our product by making it seamlessly fit into a user’s life.

Final Product

Our final product The Door Sitter, provides a solution to the need for low cost residential security. The Door Sitter is a personalized sensor set up by door(s) or window(s) to an apartment/house. When the Door Sitter is armed, it functions as an alert security system by immediately notifying resident (s) if and when there is someone that has entered  the interior of a home.  The Door Sitter notifies resident(s) when motion is detected via SMS  text message, so that they are aware of what is happening within their residence and can alert authorities if need be,The customized 3D printing housing unit and instructions makes the Door SItter easy to set up with velcro, and more importantly keeps users mobily connected to the security of their home by knowing if and when someone has entered. Our product effectively monitors and notifies users of activity in a home. The immediate information the Door Sitter provides, gives users peace of mind knowing that they do not have to worry about a break in when they are away from their residence. Furthermore  if there is a residential break in,  with the alert system residents now have the information to be able to respond. Door Sitter can solve a need in that college students and property owners,  have  the ability to respond to a residential break with a low cost option for a security system.

Certainly, the BCC team learned quite a bit this semester in terms of the capabilities and process of solving a need through 3D printing,  While we are satisfied with the progress we made in creating our own effective product that can help solve an everyday need, we also know that the product is far from perfect in terms of taking it to market. Do to the cost we did not pursue the potential of adding a camera to the Door Sitter. We do think finding a low budget camera to add to the exterior of the housing unit, would be useful in allowing a user to know not just that there is someone in their residence but who. Finally the actual cost of our product is a factor that we need to analyze more if we wanted our product to be on the market. The door Sitter costs roughly $50-$60 per unit with the all of the components. The feedback we received from our presentation suggested that even if we sold the Door Sitter at cost for $50-$60, that price tag still is  a bit expensive for our target market of a college student. In our research we found that most in home door monitors are high tech and range from $120-$250. So while the Door Sitter would be a low cost option in comparison to what most security systems entail, we may want to pursue alternative components in collaboration with Jeff Ginger at the Fab Lab to make our product less expensive given our target market.

Overall our team BCC creations, made a product that solves a need with the Door Sitter. We worked over several  project ideas, learned new softwares such as Fusion 360,   and went through many iterations of the  design making process to create a solution. Using 3D printing and the Maker / Fab Lab to create a functioning and tangible final product,  was beneficial in providing our team hands on experience of the capabilities of this technology and the  maker movement.


Looking Back

Looking back at this semester and thinking about everything that I have learned is incredible. This class has introduced me to things I was unfamiliar with. It gave me the skills to be able to go about an idea in serveral different ways.

I thought back to some of the speakers that made an impact on what I learned. Even on the first week, when we had two speakers. The video call from John Horlick kicked off the semester. He had written a book on how 3D printing was really becoming more and more prevalent in business and our everyday life. This opened my eyes to Digital Making. I realized that things were constantly changing in how things were being made, but I did not realize how much of an impact innovation was actually making. Even though this presentation was mainly on 3D printing, I felt like it spoke for more than 3D printing. It showed that there is always a better or smarter way to do something. There are also many ways to achieve that goal and I believe that is what Digital Making entailed.

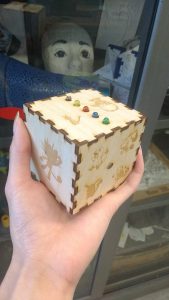
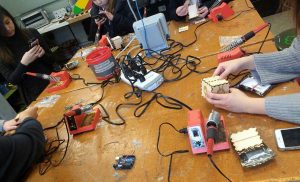
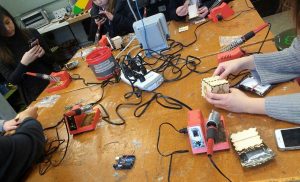
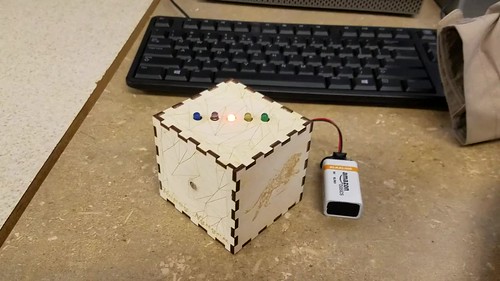
Most of everything I learned in this class, I had not been exposed to before. Something that was really foreign to me was coding aurduinos. I never thought I would mess with that. I had understood some of the code because I had dealt with coding before, but it had only been solely on the computer. I had never used a breadboard before. It was also awesome to see a product come together after our few weeks of class spent at the Fab Lab. Not only did we code Arduinos, but we lasercut wood boxes and soldered wires together. This was great experience that helped prepare us and our teams create and develop a product of our own for our final product.

Throughout the entire semester, I felt like each class taught us the skills to tackle a problem or accomplish a task that we would encounter as we did our final project. The guidelines of the final project were for you to create a project that solves a problem.

When I decided to take this class, I was hoping to get a better understanding of using different softwares. I took this class because I really liked the work I did in the lab and I wanted to be able to do more. I only had one class freshman year that I was taught a CAD software, Creo Parametric 3.0. Other than that, the only time I have had experience with other softwares was when I would help out with workshops at the MakerLab. I wanted to be able to learn them well enough to create things of my own.

I feel like that expectation I had about the class was met. I was taught various softwares through a workshop type environment in class. That helped with figuring out where to start and what to look at to finish a design. Then I had to apply those skills I learned to the final project. It really tested me on how well I knew how to use them. I used Tinkercad for most of anything I did with the final project including the team logo. I was able to do it from my laptop in my free time. When I was looking at a folder I created on TInkercad and photos of designs I had sent my partners, I could see how my skill had improved throughout the semester. When I started, I did the basic shapes and a lot of things were uneven and had odd proportions. As I practiced, I was able to fix those problems and create more complex things. It was frustrating at points, but I was able to get my designs to how I wanted them to be.

This class opened my eyes to many things.  I was able to explore different ways of making I had never done before. I also, went through the product design process that made me explore every aspect of a design even if it is identifying what you can do yourself and when to seek outside help. In this class, I learned what I wanted to learn and more.

A Semester of Creativity


Having the pleasure of fully immersing myself into the MakerLab this semester with the BADM 395: Digital Making Things class, I can now confidently say that 3D printing has the potential to uproot the basics of how we use and purchase products. The ability to think about something, and then model it on some softwares and then print a physical piece within a few hours means that there are endless possibilities when it comes to what one can create.

Coming into the class, I had no idea what to expect, but I knew that it would be unlike any other class I have previously taken on campus. The knowledge and skills that I have accumulated within the short 16 weeks will last for years to come. I believe that this has been one of the most enjoyable classes I have taken and I would like to thank Vishal for that.

The journey that the class has taken me on started with Design Thinking, specifically human-centered design thinking, where one starts with a problem, a need, for a product and develop it that way. This allows for consistent user feedback and to give the product a purpose rather than being a potential paperweight. Design for America, a student organization on campus, held a design workshop to allow the students to visualize this new idea in action.

Screen Shot 2017-04-02 at 10.58.45 PM

The next step in the course was the introduction to 3D modeling softwares and websites that would be useful for us. This included Fusion 360, Cura and TinkerCad. This process was very crucial as it allowed my team to be able to manipulate our object in a virtual 3D space and it has very advanced skills that gave it a bit of a learning curve but I was soon able to master it.

20170213_163924

The FabLab portion of the class taught me more skills that I had anticipated. From soldering to laser cutting, to coding Arduino, these skills are immensely useful, not only for this course but any future project that could require some fine tuning. This portion we made a press box that had an Arduino inside of it with LEDs and a light sensor to trigger specific lights at different light intensities. This was a really interesting and cool way for us to know and become familiar with the tools and services offered at the FabLab.

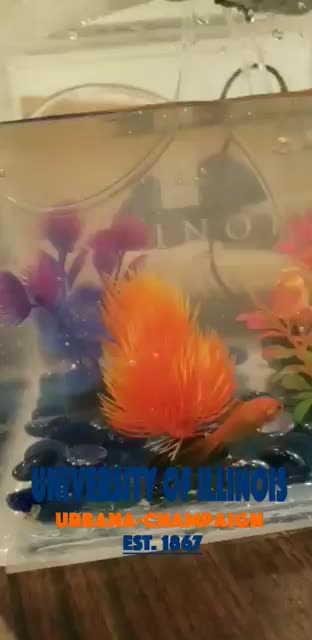
The final portion of the semester was centered around the ability to create our project with the tools and materials that we have had at our disposal for the past few weeks. This was the most time consuming and challenging part but most rewarding as well. The idea we were tackling was to create an aquaponics system for a college student to be able to have plants and a pet. The challenge was big as we were trying to emulate nature within a confined system. We encountered many roadblocks, such as failed prints, delays in shipping for acrylic and leakages. However, with my team’s hard work and determination, we were able to overcome the obstacles and build a product we were proud of.

Looking back at the beginning of the semester, I had no idea I would be learning so much, and at the same time being so hands on and developing a working product within 16 short weeks. I believe that my expectations of this class were supremely surpassed. It was different because of the way the class as laid out, it allowed us to learn at a gradual rate all the resources at our disposal and how to fully benefit from them. I learned that I was able to tackle problems as they come and being able to be flexible and having a backup plan is crucial. I learned how important it is to constantly change and adapt, whether its designs in a product or user feedback on functionality. Being able to adapt and change with any issues gave me an edge to think on my feet. I learned a lot about softwares, tools, machines and facilities, all of which I will continue to refine for years to come, in my professional life as well as personal endeavors. If anyone that is reading this and is teetering on whether to take this course or anything similar, do it, it breaks conventional classroom politics and provides a fun and creative atmosphere where students different backgrounds can interact with each other. If you have any questions or concerns, don’t hesitate to contact me at khnguyn2@illinois.edu.

Product Testing

We are at a time in the semester where everything is coming to an end. This is also a time where everything on our product is coming together. Throughout the semester we have developed a product through rapid prototyping. Now we have reached the point of product testing. This will help teams figure out what they need to fix to either make their product better or appeal to more consumers.

It has been a journey for my team to get to where we are now. Last week, we had a small prototype of our product. It was functional. As we held it in our hands, we realized what we could improve. We thought we needed a bar at the front of the device to keep it from letting the sliding mechanism from sliding out. We also thought the sliding mechanism could be longer. Besides the improvements we were able to notice as a group, we met with other groups to get their feedback. This was very helpful to get their feedback. Since others teams are going through the same process of developing a product, they have helpful insight. One team told us that they felt some of the sides need to be made thicker. If we increase the sides then we are less likely to have weak points in our design. Other than those comments, the teams liked our design and that we were going to use the Flex material to the sliding mechanism.

After getting that feedback, my team and I went to work on making changes to our design. We essentially made everything thicker. We also added a bar to the edge of the base. This is to prevent the sliding mechanism from sliding off. In order to make this adjustment we had to make the sliding mechanism into 2 parts. The handle on the sliding mechanism is separate from the entire mechanism. We will just need to glue those two parts together. I thought this would be fine because the handle does not need to be very strong since it does not come into direct contact with the door.

These adjustments got us closer to our final design. Although since we did make more adjustments, it did set us back on properly testing our product. We should be able to put our print on again to have it printed in the flex material. Then we will be able to do proper testing!

Idea Coming Toegether

My team and I had a lot of things to get done this past week. We did learn a lot from asking other people what they thought of our design and implementing those thoughts into our design. Although this did put us more towards the beginning of the design development process. Needless to say we had a lot to accomplish.

Our time in class was dedicated to working on our product. My team and I talked about our feedback from others and were able to come to an agreement and create our design on Tinkercad. We came about this by deciding what parts of our product needed to be finalized before we moved onto the next part. Instead of worrying about the material design and testing all at once, we decided one thing at a time. We thought we needed to at least finalize a design.

We had gone through a lot of designs. Our final design will be attached to the side of the door and have the ability to slide out to ajar the door and then slide back in and then let the door close. SInce it will be positioned horizontally on the door we do not have to worry about it moving around too much without the user moving it. Also, the moving part will have a handle to make it easy to move the device in and out.

Now that we had finalized we put it on the printer to see if the dementions were correct. In the time our product was printing, we discussed on what materials we think would work best for our product. Our main concern was trying to find a material that would hold up to a door slam. We needed something to absorb the shock a little bit. We thought the base part that is attached to the door could be made out of PLA since it does not come in direct contact with the door. For the sliding part, we think using the material Flex will be the best because we can print it thick and it has some give to it.

We did do trials in class. We wanted to see if the prototype we printed in class would hold up to the door in the MakerLab. Sadly, the door won after a few trials. But we intend to increase the size and density of our product and use the correct materials for the real trials!

Seeking Advice

Last week, my team and I still had a lot to decide. After the previous week of completely changing our product idea, we had a lot of ground to make up. We were basically starting from scratch. We still did not have a clear product idea and wanted advice on where to go. So our goal by the end of class on Monday was to make a plan. We decided on a design. Our design was to have on piece that had a notched design attached to the door. Then we would have a moveable part that moved in the notched part to slide out to ajar the door and slide back in when you would want to door to close. We were unsure on what materials to choose, but we were thinking of using thick metal and coving it in a rubber resin.

The next day we went over to the Fab Lab seeking advice. When we got there we showed them our plan. We went back and forth on what would work and what would not work. We decided that using metal was not the way to go. It in the end would be very expensive and we would probably have more luck with either wood or plastic. The problem we might have with wood is that we might put out more effort and time than necessary. They suggested that we us CAD software to try different variations and we could always print it and see how or design works. Going to the Fab Lab was very helpful because we had a better idea of where to go with our design!

Now we have to figure out exactly what we are going to do. We have thought of two designs so far that we have run through this past week. One design was like the original slide out the side of the door. Another design we had was to have something we could slide a bendable material to ajar the door from the top. These ideas are similar, but go about ajaring the door from different sides of the door. Currently we have not decided on which design we will choose, but hopefully by class on Monday we have made that decision. I think it is better that we have thought of different options to go about solving our problem instead and drawing a blank. This is a process we are consistently going through.

[Final Project: Maker Lab Bot] But First, Map it Out

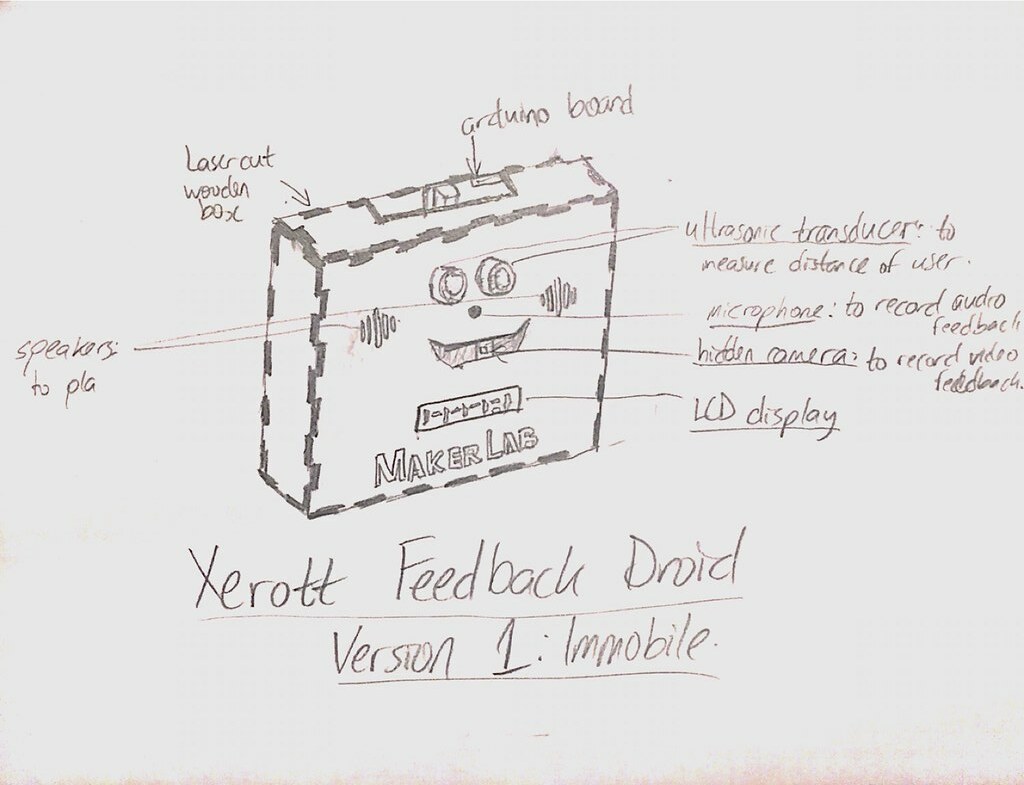
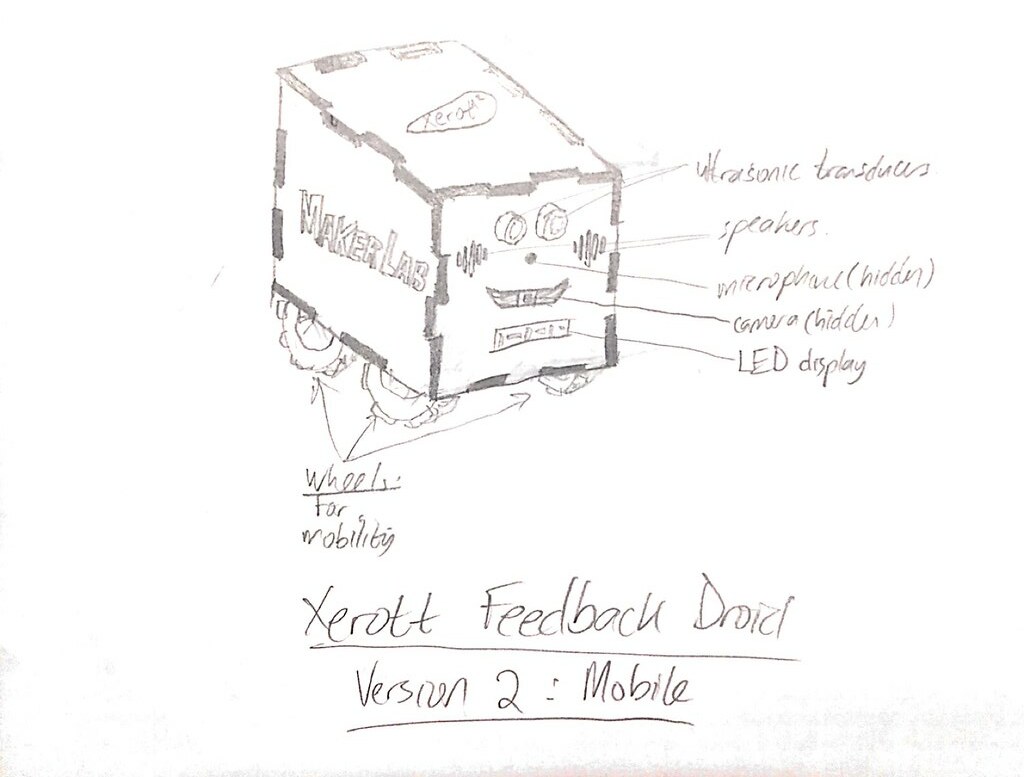
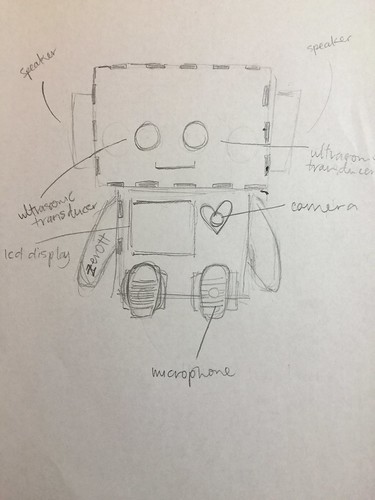
This week in class we returned to the Maker Lab and continued to work on our final projects with our teammates. We, Team Zerott, have decided on creating a small, friendly-looking Maker Lab bot that records people’s ideas and stories or any feedback they have for the lab. The bot will also have the ability to sense when someone gets close to greet the person. The video/audio recorded by the Maker Lab bot will be saved to an SD card/USB which could help in keeping a record of the things that are going on in the lab as well as collecting data for future use.

To start the prototyping process, we first made a few sketches on how we wanted the bot to look like. The inspiration for our bot came from both the BlabDroid and TJBot.

Super adorable BlabDroid

cbcdd83a20394a03ac88711a2d5960b4

One of the earlier sketches

2a8e1dfb46c64d28a5fcaca6d2607556

IMG_6990

Most recent sketch

After making these rough sketches, we discussed how each component of the bot should be made and who should be responsible for what. To run the code for the entire system, we’ve decided to use a program similar to Arduino called Raspberry Pi. Holding that would be a 3D printed body with plywood board covering the entire outer portion of the bot and finally, 3D printed arms and legs.

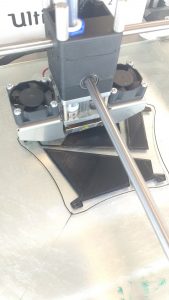
During this session, we were able to jumpstart on 3D printing the part that holds the Raspberry Pi. With the help of TJBot’s open downloadable files on Github and instructions on Instructables, we were able to successfully print out the inner portion of the bot.

Our next step will be to start on the laser cutting of the outside portion of the bot as well as the coding. I am happy about our progress so far and cannot wait to continue working on this project!

Making Adjustments

Last week team Supra went in with a trash compacting idea and have completely changed the whole idea. As we were approaching the prototyping stage of our product we had a lot to consider. Does our product solve the problem? Does it appeal to the consumer? Is it still low cost?

My team and I faced a few problems. We did not feel like our product had much of a need since we had redesigned it. So we needed to start over with our design of the trash compactor. We thought from the perspective to get maximum compaction. We modeled it after the Big Belly trash can you can see around campus. The design would have the look of the Big Belly so that you could throw trash in the top side to the trash can. Then the top would have a board with a weight attached that could be released to compact the trash in the can. Then the weight/board would be connected to a leaver arm that could crank it back to the top of the trash can. After thinking of this complex design we asked the question “Why would people actually need this in their household?” There is really no need for “maximum compaction” in a household trash can. We found ourselves overcompensating to fix some problems in our design and under compensating in some parts of our design. This created a massive problem for us. We thought it was best to revisit different product ideas.

We went back to our original idea list. One idea intrigued us. We wanted to create an improved version of a door stop. We find the conventional door stops that have already been designed faulty. They never really hold the door open and are hard to maneuver. So we plan on developing a door stop that you can attach to the door a few inches above the door handle. It will have a sliding function that will allow you to have it hold the door open when it is slid out and then slid in to allow the door to close. We are still in the beginning stage of figuring out how we are going to attach it to the door and what material we will use. I was originally thinking thinking plastic so it would be cheap, but I am afraid a hard slam might break it. So then I thought about using metal so it is more sturdy, but I think a thick rubber material might actually be the best. We still have a lot to figure out, but we are making a lot of progress!