Digital Making Reflection

Before the class started this semester, I expected to learn 3D printing and work in a team with students from different interdisciplinary fields. Initially, I also thought that the course would be more technical; however, the course instead focuses more on design thinking and problem solving. The more technical offerings were found in the workshops we took at the Champaign-Urbana Fab Lab along with the AutoDesk Fusion 360 demonstration. Throughout the semester, I learned more about working in a team and more about the 3D printing terms and industry.

Here are the top things I learned through taking the course:

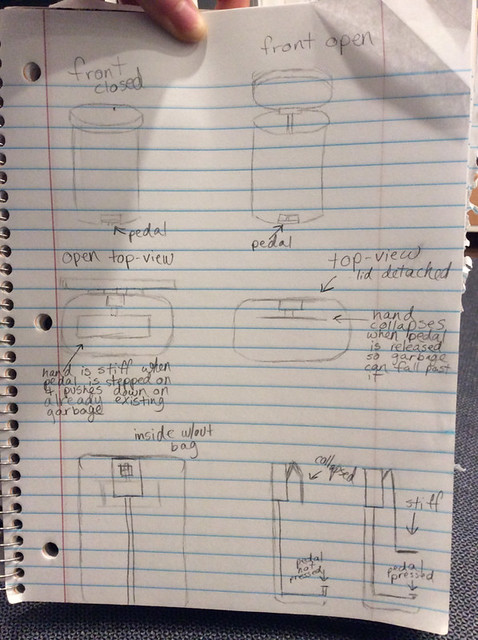
  1. Design Thinking is Key – Coming up with a great idea takes inspiration and hard work. How can we statements are helpful guidelines during the ideation phase. Try to find a problem that consumers are facing and create a prototype using that.
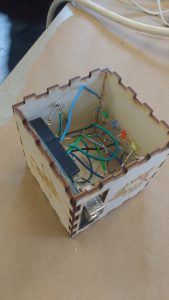
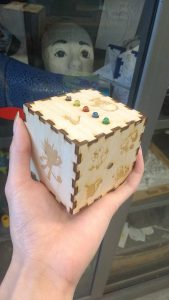
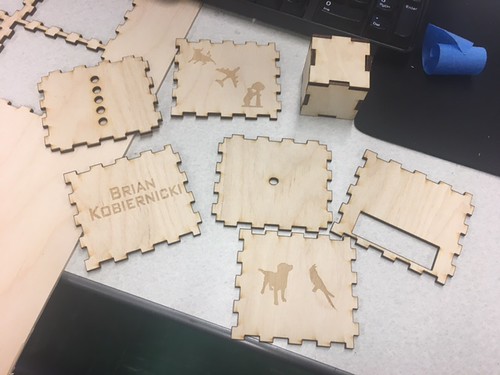
  2. Make Lots of Prototypes – There’s always a way you can improve on your product, so keep making prototypes. Test out new materials or new designs until the produce no longer runs into issues.
  3. Feedback is important – Receiving feedback from people on your designs is a crucial process throughout all phases. With constructive criticism, you can make adjustment to your designs and work on more ways to improve them. Learning how to provide feedback to others is also a great skill to have.
  4. Working with teams – In any jobs, you’ll be put in teams to tackle projects. Being a team player is a bulk of the work, be engaged during meetings to move the project forward and give constructive criticism. It’s also important to listen to the opinions of team members.  
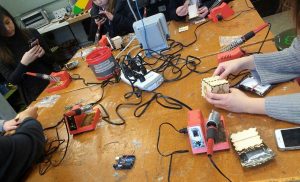
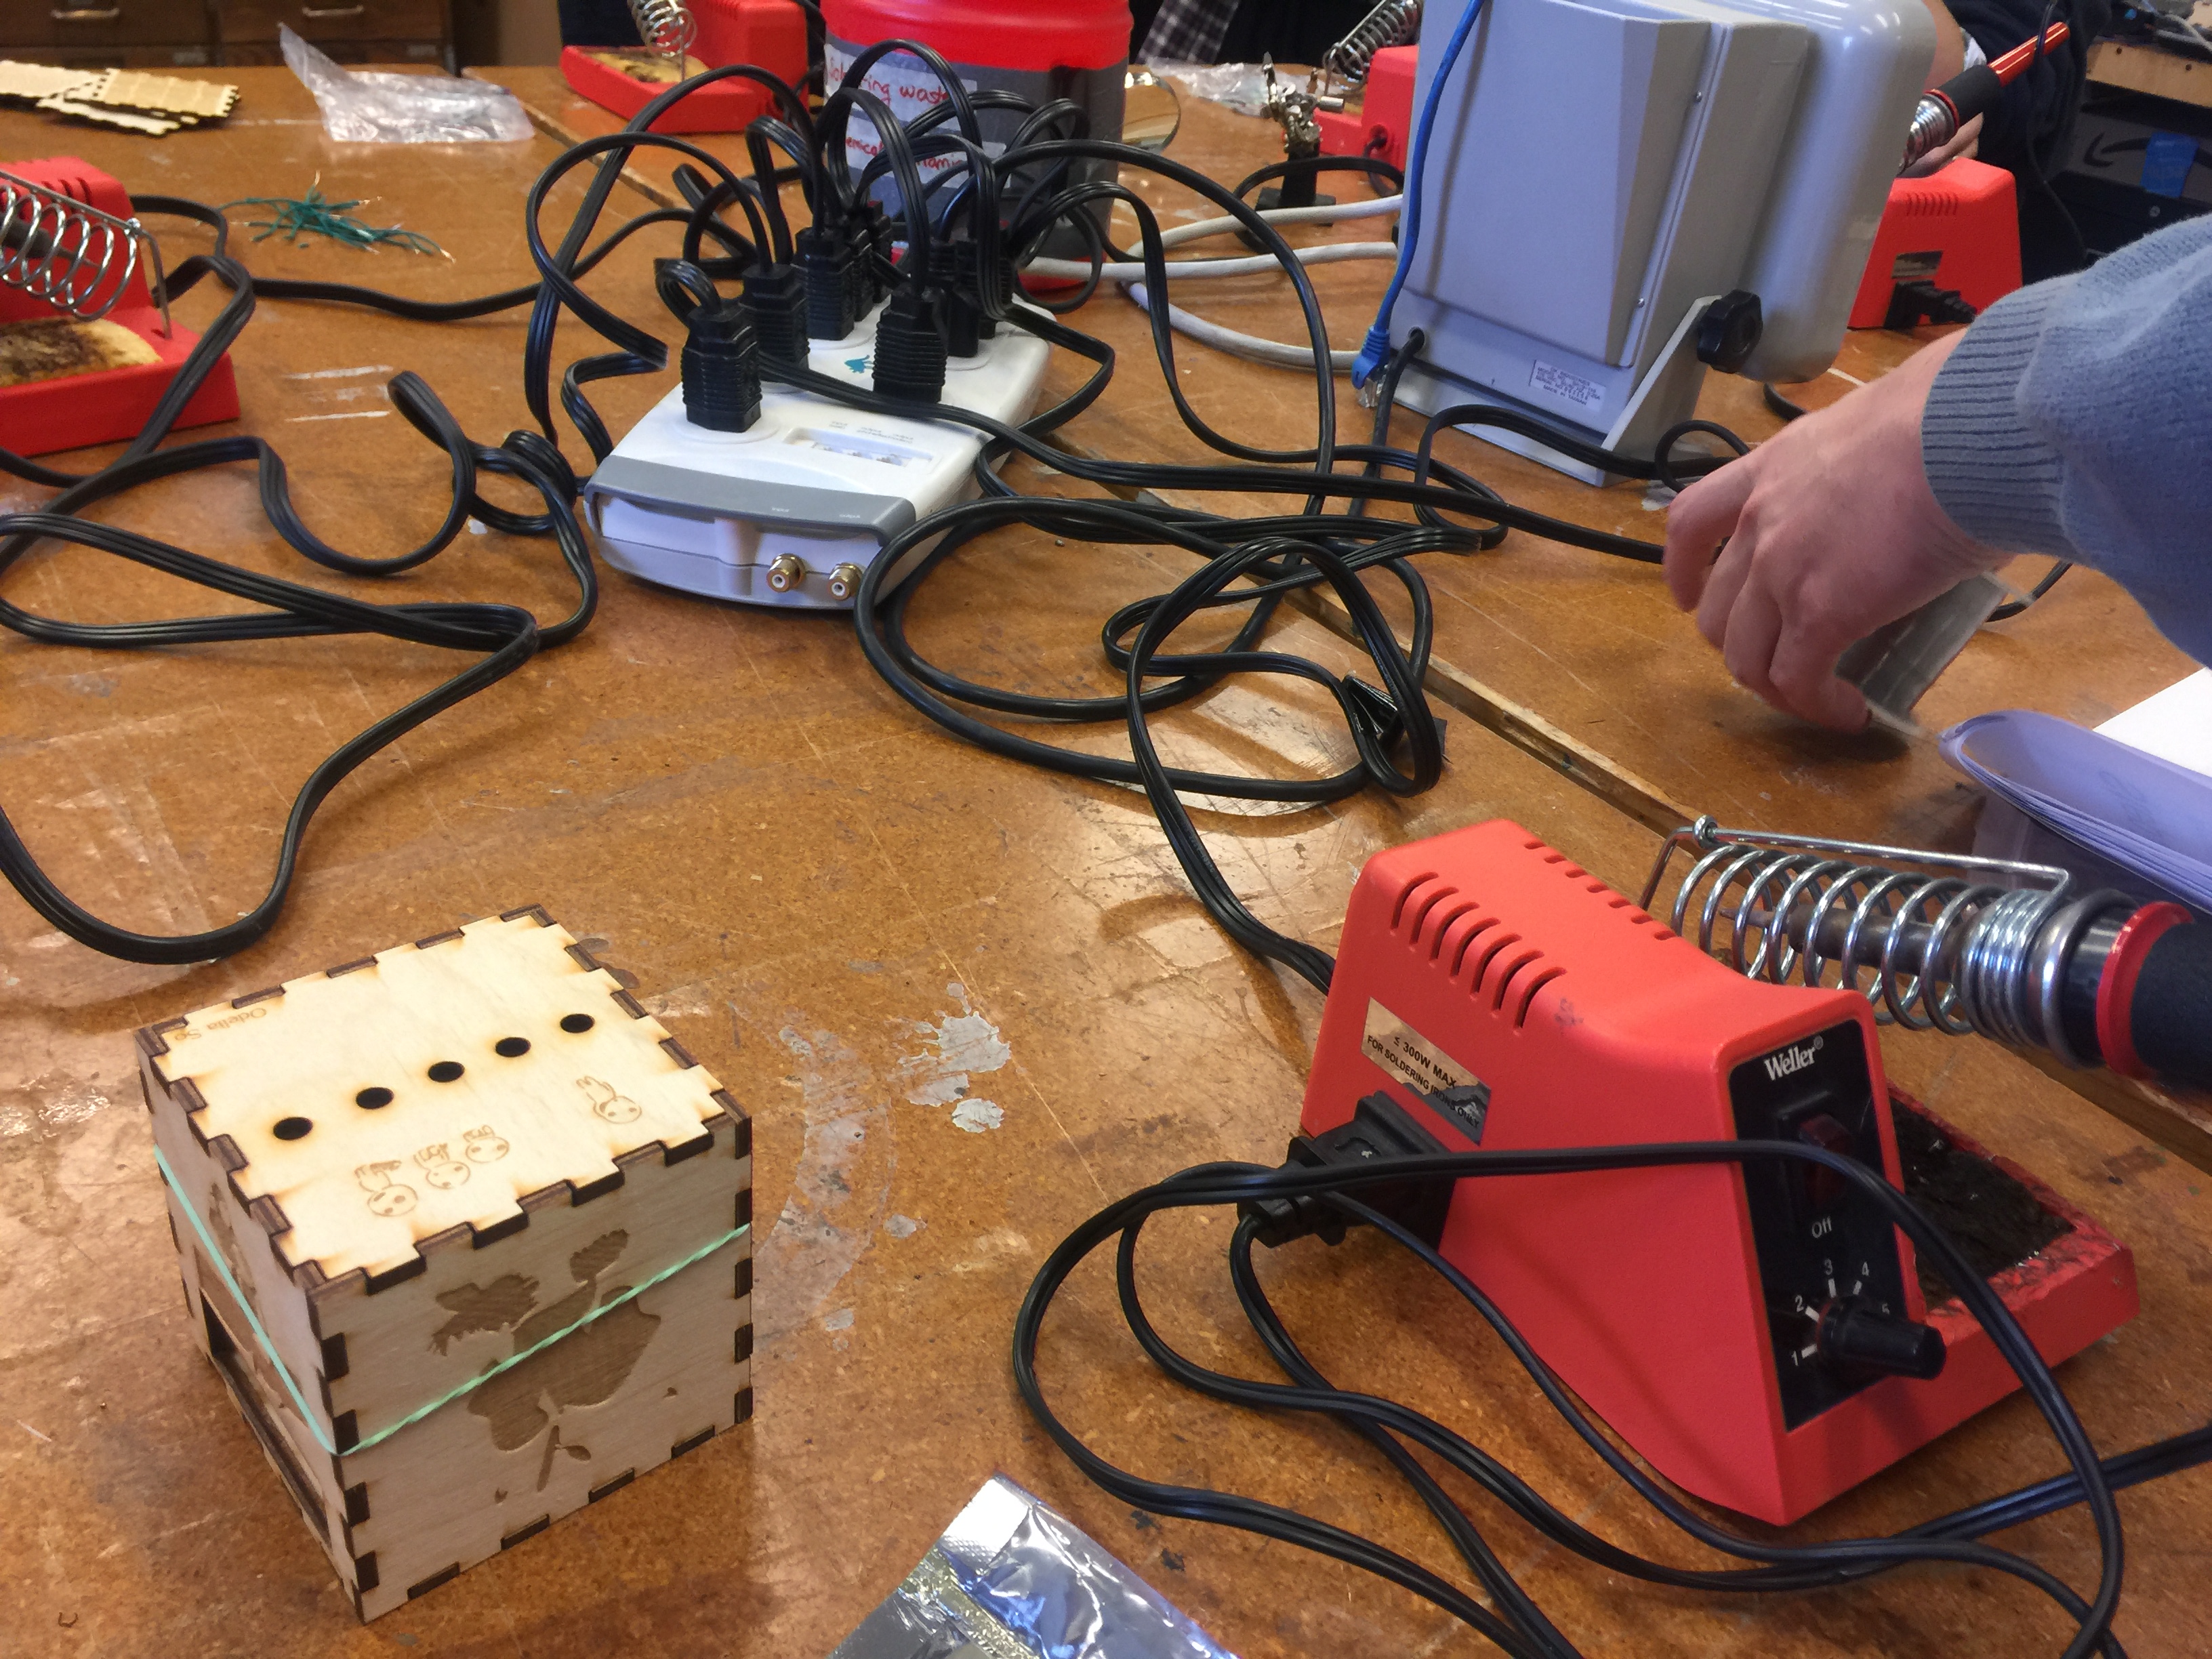
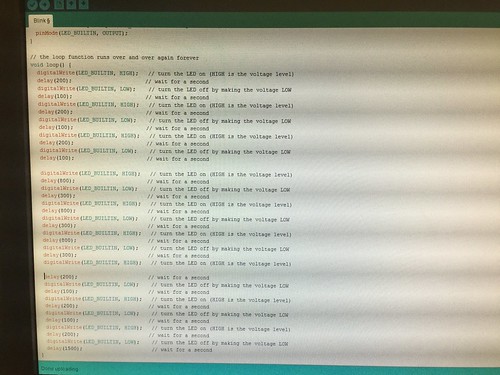
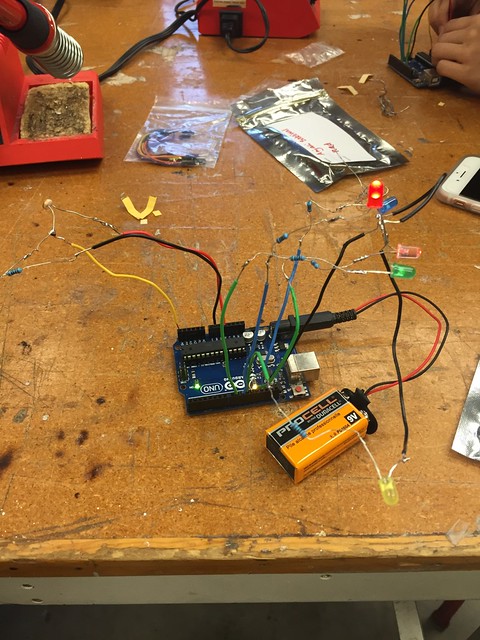
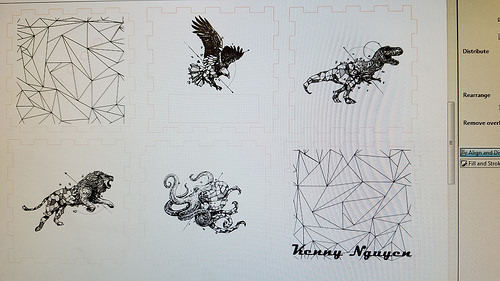
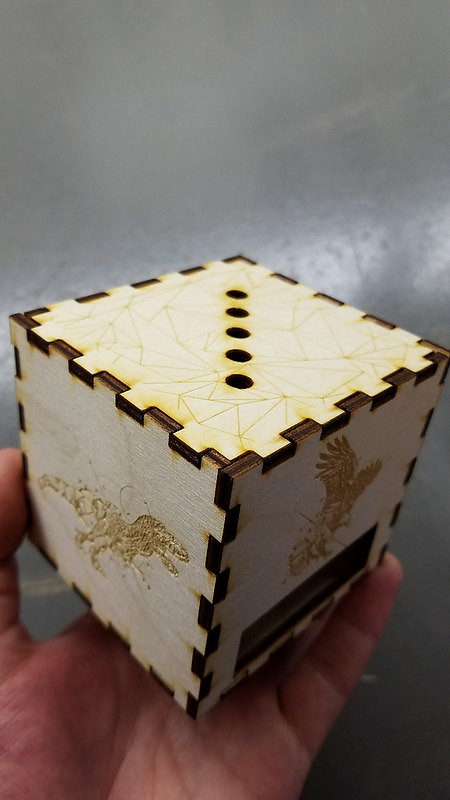
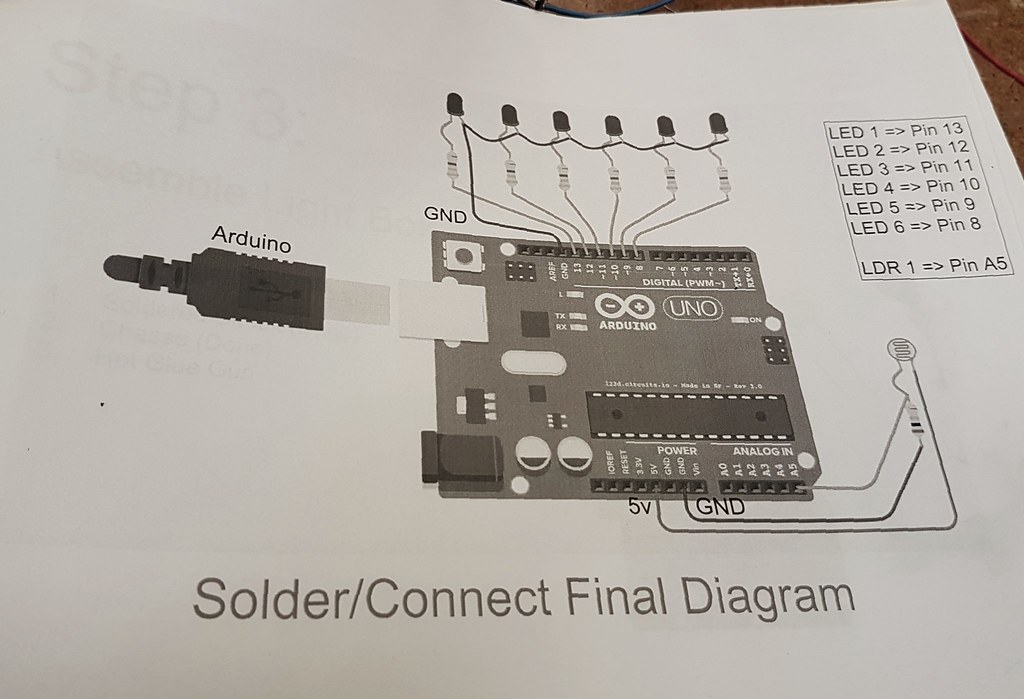
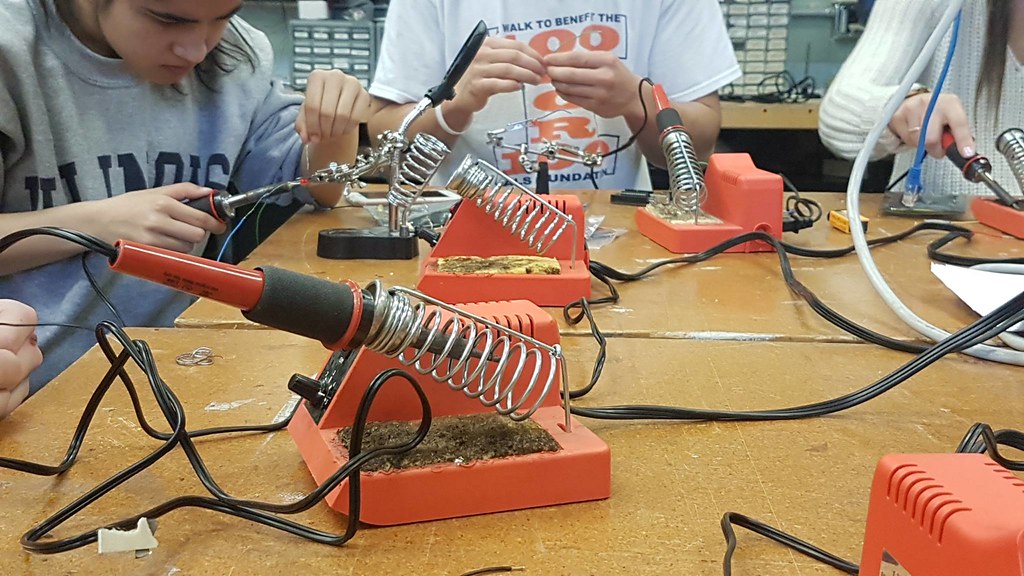
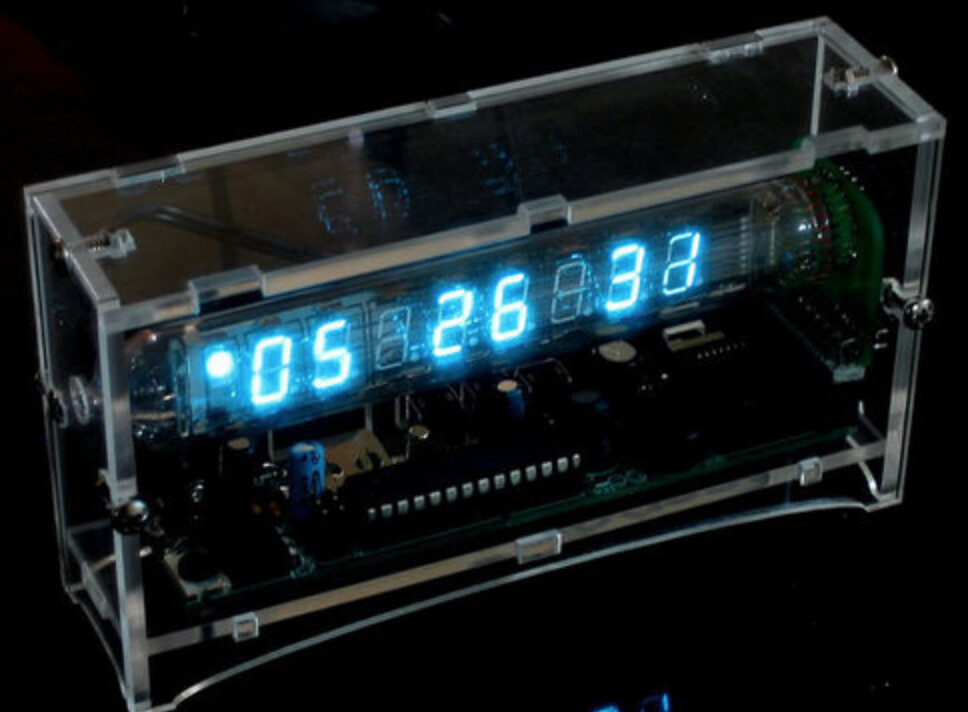
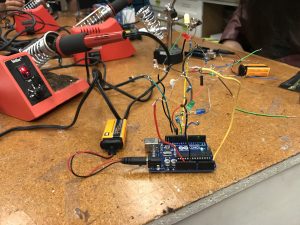
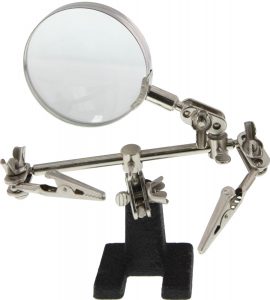
  5. Technical Skills – Every time I use the 3D printer, I am still mind blown. I am greatly to have dabbled in soldering, coding, Fusion 360, and other software. I definitely want to explore deeper into the software and skills I have acquired from the workshops.
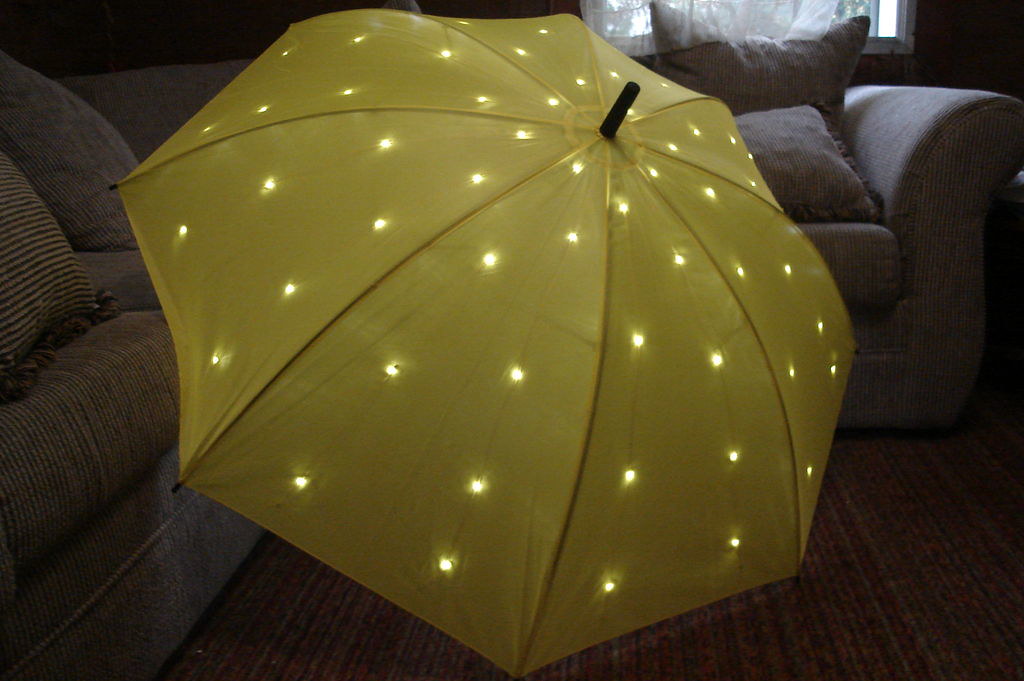
  6. The Future is 3D Printing & Innovation – the potential of 3D printing is limitless. They are already being implemented in various field: tech, medicine, and fashion. It’s especially great to see the technology being used children to stimulate their problem solving skills and education. The same could be said for minorities and developing communities, where 3D printing is used to improve quality of life and educate.

It’s sad to know that the class has ended, but I will continue to utilize the skills and things I have learned in this course and apply them to future projects and in my career. I highly recommend other students to take this course and become a part of the Maker movement. Stop by and visit the Maker Lab or Fab Lab on campus!

A Reflection Of My Digital Making Experience

My learning experience throughout this course had gone beyond my expectations. Though we only had class once a week the Digital Making Seminar had impacted my thinking process and brought in a different perspective of the world. Now, I would like to describe my journey and the various learnings and knowledge I had picked up on the way.

The first two weeks were more of introductory classes, allowing all the students to have a better understanding of what we would be delving into. We immediately were given the hands on experience to create our own 3D printed object after given a quick tutorial. I had learned about various sites and chose to use Tinkercad to print out an Illinois keychain. During the class we learned about the large amount of resources (ex. FabLab) available on campus for making and creating.


During the third week of class, Vishal had brought in UIUC’s Design For America. I really enjoyed their presentation because it truly helped my group, BCC Creations get our creative juices flowing. I realized how naturally creative the human kind is, it is easy for anyone to have the ability to design products or services through the design thinking process in order to meet a consumers demand. The group had taught us through a hands-on activity to create a prototype that would benefit our customer group: senior citizens. We had brainstormed various products that would allow a senior citizen to be more at ease.

Our fourth week we met with Jeff Smith from Autodesk who was teaching us about Fusion 360, the software allowed designers to design products or services from what used to many hours to only a couple of minute. Each of the tools in Fusion 360 were incredibly powerful unlike other softwares. With the step-by-step tutorial given by Jeff, I was able to create my own version of a perfume bottle I had through Fusion 360 after the session,


By the fifth week of class I had learned about different websites and softwares that could be used for designing, now I was excited to see how this could be incorporated to my final project. We met with our groups to brainstorm needs people have on the daily and create “how can we” statements. Furthermore, we had to make sure the statements were broad enough to solve the need and we weren’t delving into finding the perfect product for the need.

Week six, seven and eight we were at the FabLab working on creating a blinky box through three steps: Inkscape/laser cutting, soldering, and coding, My group started out with learning how to use Inkscape, we were given a template of the press fit box, we learned to change the settings for the laser cutting and added designs to our boxes. Once our designs were done we laser cut them, it was an interesting experience and the laser cutter had to be carefully monitored. The next week I learned how to make the lights blink on the hardware through coding. It was an incredible experience and a great learning process for me as my core classes don’t touch computer science coding or work with hardware pieces. In the final class we learned how to solder, it was a new experience for me and I learned how soldering melted filler metal onto metal joined objects by creating an established thin layer. Overall, I had a strong understanding of how everything came together to create the box and learned how all the components could be used, which would come in handy for my final project.


During weeks nine, ten, eleven and twelve we focused on our project, we went through prototyping, researching, improvements, auditing and making final adjustments. Once we decided on creating our “cheap” alarm system we began the prototyping process. We researched on the components needed for the hardware as well as the software side. Then we drew up a diagram so we had a clear understanding of how the hardware would look, what the software would need to accomplish and the shape of the housing. We gathered our components from Vishal and the FabLab. Throughout the process we had challenges, we had received help from the FabLab on useful components and my friend, Alvin Wu (Electrical Engineering) to assist us with the coding and putting together the hardware. In the four weeks I had learned so much about the product we were creating, I learned how to use the Raspberry Pi, searching up code as well as the incorporation of them, how the components worked and starting up Twilio so we could send text messages to the user. Once we were done with the product we worked on the housing which was a bit difficult to make the adjustments as we started out using Fusion 360 and moved on to Tinkercad. We made several adjustments to our housing so all the components could fit inside. FInally, we began our testing process of how our consumers would use it, we added on an extra text message so users would know when the security system was on and once it turned on there would be 60 seconds before startup.


Prior to taking the Digital Making Seminar course I had heard great things about it, not only from Vishal during an advisor meeting but also from students who had taken the course or were about to take the course during the same semester. I was very excited to see where this class would take me, as I had no experience with 3D Printing and all the functions we learned throughout the course. Thus, coming in I had little expectations but I was ready to experience a different side of what IT could offer. Now, that I have reached the end of the course and reflected on my learnings and experience I can definitely say the course reached beyond my expectation. I had not expected to be able to learn so many different aspects on designing and was really amazed by all the results as well as support. Throughout the process, I learned that even though I never saw myself as being a creative mind I was still able to create a final product design that would be suitable for our consumers need. I will definitely be taking all my knowledge from this course and apply it into my future career.

Soldering & Putting Together The Light Box

Wires are wrapped together and dangle like gruesome tentacles. A foul smoke rises in the air as the iron touches the metal. Silvery blobs form between two pieces of metal. The process of soldering is underway in the laboratory.

The third and final workshop at the Fab Lab was learning how to solder. I had no prior experience to soldering before, so I was extremely interested. The process of soldering is joining multiple pieces of metals together by melting and adding a filler metal. This results in a permanent connection between electronic components.

Looking back the process was fairly simply. We had to connect all our materials together using a soldering iron. A LED would be connected to a resistor, which would then be connected to a wire. The main concern was using knowing how to safely handle the soldering iron.

The three main safety procedures were to place the soldering iron back into its holder when finished and to never pass the iron to another person, the second was to not breathe in the gas being released when joining metals together, and to wash our hands afterwards since the materials contained lead.

During the workshop, I had difficulty getting the two pieces of metal to stay connected. In addition the metal wires were hard to twist together since they were small. I was one of the last to finish after carefully soldering all the wires together to create an octopus-shaped creature.

Once the soldering was finished, we tested them on our Arduino boards to see if the LEDs worked properly. Taking my time soldering had paid off as mines did not run into too many issues.

I laid out all of the components for my box on the table and began putting everything together. We had to make sure the wires were not touching one another and that the battery component was sticking out of the backside of the box. A couple drops of hot glue and a few burns later, the Arduino Light Box had been completed!

Instructables provides an easy to follow guide on soldering that can be used to apply these skills for your own project along with other projects that can help you practice your skills. Additional resources include a comic of soldering guidelines by the NASA standard.

The Final Product

After three of making at the Fab Lab, we finally completed our light-boxes! For me week one was all about learning how to laser cut and designing the outside of my light-box. Then week two was learning about coding and testing an arduino. My final week at the Fab Lab was dedicated to soldering my arduino.

I have had zero experience with soldering. I did have a few concerns though. I was concerned I would burn myself and that i would soldering the wrong wire. Recalling from the time I coded and tested the arduino the previous week, I found connecting the wires slightly confusing. If you put one wire in the wrong spot then it can throw off the entire arduino. Although I founded soldering easier to pick up than I had previously thought. We were given a brief lesson of how soldering works and then the soldering began! We first connected all the wires together by twisting their ends together to make sure that we ad the structure correct. Then we soldered the connections to make them permanent. I found it crazy how fast the soldering metal would melt and the solidify. A few good tips I learned from soldering were:

  1. Clean your iron off on the sponge.
  2. Do not touch your eyes or face once you have touched the soldering metal.
  3. Do not hand your iron to someone else.

These tips were the keys to my success!

After I had completed soldering then I had completed all three stages in developing a light-box. The only thing left to do was assemble it. Now that everything else was done, this part was simple. To assemble the box, you needed to put the arduino inside the box and assemble and glue the box around the arduino. Then you are left with a completed light-box!

These past three weeks have given me a lot of experience with developing a product from start to finish. It has given me great insight to somewhat of what it takes when you actually start developing a product. You need to individually develop each component of your product. This reassures that each part is working properly. Then once you have done that you can confidently. I will take what I learned with me to make my team’s product for this class. I have really enjoyed these past three weeks and everything the Fab Lab has taught me!!

Week 8: Skill Set and Soldering

This week at the FabLab we wrapped up the workshop sessions. My team, the white team did soldering this week. Before this week’s workshop, I’ve seen my dad solder wires together to improve “circulation” of the wires, so I already felt like I did have some knowledge in this area. However, in truth, this week was my first week in getting hands-on experience with it.

Soldering station

To be totally honest, out of all three workshop stations, my favorite was the laser cutting station due to my overall familiarity with the concepts of the machine, as well as the usage of the software. This week’s station was probably the most frustrating and difficult area for me. The combination of needing nimble, yet sturdy fingers to twist the wires together, the potent smell of the metals melting together, as well as the fragile and easily breakable wires made the whole process mentally straining. The constant need to be mindful of the positive and negatives of the LED lights, as well as the much-needed patience really took a toll on my attitude towards soldering, and by the end, I felt ready to give up and never touch soldering again. To add fuel to the fire, because of my twisting and turning of the wires, the connections constantly broke to a point in which some of the connections were unrepairable. Because of this turn of events, I was unable to successfully created the LED box that included the soldering of the lights and photoreceptors. Since I broke most of my connections toward the end of the class, I had no time to redo the soldering and was forced to create a prototype LED box with the breadbox and the Arduino. As much as I don’t like soldering, this skill is very important to have knowledge of. Thanks to CUC FabLab, I am now able to solder wires together (even if I’m terrible at it).

In the end, no matter how must frustration or hatred I had for a specific “step,” the workshops that we learned from were definitely really helpful in our group projects and will help us start finalizing what process and skills are needed for the project. Furthermore, not only did we gain three new skill sets to use but also gained insight to our abilities in each skill. By analyzing these interactions, we were able to tell which part of building our future project prototypes was our strong point and which was our weak point. For me, it was obvious that designing and laser cutting was my strong suit, while soldering was hands-down my weak suit.


Week 7 Summary: Building on Our Skills in the Fab Lab

In Week 7 of the Digital Making Course, our community of Makers once again ventured over to the Champaign-Urbana Community Fab Lab. Similar to week 6, our class broke into our three groups to work on the next rotation in making the Blinker Boxes. However, since we were already familiar with the layout of the building and the resources available to us at the Fab Lab, we were able to hit the ground running. Once again, our three groups were split up to working on Coding with the breadboard and Arduino, soldering the electronics, or designing the press-fit boxes for laser engraving and cutting.

Our time in the CUC Fab Lab serves many purposes. First and foremost, it provides us the opportunity to practice skills that can help us with our own making endeavors. It is especially helpful for our project groups to develop a diversified skill set that we can utilize on our semester projects. The workshops at the Fab Lab also familiarize us with the technologies and physical tools available to us. Learning from the staff also helps us get a feel for the greater Maker Community and hearing about their personal projects helped us understand their skill sets and how each of them may be able to help with our projects. Finally, spending time in our own Maker Lab, the Fab Lab, and with all the staff and volunteers gives us a better idea of the Maker Movement that is revolutionizing businesses across the nation and around the world.

Supra

Team Supra’s Concept

As we keep going through the semester, we are rapidly approaching the design and prototyping phases of our semester projects. All of the project teams are refining their “How can we” statements while defining the actual problem they are looking to solve. Our first project idea submission was due on Wednesday of Week 7. To give you an idea on some of the concepts the class is working on, Team IJK is trying to help college students decrease stress by using indoor gardening. Team XNihilo is attempting to have busy professionals or college students drink more water. The MakerLAX is hoping to “help teenagers, young adults, and anyone else who struggles” tie a tie properly. Team Zerott is trying to improve patient satisfaction at hospitals. In Week 8, the project groups will be moving forward based on the feedback they have received. Once again we will be submitting our “How can we” statements, but this time we will include a concept details, key components of the solution, the capabilities of team members, outside resources for skills and fabrication tools, and any information resources identified.

Odelia Code

Odelia spent this week in the computer section of the Fab Lab code the Arduino for the Blinker Box. Odelia said, “This was my first time actually seeing a computer board up close and I was definitely quite surprised by how it looked. Personally, I thought that it seemed quite fragile and easily breakable. However, it was quite sturdy and it could hold quite a bit of force. Along with the Arduino board, the following things were included.” After setting up the circuit and trying to adjust the code, she found working with the light sensor was the most difficult part of the lesson. I think many would agree, as the range of values corresponding to which LED flashed depended on the specific sensor and how bright the part of the lab you were sitting in was.

Chase Soldering

Chase spent the class time in the electronics section of the lab soldering his LED’s together. Reflecting on the class , said “the instructional course ultimately proved to be very time consuming and required incredible delicacy, there is little doubt in my mind that this is a crucial tool in any maker’s arsenal of building tools.” For many in the class, this was their first experience with soldering. However, we all were able to pick up on tips and tricks such as using the “helping hands” or tape to hold wires down while soldering multiple pieces together. By the end of class, Chase and his group mates were able to wire the LED’s and sensor into the Arduino he programmed in Week 6 and the LED’s flashed as planned! Finishing off his post, Chase, like many, said he hopes to “incorporate soldering in some capacity” into the final project.

Kenny Design

The final phase of the Blinker Box is the making the press fit box. Kenny wrote about using the free Inkscape software to design his box. By taking images from the Internet and vectoring them using the Trace tool, the images became compatible with the laser. Kenny chose artwork from one of his favorite designers to put onto his box. Once it was finished, he said, “It was very rewarding to be able to see something you design on a computer come to life in a matter of minutes. There was something satisfying from watching it go back and for until your vision comes true.”

Kenny Box

All of our blinker boxes are coming together as we build on our skills at the Fab Lab. Week 8 will be the last class session in the Fab Lab but many of us will be back to work on our projects. Happy Making!


Soldering + LED Lights = LIT

My Fab Lab experience just keeps getting more and more fabulous each time I visit. This week, my group had the chance to get our hands on soldering, which by definition is the act of fusing together the joints of metal objects by melting a filler metal. This is different from welding, a term I was more familiar with, in that it doesn’t involve melting of the actual workpiece, but rather just the filler metal which connects the wires. Our goal was to use soldering techniques to fuse LED lights and sensor wires together with the use of Arduino board to make a cool LED product. It was quite an intimidating process at first and I faced some challenges listed below, but gradually I was able to overcome some struggles I had and successfully create the final product–a series of LED lights that respond to the light sensor.
17269192_1534548909896760_405950736_o
17310721_1534548903230094_2065225234_o
Challenges I faced while soldering for the first time:

  1. Fear of getting burned (the soldering gun heats up to 350 degrees Celcius, which could cause a second degree burn with a single touch)
  2. Not having the wires stay connected although the filler metal has melted on them
  3. The smell. It wasn’t the best unfortunately.

This eye-opening experience certainly enhanced my interest in soldering and would definitely try again if I had the chance. Also, I looked up a few soldering products that look really neat. These are of course much more complicated projects than the one we did in class, but the basic technique is similar. Check them out!

LED Umbrella
FJXW1FUFEQ4B1PQ.LARGE

LED Ice Cube Clock
Screen-Shot-2016-03-18-at-17.57.41

Week 6 Summary: An Exploration of the Fab Lab Opportunities

This week we engaged in the second phase of a continuous three-part series meant to offer exposure to the myriad of activities offered at the Champaign-Urbana Community Fab Lab. The Fab Lab, although the majority of the class was unaware of its existence prior to this semester, is a leading-edge open and collaborative workspace for design, creation, and printing through the use of computer-driven technologies, such as 3D printing, lasering, inkscape, and soldering. Below is a picture of one of the spaces within the workshop.

One of my favorite aspects of the Fab Lab is its openness to the entire community, irrespective of whether the makers are students or local community members. Everyone is welcome and simultaneously given the resources to collaborate, share, and implement their ideas. Since the making space offers such a vast array of opportunities to its various users, the class was divided into three separate groups during our first session, with each group rotating between the three main functions of the lab: laser cutting, soldering, and coding.

In Brian’s most recent post, he examines the laser cutting portion of the project. The objective of this part was to assemble the wood cube that would house the photo dependent LED light resistor. The software used to create the designs on the sides of the cubes was Inkscape, a completely free, open-source platform that appears to be user-friendly yet still able to make complex designs. Once the template for the wooden cube was downloaded, he initially needed to consider some alterations to guarantee the fitting of the wood. In order for the laser to properly cut the wood, certain formatting and thickness adjustments had to be made. Using Inkscape, Brian and the other members of his group traced images taken from online, and, once finished, the PDF file was loaded onto the laser cutter. The laser etched the designs into the wood which created the downloaded images, while also making the actual cuts to create the box. The cutting process lasted just a few minutes, as subtractive manufacturing such as laser cutting can be considerably faster than additive manufacturing, like 3D printing. Brian’s finsihed creation can be seen below.

Carter’s weekly reflection focused on the soldering aspect of the project. While the initial instruction appeared to be very time consuming and required immense precision, concentration, and delicacy, soldering as a tool in the making and design process can be incredibly powerful and handy, as it offers certain advantages to a product that otherwise would not be available. Soldering allows for more accurate and uncluttered connections between various electronic parts, such as wires, resistors, and other components. An additional benefit of soldering is the ability to maintain the original shape of the soldered metals, considering that the solder has a much lower melting point than the adjoining metal. Since the fusing occurs at much lower temperatures (albeit still incredibly hot), the metals that are being connected do not warp in shape or size, nor do they melt. Lastly, soldering allows for the joining of multiple wires using a single focal point. This can allow electricity to be conducted, as all the wires have been bonded together. Below is a picture of Carter’s finished soldered Arduino circuit board and light dependent resistor.

Charlene’s post focused on the coding of the Arduino Uno circuit board, using Arduino’s open sourced software. Arduino’s simple platform allows for makers with only basic coding experience to still utilize the immense functionality of the technology. Her group was tasked with coding specific behaviors into their widget. In this case, the object that was being encoding was a photo resistor (light dependent resistor) with LEDs. By connecting the LED lights to the light resistor and being guided through some of the basics of the Arduino code, the LED lights extinguished in the presence of light and flashed during times where there was no light (when it was covered by a hand, for example). This first exercise with the Arduino technology was simple enough for us as first-time users to comprehend, yet was still an applicable and useful first attempt at the software, and definitely something that could potentially be incorporated into our end of the semester final projects. Personally, having the ability to view tangible, physical result of our efforts was something that felt gratifying. Charlene’s final product for this phase of the project is pictured below.

While each group has been focusing on a specific activity, we can universally agree that the experiences at the Fab Lab have been invaluable to our making journey. We are constantly attempting to apply what we are learning to not just our semester projects, but also outside of the classroom. I look forward to the rest of our time at the Fab Lab, as well as the rest of the semester!

Soldering: An Art of Trial and Error

Trial and error: the phrase that best describes my experience during our second session in the Fab Lab.  After our work with red boards and coding during Week 6, my group progressed to the soldering station to create circuits sans red boards. Before beginning, we were warned that the day’s activities would vastly increase our appreciation for the simplicity of the red board systems; this held entirely true. As an incredibly impatient perfectionist, this activity tried my ability to make repeated attempts to complete a single step of the project. However, the sometimes-tedious nature of soldering did not bother me in the way I expected; rather, I really enjoyed the process! It was perhaps my favorite skill we have learned in the course thus far due to the hands on nature, and the fact that you can test and check your physical progress as you move from stage to stage.

The soldering station and my relative success in the activity inspired me to incorporate a new aspect into our garbage condenser – an LED sensor that lights up when the trash cannot be further compacted or pushed down in the bin, therefore indicating “full.” I think this will both incorporate another useful technology and create added value for the consumer, as the product will have dual functionality. Furthermore, I feel as though this sets our product apart from other products on the market as well as “DIY” alternatives, as it is more technologically advanced – an upgrade that is important to many consumer groups in an increasingly digital world. I hope that, in improved my soldering skills and combining with the other abilities we have developed throughout the course, my group is able to develop an effective product that can accomplish the desired task in the simplest way possible.

While I will not be participating in the soldering station during our next course in the Fab Lab, I hope to take time outside of class to assess the best possible way to include a soldered LED circuit and code in our product in order to enhance its functionality. In conducting outside research, I found a very useful tutorial that instructs one on how to code an LED Arduino to blink at one second intervals (which I think would work well as a “full” trash alert.) Furthermore, I performed a bit of industry analysis to see what products are currently on the market – none incorporated technology in such a way, making our product both unique and advanced in this niche market. See here for one comparable offering on Amazon. 

Soldering at the FabLab

After last weeks lab session where our group wired a breadboard and uploaded our code onto an Arduino Uno, the next step was to set stone our circuit design with the help of a soldering process in which wires are joint together by melting metal. Our task was to wire up the LED’s and the photoresistor so that they have fixed joints and can be easily wired into the arduino board. As we sat around the table with soldering machines and wires in front of us, we were pretty overwhelmed and somewhat scared about using the solder as even a small touch of it onto our skin could result in a 2nd degree burn. Some of us used “soldering helping hands” helpers to keep our wires fixed in place while soldering them together as shown in the picture below. Due to the delicate nature of the soldering components and wires the helping hands proved to be very useful in keeping everything stationary and out of harms way.

Soldering basically uses a hot iron rod and a solder flux (a metal with a low melting temperature) to join two wires or two metal components together. The hot iron melts the flux in between the junction of the two metal components and quickly solidifies thus keeping them in a fixed state. Due to the fluxes metal characteristics it does not impede the flow of current in the circuit. The instructor was incredibly patient and helpful as she guided as through each of the soldering tasks. I quickly realized that soldering was an art form of its own as it required immense precision and concentration. The worst part about the soldering process is the smoke which is given off when the flux melts and it can be really suffocating at times. Due to this we took a 15 minute break to clear the smoke and also to rest our eyes.

Finally after soldering and wiring the arduino to our LED’s we powered it up using a battery and yes it did light up! In the video here, you can see the LED’s light up when my hand is close to the photoresistor and vice versa. The next step of the project is to laser cut a wooden box to house all these cool LED’s.

**Here is a link for beginners to learn more about the soldering technique!