Week 12: Auditing and Making Adjustments

During this weeks class we were given the task to audit two different teams on their final projects. One of the groups we audited was working on the hydration band. We really liked their progress as we had watched it from early on, now the band isn’t specifically geared for Fitbit users but for users with watches. They created a band and they intend on adding the hardware into the band where it has lights reminding the user to drink or replenish water. I think their idea is great, we all tend to forget to drink water even when it’s right in front of us, so it would be a great way to remind us to take care of our bodies. We had given them ideas in regards to the flashing light as some users may find it to be excessive or hard to see if in the sun. We recommended trying out vibrations rather than blinking lights.

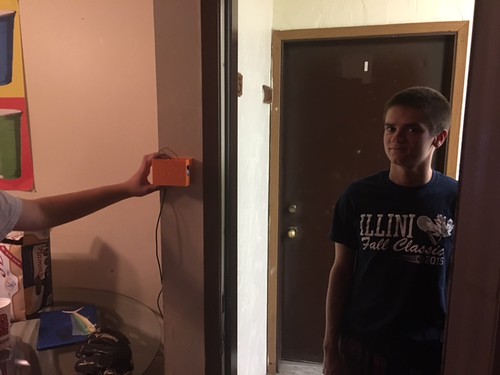
After we had audited the groups we began working on our own projects and taken into account the feedback that were given to us. Some of the feedback we got was in regards to the placement of our product especially in regards to pets that consumers might have that the sensor may be able to sense and think it was an intruder. Other suggestions we received was being able to automatically turn on the sensor by sending it some sort of signal instead of having to turn the power on the product itself. Another recommendation we received was reminding the user to turn on the system before leaving the house, we tend to have a lot of things to do before leaving apartments so its understandable to forget. The group had mentioned trying to incorporate an external calendar into the system, so if it ever had “break” on the calendar the system would know to remind the user to turn on the system. All these suggestions were really great and we definitely took them into consideration. However, some of the suggestions would be very difficult to incorporate in this first prototype as we believe the best way to go about many of the suggestions would be through creating an actual application that the user could use if they wanted to change the phone number attached to the system, the location of the system, the amount of time before the alarm turned on after being powered, etc.

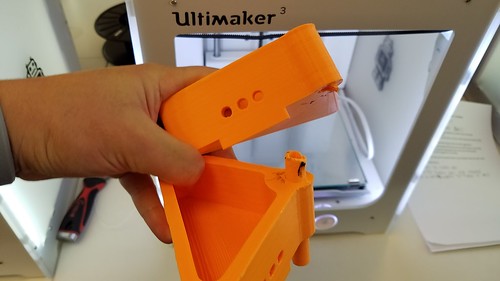
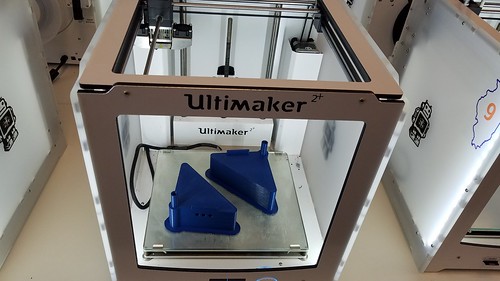
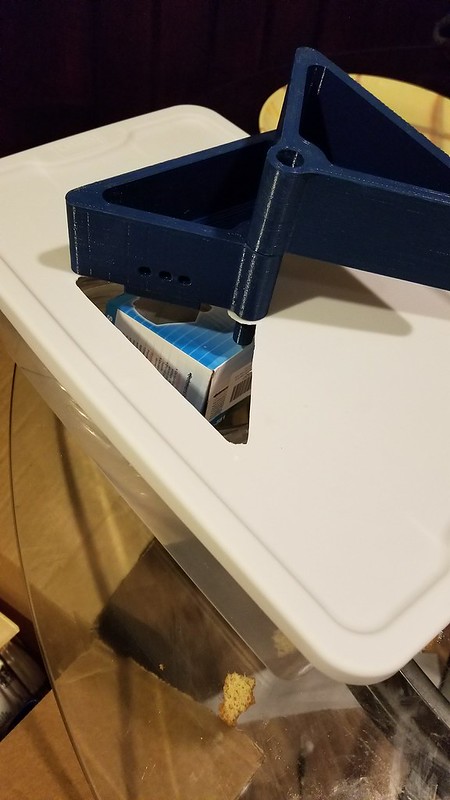
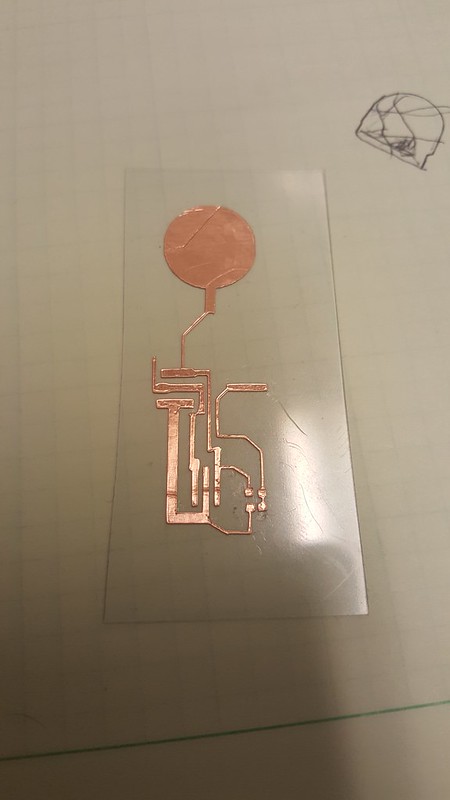
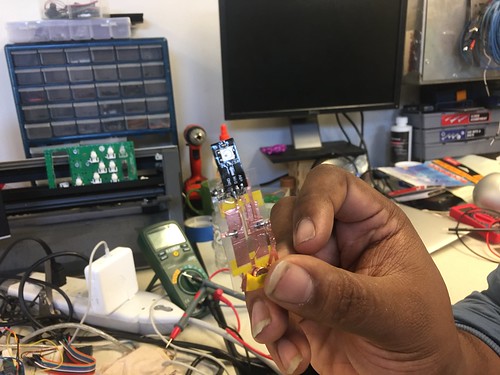
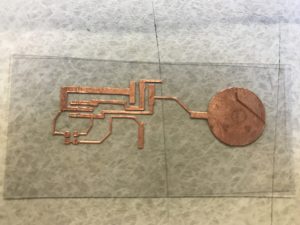
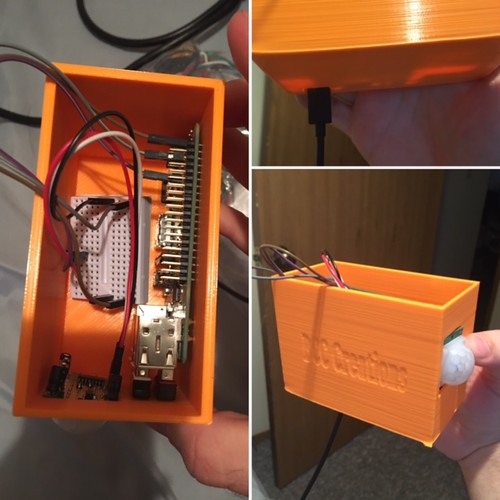
We had our first housing printed out and we were able to place our hardware in, we realized that the sensor and power hole needed to be shifted and made bigger. Thus, we reprinted the new housing today and will be picking it up the day after. Once we started printing the housing, we decided to continue testing our sensor, so we would be able to ensure it would work when we did our prototype testing. The system had worked great today, it sent a text around 55 seconds after start up that the system had started and immediately sent a text when the sensor sensed any motion.

Sensor hole needs to be enlarged.

Power hole needs to be shifted.

Testing our sensor.

Rome wasn’t built in one day

The curation of our idea from concept to prototypes to fulfilling the design requirements has been a journey. With that being said, our product contains a lot of parts and materials to come together, from acrylic from the Fab Lab to 3D printing at the Makerlab, to clay pebbles and then lastly a fish. Our project combines technology and biology to form a symbiotic balance and that is where some issues may arise.

We received some great constructive feedback this week with a design audit partnered with another group and from there we determined that an increased in depth to the modules will allow for healthier plants overall.

This week we were finally able to use the 1/4″ x 12 x 24 sheets of clear acrylic that we will be making our fish tank from scratch with silicone sealants as well. After some trials and errors with the laser cutter, we were finally able to cut everything to size but fear it will not be cured in time for the prototype review with Vishal on Monday. With that being said, our next hiccup came from the 3D printers failing to complete our prints in a timely manner. This week we encountered our 2nd failed print and each of our prints take 10 hours and so time is of the essence when it comes to creating the aquaponics modules. Our team has been working tirelessly when it comes to designing and putting together this product. With the help from the Fab Lab and the Makerlab, we are slowly able to achieve our vision.

20170417_155925

There are hiccups along the way but we know we will be able to complete this in due time, but we constantly remind ourselves that Rome was not built in one day and for us to deliver our product we have to realize that an attention to detail is essential.

Our next phase of achieving our vision is putting the fish tank together with the use of the 1/4″ clear acrylic sheets and aquarium approved silicone sealant to ensure that the tank is waterproof. Due to scheduling conflicts and the allowable time for the tank to cure we were not able to complete the tank on time due for the class for Vishal’s review of our model. However, we were able to use a simple plastic bin to simulate our tank until we have it finished during the final presentations. This week proved to be a difficult week for us due to the complicated nature of the project and how many pieces are coming together. But we were able to reprint our modules to ensure that it is of the top most quality. Our project has been a test of many moving parts and the culmination of it coming together is very exciting but also nerve racking as our goal is to have our product 100% ready within the week.

20170420_141233

20170423_213521

Final Project Update

A quick recap of what we did during the past weeks: we are designing a dehydration band to remind the users to drink water. In the last week, we have successfully tested our customized sensor on the regular Arduino and we also generated a hand-made circuit.

IMG_4132


This week, to improve the precision of our circuit, we made a silhouette-cut circuit. It looks very beautiful, right?

IMG_4167

To make sure the mini-controller, a mini-Arduino, connect smoothly to the silhouette, I needed to solder the pin to its corresponding copper tape. I had to be extremely cautious because the signal for each pin was independent from others. If I soldered two pins or two copper tapes together, the system would malfunction. In other words, the dehydration detection band could not detect the humidity level of user’s skin properly. Then, I needed to place two mini-resistors on the side of the mini-controller. Once again, to ensure the connectivity, I needed to solder the resistors to the circuit. The picture below was the motherboard of our Dehydration Band. Next we would integrate the sensor to it.

IMG_4142


(Someone’s hand is holding the sensor)

Because we needed to place the integrated circuit into a 3D printing band in the end, we had to attach our customized sensor on the back of the motherboard, where the sensor could contact user’s skin. At first, I only used the slim copper tape to connect the sensor to the motherboard. However, resistance detector displayed that there was no connection at all. Then, I realized that I still needed to use solder to solder the sensor to the motherboard. Next, we chose a small button battery and soldered it to the mother board. As you can see from the picture below, this is the final version of our prototype. After the last four weeks’ multiple attempts and three experimental prototypes, now we are so close to the end of our project.

IMG_4170

In the following week, we will import the tested code to the mini-controller and place the integrated motherboard into 3D printing band. Then, we will do the final prototype-testing and make trivial adjustments.

Getting and giving critiques

It is hard to believe that there is one week left before our final presentation. All the teams have come a long way from their first prototype. As per our group, we have been very busy in making the final testing circuit, 3-D printed band and the program for the software. When it comes to functionality all three three parts work perfectly on their own all we have to do is put them all together and start with the testing part.

Additionally, for testing, we have convinced our friends to test them for us. We would try to test the product for three types of dehydration. The first one being hydration when you are sweating, the second one when you have not had water for long and are actually dehydrated and lastly when you are perfectly hydrated. Our team cannot wait to test out the product as we are very excited about making it possible for each part to work. Furthermore, we got and gave helpful feedback on our existing prototype and our plan of action for the final product. We got some useful feedback for our product. One of the groups told us that instead of making the LEDs blink throughout it should blink 2-3 times as it would be very annoying to have it blinking while we are in class or in some meeting. Adding to that, we thought of making the LED blink 3-4 times and after that have a constant light. This is because there are chances that people might miss those three blinks.

We even critiqued other teams’ prototypes. One of the teams that we gave feedback to was making a security system that would send a notification to your mobile phone if someone entered your house. You can have this on your main door. It works with a motion sensor. The idea is whenever it detects motion it will send a text message. I enjoyed giving feedback to other teams prototypes as it was nice to hear other ideas that teams had.

According to me, the feedbacks allowed the groups to get a different perspective on their products. It also gave a sense of how the users would want to change the product and what would benefit them more. We will definitely incorporate the feedbacks we received and hope to make the product that can be used by everyone.

Product Testing

We are at a time in the semester where everything is coming to an end. This is also a time where everything on our product is coming together. Throughout the semester we have developed a product through rapid prototyping. Now we have reached the point of product testing. This will help teams figure out what they need to fix to either make their product better or appeal to more consumers.

It has been a journey for my team to get to where we are now. Last week, we had a small prototype of our product. It was functional. As we held it in our hands, we realized what we could improve. We thought we needed a bar at the front of the device to keep it from letting the sliding mechanism from sliding out. We also thought the sliding mechanism could be longer. Besides the improvements we were able to notice as a group, we met with other groups to get their feedback. This was very helpful to get their feedback. Since others teams are going through the same process of developing a product, they have helpful insight. One team told us that they felt some of the sides need to be made thicker. If we increase the sides then we are less likely to have weak points in our design. Other than those comments, the teams liked our design and that we were going to use the Flex material to the sliding mechanism.

After getting that feedback, my team and I went to work on making changes to our design. We essentially made everything thicker. We also added a bar to the edge of the base. This is to prevent the sliding mechanism from sliding off. In order to make this adjustment we had to make the sliding mechanism into 2 parts. The handle on the sliding mechanism is separate from the entire mechanism. We will just need to glue those two parts together. I thought this would be fine because the handle does not need to be very strong since it does not come into direct contact with the door.

These adjustments got us closer to our final design. Although since we did make more adjustments, it did set us back on properly testing our product. We should be able to put our print on again to have it printed in the flex material. Then we will be able to do proper testing!

Auditing, Testing, and a Trip to Chicago

IMG_1571

As we quickly approach the end of the semester, our teams have started to refine our prototypes. This week in class, we split up into our teams and met with other teams for a design audit. Meeting one to one with another team, one team described their product by explaining the problem it was solving, how it worked, and how to use it. Then, the other team would ask questions about why they made certain decisions while designing the product. Based on those responses, the team would then offer suggestions as to how to improve the design for the next phase. Our team audited a hydration sensor FitBit attachment, an aquaponics system, and a doorstop. With each rotation, we were also able to receive feedback on our design.

While there is not too much we can change about our design, we did receive some valuable feedback. One student pointed out that printing the housing in white would make the security system more discrete as it would not stand out as much. Another student mentioned that she thought that students may forget to plug in the device before leaving. Based on that feedback, we will print in white when we finalize our design, and we are looking into incorporating either an on/off switch or activating the alarm remotely.

IMG_1596

Going forward, we had to now test the prototype. This Web Designer Depot page, though geared towards digital interfaces, still gives valuable insights into things to consider while testing prototypes. We came up with a list of questions to guide feedback and had a group member and a friend answer the questions after using the prototype in their apartment. We wanted to know how easy it was to use the design, any difficulties they found in their apartments, and any concerns they had about the product. Using this feedback, we hope to have the best product possible that could be brought to market.

IMG_1576

On Friday, Brian Xu and I had the opportunity to travel to Chicago with students from the Making Things class. We left campus early in the morning and arrived at Deloitte Chicago for a presentation and workshop. We were treated to lunch while learning about Deloitte’s Tech Trends and had a quick startup workshop on solving problems on our campus with a product that incorporated the tech trends. After running through the workshop, we headed upstairs to the Deloitte Greenhouse for a tour. The Greenhouse was designed for clients to come in and reach “breakthroughs” with problems they are facing in their firms. The Greenhouse incorporates different technologies into the space along with sensory equipment to enhance the experience. It was a really cool space to be in. After the Greenhouse tour we drove over to mHUB for a tour. mHUB is a unique space that allows members and partners to work together on learning, producing, and manufacturing. There was an incredible amount of equipment in the massive space and we were able to see some of the companies working on their products as we walked through. The entire experience was a great way to spend my Friday!

IMG_1581

Final Project Update

Another exciting week for our group! We were finally able to program the servo motor to rotate using a smartphone. Lucky for us, we found an app that lets us do just that. This app just saved us a lot of time and headaches. The only thing we had to do is connect the servo motor and Bluetooth module to the Arduino. The image below is the circuit we have for our project. For those wondering, I created this circuit using Fritzing.

View post on imgur.com

View post on imgur.com

Animated GIF  - Find & Share on GIPHY

The only challenge we have is creating the box where we can mount the servo motor. Hopefully, we have enough time tomorrow to have a working prototype. For now, we are only worrying about putting the motor in the housing and not the Arduino board, cables, and batteries. Instead, we’re just going to run the cables through the bottom.