An Introduction to the Fab Lab

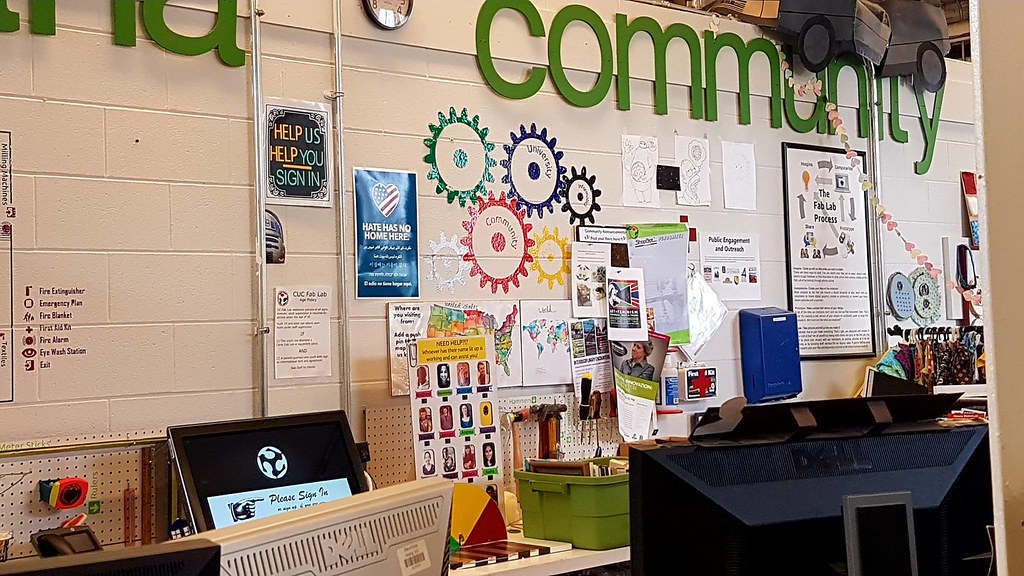
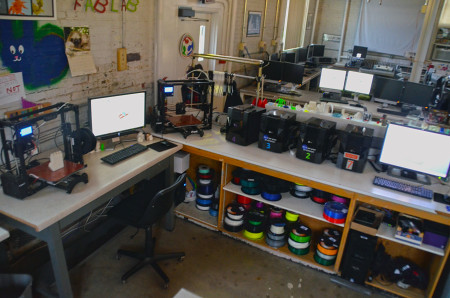
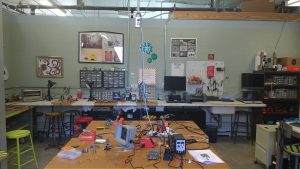
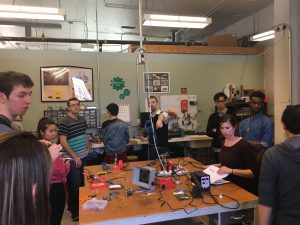
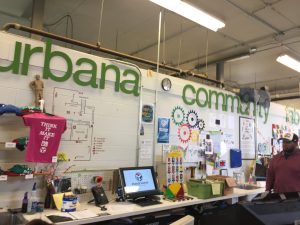
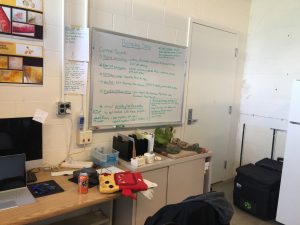
This week we had our first encounter with the opportunities and capabilities of the Champaign-Urbana Community Fab Lab. The Fab Lab, although I was unaware of its existence prior to this semester, is a leading-edge open and collaborative workspace for design, creation, and printing through the use of computer-driven technologies, such as 3D printing, lasering, inkscape, and soldering. Below is a picture of one of the spaces within the workshop.

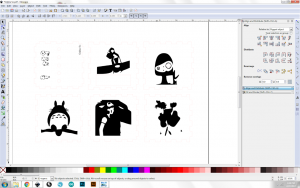
One of my favorite aspects of the Fab Lab is its openness to the entire community, irrespective of whether the makers are students or local community members. Everyone is welcome, and given the resources, to collaborate, share, and implement their ideas. One maker that we met was trying out a new machine called a “Water Color Bot” (the link to a YouTube explanation can be found here), which uses a specific software to produce complex water color paintings, using precise brush strokes and shading. While he was still becoming acclimated to the software, this is just one example of the various initiatives being worked on in the Fab Lab.

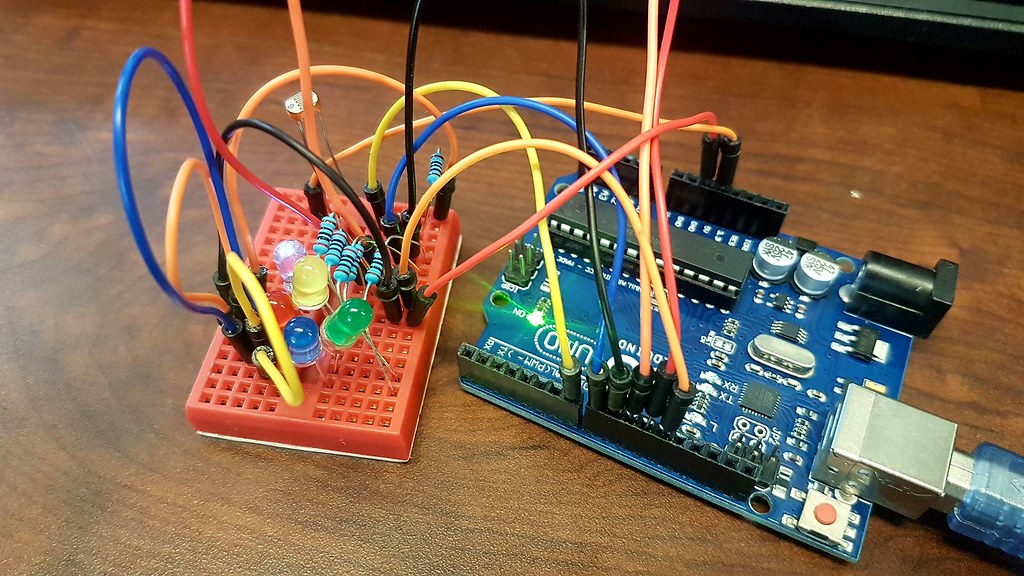
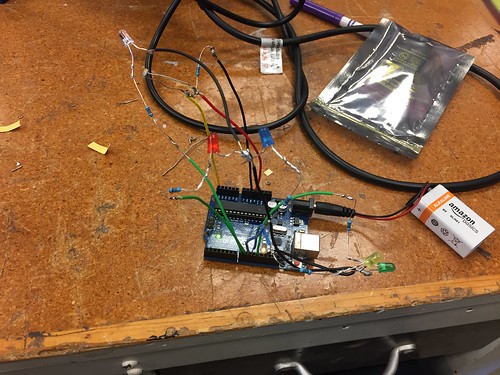
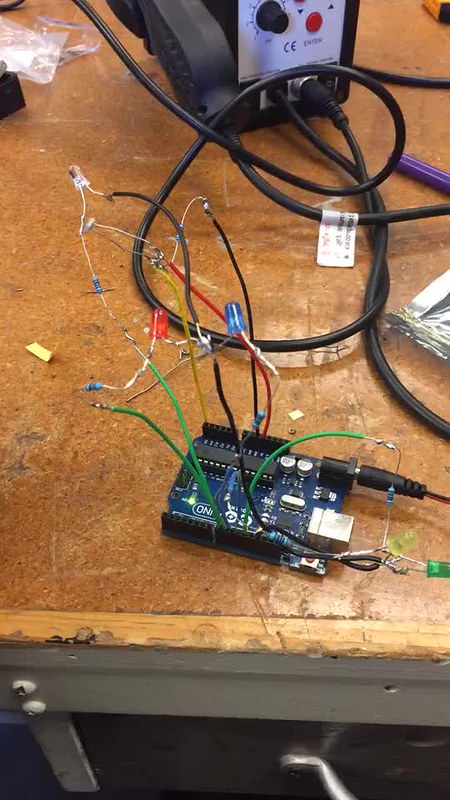
After receiving a tour of the workspaces, we were split into three groups, of which my group was assigned to utilize Arduinos to code behaviors into our widget. Arduino’s are an open-source platform that allows users to code certain behaviors and actions into an electronic object. In this case, our object that we were encoding was a photo resistor (light dependent resistor) with LEDs. Essentially, by wiring the LED lights to the light resistor and writing some basic “for” loops in the Arduino code, the LED lights would illuminate when there was no presence of light (when it was covered by a hand, for example), and would turn off in the presence of other light. I thought it was an incredibly useful and applicable first exercise in Arduino technology. Though the coding and wiring itself were complex, it was simple enough for us as first-time users to comprehend. In addition, I enjoyed being able to see a tangible result of our efforts, as opposed to just writing the code. The final product is pictured below. I look forward to engaging with the lasering/inkscape and soldering workspaces as well, and will definitely look to incorporate this technology into our final semester project.
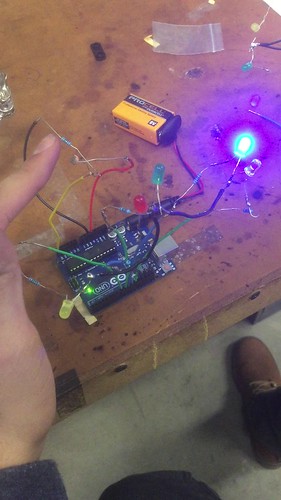
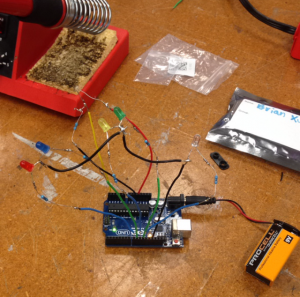
The Hands-on Intro to Digital Making. Part 1: Circuits and Soldering.

LabLocationMd

CU FabLab. Located at 1301 South Goodwin Avenue, Urbana IL.

This week was definitely my favorite class session, because I am a person who loves getting work done physically and having a physical product in my hands. After hearing Jeff Ginger – the director of CUC FabLab – tell us about the lab in week 2, he gave us a great tour through the space where we got to go in as part of a series to get trained on and work with the many great tools and resources there ranging from 3D printing, to digital embroidery and every thing in between such as the biohacking space and laser cutter. It was also interesting learning how it all tied in with a Fablab movement/Network of FabLabs across the globe. Seeing the place in person was definitely more inspiring as they turned a place that could be considered run-down into an environment where ideas and creativity are not just born but brought to life. Its very astonishing how much is possible and available through the lab, they had a section for each of the above mentioned and set up classes to teach each of these concepts.

@Fab Lab splash-b8d8cb4fbb

Different facets of the FabLab.

After the tour we, were split up into groups to partake in these classes to dive into one of these facets. I started with circuits and soldering using the given starter kit shown below. It consisted of an arduino uno board, batteries to power it, a photo resistor/resistor that changes its resistance according to the amount of light that hits it,

IMG_8006

Starter Kit

So with these resources, we will create a light sensing box that changes color the darker it gets around the sensor on the box. We were taught the basics of soldering – which means to join two wires using a hot-tip soldering iron and tin metal as a joint -then setting up the wires in the right connections with the LED lights and resistors, and finally plugging them into the arduino boards that were preset with the code needed for the final product. I enjoyed my time working on these so much that I bought some parts to work on my own personal projects and thats one of the effects that the FabLab has on people – inspiring the maker mentality to people that visit.

IMG_8008

IMG_8009

My Final Circuit

And now that we will have these skills and be familiar with these resources, we will be able to apply them to our own group projects due at the end of the semester. I am looking forward to the next two weeks where I will learn how to use laser cutters, write Arduino code and bring them all together. And I suggest everyone gets involved in the fablab nearest to their communities. Here’s links to learn more about Fablabs and where to find the nearest one. Link 1. Link 2.

Designing & Laser Cutting A Box With Inkscape

This past week, we were given a grand tour of the Fab Lab on campus. The Fab Lab is a Maker Space available to students and people within the community. Plentiful of technology are provided at the lab including: work spaces for 3D printing, BioHacking, electronics, sewing to name a few. They offer workshops, summer camps for children, and open hours for you to kick start your projects.

During the next 3 weeks, we will attend different workshops to learn programming, designing, electronics assembly, and more. By the end of the workshops, we will be able to put together an electronic box that can light up depending on certain movements in the environment.

I took part in the designing phase this week, where we used open source software Inkscape to add special features for our box. As a vector graphics editor, Inkscape can also be used for many other purposes, such as sticker designs and creating logos. Using http://boxdesigner.connectionlab.org/, we added parameters as inputs and were given a laser cutting file in .PDF. The file served as a template for our box, which we imported into Inkscape. The shape tool allowed us to add holes and squares to our box template, which would later be used to connect the electronic hardware.

Then, we selected b&w image files online and imported them into the software to rasterize. Once our designs were completed, we sent our files to the laser engraving machine to watch the magic unfold. Our designs from the computer screens were being engraved onto the piece of wood. Another project that was being worked on at another laser machine was an intricate puzzle piece.

Different laser cutters have other properties that allow you to engrave in glass and metal. More complex and intricate designs require more time and high degree precision. In addition, there are machines out there that can cut textiles in a cost efficient way saving resources and time. Small laser cutters & engravers run from a few hundred dollars, while larger machines run in the thousands price range.


I cannot wait to see the final product that will be made with my own two hands. The Fab Lab is a great resource and environment to experiment ideas and learn new skills; I definitely recommend checking it out along with other makerspaces in your area!

Learning in Fab Lab – Laser Engraving

This week, we started our 3-week exploration in CU Community Fab Lab. I’m really impressed with all the cool things going on in this one of the oldest buildings on campus. There are three major parts in the Fab Lab: electronics room, prototyping room, and main lab area. In Fab Lab, we’ve seen exciting projects such as fabric customization, BioHacking and many more that I cannot name. Fab Lab opens to everyone in the Champaign-Urbana community. It’s purpose is not only to create cool stuff, but also to encourage and educate the community with the technology. It offers various programs for youth, professionals, or anyone who are simply interested in creating things.

In this week’s lesson, I experienced the process of designing print for laser-cut boxes. As the photo above, the laser-cut boxes are made from pieces of wood board carved by the laser engraver.

According to Fab Lab’s website, the laser engravers are their most popular type of tool. From my own experience, I can totally see why it’s so popular. Compared to 3D printing, laser engraving is a reversed way of creating new things. Instead of stacking materials together to build an item, laser engravers takes away unneeded material and cut out connecting structures. Therefore, if you want to build a box, using laser engravers will be much faster. In addition, laser engravers can create extremely delicate patterns, which is hard to achieve using 3D printers. Last but not least, the skills needed for creating print or customization is easy for beginners to pick up. Laser engravers read PDF files, so instead of building a 3D model and using softwares to slice it to 2D prints, users can design prints for laser engravers using any vectogram editing softwares. The software we used during the workshop is InkScape, an open-source software that is free and powerful. It is easier to handle compared with TinkerCad and Fusion 360.

The process of creating the print for a box is simple as we learned in the workshop. After having the picture of the box you want to design in your mind, you can go to any websites that offer free customized box print (for instance this websiste). Then you can put your design on any faces of the box. The machines recognize certain colors, so it’s important to make sure the color settings are correct in your print. After saving your print as PDF, you can direct the engraver to the file to get started. One thing noticeable is that unlike using a 3D printer, you need to watch the engraver while it works in case of it (or the wood) catch on fire.

During the session, I’ve put together my design. In the next session, I’ll have my design printed out and assembled. Besides designing the box, I also tried to assemble a box printed out by Fab Lab.

Looking forward, I think the laser engraver can be a powerful tool for both designing prototypes (and making customized gift boxes). If a designer has a clear idea of what his or her design should be laid out on a flat face, it is easier to use laser engraver to build their prototypes than using 3D printer. In the future, I look forward to using laser engraver to realize my project ideas.

Soldering @ the Fab Lab

For this past week, our class had the opportunity to visit the FabLab on campus! To be completely honest, this was the first time I walked to that side of UIUC. Before taking this class, I had no idea that this existed. It makes me sad because I’m a junior and I have not taken full advantage of the resources the University has to offer. As a tech nerd, this place is amazing! I will definitely be going back on my own time to see what kind of projects I can work on.

When we first arrived, Jeff Ginger, the directory of the CUC FabLab, gave us a quick tour of what one is capable of doing at the FabLab.

View post on imgur.com

One of the first things we saw was a WaterColorBot in action. I had no idea these things existed! It was pretty cool. Check out the GIF!

Animated GIF  - Find & Share on GIPHY

After the tour of the FabLab, our group got split up into three different groups. One group learned how to program an Arduino. The second group got to work on wiring and soldering things to use the Arduino with. The third group learned how to laser cut to make a box for the LEDs that we soldered on earlier. I was part of the second group and worked on wiring and soldering. I have actually soldered before, however, I still think it’s a difficult skill to pick up. Although I have some experience in soldering, I still struggled to solder and LED to a cable. Here are all of the things we were given (plus LEDs that are not shown in the picture).

View post on imgur.com

We first learned the basics of wiring. For example, how an Arduino works, how the longer leg in a LED is the positive side, etc. After this, we started soldering LEDs to some cables.

View post on imgur.com

After about 45 minutes of struggling to solder on a good joint, here is the final product. The purpose of this product is to create a box with LEDs that indicate how bright it is. For example, if it’s extremely bright, the LED that is assigned to the highest setting will light up. As it gets darker, the LED changes. If it’s completely dark, the LEDs go back and forth really fast. Here’s a video showing how this works:

Animated GIF  - Find & Share on GIPHY

I can’t wait to start working on our project and implementing the skills we will be learning in the next couple of weeks.

Week 6: Fabulous FabLab

This week, we finally visited the FabLab. After Jeff Ginger, the director at the CUC FabLab came to talk about the facility, I was definitely hyped and excited to personally see where all the magic happens.

Firstly, we got a tour around FabLab and got to see the different “sections” of creation happened whether it be textiles, growing material (image below), laser cutting, or using soft circuits.

After our tour around the facility, we were separated into three groups, one for laser cutting, one for soldering, and one for coding. I was assigned with several other classmates to the upstairs lab and got to learn more about laser cutting. We learned first what laser cutting is: when a laser etches or cuts into the material to make a design or object.

IMG_6732 (time-lapse of the laser cutter at work)

We also learned that laser cutting can be used to make boxes (shown below). The box we are currently designing and making will be a box with 5 LED lights that will blink when the sensor which is attached to an Arduino is triggered.

We used Inkscape, an open source software designed to make laser cutting easier. We then were given a “class”/tutorial on how to build a box through Inkscape. My box’s design (pictured below) uses pictures that are black and white in which the laser cutter etches onto wood.

We will start coding the Arduino and installing the LED lights in later weeks. While reflecting, I understand now that that laser cutting objects are just as important as learning to 3D print. While both create something, in the end, 3D printing builds something, while laser cutting cuts the material. I realized that laser cutting can be even more time efficient than 3D printing. For example, if you want to make a box, 3D printing could possibly take hours, but laser cutting a box probably take 30 minutes or less. By knowing how to create and make objects through laser printing, our team can determine whether 3D printing or laser cutting should be used to make the project more efficient.


Learning @ The Fab Lab

This week our class took a little detour to the Fab Lab. It was our first time visiting a MakerLab space other than our own. The Fab Lab was actually really incredible in a lot of ways and actually quite different from the Maker Lab. I was honestly expecting it to be super similar to the Maker Lab but it definitely had a way different feel to it that the Maker Lab.

IMG_0449

For starters, it felt a lot more rustic and upstart due to the nature of the building itself. We were told it actually used to be a place to hold horses and they used to shove the waste outside of the huge doors. Since then the Fab Lab space has been transformed to hold an electronic’s space, a biotech space, a wood laser printing space, a dance studio, and more. It’s also filled to the brim with people attending workshops, teaching, and of course making.

They have all sorts of tools on hand ranging from 3D printers to Arduino. There’s also helpful staff there to help you out if you need to learn anything or don’t know how to do something. We even saw a kid print out his own customized puzzle of a tiger. The workshops themselves seemed really cool. We were told they really try to incorporate everything from electronics to fabrics if they do a workshop you could learn how to sew and code all in one day.

IMG_0456

I think our class really enjoyed moving through the space and getting to see all the cool things that are done at the Fab Lab. Particularly the making tools outside of 3D printing. Which is really all our class has covered up until this point. So, it was very fascinating to see what else is out there in terms of physically making things with the power of modern technology, like the laser wood cutter that could make a box much quicker than a 3D printer could.

Week 6: First Visit to the Fab Lab

This week, we paid a visit to the surprisingly out-in-the-open Champaign-Urbana Community Fab Lab; a free community center-like makerspace open for anyone. The Fab Lab is aptly named as the inner workings of the building are almost like a laboratory filled with fabulous creations by the volunteers and others who happen to stop by. Unlike our Digital Making Lab, it contains not only 3D printers, but other varieties of technology designed for the specific purpose of creation. These include sewing machines, paper cutters, laser engravers, and soldering stations. The lab contains a plethora of methods for people to express their creativity; it’s a shame that it is not very well known.  < Outside view of the Fab Lab

For the first week here in our 3 part saga in this lab, one person from each of our groups was assigned to a station in the lab where we would participate in a different workshop to make something out of nothing. For my personal station, we worked in electronics. I chose this because as an electrical engineering major it was definitely in my all you expertise and I knew that I would be able to learn something to improve upon. Our project was creating a type of light-sensing electronic circuit using LEDs, a photocell resistor, and an Arduino. Depending on the amount of light sensed by the resistor, a different color LED would light up. If no light was sensed, then all the LEDs would turn on. The project involved looking at some schematics and quite a bit of soldering, and the end result as it currently stands (an Arduino board with a bunch of wires and LEDs branching everywhere) did not look so appealing, but the functionality was the true beauty of it. Plus, we should be able to improve upon and make the design “prettier” in our next workshop. The other two groups were split into those working with laser cutters and coding in the computer lab portion of the Fab Lab. Laser cutting is another type of 3D printing in a sense, but in a way opposite to the norm. Instead of starting with nothing, your starting material is already there. You just need to decide upon a design and what portions you wish to cut out rather than add on. The results are stunningly precise. And while coding might not seem as glamorous as the other two activities, it is the basis of modern day electronics. Virtually every device for use by citizens requires some programming: phones, computers, televisions, and the 3D printers we use in our lab. It may not inherently make some visually stunning object, but without it we wouldn’t be able to use the machines that make those objects in the first place. All in all, these activities were extremely enjoyable to spectate and participate in, and in doing so we’ve gained knowledge of more methods for our use in not just our final project, but Making as a whole.

 Arduino Circuit

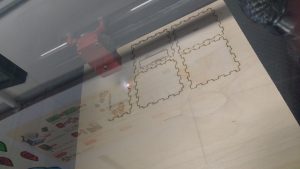
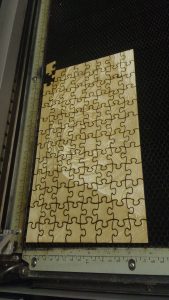
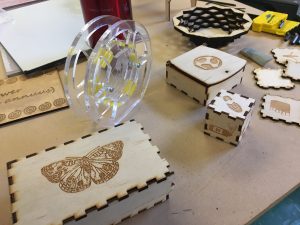
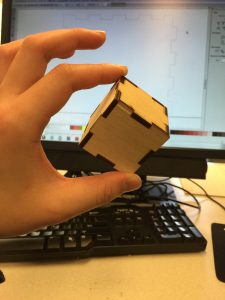
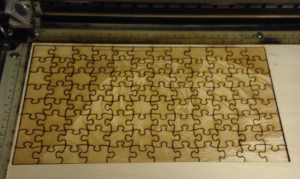
Laser Cut Tiger Puzzle


Fab Lab: Intro to Arduino

Throughout the four years I’ve been at UIUC, I’ve probably walked past CU Fab Lab about 8 times (yes, I do realize that’s awfully specific) but never have I had the opportunity to check out what it was about. This week, our class took a trip to the Fab Lab and in my opinion, it was one of the most eye-opening things we’ve done so far. From the outside, it looks like a pretty insignificant, beaten down building. In fact, it is the second oldest building on campus and used to store horse carriages. But inside, it’s an entirely different world of its own.

17122023_1526496920701959_635175370_o17176301_1526495907368727_821673810_o


17122168_1526536830697968_728589580_o
As seen in the pictures, the lab consists of colorful wall decorations as well as computers and machines buzzing away while at work. Jeff Ginger, the director of the CU Fab Lab, first gave us a brief history of the organization, then a tour of the building itself.

Afterward, I had the chance to work with Arduino for the first time. Arduino is a programmable microcontroller. It contains pieces of codes in which it executes on demand. The Arduino is then connected to LEDs, motors, and motion sensors via IO pins. We first learned how to wire the board. Then, we moved on to connecting it to a computer software and inputting codes that control the Arduino.
17175848_1526496060702045_1425635065_oIt was quite challenging for me at first because of the complexity of the wiring process and the constant feeling that my fingers were way too fat to properly place the wires in the right spots. But with the help of the instructors and peers, ultimately I was able to create an Arduino circuit board in which the LED lights will blink when it can no longer detect light with its light sensor.

Me hovering my hand over the light to make the LED blink.

As someone who hasn’t previously worked with electronics and doesn’t have much experience with coding, I am fascinated by Arduino and its functions. Moving forward, I would like to explore more of this small but powerful machine and its capabilities. Meanwhile, I found quite a few online resources such as this tutorial of basically what we did in this lab as well as a cool video of a fire breathing pony made with Arduino.

Fab Lab & Circuit Board

Fall-2014-450x298


It had been two weeks since Jeff Ginger, the director at the Illinois Informatics Institute, gave us a detailed introduction about 3D printing and talked about interesting stories happened in the Fab Lab. This week, we made our first visit to the Fab lab, an open and collaborative workshop space for computer-driven innovation on U of I campus. At the very beginning, Jeff led us to see the main functional areas in the lab. Basically, the lab had four main areas. Adjacent to the front door, 3D printing and scanning area allowed users to actually make their designs. On the same floor, there was a small room for making small electronics fabrication. Now, the room had been used for exploring bio-3D printing. Soldering and diagnostics room was on the second floor, and laser cutting room was on the third floor.

DSC_0179-450x298

After a brief overview of the Fab Lab, we were divided into three groups, one for laser cutting, one for soldering, and one for coding. This week, I voluntarily joined into the soldering group because I had soldered circuit board in my high school. Though I have some experience, it had been 4 years since the last time I soldered circuit board and the project is much easier back in high school.

IMG_3782


IMG_3779

The main purpose of our assignments was to connect the LED lights, light sensor to a circuit board so that the system can automatically turn on the LED lights when the light sensor can’t detect light. Initially, we had Arduino circuit board, 5 LED lights, resistors, light sensors, wires, and soldiering iron in front of us. Under the instructions of Duncan and Andrea, I could solder the LED lights and wires correctly. I had to mention that the “helping hand” was a tool to hold wires for users to solder. However, we had more users than the holding tools and I did not have one. It was quite challenging to solder 3 wires together without the help of the holding tool. As a result, I failed much more times than my friends in the group. Despite of the unfavorable circumstances, I successfully soldered the wires and lights together. As you can see from the video below, the light will be turned on/off depending on the light detection of the sensor.

IMG_3783


One of our proposal for our final projects is to make a light & noise detection lamp. After soldering this circuit board, I believe the lamp is much more doable than I previously thought. We will talk our ideas with the staff at Fab Lab to gather more information before deciding the final design.