A Reflection Of My Digital Making Experience

My learning experience throughout this course had gone beyond my expectations. Though we only had class once a week the Digital Making Seminar had impacted my thinking process and brought in a different perspective of the world. Now, I would like to describe my journey and the various learnings and knowledge I had picked up on the way.

The first two weeks were more of introductory classes, allowing all the students to have a better understanding of what we would be delving into. We immediately were given the hands on experience to create our own 3D printed object after given a quick tutorial. I had learned about various sites and chose to use Tinkercad to print out an Illinois keychain. During the class we learned about the large amount of resources (ex. FabLab) available on campus for making and creating.


During the third week of class, Vishal had brought in UIUC’s Design For America. I really enjoyed their presentation because it truly helped my group, BCC Creations get our creative juices flowing. I realized how naturally creative the human kind is, it is easy for anyone to have the ability to design products or services through the design thinking process in order to meet a consumers demand. The group had taught us through a hands-on activity to create a prototype that would benefit our customer group: senior citizens. We had brainstormed various products that would allow a senior citizen to be more at ease.

Our fourth week we met with Jeff Smith from Autodesk who was teaching us about Fusion 360, the software allowed designers to design products or services from what used to many hours to only a couple of minute. Each of the tools in Fusion 360 were incredibly powerful unlike other softwares. With the step-by-step tutorial given by Jeff, I was able to create my own version of a perfume bottle I had through Fusion 360 after the session,


By the fifth week of class I had learned about different websites and softwares that could be used for designing, now I was excited to see how this could be incorporated to my final project. We met with our groups to brainstorm needs people have on the daily and create “how can we” statements. Furthermore, we had to make sure the statements were broad enough to solve the need and we weren’t delving into finding the perfect product for the need.

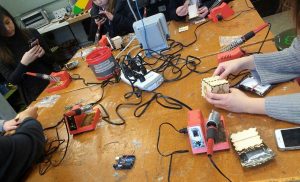
Week six, seven and eight we were at the FabLab working on creating a blinky box through three steps: Inkscape/laser cutting, soldering, and coding, My group started out with learning how to use Inkscape, we were given a template of the press fit box, we learned to change the settings for the laser cutting and added designs to our boxes. Once our designs were done we laser cut them, it was an interesting experience and the laser cutter had to be carefully monitored. The next week I learned how to make the lights blink on the hardware through coding. It was an incredible experience and a great learning process for me as my core classes don’t touch computer science coding or work with hardware pieces. In the final class we learned how to solder, it was a new experience for me and I learned how soldering melted filler metal onto metal joined objects by creating an established thin layer. Overall, I had a strong understanding of how everything came together to create the box and learned how all the components could be used, which would come in handy for my final project.


During weeks nine, ten, eleven and twelve we focused on our project, we went through prototyping, researching, improvements, auditing and making final adjustments. Once we decided on creating our “cheap” alarm system we began the prototyping process. We researched on the components needed for the hardware as well as the software side. Then we drew up a diagram so we had a clear understanding of how the hardware would look, what the software would need to accomplish and the shape of the housing. We gathered our components from Vishal and the FabLab. Throughout the process we had challenges, we had received help from the FabLab on useful components and my friend, Alvin Wu (Electrical Engineering) to assist us with the coding and putting together the hardware. In the four weeks I had learned so much about the product we were creating, I learned how to use the Raspberry Pi, searching up code as well as the incorporation of them, how the components worked and starting up Twilio so we could send text messages to the user. Once we were done with the product we worked on the housing which was a bit difficult to make the adjustments as we started out using Fusion 360 and moved on to Tinkercad. We made several adjustments to our housing so all the components could fit inside. FInally, we began our testing process of how our consumers would use it, we added on an extra text message so users would know when the security system was on and once it turned on there would be 60 seconds before startup.


Prior to taking the Digital Making Seminar course I had heard great things about it, not only from Vishal during an advisor meeting but also from students who had taken the course or were about to take the course during the same semester. I was very excited to see where this class would take me, as I had no experience with 3D Printing and all the functions we learned throughout the course. Thus, coming in I had little expectations but I was ready to experience a different side of what IT could offer. Now, that I have reached the end of the course and reflected on my learnings and experience I can definitely say the course reached beyond my expectation. I had not expected to be able to learn so many different aspects on designing and was really amazed by all the results as well as support. Throughout the process, I learned that even though I never saw myself as being a creative mind I was still able to create a final product design that would be suitable for our consumers need. I will definitely be taking all my knowledge from this course and apply it into my future career.

Looking Back

Looking back at this semester and thinking about everything that I have learned is incredible. This class has introduced me to things I was unfamiliar with. It gave me the skills to be able to go about an idea in serveral different ways.

I thought back to some of the speakers that made an impact on what I learned. Even on the first week, when we had two speakers. The video call from John Horlick kicked off the semester. He had written a book on how 3D printing was really becoming more and more prevalent in business and our everyday life. This opened my eyes to Digital Making. I realized that things were constantly changing in how things were being made, but I did not realize how much of an impact innovation was actually making. Even though this presentation was mainly on 3D printing, I felt like it spoke for more than 3D printing. It showed that there is always a better or smarter way to do something. There are also many ways to achieve that goal and I believe that is what Digital Making entailed.

Most of everything I learned in this class, I had not been exposed to before. Something that was really foreign to me was coding aurduinos. I never thought I would mess with that. I had understood some of the code because I had dealt with coding before, but it had only been solely on the computer. I had never used a breadboard before. It was also awesome to see a product come together after our few weeks of class spent at the Fab Lab. Not only did we code Arduinos, but we lasercut wood boxes and soldered wires together. This was great experience that helped prepare us and our teams create and develop a product of our own for our final product.

Throughout the entire semester, I felt like each class taught us the skills to tackle a problem or accomplish a task that we would encounter as we did our final project. The guidelines of the final project were for you to create a project that solves a problem.

When I decided to take this class, I was hoping to get a better understanding of using different softwares. I took this class because I really liked the work I did in the lab and I wanted to be able to do more. I only had one class freshman year that I was taught a CAD software, Creo Parametric 3.0. Other than that, the only time I have had experience with other softwares was when I would help out with workshops at the MakerLab. I wanted to be able to learn them well enough to create things of my own.

I feel like that expectation I had about the class was met. I was taught various softwares through a workshop type environment in class. That helped with figuring out where to start and what to look at to finish a design. Then I had to apply those skills I learned to the final project. It really tested me on how well I knew how to use them. I used Tinkercad for most of anything I did with the final project including the team logo. I was able to do it from my laptop in my free time. When I was looking at a folder I created on TInkercad and photos of designs I had sent my partners, I could see how my skill had improved throughout the semester. When I started, I did the basic shapes and a lot of things were uneven and had odd proportions. As I practiced, I was able to fix those problems and create more complex things. It was frustrating at points, but I was able to get my designs to how I wanted them to be.

This class opened my eyes to many things.  I was able to explore different ways of making I had never done before. I also, went through the product design process that made me explore every aspect of a design even if it is identifying what you can do yourself and when to seek outside help. In this class, I learned what I wanted to learn and more.

Week 11: Seeing Lights

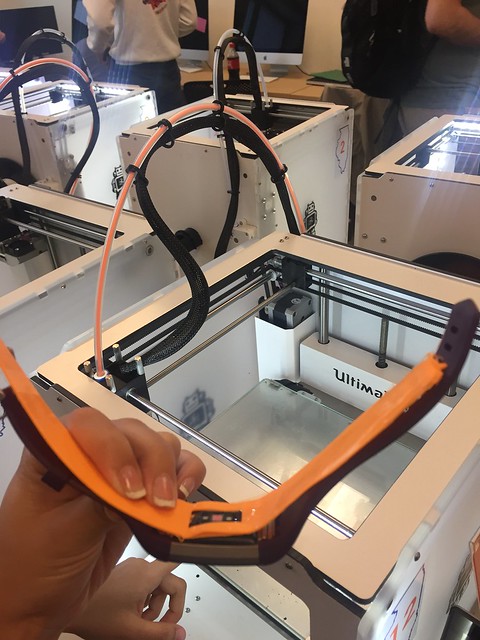
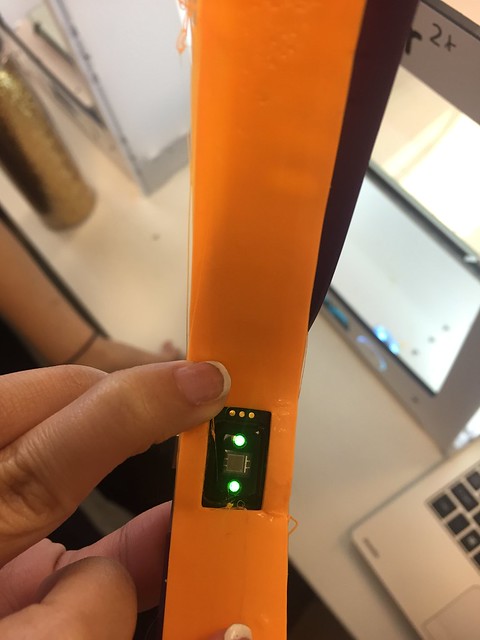
Up until this point, my group XNihilo has been working on more of the hardware and design when it comes to our project. As a reminder, our group’s main objective is to create a hydration wristband. The first week of starting our project, we came up with the initial concept and design of our product as well as sourced materials and resources for the product. The second week, we created our cardboard prototype of the product and refined our idea. Additionally, we had tested the moisture sensor from copper tape in order to find the perfect distance to space the strips. The third week, we worked more specifically on the band design and then created the moisture sensor and circuitry from copper wire.

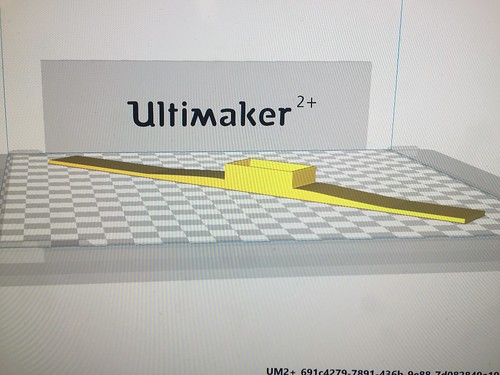
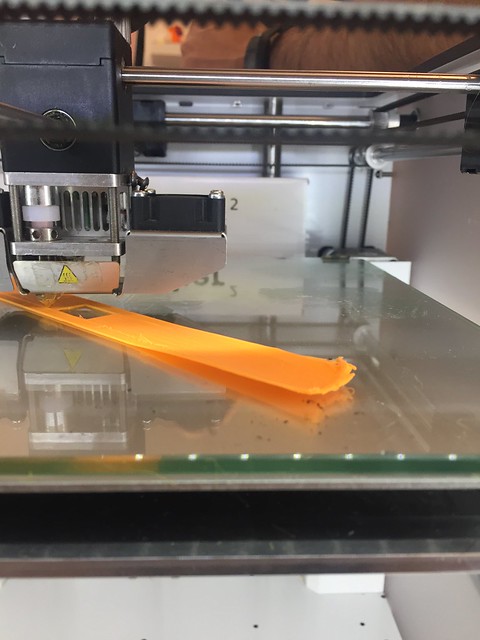
This week in class at the maker lab, Anjali was modeling the wristband on Fusion 360 and taking precise measurements of the FitBit screen while Ben and I were working on our final presentation PowerPoint. Used her amazing design skills and knowledge of Fusion 360 to design a wonderful band for us. This was one of the wonderful maker concepts brought to life in font of our eyes. By doing a project with people who have different backgrounds, we can utilize their skills. In this case, with Anjali’s major in industrial design gave us a sleek design of the wristband. We wanted to make sure that the band would be able to fit the FitBit screen so we attempted to print the design on regular filament rather than the semi-flex that the final design would be printed in due to another group using the semi-flex filament at the same time. We will be printing the final design with semi-flex material in this upcoming week. Unfortunately for us, we were unable to test out our band as the 3D printer could not print our design properly, the edge of one side of the band kept lifting up and we were sadly left with a strip of plastic.

Ben working on PowerPoint

Anjali on Fusion 360

Our band on fusion 360

Band printing

https://giphy.com/gifs/ka6X2DvJcA6f6

What were able to print

“You can print in whatever color you like as long as it’s orange” – Professor Vishal Sachdev


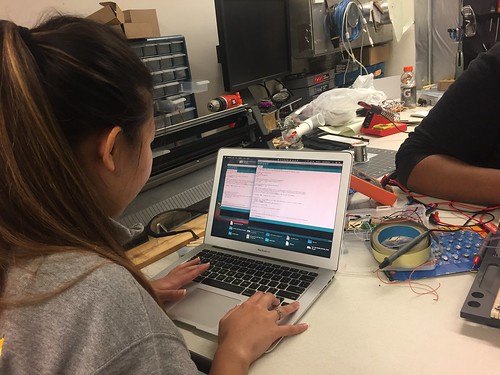
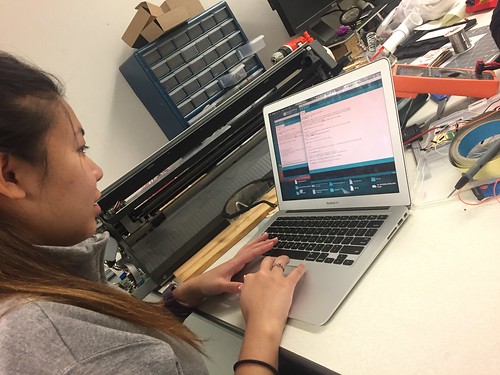
On Tuesday and Wednesday, we met up in the FabLab in order to get some coding done. This was the part I was responsible for. I hadn’t coded for about 3 years before taking this class. As aforementioned in my previous blogs, I had coding experience from high school where I coded in Java and Flash. Unfortunately for me, coding for Arduinos only took C/C++ . Although the logic was similar when it came to coding, the syntax threw me off. Additionally, beside the small bit of coding we had done for our flashing light box, I had no idea what I was doing. Luckily for me, the FabLab was equipped with many helpful resources, including our main resource Brandon. While I was coding to make the LED lights flash , Brandon gave me hints and moral support. I learned so much from him as I learned new functions such as millis(), which count the number of milliseconds in which it has been since the program has called the function. With Brandon’s help, I was able to learn C’s syntax and code for the lights to blink different colors  after we had calibrated the sensor by testing people’s skin for moisture sensitivity. It was truly a magical moment when it finally worked after hours of debugging the code and solving logical errors.

Me coding


Testing sensor to calibrate it with code:

https://giphy.com/gifs/sGo40ooUCyeLm


https://giphy.com/gifs/E2QEd2tIsSjbW

Our sensor is now able to:

  • Blink red 3 times, if the skin moisture is below average/dehyrated.

https://giphy.com/gifs/5YAlb1btEkk92

  • Blink blue 3 times, every 3 seconds (this will be changed to every 3 hours, as a this is an estimate of how often a person should drink a cup of water)

https://giphy.com/gifs/AoZkb26dMxvfa

  • Blink green 3 times, if the skim moisture is too high, such as when a person is perspiring and losing water.

https://giphy.com/gifs/11vlzFiJXNvDmo

Please enjoy this video of me explaining what is happening with our sensor:

Week 8: Last week at the Fab Lab

This week’s session marked our final week at the Fab Lab. Our time spent here was memorable and it’s sad to say that this is our last class time here, but the skills and know-how gathered here were quite memorable and are sure to last us quite a while. To conclude our 3 week journey, everyone participated in their last workshop to finish our light boxes. For me, it was finally time to code.

Having finished all the hardware aspects of the project, the last remaining task was the most integral to the box’s function: its programming. The Arduino itself is a powerful tool, but it cannot be used to its full potential without working with coding. The capabilities of a programmed Arduino are only limited by its user. Being an electrical engineering major, I’m required to have expertise in programming. Most of the programming that I currently do is in C programming, which is what the Arduino IDE (Integrated Development Environment) is based off of. I don’t really deal with the actual custom Arduino software much, however, so it was good to get some practice with this.

Arduino Software Application

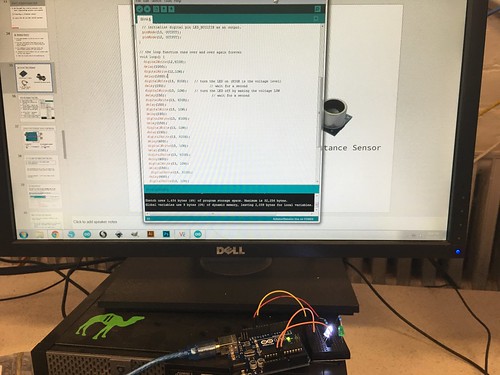
We began with the basics, making a simple LED blink. Then we gradually moved on through the Arduino language to where we would be able to design a program that would make the light box behave as we wanted it to: as a light sensor with LEDs that activate accordingly to the level of light. The Arduino IDE is custom built for the various modules that Arduino produces, and as such their certain commands and implications available only to it and not in conventional C programming. We began creating slightly more complex circuits on a test breadboard preparation for the final step of the project.  We were allowed to play around and “hack” the programs provided to us so we could get a better feel of the software. This also allowed us to customize each of our light boxes to our preferences. We could select which LEDs would light up and in what order, the amount of light exposed to the sensor which would cause it to send signals to the LED, and so on. Relatively small adjustments, but those little differences were what allowed us to differentiate our final projects from each other. We finished compiling our code and assembled our boxes that we got to take home as a trophy for our weeks of work.

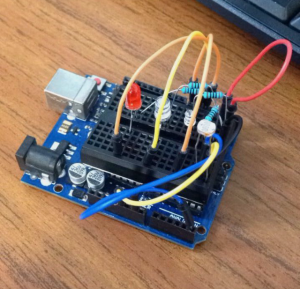
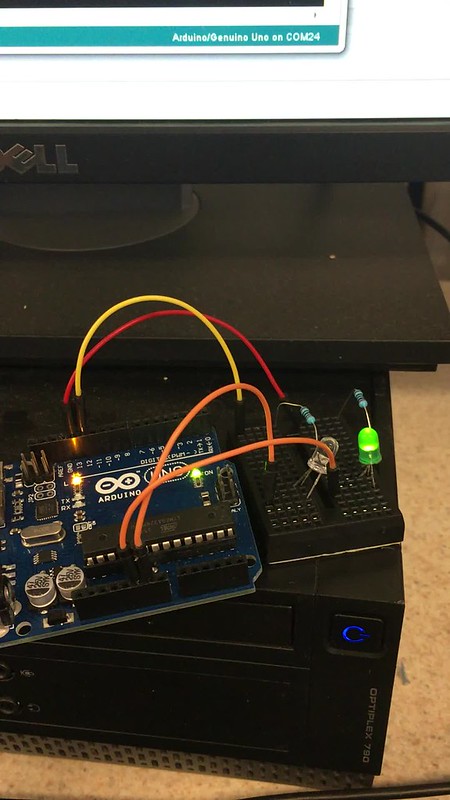
Test circuit for the final project

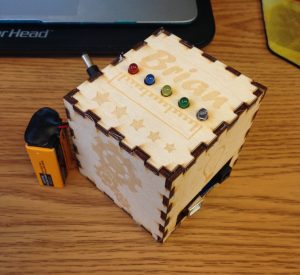
The long awaited finished product

It may have taken place over a few weeks, but our time spent at the Fab Lab seemed relatively short. I cherish the skills I’ve gained here and the memories of the fun I’ve had these past few weeks will last my lifetime as a maker(i.e. the rest of my life). We’ve come quite a way from our first session here, and our final class projects as well as our abilities as makers have certainly benefited from it all. The Fab Lab was such an amazing experience: I loved being surrounded not only by all the amazing technological tools and processes, but by other inspired and talented people as well.

Final Week in the Fab Lab: Coding with Arduinos

This week we faced the cold and snow as we headed to the Fab Lab for our final session of our 3-week long workshop at the Fab Lab. After working in the electronics area to solder, the laser area to make the press-fit box housing, it was time to work in the coding area at the front of the Fab Lab.

Assisting our group with the Arduino portion were Fab Lab staff members Andrea Vozar and Alexis Papak. After an introduction to the interface we would be using to practice our coding, we started taking out all the components in our kits. To familiarize ourselves with the basics, we set up a simple circuit and opened up some example code that would cause an LED to flash on and off. We were than challenged to change the code so that it signaled the SOS message Morse code. After adding a few lines and changing some values then uploading the new code to the Arduino, I was able to successfully make the LED signal SOS. Then we were challenged to add a second LED and code it so that the lights alternated flashing. After changing the existing code and adding more lines to accommodate two separate LED’s, the lights alternated flashing.

IMG_1137

Once we were comfortable with our introduction to coding, it was time to start working on the Blinker Box. We followed a schematic to assemble our soldered LEDs into the right pins, ground, and power source. Then well pulled up the coding for the light box and uploaded it to the Arduino. Now we had to test the photo resister to determine the range of light intensity that was being sensed. After a few attempts of trial and error, I was able to identify an appropriate range for the LED’s to light up at and eventually cycle through flashing. Finally it was time to assemble the box. Using the press-fit cutouts from last week, I put the LED’s and photo resister through their respective holes, and then assembled the box around the Arduino. After 3 weeks of hard work, the project was completed!

Over the past three weeks, working at the Fab Lab provided a solid foundation of 3 different areas of making. Not only do we have a tangible object to show off our learning, we are also comfortable working in the fab lab and can now use what we learned on our group projects and hopefully our own personal projects. To help with personal or the group project, I found Hackster.io, an online community geared towards helping people learn about hardware. You can search difference projects by proficiency level, application type, hardware unit, or many other options. it reminds me of Thingiverse in that you can search and use product categories as well as the community platform it provides.  For the group that is considering Hydroponics product, I found this project using Arduino and Raspberry Pi, which may be helpful.  The Arduino website also has a great collection of resources for learning the various Arduino products, programming, and offers several tutorials to work through.  Happy Making!

Week 7: Arduino and Lights

This week, I got back my laser cut box and I was so excited on how my design came out.
The design that was laser cut.

Furthermore, this week the white group was assigned to the main lab in order to learn how to program an Arduino board. This was my first time actually seeing a computer board up close and I was definitely quite surprised by how it looked. Personally, I thought that it seemed quite fragile and easily breakable. However, it was quite sturdy and it could hold quite a bit of force. Along with the Arduino board, the following things were included: The Arduino packet FabLab provided.

Using the package, we connected power and ground to the board by connecting pins. By doing so it helps “power” and enables the user to correctly use the Arduino board. For example, we connected the pins and linked power and ground together so that later on we could “power” and enable the LED lights to blink and turn on. One of the steps to put together the blinking LED lights.

After assembling all the parts of the hardware, we had to “assemble” the software together and make the LED light blink by coding on the Arduino software. Here is one of the activities that we did:

The Arduino code in which sends a SOS through Morse Code.

This example was coded so that the LED lights would emit a Morse Code for
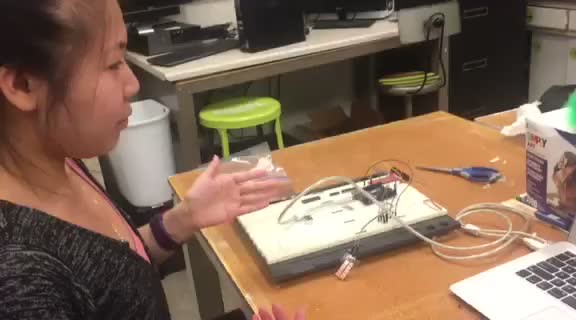
“SOS.” After coding for the LED lights, we had to add sensors. Personally, the sensor was the hardest part of building the hardware. Because the breadboard was so tiny, it was hard to find empty rows and columns to use for the sensor. However, with some help, I was successfully able to make the LED lights blink when I waved my hand over it. After completing and successfully doing so I felt such a sense of pride because, through my first attempt, I was able to successfully complete such a feat.The completed assembly for the workshop.

This week will be very applicable for our group project. Our group project is going to be a feedback droid in which there will be sensors, so learning how to connect the breadboard to the Arduino board through the pins. The coding as well using the Arduino software was very informative and will help us in the coding for our droid. I am excited to be using such new skills in my future group project. Next week, the white team will be soldering so that the LED lights will fit into the box well.