My Semester at Digital Making Seminar

Image

This semester, I got to learn a lot not only about digital making, but the design process and design thinking as well! This post is going to summarize everything that I’ve learned in this past semester, then I will talk about how the class met my expectations, as well as aspects of the class that I enjoyed that I didn’t expect to even learn about coming in.

3D printing

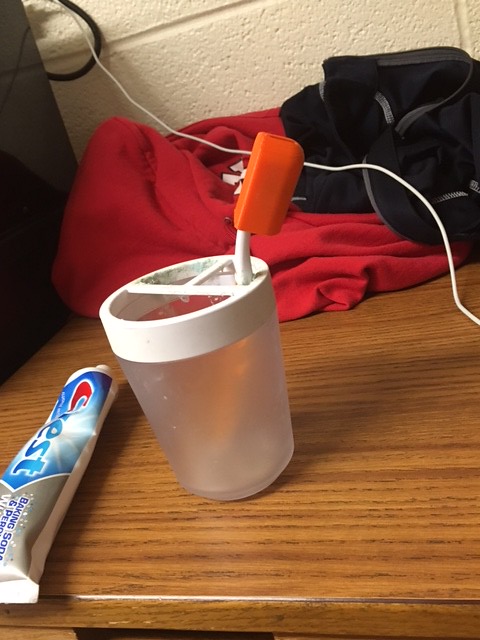
Digital Making Seminar takes place in a 3D printing lab, so it was very fitting that the first thing we learned about in this class was 3D printing. While at first we didn’t model anything, we had a guest speaker come in and talk to us, and even got to print out a small object to see how the printers worked. I printed out a small cover for my toothbrush, as shown here.

IMG_0343 (1)

The Design Process

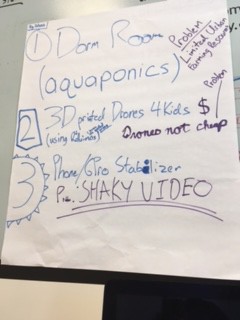
The next week, DFA (Design for America) came into our class and gave us a presentation on the design process, as well as design thinking. This helped our team out in the upcoming week, as it gave us a structure to follow when thinking of a product idea that we could build for our project. I never realized that there was a structured way to come up with product ideas, I thought that people just came up with random ideas but this truly enlightened me.
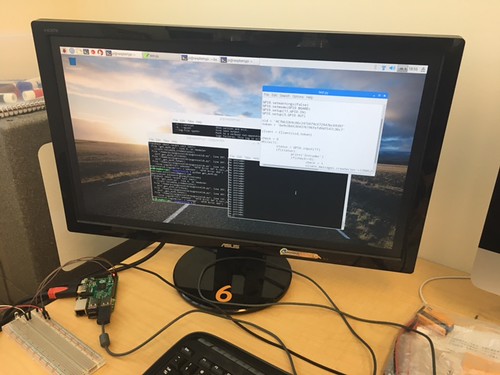
Fusion 360

Week 4 provided us with a chance to learn the ins and outs of Fusion 360, which is a CAD modeling system that is compatible with 3D printers. We were required to become familiar with the software before class began and then had an expert on the subject, Jeff Smith, come in and talk to us about it. I got to learn just how powerful Fusion 360 could be, as the sculpting mode allows you to make complex shapes in the blink of an eye on Fusion.

Fusion 360 Picture

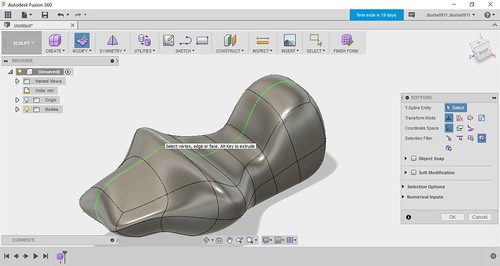
Designs like this would take possibly hours using traditional CAD techniques. This is one of the many benefits of Fusion 360 that our class learned about in this course.

Creating a Circuit

We were also introduced to the technique of creating circuits using Arduinos. We were fortunate enough to be able to use our schools Fablab, which is a building created for the purpose of inspiring creative thinking and design. During our class, we were actually able to make a circuit that caused LED lights to blink at a certain rate depending on how much light is picked up by a sensor. While it was a pretty basic circuit, it was cool to see how the process of circuiting worked and I know that this will be helpful down the road if I ever have to take an electrical Engineering class.

IMG_0421

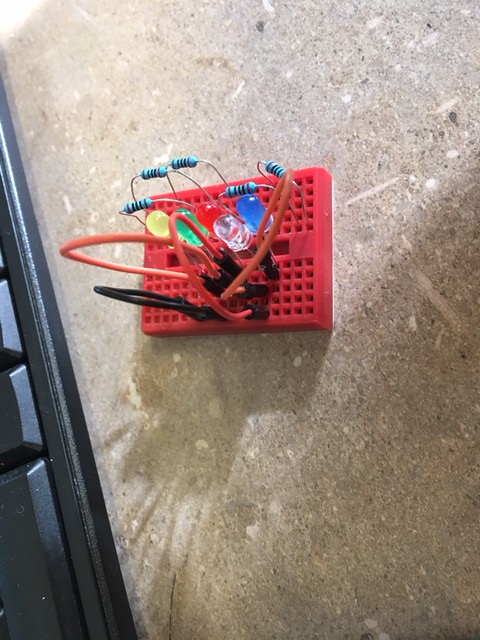
We also learned how to solder a circuit the next week. This took a lot of patience, but in the end everything turned out really well! This is also a valuable skill I could use, and hopefully I am able to use the soldering skills in the future as well.

IMG_0430

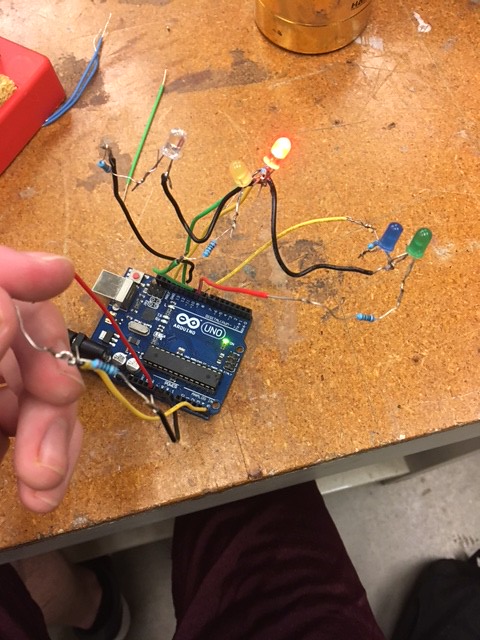
Here is a picture of my completed Arduino Circuit.
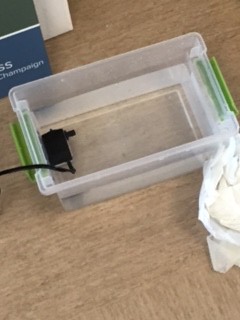
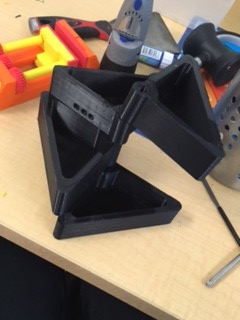
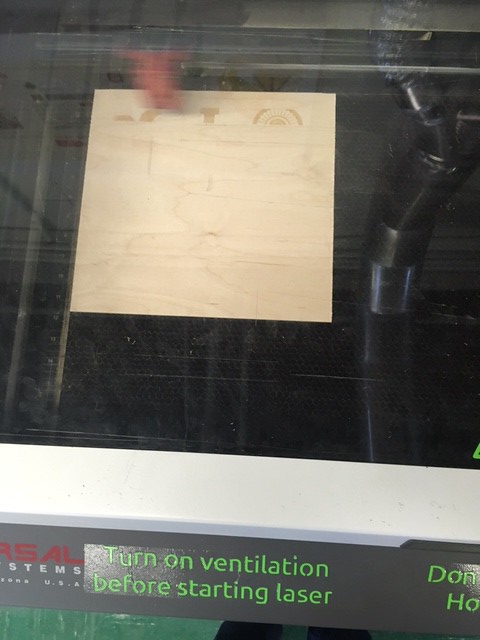
Laser Cutting

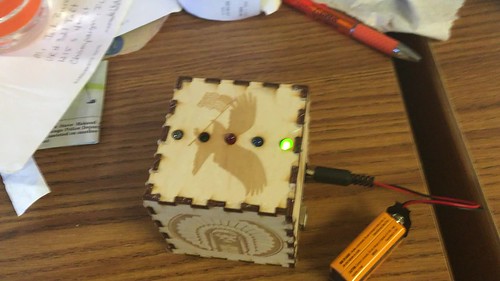
The last week in the Fablab, I was able to learn about laser cutting and how to print designs on wood using a laser cutter. We got to create a box that we would assemble and use as the container for our sensor and circuit board. The final result turned out really cool and the result is shown below.
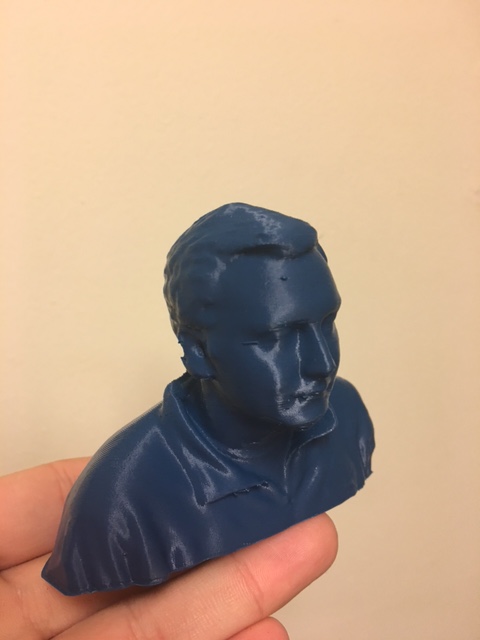
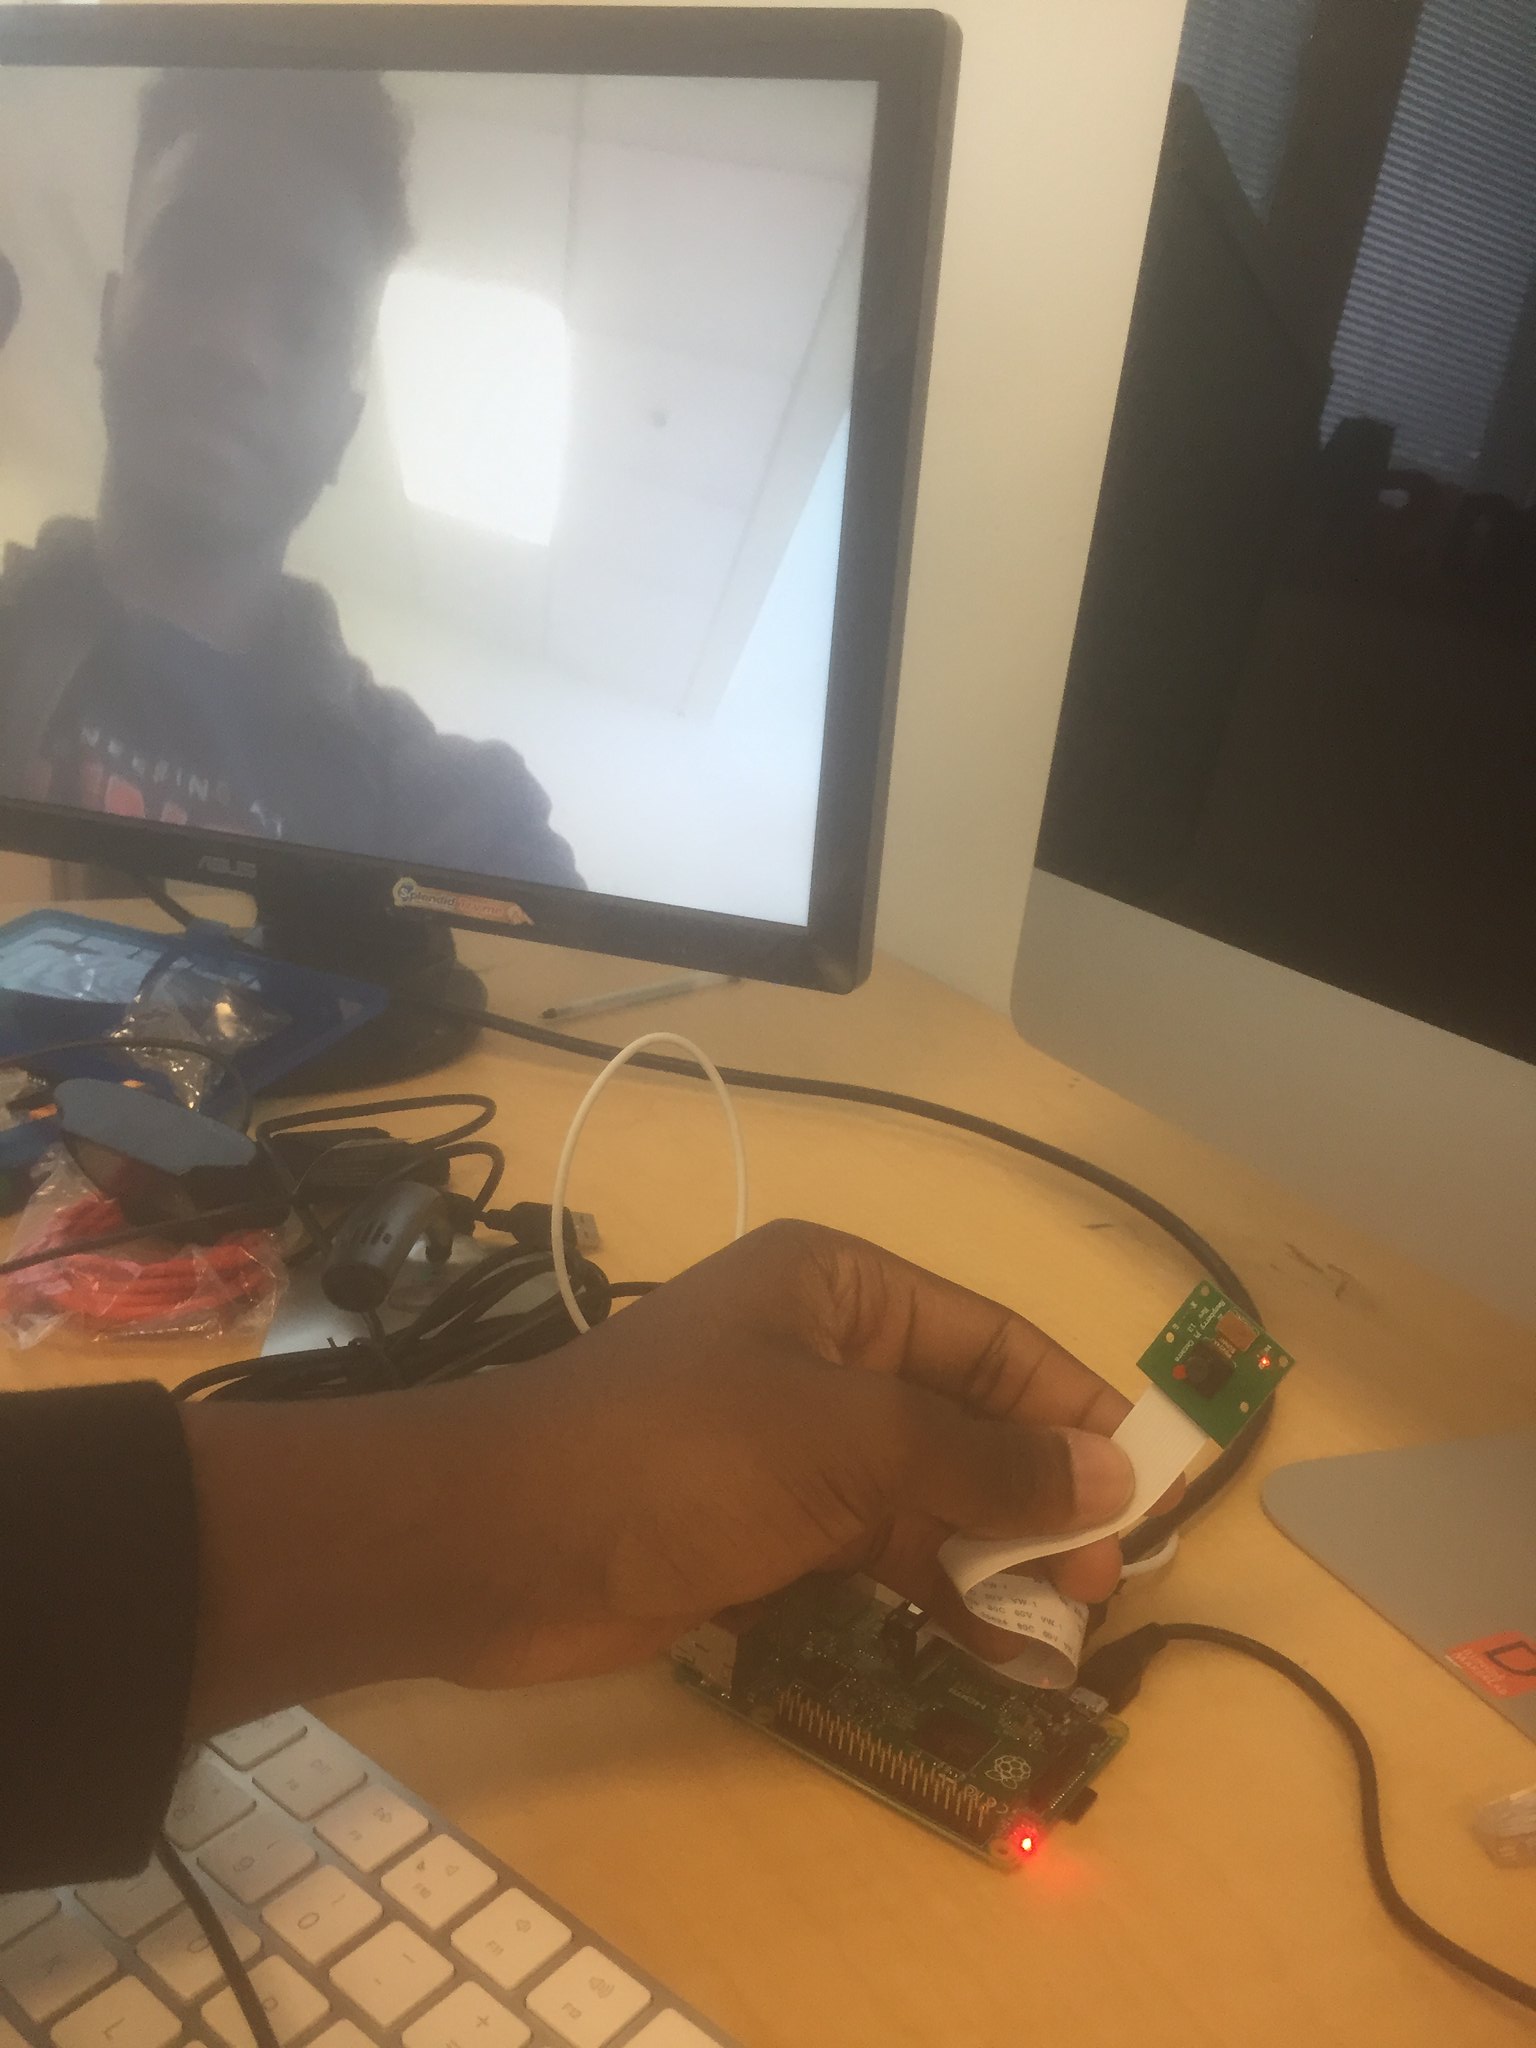
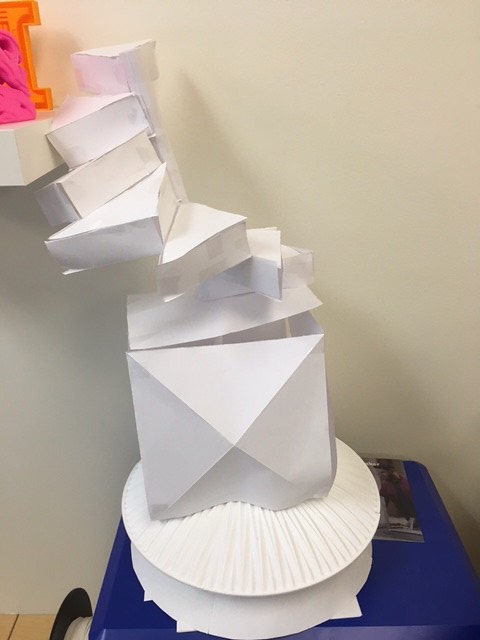
IMG_0449

3D Scanning

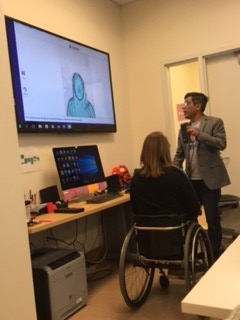
One of the last weeks of the year, we had the opportunity to learn about 3D scanning. A former student of the class, Ariel, came in and demonstrated the technology for us. We then were able to use the scanner ourselves, and even got the opportunity to make 3D models of ourselves. A picture of Ariel demonstrating the scanner to us is shown below.

IMG_0485

Takeaways

Overall, while this course didn’t turn out exactly how I thought it was going to, it was still an amazing and really helpful course. Going in, I thought the course would be exclusively about 3D printing and how to make and design things with 3D printers. While this turned out to be a huge part of the course, there was so much more cool topics that we learned about that I would never have learned if it wasn’t for this class. Everything we learned in the Fablab taught me the basics of some really cool skills that I would not have know if not for this class. Looking back, my expectations of learning about 3D printing were met, and on top of that we learned about some technical skills that I wouldn’t have known about had it not been for Digital Making Seminar. Before this class, I thought that coming up with awesome product ideas or a new invention was only for a select few. However, this class taught me how Design Thinking can help any person who encounters a problem in life come up with a viable solution. This class will hopefully come in handy and may help me create a viable product one day.

To those of you out there considering taking this class, my advice would be go for it! It’s a really cool class and there’s so many skills I have learned in Digital Making Seminar that I would not have learned on my own. I would absolutely recommend taking this class if you have the chance.

If you ever have any questions, feel free to email me at johnhb2@illinois.edu


Week 12: Auditing and Assessing our Projects

This week was all about getting other’s opinions of our product. We had the opportunity to split into groups and present our product. The other team then listened to us and gave us their opinion on our project. This actually gave us some great insight and the feedback that they provided will prove invaluable in the next couple weeks as we are finishing up our project. We also got the opportunity to look at some other groups projects and see how their progress was going.

The first group we were paired with was working on a door stopper that would attach to your door and slide out when you wanted to make sure your door didn’t close. It was a really cool idea and hopefully the feedback we gave them will help them out down the road. They were still on their first prototype so there was some problems such as how much shock the piece holding the door open could absorb. However, their group figured out that by using a more flexible material that could absorb more shock, the piece wouldn’t shatter as easily. I thought this was a really smart adjustment, as well as a cool demonstration of all the kinds of materials that 3D printers are able to use.

The second group we assessed was making a fitbit for hydration. This device would tell you when you were dehydrated, as well as give you friendly updates to keep drinking water. I found this one especially cool, particularly how they got the sensor to get information back to the Arduino and tell the wristband how often and what color to blink. I am also very impressed at how they learned to make this electronic piece in such a short time with no background.

At the end of the day, we got some minor adjustments but our aquaponics system is looking pretty good and everyone seemed to like it! The next week should include the finishing touches on our project as well as preparation for our presentation on May 1st. I can hardly wait to see our finished product!

Week 11: Continuing to Prototype

This week was simply dedicated to working on our prototypes for our final project. We made a lot of progress this week, and things are looking great! Some of our materials came in this week, so we got to begin testing out some of the parts that are going in our fish tank. While we ran into several problems throughout the day, we were eventually able to solve all of them and continue progress on our project.

The first problem presented itself within the opening minutes of class. Our teacher told us that our fish pump and tubes had come in, and we were very excited to try them out. Unfortunately, to our dismay, the hole for the tube to go into the fish pump was actually too large for the tube. We quickly reacted though, and got out some measurement tools and measured the size of the fish pump hole and the diameter of the tubing. We then used these measurements to create an adapter that would go into the hole but the other end would provide a snug fit for the tubing. This was the first time I realized how useful 3D printing could truly be firsthand. Before 3D printing, we would have been out of luck, and had to get new tubing, or searched for a pre-manufactured adapter. However, thanks to 3D printing we were able to get fix the problem within the hour, and continue progress on our prototype.

Once we had the tube fit snugly into the pump, we were able to test the pump out to see what setting we would need it on to get the flow of water that we wanted. After a couple tests we got it to the setting we want. A picture of our initial test is provided below.

IMG_0506

Finally, we capped the day off with sanding down the connectors on our plant containers to see if we could get them to fit. Last week, we printed the containers out, and the holes ended up being a little too small for our connectors. However, after a couple minutes of sanding, the connectors had lost enough material to be a perfect fit, and we were able to do a test run of the pump bringing water to the top container and letting it flow down to the lower containers. It was really gratifying to see our initial design and hard work come all this way to a working prototype.

I hope to continue making progress in this next week and finish our final design in the next couple weeks. I can’t wait to see not only how our product progresses, but how the projects of the other teams progress into awesome designs!


Week 10: 3D Scanning and Prototyping

This was an awesome week in the Makerlab, as we had the privilege of getting a tutorial in 3D scanning by a former student of this class, Arielle Rausin. We had Arielle come and talk to us earlier in the year, so it was awesome to see her again and listen to what she had to say. For those of you who aren’t familiar with 3D scanning, it is essentially technology that takes a picture of an object, and then scans it with lasers. It then records how the laser reflects off the object, and uses that data to create a file that could be used by a 3D printer to create that object. One type of software used by 3D scanners is called Meshmixer, and is created by Autodesk. This is the kind of software used by Arielle, and we got to see some pretty cool demonstrations during class.

This picture, found on Chase’s blog, shows Arielle going over 3D scanning using an example file of her wheelchair racing gloves. After taking this class, she used her knowledge of 3D printing and scanning to start her very own business! The link to her shop is here if you want to check out her product.

The best part of the lesson came when we had the chance to 3D print ourselves. While Arielle made things look easy, it was much harder for us beginners to get a good scan. There were many obstacles that we did not see coming that prevented us from getting good scans at first. For example, two guys in our group had very dark hair, so we had to hold up a phone flashlight by their heads in order to get good results from the scanner. This is just one example of how this class has taught us how to think outside the box and fix problems in sometimes unorthodox ways.

IMG_0485

Here is our teacher, Vishal Sachdev, scanning Arielle with the 3D scanner. You could tell he had been doing this for a couple years, he was a natural!

IMG_1526

Brian Kobiernicki ended up printing out his scan, and it turned out really well! This is definitely a cool souvenir to remember the class by.

Once everyone who wanted to scan themselves did so, we were able to break off into groups and continue working on our semester projects. It was really cool to see how much progress all the teams have made over the past couple weeks, and there have been some awesome ideas for projects so far. I’ve put a couple examples down below so you can see what people have been working on.

IMG_0138

Taofik’s team got their camera up and running and even got it connected to the computer so they could see the images on the monitor.

IMG_0493

This is the prototype for the top of our aquaponics system. There will be plants growing inside of these containers that receive water from the fish tank below. The plants will receive nutrients from the fish waste and in turn will filter the water and keep the aquarium clean, its a really cool self-sustaining system! Anyone that wants to know more about aquaponics can go ahead and follow this link here. You could also learn more about what my team did by visiting my blog post.

IMG_1512

Charlene, Carter, and Brian’s group made a security monitor that can send text messages to your phone.  I thought this was really cool and could be something that almost everyone needs in their life. You can see more about their project at Brian’s Blog Post.

Overall, the class today learned about not only how to use 3D scanners, but also various reasons why 3D scanners come in handy. On top of that, we learned how to solve problems on the fly. For instance, thinking of a way to fix the fact that the scanner wasn’t picking up black hair showed how this class has influenced us to solve problems creatively. Also, all of the groups gained much needed prototyping experience that will hopefully help us for years to come. After all, no matter what field you go into problem solving is a huge asset and an effective method to solving problems is starting with a basic solution and then improving on it until you come up with something that works perfectly. This is the idea behind prototyping and I know the skills I have learned in this class will help all of us, no matter what we do in life after college.


Week 10: Learning about 3D scanning.

Image

This was definitely one of my favorite weeks, as we got to use some cool 3D scanning technology and discover how it works. A former student of the class, Ariel, was nice enough to demonstrate how these machines work. We made 3D files of a watch, a keychain, and even ourselves! I had a lot of fun not only getting scanned, but also learning how to scan my friends. If you would like to learn more about 3D scanning, I found a pretty helpful link here.

IMG_0485

Playing with the scanner was very fun, and I hope that I can use technology like this in the future. However, our project does not require the use of a 3D scanner, so we only played around with it for a little while then got back to work.

Our hydroponics project is making great progress, as we have made our first two prototypes and hope to have our finalized product out within the next couple of weeks. As you can see in the picture below, the second prototype we made is much nicer than our first, and we fixed some structural problems we had with the first design.

IMG_0480

After we had finished creating a basic prototype of the overall structure of the product, it was time to start 3D printing prototypes of the containers that the plants would be held in. At first, the pieces that were supposed to connect the containers together didn’t initially fit, so we had to make the holes bigger and print again. The result is shown below.

IMG_0493

The thickness and strength of the containers turned out awesome! However, we made the holes slightly too big when we modified our design and on two of the containers the printers ran out of filament before finishing. This means that we are going to have to print at least one more version of our containers. We created a file that just contained the cylinders of the container that fit together, so we will pick them up in class this week and hope that everything fits well.

Even though our containers didn’t come out perfect, we still have made a tremendous amount of progress in the past couple weeks, and I am very proud of our team. With any luck, this week we should be able to print a stable version of the containers and assemble our fish tank using material from the Fablab. We will then begin to incorporate the fish pump into the design, and possibly even get some plants for us to use as well. I am very excited and can’t wait to see our finished project, as well as the progress that other teams have made on their projects.

The Beginning of the End: Prototyping our Final Project Idea

Image

This week, we had to finalize our ideas and work on creating a prototype for our product. Prototypes are really helpful because they can help you envision how your project will look once it is life-like and in 3D form. This week, we created our first prototype, which was a cheap, easy to make model made out of paper. Our prototype models an hydroponic system. In this system, a fish tank serves as the base for containers on top of the tank that grow plants. The water from the tank is pumped up to the top container, where gravity does the rest and the water will run through all of the containers back into the tank through little holes found in each of the containers.. The plants use the fish’s waste found in the water as a source of nutrients, and this in turn filters the water. The result is a self-cleaning ecosystem. Our prototype is shown below.

IMG_0470

As you can see, the prototype is very far away from being done, and we still have a lot of work to do. However, there were many positives from creating a simple model just like this one. For instance, we discovered that our spiral staircase idea would not work out well because the containers that the plants would grow in (the small triangles on top of the box), were too high up and would make the system too top-heavy. We now know to design the top differently so the boxes will be lower to the ground.

Learning how to prototype is a valuable skill, especially as a mechanical engineer, because if I am ever creating a product in the future it will take many trials before I finally get exactly what I want. Learning how to prototype quickly and efficiently will enhance the level of product that I produce.

While everyone on our team is going to help equally with physically making the product. I will be working specifically on designing the product on CAD, specifically on Fusion. I have already began drawings with exact specifications on the containers that will hold the plants, and I plan on creating the first version of the CAD model this upcoming week after we create our second prototype.  With any luck, this week we will make a lot of progress and I will be able to share a lot with you guys on my next post!


Week 8: Last week of Fablab

This week was unfortunately the last week we got to spend learning at the Fablab. However, we got to finally finish our light sensors, which turned out super cool. I started the day learning about cutting designs out of wood using lasers. We used this really cool software that allowed us to transfer pictures from the internet onto the pdf we were creating. Frist we created the specifications of the kind of box we would like. Then, we were taught how to insert holes into the design that would house the light sensor, LEDs, and Arduino board. We accomplished this using a vector cut, which is where the laser cuts all the way through the board. Next, we found pictures that we liked and downloaded them, then pasted them on the computer. Finally, we were ready to print. The designs we put on the boxes were printed onto the wood by using a raster cut, which involves the laser going over the area we were printing on very rapidly and only cutting off a small portion of the wood. This allowed us to make cool designs. Below I included a picture of the printer in action.

IMG_0441

If you would like to see a video of an entire print, I provided a good one of a pretty cool wood design here.

After we finished making our boxes, it was time to finally put the whole thing together. While a little confusing and frustrating at first, I finally got all the pieces together and the result was actually really cool.

IMG_0449

It was really cool to be able to learn so many cool technical skills over the past three weeks, and these skills will prove handy later down the road not only in finishing our semester project, but in future classes and possibly in my job down the road. Learning skills like these can help me turn my ideas into real products that I could sell. With tools like these the possibilities are endless.

Now that I now these skills, I can turn my full attention to my semester project. Our team has decided on building a simple, cheap aquaponics system that allows college students to both help the environment and help release stress. The skills I learned at the Fablab will definitely come in handy with building this in the upcoming weeks. While I enjoyed the Fablab, I am excited to get back in the MakerLab after Spring Break and get back to learning about 3D printing.


Soddering an Arduino Circuit

Image

This was week 2 of our lessons at the Fablab, and it was just as interesting as the first week. Last week, we got to create an Arduino circuit using a breadboard. This week, we had to solder the wires together. For those of you who aren’t familiar with soldering, it is basically bonding two wires together using an easily melted metal such as lead. The two wires are heated up using a solder pen, which is just almost screwdriver-like in form, but is heated to very high temperatures using electricity. If you want to learn more about soldering check out this link. Soldering is a much, much harder process compared to the breadboard, and it makes you appreciate how easy the breadboard was. We started the day by learning about soldering and safety procedures. It turns out, being in contact with hot solder for even half a second could leave very severe burns so we had to be extremely careful when making our circuit. After about 2 hours and a lot of frustration, all my work paid off. I got to see my creation of what looked like a bunch of random wires turn into a light sensor that went off if it sensed that it was too dark. I attached a picture below.

IMG_0430

Learning soldering was a very cool and important skill because as our team continues to develop and think of our project, there is a good chance that we will need some sort of electrical circuiting that will require us to solder. Luckily, we will now be able to do this thanks to the awesome people at the Fablab. This could also come in handy for me down the road, as I will definitely be making other projects in my classes in the years to come and my knowledge of soldering will help me to stand out from the other students.

Now that I have a basic knowledge of soldering, I hope to use it in the future, whether it be on this project or one in a Mechanical Engineering class. I can now add soldering to the list of awesome skills I have learned about during this class. Next week is our last week at the Fablab and I can’t wait to see what they have in store for us then. If it’s anything like the first two weeks, I wont be disappointed.

Week 6: Controlling Sensors using Arduinos

Image

This week we got the privilege of having the opportunity to do some hands on making at our very own University of Illinois Fablab. I really enjoy hands-on learning and making cool things, so this was a really fun week for me. We started the day off by getting a tour of the Fablab. There were some super cool projects going on there, such as a 3D printer that can water-paint, as well as fungus that can be grown into biodegradable molds. We then got split up into different groups, each to work on a different project. My group’s project involved learning how to control LED lights that are put on an Arduino board. For those of you not familiar, an Arduino boards are used to create sensors and programs that can interact with the environment. They are fairly simple to use and therefore can be picked up fairly easily by a beginner. If you would like to learn more about Arduinos, you can check out there website here. Our project was to build the Arduino board for a light sensor. With the help of some of the smart people over at the UIUC fablab, we were able to orient the circuit board and program the board in a way that whenever the light sensor detected a quantity of light deemed too little, the LED lights would starts flashing. It was really cool to see how something so seemingly complex could be made fairly easily. A picture of my Arduino board can be seen below.

IMG_0421

Learning about Arduinos is awesome because besides giving you a very basic intro into things like coding and creating circuits, they also allow you to make a broad range of things with them. This, like the Maker movement, inspires a lot of creativity and I’ve seen some really cool creations made with the Arduino. One such invention was a man who came to talk to us a couple weeks ago. He used an Arduino board to create a sensor that would text his daughter every time their cat litter needed to be changed. Having a product that allows creativity like this can only mean good things for the world.

Now that I have learned about Arduinos, I hopefully can use them in the upcoming weeks when building my semester project. While the project will be 3D based, there may be some circuits involved, and anything involving a sensor would be perfect with an Arduino. I will also be at the Fablab the next several weeks as well, learning how to do other things that I may need to do in my project. I continue to look forward to all the cool skills I will learn from this class in the upcoming weeks.

Week 5: Brainstorming for Semester Projects

Image

This week, we began the process of beginning our semester projects. To begin class, we split up into our groups with some paper and markers, and we began thinking of problems we could solve in our lives. Our problems included making it easier for people living in urban environments to grow gardens within their homes, as well as making time management easier for students. We also talked about solving the problem of shaky phone videos as well. In the end, we created a list of ideas as shown below.

IMG_0402

After all of the groups made these lists, we then met back up and presented our ideas to the class. Our instructor, Vishal, then critiqued our ideas and presentations and gave us helpful advice for choosing our projects moving forward. Once this was done, the members of each group were then split up into separate groups where we presented our ideas to the members within our group, then they gave us their feedback. This was very helpful, as it gave us fresh new viewpoints from outside our group that gave us an insightful new perspective on our problems.

This process was a very helpful learning experience for me, as it shows me what evaluating an idea will be like if I work at a business after college. As the dummies.com article titled “10 ways to evaluate a new Business Idea” says, there are many questions you should be asking yourself and taking into consideration when thinking of a new idea for a product. Things like “Am I really passionate about this?”, or “Does this idea actually meet or solve a real problem?” are questions you should definitely be asking yourself when thinking of business ideas. This is a something I learned how to do this week, and it is a very important skill to have if you would like to create new products or identify needs in a business.

Now that I have learned the skill of thinking critically about problems in our world and how I can solve them, hopefully I can use this experience to create something of my own that would solve problems. I hope to design products at a company or possibly run a company of my own one day, and having the skills to identify a need or problem that needs to be solved is a very important skill that provides the starting line for product development. I can’t wait to develop these skills even further in the upcoming weeks, and hopefully with some more practice on developing products I can design some products of my own one day.

In order to continue my learning on evaluating business ideas, I did some more online research by myself. One article I liked a lot you can read here. While in class we worked on identifying needs that needed to be met in the world, articles like this one are more centered on the finances and business feasibility of such ideas, which are very important factors to consider when thinking of coming up with an idea.

I also liked this article, as it goes into ways you can evaluate ideas as a group if you’re working in groups. This article is helpful because in most scenarios it will not just be you alone in a room thinking of the next great idea. You will be put in groups with other people just as smart as you and you have the opportunity to build off of each other’s ideas. This kind of groupthinkinking is invaluable, and the suggestions listed in this article help to maximize the benefit of thinking of ideas in groups.