Team MakerLax Tie Assistant Project Reflection

Overview:

The MakerLax Team consists of three members with very diverse backgrounds. Brian is a freshman majoring in electrical engineering, Peter is a senior in advertising, and Chase is a senior in business. Having three strongly uncorrelated majors allowed us to experience a wide range of perspectives throughout the semester. While at times one of us were unfamiliar with a certain part of the making process, the others would step in and help fill the knowledge void.

Motivation:

While our initial ideas proved to be either too complex or out of the scope of this course, we ultimately decided on our final topic based on an article Vishal shared during one of our classes. The article focused on creating a “How Can We?” statement, which essentially stated that, in order for an idea to become a reality and a finished product, it must first meet three criteria. First, the idea needed to be narrow in its scope. Users should be able to understand the capabilities and capacity of the product without needing an extensive manual to guide them. Next, the idea should be local in its presence, meaning that the product should serve some type of purpose that fulfills a need in the surrounding community. By doing this, the creators will already be familiar with the problem and can devise more intuitive solutions. The final requirement for this product was that the answer needed to be realistic. Users cannot be expected to have advanced knowledge of programming, for example, in order to fully utilize it. Drawing from these three requirements, we ultimately decided to gear our making efforts towards aiding students in preparing for professional engagements, such as interviews, career fairs, or networking events.

Prototypes:

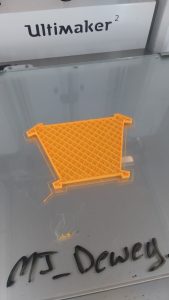
The very first crude prototypes that we created were paper models. They were quickly fashioned to act as both visuals, as well as to test different shapes for our design. After we decided on one, we recreated that form in Fusion 360. Our very first print was only meant as a test for the shape that we decided to implement. Initially, we considered making the design modular in some way. Either by adding tabs for the parts to lock into, or by creating a “puzzle piece” design. Eventually, we decided to keep the design as a single unit. Afterwards, we shifted to TinkerCAD as we believed it would better for our purposes. We then printed more models to test various clip designs. After we found a suitable one, we moved to testing. The size and shape seemed fine, but it was a bit cumbersome to wrap the tie around the sturdy print. It was this that caused us to move on to the semi-flex filament for our last design. After reprinting the last model in semi-flex and testing it, we found it satisfactory and used everything we gathered to create the final product.
Final Product:

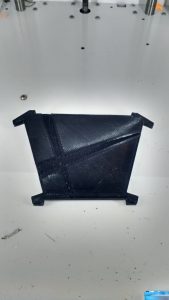
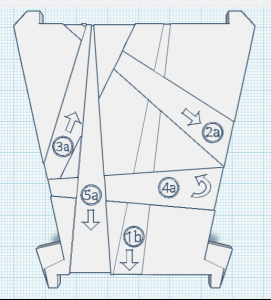
Our final product was, at first, our second to last model. After producing and testing the semi-flex model, we thought it was suitable enough to be our final design. However, somewhat last minute, we decided to improve upon it further. We decreased the dimensions, and redid the shape to make it more versatile. Physical features such as grooves and numbering were added to act as guides and “mini-instructions” to improve the ease of usage. It still is not necessarily perfect, and the print itself did not turn out that well, but it is quite an improvement on the original.
Features & Benefits:

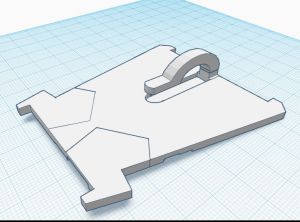
Our final design has a thin and sleek profile, making for easy storage. It can easily fit within a pocket or portfolio. The flex material makes it very malleable and not very prone to breaking. This also allows one to utilize it with ties of varying shapes and sizes, and work it with ease. The clip is barely noticeable and and the physical structure of the design allows it to hold a tie snugly while at the same time allowing for easy removal. The indentations in the front face of the model are of different depths, allowing a user to feel around for the different steps. A number and arrow system are also engraved into the face that coincide with the instruction manual. Aside from allowing one to tie a tie around oneself, it can also be used to store a premade tie, in the event that the user foresees a circumstance for it.

User Feedback:

Overall, we found user feedback to be incredibly helpful during our prototyping phase. We had both in class feedback along with feedback from students outside the classroom. During the sessions, we were able to observe how our products were used the and difficulties that occurred. One student said, “I suggest adding instructions or some kind of step-by-step process to make using the product easier.” We took their advice and created a pamphlet as part of the packaging and adjusted the clip size and indents on our original prototype.

Future Improvements

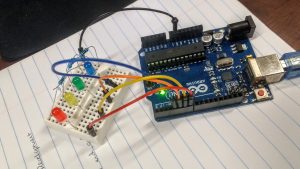
We hope to utilize more materials in future prototypes. Semi-flex filament was different to handle and took the 3D printers multiple tries to print out our prototype, so we hope to test different types of semi-flexible materials. One feature would be to have a collapsible, modular format. The benefit would is that the user can easily remove the product once they had completed tying their tie. From the user feedback, the other suggestion we were given was to incorporate electronics into our design. The product would have an LED guidance where different sections would light up green to guide the user to tie the tie. The LED guidance would require coding and implementing a small arduino and a battery into the product.  
Takeaways:

After the conclusion of this project, our team came away with three main conclusions from the experience. Firstly, it was incredibly satisfying to see our weeks of efforts and labor culminate in a working and usable model. One of our team members who previously was unfamiliar with how to tie a tie was able to learn how, with the guidance of our product. After seeing it be put to use, we can say with complete certainty that our efforts proved worth it. Additionally, we learned that rapid prototyping is critical to the making process, and to creating an effective final product. We spent the majority of our initial efforts attempting to make the perfect first prototype, when in reality the majority of our progress came upon the third and fourth iterations. Similarly, our team realized the immense importance of receiving user feedback. While we had certain connotations of the direction we wanted to pursue with our product, obtaining feedback from users that were unfamiliar with the making process gave us great insight as to what the average user would actually prefer.

Slide Presentation:

https://docs.google.com/presentation/d/1IPbJ5ryCkPmgwZ3aqKYncMZNeR6uIaXsuPVW9Mw8MWc/pub?start=false&loop=false&delayms=3000

More than meets the eye

Design. A word that may be daunting to some and may be invigorating to others. Every aspect of our daily lives, from the food we eat to the products we use every day, have been thoroughly thought about and crafted to fulfill the epitome of its purpose. The stages in which a product comes to fruition are very extensive and is comprised of thousands of hours, dollars and a lot of people coming together for the common goal of solving a problem. The design process that I will talk about today will be focused on problems, from identifying them all the way to testing with users. It is extremely important to address a NEED first before coming up with a solution because if there is no one that needs to use it, then no one would want it.

This is where I have seen people in BADM 395 fail quick and then have to start from scratch, it is creating a solution before thinking of the problem you are trying to solve. Human-centered design thinking is exactly as it sounds, by thinking of the humans that the product is intended for, then can you truly create something that is worth other people’s time, money and effort in utilizing the product. The design thinking process will help you be able to approach a problem you see in the community and create a product that will enable you to make it meaningful and to fully fulfill its purpose through iterations and critiques. The idea of this is to start thinking outside the box and sometimes take a few steps back in order to create the best of the best. The following steps outline how the Design for America human-centered design thinking process has been helpful for students all over the country.

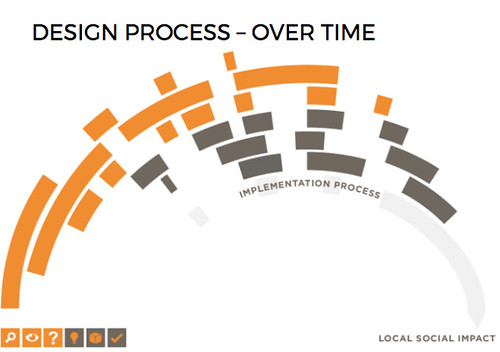
Screen Shot 2017-04-02 at 10.58.45 PM

Step 1. Identify
Goal: Defining targeted problem spaces you will tackle to focus future research. This is a crucial step in creating something that will create the largest impact in the community. In order to build something, there has to be a need and identifying it is the first step. You want to be able to take large challenges and break them into smaller parts that are easier to manage and tackle. The issue of campus safety, for example, is very large, but you can examine it by looking at safety in classrooms, on the sidewalks or even in dorms. By analyzing assumptions and initial knowledge, you can see what knowledge you are lacking and where to find it. Think of the local organizations and mentors that are available to help you with this challenging area as well. For the example above, the police department and campus security may be helpful resources.

Step 2: Immerse
The next step is to be able to immerse yourself into your targeted audience. To empathize with stakeholders and uncover insights to deeply understand your problem spaces. The idea is to fully wrap your head around the problem space from every aspect and every party involved. For the example above, the idea is to talk to students, police, and people in the community that are potentially at risk from criminals or even feel unsafe in their areas. This will give you a much more well-rounded idea of identifying common themes, stories, and existing solutions. The UIUC Makerlab, for example, has the extremely expensive equipment and so talking to people in their and how they keep it safe would be helpful too.

Step 3: Reframe
The goal of reframing is to define the change you want to make in the world and determine what your solution needs to accomplish to get there. This is to define desired qualities as well as narrow down your focus. This also allows you to take a step back and gauge how you define a successful impact. As it pertains to BADM 395, the idea of reframing means that the product you create will ultimately solve your problem in an efficient manner.

Step 4: Ideate
This is another important step, brainstorming and generating a variety of ways that make  an impact and exploring alternative solutions is extremely important. Some students jump directly to this step and that is where they falter since they do not know what existing solutions may be out there. Thinking of any idea, no matter how big or small means that there is room for innovative ones as well as the possibility of ideas colliding and collaborating together.

Step 5: Build
Making a variety of tangible prototypes to communicate and test your ideas will allow you to see where your design falters and where it can be heavily improved. Without many iterations and samples, one can never perfect a product. Take the David Kelley example of the Apple mouse, for example, he tested and built hundreds of mouses in order to find what was wrong with each version and how to make it better. Getting started with low fidelity prototypes lets you envision your product and lets you fix potential problems quickly before they arise and cause more problems down the line.

Step 6: Test
Getting feeback to uncover insights and develop the nextsteps to improve a solution and product is extremely important. Being able to take this product into the homes and talk to the potential users is important since it allows your target audience to actually see a tangible product and envision if they can see themselves using it. This also allows you to obtain expert input and quotes about the solution to give you a much deeper and well-rounded way to go about the product. Testing a product in the BADM 395 course before it comes to fruition is important since we have to present it at the end of the year to our fellow classmates. This means that ensuring the product works for its intended purpose is extremely important.

To wrap up the design process, you have to keep in mind that these steps are not a one-way road, it is extremely important to constantly go back and forth to make corrections and improve designs with reiterations and consulting the users constnatly. By involving experts and professors in your process of creating the BADM 395 product, you will gain a deeper understanding and identify where and how you can fix it, so your initial idea becomes alive and ready to change the world.

Screen Shot 2017-04-02 at 10.58.53 PM

http://designforamerica.com/resources/

Week 7 Summary: Building on Our Skills in the Fab Lab

In Week 7 of the Digital Making Course, our community of Makers once again ventured over to the Champaign-Urbana Community Fab Lab. Similar to week 6, our class broke into our three groups to work on the next rotation in making the Blinker Boxes. However, since we were already familiar with the layout of the building and the resources available to us at the Fab Lab, we were able to hit the ground running. Once again, our three groups were split up to working on Coding with the breadboard and Arduino, soldering the electronics, or designing the press-fit boxes for laser engraving and cutting.

Our time in the CUC Fab Lab serves many purposes. First and foremost, it provides us the opportunity to practice skills that can help us with our own making endeavors. It is especially helpful for our project groups to develop a diversified skill set that we can utilize on our semester projects. The workshops at the Fab Lab also familiarize us with the technologies and physical tools available to us. Learning from the staff also helps us get a feel for the greater Maker Community and hearing about their personal projects helped us understand their skill sets and how each of them may be able to help with our projects. Finally, spending time in our own Maker Lab, the Fab Lab, and with all the staff and volunteers gives us a better idea of the Maker Movement that is revolutionizing businesses across the nation and around the world.

Supra

Team Supra’s Concept

As we keep going through the semester, we are rapidly approaching the design and prototyping phases of our semester projects. All of the project teams are refining their “How can we” statements while defining the actual problem they are looking to solve. Our first project idea submission was due on Wednesday of Week 7. To give you an idea on some of the concepts the class is working on, Team IJK is trying to help college students decrease stress by using indoor gardening. Team XNihilo is attempting to have busy professionals or college students drink more water. The MakerLAX is hoping to “help teenagers, young adults, and anyone else who struggles” tie a tie properly. Team Zerott is trying to improve patient satisfaction at hospitals. In Week 8, the project groups will be moving forward based on the feedback they have received. Once again we will be submitting our “How can we” statements, but this time we will include a concept details, key components of the solution, the capabilities of team members, outside resources for skills and fabrication tools, and any information resources identified.

Odelia Code

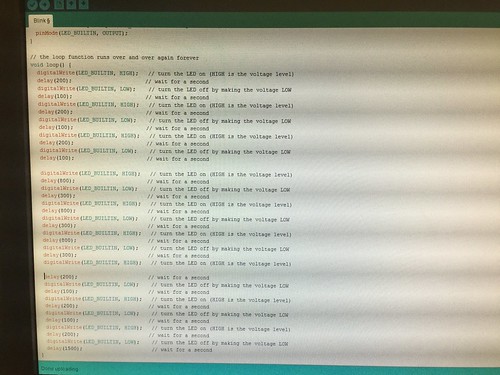
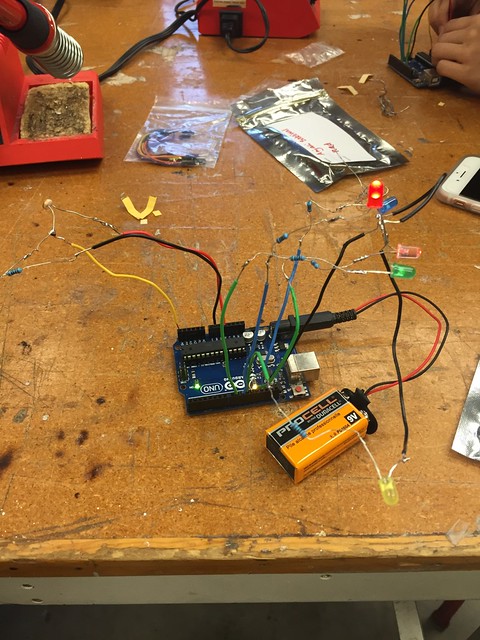
Odelia spent this week in the computer section of the Fab Lab code the Arduino for the Blinker Box. Odelia said, “This was my first time actually seeing a computer board up close and I was definitely quite surprised by how it looked. Personally, I thought that it seemed quite fragile and easily breakable. However, it was quite sturdy and it could hold quite a bit of force. Along with the Arduino board, the following things were included.” After setting up the circuit and trying to adjust the code, she found working with the light sensor was the most difficult part of the lesson. I think many would agree, as the range of values corresponding to which LED flashed depended on the specific sensor and how bright the part of the lab you were sitting in was.

Chase Soldering

Chase spent the class time in the electronics section of the lab soldering his LED’s together. Reflecting on the class , said “the instructional course ultimately proved to be very time consuming and required incredible delicacy, there is little doubt in my mind that this is a crucial tool in any maker’s arsenal of building tools.” For many in the class, this was their first experience with soldering. However, we all were able to pick up on tips and tricks such as using the “helping hands” or tape to hold wires down while soldering multiple pieces together. By the end of class, Chase and his group mates were able to wire the LED’s and sensor into the Arduino he programmed in Week 6 and the LED’s flashed as planned! Finishing off his post, Chase, like many, said he hopes to “incorporate soldering in some capacity” into the final project.

Kenny Design

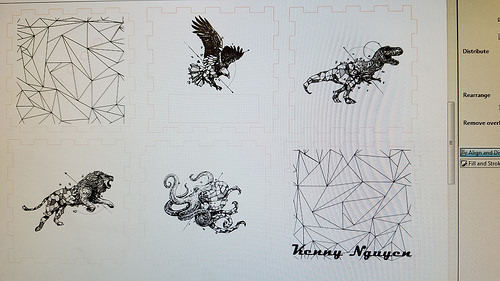
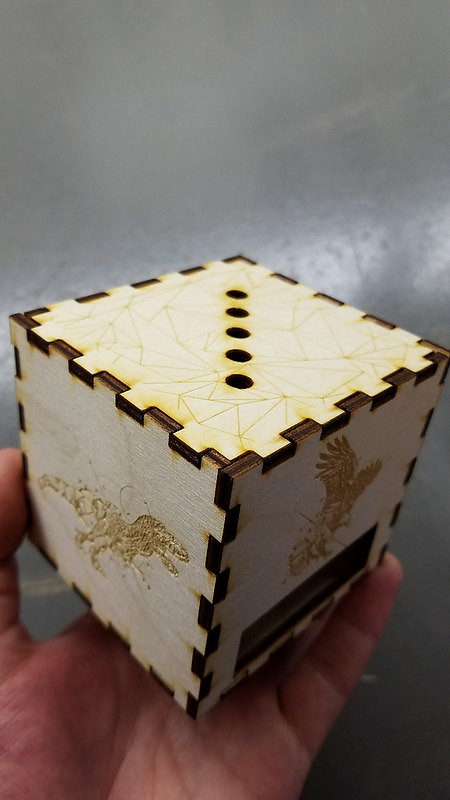
The final phase of the Blinker Box is the making the press fit box. Kenny wrote about using the free Inkscape software to design his box. By taking images from the Internet and vectoring them using the Trace tool, the images became compatible with the laser. Kenny chose artwork from one of his favorite designers to put onto his box. Once it was finished, he said, “It was very rewarding to be able to see something you design on a computer come to life in a matter of minutes. There was something satisfying from watching it go back and for until your vision comes true.”

Kenny Box

All of our blinker boxes are coming together as we build on our skills at the Fab Lab. Week 8 will be the last class session in the Fab Lab but many of us will be back to work on our projects. Happy Making!


Brainstorming for the Problem Before the Solution

This week we were back in the Maker Lab after two weeks away. At the beginning of class we broke off into our groups and were able to start discussing our projects. As we learned from our session with Design for America, the best designs do not start immediately from a solution. Instead, we took an approach that had us start from a broad problem before narrowing it down to a single specific problem that a unique solution could be developed to solve that problem.’

Ideas

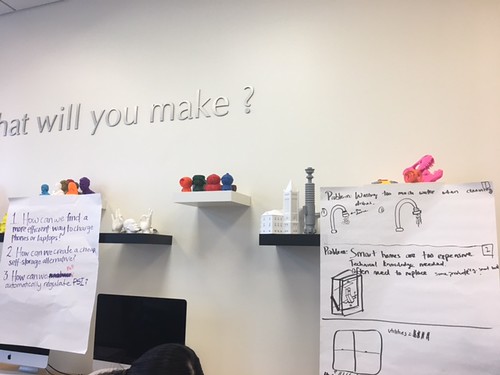
The Interaction Design Foundation says, “the first step of product thinking is to determine the problem that your users are looking to solve.” If a problem exists, consumers will have a reason to purchase a solution. Therefore, successful designs should begin with the problem and affected users. We also considered the “10 ways to evaluate a new business idea” article when generating ideas to work with. Our group thought about problems we encountered in our lives and identified these three problems: overcharging laptops and cell phones, reliability of self-storage options in public spaces, and keeping athletic equipment up to specifications over time. While these were good to use for this exercise, Charlene, Carter, and I agreed that for the purpose and scale of the semester project, these problems are not realistic to find a solution for.

A valuable part of our class session was peer review. One member of each group rotated to another group in order to offer constructive feedback on the problems each group identified as they worked towards a solution. Going forward, we now know how valuable it can be to receive an outside opinion on a project or idea. An outsider can find flaws or even alternatives that were previously overlooked. UK based Corintech defines design peer review as “a process whereby a design project (or aspect of) is reviewed and evaluated by a person, or team, not directly involved with the project, but appropriately qualified to provide input that will either reinforce a design solution, or provide a route to an improved alternative.” It continues on to say that utilizing the experience and expertise other people will add valuable insight. As we develop our project, we will be sure to reach out to classmates or others who are familiar with the topics we are working with for their feedback.

Mike

In the second half of class, Mike Bohlmann, Assistant Dean of Technology in the College of Media and self-proclaimed Maker came to discuss many of the projects he has worked on. It is important to note that all of the examples he showed us started from a problem that he then worked to solve by making something. He did not begin his process by making a product and finding a problem to associate it with. From digitalizing a Star Wars game to making a holder for his airplane radio, he identified problems in his life then developed a solution. Another takeaway from the presentation was that Making can be a fun, affordable hobby that can be pursued at anytime. On top of professional and family obligations, Mike still has time to make prototypes, often supporting his other hobbies and passions. Even after this class ends and I am working full-time, I hope that Making can be an outlet for learning and having fun.

First Attempt at Autodesk Fusion 360

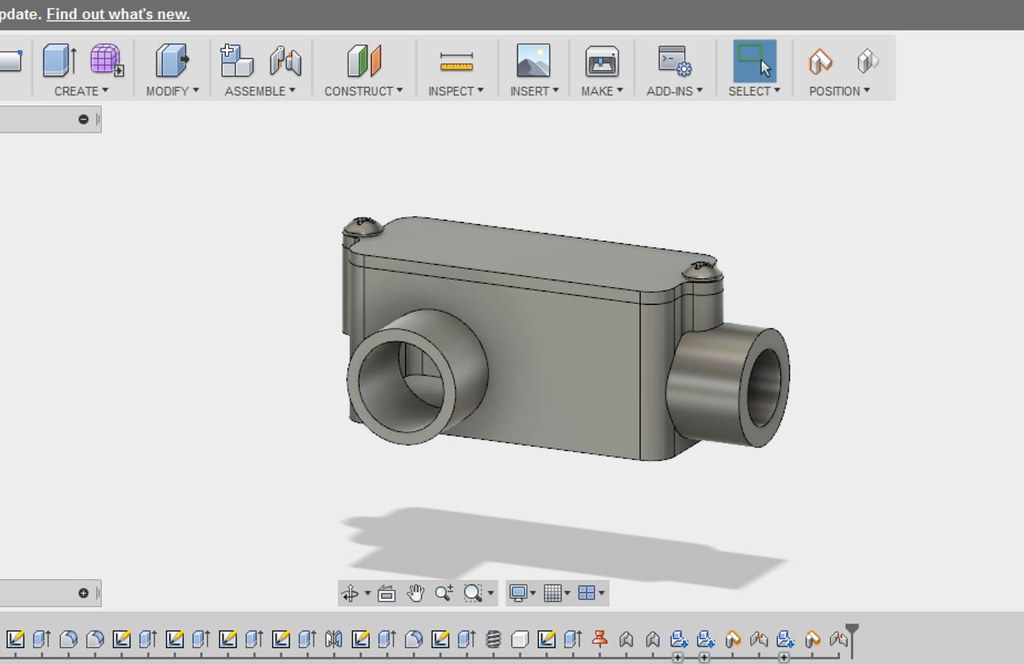
Autodesk Fusion 360TM, a phenomenal tool for designing, engineering, and simulating 3D models, turned out to be more challenging but at the same time simpler than I had imagined. As self-contradictory as that statement sounds, that was exactly how I felt after playing around with the program for hours and following Lars Christensen’s video tutorials to create the model shown below.
model 1
There were times when I felt excited that with a simple click, I could quickly mirror a specific part of the model to the opposite side. While other times, I would sit in frustration, cracking my head trying to figure out how to do something as simple as changing the view of the model. Overall, I felt pretty happy with what I was able to do with the program on my first attempt and know that through practice, I’ll be able to familiarize myself with Fusion 360 and create even more advanced models down the road. Of course, it’s not easy just watching videos and trying things out myself. This past week, our class was fortunate to have guest speaker, Jeff Smith, come in to share with us not only his life experience as an industrial designer at Autodesk and working overseas, but also an extensive introduction on how to use the Fusion 360 program. We first started out sketching simple 2D shapes such as lines, squares, and circles. Then, we created 3D objects such as cylinders and boxes and learned how to join them together.

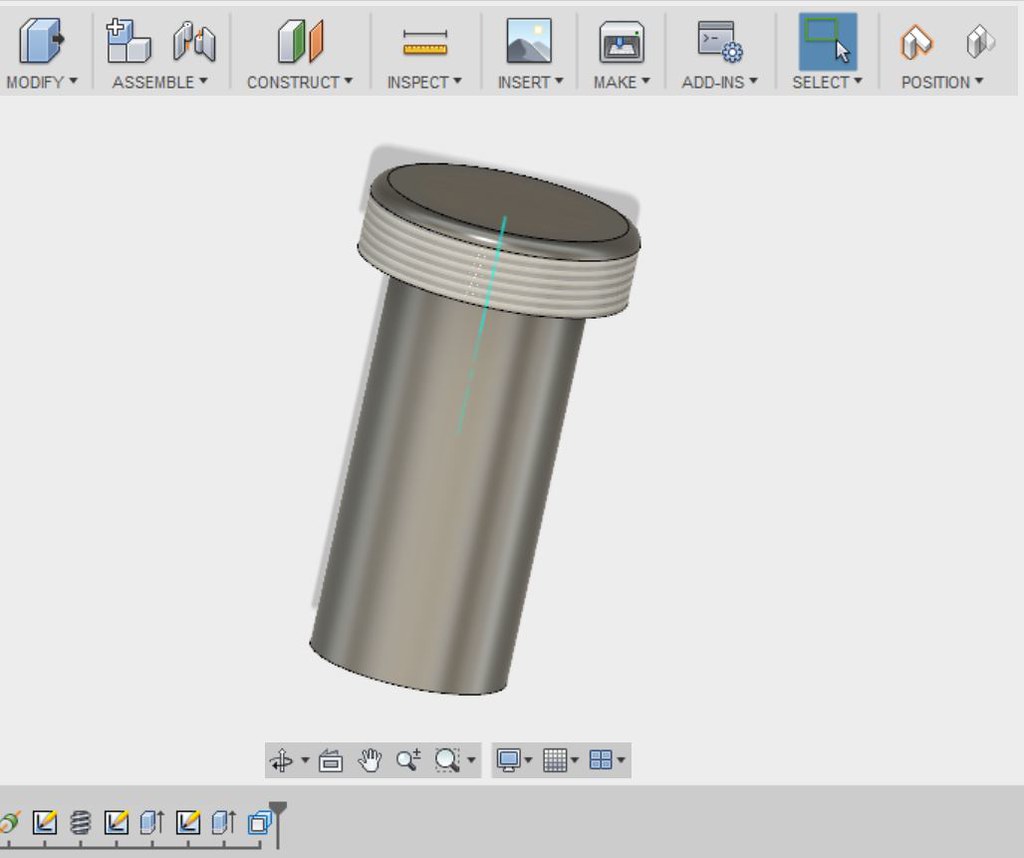
Here is a very simple model of a prescription vial that I created, something I get to handle a lot at my job (I work at a retail pharmacy).
what
Just like how Jeff said that back in his college years Photoshop was barely in beta version and how I personally experienced the disappearance of Dreamweaver, a program I was taught to use back in high school, something that got me thinking was that due to the rapid development of technology, would a program that we learn today be quickly replaced by other more advanced software by the time we get into the workplace?

Design Thinking – People Over Process

In Tim Brown’s article of Design Thinking, IDEO defines design thinking as a method to focus on people’s behavior and solving people’s needs and desires. Design thinking has three main processes. One research consumer insight and figure out what customers want but don’t have. Two test your ideas by building prototypes and running experiments. Finally, bring the product to life making sure there are enough resources and strategies in place on distribution. I found the reading to be thought provoking because it touches on the how design was thought of in the past as a tool used later in the product development phase. By encompassing processes that are human centered, companies will be able to create products that are efficient and solve real-life problems.

From the class videos, design thinking is a set of guidelines. Finding solutions to wicked problems, where problem and solution are unclear. Similar to the reading, design thinking is described as user centered or finding out what the user needs. Desirability, viability, and feasibility, and responsibility are described as the four characteristics in design thinking. The two main takeaways I found were to empathize with others by placing yourself in their shoes, brainstorming all kinds of solutions, even if they seem impossible, and be willing to fail multiple times. In the Design for America workshop, we went through the ideation phase to the prototyping phase. I found the workshop to be a great introduction into design thinking.

Putting the idea of design thinking in real practice, Rotterdam Eye Hospital used the guidelines to solve their issue of an unwelcoming environment that included long dreary hallways. They redesigned the children’s wing adding artworks to create a welcoming environment. Children were sent animal print T-shirts before their scheduled appointment at the hospital, and their doctors would wear a T-shirt with the same print to establish closer connection. As part of design thinking, not all of the hospital’s idea were successful, and they were able to learn and build on them.

Another example of design thinking was combating sanitation issues in Cambodia and Vietnam. Jeff Chapin and his team observed villagers then designed sanitation systems that fit into the villagers’ everyday life. By using prototypes, they optimized which sanitation system worked best and discovered that kitchen sinks were the most important to the villagers because it prevents illness caused by food contamination. See more from the TEDtalk: https://vimeo.com/67542403


Pushing the Boundaries of Creative Thought: Design Thinking and Ideating

Design for America’s presentation on design thinking and ideating drastically changed my perception of the product creation process. In accordance with Tim Brown’s article titled “Design Thinking” (https://hbr.org/2008/06/design-thinking), we learned the three steps in the design thinking: inspiration, ideation, and implementation. Many times, it can be easy to perhaps identify a problem that is encountered in everyday life (i.e. the product’s inspiration), however developing an idea to resolve the problem can take a significant amount of effort. The problem itself, in addition, cannot be too broad or impractical. This part of the process is so impactful, Brown believes, that companies are now hiring thinkers to not only implement an idea, but also to originate them.

One particularly interesting exercise the presenter’s guided us through was the design thinking card game. Each team was given three cards: one card had the hypothetical patrons of the product, the other had the purpose of the product, and the third outlined some type of constraint that the creators would encounter. This game definitely forced us to think outside the box, as well as demonstrated from a high-level the thought process that designers experience. In addition, our team used the design thinking process described by the presenters in order to develop our team logo. The logo (which can be found here), incorporated the initials of our last names in an overlapping and visually appealing fashion.

An intriguing real-world example of design thinking that was recently publicized was the German engineering firm Siemens use of 3D printing to create gas turbine blades. The article, which can be found here, details the problem faced by Siemens and their solution. The problem, that the cost to produce these blades were immense and the time needed to produce them was lengthy, was resolved by using metal-based 3D printing. As a result, the time needed to produce this part was shaved from two years to just two months.

Further examples of the impact of design thinking can be found in this article, “3 Great Examples of Design Thinking in Action”, found on the website Medium. One in particular great example of the utilization of design thinking was in creating a foot activated car door, in which ideators realized the challenge of opening a car door when the user’s hands are occupied, such as when they are leaving a grocery store. The foot activated car door allows users to still open the door without needing to free their hands.

In conclusion, I believe that learning about the design thinking process will prove to be crucial as we continue to explore the world of making, and this knowledge will serve as a strong foundation on which we can start to build our own innovative ideas.

From Design Process to Design Thinking

I had the opportunity to participate in this week’s workshop with the Design For America-UIUC. They focused on guiding us through the steps of design thinking – a new trend/concept in the product development life cycle. These steps included:

  • Identify
  • Immerse
  • Reframe
  • Ideate
  • Build
  • Test

In this workshop, we went through many different scenarios and worked in groups to create a non-functional prototype in its simplest form using the deign thinking steps. Starting off with perceiving and questioning the consumers’ world/perspective. After which we worked on an idea, sketch, a model prototype out of arts and craft material available. We came up with so many questions and scenarios for the cinsumers and equally as many possible solutions in the “ideate” step then tried to combine them into one prototype out of art supplis available.

As mentioned in an article by Tim Brown, before companies made products that performed a specific function then it would try to apply to a problem by “dressing them up” with a design. I’ve learnt that this is a flawed way of creating a product. With the new concept of “design thinking”, I would be able to enhance the need and impact of my product ideas on consumers and reduce the chances of them being useless or redundant, this would make them much more innovative. The deign thinking process first pushes me to identify a problem or need. Then immersing my self, empathetically, relating to the world of the consumer encountering that problem or need, reframing the problem to avoid assumptions, coming up with an idea from the perspective of the consumer – this is where the human centered focus is crucial, then building the idea to those constraints and finally testing as in any product development cycle.

So we have an idea of what design thinking is, What does that do now? Now we can target specific problems and consumer responses to products as well as identifying new market potentials as in the examples given in Tim Brown’s articles. Universities are starting to implement this in their classes, as I have experience with this new concept from my ME270 class at UIUC which involved creating a product – primariy mechanical focused – to tackle a specific problem and reiterating till it solved the problem more efficiently. I could then see the business potential in these especially after reading the two articles mentioned below. In the  “Design Thinking: Past, Present and Possible Futures”, they did a great job doing in-depth definition of design thinking and the different ways it could be implemented. Also in “Wicked Problems in Design Thinking”, he kind of alluded to the challenges of incorporating design thinking as putting art before science and how it was difficult for ‘scientists’ to do so.

[1] “Design Thinking: Past, Present and Possible Futures” Ulla Johansson-Sköldberg,
Jill Woodilla, Mehves Çetinkaya . Wiley Online Library. Web. 25 March 2013

[2] “Wicked Problems in Design Thinking” Richard Buchanan. The MIT Press. Web. 23 October 2015

Now, we are entering a world where almost any new open-ended idea has been implemented. Now we need innovative ideas and products that solve the other problems – the specific problems. We will need this design thinking in today’s innovators and major players to tackle more specific problems. I believe companies like Amazon, Capitol One, General Electric and so on, are using big data and data analytics in a way to find these specific problems – these specific potential consumer/market – and provide solutions to these.

Week 3: Inspiring, Ideating, and Implementing

Image

When Design for America came to talk, I was quite taken aback. I was thinking questions like what does design or art have anything to do with IS/IT? But the presentation begged to differ. I was genuinely surprised how much design and innovation was used to actually create the beginning steps of a product. Like Brown mentioned in his “Design Thinking,” the design I assumed was for aesthetics or advertising strategies. Even when I think of design, I always think of forms of art category such as graphic design or interior design. Design thinking is taking an innovation or activity and changing it to fit human needs. In this day and age, a design must keep up with current technology.

Design for America's presentation

Professor Weightmen brought up that design thinking has to incorporate the desirability of humans, the viability of business, and the feasibility on the technical side. This was also seen in the article. For example, IDEO and Shimano (Japanese bicycle components manufacturer) designed a completely new category of bicycling. in the article, Brown talks about how the majority of American adults don’t because of dangerous roads and intimidation. To conquer such a problem IDEO and Shimano created coasting bikes that incorporated simplicity and straight-forwardness with the intent of pleasure and fun. This new product from an untapped market hoped to help Americans lapse into biking.

The presentation encouraged us to think outside the box. In business and design, success usually requires innovation that gives a company an advantage over other companies. As a group, we were given three design cards that forced us to design a product for a target group, a “problem,” and then a constraint. This was very fun since we got a mid-life crisis father who has everything with a constraint of the cloud. It challenged us to think differently while still making a product attractive and possible even when we had a big restriction.

Our group's (Tiffany, Taofik, and me) brainstorming and reasoning for the activity.

We also learned the three steps in design thinking: inspiration, ideation, and implementation. During class, as a group, we had to design a type product centered around senior citizens in their day to day life. This was very memorable because we were able to go through these steps to make something that had potential to become reality. For my group, we noticed that seniors often have less balance and fall easily. When they fall, they often don’t have the ability and resilience to get back up. We brainstormed many different ideas and possible products that could help the senior get the help they needed. Using such ideas we eliminated ideas that were less plausible and focused on something efficient and more likely to be used. Finally, we crafted a prototype of our product to show how it might work. Through this week’s we were inspired, we ideated, we implemented.

Our first prototype product for senior citizens.

Steven Widen’s “How to Use Design Thinking and Agility to Reach Product Development Breakthroughs” used another example of design thinking that is closer to home, the iPhone. Back in 2004, design thinking managed to push Apple on to the radar for innovation and creative technology. Even today Apple has stood far above the rest of the companies such as Motorola, or BlackBerry, and slowly but surely edging itself out of the competition with Samsung. Apple is able to stay successful by taking risks that they predicted will become the norm in a couple of years. For example, two years ago Apple decided to make the “plus” phones that were more than an inch bigger than the regular phone. There was a lot of critics on the phone, but now two years later, a big phone is normal and almost every phone designer has an option of going bigger with the size of the phone.