Seeking Advice

Last week, my team and I still had a lot to decide. After the previous week of completely changing our product idea, we had a lot of ground to make up. We were basically starting from scratch. We still did not have a clear product idea and wanted advice on where to go. So our goal by the end of class on Monday was to make a plan. We decided on a design. Our design was to have on piece that had a notched design attached to the door. Then we would have a moveable part that moved in the notched part to slide out to ajar the door and slide back in when you would want to door to close. We were unsure on what materials to choose, but we were thinking of using thick metal and coving it in a rubber resin.

The next day we went over to the Fab Lab seeking advice. When we got there we showed them our plan. We went back and forth on what would work and what would not work. We decided that using metal was not the way to go. It in the end would be very expensive and we would probably have more luck with either wood or plastic. The problem we might have with wood is that we might put out more effort and time than necessary. They suggested that we us CAD software to try different variations and we could always print it and see how or design works. Going to the Fab Lab was very helpful because we had a better idea of where to go with our design!

Now we have to figure out exactly what we are going to do. We have thought of two designs so far that we have run through this past week. One design was like the original slide out the side of the door. Another design we had was to have something we could slide a bendable material to ajar the door from the top. These ideas are similar, but go about ajaring the door from different sides of the door. Currently we have not decided on which design we will choose, but hopefully by class on Monday we have made that decision. I think it is better that we have thought of different options to go about solving our problem instead and drawing a blank. This is a process we are consistently going through.
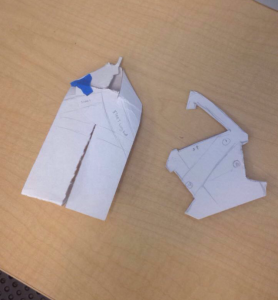
Final Projects in the Making

For this week, we delved into the last stretch of the course: our Final Project. Each group some sort of solution to a problem of their choosing; big or small. The issue or solution does not necessarily have to be 3D printing-related, but simply portray the aspects of design and making that we have learned over the course of the semester. Although, most of the final projects do include 3D printed models to some degree. This week, we began the first stage(s) of our projects.

My team and I, the MakerLAX, decided aimed to resolve an issue that was felt by many college students and other young adults: tying ties. As one gets older, they will have to attend more and more formal events and gatherings, and as such will require more formal dress. The tie is an integral part of formal attire, but is notoriously difficult to prepare for the first time, as well as long after. It may seem like relatively simple task, but getting accustomed to tying a tie as well as all the different knots that once can choose from takes time. This combined with the fact that most young adults only really have to wear ties from time-to-time and not on a daily basis, makes learning the ins and outs of tying one somewhat difficult. I personally require assistance from someone who already has gone through the whole process of learning how to tie a tie, or watching an online tutorial whenever I find myself needing a tie. While this may not be an inherently big problem, it can certainly be helped.

The premise behind our solution is to create a sort of “tie-helper”, as in, an object about the size of a small paperweight that can act as a guide for a person to use to tie their tie. We have found remnants of what appear to be previous attempts at creating such a product, but they were either flawed or never really reached production. https://www.youtube.com/watch?v=D3tkWcp3wK4 Our group is aiming to create a design that can be mass-produced or even printed at home. The idea as it stands so far is to print a model that is inscribed with numbers and/or pictures of instructions on how to tie a specific knot that has yet to be chosen. After finishing the knot, the object can be easily separated from the tie and the tie will already be tied around the neck. In class, we presented our idea to the rest of the groups and were given feedback. We also created some crude models of possible designs, which could be considered our initial prototypes. From here, we will be creating and testing new models to perfect for our final iteration. We’ve all learned a lot these past few months in Digital Making; I am really looking forward to putting it to good use, as well as seeing what everyone else comes up with.

Paper Prototypes

Week 7: 2nd Week at the Fab Lab (Laser Cutting)

Aside

For our second visit to the Fab Lab, each group switched stations to work on a different portion of our final project. This week, I attended the Laser Cutting session. Though the workshop is somewhat secluded towards the back of the Fab Lab, it certainly shines through as one of the more unique creative processes the Fab Lab has to offer (no pun intended).

In my last workshop, we focused on designing the physical circuit for our light-sensitive boxes. This week, we continued with moe hands-on work dedicated to making the appearance of the project aesthetic and to our liking. By using specifically designed software, we were able to create layouts for our boxes that we could customize. We first gained the template after entering our desired dimensions into an online resource, and then imported that file onto the lab computer software Inkscape to customize them. We were able to select images online to use as stencils for the panels. The images had to be completely black & white, as well as properly pixelated. The laser cutters are incredibly precise, and are able to stencil out wood portions with cuts of down to .001 m in width, resulting in flawlessly fitting pieces and stellar quality of silhouettes. One of the most amazing bits of all this, is that each person’s cuts only took approximately 20 minutes maximum, way faster than a conventional 3D printer. While it is certainly a sight to see something create out of nothing, some don’t realize that you can also achieve great designs by taking away from what you already have.

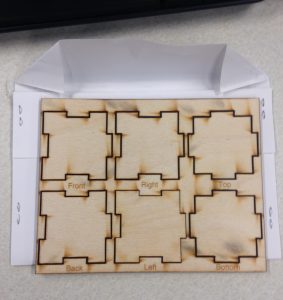
Smaller scale sample box pieces
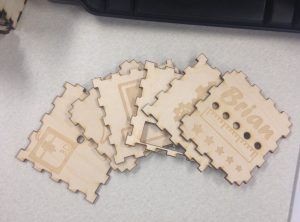
For my custom designs, I chose each side to represent a field of engineering/design as I am an engineering major. Four sides included images reminiscent of electrical, mechanical, and computer engineering, as well as architecture. The underside of the box features a 3D printer silhouette as well as that of a laser cutter, the two main methods of design that my group will probably use in our final project. The remaining side just has my name with a special measurement system composed of a ruler image and different sized stars to represent the brightness of the LEDs.

My pieces

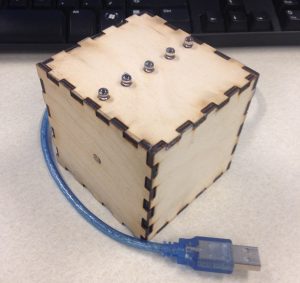
Sneak peek of the completed project

Now that I’ve completed both the physical portions of the workshop, I’m excited to take part in the coding session next week, where we will program the Arduino with the desired code to allow it to respond as we want it to. I’ve thoroughly enjoyed these Fab Lab sessions not only because we get to create a custom project for ourselves to keep in the end, but we also get to see multiple types of engineering and designing intertwined (specifically electronics, mechanics, and programming) into a single project. It’s been a fantastic experience to work with all these different processes, and I’m hoping that we can incorporate every one of them into our final project.

Trial and Error

When coming up with an idea for a product, you will have a million ideas and you have to narrow down to the ideas that appeal to the most people and have a need for it in the world. In class last week, all of the teams had to brainstorm about three ideas that are potential ideas for our final project.

My team, Supra, and I knew we wanted our product to fix problems everyone has. Most of our ideas fixed “first world problems” that everyone has. Our first idea was trash compactor for trash cans in households. This appeals to everyone who makes trash. I struggle with this personally. If the trash is building up in my apartment, I do not think to push it down myself because I do not want to touch the trash. So I usually end up taking it out of the trash can and when I do, the bottom portion of the trash bag is empty. This means I am only using half of a trash bag. That is wasteful and expensive!

For our idea, the trash bag would attach to the bottom of the trash can so if would be more open for trash to fall to the bottom. Also, when you step on the foot pedal that opens the lid, an arm would press the trash down to ensure you used as much of your trash bag as possible.

I found it very helpful to get feed back from other groups. This helps bring up more things that we may need to address or small improvements we could make. I found an article by Forbes Magazine that has ten questions listed on it to ask ourselves for us to have a successful product. This is a good reference to use when you are brainstorming. The questions are focused around a few main things.

  1. Appeal to a broad audience
  2. Simple enough to use
  3. Solve a problem

If your product can appeal to a large audience then it will be successful. Everyone will find a need for your product and go out and buy it. Simplicity is crucial. If something is too complicated to use or understand the use, no one will put out the extra effort to understand it. Then one of the most important things to keep in mind is that it actually solves the problem. After you have passed all of the checkpoints then your product is ready for sale!

Design Thinking – People Over Process

In Tim Brown’s article of Design Thinking, IDEO defines design thinking as a method to focus on people’s behavior and solving people’s needs and desires. Design thinking has three main processes. One research consumer insight and figure out what customers want but don’t have. Two test your ideas by building prototypes and running experiments. Finally, bring the product to life making sure there are enough resources and strategies in place on distribution. I found the reading to be thought provoking because it touches on the how design was thought of in the past as a tool used later in the product development phase. By encompassing processes that are human centered, companies will be able to create products that are efficient and solve real-life problems.

From the class videos, design thinking is a set of guidelines. Finding solutions to wicked problems, where problem and solution are unclear. Similar to the reading, design thinking is described as user centered or finding out what the user needs. Desirability, viability, and feasibility, and responsibility are described as the four characteristics in design thinking. The two main takeaways I found were to empathize with others by placing yourself in their shoes, brainstorming all kinds of solutions, even if they seem impossible, and be willing to fail multiple times. In the Design for America workshop, we went through the ideation phase to the prototyping phase. I found the workshop to be a great introduction into design thinking.

Putting the idea of design thinking in real practice, Rotterdam Eye Hospital used the guidelines to solve their issue of an unwelcoming environment that included long dreary hallways. They redesigned the children’s wing adding artworks to create a welcoming environment. Children were sent animal print T-shirts before their scheduled appointment at the hospital, and their doctors would wear a T-shirt with the same print to establish closer connection. As part of design thinking, not all of the hospital’s idea were successful, and they were able to learn and build on them.

Another example of design thinking was combating sanitation issues in Cambodia and Vietnam. Jeff Chapin and his team observed villagers then designed sanitation systems that fit into the villagers’ everyday life. By using prototypes, they optimized which sanitation system worked best and discovered that kitchen sinks were the most important to the villagers because it prevents illness caused by food contamination. See more from the TEDtalk: https://vimeo.com/67542403