BCC Creations – Door Sitter: Our Experience in Making

Our journey of creating the Door Sitter was challenging yet intuitive. Though the three of us in BCC Creations were not engineers, we had used our resources, research and knowledge to create an efficient product.


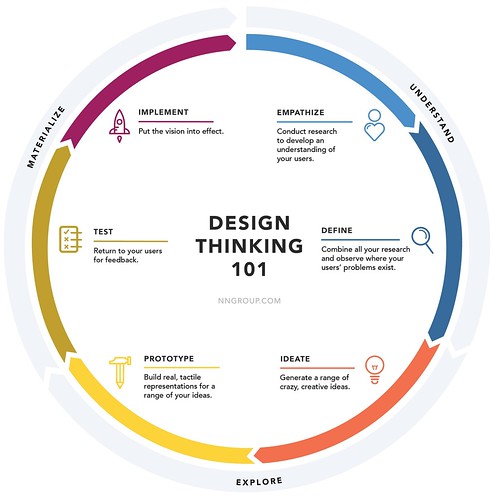
Prior to choosing to create the Door Sitter we went through a couple of ideas in our brainstorming process. We had first started out with identifying problems that were occurring in our own lives or to those around us. Vishal had stressed on using the Design Thinking Method which was a problem-solving process that allowed us to build up ideas with no limitations. Our first idea was based on our teammate, Carter’s experience with the recreational facilities on the U of I campus. He had noticed how many of the sporting balls were not at the correct PSI and having a decide to test it rather than manually doing it would be efficient. Thus, we decided to create a product to regulate a sporting balls PSI and pumping the ball to the correct amount. However, the more in-depth we got and furthered our research we realized that the product itself would be very complex and the pricing of it may not be suitable for the target consumers. Furthermore, we thought the product would worsen the problem and reduce the efficiency and we wanted to create a product that would be beneficial for more consumers.

Our next idea had helped lead us to our final idea, a Chores Alert System. We thought it would be useful to those in the dorms with roommates, they would be alerted through a text whenever a chore needed to be accomplished. Though we all liked the idea we had continued brainstorming for more possibilities which led us to the Door Sitter. All three of us lived in apartments and had the realization that when we left during school breaks we had no way of checking for breaking and entering which had happened to many of our friends. So we came up with the idea of creating an affordable yet efficient alarm for an apartment that would be able to detect an intruder and sent a text message to the roommates of the apartment.

Making


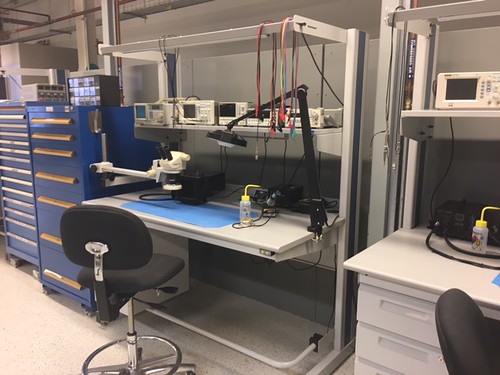
Once we finished brainstorming and settled on our problem to solve, it was time to determine how we were going to solve that problem, and how we could actually make that solution work.  Fortunately for us, we had the MakerLab and Fab Lab at our disposal, not only for the physical components but also their expertise.  

We knew that we wanted to 3D Print the housing for the system since we were familiar with the MakerLab, knew we could have multiple iterations, and the general low cost of 3D Printing.  Before we could start designing the housing, we had to know what physical components our alarm system would need to function.  Only after we settled on the technologies and hardware we were using could we design the housing.

Hardware

IMG_1514

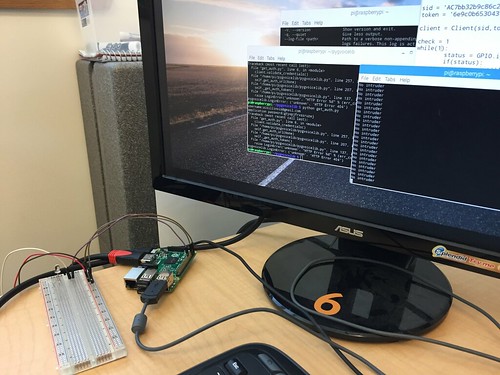
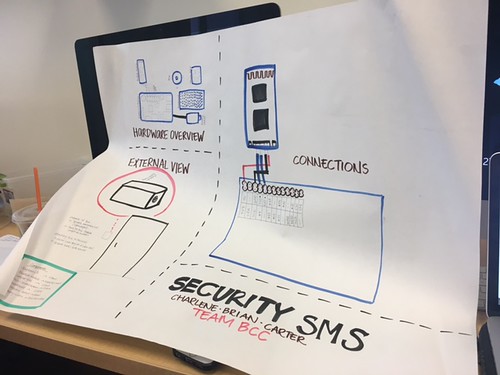
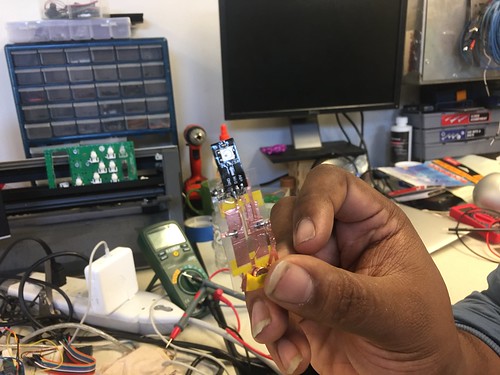
Initially, we planned on using an Arduino since we had used one and had experience programming it from our Blinker Boxes during our time at the Fab Lab.  We thought we could use an Arduino with a bluetooth module to send notifications, but later decided to use a Raspberry Pi with Kootek Wifi adapter from the Maker Lab.  To detect motion, we used an ultrasonic sensor from the Fab Lab.  This allowed us to detect motion within a specific range that we were able to physically adjust to about 10 feet at a 120 degree angle.  We also picked up male to female jumper wires to connect the Raspberry Pi, sensor, and breadboard together.  We powered the device through mini-USB rather than a battery, and ultimately decided against the piezo sound buzzer.  To interact with the Raspberry Pi, we used a keyboard, mouse, and monitor from the MakerLab.

Software

2r7wkes

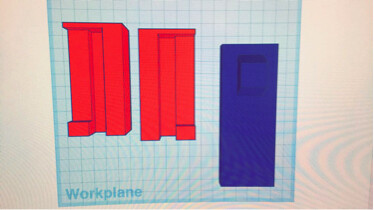
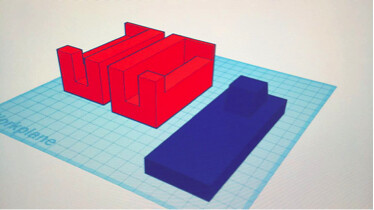
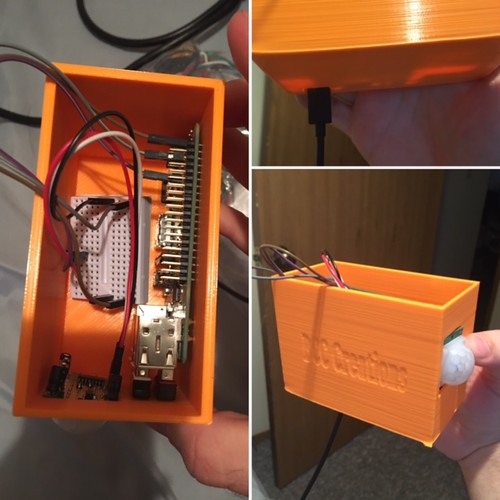
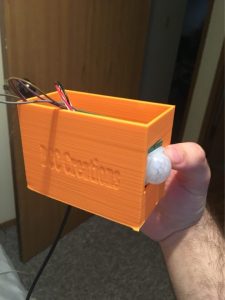
Once we acquired all the hardware for the security system, it was time to make the system actually work.  We first had to load an operating system (Raspberrian) onto the device so that we could put in the Python code.  We were fortunate to have Charlene’s friend lend us his technical skills with the programming.  We used Twilio as a service to send the text message notifications to our phones when triggered by the motion sensor.  To design the housing, we initially started using Fusion 360 since we had used it for the tutorial homework and our in class workshop with Jeff Smith, but we instead used Tinkercad for its simplicity.  Although it is a relatively simple program, Tinkercad provided all the functionalities we needed, with far less complication.  

The entire “making” process flowed very well.  As the software was being programmed, we were simultaneously physically putting the hardware together.  Once we knew how much space the hardware was taking up, we were able to design, print, and refine the housing.  The MakerLab provided a great meeting place to work on the project together in addition to supplying the Arduino, wifi adapter, keyboard, monitor, power cord, and mouse.  The Fab Lab was also a great outlet to receive advice from and supply us with the sensor, breadboard, and jumper wires.

Feedback & Testing

Given that security product solution is heavily user dependent, receiving feedback and testing the security “door sitter” was vital to allowing us to make adjustments to make the product function properly. The initial tests we ran ourselves focused on getting the device to accurately function as we created it. Functions such as the sensor detecting motion, ensuring the programmed Python sent the text message to a phone, and even connecting to wifi internet connection were processes that were refined by our testing. The range at which our ultra motion sensor detects motion was one capability we spent hours adjusting on our product. The ultra motion sensor has the capability to detect motion for a  120 degree 30 feet radius. We ultimately adjusted the sensor to only detect within 8-10 feet after much consideration about how our product is practically used. Since our the product is meant to run perpendicular with the entryway of a door,  we did not want it to trigger a false alarm from movement far away. Taking  practical considerations such as false alarms, how the product is used, and what makes most sense for the user were our primary goals when testing the security door sitter.

Furthermore, we tested the door sitter ourselves, collaborating with class members, and finally our team member Brian had his roommates test the door sitter within their daily routine. The feedback we received focused on two aspects of the door sitter. Firstly, where to install the product was something that was not intuitive to users outside of our team. It was not necessarily clear what location to velcro the door sitter box worked best. Another point that was brought up with the door sitter sensor location, was “what if a user has pets such as cats in the apartment? Would that trigger false alarms? “.  We resolved this issue by creating an installation instruction manual, that would be given with the product for users who purchase the door sitter. The instructions tell the owner to use the provided velcro to put the door sitter on a wall perpendicular of the entry way that the user wants to be detected. It also has recommendations such as to install it high above if a user has pets.

Secondly, our classmates suggested that a user could easily forget to arm the door sitter before leaving there room / apartment.  Our product is currently armed by simply plugging in the power cord. As in once a user wants their residence to be monitored they simply plug in the power, and after a 1 minute delay there motion sensor is monitoring the entry way. Although we could not figure out a low cost way to arm and disarm the door sitter remotely in the event that a user forgot to power it on, we did create a notification system that texts a user to let them know the system is on. This way a user can know based on their message history that the security system is armed, and the text message becomes a part of their daily routine


The feedback we received was generally positive, in that the Door Sitter was helpful in providing peace of mind and information regarding college students area of residence. Most importantly the critical feedback we received was beneficial, because it led to us improving our product by making it seamlessly fit into a user’s life.

Final Product

Our final product The Door Sitter, provides a solution to the need for low cost residential security. The Door Sitter is a personalized sensor set up by door(s) or window(s) to an apartment/house. When the Door Sitter is armed, it functions as an alert security system by immediately notifying resident (s) if and when there is someone that has entered  the interior of a home.  The Door Sitter notifies resident(s) when motion is detected via SMS  text message, so that they are aware of what is happening within their residence and can alert authorities if need be,The customized 3D printing housing unit and instructions makes the Door SItter easy to set up with velcro, and more importantly keeps users mobily connected to the security of their home by knowing if and when someone has entered. Our product effectively monitors and notifies users of activity in a home. The immediate information the Door Sitter provides, gives users peace of mind knowing that they do not have to worry about a break in when they are away from their residence. Furthermore  if there is a residential break in,  with the alert system residents now have the information to be able to respond. Door Sitter can solve a need in that college students and property owners,  have  the ability to respond to a residential break with a low cost option for a security system.

Certainly, the BCC team learned quite a bit this semester in terms of the capabilities and process of solving a need through 3D printing,  While we are satisfied with the progress we made in creating our own effective product that can help solve an everyday need, we also know that the product is far from perfect in terms of taking it to market. Do to the cost we did not pursue the potential of adding a camera to the Door Sitter. We do think finding a low budget camera to add to the exterior of the housing unit, would be useful in allowing a user to know not just that there is someone in their residence but who. Finally the actual cost of our product is a factor that we need to analyze more if we wanted our product to be on the market. The door Sitter costs roughly $50-$60 per unit with the all of the components. The feedback we received from our presentation suggested that even if we sold the Door Sitter at cost for $50-$60, that price tag still is  a bit expensive for our target market of a college student. In our research we found that most in home door monitors are high tech and range from $120-$250. So while the Door Sitter would be a low cost option in comparison to what most security systems entail, we may want to pursue alternative components in collaboration with Jeff Ginger at the Fab Lab to make our product less expensive given our target market.

Overall our team BCC creations, made a product that solves a need with the Door Sitter. We worked over several  project ideas, learned new softwares such as Fusion 360,   and went through many iterations of the  design making process to create a solution. Using 3D printing and the Maker / Fab Lab to create a functioning and tangible final product,  was beneficial in providing our team hands on experience of the capabilities of this technology and the  maker movement.


Team IJK Summary Post

Introduction

One of the first weeks of the semester, DFA (Design for America) came to our class and talked to us about the design process, specifically design thinking. We learned that when coming up with a new product, one should not first think of the product. Instead, they should think of a problem they have encountered that could be solved with a product. After they have identified a problem, they could then come up with possible solutions and eventually pick the best option.

The problem that our group identified early in the year was that many college students encounter great levels of stress throughout the year due to adjusting to living on their own, as well as grades. Our group set out to find a relatively low-cost solution to this problem, as many college students won’t have a lot of money to spend.

Design Thinking

Possible Solutions

After brainstorming in class one day, our group came up with three possible solutions that could help reduce levels of stress in college students. The first was a stress monitor that could measure some sort of bodily signals, such as blood pressure, that could signal that you’re stressed. If one’s blood pressure got too high, the sensor could let you know that you’re getting too stressed and that you should take a break. However, this product had no real way of relieving stress, only identifying it. Our second idea was a product that would allow students to have their own garden indoors. We did some research and found that gardening has great effects on people. We knew that many college students wouldn’t have large yards to garden in, so we wanted to make sure that it could be done indoors. Our last idea had to do with meditation, which has also been shown to decrease stress levels in people. We were thinking to possibly make something that could help facilitate meditation for someone.

Stressed Picture

Research on Plans

We decided to go the indoor gardening route after seeing all the positive effects gardening had on people. Some of the research we found is listed below, there are a ton of benefits to gardening!

A University of Michigan study showed that gardening increased memory retention in subjects by up to twenty percent. It has also been shown to positively affect concentration both at home and at work. Tasks that were performed under the influence of nature also were performed with greater accuracy. This is because nature stimulates both the senses and mind, which improves mental cognition and performance. All of this research showed our group how gardening could truly serve as a powerful stress-reducing agent. After we saw this research, we knew that creating a product involving indoor gardening was the way to go.

Final Solutions

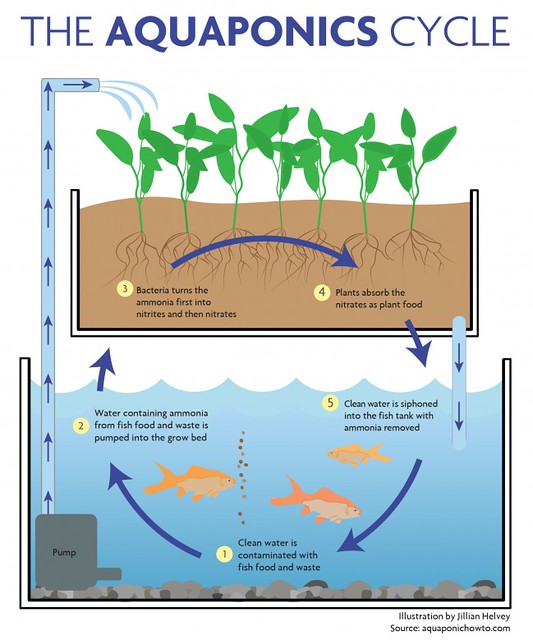
After surveying the various options at hand our team decided to pursue a solution that allowed students to do indoor gardening in small contained environments like apartments or dorm rooms. Our innovation on this indoor gardening system was the idea to make the growing of plants modular, therefore you could plant as little or as many as needed. The modular holsters for the plants would be placed on top of a fish tank to make a makeshift aquaponic system. The aquaponic system would allow for easy maintenance of the plants, fish, and the entire ecosystem. Perfect for a college student with little time on their hands.

View post on imgur.com

Prototyping Process

The prototyping process went through three phases: low fidelity paper prototype, cardboard, and finally a functional product. The low fidelity paper prototype was meant to figure out if this could be done at all. To see if our product could exist in 3D space and allow our team to easier visualize what our finished aquaponic tank might look like. The paper prototype helped us with the sizing of pieces. Next, the cardboard prototype served as a sturdier paper prototype that helped our team figure out what realistically made sense for the stacking of modular pieces. The cardboard prototype helped us learn that four pieces were most likely the ideal number. Finally, we made the functional prototype. The functional prototype was extremely useful for testing the product in an open environment to get feedback and improve it before making the final finished version.

View post on imgur.com

Testing the Product

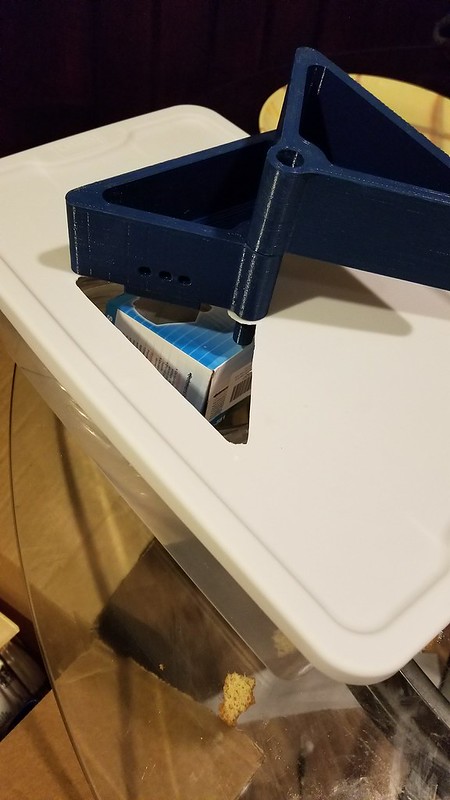
To test the product we purchased a bin from the store and placed our acrylic lid on top with water going through our modules to replicate what the product might look like and function like. Overall, it was very useful for showing it to our two users. We asked questions ranging from how they felt about it to what they would prove about the product itself. From this, we were able to compile notes about the product and moved forward to figure out how we could work on improving the product from what we had.

View post on imgur.com

Challenges Encountered

There were three main parts in which our team encountered the majority of our problems: Fusion 360 modeling, 3D printing, and building the aquarium itself. For the Fusion 360 modeling, it took a lot of work just getting up to speed with the software. The software itself is quite complex and can make quite complex shapes in a matter of minutes. Once we learned the software itself we went through quite a few iterations. Getting it to work well with exporting it to a 3D printer posed some difficulties with getting the shape just right so each modular piece would perfect stack on each other. The aquarium, on the other hand, took a different nature of the issue. Getting the materials proved quite difficult and a lengthy process given the amount of acrylic we needed for our project. Through it all though we were able to create a good product and learned quite a bit through all our product iterations and learned a great software and where to find a great campus resource in case we ever need to build something again.

Interview Results

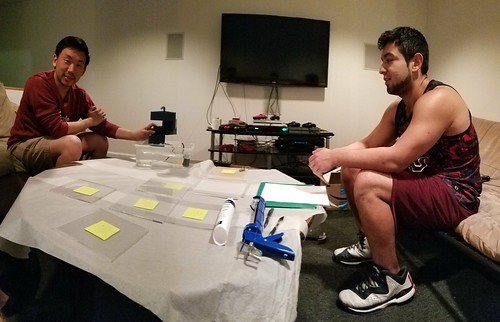
Through the culmination of rapid and iterative prototyping, we now knew the direction we were heading towards when it came to fine tuning our project.  Therefore, once we got to our prototyping stage we were able to formulate a questionnaire to interview our test subjects, Ian Szetho and Anthony Bermeo.  The survey that we conducted revolved around the functionality, aesthetics, likes and dislikes and finally how they would improve the product.  

We conducted the interview with Ian first and he thought the prototype worked well.  However, the aesthetics of the design was negative for him as our prototype was primarily a plastic bin for the fish tank as the acrylic was not ready, which gave the prototype a cheap vibe.  Ian, however, did find the design to be very soothing and relaxing.  He also liked the modularity of the product as one can upgrade it with more or fewer plants as needed.  Overall, he enjoyed the relaxing and modular characteristics of it but disliked the aesthetics of the prototype. Next, we interviewed Anthony Bermeo and he believes that he can see himself using the product in his home.  He provided some details about how he disliked the pump noise as well as the aesthetics of the bin.  Surprisingly even though Ian found the noise soothing and relaxing it seemed Anthony saw that as a negative. Saying the noise was little too loud and something that he would definitely change for the final product.  At the end of both interviews, we knew we needed to fine tune our product and so we decided that we needed to increase the quality and aesthetics of the products and identify an optimal power level for the water pump to minimize noise levels.

20170424_211201

Final Product

After taking as much constructive feedback as we could accumulate, we were able to meet the demands of our testers by constructing the tank out of acrylic and tweaking the motor speeds.  Our final product is essentially emulating nature in a compact ecosystem.  This combined tabletop ecosystem is basically a self-cleaning fish tank with a self-sustaining indoor garden.  Our main goal was to provide a relaxing tool for dorm rooms and students that wanted to engage in light gardening.  We believe that we were able to develop a product that emits a tranquil ambiance as well as provide indoor vegetation for students all year round.

Aquaponics-Diagram-41-649x779

Snapchat-1849388938

What We Learned & Conclusions

The process of creating our own product from the conception, to prototyping to user feedback taught us a lot about the human-centered design process.  The ability to go back and forth to fine tune a product means that it will perform as anticipated as well as fulfill its duty.  The prototyping stage really enabled us to make our product better with each step with trial and error.  The tools such as laser cutting, 3D printing, Fusion 360 and everything else we used helped grow our knowledge base and can be applied to numerous future projects of our own.  From rapid prototyping to acting as a drivetrain for innovation, 3D printing has the ability to shape the world and we believe that our project is one of many examples of its limitless possibilities.

Full Presentation Slides: http://bit.ly/2pQX1yc

Team Supra Project Reflection – DOORJAR

With only approximately 8 weeks time, Team Supra sought to rapidly research, design, prototype, and bring to life a prototype that would effectively fulfill a business need, bridge a gap in consumer needs, and ultimately turn profitability for a business in the long run.

Ideating Process:

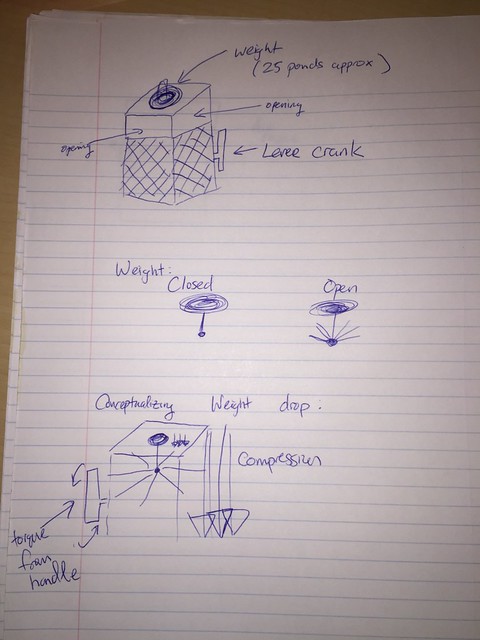
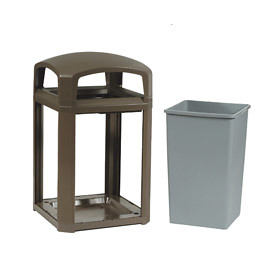
In the Ideating Process, Team Supra wanted to identify a business need in a consumer segment that was comprehensively understood. As Veronika, Olivia, and Ben are all college students, Team Supra decided to evaluate college-aged students who were living on a budget in a house or apartment. After observing consumers’ behaviors for a several days, Team Supra pursue a household trash compactor:

IMG_5322

30517607

Team Supra agreed that trash is a common college struggle especially with full utilization of trash bags. Thus, Team Supra set out to create a trash compacting device that allows for greater trash bag “storage volume” to be achieved, leading consumers to have cost savings and environmental wellness at a reasonable price. However after receiving feedback from Professor Vishal, we realized that 8 weeks was not enough time to construct a product with numerous variables such as cost, size, and strength.


Refocusing & Designing with Innovation By Simplicity

Team Supra decided to tackle a new problem that commonly occurred at the Maker Lab: faulty door stops. Thinking of all the times students were locked outside the classroom, We challenged ourselves in creating a device that would efficiently ajar the door. With a very complex previous prototype, Team Supra was inclined to develop a resounding solution in a simplistic way. We realized that simplicity yielded easy constructability, low costs, and room for continuous improvement without drastically increasing the price.


We began by taking time to understand and explore the market. It became evident that the vast majority of doorstoppers sold between $5 – 15 (with premium stoppers above $20) and were all made of rubber material. Team Supra also met with Fab Lab to gain criticism on our idea. Fab Lab recommended a product with some form of a base that could attach to the door near the door knob with some form of a sliding mechanism that would allow for the locking position to turn “on and off”. While Team Supra initially hypothesized utilizing magnets to attach our device to the door, Fab Lab’s expertise made it evident that no household friendly magnets would be strong enough to sustain the impact of the door.  Additionally, Fab Lab recommended the employment of a wood coated in rubber resin or semi flex material for the actual stopping block portion of our product.


Prototype One

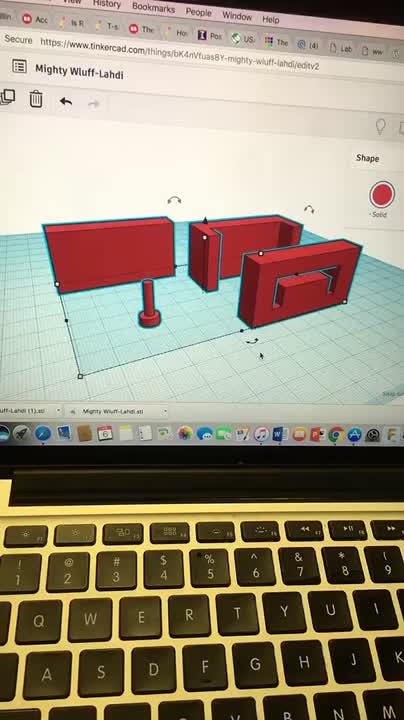
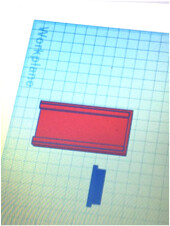
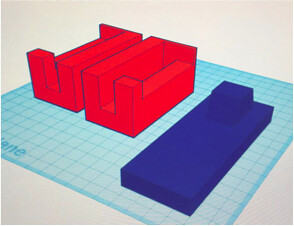
Using TinkerCad, Team Supra was able to create the following prototype:

First Prototype Team Supra 4.9.17

Supra1

Supra2

Supra3

Supra4


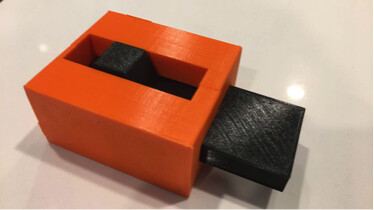
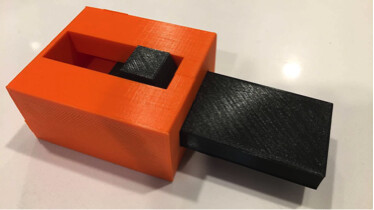
From our first prototype, we realized we really liked the shape of the base and the handle attached to the base. The handle allowed consumers to easily slide our product from “on to off” and the base could hold our “stopping block”. However, we realized that our first prototype had nothing to prevent the sliding piece from detaching from the base and was too small and brittle ultimately resulting in breakage during testing.


Prototype Two

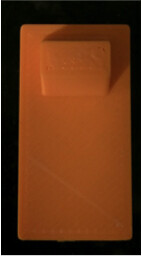
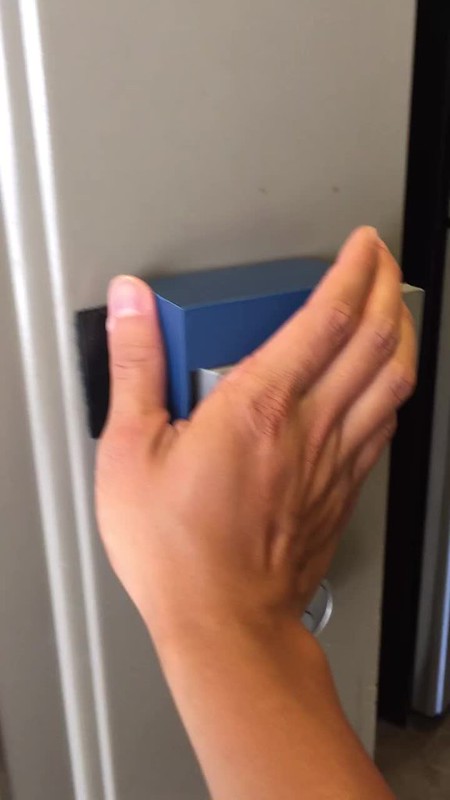
After analyzing our results of prototype one, we decided to increase the surface area, density of base & block, and overall thickness of our prototype. Additionally, we added a bar to prevent the block from sliding out. And here is a video demonstrating progressive success from our prototype:

IMG_5593 (1)

After achieving progression, Team Supra decided to perform testing to reaffirm the consumer need for our product and also verify the usability and ergonomics of our product.

Quality Assurance and Consumer Testing

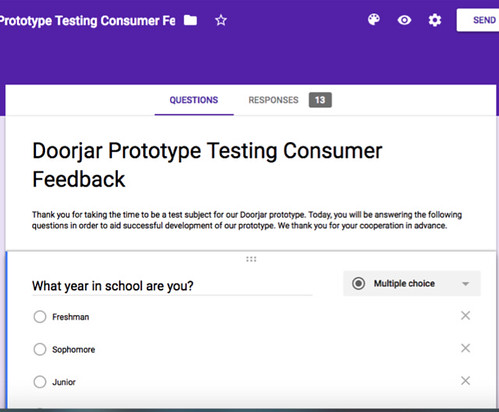
Using google forms, we created a consumer experience feedback survey to be completed after the consumer had personally experienced and utilized our prototype two.

Supra5

Our survey questions centered around the following topics: demographic information, problem solutioning, aesthetics, ergonomics, applicability, durability, and willingness to purchase. Additionally, we realized the necessity in random sampling and ensured our sample had participants of all different years, majors, and household incomes in school. And, our key consumer insights were as follows:

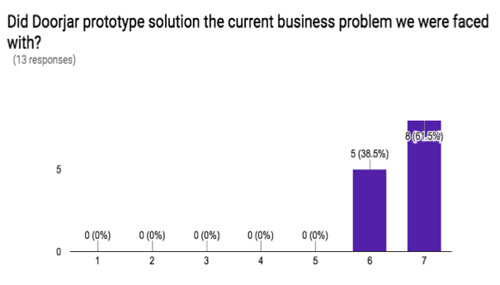
From a scale of Not At All(1) to Absolutely(7), it becomes evident that our whole sample agreed that our prototype solution solved the current business problem.

Supra6

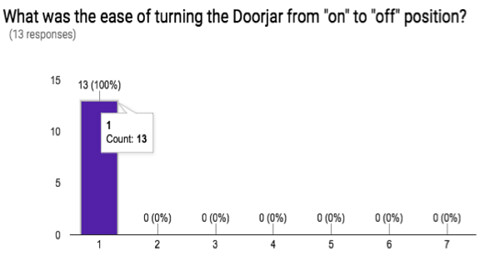
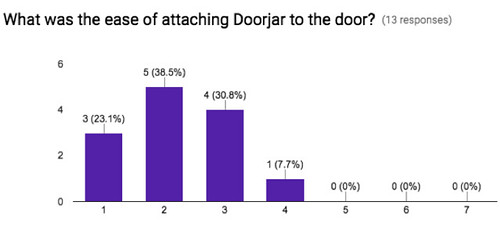
Additionally, we saw that overall our product was relative easy to use, but there was an opportunity to enhance the attachment experience.

Supra7

Supra8

Supra10

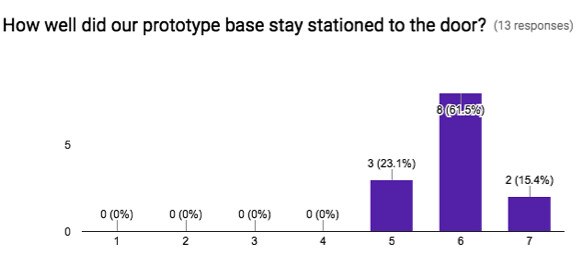
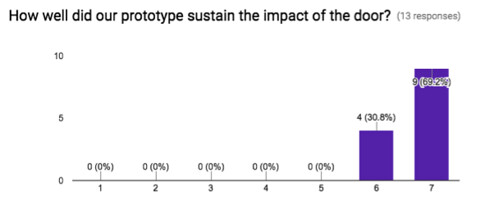
Our participants believed that our prototype could sustain impact from the door as and stay stationary. However, we did see a small discrepancy in Doorjar’s impact sustainability and impact stability (or stationing capability) and realized keeping the prototype base stationed to the door could be an area of improvement.
Supra9

Lastly, our results show that our subject participants were relatively happy with our product and most were relatively willing to purchase our product at an average price of $7.73.

Prototype 3

Supra12

Supra13

Supra14

Supra15

In our final prototype, we made the base material out of PLA, printed the block material out of semi-flex, and printed it with a 40% infill. And our final product proved to be even more successful than the previous attempt.

Next Steps & Time Constraints

With only 8 weeks, we were forced to stop our prototyping efforts and prepare for our final presentation and wrap up for this class. However, had we had more time we would have pursued four additional features. Team Supra would have potentially utilized clear plastic or acrylic to enhance aesthetic appeal for Doorjar. Dual functionality would be added giving DoorJar both ajaring and locking functionality. Bluetooth functionality would have been implemented alerting consumers when their doors are fully locked and open and some unique attachments could also have been added to the door.


In terms of bringing DoorJar to market, Team Supra did some due diligence and was able to prove profitability margin of 23.35% with Doorjar. This was derived from a $5.94 cost per unit (PLA and SemiFlex material costs researched and labor, utilities, and building costs estimated) and a $7.75 retail price that was proven through our feedback survey. Lastly, Team Supra segmented its implementation plan into 4 unique categories. Initial Capital Investment would seek funding for our project in order to purchase 3D equipment, hire employees, and pay building costs. Relationship Development with Suppliers would ensure low raw material prices and overall low costs for the product. Commercialization begins the creation of our product seeking for opportunities to cut process inefficiencies, cycle flow time, and identify bottlenecks within the process. Marketing & Sales ensures awareness of the our product and that Doorjar remains successful with a loyal consumer base being relentless built.

Click here for our google slides!!!

Looking Back

Looking back at this semester and thinking about everything that I have learned is incredible. This class has introduced me to things I was unfamiliar with. It gave me the skills to be able to go about an idea in serveral different ways.

I thought back to some of the speakers that made an impact on what I learned. Even on the first week, when we had two speakers. The video call from John Horlick kicked off the semester. He had written a book on how 3D printing was really becoming more and more prevalent in business and our everyday life. This opened my eyes to Digital Making. I realized that things were constantly changing in how things were being made, but I did not realize how much of an impact innovation was actually making. Even though this presentation was mainly on 3D printing, I felt like it spoke for more than 3D printing. It showed that there is always a better or smarter way to do something. There are also many ways to achieve that goal and I believe that is what Digital Making entailed.

Most of everything I learned in this class, I had not been exposed to before. Something that was really foreign to me was coding aurduinos. I never thought I would mess with that. I had understood some of the code because I had dealt with coding before, but it had only been solely on the computer. I had never used a breadboard before. It was also awesome to see a product come together after our few weeks of class spent at the Fab Lab. Not only did we code Arduinos, but we lasercut wood boxes and soldered wires together. This was great experience that helped prepare us and our teams create and develop a product of our own for our final product.

Throughout the entire semester, I felt like each class taught us the skills to tackle a problem or accomplish a task that we would encounter as we did our final project. The guidelines of the final project were for you to create a project that solves a problem.

When I decided to take this class, I was hoping to get a better understanding of using different softwares. I took this class because I really liked the work I did in the lab and I wanted to be able to do more. I only had one class freshman year that I was taught a CAD software, Creo Parametric 3.0. Other than that, the only time I have had experience with other softwares was when I would help out with workshops at the MakerLab. I wanted to be able to learn them well enough to create things of my own.

I feel like that expectation I had about the class was met. I was taught various softwares through a workshop type environment in class. That helped with figuring out where to start and what to look at to finish a design. Then I had to apply those skills I learned to the final project. It really tested me on how well I knew how to use them. I used Tinkercad for most of anything I did with the final project including the team logo. I was able to do it from my laptop in my free time. When I was looking at a folder I created on TInkercad and photos of designs I had sent my partners, I could see how my skill had improved throughout the semester. When I started, I did the basic shapes and a lot of things were uneven and had odd proportions. As I practiced, I was able to fix those problems and create more complex things. It was frustrating at points, but I was able to get my designs to how I wanted them to be.

This class opened my eyes to many things.  I was able to explore different ways of making I had never done before. I also, went through the product design process that made me explore every aspect of a design even if it is identifying what you can do yourself and when to seek outside help. In this class, I learned what I wanted to learn and more.

That’s a Wrap! 4 Awesome Things about BADM 395.

Over this past semester, I’ve learned so much in the digital making realm. I came in wanting just to earn a credit for school but ended up gaining so much more out of it. The experience was invaluable and I’ve learned so much more about what this university can offer to its students. I’m sure the knowledge I’ve learned this semester will certainly benefit me in the future and beyond college.

What I learned:

3D Printing

One of the big lessons I learned, of course, was how to 3D print objects at the Maker Lab. Learning how to 3D print was definitely one of my main goals that I wanted to achieve coming into the class. From learning how to load up filament into the 3D printers to how to properly slice an object prior to uploading it to the printer I think I learned a lot about the functional capabilities of 3D printers. I learned the limitations of 3D printing and at the same time what the maximum limit of what they can achieve. For example, one issue we encountered was that our water pump’s exit valve wasn’t properly fitted for the tubing we bought. To resolve this we simply took the dimensions of the current water pump valve and 3D printed a new exit valve that fit more to the dimensions of our tubing. Then we attached it to the valve and it worked!

Below is a small GIF of us working with Vishal on 3D printing.

View post on imgur.com

Watch the full video about BADM 395 here: https://vimeo.com/216385308

Fusion 360

Personally, I didn’t expect at all to learn how to any type of modeling or creation of actual objects in software. When we were exposed to Fusion 360 my mind was thoroughly blown. The software could really achieve incredible things that I had never even thought of. There were seemingly no boundaries to what could be made in Fusion 360, which was absolutely incredible. It even exported your models into Cura ready to be 3D printed just like that! Fusion 360 for our project was absolutely vital because we were making brand new objects that had never been made before. So we were working off from scratch and had to use a semi-advanced software to make what we needed so TinkerCAD was off the table. Pictured below was just one of many iterations of our modular plant holders. Learning Fusion 360 was definitely frustrating at times but honestly, the reward of transitioning a product in your head to a real life functioning object was more than worth the steep learning curve.

View post on imgur.com

Full post on Fusion 360: https://publish.illinois.edu/digitalmaking2017/fusion-360-making/

Prototyping

Learning how to iterative prototype in BADM 395 was a great experience. With how the class is structured you naturally get into the groove of making, testing, and then (most likely) failing. Which is a great way to learn how to iterative prototype. The idea itself we had honestly morphed, changed, and evolved into what we ended up doing. Being able to go through all the stages of prototyping and physically building out different models was extremely helpful for the whole process. Personally, we built everything from paper to cardboard prototypes it was a great experience. Especially when we interviewed people on how they felt about our product using the prototype which was valuable in how we intended on changing or improving our product before the final presentation. Below is a picture of two of our three prototypes. The paper prototype was the first one we made before moving onto a more solid cardboard prototype. The third prototype we made was a water functional one with a $0.98 Wal-Mart bin as our fish tank.

View post on imgur.com

Full post on prototyping: https://publish.illinois.edu/digitalmaking2017/cardboard-fun-near-bif/

Learning About Fab Lab

Exploring the Fab Lab was certainly one of the highlights of the entire class. There our class got to learn about the various resources offered at the Fab Lab and their overall mission. The things that the Fab Lab does for the community is also very incredible. From teaching the art of making things to hosting workshops for kids they do awesome work at the Fab Lab. They also help advise students, just like us, on how to make. For our own personal project, we used the Fab Lab to help us cut out the glass materials we needed to make our final fish tank. Additionally, we used the Fab Lab’s resources to help us order the acrylic in order to make the fish tank in the first place. Overall, they have a ton of resources over at the Fab Lab ranging from physical tools to the great mentors and instructors they have there that can assist you with pretty much anything you want to do.

View post on imgur.com

Full post on Fab Lab: https://publish.illinois.edu/digitalmaking2017/learning-the-fab-lab/

Conclusions & Takeaways:

Honestly, I loved my time in BADM 395. It took a lot of hard work and a lot of time but overall this one of the most rewarding classes I’ve taken in college. In the College of Business there isn’t a lot of opportunities to make physical objects and products but here, in this class, we were able to do just that. It feels very empowering to be able to have thought of something and execute it to that degree of actually making the product happen over just a semester’s worth of work.

Moving on and going to California I really do hope I’ll be able to find similar resources such as the MakerLab or the Fab Lab. They are certainly organizations that I’d like to stay involved with moving forward as their potential to impact people seems almost limitless in scope.

With that, I hope everyone in their life at some point gets to experience the joy of imagining a product and then actually making it in real life because it is just wonderful. That, I believe, is how the future problems of the world will be solved. By regular people who are affected by the world’s problems getting access to tools like these and working to get their ideas made into real world products that can help people.

For more information about any of my projects or the video feel free to reach out to me at szethoian8@gmail.com.

A Semester of Creativity


Having the pleasure of fully immersing myself into the MakerLab this semester with the BADM 395: Digital Making Things class, I can now confidently say that 3D printing has the potential to uproot the basics of how we use and purchase products. The ability to think about something, and then model it on some softwares and then print a physical piece within a few hours means that there are endless possibilities when it comes to what one can create.

Coming into the class, I had no idea what to expect, but I knew that it would be unlike any other class I have previously taken on campus. The knowledge and skills that I have accumulated within the short 16 weeks will last for years to come. I believe that this has been one of the most enjoyable classes I have taken and I would like to thank Vishal for that.

The journey that the class has taken me on started with Design Thinking, specifically human-centered design thinking, where one starts with a problem, a need, for a product and develop it that way. This allows for consistent user feedback and to give the product a purpose rather than being a potential paperweight. Design for America, a student organization on campus, held a design workshop to allow the students to visualize this new idea in action.

Screen Shot 2017-04-02 at 10.58.45 PM

The next step in the course was the introduction to 3D modeling softwares and websites that would be useful for us. This included Fusion 360, Cura and TinkerCad. This process was very crucial as it allowed my team to be able to manipulate our object in a virtual 3D space and it has very advanced skills that gave it a bit of a learning curve but I was soon able to master it.

20170213_163924

The FabLab portion of the class taught me more skills that I had anticipated. From soldering to laser cutting, to coding Arduino, these skills are immensely useful, not only for this course but any future project that could require some fine tuning. This portion we made a press box that had an Arduino inside of it with LEDs and a light sensor to trigger specific lights at different light intensities. This was a really interesting and cool way for us to know and become familiar with the tools and services offered at the FabLab.

20170313_172241

The final portion of the semester was centered around the ability to create our project with the tools and materials that we have had at our disposal for the past few weeks. This was the most time consuming and challenging part but most rewarding as well. The idea we were tackling was to create an aquaponics system for a college student to be able to have plants and a pet. The challenge was big as we were trying to emulate nature within a confined system. We encountered many roadblocks, such as failed prints, delays in shipping for acrylic and leakages. However, with my team’s hard work and determination, we were able to overcome the obstacles and build a product we were proud of.

Snapchat-1849388938

Looking back at the beginning of the semester, I had no idea I would be learning so much, and at the same time being so hands on and developing a working product within 16 short weeks. I believe that my expectations of this class were supremely surpassed. It was different because of the way the class as laid out, it allowed us to learn at a gradual rate all the resources at our disposal and how to fully benefit from them. I learned that I was able to tackle problems as they come and being able to be flexible and having a backup plan is crucial. I learned how important it is to constantly change and adapt, whether its designs in a product or user feedback on functionality. Being able to adapt and change with any issues gave me an edge to think on my feet. I learned a lot about softwares, tools, machines and facilities, all of which I will continue to refine for years to come, in my professional life as well as personal endeavors. If anyone that is reading this and is teetering on whether to take this course or anything similar, do it, it breaks conventional classroom politics and provides a fun and creative atmosphere where students different backgrounds can interact with each other. If you have any questions or concerns, don’t hesitate to contact me at khnguyn2@illinois.edu.

My Semester at Digital Making Seminar

Image

This semester, I got to learn a lot not only about digital making, but the design process and design thinking as well! This post is going to summarize everything that I’ve learned in this past semester, then I will talk about how the class met my expectations, as well as aspects of the class that I enjoyed that I didn’t expect to even learn about coming in.

3D printing

Digital Making Seminar takes place in a 3D printing lab, so it was very fitting that the first thing we learned about in this class was 3D printing. While at first we didn’t model anything, we had a guest speaker come in and talk to us, and even got to print out a small object to see how the printers worked. I printed out a small cover for my toothbrush, as shown here.

IMG_0343 (1)

The Design Process

The next week, DFA (Design for America) came into our class and gave us a presentation on the design process, as well as design thinking. This helped our team out in the upcoming week, as it gave us a structure to follow when thinking of a product idea that we could build for our project. I never realized that there was a structured way to come up with product ideas, I thought that people just came up with random ideas but this truly enlightened me.

Fusion 360

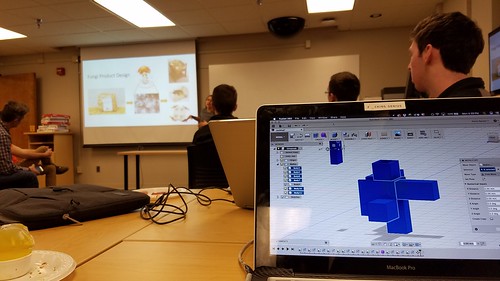
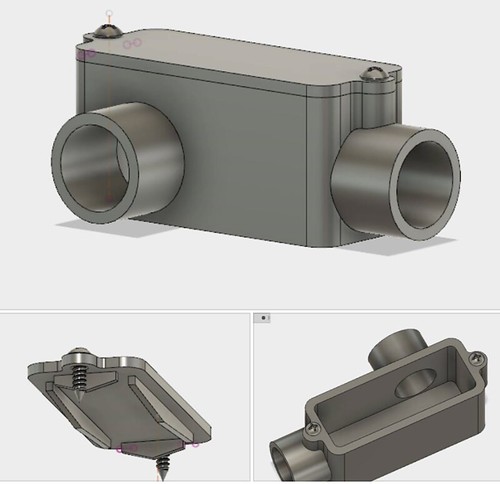
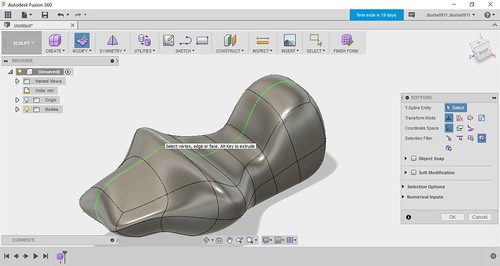
Week 4 provided us with a chance to learn the ins and outs of Fusion 360, which is a CAD modeling system that is compatible with 3D printers. We were required to become familiar with the software before class began and then had an expert on the subject, Jeff Smith, come in and talk to us about it. I got to learn just how powerful Fusion 360 could be, as the sculpting mode allows you to make complex shapes in the blink of an eye on Fusion.

Fusion 360 Picture

Designs like this would take possibly hours using traditional CAD techniques. This is one of the many benefits of Fusion 360 that our class learned about in this course.

Creating a Circuit

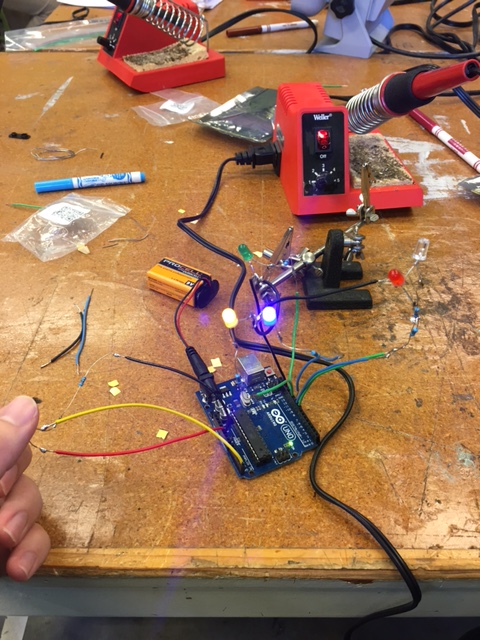
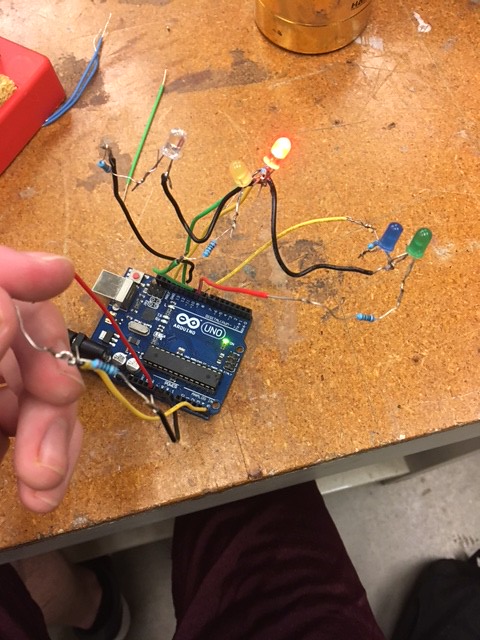
We were also introduced to the technique of creating circuits using Arduinos. We were fortunate enough to be able to use our schools Fablab, which is a building created for the purpose of inspiring creative thinking and design. During our class, we were actually able to make a circuit that caused LED lights to blink at a certain rate depending on how much light is picked up by a sensor. While it was a pretty basic circuit, it was cool to see how the process of circuiting worked and I know that this will be helpful down the road if I ever have to take an electrical Engineering class.

IMG_0421

We also learned how to solder a circuit the next week. This took a lot of patience, but in the end everything turned out really well! This is also a valuable skill I could use, and hopefully I am able to use the soldering skills in the future as well.

IMG_0430

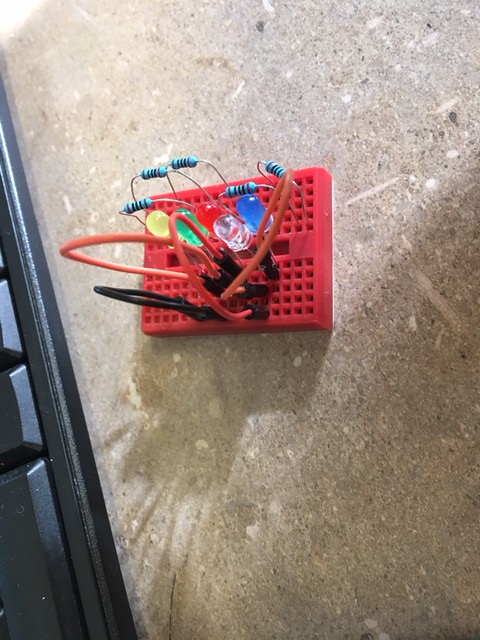
Here is a picture of my completed Arduino Circuit.

Laser Cutting

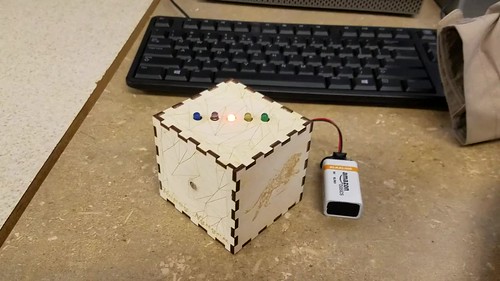
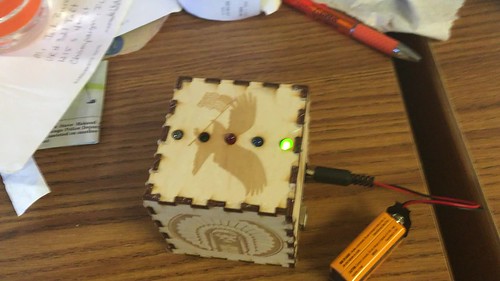
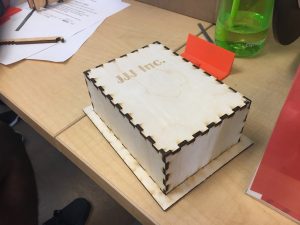
The last week in the Fablab, I was able to learn about laser cutting and how to print designs on wood using a laser cutter. We got to create a box that we would assemble and use as the container for our sensor and circuit board. The final result turned out really cool and the result is shown below.

IMG_0449

3D Scanning

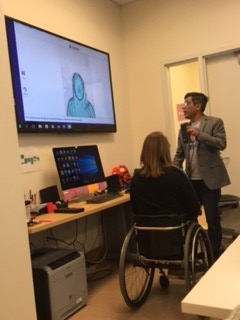
One of the last weeks of the year, we had the opportunity to learn about 3D scanning. A former student of the class, Ariel, came in and demonstrated the technology for us. We then were able to use the scanner ourselves, and even got the opportunity to make 3D models of ourselves. A picture of Ariel demonstrating the scanner to us is shown below.

IMG_0485

Takeaways

Overall, while this course didn’t turn out exactly how I thought it was going to, it was still an amazing and really helpful course. Going in, I thought the course would be exclusively about 3D printing and how to make and design things with 3D printers. While this turned out to be a huge part of the course, there was so much more cool topics that we learned about that I would never have learned if it wasn’t for this class. Everything we learned in the Fablab taught me the basics of some really cool skills that I would not have know if not for this class. Looking back, my expectations of learning about 3D printing were met, and on top of that we learned about some technical skills that I wouldn’t have known about had it not been for Digital Making Seminar. Before this class, I thought that coming up with awesome product ideas or a new invention was only for a select few. However, this class taught me how Design Thinking can help any person who encounters a problem in life come up with a viable solution. This class will hopefully come in handy and may help me create a viable product one day.

To those of you out there considering taking this class, my advice would be go for it! It’s a really cool class and there’s so many skills I have learned in Digital Making Seminar that I would not have learned on my own. I would absolutely recommend taking this class if you have the chance.

If you ever have any questions, feel free to email me at johnhb2@illinois.edu


A Semester of Making

IMG_1015

When I enrolled in the BADM 395 Digital Making class, I was really not sure what to expect. I had learned about the class while enrolled in Professor Vishal’s BADM 350: IT for Networked Organizations class and thought it might be worthwhile to take. Prior to the first day of class, I had never been to the Maker Lab. In fact, other than seeing a quick demonstration several years ago, I had no experience with 3D Printing or really any form of digital making. My main motivations for taking the class were that 1) I wanted to learn more about the Maker Movement which I knew little about, 2) it would introduce me to many of the resources available at the University that few students take advantage of, and 3) I like the emphasis on learning, growth, and sharing rather than cramming and examination. The fact that the class counted towards my IS/IT major was certainly an added bonus.


I was hoping to learn how 3D Printers work, how to design objects for 3D printing, and different types of 3D Printing. However, I learned all of this and much, much more. I learned about the Maker Movement, different types of fabrication, design, product development, and prototyping, just to name a few topics. I have never considered myself a very “creative” person, so this course challenged me to think outside of my comfort zone. Working through the projects helped me develop some creative skills and further refine my problem solving skills. I am now more comfortable working on product development, a skill that is transferrable to many other processes such as project management. In addition to this, I was introduced to and learned about the following topics.


The Maker Movement:

The first few weeks of class served as an introduction to the Maker Movement. We covered topics such as intellectual property concerns and the success of open source software and devices over paid or closed services. It is here where we learned the learning aspect of the Maker Movement and the importance of learning, sharing, modifying, and most importantly: doing.
IMG_1021

Design:

One of the most important facets of making is design. Design for America led us through a workshop to demonstrate the importance of meaningful design. Instead of creating a product and finding demand, we should find a problem and design a solution. Through our readings we learned that products must be desirable, viable, and feasible.

Screen Shot 2017-02-17 at 5.03.53 PM

Tinkercad and Fusion 360:

Learning Tinkercad was very easy. Vishal demonstrated the open source online software and we designed our team logos. Even though the program is pretty simple, it makes it very easy to design objects quickly. Our first experience with Fusion 360 was through tutorials before class. Following this series of videos by Lars Christensen, we are able to create a box/housing with a lid. It demonstrated how powerful Fusion 360 really is. We were lucky to have Jeff Smith from Autodesk teach us even more the features available. For my group’s final project, we ended up using Tinkercad rather than Fusion 360 because of its simplicity.

Electronics

Fab Lab:

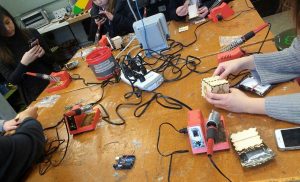
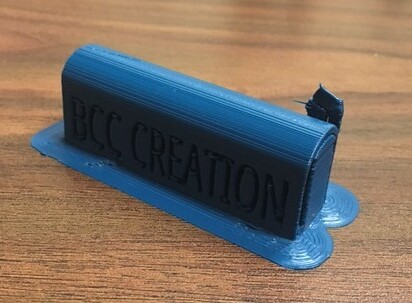
We spent three consecutive weeks in the Champaign-Urbana Fab Lab. Although I had soldered in the past, it was my first time in several years. It was a great way to practice making circuits and soldering them together. I was also able to code an Arduino for the first time, which sparked my thought process as we brainstormed ideas for our final project. Finally, I also used a laser engraver for the first time. This introduced me to Inkscape, another open source software (have you noticed a theme yet?) that allowed us to take silhouettes and have them etched into the wood and cut through to form edges.

IMG_1468

IMG_1571

IMG_1526

Prototyping:

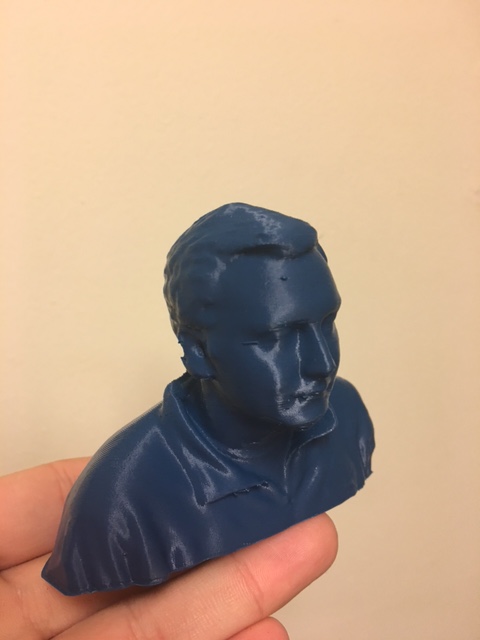
The remainder of the semester focused on prototyping. Although I have been through mock product development phases, this was the first time I have gone from identifying a problem to presenting a final, physical working product. David Kelley says “Design is an iterative process” and I found that to be very true. Our prototype went through many versions starting with a sketch on paper to the final version. Between adjusting our coding on the Raspberry Pi to changing the design of the 3D printed housing to adding and removing functionalities, we spent a lot of time refining the project to best solve the problem of a lack of security on campus while addressing the needs of users. Somewhere in the middle of things we were able to learn about 3D scanning, something we could turn into a business idea as Arielle Rausin has. I was able to scan my head and 3D print it. By the end of the semester, we had been able to design, test, refine, and produce a final security system alternative.


An added bonus of the class was being able to go up to Chicago for a day. We visited Deloitte for a presentation on Deloitte’s tech trends and a consulting workshop. We also visited the Deloitte Greenhouse, a space where clients can come in and run through workshops to problem solve and create connections across many levels of their own companies. It was a really unique space and I’m glad I was able to see it. After Deloitte, we drove over to mHUB, a collaborative space where member companies can work on developing and manufacturing products. This is the epitome of the future of making. Members can work together, building off of each others skill sets, have access to collaborative and shared workspaces, and take advantage of a significant amount of expensive, advanced equipment. It was really cool to see Making on a commercial scale.
IMG_1576

IMG_1581

The end of the semester is bittersweet. While I’m excited for the summer and to be interning again, I am going to miss this class. We formed such a great community together and learned a lot from Vishal, all of our guest speakers, and each other. I’m glad I was able to enjoy this class and challenge myself these past few months.
 

Week 12 Summary: Design Auditing


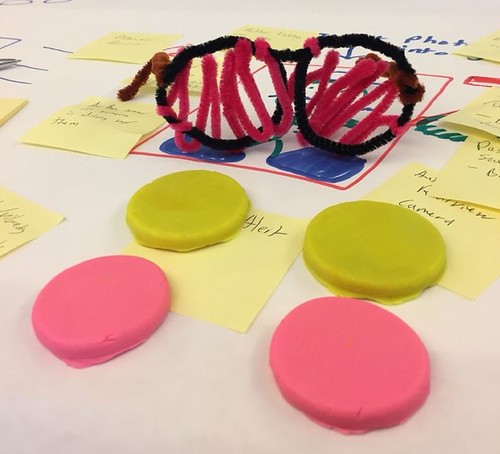
Week 12 is the design audit for all the groups. This is where teams act as auditors of another teams in the class. Each group will provide an overviews (both visual and verbal) of their current designs of their projects. The auditing team will actively listen and then ask a series of questions regarding the feasibility, functionality and design of the other teams design. Questions commonly asked at the design audit are shown below:

  1. Why did your team choose this particular design?
  2. What issues is your team trying to resolve?
  3. How will the various parts of this design be fabricated?
  4. How will you test your team’s design?

These questions are design to spark conversations regarding design and functionality of the product. Speaking to other teams fosters a collaborative creative thinking space which allows the group being audited to see a view point which is unbiased. This encourages the DIWO, “do-it-with-others” maker mindset.  This gives the mentality that the people around have diverse experience and can be possibly the missing piece to the puzzle. Having an unbiased team audit the design and functionality of another team could raise possible concerns, limitations and improvements to the group’s design which the group being audited had never thought about. Each team learned so much from others and we were able to help each other perfect our designs and solve issues and flaws in our designs. Below are summaries of what each team learned as well as images of them in a design audit.

XNihilo & BCC Creations

Animated GIF  - Find & Share on GIPHY

XNihilo (Ana, Anjali, Yuanzhen “Ben”) – H2Go, the hydration wristband

Feedback: Make the red light blink and then stay red so that the user can still tell that they are dehydrated. Possibly look into vibrations along with light signals or variations of the product in which it can be used as an attachment to a water bottle or just a band for people without a FitBit

“A quick recap of what we did during the past weeks: we are designing a dehydration band to remind the users to drink water. In the last week, we have successfully tested our customized sensor on the regular Arduino and we also generated a hand-made circuit.” – Yuanzhen “Ben”


“According to me, the feedback allowed the groups to get a different perspective on their products. It also gave a sense of how the users would want to change the product and what would benefit them more. We will definitely incorporate the feedback we received and hope to make the product that can be used by everyone.” – Anjali

IMG_4170

XNihilo Circuit Prototype

BCC Creations – Brian K., Charlene, Carter – Home Security

Feedback: Think about possibility of having pets in the home and how that would affect product; looking into a reminder to set a home alarm before leaving the house because people may be in a rush to leave and may forget to set the alarm; look at making product more discrete.

“The feedback allowed our group to think about our product from a different perspective, and to also consider situations that we had not though of when we originally came up with the idea.” – Carter


BCC Creations Prototype


AquaPonics & Supra

Animated GIF  - Find & Share on GIPHY

AquaPonics – Kenny, Ian & John – Fishtank Aquaponics Self Sustaining Garden

Feedback: Make modules for the garden larger for root growth

“This actually gave us some great insight and the feedback that they provided will prove invaluable in the next couple weeks as we are finishing up our project.” – John

Animated GIF  - Find & Share on GIPHY

20170423_213521

AquaPonics Prototype

Supra – Olivia, Ben, Veronika – Doorstop

Feedback: Create a much stronger structural base; Minimize the vibration the stopping component the doorstopper experienced; Utilization of either a stronger adhesive or multiple command strips on our prototype base.

“As Marty Cagan testifies in Silicon Valley Product Group’s Prototype Testing, “testing your ideas with real users is probably the single most important activity” in the prototyping process: and I honestly couldn’t agree more.” –Ben


The MakerLax & JJJ Inc.

Animated GIF  - Find & Share on GIPHY

The MakerLAX – Peter, Chase, Brian X. – Tie Helper

Feedback: Add some physical grooves to the tie helper not only to make it more flexible, but as a method to make it easier for the user to determine where each end of the tie may go; Look into resizing the design and maybe changing the thickness.

“This was different from our usual group sharing in that we actually had the chance to sit down and really delve deeper into another group’s work and vice-versa. ” –Brian

Animated GIF  - Find & Share on GIPHY

JJJ Inc. – Jorge, Jai, Xinlu – Smart Light Switch

Feedback: It is somewhat bulky and maybe arduous to install and/or remove;

“Our team also made huge progress for our own project —  the Smart Light Switch. Based on our experiments in last week, we decided to use a cross-shaped arm instead of gear. We connected the arm to the motor, and connected the motor to the Arduino board. Then, we connected the bluetooth module to the Arduino board. We found a smartphone application that allows us to control the motor to rotate through bluetooth. This app saved us a lot of hassle.” – Xinlu

Animated GIF - Find & Share on GIPHY

Animated GIF  - Find & Share on GIPHY

JJJ Inc Prototype


Zerott – Taofik, Odelia, Tiffany – Robot

Animated GIF  - Find & Share on GIPHY

Feedback: keep our ultrasonic transducer would be better than a button because an ultrasonic transducer would be more interactive and impressive; focus more on the internal hardware versus the outerwear.

“Many of the suggestions that both parties pointed out were important and logical. Obviously, as a team we need to take these suggestions into consideration and figure out if we will use these suggestions.” – Odelia


“My main take away from the design auditing process was to strive for a minimum viable product given the short timeline we have and to learn as much as we can while working on our projects.” – Taofik

IMG_0204

Zerott Prototype

Zerott Prototype


It looks like all the teams are well on their way to presenting their wonderful creations!

Design Auditing

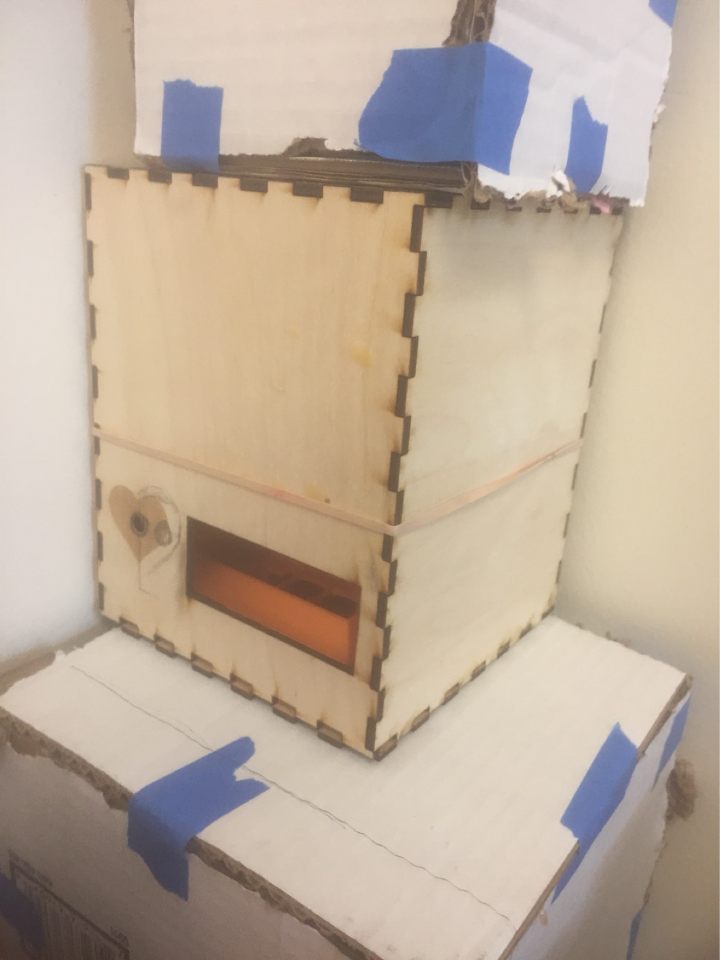
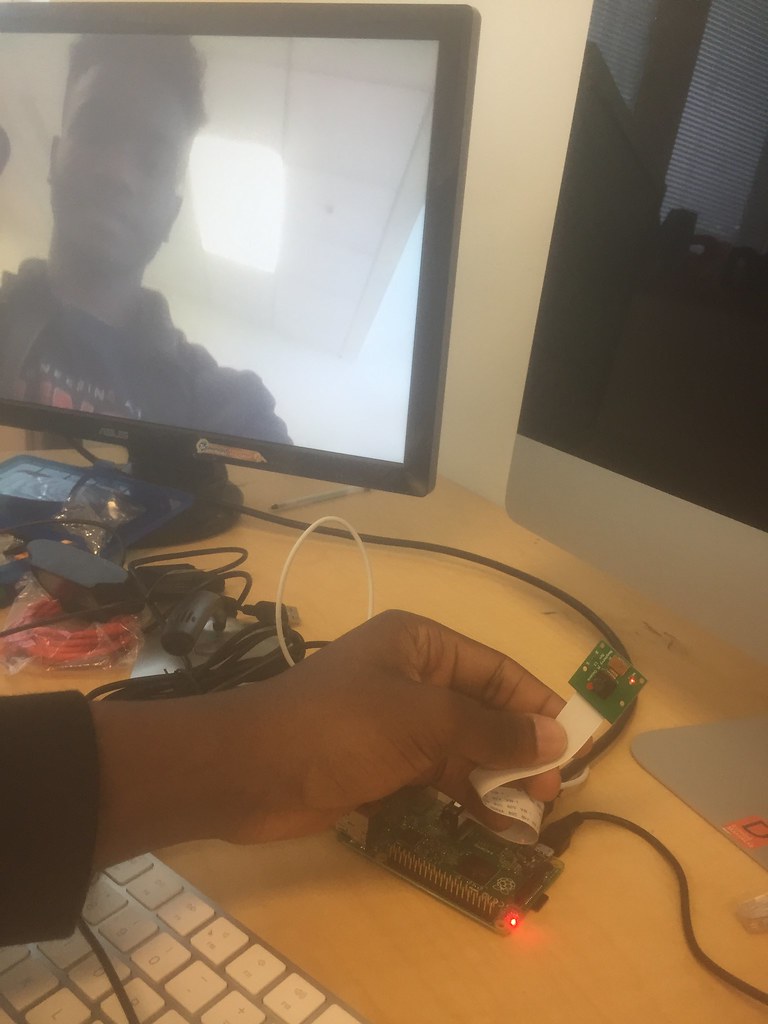
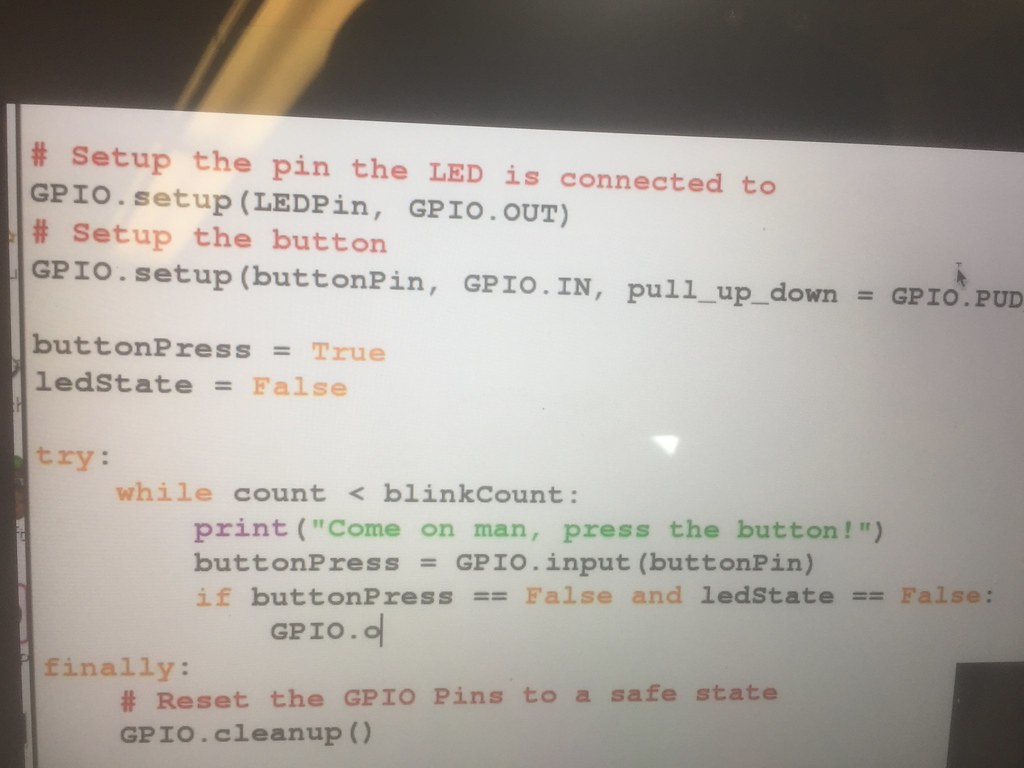
This week has been yet another week of great progress. Since the beginning of the project I have learned more about our product and what is needed to complete the minimum viable product and have since then been stream-lining what features it will need as well as how I will go about doing that. The design auditing process did great work in helping me see some of the ways I can do this as well as give me a few ideas on how to execute the final product iteration. And this final iteration is coming along very well as the last thing to get the fully functioning prototype is the speakers and microphone. I wrote code and setup the electronic circuits to control the led, button, camera and the LCD display and be able to already record the stories (with video without audio). I also got a lot of insight into the JJJ Inc. team who also did a design audit for us as well. They were working on the smart light switch, I found their project interesting and saw they had a different approach to their project. My main take away from the design auditing process was to strive for a minimum viable product given the short timeline we have and to learn as much as we can while working on our projects. We should have our finished product before next monday and that thought excites me greatly. I look forward to seeing everyone’s final products.
IMG_0138
IMG_0204
IMG_0202