Introduction
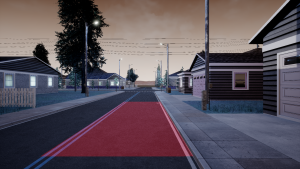
Perception is a challenging piece in an autonomous system. Like human drivers, the decision making algorithms on a self-driving car needs to know the surrounding environment through various types of sensors. This is also sometimes called situational awareness. In this MP, we address a small part of this problem—lane detection—with the help of some powerful open source tools.
This MP will emphasize on traditional computer vision approaches; these approaches are still important but they were predominant before machine learning approaches and GPUs came into play.

This MP has two parts. First, you need to download the folder on both the VM and your laptop. Then finish the python code using jupyter notebook on your own laptop. Once the code shows correct results, you will copy it to the python file (./src/mp1/src/ImageCallback.py) in our VM and test it using the RightHook simulator. The jupyter file we gave you is just a guidance, you can make any changes you want. Just make sure to print out the required images and that you submitted code works in Righthook simulator.
Grading Rubric
You are supposed to work with your project teammate. Both of you will get the same grade.
- 60% Lane detection code in jupyter notebook file (.ipynb)and tested on 6 static pictures.
- 20% Lane detection tested in RightHook Simulator. Take a video (< 3 minutes) to prove it.
- 20% Written report in pdf format.
- Up to 10% Extra credit for trying creative new approaches.
Environment Setup
To set up the development environment in jupyter notebook, you need to follow these steps:
-
- Download the folder from Gitlab.
git clone https://gitlab.engr.illinois.edu/GolfCar/mp1-release
- Install python3 (command depends on your own machine)
MacOS (need to install homebrew first):
brew install python
Linux:
sudo apt-get install python3.6
Windows: official python website
- Go to the jupyter folder and install required packages:
cd jupyter
pip3 install -r requirements.txt
- Open Jupyter notebook:
jupyter notebook
Code Development in Jupyter Notebook
Open the RightHookPipelineStudentVersion.ipynb.
You need to fill all the missing parts that have been bounded by “## TO DO” and “####”.
If you have better way to crack the task, feel free to change the other parts of the code. You will get extra credit if your solution is significantly better than ours.
See detailed instruction inside .ipynb file.
Simulate in RightHook
-
- Download the folder into VM.
git clone https://gitlab.engr.illinois.edu/GolfCar/mp1-release
-
- Go to the folder.
cd src/mp1/src
- Fill in the blanks in python script ImageCallback.py between “## TO DO” and “####”.
You just need to copy from the code developed previously on jupyter file RightHookPipelineStudentVersion.ipynb.
The function names are the same in two files - Run simulation using following commands.
- In the terminal window type the following
nvidia-docker run --name NetID --env="DISPLAY" -e "KEY=API_KEY" -e
"PORTAL_URL=https://illini.righthook.io"
-v /tmp/.X11-unix:/tmp/.X11-unix:rw -v
/usr/lib/x86_64-linux-gnu/libXv.so.1:/usr/lib/x86_64-linux-gnu/libXv.so.1
 --ulimit nofile=65535:65535 rh_sim/minimaps:c000140725e017ab00810eea6ab55e1cc9310182
This function will essentially create docker container in with the name being your NetId. So, the next time you want to re-start this container just enter the following command.
nvidia-docker start -a NetId
- Start a new terminal and clone this repository
git clone https://gitlab.engr.illinois.edu/GolfCar/mp-release.git
- change directory to this repository
cd mp_release
- run ros set configuration files
source setup.sh
- build the ros repository
catkin_make
- To start the simulation Right-hook server
./run.sh
- To start our own ROS implementation
source devel/setup.bash
roslaunch mp1 run_mp.launch
- To kill the simulation
./kill.sh
- Kill the docker container after you are done with your code
docker kill NetId
Report
You are expected to write a 3-page-long report (can be longer but not shorter), including:
- A brief explanation for each block of code (warp image, edge detection, find center …).
- Did the code not work well at certain situations? Why would that happen? If you fixed it, how?
- If you find any typo or you rewrite the code structure to improve performance, please explain in the report. You may get extra credits in your final grade based on your contribution.
- Photos to prove your code works in RightHook simulator and show the scenarios when your code is not showing proper results. You don’t have to make the code work 100% accurate through the simulation to get full grade.
Submission
You need to submit the finished jupyter file (.ipynb) with the results, a video(mp4 format preferred) and the report (pdf) to Compass 2g. For each group of two students, only one of you need to submit it. Please submit a zip file with name “netid1_netid2_mp1”. Fail to fulfill these requirements may effect your grade. The deadline is on Feb. 6 at 11:59PM. If you didn’t see the link to submit in Compass 2g by Tuesday Jan. 29, and you have registered the class, please let us know.
