
Class Summary
In class this week, we had our first opportunity as a group to explore the community’s Fab Lab making space. I was pretty surprised to find some extraordinary machines and creations in what looked like the oldest building on campus. Our day started off with a tour guided by Fab Lab director (and former guest speaker) Jeff Ginger. We saw several cool creations including a backpack that acted as a turn signal with a face for students who ride their bikes to school. It was empowering to hear that those students were far younger than us and that we would soon be able to create something even more complex. The Fab Lab was much larger and more complex than what we are used to in the MakerLab in the BIF. Yes, the Fab Lab has its own 3D printers, but it also has a plethora of other technology including a wood laser cutter, raspberry pi, and threading machines.
After the tour, the group was split into two groups. Each group was given a different task. Mine was to create a box with no top to it. First, we created the dimensions of the box before importing it into Inkscape, a software that works similarly to Adobe Illustrator and other design tools. We created our box, manipulating various-sized rectangles so that there were interlocking pieces. Then, we were given the chance to import designs onto our box. I chose the Superman logo as well as the logo of my startup, Cover’d. I happily volunteered to be the guinea pig and print my box first. I attached a photo below – I was pretty pleased with the way it came out!
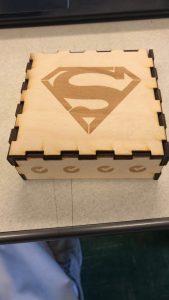
It was really cool to see the laser cutter in action as my box began to take shape. One mistake that I made was in not mirroring the small logos on the top part of my box. Because the top and bottom sides fit in such a way onto the box, it caused my logos to appear upside down on the unseen side of the box. It was most definitely a lesson learned for next time.
I’m excited to get back to the Fab Lab this week for part two of our learning. It seems that with each week in this course, we unlock new and more powerful learning tools that further widen the possibilities of 3D printing technology.
Hi Jake,
Great post! I had a lot of fun sitting next to you in class and working on our wooden boxes. The process was a little confusing at first because the website was unfamiliar. After some time, we started to understand how it worked. This shows that the more practice the easier it becomes. One of my logos printed upside down too. This was an easy error to make because we did not pay close attention to the format of the pictures. Overall, it was a great learning experience and I am excited to create our cloth tops.
Hey Jake! Thanks for the reap of the tour – I wasn’t able to attend class last week, so I missed everything! Considering I’m a campus biker, that turn signal would be awesome. Many drivers don’t look or don’t know what biker turn signals mean, so a big flashing light on my backpack would be nice. I hope to see that and more when I finally get in the Fab Lab this week.