The Hands-on Intro to Digital Making. Part 1: Circuits and Soldering.

LabLocationMd

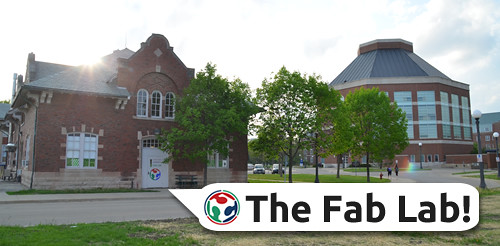
CU FabLab. Located at 1301 South Goodwin Avenue, Urbana IL.

This week was definitely my favorite class session, because I am a person who loves getting work done physically and having a physical product in my hands. After hearing Jeff Ginger – the director of CUC FabLab – tell us about the lab in week 2, he gave us a great tour through the space where we got to go in as part of a series to get trained on and work with the many great tools and resources there ranging from 3D printing, to digital embroidery and every thing in between such as the biohacking space and laser cutter. It was also interesting learning how it all tied in with a Fablab movement/Network of FabLabs across the globe. Seeing the place in person was definitely more inspiring as they turned a place that could be considered run-down into an environment where ideas and creativity are not just born but brought to life. Its very astonishing how much is possible and available through the lab, they had a section for each of the above mentioned and set up classes to teach each of these concepts.

@Fab Lab splash-b8d8cb4fbb

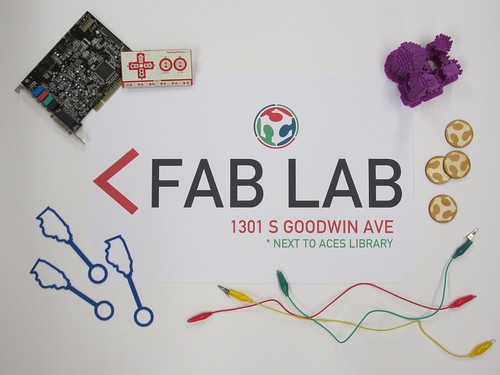
Different facets of the FabLab.

After the tour we, were split up into groups to partake in these classes to dive into one of these facets. I started with circuits and soldering using the given starter kit shown below. It consisted of an arduino uno board, batteries to power it, a photo resistor/resistor that changes its resistance according to the amount of light that hits it,
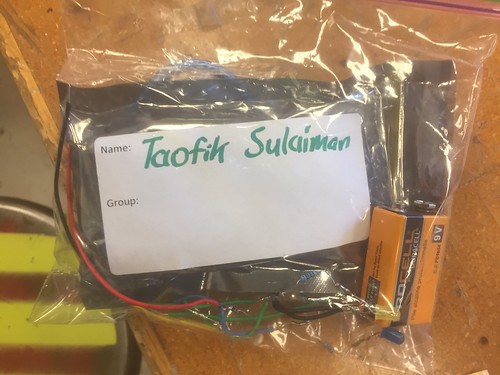
IMG_8006

Starter Kit

So with these resources, we will create a light sensing box that changes color the darker it gets around the sensor on the box. We were taught the basics of soldering – which means to join two wires using a hot-tip soldering iron and tin metal as a joint -then setting up the wires in the right connections with the LED lights and resistors, and finally plugging them into the arduino boards that were preset with the code needed for the final product. I enjoyed my time working on these so much that I bought some parts to work on my own personal projects and thats one of the effects that the FabLab has on people – inspiring the maker mentality to people that visit.
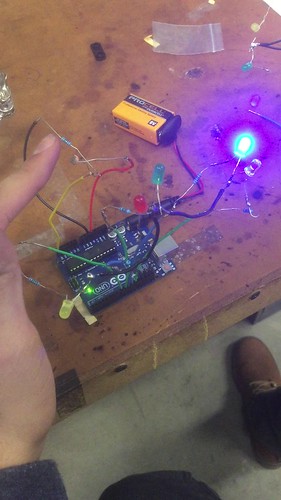
IMG_8008

IMG_8009

My Final Circuit

And now that we will have these skills and be familiar with these resources, we will be able to apply them to our own group projects due at the end of the semester. I am looking forward to the next two weeks where I will learn how to use laser cutters, write Arduino code and bring them all together. And I suggest everyone gets involved in the fablab nearest to their communities. Here’s links to learn more about Fablabs and where to find the nearest one. Link 1. Link 2.

Creating With Fusion 360 and DIY Biology

Jeffrey Smith from Autodesk held a workshop in class teaching us about the company and the Fusion 360 software. Autodesk’s Pier 9 is located in San Francisco Bay and is a facility that houses collaborations between artists, engineers, and technologists. One of their latest projects is a 3D-printed model of downtown San Francisco.

During the workshop session, we learned about the different tools on Fusion 360. I found the workshop to be incredibly helpful since I have never used Fusion 360 previously. Using the software, I tried creating a pipe that connected with a rectangular body. Other tools we experimented with were the sketch, modify, and assemble functions. Saving the best for last, we learned about the purple create tool. The tool allows us to deal with multiple faces and build complex, organic shapes. Jeffrey Smith create an aircraft design out of a rounded cube in a matter of minutes. I definitely want to practice using Fusion 360 more and utilize it in semester projects.

Dorothy Silverman presented on Biohacking, which manipulates the genes of organisms to usually create a product. Biohacking can also be thought of as DIY biology, where people of all backgrounds work together in small labs. Projects worth mentioning include using chitin to create biodegradable cups and plates and using fungi spores to grow furniture. I believe that the Biohacking movement is similar to the Maker Movement in that all sorts of people work together to create; however, Biohacking incorporates more sustainability in creating their products.

Merging Biohacking and fashion together, Suzanne Lee created BioCouture, a process in which clothes are grown using microbes. Biohacking is an exciting way to learn about biology and create things at the same time. I definitely want to experiment with the various processes involved to create sustainable products.

An Exercise on Materializing Ideas

The Power of Design Software

Jeff Smith’s presentation on the features of Fusion 360 as a tool to not only visualize products but also as an avenue to create and design new ideas was truly inspiring. As someone who completed all of his college major in industrial design without the use of a computer to now being an expert on all Autodesk products is a testament to the both the continuous growth of the industry as well as the ability to quickly adapt to the revolutionary technology. Besides enlightening us with a rapid and intense beginner’s tutorial on Fusion 360, one of the most innovative features of the software is its “Sculpt” feature, which allows the user to create incredibly complex objects in mere seconds that would otherwise take countless hours using legacy technology. I also enjoyed his spotlight of Autodesk’s revolutionary state-of-the-art initiative in called Pier 9. Located in San Francisco, this workplace is dedicated to exploring and connecting ideas from software to the real physical world, in order to best test, build, and use. In the picture below, Jeff utilized the sculpt feature to create an incredibly complicated yet visually appealing model, which he then rendered and displayed with a full 360-degree panoramic background.


Before class, as a result of watching the Fusion 360 “Absolute Beginners” series of YouTube videos, I was able to make this model.

After class, I was playing around with the software and attempted to create a model of an everyday object that I use quite frequently. Although I struggled mightily at first, take a look at the screenshot below and see if you can determine what object I was attempting to make.

It’s a water bottle! The link to the Fusion 360 file can be found here. The msot difficult part of the design was instructing the software as to what parts were components, bodies, joinings, cuttings, etc. Albeit at first it was frustrating, I gradually began to understand how the software functions.

Biohacking

The second presentation we received was from Dot Silverman, an extremely motivated and ambitious PhD student from the University of Illinois. She introduced us to leading edge enterprises that intertwined the design aspect of 3D printing and additive manufacturing with solving biological and natural problems. She described a variety of projects, however, there were two that particularly stood out. The first was the use of fungi to create bricks for construction. After inserting flour, water, and the fungi into a certain mold, within two weeks the mixture turns into a compound that, once baked, is especially conducive to use as bricks. The other initiative I found to be ground-breaking was the development of soft robotics. As a growing field, soft robotics offers designers and doctors alike a common ground to collaborate and create solutions to some of humanity’s most complex health problems. The article described below gives some insight into this topic.

Food for Thought

This article from WIRED magazine details new developments by researchers who claim to have developed a “robotic sleeve”, which will supposedly assume the functions of pumping blood in the event the patient enters cardiac arrest. Created using silicone as the primary material, this innovative product is a prime example of the literal power soft robotics can have on the healthcare industry. The soft feel of the silicone is less irritating than metal or other materials, which adds to its effectiveness.


References

Further information on Pier 9: click here

Simon, Matt. “The Robots Are Coming for Your Heart.” Wired. Conde Nast, 31 Jan. 2017. Web. 15 Feb. 2017. <https://www.wired.com/2017/01/robots-coming-heart/>.


Week 4: Fusion 360

This week in class, Jeff Smith, a speaker from Autodesk introduced and showed us how to use Fushon 360. Fusion 360 is one of the more powerful CAD programs out there that enables users to be innovative. To be totally honest, I had a hard time with Fusion 360, even now I still cannot fully understand and figure out how it works. However, I must admit that it becomes more user-friendly as one gets to understand the functions more and the program is quite effective. What I do admire about Fusion is its ability to help the user be more productive. It helps users create more complicated objects with different layers that would normally take hours on end to create in a normal CAD program at a faster pace with the same amount of quality. Finally, Autodesk, the company behind Fusion 360 offers this program, as well as many others, free to students for 3 years.

Personally, I still have so much to learn within Fusion 360, but as someone that has had previous background in design software such as Photoshop and InDesign, I must say that I am very surprised and have great respect for this program no matter how frustrated I get with it. Jeff really dove in and taught us the full potential of Fusion 360 and each function has a blurb that loosely summarizes each functions’ capabilities and actions. I think that applications like Fusion 360 really pave the way for people to understand that design is something that anybody can come up with and that anybody can make their own objects. For the students in this class, Fusion 360 will eventually assist us in designing our concept and plausible ideas for our projects.

This object/figure would have taken a longer time in a normal CAD to shape.

Another speaker we had was Dot Silverman. Due to time, Dot could not really go into depth about her topic on biohacking, but we did learn about the basics of biohacking, a “do-it-yourself” type of biology. She introduced fungi product design in which products such as sturdy chairs were made out of fungi and were environmentally friendly.

Harnessing the Powerful Tools At Our Disposal

Diving into Fusion 360 during this week’s class session was not unlike jumping into the deep end of the swimming pool in an attempt to learn how to swim; needless to say, there was initially quite a bit of floundering. Over the course of two and a half hours, Jeff walked us through the various functionalities of the program in a hands on demonstration that gradually built our comfortability and proficiency in the software.  We were exposed to far more advanced capabilities than we had previously been able to utilize in Tinkercad, which will permit us to develop far more sophisticated designs and products moving forward in the class. We were also exposed to the extremely fascinating prospects of biohacking, an initiative that is being led by Dot Silverman at the Fab Lab in Champaign. The use of these natural materials in lieu of traditional plastics, fabrics, etc. in production present a new element to consider when developing our capstone projects for the course.

Both portions of this class were equally important in the development of our final projects. Our work with Fusion 360 afforded us a basic level of skill in the software that we can utilize and continue to expand upon in our efforts to design our products. Without this basic level of knowledge, we would lack the fundamentals necessary to execute certain concepts. Dot’s presentation was pivotal, as it encouraged us to consider the materials that will be required to produce our designs, and the various implications of material choice. The biohacking movement is pivotal in the world of 3D making, as environmental concerns are at the forefront of issues facing production of all varieties, traditional and otherwise, in today’s society. If able to harness the technologies devised through this movement on a large scale, the standards for materials utilized in production could be revolutionized.

With my newfound knowledge, I plan to sharpen my skills in Fusion 360 in order to capitalize on all the program has to offer, and to ensure that I have a solid foundation with which to go about developing my product once we finish the brainstorming stage. While it is difficult to discern whether the biohacking aspect of 3D making will fit well with my team’s product until our design is better defined, I would love to explore this concept more. I am fascinated by the idea of utilizing biodegradable materials for short term and/or disposable products, such as packaging. I believe that creating a design that aligns with sustainability efforts is crucial to a product’s longevity and ability to best serve the community. Furthermore, it will be important to understand the interaction between the Fusion 360 design and the material selected; for example, I will need to consider whether, if selected, a biodegradable material has any restrictions or limitations as to which designs it can be implemented in.

Overall, this week’s instruction provided clarity on several powerful tools that are at our disposal moving forward in this design process. I was able to scratch the surface of these resources while replicating a side table lamp from my apartment, as per Jeff’s instruction as the conclusion of our last class. While I struggled at first, as I hadn’t used the software in several days, I eventually became much more comfortable, and was able to create this design utilizing Fusion 360.

Using Autodesk 360: A powerful CAD tool

Another day, another tool that you can use to create and make innovative products. This week in lecture we were not in our usual maker space but in the Armory to hear from Jeff Smith, an expert in AutoDesk Fusion 360 and an industrial designer for Autodesk. He gave us an overview of the Autodesk work environment, including their innovative makerspace called Pier9 which is for making digital into real. He also showed us how powerful and unique this software is and different ways of designing:

  • Parametric designing which entails specific constraints and dimensions, and
  • Free-form designing or sculpting using the Tee-Spline Body

The way Fusion 360 is setup is in order of the different design phases: model, patch, render, animation, simulate, etc. They use a top-down componentry/modeling system system unlike other CAD software such as Creo Parametric or SolidWorks which use bottom-down modelling. You could even type code and create a model instead of clicking around the tools. He also introduced the new and powerful concept of having the computer learn and design your product for a more efficient design. Learning from about Fusion 360 was a great experience the way he likened designing with time-travelling. I really felt inspired more to be a maker and get more into modeling. Using the skills that we learnt from him and the Fusion 360 tutorial, i was able to replicate the model of the wire conduit below,

Screenshot (4)

and go further to design a model of a product I use on a daily basis – A Chapstick:

Screenshot (2)

If you would like to dive into this powerful tool, Autodesk offers Fusion 360 free for students at their website.

After Jeff Smith, we had a representative from the CU Biolab, Dot Silverman, tell us about the various creative endeavors they do in combining Biology and making into what she called “BioHacking”. There are so many endeavors involving biohacking going on around the country such as the MIT Silk pavillion and so many others included in the picture below.

1280x720.png

Design and Build: Learning to Use Fusion 360

Screen Shot 2017-02-17 at 5.03.53 PM

This week, we take a step further into product design by learning how to use Autodesk Fusion 360.  Luckily as students, we have free access to Fusion 360, a tool we all found to be quite powerful and intuitive.  Prior to our class session we were able to follow a series of tutorials to become familiar with the software, and I was proud to finish this model before class.  I really enjoyed playing around with the software while learning its capabilities.  In our class session, Jeff Smith, an Instructor from Autodesk presented to us and taught us how to use many of the features of Fusion 360.  Following Jeff’s presentation, Dot Silverman came and presented on her work with Biohacking.

As with many software programs, Fusion 360 is a very powerful and complex program.  Initially, it can be difficult to navigate and to achieve your desired outcome in design.  However, once you become more comfortable with the program, designing can come naturally to you.  Playing around with the tools has been really helpful in learning how to properly use the software, and I found the tutorial videos very helpful.  I also found this slide deck which gives an overview of how to use many of the tools in Fusion 360.  I personally am a big fan of tutorial videos and slide decks as I can go through them many times until I fully understand each step. Something else I have already realized is that there are many design implications to keep in mind when designing for 3D Printing.  This article gives a brief overview of mistakes to avoid when designing.  Many of these echo what Jeff mentioned we must be mindful of when designing in Fusion 360.

IMG_1025

Moving forward in the class, our group is approaching the point at which we will need to start designing on our own.  We all need to learn and practice using the design software, 3D printers, and the many other technologies and machines that are available to us.  We want to make sure that our design is desirable, viable, and feasible.  We need to be sure that our design is logical on the screen and in its physical form, so being comfortable with the design software is paramount to our success.

IMG_1026

Unfortunately we did not have much time to cover Biohacking in class,  Dot introduced us to the concept of biohacking which could involve anything from product manufacturing to medical uses.  This article gives many examples of how makers can “biofabricate” clothes, furniture, and other special materials to turn manufacturing into a more sustainable process.  As we continue to evaluate future implications of making and 3D Printing, biohacking will become a major discussion point.

No Boundary for Innovation and Design

There are a million and one ways to make something. So far in the Digital Making course I have used TinkerCad to make a logo for my team. In the last class we were introduced to Fusion 360 by Jeff Smith, and instructor for Autodesk. We were instructed on how to go from the basics of Fusion 360 to creating more complex things. You could use that software to make everyday things very easily. I tried making a cake spatula. It has two components to it, a scoop part and a handle. After some more practice i should improve my skills with Fusion!

Fusion is used in many areas of life today. For things in our world and even out of our world! Autodesk had a “Space Challenge” where students competed in to design a 3D model of a cube satellite. This software can help solve real world problems.

Another speaker we had was Dot Silverman. She spoke to us about Biohacking. Biohacking by definition is the activity of exploiting genetic material experimentally without regard to accepted ethical standards, or for chemical purposes. Biohacking has changed the way of life for some people. The vegan lifestyle involves not eating any animal products. It is mostly a plant based diet. So just think of never eating ice cream, having a steak, or enjoying cheese on your pizza. Except biohackers have made a breakthrough that allow vegans to enjoy cheese. They have created a vegan cheese. They are essentially “writing” genes for plant proteins that are mimicking milk proteins and putting them in yeast. Once it is put into the yeast it does something similar to when people make beer. When people make beer it is developed by the yeast excreting alcohol. Except with the modified plant proteins the yeast excretes milk. This is how the “Real Vegan Cheese” is made. This has changed the diet of a vegan and opened many doors for further exploration. Now that there is a vegan cheese, can there be a vegan chocolate or butter. This restrictive diet has become less restrictive. Many people believe the vegan lifestyle is the way to go, but do not think they could make it work with their current lifestyle.

There is no boundary for innovation and design. Today we have the software like Fusion 360 and TinkerCad to let us explore the “what ifs” in life. Today we have found ways to create a 3D modeled satellite cube for space and a way for vegans to enjoy cheese. Who knows what the future has to hold for innovation.