
This week’s class was made me feel as inspired and creative as I did when I was little and the world was my playground. Design for America came in to give a presentation on the Design Process and walked us through the process for a certain group and issue from understanding the client to crafting a solution.
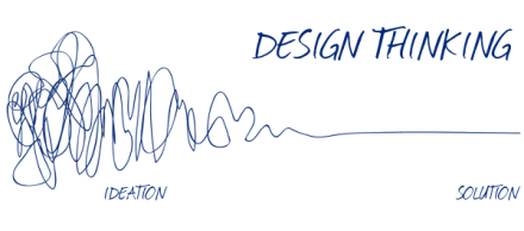
I have learned and utilized the design process once before in an industrial design class, taught by David Weightman who also introduced the idea of design thinking in our pre-class video. I really enjoyed this Design storm session because it completely encompassed and quickly introduced us to each step of the design process in a condensed form. Below you will see the 6 steps in the design process that Design For America (DFA) follows when working on any of their projects.
They walked us through each of these steps with an example situation by introducing different personal stories who each struggled with a certain aspect of life due to their blindness disability. They had already completed the first step by identifying our target group and users for the design. Our group chose to focus on solving the issue of anxiety when in unknown social situations for Jess, a blind college student. The second step in this process was immersing ourselves in our user’s world by making assumptions about how she sees the world, what she feels, thinks, hears, says, does, wants, and needs. Part of the design process is coming up with a bunch of ideas each on separate post-it notes to visualize and determine the most important ideas. After making assumptions, we were able to build “How Can We… statements” to better narrow our focus for the project. Our group came up with a few statements focusing on bettering the social environment of Football games for students who are visually impaired.
Ideation
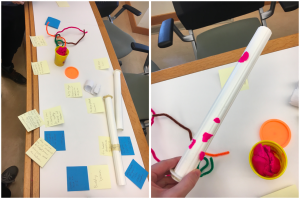
After framing and understanding the issue and potential client, we delved into the ideate portion with an individual and then longer group brainstorm sessions. In this part of class, we came up with as many solutions to the issue as we could find. One of the ideas I came up with was a railing with various textures that would differ depending on the place where you are in the stadium. We ended up adjusting this idea in our group brainstorm session to become our product and mockup in the Build portion of the process.

Prototyping
We ended up designing a railing that would surround the entire stadium and have brail labels for each different area (such as student section, hot dog stand, ect.) to help with navigation throughout the stadium hopefully decreasing uneasiness of the unknown. We presented this to the class and they had mainly positive feedback however during the ideation stage we wished we could ask questions to the user group to determine whether our solution would be useful.
Overall, this class opened our eyes to the design process and I look forward to transferring these skills towards our own ideation process towards our semester project.
Further Learnings from Printing Fusion Design: Nozzle Size
As a side note: Last week I printed the desk cord organizer that I had designed using Fusion 360 and have included pictures of the final product as well. With each print, I learn something new. This, like the phone stand had a balance issue however I could solve that by using a command strip to attach the organizer to my desk so that the cords would not immediately pull it towards the floor and it works quite well.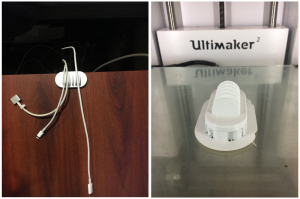
Additionally, the first few prints I didn’t understand how the nozzle size impacted the print, however I now know that using a 0.4 nozzle is typically the standard however will be much slower to print than the .8 nozzle. This makes sense, thinking about it as the .8 extrudes twice as fast due to the larger size, it is able to cut the print time in half. The down side of this is that it may not be able to capture as many small details if there are thin lines. Additionally, I learned that if using supports, it is quite difficult to remove .8 supports however .4 supports are easy to remove due to thinner lines and less strength in the material. If interested in learning more about how the nozzle size impacts the print you can refer to the 2 links below that I used.
https://craftunique.com/forums/view-thread/1254
https://rigid.ink/blogs/news/what-3d-printer-nozzle-size-should-i-use-the-pros-and-cons
Hey Helen,
I really enjoyed reading your post. I liked how you included pictures from the DFA workshop. I thought the ideation and prototyping process was extremely helpful in understanding the concept of design thinking. Similar to your post, I also wrote about the benefit of creating “How can we…” statements. These statements really helped guide our thinking and really connected all of our brainstorming ideas. I’m excited to continue using this thinking process in class and in our project groups!