3D Scanning and Final Steps

This past week we had Arielle Rausin teach us the basics of 3D scanning! The class got a chance to mess around with the 3D scanner to scan their heads. Unfortunately, Team JJJ Inc. has no use for a 3D scanner, at least not for this first prototype.


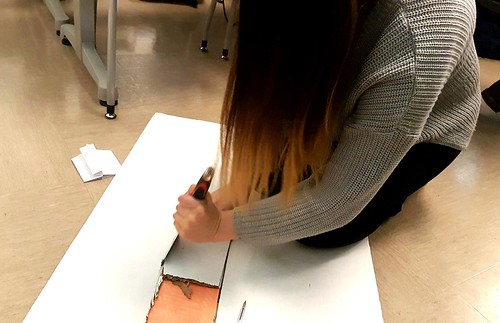
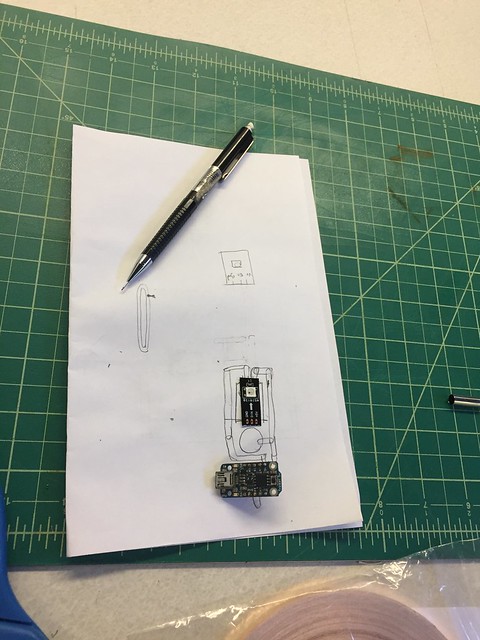
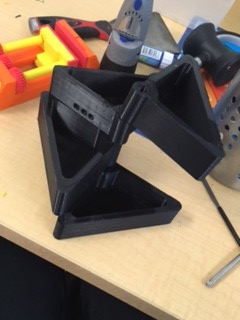
Our project is coming along. Slowly, but surely. This past week, we focused on making sure our rack and pinion had even better/more precise dimensions. However, even with the better dimensions, I don’t think we will be able to get the light switch to flip with the rack and pinion idea. We might have to modify it a bit to get more torque out of our servo motor. Through some research, we also noted that a normal RC motor won’t work since it’ll be extremely hard to get the motor to turn only a certain degree. This leaves us with only a servo motor. The only problem with this though is that the servo motor might not be strong enough to flip the light switch. My goal for tomorrow’s class is to get a working prototype that actually flips the light switch.


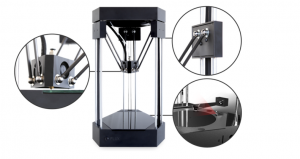
For those interested in possibly buying a 3D printer for your own use, check out this 3D printer that comes with multiple functionalities. When I first saw this printer, I wanted to get it. I still want to get it but I currently don’t have the funds. The very basic printer (only for 3D printing) costs $699. The Delux package that comes with a laser engraver, blade module (for precise cutting) and a holder module (for putting a pen/pencil and having it write on paper). This printer also has the capability of 3D scanning. Here are some pictures of the printer.

3D Scanning and Project Updates

In Week 10, we had a class in MakerLab and explored the 3D scanning technology with Arielle Rausin. Afterwards, we moved forward in our team project and tested out the components printed during the session.

3D Scanning Technology

After watching the videos of different types of 3D scanners prior to class, I couldn’t wait to actually see how it works in class. In the class, we were excited to have Arielle again to talk about 3D scanning. Arielle is a previous student from Digital Making class, and she founded a company produce 3D printed racing gloves for wheelchair racers. Back in Week 1, she gave us an overview of how she found the opportunity in 3D technology and built the company. This week, she further explained how she used 3D scanning to build the model she need for 3D printing. She introduced several 3D scanners to us and showed us how to use them. In addition, she demonstrated how to use the software to modify the model generated from the 3D scanner. This function can greatly speed up the process of prototyping based on feedbacks.

Following the demonstration, we took a try in 3D scanning each other in the class. I was surprised by the amount of details it captured and the speed of how it works. The type of scanner we used during the class is very similar to the one in the picture below except ours are desktop version.

Source: https://www.3dsystems.com/shop/sense/techspecs

As showed in the picture, one person will be holding the scanner and person getting scanned will rotate. The person holding the scanner will also be monitoring the progress on the screen and direct the scanned person to move accordingly.

Besides the advantages we found about 3D scanners, we also found the constraints. Because this type of scanner receives the reflected signals to build model, it doesn’t work on the surface with dark colors. One way to solve this problem is to have a person holding a flashlight while scanning. To get the best results of an object, one can paint it in white. In addition, it is easy to have the small item rotates on the plate but it’s hard to have a person rotate as it required. However, what we used is one of the cheapest 3D scanner on the market and more advanced scanners will have less issues.

Project Updates

In the second half of the last class, we continued our experiments for the group project. We printed out an enlarged model of the gear and learned how the gear works. Based on that model and our calculation, we scaled our design. In addition, we tested out the Arduino and motors with the code. We also put the outer case into print. Overall, we got a significant progress and we are on the right track. For the next meeting, we will be connecting the motor with the gear and modifying the outer box based on the size of components.

I’m Printin’ Myself – 3D Scanning

“I’m with some Maker lab people looking back at it.”

This week in class, we had the pleasure of having former 3D printing student, Arielle Rausin, give us a presentation of 3D scanning technologies. The whole process looked very interesting but also pretty challenging. In order to get a good scan, the scanner has to be held steadily and the person (or object) being scanned has to rotate slowly on an axis to ensure that every part gets scanned. After performing the scanning, Meshmixer was used to clean up the 3D scan by smoothing out surfaces or filling in holes.
17888403_1565024730182511_1084441748_n

3D scanning is a really neat technology that allows us to scan anything in real life and reproduce the exact same model in 3D print. Beyond that, 3D scanning also allows us to enhance the virtual world. Below is a really interesting video of 3D scanning a person and then turning them into an avatar in a video game. Here’s an article that talks more about this technology.

After learning about 3D scanning, we continued to work on our final projects in our individual groups. During the last session, we printed out the 3D material that will hold the Arduino for our Maker bot. This time, we worked on the outer portion of the bot which includes the face and body. In the end, we will be using plywood and laser cutting for those parts but for the sake of prototyping, we just used cardboard to make a rough model. The prototype turned out to be slightly bigger than expected so we learned that we should readjust our scale and make it more suitable in size.
17858601_1565023050182679_151084638_o

The Final Few Steps – Week 9

This week kicked off with a presentation by Arielle Rausin, who is a professional wheelchair paralympic athlete, on 3-D Scanning which was really intriguing. She showed us how to scan various objects and then even 3-D print them. We then got a chance to scan our heads and using this new cool 3-D scanner which was really a scanner which shoots out light and gets an input signal based on the reflection from the object. In the image below you can see Vishal scanning Ariel’s head as its been recorded on the 3-D scanning software as a mesh.

Team JJJ inc’s project is slowly coming to life as we tested our first pre-prototype on the light switch to see if we had the dimensions right. Our next steps are to print the outer boxing of our smart light switch and to program our motor. One problem we had was that the motor was running to fast and so we need to wire it so that it runs according to the distance we need our light to move. Here are some pictures of our teams 3-D printed Rack and Pinion:

3D Scanning & Second Prototype

The topic for last week lecture was 3D scanning. We had Arielle Rausin, the founder of Ingenium Manufacturing, to give us a detailed demonstration of two different types of 3D scanning technologies. The first type of 3D scanning required the object to be placed on a round platform. As the platform rotated, the camera on the side would measure the dimension of the object on the platform. Due to the time limitation, Arielle shortened the time for the camera to gather enough data. Thus, unfortunately, we did not get a normal 3D image by utilizing this technology. The second technology was much more flexible comparing to the first one. We held a scanner in front of the person/ object we wanted to scan. Meanwhile, the computer would use the data transferred from the scanner to create instantaneous 3D image. Because we could see the temporary 3D image, we could focus more on the part that computer could not generate image properly.

IMG_4080


IMG_4081


The final deliverable for our group is a dehydration detection wrap and we would design the wrap by ourselves, so there was no need for us to use the 3D scanning technology in our project. Last time, we made a cardboard prototype and this time we would make a wrap that could actually detect the humidity of the skin.

IMG_4129


IMG_4131

It was time to go back Fab Lab and work with Brandon, our technical consultant who worked in Fab Lab. This time, we started to draw the circuit on paper to visualize our idea first. Then, we discussed the possible solutions minimize the circuit based on the blueprint we drew. After we finalized the blueprint, we used the copper coil as the motherboard. Then, we carved out the coil by following the circuit map we draw. Once the motherboard was ready, we placed the controller, mini-Arduino, on it and solder the controller to the board. I had to mention that it was extremely hard and time-consuming to solder the controller and copper coil together. Luckily, we made it in the end. In the following week, we would install the sensor and code the program for the controller. Hopefully, we could have a functional prototype by the end of this upcoming week!

IMG_4133

And the Prototyping begins…

This weeks class started with an excellent cursory overview of 3D Scanning, taught by Arielle Rausin who is actually a former “alum” of Digital Making Seminar, herself. We had the opportunity to watch the power of 3D scanning go to work on both a student’s watch as well as a student’s whole entire head. The scanning of the watch began to unravel the relentless opportunities 3D scanning could bring to both the business world and everyday human life. For instance, 3D scanning allows any uniquely crafted piece or part of manufacturing to be easily replicated. For instance in the educational and museums industries, 3D scanning can enhance virtual exhibitions, augment exhibitions, and provide physical replicas of statues and historic figures. Even from a project perspective, a simple prototype that any student builds can now be easily scanned and placed into any 3D printing software system (such as Fusion 360). From there that prototype can be easily manipulated and crafted into the desired product of any consumer’s choice. Arielle Rausin did an excellent job of illustrating 3D Scanning and the implications of 3D Scanning. Here is a picture of Veronika and how excited both her and myself were to hear about all the great things happening in 3D scanning:

IMG_5361

From here, Team Supra jumped to the atrium and Olivia, Veronika, and I picked right up where we left off from the previous week. Having decided to work on perfecting a doorstopper and making it highly desirable by all consumer, Team Supra envisioned a prototype that would sit in the middle of the door in close proximity to the door handle. From here the door stopper would have some form of a sliding mechanism that allows for the door stopping functionality to “turn on and off.” Additionally, Team Supra recognized an opportunity in the market to generate a doorstopper that was both low costing and universal to all doors in order to maximize the value our product would bring to the consumer. Because of this, Team Supra anticipated a magnet to be placed on both the door and the base of our doorstopper, in order to allow for the flexibility to move this door stopper from door to door.

With all this being said Team Supra decided to pay a visit to Fab Lab in Urbana, and let me just say I am very glad we did. After receiving feedback from full-time employees in the Fab Lab, it became evident that no everyday “consumer-use” magnet would be able to withstand the impact of a slamming door. The only magnets that could would be dangerous for household use. Because of this, Team Supra decided to explore the possibility of utilizing heavy-duty command strips to hold the door stopper in place. Furthermore, Fab Lab recommended the utilization of wood as the physical “stopper for the door.” Our original plan was to utilize metal and coat it in rubber resin. While this is certainly still an option, wood coated in rubber resin would provide the same stopping effect at a much lower cost. From here we took Fab Lab’s excellent constructive feedback and created this model in tinkercad:

First Prototype Team Supra 4.9.17

Click here!
From here, it’s time to get our prototype 3D printed and put together and begin impact testing on our prototype. I’m excited to get back to work this week with the greatest team ever: Team Supra!

3D Scanning and Progressing on Our Projects

IMG_1504

This week in the Maker Lab we had our first introduction to 3D scanning. Arielle Rausin, former student of the Digital Making Class and founder of Ingenium Manufacturing gave us an overview of different 3D scanning technologies and applications, as well as some tips to achieve the best scans possible. After the lesson, we were able to try out scanning ourselves, touching up any gaps with the auto fill feature, and then setting our models to print. We found that the scanner has a hard time picking up our hair because it was too dark, but by using the flashlights on our phones, we were able to have enough light reflect back to the scanner. Below is a picture of the STL model and then my final printed bust!

Screen Shot 2017-04-09 at 6.35.40 PM

IMG_1526

After the 3D scanning workshop, it was time to work on our group projects. Charlene, Carter, and I found various projects online that had components that we could incorporate into our security system. We researched and compared the different tutorials and existing projects to see what was feasible and what hardware requirements we would need to take into account. This was especially helpful because none of us come from a technical background so taking advantage of open source projects to work on the various parts of our project saved us a lot of times and ensured our project could actually work. The PrivateEyePi tutorial gave us a good idea of what we would need to do make our project work.  We finalized the list of materials we needed for the electronics. This forum post from Raspberry Pi also was useful for evaluating options for sending text messages. Vishal provided many of the pieces of technology including a monitor, HDMI cord, keyboard, Raspberry Pi, breadboards, and wires. Carter picked up male to female wires and a speaker from the Fab Lab as well. Finally, we sketched out the design for the housing for the security system that will be 3D printed.

IMG_1512

IMG_1514

Much work still needed to be done outside of class time. On Thursday, I loaded an operating system onto the Raspberry Pi so that we could actually program our security system. On Friday, Charlene, Carter, and I met at the Maker Lab with Charlene’s friend, Alvin. Alvin is an Electrical Engineering student here at the University and offered to help us work through the tutorials we found. We spent several hours in the afternoon working with the Raspberry Pi to function with the motion sensor so that an alarm could be triggered. Because the wiring on the sound buzzer we received from the Fab Lab was not soldered well, it broke off. I went over to the Fab Lab to solder on new, longer wires so that we could better position the speaker and so that the solder would hold. We also set up our Twilio account to work with the alarm system. I would receive a text message every time the motion sensor picked up any movement.

FullSizeRender

While the system is now functioning, we have some adjustments we would like to make. We are considering adding an on/off switch or an alarm/disarm button so that you do not have to restart the Raspberry Pi each time to reset the alarm or turn it off without triggering it.   We are also trying to figure out how to have the program run automatically from startup rather than having to manually run the program. We hope to finalize these parts of the project this week. Carter was also finishing up a design for the housing in Fusion so that we could print it early this week as well. We are making progress quickly and our excited for the final product to be ready!

Week 10: Learning about 3D scanning.

Image

This was definitely one of my favorite weeks, as we got to use some cool 3D scanning technology and discover how it works. A former student of the class, Ariel, was nice enough to demonstrate how these machines work. We made 3D files of a watch, a keychain, and even ourselves! I had a lot of fun not only getting scanned, but also learning how to scan my friends. If you would like to learn more about 3D scanning, I found a pretty helpful link here.

IMG_0485

Playing with the scanner was very fun, and I hope that I can use technology like this in the future. However, our project does not require the use of a 3D scanner, so we only played around with it for a little while then got back to work.

Our hydroponics project is making great progress, as we have made our first two prototypes and hope to have our finalized product out within the next couple of weeks. As you can see in the picture below, the second prototype we made is much nicer than our first, and we fixed some structural problems we had with the first design.

IMG_0480

After we had finished creating a basic prototype of the overall structure of the product, it was time to start 3D printing prototypes of the containers that the plants would be held in. At first, the pieces that were supposed to connect the containers together didn’t initially fit, so we had to make the holes bigger and print again. The result is shown below.

IMG_0493

The thickness and strength of the containers turned out awesome! However, we made the holes slightly too big when we modified our design and on two of the containers the printers ran out of filament before finishing. This means that we are going to have to print at least one more version of our containers. We created a file that just contained the cylinders of the container that fit together, so we will pick them up in class this week and hope that everything fits well.

Even though our containers didn’t come out perfect, we still have made a tremendous amount of progress in the past couple weeks, and I am very proud of our team. With any luck, this week we should be able to print a stable version of the containers and assemble our fish tank using material from the Fablab. We will then begin to incorporate the fish pump into the design, and possibly even get some plants for us to use as well. I am very excited and can’t wait to see our finished project, as well as the progress that other teams have made on their projects.

Prototyping, Refining Ideas, and making ideas become Reality


In week 10 of class, our group continued to work on our creating a prototype for our SMS security system. Most of our work has been centered around programming our Rasberry Pi computer board with Python programming.

One thing that has been difficult is none of the individuals on our team including my self are very knowledgable on how to code in Python. Fortunately our teamate Charlene has a friend that was willing to help us with what type of coding we needed, and we have found numerous online resources in being able to create the instructions for the Raspberry Pi to send a SMS message when the Motion sensor is triggered. In the meantime we have started wiriing our Raspberry Pi to a breadboard, as well as starting to design a housing unit through fusion software. Going through this processhas been tricky in how technical we have to get in making sure our product functions the way we need it to. In each decision we have made in creating this in home security system, we are always thinking about making sure it functions and is made specifically for the end user in mind. Working with fusion, programming, and wiring a bread board are all areas that I am still by no means a master at. However I enjoy being able to learn these new softwares and technical aspects of making. I certainly am glad we had experience through the Fab Lab to help our team start thinking about how to actually make our product a reality, espescially considering the security system has a lot of work that needs to be put into it to make it work.

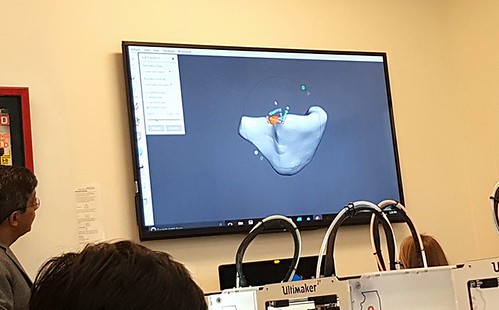
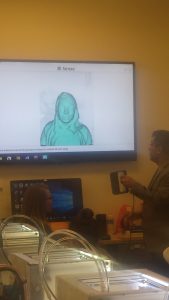
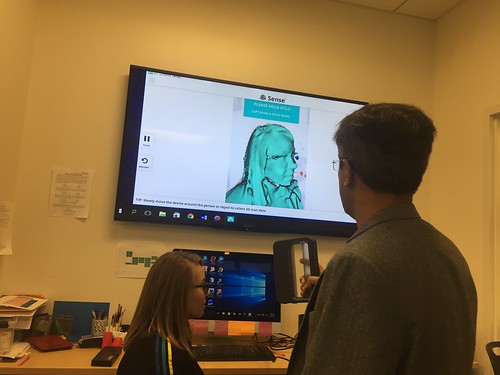
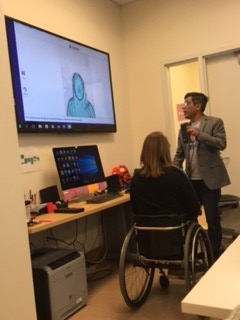
One final thing of importance was  our class was able to try out the 3D object scanner. Vishal showed us a few different options for 3D scanners, which scanned anything from small to medium sized objects, to even classmates heads. I am fairly certain our group will not use either of the 3D scanners for at least creating our product. However seeing how the 3D scanners work, and the capabilities of them was one of the more unique tech I have had the opportunity to experience. Personally I am planning to do a 3D scan of my self prior to the end of the semester!

3D Scanning and Project Update

This week, we headed back to the MakerLab to continue working on our final projects. Beforehand, though, we given a demonstration of another technique for creating 3D objects and also could maybe be incorporated into our final projects: 3D scanning. By utilizing a digital scanner, one can scan any object or even their own bust for modeling and printing. I can see how this method could be used in some of the class projects, but my group will most likely not need it. So after the demonstration and some toying around with it, we got back to work.

3D scanning is based on using specially designed scanners to scan every inch of an object, which computer software then pieces together to create a 3D model. The two types of scanners we were introduced to were desktop and mobile scanners. The desktop scanner was composed of a special laser device with a rotating plate that would allow for a 360 degree view of an object. The mobile version was a smaller and more compact device that attached to an iPad camera. The iPad version seemed to be more reliable as a person could freely move around the object or person they were scanning to get an accurate impression. The desktop scanner does work, but can be pretty ineffective at times. It is easily skewed by darker objects, or those with “hidden” features that can’t easily be detected, such as if one portion of the object blocks another. Shadows are also an issue as well, so its recommended that the objects scanned be completely white is possible. After the objects are scanned, they are imported as a model into software where a user can edit the model for errors or just make adjustments if desired. When done under good circumstances, the results can be quite astounding. They may not be perfect, but the 3D printed busts created by these scans are very recognizable. 3D scanning for consumer use still needs some development, but the current state of it certainly shows its potential.

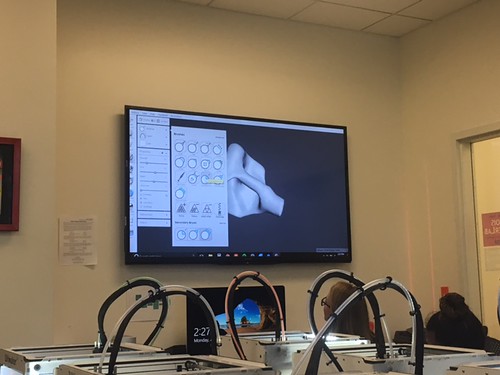
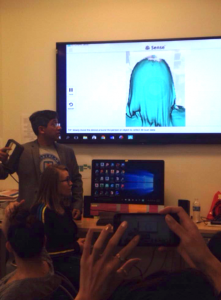
Scanning demonstration

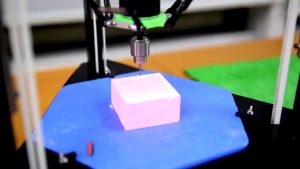
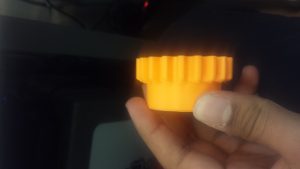
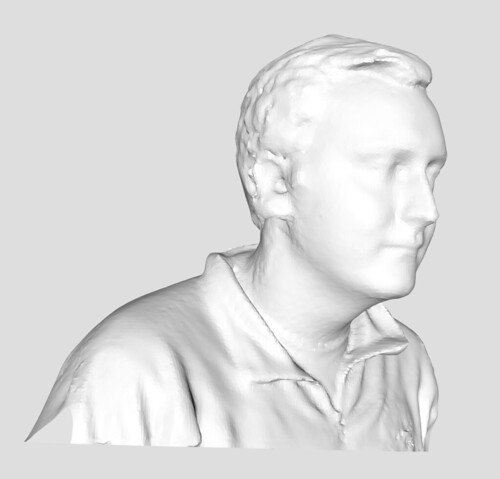
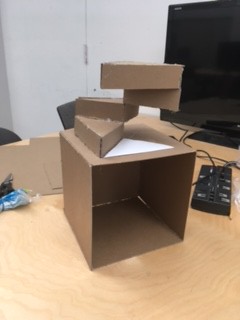
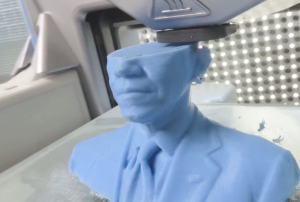
Example of a bust during printing

The process on everyone’s final projects seems to be going well, everyone is either in the process of prototyping or are making adjustments based on their last development. We created our first model and attempted to churn out a print for testing, but the extruder unfortunately malfunctioned about half way through. Not all was lost, however, as the basic shape and size of the print are we really wanted to test. Some adjustments definitely need to be made, but that was to be expected. Things may not be necessarily going as smoothly as hoped for, but the direction and goal of the project is definitely clear. We’ve got plenty of work to do in terms of processing and testing, but the final result will surely be worth it.

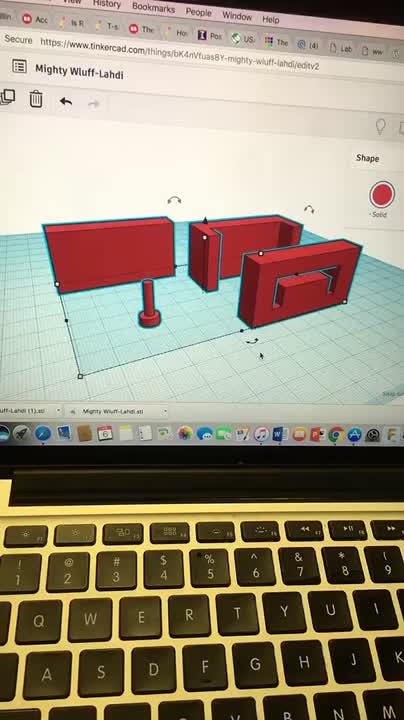
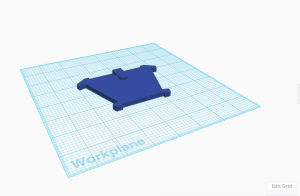
1st edition prototype model of our “Tie Helper” in TinkerCAD

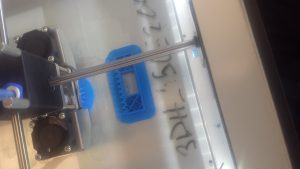
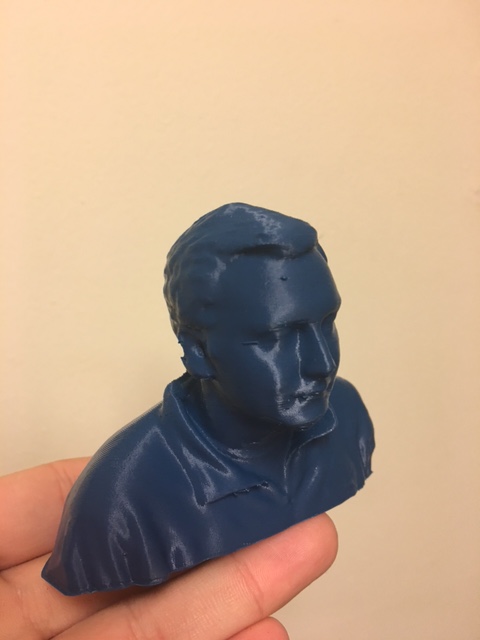
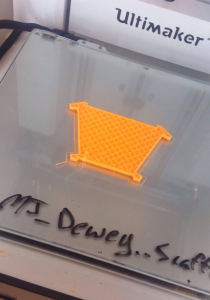
What the printed managed to create before failing