
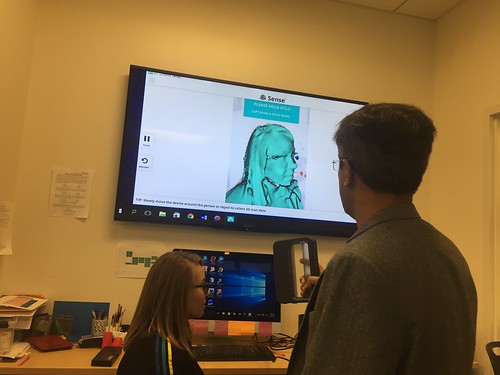
The topic for last week lecture was 3D scanning. We had Arielle Rausin, the founder of Ingenium Manufacturing, to give us a detailed demonstration of two different types of 3D scanning technologies. The first type of 3D scanning required the object to be placed on a round platform. As the platform rotated, the camera on the side would measure the dimension of the object on the platform. Due to the time limitation, Arielle shortened the time for the camera to gather enough data. Thus, unfortunately, we did not get a normal 3D image by utilizing this technology. The second technology was much more flexible comparing to the first one. We held a scanner in front of the person/ object we wanted to scan. Meanwhile, the computer would use the data transferred from the scanner to create instantaneous 3D image. Because we could see the temporary 3D image, we could focus more on the part that computer could not generate image properly.
The final deliverable for our group is a dehydration detection wrap and we would design the wrap by ourselves, so there was no need for us to use the 3D scanning technology in our project. Last time, we made a cardboard prototype and this time we would make a wrap that could actually detect the humidity of the skin.
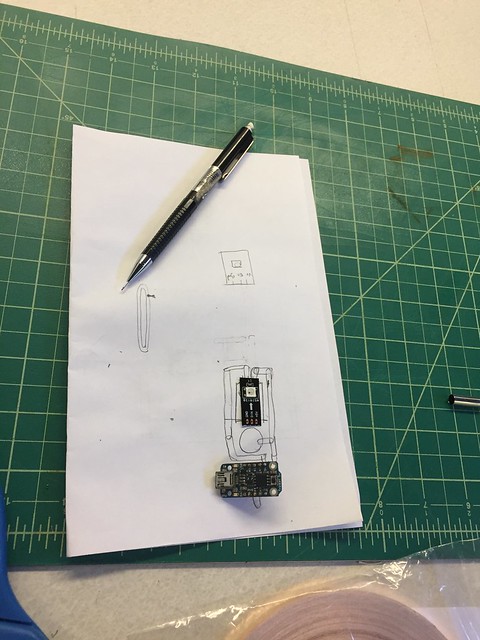

It was time to go back Fab Lab and work with Brandon, our technical consultant who worked in Fab Lab. This time, we started to draw the circuit on paper to visualize our idea first. Then, we discussed the possible solutions minimize the circuit based on the blueprint we drew. After we finalized the blueprint, we used the copper coil as the motherboard. Then, we carved out the coil by following the circuit map we draw. Once the motherboard was ready, we placed the controller, mini-Arduino, on it and solder the controller to the board. I had to mention that it was extremely hard and time-consuming to solder the controller and copper coil together. Luckily, we made it in the end. In the following week, we would install the sensor and code the program for the controller. Hopefully, we could have a functional prototype by the end of this upcoming week!

Thank you! 😉
Hi Ben,
Great post! I thought the 3D scanning demonstration was pretty interesting although it was challenging at times since we have to make sure every portion of the object gets detected by the scanner. Also, your group’s project seems pretty advanced technology-wise and I’m actually looking forward to see how it turns out. It definitely seems time-consuming but it’s great that you are using all the resources available at the Fab Lab to help create your dehydration detection wrap. Good luck!