3D Scanning and Final Steps

This past week we had Arielle Rausin teach us the basics of 3D scanning! The class got a chance to mess around with the 3D scanner to scan their heads. Unfortunately, Team JJJ Inc. has no use for a 3D scanner, at least not for this first prototype.


Our project is coming along. Slowly, but surely. This past week, we focused on making sure our rack and pinion had even better/more precise dimensions. However, even with the better dimensions, I don’t think we will be able to get the light switch to flip with the rack and pinion idea. We might have to modify it a bit to get more torque out of our servo motor. Through some research, we also noted that a normal RC motor won’t work since it’ll be extremely hard to get the motor to turn only a certain degree. This leaves us with only a servo motor. The only problem with this though is that the servo motor might not be strong enough to flip the light switch. My goal for tomorrow’s class is to get a working prototype that actually flips the light switch.


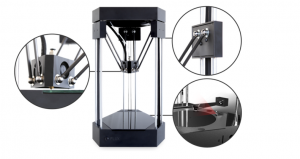
For those interested in possibly buying a 3D printer for your own use, check out this 3D printer that comes with multiple functionalities. When I first saw this printer, I wanted to get it. I still want to get it but I currently don’t have the funds. The very basic printer (only for 3D printing) costs $699. The Delux package that comes with a laser engraver, blade module (for precise cutting) and a holder module (for putting a pen/pencil and having it write on paper). This printer also has the capability of 3D scanning. Here are some pictures of the printer.

Research and Continuous Improvement

In this weeks session we had first started off with a quick presentation on scanners. I found it really interesting that we can scan with just our own phone cameras; they take pictures and stick them all together through a 3D mesh. They are created through triangles, so the more triangles the more resolution on the surface. The application that this feature could be done through is call Trnio and can be downloaded through an app store. After learning about scanning we began to work on our groups project again. Last week we had accomplished the main gist of how we wanted our product to look like, what components we would need and approximately how we would put it all together and into the 3D printed housing. However, in the last class we had only a general idea, which is why in this week’s class we had to go in more depth to understand more in detail what we would have to do and accomplish.

As none of us are engineers, we don’t have a solid understanding of how we should go about the project, which is why we had done a good amount of research to understand what components we would need as well as the placement of them. We had looked into various websites and videos, checking out the different tutorials and the ways other individuals had created a similar home security product. We had decided to use different tutorials and grab code from some of the already made products. Afterwards, we were able to receive all our components from Vishal and grabbed the rest of the components from the FabLab.

We then ended up meeting at the end of the week to work on the project together with our engineering friends. They had helped us with the installation of the Raspberry Pi and helped us with grabbing the correct code to run the system. We were able to put all the hardware together and plugged in the sensor accordingly. We had some difficulties with installing Twilio into the Raspberry Pi so we had tried to use a different method of Google Voice but that also did not turn out as we had expected even after adjusting many settings. Thus, we went back to trying to download Twilio, and to our surprise it could be done but we also had to download some other things to make it work. Finally, we tested the sensor with Twilio and the product worked! We still need to work on creating a way for the system to start on its own when plugging the power on and off so we will be doing more research on how to work that. During this time we had also started creating our 3D printed housing through Fusion 360 and we will begin printing it during the next class.