Soldering + LED Lights = LIT

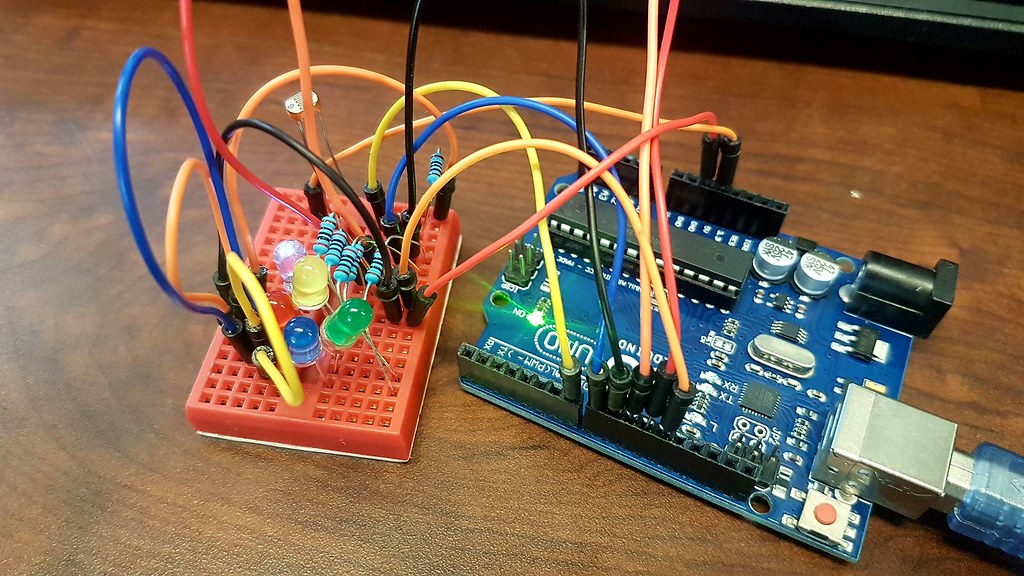
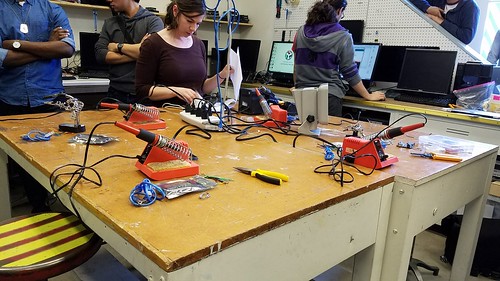
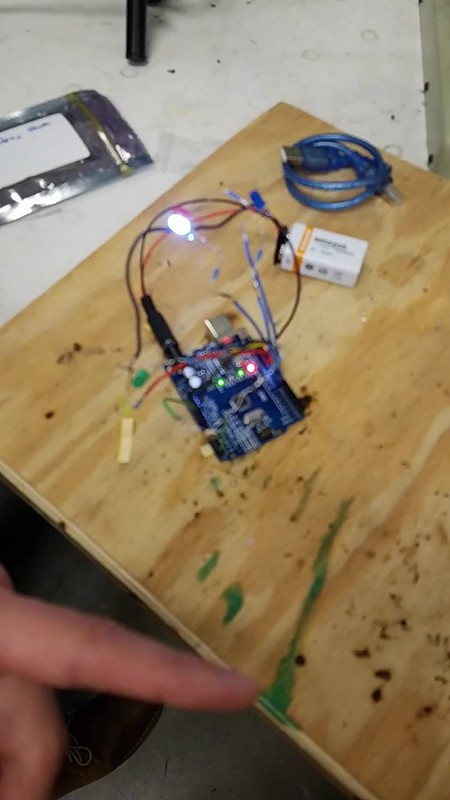
My Fab Lab experience just keeps getting more and more fabulous each time I visit. This week, my group had the chance to get our hands on soldering, which by definition is the act of fusing together the joints of metal objects by melting a filler metal. This is different from welding, a term I was more familiar with, in that it doesn’t involve melting of the actual workpiece, but rather just the filler metal which connects the wires. Our goal was to use soldering techniques to fuse LED lights and sensor wires together with the use of Arduino board to make a cool LED product. It was quite an intimidating process at first and I faced some challenges listed below, but gradually I was able to overcome some struggles I had and successfully create the final product–a series of LED lights that respond to the light sensor.
17269192_1534548909896760_405950736_o
17310721_1534548903230094_2065225234_o
Challenges I faced while soldering for the first time:

  1. Fear of getting burned (the soldering gun heats up to 350 degrees Celcius, which could cause a second degree burn with a single touch)
  2. Not having the wires stay connected although the filler metal has melted on them
  3. The smell. It wasn’t the best unfortunately.

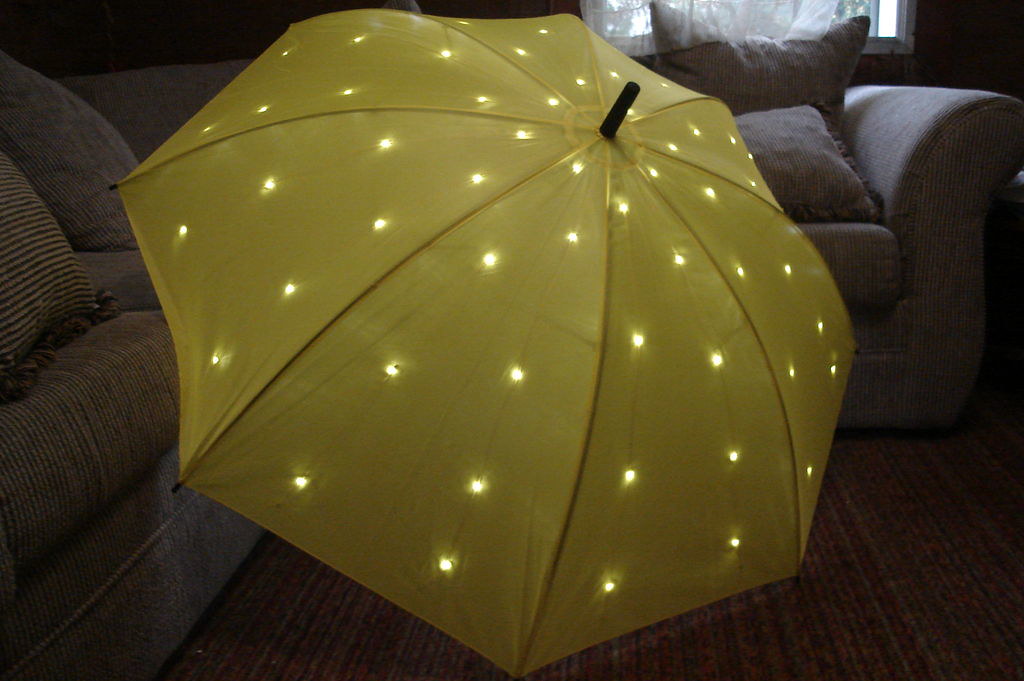
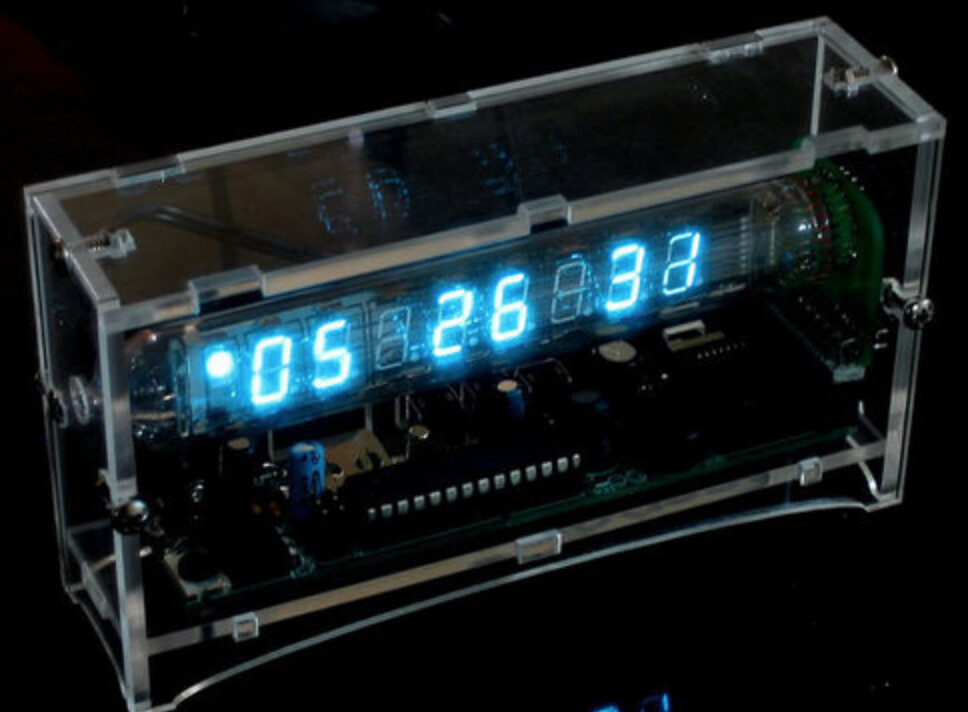
This eye-opening experience certainly enhanced my interest in soldering and would definitely try again if I had the chance. Also, I looked up a few soldering products that look really neat. These are of course much more complicated projects than the one we did in class, but the basic technique is similar. Check them out!

LED Umbrella
FJXW1FUFEQ4B1PQ.LARGE

LED Ice Cube Clock
Screen-Shot-2016-03-18-at-17.57.41

Week 6 Summary: An Exploration of the Fab Lab Opportunities

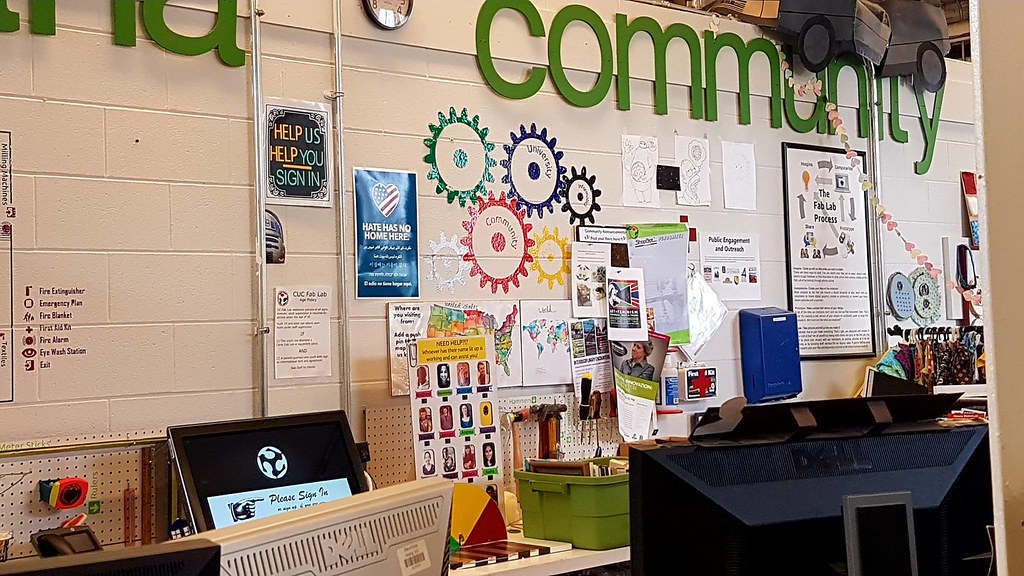
This week we engaged in the second phase of a continuous three-part series meant to offer exposure to the myriad of activities offered at the Champaign-Urbana Community Fab Lab. The Fab Lab, although the majority of the class was unaware of its existence prior to this semester, is a leading-edge open and collaborative workspace for design, creation, and printing through the use of computer-driven technologies, such as 3D printing, lasering, inkscape, and soldering. Below is a picture of one of the spaces within the workshop.

One of my favorite aspects of the Fab Lab is its openness to the entire community, irrespective of whether the makers are students or local community members. Everyone is welcome and simultaneously given the resources to collaborate, share, and implement their ideas. Since the making space offers such a vast array of opportunities to its various users, the class was divided into three separate groups during our first session, with each group rotating between the three main functions of the lab: laser cutting, soldering, and coding.

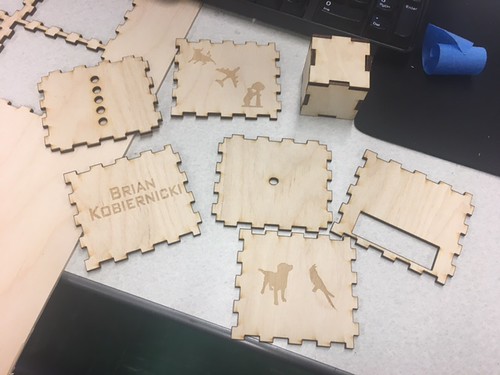
In Brian’s most recent post, he examines the laser cutting portion of the project. The objective of this part was to assemble the wood cube that would house the photo dependent LED light resistor. The software used to create the designs on the sides of the cubes was Inkscape, a completely free, open-source platform that appears to be user-friendly yet still able to make complex designs. Once the template for the wooden cube was downloaded, he initially needed to consider some alterations to guarantee the fitting of the wood. In order for the laser to properly cut the wood, certain formatting and thickness adjustments had to be made. Using Inkscape, Brian and the other members of his group traced images taken from online, and, once finished, the PDF file was loaded onto the laser cutter. The laser etched the designs into the wood which created the downloaded images, while also making the actual cuts to create the box. The cutting process lasted just a few minutes, as subtractive manufacturing such as laser cutting can be considerably faster than additive manufacturing, like 3D printing. Brian’s finsihed creation can be seen below.
Carter’s weekly reflection focused on the soldering aspect of the project. While the initial instruction appeared to be very time consuming and required immense precision, concentration, and delicacy, soldering as a tool in the making and design process can be incredibly powerful and handy, as it offers certain advantages to a product that otherwise would not be available. Soldering allows for more accurate and uncluttered connections between various electronic parts, such as wires, resistors, and other components. An additional benefit of soldering is the ability to maintain the original shape of the soldered metals, considering that the solder has a much lower melting point than the adjoining metal. Since the fusing occurs at much lower temperatures (albeit still incredibly hot), the metals that are being connected do not warp in shape or size, nor do they melt. Lastly, soldering allows for the joining of multiple wires using a single focal point. This can allow electricity to be conducted, as all the wires have been bonded together. Below is a picture of Carter’s finished soldered Arduino circuit board and light dependent resistor.
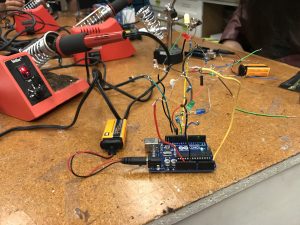
Charlene’s post focused on the coding of the Arduino Uno circuit board, using Arduino’s open sourced software. Arduino’s simple platform allows for makers with only basic coding experience to still utilize the immense functionality of the technology. Her group was tasked with coding specific behaviors into their widget. In this case, the object that was being encoding was a photo resistor (light dependent resistor) with LEDs. By connecting the LED lights to the light resistor and being guided through some of the basics of the Arduino code, the LED lights extinguished in the presence of light and flashed during times where there was no light (when it was covered by a hand, for example). This first exercise with the Arduino technology was simple enough for us as first-time users to comprehend, yet was still an applicable and useful first attempt at the software, and definitely something that could potentially be incorporated into our end of the semester final projects. Personally, having the ability to view tangible, physical result of our efforts was something that felt gratifying. Charlene’s final product for this phase of the project is pictured below.

While each group has been focusing on a specific activity, we can universally agree that the experiences at the Fab Lab have been invaluable to our making journey. We are constantly attempting to apply what we are learning to not just our semester projects, but also outside of the classroom. I look forward to the rest of our time at the Fab Lab, as well as the rest of the semester!
Week 7: Arduino and Lights

This week, I got back my laser cut box and I was so excited on how my design came out.
The design that was laser cut.

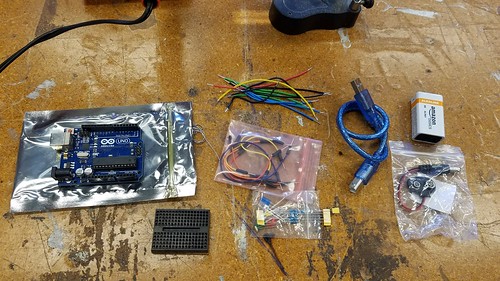
Furthermore, this week the white group was assigned to the main lab in order to learn how to program an Arduino board. This was my first time actually seeing a computer board up close and I was definitely quite surprised by how it looked. Personally, I thought that it seemed quite fragile and easily breakable. However, it was quite sturdy and it could hold quite a bit of force. Along with the Arduino board, the following things were included: The Arduino packet FabLab provided.

Using the package, we connected power and ground to the board by connecting pins. By doing so it helps “power” and enables the user to correctly use the Arduino board. For example, we connected the pins and linked power and ground together so that later on we could “power” and enable the LED lights to blink and turn on. One of the steps to put together the blinking LED lights.

After assembling all the parts of the hardware, we had to “assemble” the software together and make the LED light blink by coding on the Arduino software. Here is one of the activities that we did:

The Arduino code in which sends a SOS through Morse Code.

This example was coded so that the LED lights would emit a Morse Code for
“SOS.” After coding for the LED lights, we had to add sensors. Personally, the sensor was the hardest part of building the hardware. Because the breadboard was so tiny, it was hard to find empty rows and columns to use for the sensor. However, with some help, I was successfully able to make the LED lights blink when I waved my hand over it. After completing and successfully doing so I felt such a sense of pride because, through my first attempt, I was able to successfully complete such a feat.The completed assembly for the workshop.

This week will be very applicable for our group project. Our group project is going to be a feedback droid in which there will be sensors, so learning how to connect the breadboard to the Arduino board through the pins. The coding as well using the Arduino software was very informative and will help us in the coding for our droid. I am excited to be using such new skills in my future group project. Next week, the white team will be soldering so that the LED lights will fit into the box well.

Arduino Light Box With Ultrasonic

This week was the second part of our session with FabLab and I was so eager to learn more about what we would place inside the boxes we had laser printed last week. I got to work with Brandon Rice (Lab Assistant and Consultant) and Aakanksha Ardhapurkar (Lab Assistant) who taught us how to make LEDS controlled by an ultrasonic sensor. Honestly, going in to the session I was nervous because I had no experience with hardware though I did have some in software. Many of my friends had talked about using Arduinos as a great prototyping platform so I was excited to play with both hardware and software through it.

In the lesson we started out with learning how to make blinking lights on the hardware through a code that we would apply. In setting up the hardware we used an Arduino Uno, cable, LED, jumper wire, breadboard and resistors. I thought it was so amazing how there were so many different numbered and powered pins within the board that could create such powerful connections. Because all the objects we used to put on the breadboard and the Arduino was quite small it was sometimes hard to find the exact place to put it and those little mistakes would lead the blinkers to not blink. Brandon had taught us how the circuit would work in regards to the arduino, breadboard and LED as electricity only flowed in one direction around a circuit we had to put them in correctly. Once we finished building our hardware we started working on the software through Arduino Software that was in an integrated Development Environment, the software could be used to write code and upload codes to the Arduino board. There were various settings that we could change with the lights but we were specifically working on making them blink and the settings can be seen on the software (File à Examples à 01 Basics). Once we connected the software to the Arduino board we would upload it, though some of our boards took awhile to function properly we all learned that many of them were little issues with the wires that we hadn’t put in correctly. What I found great about this project was that even though we would make mistakes we had the chance to fix them and still make the system work properly. We were given some other activities such as hacking the code and making the lights blink in a certain beat. Near the last part of class we had complete the ultrasonic sensor wiring diagram and as a group we definitely worked together to make it all happen and all our boards ended up accomplishing what we had hoped for with the sensor lights.

Though we had to tear apart the hardware, I can’t wait for the soldering process when we put everything together. So far I feel that I’ve been learning so much from my experience with the FabLab and am very grateful!

In the process of building:

Final results:

An Introduction to the Fab Lab

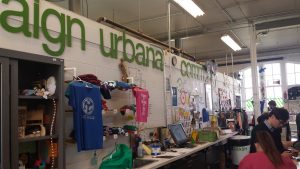
This week we had our first encounter with the opportunities and capabilities of the Champaign-Urbana Community Fab Lab. The Fab Lab, although I was unaware of its existence prior to this semester, is a leading-edge open and collaborative workspace for design, creation, and printing through the use of computer-driven technologies, such as 3D printing, lasering, inkscape, and soldering. Below is a picture of one of the spaces within the workshop.

One of my favorite aspects of the Fab Lab is its openness to the entire community, irrespective of whether the makers are students or local community members. Everyone is welcome, and given the resources, to collaborate, share, and implement their ideas. One maker that we met was trying out a new machine called a “Water Color Bot” (the link to a YouTube explanation can be found here), which uses a specific software to produce complex water color paintings, using precise brush strokes and shading. While he was still becoming acclimated to the software, this is just one example of the various initiatives being worked on in the Fab Lab.

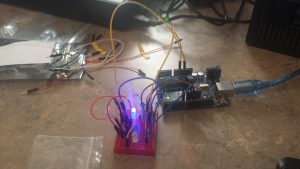
After receiving a tour of the workspaces, we were split into three groups, of which my group was assigned to utilize Arduinos to code behaviors into our widget. Arduino’s are an open-source platform that allows users to code certain behaviors and actions into an electronic object. In this case, our object that we were encoding was a photo resistor (light dependent resistor) with LEDs. Essentially, by wiring the LED lights to the light resistor and writing some basic “for” loops in the Arduino code, the LED lights would illuminate when there was no presence of light (when it was covered by a hand, for example), and would turn off in the presence of other light. I thought it was an incredibly useful and applicable first exercise in Arduino technology. Though the coding and wiring itself were complex, it was simple enough for us as first-time users to comprehend. In addition, I enjoyed being able to see a tangible result of our efforts, as opposed to just writing the code. The final product is pictured below. I look forward to engaging with the lasering/inkscape and soldering workspaces as well, and will definitely look to incorporate this technology into our final semester project.

Week 6: First Visit to the Fab Lab

This week, we paid a visit to the surprisingly out-in-the-open Champaign-Urbana Community Fab Lab; a free community center-like makerspace open for anyone. The Fab Lab is aptly named as the inner workings of the building are almost like a laboratory filled with fabulous creations by the volunteers and others who happen to stop by. Unlike our Digital Making Lab, it contains not only 3D printers, but other varieties of technology designed for the specific purpose of creation. These include sewing machines, paper cutters, laser engravers, and soldering stations. The lab contains a plethora of methods for people to express their creativity; it’s a shame that it is not very well known.  < Outside view of the Fab Lab

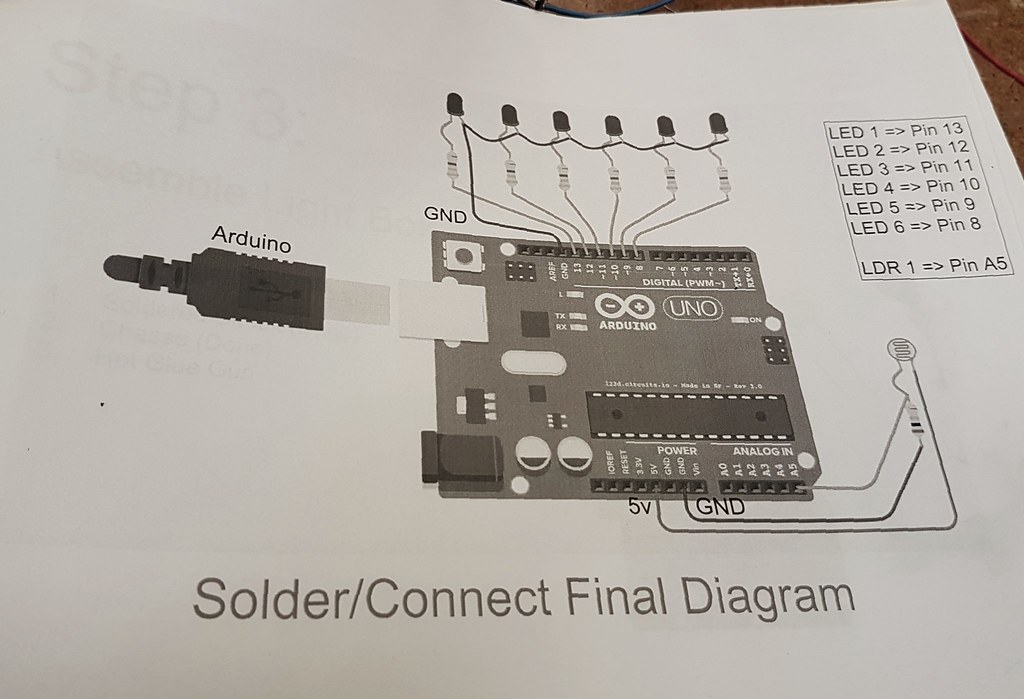
For the first week here in our 3 part saga in this lab, one person from each of our groups was assigned to a station in the lab where we would participate in a different workshop to make something out of nothing. For my personal station, we worked in electronics. I chose this because as an electrical engineering major it was definitely in my all you expertise and I knew that I would be able to learn something to improve upon. Our project was creating a type of light-sensing electronic circuit using LEDs, a photocell resistor, and an Arduino. Depending on the amount of light sensed by the resistor, a different color LED would light up. If no light was sensed, then all the LEDs would turn on. The project involved looking at some schematics and quite a bit of soldering, and the end result as it currently stands (an Arduino board with a bunch of wires and LEDs branching everywhere) did not look so appealing, but the functionality was the true beauty of it. Plus, we should be able to improve upon and make the design “prettier” in our next workshop. The other two groups were split into those working with laser cutters and coding in the computer lab portion of the Fab Lab. Laser cutting is another type of 3D printing in a sense, but in a way opposite to the norm. Instead of starting with nothing, your starting material is already there. You just need to decide upon a design and what portions you wish to cut out rather than add on. The results are stunningly precise. And while coding might not seem as glamorous as the other two activities, it is the basis of modern day electronics. Virtually every device for use by citizens requires some programming: phones, computers, televisions, and the 3D printers we use in our lab. It may not inherently make some visually stunning object, but without it we wouldn’t be able to use the machines that make those objects in the first place. All in all, these activities were extremely enjoyable to spectate and participate in, and in doing so we’ve gained knowledge of more methods for our use in not just our final project, but Making as a whole.

 Arduino Circuit

Laser Cut Tiger Puzzle


Fab Lab: Intro to Arduino

Throughout the four years I’ve been at UIUC, I’ve probably walked past CU Fab Lab about 8 times (yes, I do realize that’s awfully specific) but never have I had the opportunity to check out what it was about. This week, our class took a trip to the Fab Lab and in my opinion, it was one of the most eye-opening things we’ve done so far. From the outside, it looks like a pretty insignificant, beaten down building. In fact, it is the second oldest building on campus and used to store horse carriages. But inside, it’s an entirely different world of its own.

17122023_1526496920701959_635175370_o17176301_1526495907368727_821673810_o


17122168_1526536830697968_728589580_o
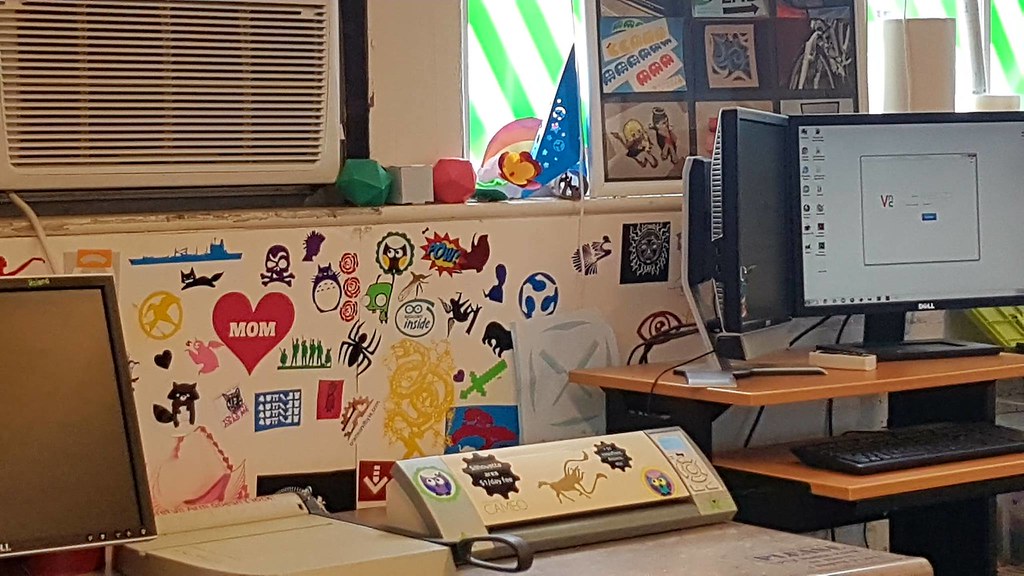
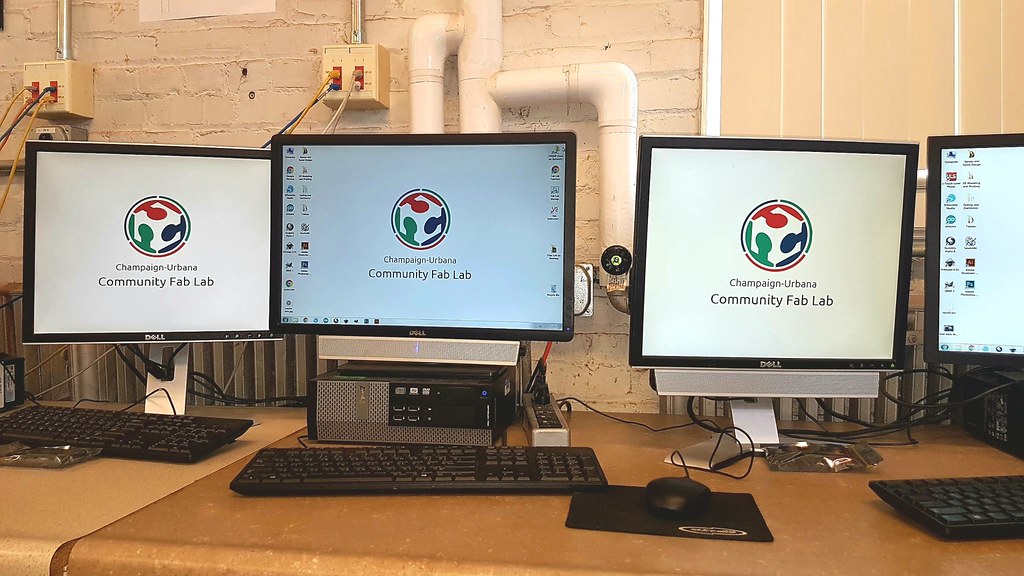
As seen in the pictures, the lab consists of colorful wall decorations as well as computers and machines buzzing away while at work. Jeff Ginger, the director of the CU Fab Lab, first gave us a brief history of the organization, then a tour of the building itself.

Afterward, I had the chance to work with Arduino for the first time. Arduino is a programmable microcontroller. It contains pieces of codes in which it executes on demand. The Arduino is then connected to LEDs, motors, and motion sensors via IO pins. We first learned how to wire the board. Then, we moved on to connecting it to a computer software and inputting codes that control the Arduino.
17175848_1526496060702045_1425635065_oIt was quite challenging for me at first because of the complexity of the wiring process and the constant feeling that my fingers were way too fat to properly place the wires in the right spots. But with the help of the instructors and peers, ultimately I was able to create an Arduino circuit board in which the LED lights will blink when it can no longer detect light with its light sensor.

Me hovering my hand over the light to make the LED blink.

As someone who hasn’t previously worked with electronics and doesn’t have much experience with coding, I am fascinated by Arduino and its functions. Moving forward, I would like to explore more of this small but powerful machine and its capabilities. Meanwhile, I found quite a few online resources such as this tutorial of basically what we did in this lab as well as a cool video of a fire breathing pony made with Arduino.

Learning and Making

Week 6 was all about learning and making at the Champaign Urbana Community Fab lab. The Fab Lab does a tremendous job in inspiring interest and innovation among the members of the community. As I walked into the Fab lab, I was amazed to see how many different machines and materials they had for us to create almost anything we imagined. Jeff Gringer who is the Director of the Fab Lab even told us that the building was the second oldest on campus and it once had huge doors to let horse carts in!  I was particularly excited for this class as I was looking forward to learn how to use Arduinos and apply them to my teams final Project. After a brief introduction of the MakerSpace, our team was split up into 3 groups with each group working on a different skill. I was put into the team which had to design an Arduino circuit which detected light and powered LED’s based on the ambient light in the room. 2 Volunteers working at the Fab Lab provided us with a step by step guideline on how to wire the Arduino on a breadboard. After wiring up our circuit, we connected the Arduino to a Desktop and messed around with some C code to bring our circuit up and running.

It was a great experience working with Arduinos as I never really understood its power and application value. As our teams project is geared towards making Smart Homes more affordable, I positively believe that we can use Arduinos in the product we are designing. The next two weeks our team is going to work on the final project proposal and put the theory and skills we learnt into action.

** Check out hackster.io , its like a pinterest for cool projects mostly related to Arduinois which can be shared and done by anyone. It also provides detailed instructions and materials which can be easily purchased from their website. The Motion Sensor Water Gun was something I was checking out as I was going through their website.

Tinkering and Soldering

The Champaign-Urbana community fabrication laboratory otherwise known as the CU FabLab led our class throw 3 different stages of building a small box that has a light sensor and powered by Arduino. The class split into 3 groups, one laser cutting the box, one soldering the wires and builds together and another group worked on coding the firmware. Splitting this into groups and stages made creating this project to be much more manageable and help show how much work truly goes into the design of an item from its conception to its creation.

20170227_140237

20170227_140408

I have never soldered before nor worked with Arduino and so it was exciting to be able to learn from professionals and people who knew what to do. Going into the FabLab I did not know what to expect and so to know that there are so many resources at our disposal really gave me hope about how our project can be created here. The soldering material was lead based and so it was instrumental that we do not touch our faces or body with our hands and that was surprising to me that we utilized lead. However, we were explained at how the smoke that rises, aka, flux, is very toxic and so soldering with other materials makes the flux much worse. We were then given our Arduino units as well as LEDs, resistors, sensors and wires.

20170227_143547

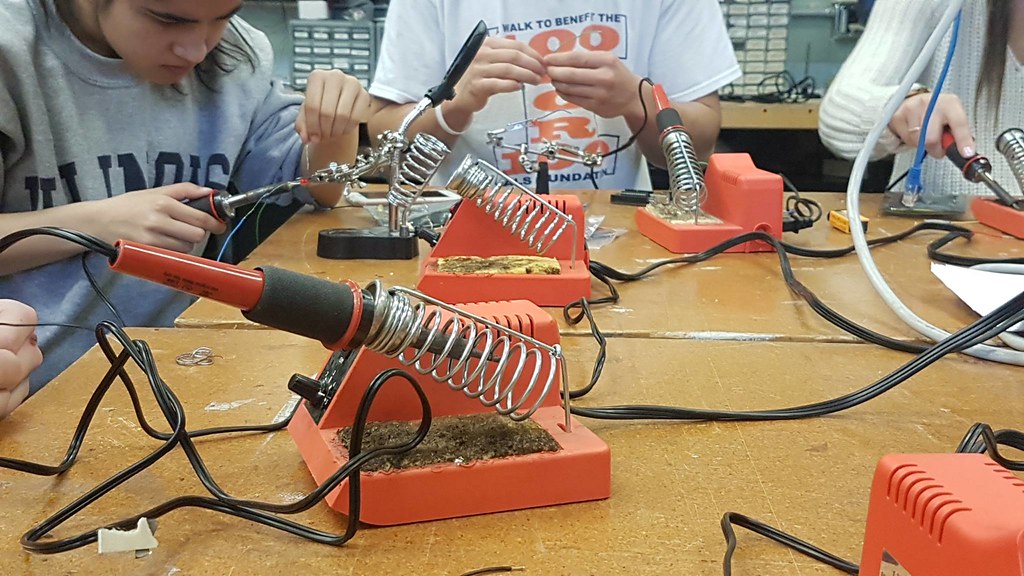
Each student in the group had a soldering iron in front of them and we were given a tool that is referred to as the ‘helping hand’ which helps hold wires for you to solder. There were some frustrating moments as solders operate at roughly 800 degrees Fahrenheit and so it was very dangerous as one can easily burn yourself.

20170227_142126

Our outcome after soldering the pieces all together was 5 LEDs each connected to a resistor and then attached to the light sensor. The way the object operated was triggering specific lights when there is a certain amount of light being received by the sensor. So as you can see, the bulbs each flicker as a number of light decreases, then all of them flicker when it is pitch black.

Snapchat-1967153025

After learning about Arduino, I became very curious as to what items can be made with it and how it operated. The website Make Use Of highlighted the many potential projects that it can be used for. Through that, I found a personal project I might work on now since I am learning the basics of Arduino. The Fablab sessions are not only very informative but it is allowing me to think outside of the box and reinforces the notion that I can build and make anything I want as long as I put my mind towards it.

Structured Creativity: Being the Piece to the Puzzle (Solution to the Problem)

In recent times, people believe that every problem has already been solved or that there are no more ideas to come up with – the difficulties and lack of creativity. This week helped us find ways around this.

To be the missing piece to the puzzle, you have to know what the puzzle is – you have to imagine what will fill in the missing spot.

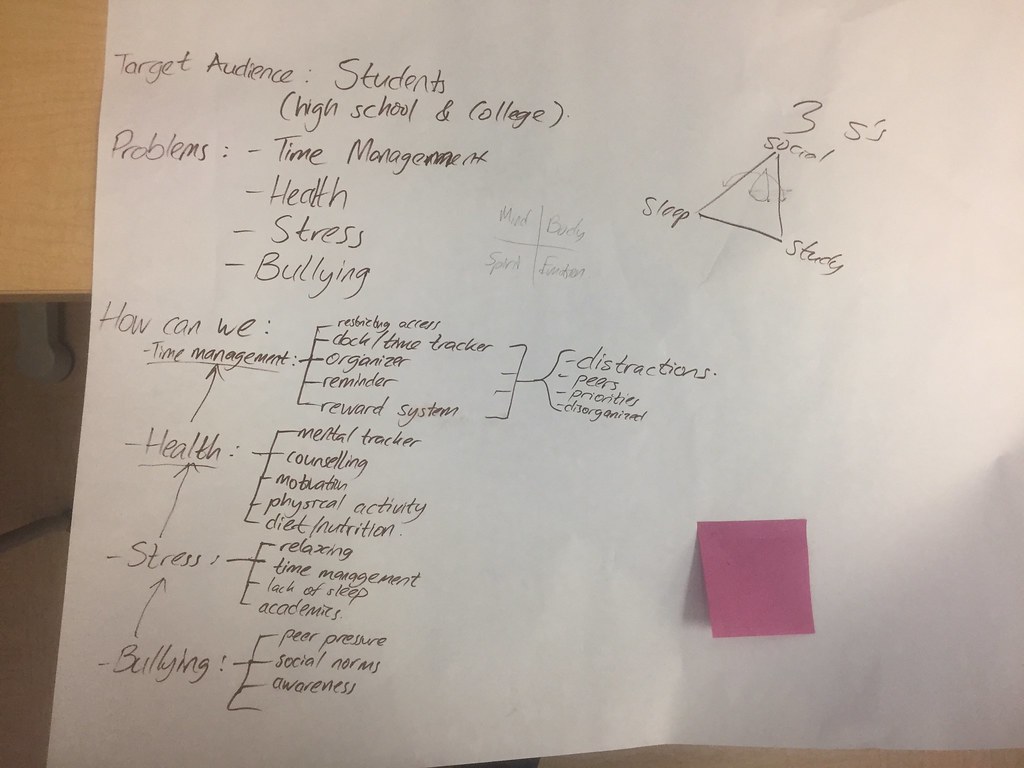
This is the first thing we learned this semester – how we can address problems using What/SoWhat/NowWhat template. It is a brainstorming method that can help ideators immerse themselves in the problem/situation to be able to empathize with the user and then come up with a solution – the missing piece. This template allows people to have a structured way of being creative, innovative and problem solving. It gives a broadly scoped problem a structure, a frame and a regularities. And during this week of class, that is what we did, using the What/SoWhat/NowWhat and the HowCanWe that we learned first from our exercise with the Design for America group. Jacob Goldenberg, David Mazursky, and Sorin Solomon’s article “Creative Sparks” does a great job in explaining this and analysing the need and usefullness of the application of frames or regularities in the creative process. They even go further in giving examples and I could draw more examples from industry situations where companies essentially copy another companies process but for a different field or problem but are still deemed ‘creative’. This template used more specifically to coming up with a solution to an already given problem by using or modifying something that already existed. This kind of tied into what David Kelley said in his interview with 60Minutes.  It encompassed the How Can We methodology and the idea to improve on something else that already exists. Using what we learned, we came up with diagram below which showcases that structure that we used to come up with ideas listed below.

FullSizeRender (1)

We used this structure in a different way. We used it to decide which problem to tackle then applied it to that problem. As seen in our picture above

For our semester project, what we have so far:

1.) Feedback/Story droid –   inspired by the blabdroid

-How can we capture students stories in the MakerLab?

-How can we make a place (The MakerLab) more interactive?

2.) Self Watering Plant pot – inspired by a thingiverse model

-How can we help potted plant goers water their plants when they are not around?

3.) Board copier/transfer – our very own idea

-How can we help students with limited/timed access to whiteboards keep/transfer their work to another whiteboard or physical print?

4.) Time management compact holder/watch – our very own idea that we came up with using the template in the picture above.

-How can we help busy students manage their time or balance between (Sleep, Study and Social Life)?

We also got to listen to Mike Bohlman tell his story in creativity and the maker movement at the Makerspace in Urbana. Not only is he a pilot and gamer but he is a maker who comes up with ideas in the area of former two such as 3D printing holders for instruments in the cockpit for one of the planes he flies and the StarWars game that he made and is up for display at a game store in Champaign. To see more of his great work and projects, they are all available on his website at this link. He incorporates the lessons (templating) we learnt this week in his work with arduinos by improving and modifying code that he finds online in a new and innovative way.

This concept of structured creativity is a powerful concept, and I hope to incorporate it in our semester project. Other resources to learn more about this is also Edward de Bono’s article ‘Creativity is easier when it’s structured’.