The Final Product

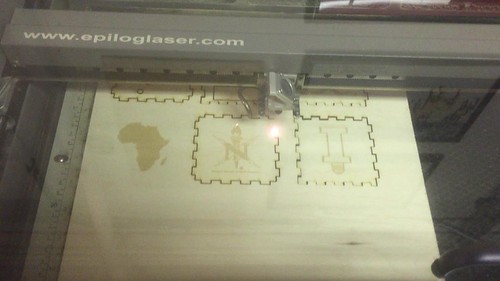
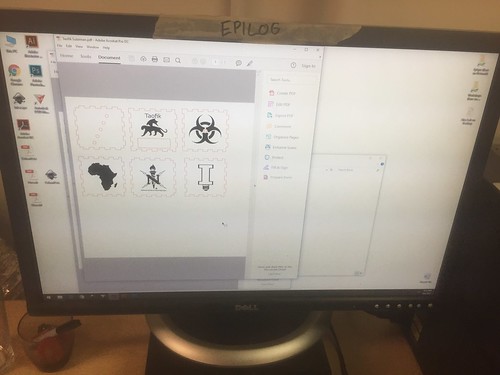
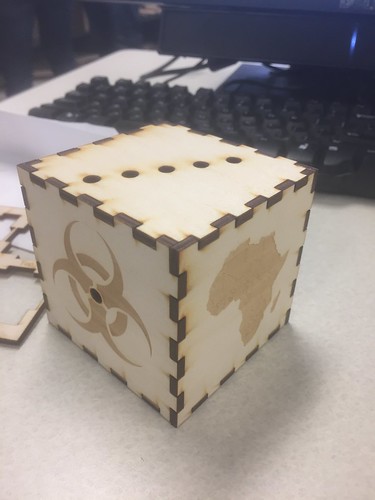
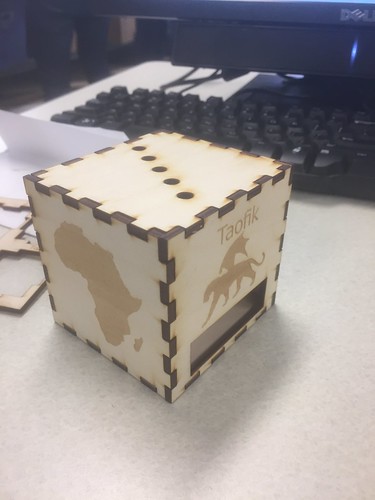
After three of making at the Fab Lab, we finally completed our light-boxes! For me week one was all about learning how to laser cut and designing the outside of my light-box. Then week two was learning about coding and testing an arduino. My final week at the Fab Lab was dedicated to soldering my arduino.

I have had zero experience with soldering. I did have a few concerns though. I was concerned I would burn myself and that i would soldering the wrong wire. Recalling from the time I coded and tested the arduino the previous week, I found connecting the wires slightly confusing. If you put one wire in the wrong spot then it can throw off the entire arduino. Although I founded soldering easier to pick up than I had previously thought. We were given a brief lesson of how soldering works and then the soldering began! We first connected all the wires together by twisting their ends together to make sure that we ad the structure correct. Then we soldered the connections to make them permanent. I found it crazy how fast the soldering metal would melt and the solidify. A few good tips I learned from soldering were:

  1. Clean your iron off on the sponge.
  2. Do not touch your eyes or face once you have touched the soldering metal.
  3. Do not hand your iron to someone else.

These tips were the keys to my success!

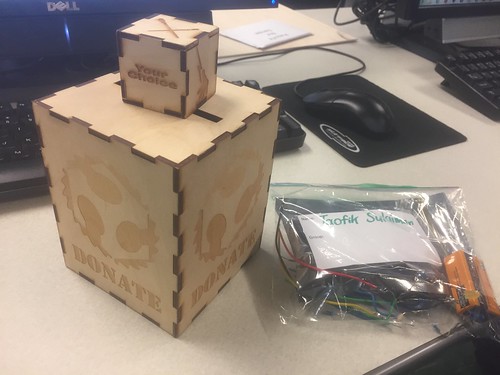
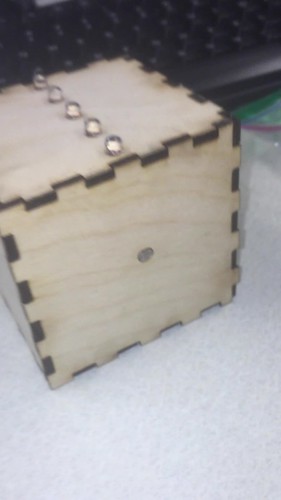
After I had completed soldering then I had completed all three stages in developing a light-box. The only thing left to do was assemble it. Now that everything else was done, this part was simple. To assemble the box, you needed to put the arduino inside the box and assemble and glue the box around the arduino. Then you are left with a completed light-box!

These past three weeks have given me a lot of experience with developing a product from start to finish. It has given me great insight to somewhat of what it takes when you actually start developing a product. You need to individually develop each component of your product. This reassures that each part is working properly. Then once you have done that you can confidently. I will take what I learned with me to make my team’s product for this class. I have really enjoyed these past three weeks and everything the Fab Lab has taught me!!

Coding, Arduinos, and LEDS, Oh My!

As week 2 of constructing the light up box commenced, we took part in a coding and arduino workshop. Arduinos are electronics made of a combination of hardware and software tools. In our tool kit there was LED lights, an Arduino Uno, jumper wires, a breadboard, and a resistor. The first steps we took were to connect hardware to the Arduino Board.

We had to connect the different components together to create a circuit to allow for the flow of electrons or in other words electricity. I had trouble grasping the concepts at first, but when I started connecting the pieces together, things made more sense. Once we finished connecting the Arduino to the breadboard along with the LEDs, it was time to run some tests on it through software.

We used an Integrated Development Environment (IDE) software to upload a code, or a written text that tells the arduino what to do, onto the LED circuit that we had created. To test whether or not the code was successfully uploaded, we had to check if the LED light was blinking. I found it extremely frustrating trying to edit until the code worked, but once it was successful, I felt extremely satisfied. Afterwards, I had time to practice hacking the code and changing the time and frequency of when the LED would blink.

Overall I found the workshop to be a great first introduction to coding since I had never coded before. While coding is still a daunting skill, I am more motivated to learn it after having played around with it. I believe that coding is an incredible resourceful skill to have going into any industry.

I especially find it inspiration that companies and organizations are reaching out to children to teach and encourage them to code. Girls Who Code is a nonprofit organization dedicated in closing the gender gap in technology; they host after school clubs along with summer immersion programs for girls to learn coding and get exposure to the tech industry. Implementing coding into the fashion industry, Google’s Made with Code initiative allowed for girls to design a black dress with the help of designer Zac Posen and technologist Maddy Maxey.

The Hands-on Intro to Digital Making. Part 2: Laser/Vinyl Cutting 7 Inkscape

LabLocationMd

CU FabLab. Located at 1301 South Goodwin Avenue, Urbana IL.

This week we got to return to my favorite part of the class for the second part of our three-part FabLab series. I got to immerse myself more in the hands on part of making. This time around I was more familiar and comfortable in the CUC FabLab space but I wasnt working with arduinos or electronics this time around. We were at first just shown the sample lasercut box and given back our kits below.
IMG_8043

At first, I was a little hesitant because I had thought that we would have to do the measurements by hand or use some form of Computer-aided drawing (CAD) but after listening to their explanation on the process of Laser/Vinyl cutting and engraving, I became more relaxed and interested in learning the tool they mentioned. Instead of using 3D CAD for prototyping like the usual, we used a graphics package called Inkscape to design the outline of each face as well as the graphics that we would engrave on the faces. Here we learned that the laser cutter performed two functions: Vector cutting which is when the laser cuts entirely through the wood or material and creates a blackened outline from the burn of the laser and the Engraving which is when the laser does not cut through the wood but etches a silhouette we created on Inkscape onto the wood in a darker unburnt shade. So essentially, laser cutting is a form of subtractive manufacturing where they take a flat piece of material and cut out shapes to be assembled into a hollow structure or skeleton of a solid object.

IMG_8049

Lasercutter vector cutting the outline through the wood

Before any of this we had to create the outline/shape on inkscape. There we learnt some of the basics of Inkscape and how to navigate the environment to use the tools available. We used a website to create the box press fit outline as it was much ore convenient and efficient than manually sketching it out. By putting the dimensions of the box in the website, we were able to adjust the settings to create our press fit box in a matter of minutes.  We imported pictures from the internet, and used tools to create our own shapes combining them into cool graphics to be engraved. Some of us even went further to create complex graphics such as the mythical creature I made which is a black panther with dragon wings as well as the “Illini light bulb” that I made which is a pun for the purpose of the lightbox we are making. But to convert these images and outlines, we had to create the Bitmap paths to turn them into silhouettes that the laser cutter could understand. By doing all these, I learnt how powerful graphics are in making designs and products more attractive and personal.The thing about the lasercutter environment below, is that it only recognizes specific colours: black as engrave space, red for vector cut path and white as material.

IMG_8044

The Lasercutter Final Print Environment

IMG_8054

My Final assembled press fit box. View 1

IMG_8053

My Final assembled press fit box. View 2

The cool thing about laser cutting is that not only is it fast and material efficient, it can be used on many other materials. the most common is wood and glass/vinyl but you can also laser cut metals, paper, foam, cork, silicone and so on. You can learn so much more here at this link. The Stanford Product Realization Lab is making great products there and exploring much more materials. But the most impressive thing to me is the innovative use of lasercut patterns to make flat materials curved or bendable. They way they do this is by laser cutting thin lines and holes in the area that is desired to be flexible in such a way that there would be more freedom for that section to be less rigid and be able to stretch and hence be flexible.

Now with all this the final outcome for our lightbox should look like the sample below. I am looking forward to being able to incorporate this into our project this semester.

IMG_8050

Sample final product for the lightbox.


Arduino Testing and Experience

This was week two in the Fab Lab. My group, group White, was switching from laser cutting to coding and testing Ardiunos. I have had very little experience with coding and zero experience with Arduinos. I was not sure how this would go.

The first thing we did was grab the box we had laser cut the week before along with the pouch that would help us assemble our Arduinos. Each of us sat at a station with two monitors. On one monitor we pulled up a slide show that would help us follow along with how to code. We ran a series of tests to make sure our Arduino would function properly. I found the most difficult part of this process was figuring out where exactly to place everything on the bread board in order for it to work. Luckily the final product turned out!!

When I looked more into what kinds of things arduinos are used for, so many things came up! Something that stood out to me was a “smart house” controlled by arduinos. At first, my mind immediately went to the Disney movie “Smart House” that was created in the late 90s. When I read into it, I found out that arduinos control more of the environment of the house. For example, controlling the internal temperature of the house, letting know which windows are open or closed, or which doors are locked. These are small things, but they are helpful. Every time my family and I leave our house, we ask the same questions. We are not for sure we locked all the doors, turned off all the lights, or even made sure the stove was off. An arduino for our house would be very convenient. We would not have to wonder and would have the answer at our fingertips by checking our phones. Click here to read more about smart houses.

I am curious to see what arduinos hold for the future. I know I have only recently had experience with probably one of simplest functions of an arduino, I was amazed. I have never made something that was motion sensitive. I think exposure to arduinos will broaden our ideas as a class for our development of our products for Digital Making. This could make something touch sensitive or notify you what the temperature is. Arduinos can upgrade an idea that you may of already had!

More Ways to Make

Last week, we had class in a different setting. A similar, but different setting. Just east of the BIF is the Fab Lab. Here is were we were introduced to more opportunities of making. I feel that the introduction to this lab will broaden our thinking.

Jeff Ginger, who had previously visited the MakerLab, showed us around the Fab Lab. We started in the front left side of the lab that contained computers. They seemed similar to the computers in the MakerLab with the tapes of software. Also in the front of the lab were 3D printers. Some were less sophisticated than the printers in the MakersLab, some were more sophisticated. They also had a section in the lab dedicated dedicated to playing with different types of materials. They had backpacks and plush toys that they had designed. As you move further through the space they are messing with many other things such as other electronics and teaching others how to make!

The Digital Making class is going to be having class at the Fab Lab over the span of three weeks. Our project teams are split up into three different activities. Last week I was in the laser cutting wood activity. I had zero experience with the software we used to prepare our wood with our designs. The software we used was Inkscape. This software was tricky to use at first, but I was able to get the hang of it. We were going to make a box with our own designs on the side. Once we completed our designs we could start laser cutting. One thing to watch for when the laser is cutting the wood is if the wood catches fire!

Laser cutting wood has many advantages. One advantage to laser cutting wood is that you can make a prototype of an idea you have at a very low cost. I had laser cut before at an engineering camp(GAMES Camp) when I was in high school. When I attended GAMES camp at UIUC in the Summer of 2014, I was on the GBAM track. GBAM was the Mechanical Engineering track at the camp. We were given a task of designing an new innovative design of a wind turbine. We laser cut our wind turbine panels and then created curved panels out of purple duct tape. Then the base of the turbine was made out of PVC pipe. This was my first experience using this type of making. Even in 2014 I was making!

Wind turbine design from GAMES camp 2014