Week 6: Laser Focused on Learning

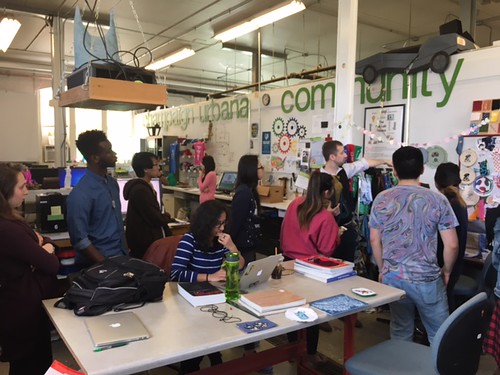
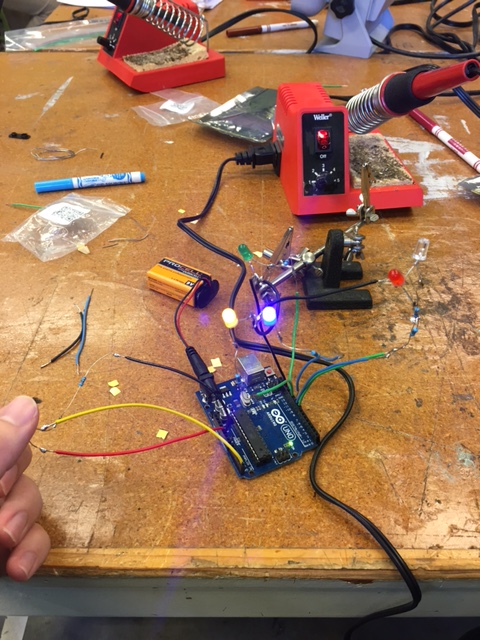
This Monday we entered a whole new world and expanded our knowledge by going to the Champaign-Urbana Community Fab Lab. The CU Fab Lab was one of the most creative spaces I have ever seen with stickers coloring the walls and trinkets hanging from the ceilings. However, it wasn’t the décor that was the main star of the Fab Lab. It was the type of machines and the shared knowledge available to the public. The Fab Lab provided those in the Champaign-Urbana area with access to a plethora of fabrication tools such as a laser engraver, CNC routers, 3D printers, scanners, electronic cutters, digital textile machines, small board electronics, graphic drawing tablets, and advanced software. We were fortunate enough to take a tour, with Jeff Ginger, of the colorful facilities as shown below. The place was a well-organized fascinating maze with areas such as a computer lab, 3D printing area, textile workshop, electronics section, soldering stations, circuit board milling, milling machines, digital area, laser area and wood working.

IMG_6067

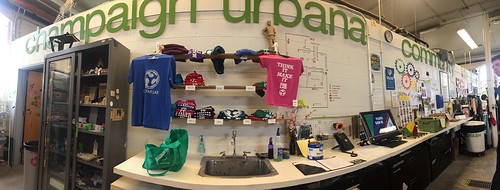
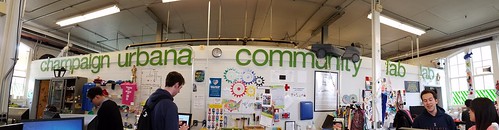
Panoramic of Fab Lab Entrance
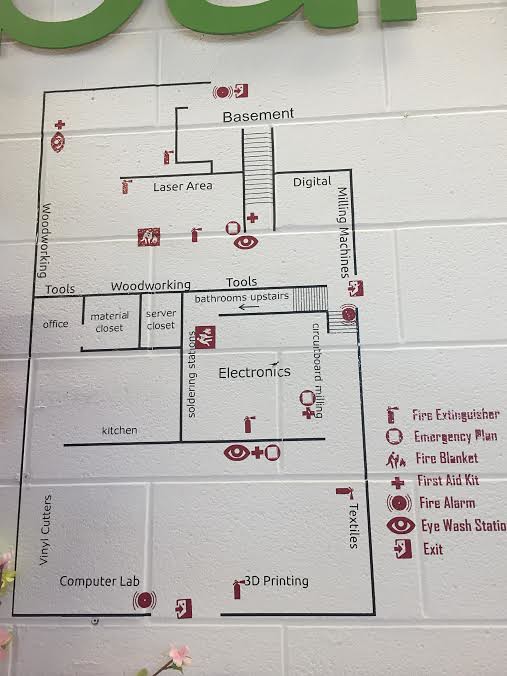
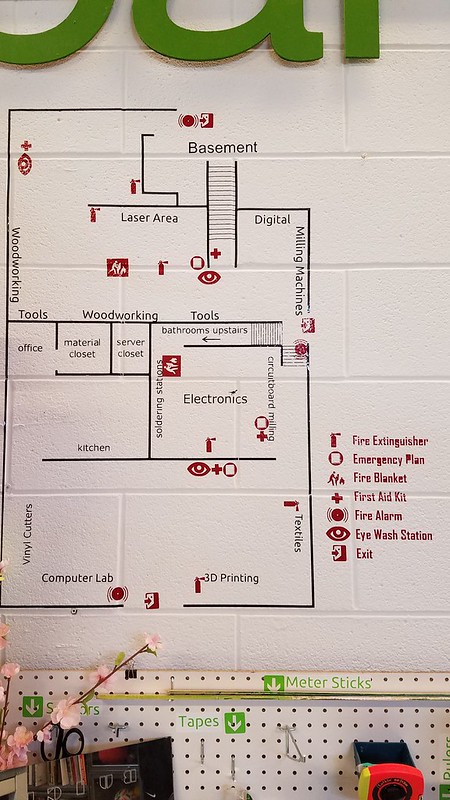
map

Map of Fab Lab

better

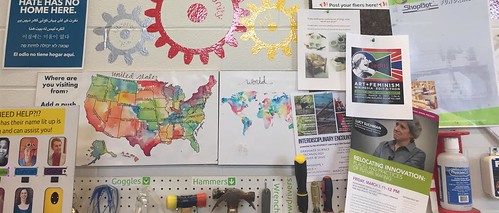
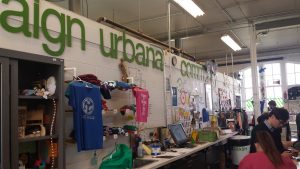
Colorful wall of Fab Lab

makerlab

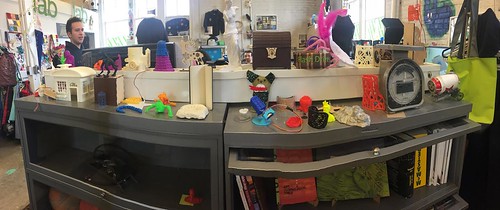
Awesome models near the entrance

ug

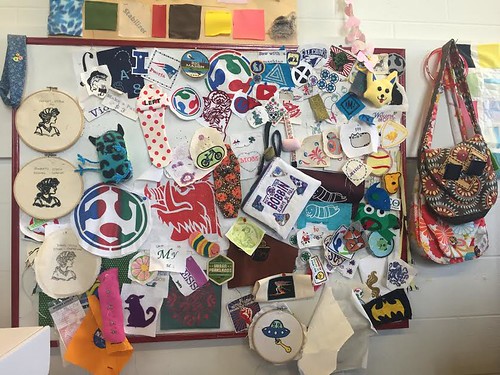
Cool Display from Textile Area


I truly loved that this workshop was a haven for makers. There were so many resources to spark imagination, develop designs and create. My favorite part of this space, was that it encouraged collaboration. Many projects were DIW which means “do it with others”. This gives the mentality that the people around have diverse experience and can be possibly the missing piece to the puzzle. This idea was further implemented when our groups for our final presentation was split up so that each member learned and did something different in the workshop after the tour. Each week we would rotate into another area. I think that this is extremely beneficial as each member would have an entirely unique experience with each workshop. This would allow each group to work together and ultimately do the project with each other and utilize each individual experience.
Animated GIF  - Find & Share on GIPHY

Textiles Tour

Animated GIF  - Find & Share on GIPHY

Amazing Watercolor Machine

Animated GIF  - Find & Share on GIPHY

Woodworking Tour

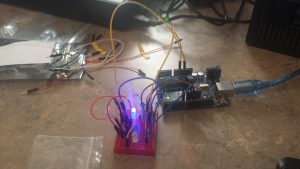
When the tour was over, I was placed in a group led by Holly Brown (Lab Manager and Instructor) and Clinton Gandy (Lab Assistant) where we learned how to prepare laser cutters. We were using a universal laser cutter to create a personalized box. We sat at the computers in the woodworking area and utilized the advanced open source software. We used Inkscape which was very similar to Adobe Illustrator.  I’ve had experience with Adobe Illustrator in my high school graphic design class, so I didn’t struggle too much with it. I found it so interesting that so much work came into preparing an image to be cut with a laser. Each line to be cut must be RGB (255,0,0) with a strike width of .001.  Images to be rastorized must be black and white. I asked to if I could venture into the gray-scale area, but for simplicity’s sake, Holly advised me to do a straight black and white image. She did however mention that gray-scale images could be etched on, but it requires more preparation and time which we did not have. I however researched more on this and found a wonderful YouTube video on how to prepare gray-scale images to engrave on wood. Expanding my knowledge in how to cut and engrave with a laser printer helps me become prepared to execute my final group project given the need of laser cutting or rastorizing. Additionally, this knowledge and experience can help me further assist my fellow peers should they approach me for help.

woodworking

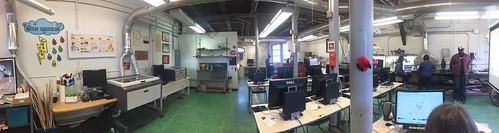
Woodworking and Laser Area

example

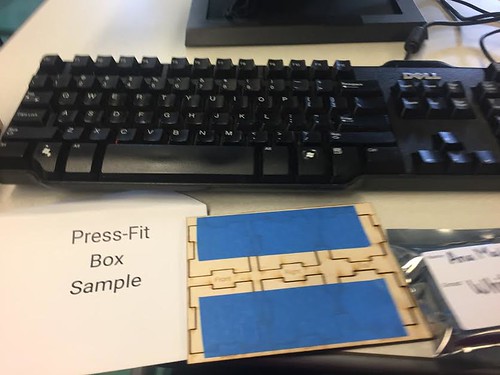
Press Fit Box Example

unnamed

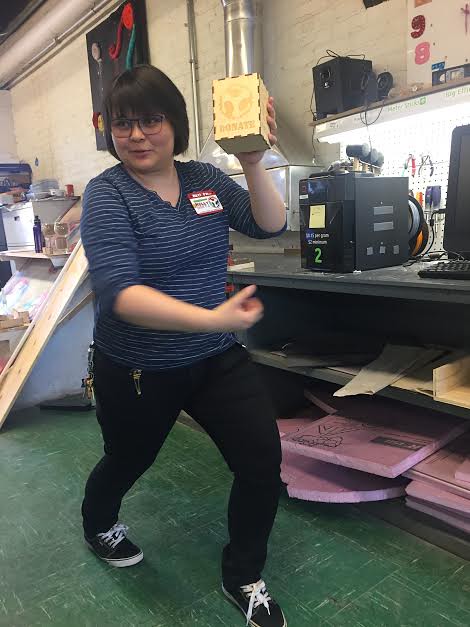
Holly Modeling a Press Fit Box

lkjhg

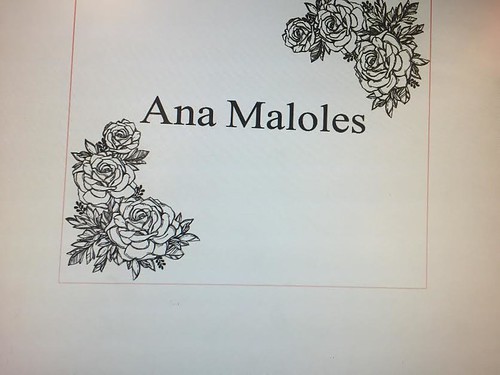
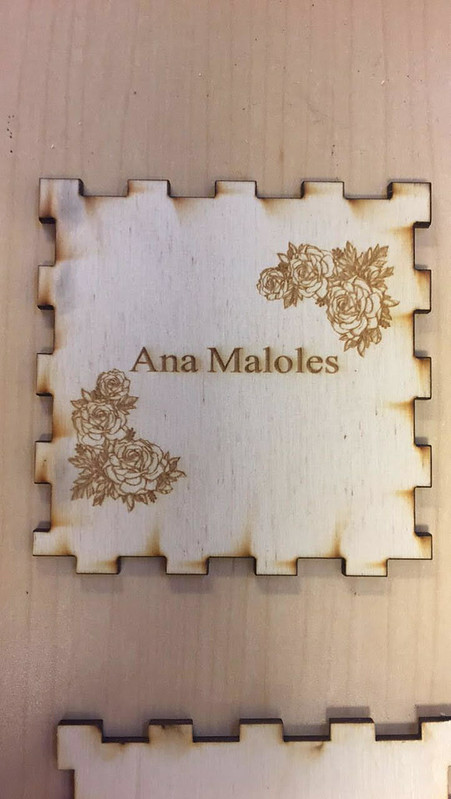
Black and White Design I chose

unnamed (1)

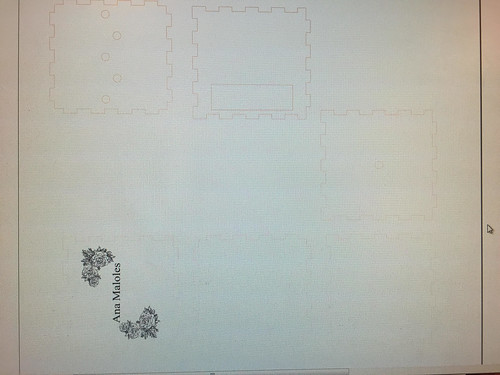
Press Fit Box Parts Preparted on Inkscape


While going through the workshop, I was able to follow very quickly and intuitively, most likely due to my previous experience with Adobe Illustrator. I ended up finishing my project first. I had help with calibrating the laser (as shown in the instructions on the wall in the images below), and then I started the laser cutter. I found this laser cutting and rastorizing so fascinating. The design image that I chose was etched on the wood so easily. The design I chose was very detailed and I did not think that the laser would capture so much detail in a small area but the laser was so fine and precise that the image turned out beautifully. From this workshop, not only have I learned how to cut and engrave with lasers, I have also realized how flexible these laser cutters are and how these laser cutters have a tremendous amount of applications and uses in product design (here’s a video on many of the applications!). Overall, I hope to use this knowledge in creating my groups project.

lser

Universal Laser Cutter

lasercalibration

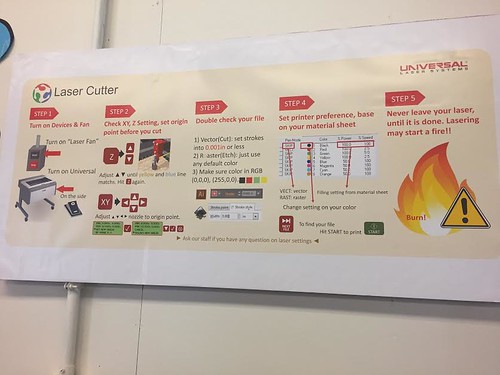
Instructions to Calibrate Laser Cutter

Animated GIF  - Find & Share on GIPHY

My Box Design Being Printed

unnamed (3)

Intricate Design

unnamed (2)

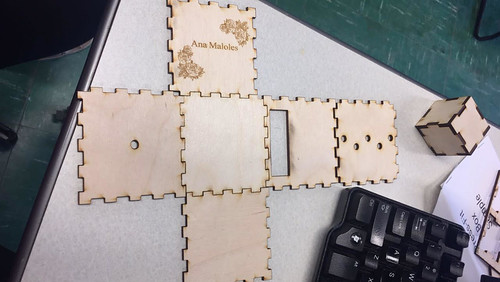
Pieces attached to each other before put in a cube.

Learning and Making

Week 6 was all about learning and making at the Champaign Urbana Community Fab lab. The Fab Lab does a tremendous job in inspiring interest and innovation among the members of the community. As I walked into the Fab lab, I was amazed to see how many different machines and materials they had for us to create almost anything we imagined. Jeff Gringer who is the Director of the Fab Lab even told us that the building was the second oldest on campus and it once had huge doors to let horse carts in!  I was particularly excited for this class as I was looking forward to learn how to use Arduinos and apply them to my teams final Project. After a brief introduction of the MakerSpace, our team was split up into 3 groups with each group working on a different skill. I was put into the team which had to design an Arduino circuit which detected light and powered LED’s based on the ambient light in the room. 2 Volunteers working at the Fab Lab provided us with a step by step guideline on how to wire the Arduino on a breadboard. After wiring up our circuit, we connected the Arduino to a Desktop and messed around with some C code to bring our circuit up and running.

It was a great experience working with Arduinos as I never really understood its power and application value. As our teams project is geared towards making Smart Homes more affordable, I positively believe that we can use Arduinos in the product we are designing. The next two weeks our team is going to work on the final project proposal and put the theory and skills we learnt into action.

** Check out hackster.io , its like a pinterest for cool projects mostly related to Arduinois which can be shared and done by anyone. It also provides detailed instructions and materials which can be easily purchased from their website. The Motion Sensor Water Gun was something I was checking out as I was going through their website.

Learning about circuits

It was time for us to get some hands-on experience with building and making other interesting things. For this, we had the opportunity to go to the Champaign Urbana Community Fab Lab which is located near the South Quad in the building called Art Annex 2. This day was very different from the other days as today was when we started with the making process. The Fab Lab was a space with vastly modified products, for instance, a printer that could paint with water colors, electronic cutters, and fabric machines.

We were then split into three groups and hence were working on two different projects. My group was working on the electronics side of the project. Duncan and Andrea helped us in learning the working of LED lights on an Arduino board. An Arduino board is used to create sensors. “Arduino board designs use a variety of microprocessors and controllers. The boards are equipped with sets of digital and analog input/output (I/O) pins that may be interfaced to various expansion boards (shields) and other circuits. The boards feature serial communications interfaces, including Universal Serial Bus (USB) on some models, which are also used for loading programs from personal computers.” It was not that tough to use the Arduinos and therefore one can learn at home very easily. You can learn more about this on a website called ‘Instructables’. This is a website that tells you the step by step process of making an Arduino board yourself at home. There is a list of things that you would need to purchase to make this board which is also listed on the website.

As per our group, we are thinking of adding an electronic component in our product and that too a band that lights up due to certain reasons, so this was very helpful. The main purpose of the project that we were working on today was to make the LED lights blink based on the intensity of the light. The darker the light, the faster the LED lights would blink and the brighter the light the slower the LED blinks. There was a kind of a light sensor to which the board responded. By the end of the day, I could not believe that I actually made a circuit board that functions like a light sensor.

More Ways to Make

Last week, we had class in a different setting. A similar, but different setting. Just east of the BIF is the Fab Lab. Here is were we were introduced to more opportunities of making. I feel that the introduction to this lab will broaden our thinking.

Jeff Ginger, who had previously visited the MakerLab, showed us around the Fab Lab. We started in the front left side of the lab that contained computers. They seemed similar to the computers in the MakerLab with the tapes of software. Also in the front of the lab were 3D printers. Some were less sophisticated than the printers in the MakersLab, some were more sophisticated. They also had a section in the lab dedicated dedicated to playing with different types of materials. They had backpacks and plush toys that they had designed. As you move further through the space they are messing with many other things such as other electronics and teaching others how to make!

The Digital Making class is going to be having class at the Fab Lab over the span of three weeks. Our project teams are split up into three different activities. Last week I was in the laser cutting wood activity. I had zero experience with the software we used to prepare our wood with our designs. The software we used was Inkscape. This software was tricky to use at first, but I was able to get the hang of it. We were going to make a box with our own designs on the side. Once we completed our designs we could start laser cutting. One thing to watch for when the laser is cutting the wood is if the wood catches fire!

Laser cutting wood has many advantages. One advantage to laser cutting wood is that you can make a prototype of an idea you have at a very low cost. I had laser cut before at an engineering camp(GAMES Camp) when I was in high school. When I attended GAMES camp at UIUC in the Summer of 2014, I was on the GBAM track. GBAM was the Mechanical Engineering track at the camp. We were given a task of designing an new innovative design of a wind turbine. We laser cut our wind turbine panels and then created curved panels out of purple duct tape. Then the base of the turbine was made out of PVC pipe. This was my first experience using this type of making. Even in 2014 I was making!

Wind turbine design from GAMES camp 2014

Introduction to Intricate Designing

For this week and the upcoming two weeks our class has the privilege of going to the University of Illinois FabLab to learn new tools for our upcoming final project. The first time I had heard about the FabLab was during Jeff Ginger’s presentation during class. I was very intrigued by the different things I could create at the FabLab and was incredibly excited to be able to go and learn from experienced users. When entering the FabLab we were given a tour of the whole facility then split into three groups to begin learning the different tools available. I was assigned to the group led by Holly Brown (Lab Manager and Instructor) and Clinton Gandy (Lab Assistant) to work on creation, design and the process of building boxes through a graphics software called Inkscape.

We had been told that Inkscape would be similar to Adobe Illustrator and I had played around with the application here and there. Throughout class we were given a tutorial box to create, a tutorial of Inkscape and a chance to design our own box that would be laser printed on the wood that was provided by the FabLab. We started by learning the various tools that could be used on Inkscape especially ones that would be useful in designing our boxes, such as grouping and creating holes. Here is a link that gives users an idea of the different features that Inkscape provides: https://inkscape.org/en/about/features/. We then imported the box design onto Inkscape and began adding holes onto one side of the piece that will be used for the lights to shine through in the next two sessions. On another side of the box was a rectangular hole for the battery to come out that would be used for the lights to shine. On the other sides we were able to add our own designs but specifically we were told to use silhouettes of images that could be found through Google. I had chosen silhouettes that I related to personally because I figured it would be more special. Inkscape is a nice introduction graphics software to understand and it was easy to maneuver things around at ease. I really liked how the interface was so simple yet provided an opportunity to draw seamlessly. It was great that imported and exported files could be done through various file formats and overall was comprehensible. I believe that any user is able to use Inkscape to design practically anything. Furthermore, the software allows users to start from the beginning stages to the final stages of a professional design format, which we had created towards the end of class.

After finishing up the box design we had sent them to the laser printer, however, the laser printer took awhile to complete each design and I was not able to watch my design be printed by the end of class. However, when I was watching other student’s designs I was really intrigued with how the lasers had hit the wood to print. The designs were incredibly intricate and we were all amazed with how it was able to print so easily, though it was interesting to see how the laser printer had to be watched carefully at all times in the chance of a fire occurring.

Here is a panoramic of the entrance of the FabLab.

This is the a smaller version of the box we would be creating for practice and putting the box together.

This is the completed tutorial box.

This was an example of what the creation will look like once all the FabLab classes are complete.

Here is the design I had put on one side of the box.

As I stated earlier I was unable to have my design go through the laser printer, but here is how another student, Ian’s design had turned out.

Tinkering and Soldering

The Champaign-Urbana community fabrication laboratory otherwise known as the CU FabLab led our class throw 3 different stages of building a small box that has a light sensor and powered by Arduino. The class split into 3 groups, one laser cutting the box, one soldering the wires and builds together and another group worked on coding the firmware. Splitting this into groups and stages made creating this project to be much more manageable and help show how much work truly goes into the design of an item from its conception to its creation.

20170227_140237

20170227_140408

I have never soldered before nor worked with Arduino and so it was exciting to be able to learn from professionals and people who knew what to do. Going into the FabLab I did not know what to expect and so to know that there are so many resources at our disposal really gave me hope about how our project can be created here. The soldering material was lead based and so it was instrumental that we do not touch our faces or body with our hands and that was surprising to me that we utilized lead. However, we were explained at how the smoke that rises, aka, flux, is very toxic and so soldering with other materials makes the flux much worse. We were then given our Arduino units as well as LEDs, resistors, sensors and wires.

20170227_143547

Each student in the group had a soldering iron in front of them and we were given a tool that is referred to as the ‘helping hand’ which helps hold wires for you to solder. There were some frustrating moments as solders operate at roughly 800 degrees Fahrenheit and so it was very dangerous as one can easily burn yourself.

20170227_142126

Our outcome after soldering the pieces all together was 5 LEDs each connected to a resistor and then attached to the light sensor. The way the object operated was triggering specific lights when there is a certain amount of light being received by the sensor. So as you can see, the bulbs each flicker as a number of light decreases, then all of them flicker when it is pitch black.

Snapchat-1967153025

After learning about Arduino, I became very curious as to what items can be made with it and how it operated. The website Make Use Of highlighted the many potential projects that it can be used for. Through that, I found a personal project I might work on now since I am learning the basics of Arduino. The Fablab sessions are not only very informative but it is allowing me to think outside of the box and reinforces the notion that I can build and make anything I want as long as I put my mind towards it.

Week 6: Controlling Sensors using Arduinos

Image

This week we got the privilege of having the opportunity to do some hands on making at our very own University of Illinois Fablab. I really enjoy hands-on learning and making cool things, so this was a really fun week for me. We started the day off by getting a tour of the Fablab. There were some super cool projects going on there, such as a 3D printer that can water-paint, as well as fungus that can be grown into biodegradable molds. We then got split up into different groups, each to work on a different project. My group’s project involved learning how to control LED lights that are put on an Arduino board. For those of you not familiar, an Arduino boards are used to create sensors and programs that can interact with the environment. They are fairly simple to use and therefore can be picked up fairly easily by a beginner. If you would like to learn more about Arduinos, you can check out there website here. Our project was to build the Arduino board for a light sensor. With the help of some of the smart people over at the UIUC fablab, we were able to orient the circuit board and program the board in a way that whenever the light sensor detected a quantity of light deemed too little, the LED lights would starts flashing. It was really cool to see how something so seemingly complex could be made fairly easily. A picture of my Arduino board can be seen below.

IMG_0421

Learning about Arduinos is awesome because besides giving you a very basic intro into things like coding and creating circuits, they also allow you to make a broad range of things with them. This, like the Maker movement, inspires a lot of creativity and I’ve seen some really cool creations made with the Arduino. One such invention was a man who came to talk to us a couple weeks ago. He used an Arduino board to create a sensor that would text his daughter every time their cat litter needed to be changed. Having a product that allows creativity like this can only mean good things for the world.

Now that I have learned about Arduinos, I hopefully can use them in the upcoming weeks when building my semester project. While the project will be 3D based, there may be some circuits involved, and anything involving a sensor would be perfect with an Arduino. I will also be at the Fablab the next several weeks as well, learning how to do other things that I may need to do in my project. I continue to look forward to all the cool skills I will learn from this class in the upcoming weeks.

Something in the Making: An Intro to the Fab Lab

Lab

This week we made the trek all the way past the South Quad to the Champaign Urbana Community Fab Lab. The Fab Lab, despite being home to lots of top of the line making equipment is housed in Art Annex 2, the second oldest building on campus. However, this is seen as a bonus in our eyes as it allows creativity to flow nicely in the highly customized space.

After a quick tour of the space including laser engravers, 3d Printers, electronic cutters, milling machines, textile and fabric machines and so much more, it was time to split the class into groups to begin our rotations. I was put in the electronics group this week, and Duncan and Andrea helped us through our project. We spent the day soldering together LED’s to an Arduino as part of the “blinky boxes” project. Soldering is an important skills in making if you are going to incorporate electronics, so it was good to get practice with it. The “blinky boxes” have a light sensor on them that responds to light intensity. The darker it gets, the faster the LED’s will flash. With the help of Duncan and Andrea as well as a schematic, we were able to finish the electronics phase. We did not program the Arduino ourselves, but it is a skill we will be learning later. Now that I am familiar with how we can incorporate electronics into our project, it has given me a better prospective as to how we can come up with a product design. I know that I want to practice soldering to get better at it and start learning how to set up the board by myself.

Electronics

This Instructables article is a beginners guide to soldering. I think it is a really good resource to start familiarizing yourself with the equipment you will be using, as well as proper techniques to hopefully make the process a little easier for yourself. This Makeuseof article gives an introduction to Arduino’s. The article gives some background, describes capabilities, details the many parts found on or that can be used with Arduino’s, and stimulates creativity by showing what is possible with this small piece of technology. It also offers a tutorial on programming an Arduino, so after class I started going through this article in hopes of boosting my creativity for my project brainstorming.

Above all else, walking around the Fab Lab was an excellent way to stimulate our creative processes. The Maker Community is more than willing to help us with our projects and they are all very passionate with what they are working on for their personal projects. As you walk around the many rooms, you will find projects of all different types covering the tables, walls, and shelves. Certainly you can figure out a way to combine several different components of making into a unique project for yourself. Happy Making!