Week 4 – Reflections

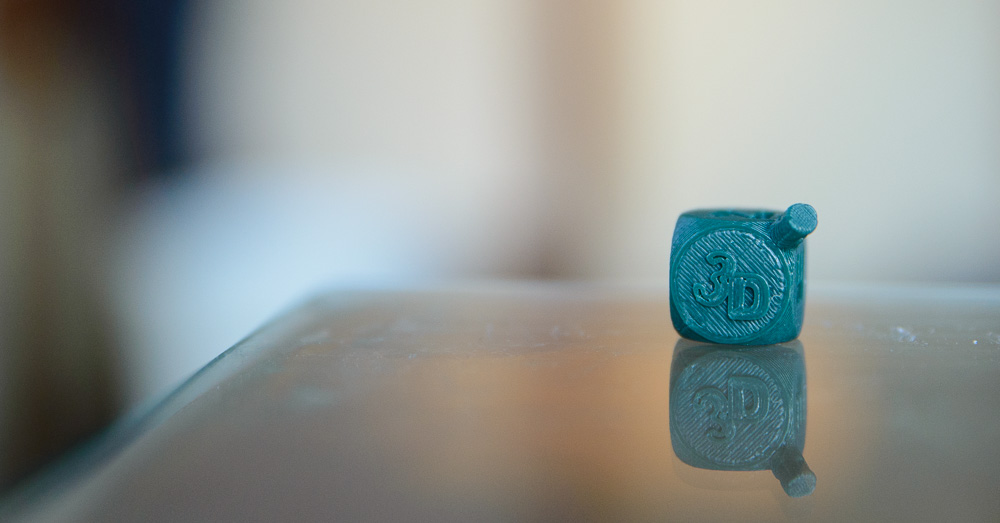
This week was primarily occupied by creating our first 3D print. We spent the majority of the period scanning our faces, cleaning up the scans, and printing the resulting model. This was our first real experience working with the MakerBots and it wasn’t without a hitch. Leveling the platform, something that should have proved a relatively simple process, turned out to be more difficult for me than anticipated. Despite these minor hiccups, I was able to successfully begin my print by the end of class and be able to pick it up the next day.

The first thing I learnt from this experience with the MakerBot is some of the devices drawbacks. While 3D printing is a wonderful tool, the physical limitations of the device can get in the way of the printing of the object. When printing, the plastic outlining my chin and nose drooped slightly. This shows how in order to accurately print objects with that sharp of oblique angles, the MakerBot would need adequate supports in order to allow the MakerBot to accurately corner and support these objects.

I also learnt a valuable lesson in the beginnings of 3D design. In order to learn best of how to work with a thing, its best to work with something you already know fairly well. And what do people know better than their own face? By working with a familiar object, a person can familiarize themselves with the software they are working in, as well as the limitations of the hardware themselves. This learning experience can help inform on how to better improve objects that someone may not be as comfortable working with, such as an object that may only exist in the designers mind.

Going into the future, I will keep this experience in mind with designing my own objects. The complexity of the model is no impediment to the physical manifestation to the object. However, there are some aspects of design that the printer cannot handle. I think going into the future, I will focus on working from objects that I have experience with objects on Thingiverse that others have designed.

By working with other objects, I can find how I can put my own personal spin on these ideas and make them work for me.


–Noah Baird

Week 2 Reflection!

My experience with making has gone from zero to sixty in just a matter of days. Well, maybe not from zero but darn close to it! I have always been creatively inclined so the fact that I am getting my feet wet with software and hardware that puts the power of creation in my hands is beyond awesome. Just tinkering with TinkerCad (Hah!) and following instructions to prep my creations for printing has opened so many doors. It’s crazy to think that my ideas can be turned into physical, functional objects in a short amount of time. The whole learning experience is empowering!

Not only can I bring my own ideas to life, but it is sweet to know that I have the ability to bring the designs of others into the real world with sites like Thingiverse. Here are a few products I thought were particularly cool (potential gifts for family and friends)!

1. Bat Signal for mobile phones

First off, I’m a HUGE fan of Christopher Nolan’s Batman trilogy so this object hits close to home. It’s especially cool in that it can be used with most any smart phone that has a flashlight. A lot of items I’ve come across are phone specific (not necessarily bad) so I like the flexibility this object has. I’ve only played around with CAD slightly so I am interested to learn the process of designing and prototyping an item like this. Is it just a matter of trial and error until the desired effect is achieved?

2. http://www.thingiverse.com/thing:548230

Easy birthday present for my brother. This plane is not only great for flying (according to the reviews) but also looks sleek as heck. This is one of those objects that I would that has pretty specific instructions for the thickness of the print at different points. The trial and error required for this product must’ve been quite the hassle. Then again, I’m no engineer so I have a hard time wrapping my mind around the creation process. How does the creator figure out the correct density and thickness for each portion aside from guess and check? Regardless, I may be printing this one in class as a gift.

3. Shopping Bag Handle

Gift for mom? Well, to be honest, I can’t see her using it that much. Regardless, I love the utility of this object. I’m sure everyone has experienced heavy plastic bags tugging on skin and ripping because of pressure. This is a perfect example of the current state of consumer 3d printing. That is, this is a functional, extremely simple product that members browsing Thingiverse can potentially use to improve their quality of life. It isn’t reinventing the wheel or just acting as a crappier version of something you can buy at the store. Rather, its a unique item that once printed can be put into use immediately.

4. Tower of Pi

March 14th is coming up! A good gift for that special mathematician in your life… In all seriousness, this item is incredibly cool. The comments on the item indicate it is very difficult to print. Maybe not an item I should tackle just yet. I suppose it would require certain levels of support to achieve the aesthetic. I think with my current skills I would run into problems printing a solid square so I’ll walk before I can run. Nonetheless, this object is proof that if you can think it you can make it.

Digital Making Log: Week 2

I walked into this class without knowing anything about modeling, and after this week, I think I can safely say I know a little more than nothing: I’ve learned how to think in a maker mindset, something not easy to come by given my area of study (journalism).

We got to play around with Tinkercad.com, a very basic platform for modeling with preset shapes that can be scaled, cut, bent, etc. I ended up piecing together a nametag for my team (gold team), and using the “box hole” feature, I was able to angle the words without having a failed print.

Well, without having more than one failed print. Ha. Below is what I made.

Gold Team rules

This was just an exercise to get us exposed to modeling; the harder stuff comes later. And I can’t wait.

Just using some free time, I modelled a sci-fi space ship with the existing Tinkercad shapes. I had to use a wheel preset, so it doesn’t look all that cool.

space ship

Notice there aren’t really any engines, or any jagged details, like a torpedo bay. No discernible bridge. The eventual goal for me is to have the modeling skills to make fleets of ships that I’ve been working on with graph paper for my entire nerdy adolescent and college life. They’re a lot more complex.

Another component of week 2’s class was an introduction to 3d modelling sharing sites, most notably, thingiverse.com.

I found four really cool things that I could use in my life and I’ll list them for you now:

Settler of Catan replacement pieces

This is something very essential in my life, as I have lost a few wheat pieces to my set. One thing I might tweak with this before I print it, and presumably learn more about modeling, is beef up the terrain. Whoever made this took care to make what is normally a 2d landscape in normal Catan, to a 3d, much cooler landscape. However, it still took on the same look as the 2d pieces, down to the location of the wheat farms. Me, I might want to add a river, or a dinosaur. The possibilities are endless!

Tri-dimensional chess set

As a trekkie, I’ve spent a large part of my life wondering how the hell people in Star Trek play 3d chess. When I looked into buying a set two years ago, the cheapest one was $300. With this print, it would come out cheaper and look a lot sleeker, with custom colors even. The only thing I would change: I would probably put Vulcan ears on the pawns, just to be cute.

Batman shelf

I’ve been deprived of a night stand for two consecutive years of my college career. To one side of my bed, there’s a book shelf, to the other, there’s a wall. I’ve had to put my alarm on the other side of the room, and let me tell you, snoozing that in the wee cold hours of the morning is pretty brutal. Having this shelf on the wall slightly above my bed would make life quite easier, though I think I would have to increase the width to make my clock fit.

Saturn V rocket

The Saturn V rocket seems pretty essential to me, maybe not so essential to most other people. As someone who wants to make a hobby out of printing spaceships, I’d be remised if I didn’t include her in my collection. The only improvement I could make would be a launch pad.


My first 3d printed object

I was quite excited about my first class of DigitalMaking! I’ve never been to a 3d printing lab before, so even the atmosphere with all these MakerBots around was a new for me! But why do I have missed the first class, the week before? I’m an exchange student from Austria and was not aware that this course even exist until Vishal announced it in another BADM class!

I haven’t heard about Tinkercad before. I did not expect that it is that easy to create 3d object. Within 30 minutes I created the first prototype of our team logo. Following major steps were made

  1. The cube is a predefined object in Tinkercad. Just the size must be adjusted
  2. The number 3 and the letter D were placed on the top. Angle and size were adjusted. The letters should be “outside” of the printed cube.
  3. On the five sides remaining I placed the letters of our team named SENOL. These letters should be “inside” of the printed cube.
  4. Finally, I wanted to have a “adapter” to make the cube a key fob. This was quite tricky, because of the angle of this detail. I designed it out of two cylinders. One for the printed object, and one for the hole inside.

One the printed object I recognized a few mistakes, that I’ve designed wrong.

  • There are different depths inside the cube of the letters SENOL
  • The letter L is mirrored.

3d

SE___

__NO_

____L

What’s next?

While you are sitting in front of your computer designing new objects or sitting in front of a makerbot when it is printing new objects, one can really get addicted to 3D printing! There are a bunch of sites online where you can view and download objects other users have designed and shared. I started to think, what the next object I print could look like. Here are a few ideas:

  • A wall cleat to place a cable when it is not in use! I like the idea, to replace the normal cover with a one that has a function. I think about a “function” like a mobile phone mounting while charging.
  • Eggcups are a good idea for making nice gifts for anyone. However, I think that this object would need a bigger base to stand stable and there must be different sizes for different eggs.
  • This Pen&Card Stand is a good example of useful 3d objects for daily usage on your own desk. When I was looking at similar objects I thought about making a bigger object to put in kitchen knives.
  • When you have a OnePlus One, like I do, you do might also have the problem, that there are not many accessories available to buy. You can not buy a docking station, but you can print it! This object has been published on Nov 23, 2014 but it has been modified a few times. I’m sorry to say, that there nothing I see to improve. I just want to print my own “copy”!

Week 2 reflection

The highlight of this class, for me, was finally learning how a set of gears worked, and how important of a role they play in today’s world. This only came to being as our team was assigned to research a hyperbolic planetary gear-set from thingiverse. It is a unique gear-set and while I am not sure where it can be used (thanks to my lack of engineering knowledge), I’m sure it’s spatial structure (or other iterations of its structure) will have uses in many areas. Learning about the gear-set also fell in place with the theme of the session – learning through making. Although the only object we made in class was our group logo, we still managed to learn how a gear-set works by almost making.

Dr. Peppler‘s talk on how new technologies are enabling completely new and fun forms of education, albeit very informational,made me wish that I was born post 2000 and also left me feeling old.  Another interesting aspect of the session was my group’s name and logo. My teammates are Jill and Lin. My first thought was Jill-Lin aka Chillin, but upon realizing that my name wouldn’t be a part of it, we just decided to go with JKL, they’re placed conveniently in order on QWERTY keyboards and also in the universal English alphabetical sequence!

For my four interesting objects, here you go:

  1. Combatit – A cool fusion between a Counter-Strike video game weapon and a comb!
  2. Pulp Fiction coasters – Being a Quentin Tarantino fan, these just have to be printed by me soon.
  3. The 10 Cent Flashlight – Just an example of how AM will be a game changer in the basic consumer goods industry.
  4. Glasses Holder – Just how cool would it be to place your glasses on this before you go to bed everyday.