Racing Gloves

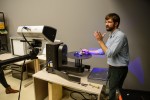
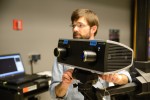
We were already well into the first month of class, and I still couldn’t decide what I was going to do my semester long project about. Then Vishal told us we were taking a field trip to the Beckman Institute of Advanced Science and Technology, with the assignment of bringing an object to 3D scan. I racked my brain for a while trying to come up with an object that was interesting and maybe held potential to be turned into something more.
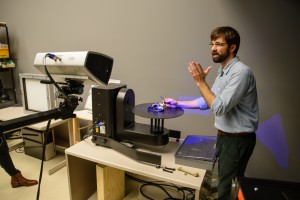
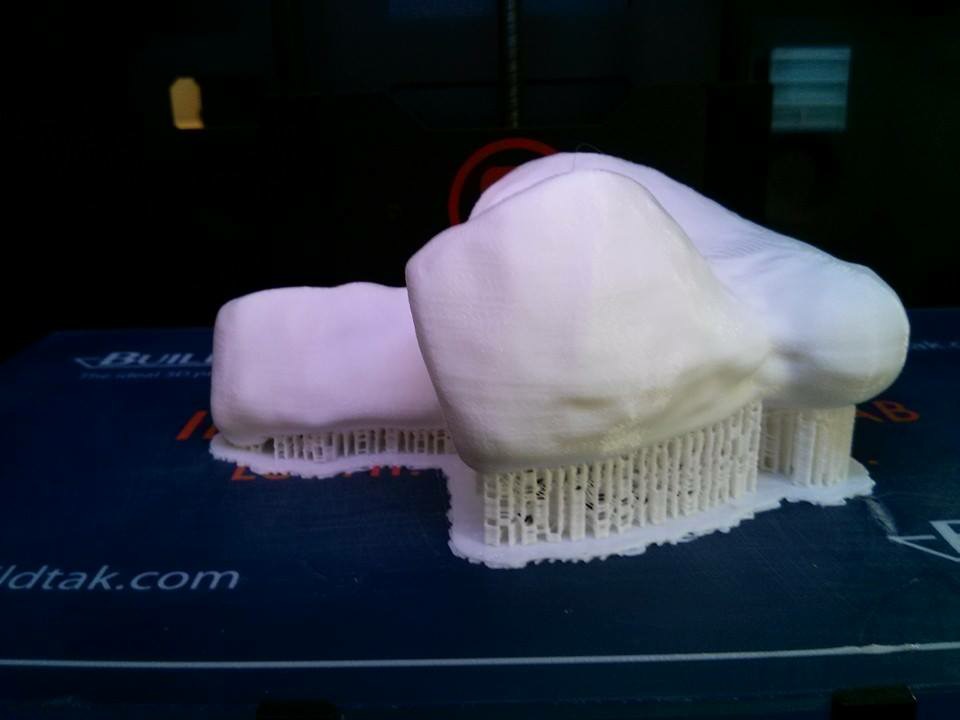
2015-03-03 3D Scanning - 5784Then later, at track practice, my coach suggested trying to scan one of the handmade gloves we use to race. Usually the gloves take hours and hours to make- custom fit for each racer, not to mention their 350.00 dollar price tag. One pair will last a long time, but since they are so unique they can never be exactly duplicated. This sounded like the perfect kind of item to try and scan, because having a 3D model that you could print over and over again would open up many possibilities.

Sebastian and Mark were also interested in this project, so the three of us set out to try and make the world’s first 3D printed wheelchair racing glove!
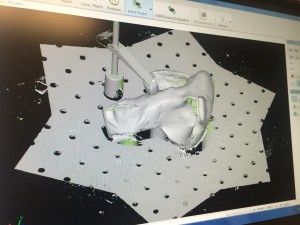
IMG_7091After Travis (from the Vis Lab over at Beckman) completed the scan and cleaned up the glove file, we were off to work! We were incredibly lucky and barely had to manipulate the design at all in Geomagic because the scanner was so precise. Surprisingly, the very first time we tried to print our glove, it worked! Afterwards, when trying to make duplicates, we had a lot of trouble positioning it correctly on the raft so print would not fail, but eventually we figured out the best angle and direction to place the glove in order for the prints to continuously be successful.

IMG_7192


Once we had our first printed glove, we got to work testing it. I added the additional materials needed to generate grip when pushing at high speeds- some suede and rubber- and encountered a little trouble getting these materials to stick to a different kind of plastic than I was accustomed to.
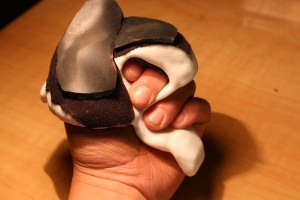
IMG_0384Once I discovered that using contact cement was the best method, I started putting the glove to good use! We were very excited that the glove held up after just using it for one training run, but we’re happy to announce that the glove is still working perfectly after over 200 miles of force and exertion.
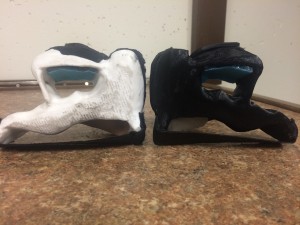
 

IMG_7456The next step was mirroring the 3D glove file in order to print another glove for my right hand.  Once we figured that out, I added the same extra materials and used the gloves to race in the 2015 Boston Marathon. They worked beautifully!


The things that make this project so successful though were all of the benefits we discovered after the prints proved their durability. For one thing, the plastic that we printed with is incredibly lightweight. My original gloves weighed 174 grams each, and the printed glove only weighs 70 grams. It may not sound like much, but this, I’ve noticed, makes a significant difference when using the gloves to climb hills and push at high speeds. Their lightweight quality also aids in injury prevention. It is common among wheelchair racers to get tendonitis in the wrist from overuse, but the 100 grams that the printed gloves shave off put less stress on the tendons and hopefully decrease the risk of injury. The cost is another great advantage! To print a single glove cost only 4 dollars, that’s a lot of green left in your pocket from the original pair costing a minimum of 300 dollars. The replicability is probably the greatest benefit here though. The fact that you could print multiple pairs of gloves for different weather conditions could be a huge advantage when racing. Some of the world’s best athletes lose important races because they weren’t prepared for the conditions, whether it was rain, humidity, or even snow. Now that we found a way to print the perfectly fitting glove, it is possible to make many, many varieties.

Our next step is to help everyone on the University of Illinois’ Wheelchair Racing team to get their own pair of printed gloves! We’ve started scanning more and more pairs and the team is getting excited. Eventually we would like to discover a process to create a pair of gloves from scratch- just by scanning an athlete’s hand. Over the summer we will continue to explore different methods so potentially people all across the world could buy a pair by simply sending us a file of their scanned hand.

We are very excited to continue pursuing this project, and hope to see it keep growing into the future! The uses for 3D scanning and printing are endless, and it is so thrilling to be a part of discovering why!

Arielle, Mark, Sebastian

My DigitalMaking Experience

In January 2015 I came to the US and to the University of Illinois to study abroad for one semester. Back home I had to chose several classes. Digital Making was of course not one of them, because nobody had told me before about it. However, Database Design, a class also offered by Vishal, was one of them. During the first class of Database he mentioned the MakerLab, the worlds first 3d printing lab at a Business College. I was impressed, I’ve heard a lot about 3d printing before, but I haven’t seen a printer in real life before. Of course, there are many 3d printers in Vienna as well. There are some at the FabLab, at the Technical University, and so on… Nevertheless, that day Vishal also mentioned his course DigitalMaking! So I asked Vishal if I could participate and I also asked him if I would receive credits for that course. I thought: „An interesting and fun class, that’s not something you get credits for!“ But we did!

First of all, I want to say what I expected this class to be – and what it was not about. I expected this class to be all about 3d printing. Isn’t it taught at the MakerLab?
Of course, this course was about 3d printing, but that was only one piece. It is a lot more and therefore you don’t have to be afraid to be locked into the MakerLab the whole semester! 🙂 Let me organize all facilities as a list

Truly, I can say that I have learned a lot in this course! We started by designing simple things on Tinkercad, moved on to scanning and printing our own head. We thought about finding solutions for several problems and we later started using the powerful tool Fusion 360. We used a more precise 3d scanner and of course printed our scan. We „printed“ by stitching and engraved paper and wood, and we learned about the small but powerful Arduionos.

But what was this all for? For me, it was a hands on experience on several different tools. I think Vishal designed this course to show us all these tools to use them in future. It is not possible to try every tool in detail in class, but you are able to get to know them.

So I got to know all these different tools, and I can tell you, I will use all of them in future! I have plans to buy an Arduino, a temperature sensor and an Wifi Add-On like this to connect it to IFTTT and my Nest Thermostat. I have also several ideas of things I wanted to design and 3d-print. As I am going home in a few weeks, I will not be able to use the facilities at UIUC but I’m looking forward to visiting similar facilities at Vienna!

My Semester of Digital Making

I have learned so much about digital making this semester! I’m going to break down some of the main things I learned, then talk about what this experience means to me as well as what I plan to use this knowledge for in the future.

What I Learned:

3D Printing and Scanning
2015-02-10 17.27.40

One of the first things I learned this semester was 3D printing and scanning, which makes sense since our class was held in the Maker Lab. We were introduced to the many sources to find 3D printable files, the software to edit files, and then how to print the files.

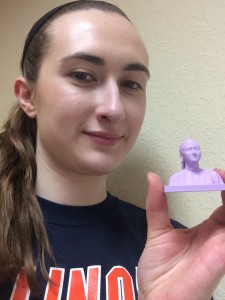
The first thing I edited and printed myself…was myself! We learned how to use a scanner that was very easy to use, then got to edit it however we liked. I went with a simple stand to create a bust of myself.

I later printed many objects including detailed jewelry, a candle holder, and a brain.

Fusion 360
Screen Shot 2015-02-17 at 4.52.55 PM

The next thing I learned about in class was how to create 3D objects in a software called Fusion 360. It is a way to make 3D designs into almost anything imaginable. It is quite complicated to learn, but once you understand some of the basic functions the possibilities are endless.

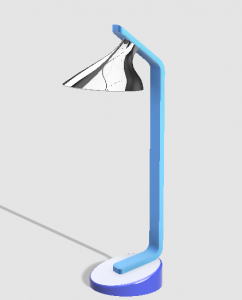
I followed the in-class tutorial to create a lamp and also tried to make some other objects outside of class including headphones. I’m not sure I will be using Fusion 360 beyond this semester, but I know it is available to me if I have a use for it.

InkScape (for laser engraving and vinyl cutting)

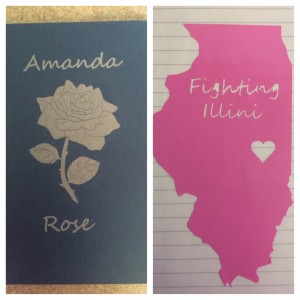
2015-03-31 17.45.49The first week in the Fab Lab I was introduced to InkScape and learned how to edit images in order to create amazing things. I first used a laser cutter to engrave a journal. I also used an electronic cutter to cut out a vinyl sticker.

I had a lot of fun making both of these items. I was able to use InkScape in other projects as well this semester including the digital embroidery patch below.

Arduino
2015-04-07 15.16.09

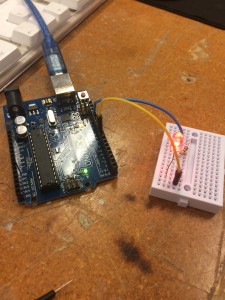
The second week in the Fab Lab I got to learn about Arduinos. I used the Arduino Uno and we were given basic items to get started on our learning. I followed online tutorials to run programs like the basic blink and fade, then added in an LED.

I also got to learn about different types of sensors that can be used with Arduinos. I was able to use this in the CU Make-a-thon in my group project for the semester to create a pillbox for the elderly that senses when you take a pill out of the container.

Digital Embroidery

2015-04-21 17.16.24

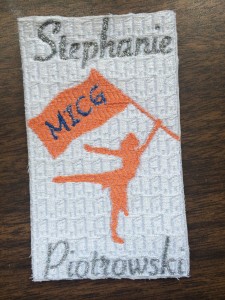
The last week in the Fab Lab I learned about digital embroidery. I had created a design in InkScape in preparation for class because I wanted to make a gift for my roommate’s birthday, so I got to focus on learning how the process works rather than designing.

I chose different patterns for each part of the design then threaded the sewing machine and watched the magic happen. I was amazed by how accurate the stitches were.

This project, as well as all of the others mentioned above, can be found with more details on my previous blog posts: http://publish.illinois.edu/digitalmaking/author/arkowal2illinois-edu/

Take Aways:

This class taught me so much about the world of digital making. I am very grateful for the experience and I wish I could take this class again next semester.

I started in the class having no idea what I was getting myself into. I didn’t know anything about 3D printing or other digital making technologies. Also, I didn’t know about the other digital making spaces that are around campus. I was amazed from all of the information I learned in the first few class sessions. The scope of the technology that exists is so far beyond what I initially imagined.

Now that I have completed the course I can say that I am much more aware of what is available to me and have a better insight into the digital making world. And I have loved sharing my learning with my friends and family.

I plan to return to the Maker Lab and the Fab Lab next semester to teach my sister (an incoming Freshman) all about what I have learned this semester. Hopefully we can learn even more together. I look forward to exploring deeper into the technologies I learned about and beyond. I can’t wait to see all the projects that can come out of it!

I encourage everyone to try out digital making in any or all of its forms because the technology is useful to anyone no matter the age, gender, ethnicity, or interests. The digital making world welcomes all makers, no experience necessary!

Any questions about my projects or experiences in this class can be directed to my email arkowal2@illinois.edu or message me on twitter @ARoseK10.

Struggling Against the Grain: Fusion 360

I am an extremely inexperienced designer. My world is in finance and accounting; money, not models. Due to this, I had never worked with such a power CAD or really any software even remotely close to the power of Fusion 360. Because of this, I ran into several issues along the way to creating my design.

With power comes complexity, and most of this CAD’s functions were beyond my simple design capabilities. With that being said, I could tell even from a beginners point of view that this program could be used to create extremely intricate designs. However, all I wanted to do was create a lamp.

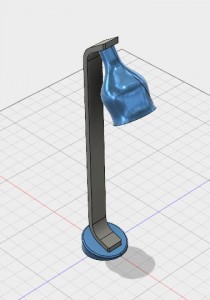
NHB Lamp

Here’s my lamp. It’s rudimentary and doesn’t look great. Yet, this design showed me the power of the program that we were using. If you scroll down this page, you will see many other lamps that look similar to this one. This is because we all followed the same basic design frame work in order to create this project. Yet, Fusion 360’s “Create Form” function allowed us all to personalize our projects to our individual whims, showing that relative beginners can use this tool to create vastly differentiated designs.

As I continue to work with Fusion 360, I am learning how to control and shortcut my way through this CAD. This program has had a faster learning curve than other new software I have tried in any regard. While I may struggle now, I know that as I continue working with this software, it will begin working for me.

Update: It gets better, I swear!

After messing around with Fusion 360, I am becoming more comfortable with the software. By using the basic shapes and functions within the program, I am able to create simple designs that I can use.

Keys Holder

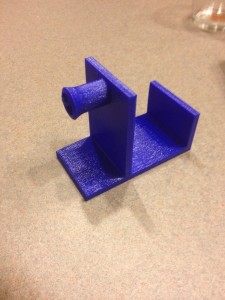
Here is my first print using Fusion 360. I was able to make it by drawing planes and then extruding out the heights. Finally, I was able to add the nodule at the top by using the create shape function and then thickening it out.

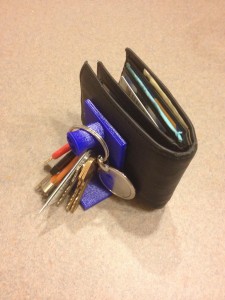
Demo

As you can see, its purpose is to be a hub to hold my wallet and keys in my apartment when its not in my pocket. One downside is that in order to print, the nodule required supports. This causes the backside to be rough without the supports. In the future I will learn to design to not need that measure.

In conclusion, I now feel comfortable using Fusion 360 in order to create basic designs. Some of the more intricate tools are still beyond me, but I know that now I will be able to learn to create more complex models.

Digital making log: Week 4

This week we utilized scanning equipment to scan our heads for 3D printing. We had classmates scan our faces onto a cloud, and then we took those scans and scaled them in our modeling software.

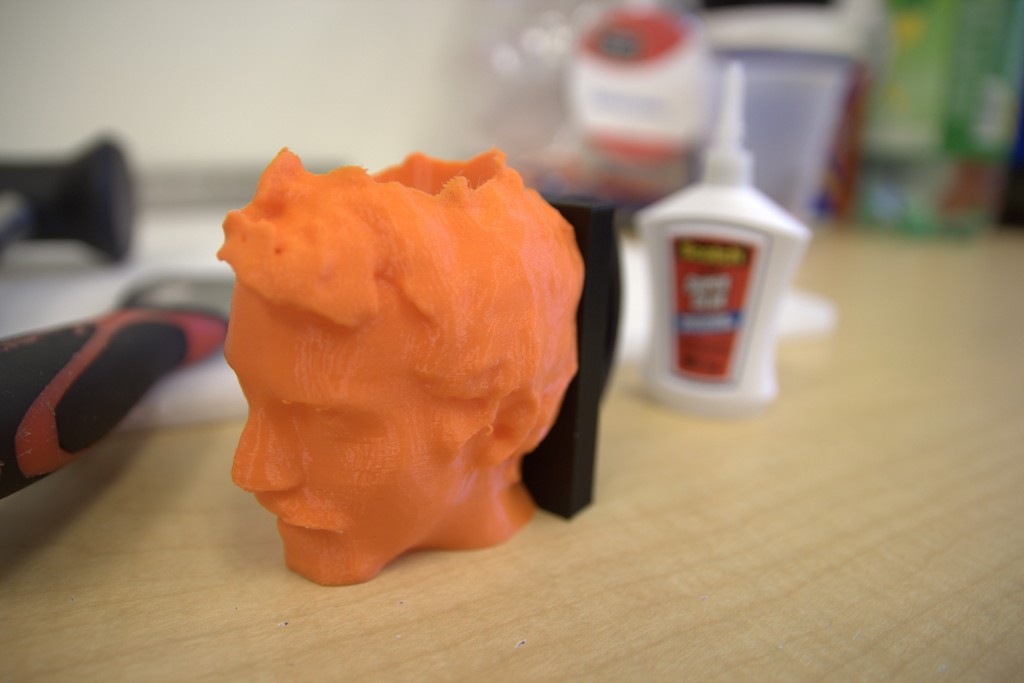
From there we could do anything to our 3D mugs. We could put hats on, type our names into our foreheads – anything. I wanted to go the practical route and inserted a hole into my head, making it a fine mug.

From there, I flattened the back-side of my head and printed two additional components: a plank and a handle. When all three components were printed, I simply glued it together. Check it out:

IMG_0070


Of course, it probably isn’t safe to drink out of this, so I think I’ll just use it as a coin cup for now.

What I’ve learned

This new print has propelled me farther than I was before Not only can I print something, but I now also can print multiple things separately as long as they’re scaled to fit together just right.

I also know how to use scanning equipment, so if I ever want to, I can get an app and accessory for my roommates iPad and start doing these scans myself!

With this knowledge in my backpocket, I’m thinking I can continue to grow, most importantly, in learning how to model well.

I may never be able to produce something as complex as a face without the assistance of a scanner, but maybe I can get close enough.

Week 4 – Reflections

This week was primarily occupied by creating our first 3D print. We spent the majority of the period scanning our faces, cleaning up the scans, and printing the resulting model. This was our first real experience working with the MakerBots and it wasn’t without a hitch. Leveling the platform, something that should have proved a relatively simple process, turned out to be more difficult for me than anticipated. Despite these minor hiccups, I was able to successfully begin my print by the end of class and be able to pick it up the next day.

The first thing I learnt from this experience with the MakerBot is some of the devices drawbacks. While 3D printing is a wonderful tool, the physical limitations of the device can get in the way of the printing of the object. When printing, the plastic outlining my chin and nose drooped slightly. This shows how in order to accurately print objects with that sharp of oblique angles, the MakerBot would need adequate supports in order to allow the MakerBot to accurately corner and support these objects.

I also learnt a valuable lesson in the beginnings of 3D design. In order to learn best of how to work with a thing, its best to work with something you already know fairly well. And what do people know better than their own face? By working with a familiar object, a person can familiarize themselves with the software they are working in, as well as the limitations of the hardware themselves. This learning experience can help inform on how to better improve objects that someone may not be as comfortable working with, such as an object that may only exist in the designers mind.

Going into the future, I will keep this experience in mind with designing my own objects. The complexity of the model is no impediment to the physical manifestation to the object. However, there are some aspects of design that the printer cannot handle. I think going into the future, I will focus on working from objects that I have experience with objects on Thingiverse that others have designed.

By working with other objects, I can find how I can put my own personal spin on these ideas and make them work for me.


–Noah Baird

3D Printing and Scanning

Design Process

My first 3D print was successful! This week we got to dive even deeper into 3D printing and actually make a model. Ryan gave a brief introduction about the printing/scanning process and its components such as file types and slicer programs.

First, we needed a scan of the object that we wanted to print using either the iSense for iPad scanner—which took a bit longer—or the handheld Sense scanner connected to the computer. I may not have had the magic touch using the Sense scanner, but the scan came out really well. After a bit of editing the model was ready for “tinkering.”

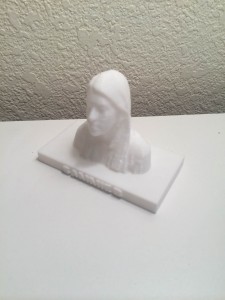
For my model, I just added a platform to etch my name in and tweaked the size and position of the bust.

IMG_1117

Significance

I really enjoyed this week’s class because it was my first time ever interacting directly with a 3D printer and scanner. I see myself keeping the model so I could one day show my grandchildren — and who knows where we’ll be by then. As this type of technology is growing, it is also important to know how to use it and apply it so that when it does become a mainstream consumer product, we will already be familiarized with it.

What’s to Come Next

It’s clear that 3D printing is still in the beginning stages of development. There are about 2 billion PCs and only 200,000 3D printers as said by Aric Rindfleisch, the executive director of the Illinois MakerLab. We experienced some printer malfunction during class, such as the head getting clogged. Human error is very minimal as the printers are very user-friendly.

There are also online tutorials to help the newcomers 3D printing (i.e. me) that go through loading and unloading filament, leveling the build platform, and slicing the model after the initial scan. This is all new and exciting for me and I look forward to next week’s class!

I’ve posted a resource about the MakerBot printers used in class for added information or helpful tips. Check it out here.

3d scanning and printing in black-and-white

For me, it’s quite hard to belive that 3d printing is still in the “black-and-white-age”. It was on 1. January, 1969 when the first television programm was broadcasted in color! Before that time, did people image that there could exist any “upgrade” to black-and-white TVs?

Aric Rindfleisch Executive Director of the Illinois MakerLab made clear, that 3d printing is still in its infancy stages. We cannot yet imagine what we will print in 2025, or 2035. Do we still have to go to a grocery store to buy food or will every family have a printer in their kitchen?

scan my head

In any case, I was facinated how easy it was to scan ourselves within minutes! Yes, there occured some problems so that we had to rerun our scans, however we really did not need to spend more than 5 minutes per scan!

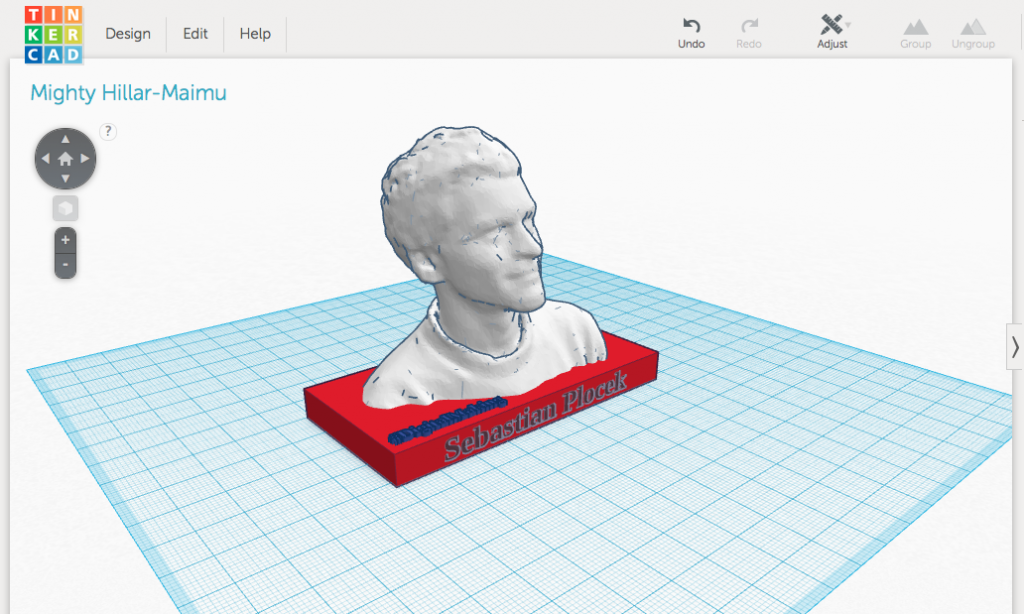
Next, we imported our scans to TINKERCAD and … well see the picture below.

My head virtually at tinkercad

me in tinkercad

print my head

The printing itself was not that successful. The reason was a problem with the printer. He unfortunately stopped grabbing new material. I’ll repat my print another time. For now, watch my 10-seconds black-and-white 3d printing video

HCD with DFA

This week’s class was all about HCD. Human-centered design focusses on the “needs, wants, and limitations of end users of a product” [1] The Design for America Team was invited to make a workshop about HCD, to improve our skills to see problems, find out humans needs and find solutions to solve these problems.

We tried to design solutions to stop distracted driving. One week before class, I saw this video about an Android application that was introduced in Australia. It was quite not to keep their ideas in mind, while we tried to think about our own ideas. 🙂

I’ve learned about learning at individual as well as on organizational learning within the last year. I really like the approach to focus on human needs to define problems. In our workshop we tried to go similar ways. We tried not to find solutions at the beginning but after two hours of different brainstorming phases. Then we started prototyping our idea.

[1] Wikipedia contributors, “User-centered design,” Wikipedia, The Free Encyclopedia, http://en.wikipedia.org/w/index.php?title=User-centered_design&oldid=644383288 (accessed February 8, 2015).

And what’s about 3d printing?

In class we did not print anything this week, nevertheless, I came to the lab this week to print an updated version of my SENOL cube. I made some corrections (see problems here) and “upgraded” the size.

In addition I started printing the OnePlus One dock. However, MakerBot hasn’t finished printing on friday, so I haven’t seen the outcome yet.

Week 2: Printing Plans and Class in Review

So far in Digital Making Seminar, we have spent most of our time learning about 3D printing (or, as we learned from Senvol in week 1, additive manufacturing). Though I have a bit of experience in this area from working on 3D modeling projects in my GE 101: Engineering Graphics and Design course and from independent work in various maker lab workshops, our first two class sessions have taught me a lot about the reasons why we would want to use 3D printing (aside from the obvious “It’s super cool!” answer) and helped me connect with tons of online resources for finding ideas of things to print. Looking more deeply into the different online resources we explored in class has made me even more excited about what things I’m going to have a chance to make this semester and has helped me come up with more ideas for what I might be able to model. Some of my favorites, along with the modifications I would make to them (because customization is what 3D printings all about) include the following:

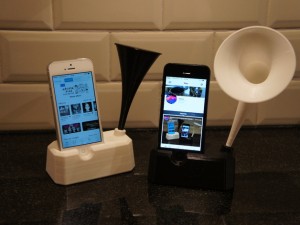
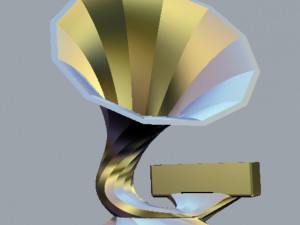
DSC04259_preview_featuredspeaker2_preview_featured

IPhone Stand + Speaker (http://www.thingiverse.com/thing:175454)

This stand and speaker set would be great to have around to use as a stylish and power free way to amplify music on my IPhone. Instead of using the original horn (which in my opinion is a bit plain) I’d love to use something more like this (http://www.thingiverse.com/thing:544525) that I could fit into the stand.

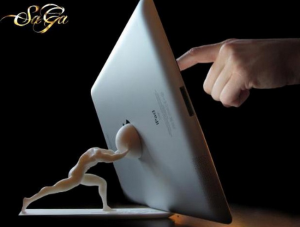
desktop-1411163272

IPad Stand (http://www.viralnova.com/crazy-3d-printing/)

Adding to my 3D printed stand collection, I’d love to have this little guy printed for my IPad to use when doing things like watching movies. Though this version looks super cool, I think I might turn the little half circle stand piece the man is holding into a longer bar to make the piece a bit more supportive.

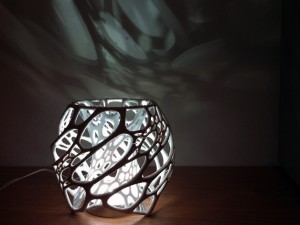
cellularLamp_preview_featured

Cellular Lamp (http://www.thingiverse.com/thing:19104)

I originally saw this lamp in the BIF Maker Lab and then ran across it again while browsing Thingiverse. I like how they use it more like a statue in the Lab, but would probably use it for its lampshade purpose in my own room. I’d customize it by printing it a lot bigger than the model they have online so I could fit a light bulb inside it and have it reflect cool shadows all around my room.

IMG_5410

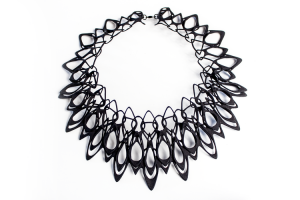
Stria Necklace (http://www.jennywulace.com/shop/stria-necklace)

This bold 3D printed necklace would be a great piece to wear out, and I’m sure would be a great conversation starter at tech related events. I wouldn’t change much about the actual design of this one, but I think it would be really cool to use the silver leafing process described in this instructable http://www.instructables.com/id/Silver-Leaf-a-3D-Print/ to make it really stand out. I might also consider designing a pair of 3D printed earrings to go with it as well.