A semester of #DigitalMaking

Before we get started, watch this video I made for the course! I think it is cool. Maybe you might too.

I am a member of the maker movement. Starting this semester, my experience with making went from zero to sixty in just a matter of days. After months of working in the hands on environments of the MakerLab and FabLab, I feel comfortable calling myself a maker!

I have always been artistically and creatively inclined. Naturally, I went into studying Information Technology! The sarcasm that might have used to exist in that last sentence has really diminished since taking this course. I’ve gotten my feet wet with software and hardware that puts the power of creation in my hands. I’ll go into detail about the skills I have been exposed to and their implications.

CAD (Computer Aided Design) and 3D Printing.

Upon entering the MakerLab for the first day, I felt like I had a good idea of what 3D printing was. I guess I always knew that the printed object had to come from some digital location, but I had never really reflected on the process itself. Then comes TinkerCad!

IMG_0093

My mom always suggested I had a whole in my head

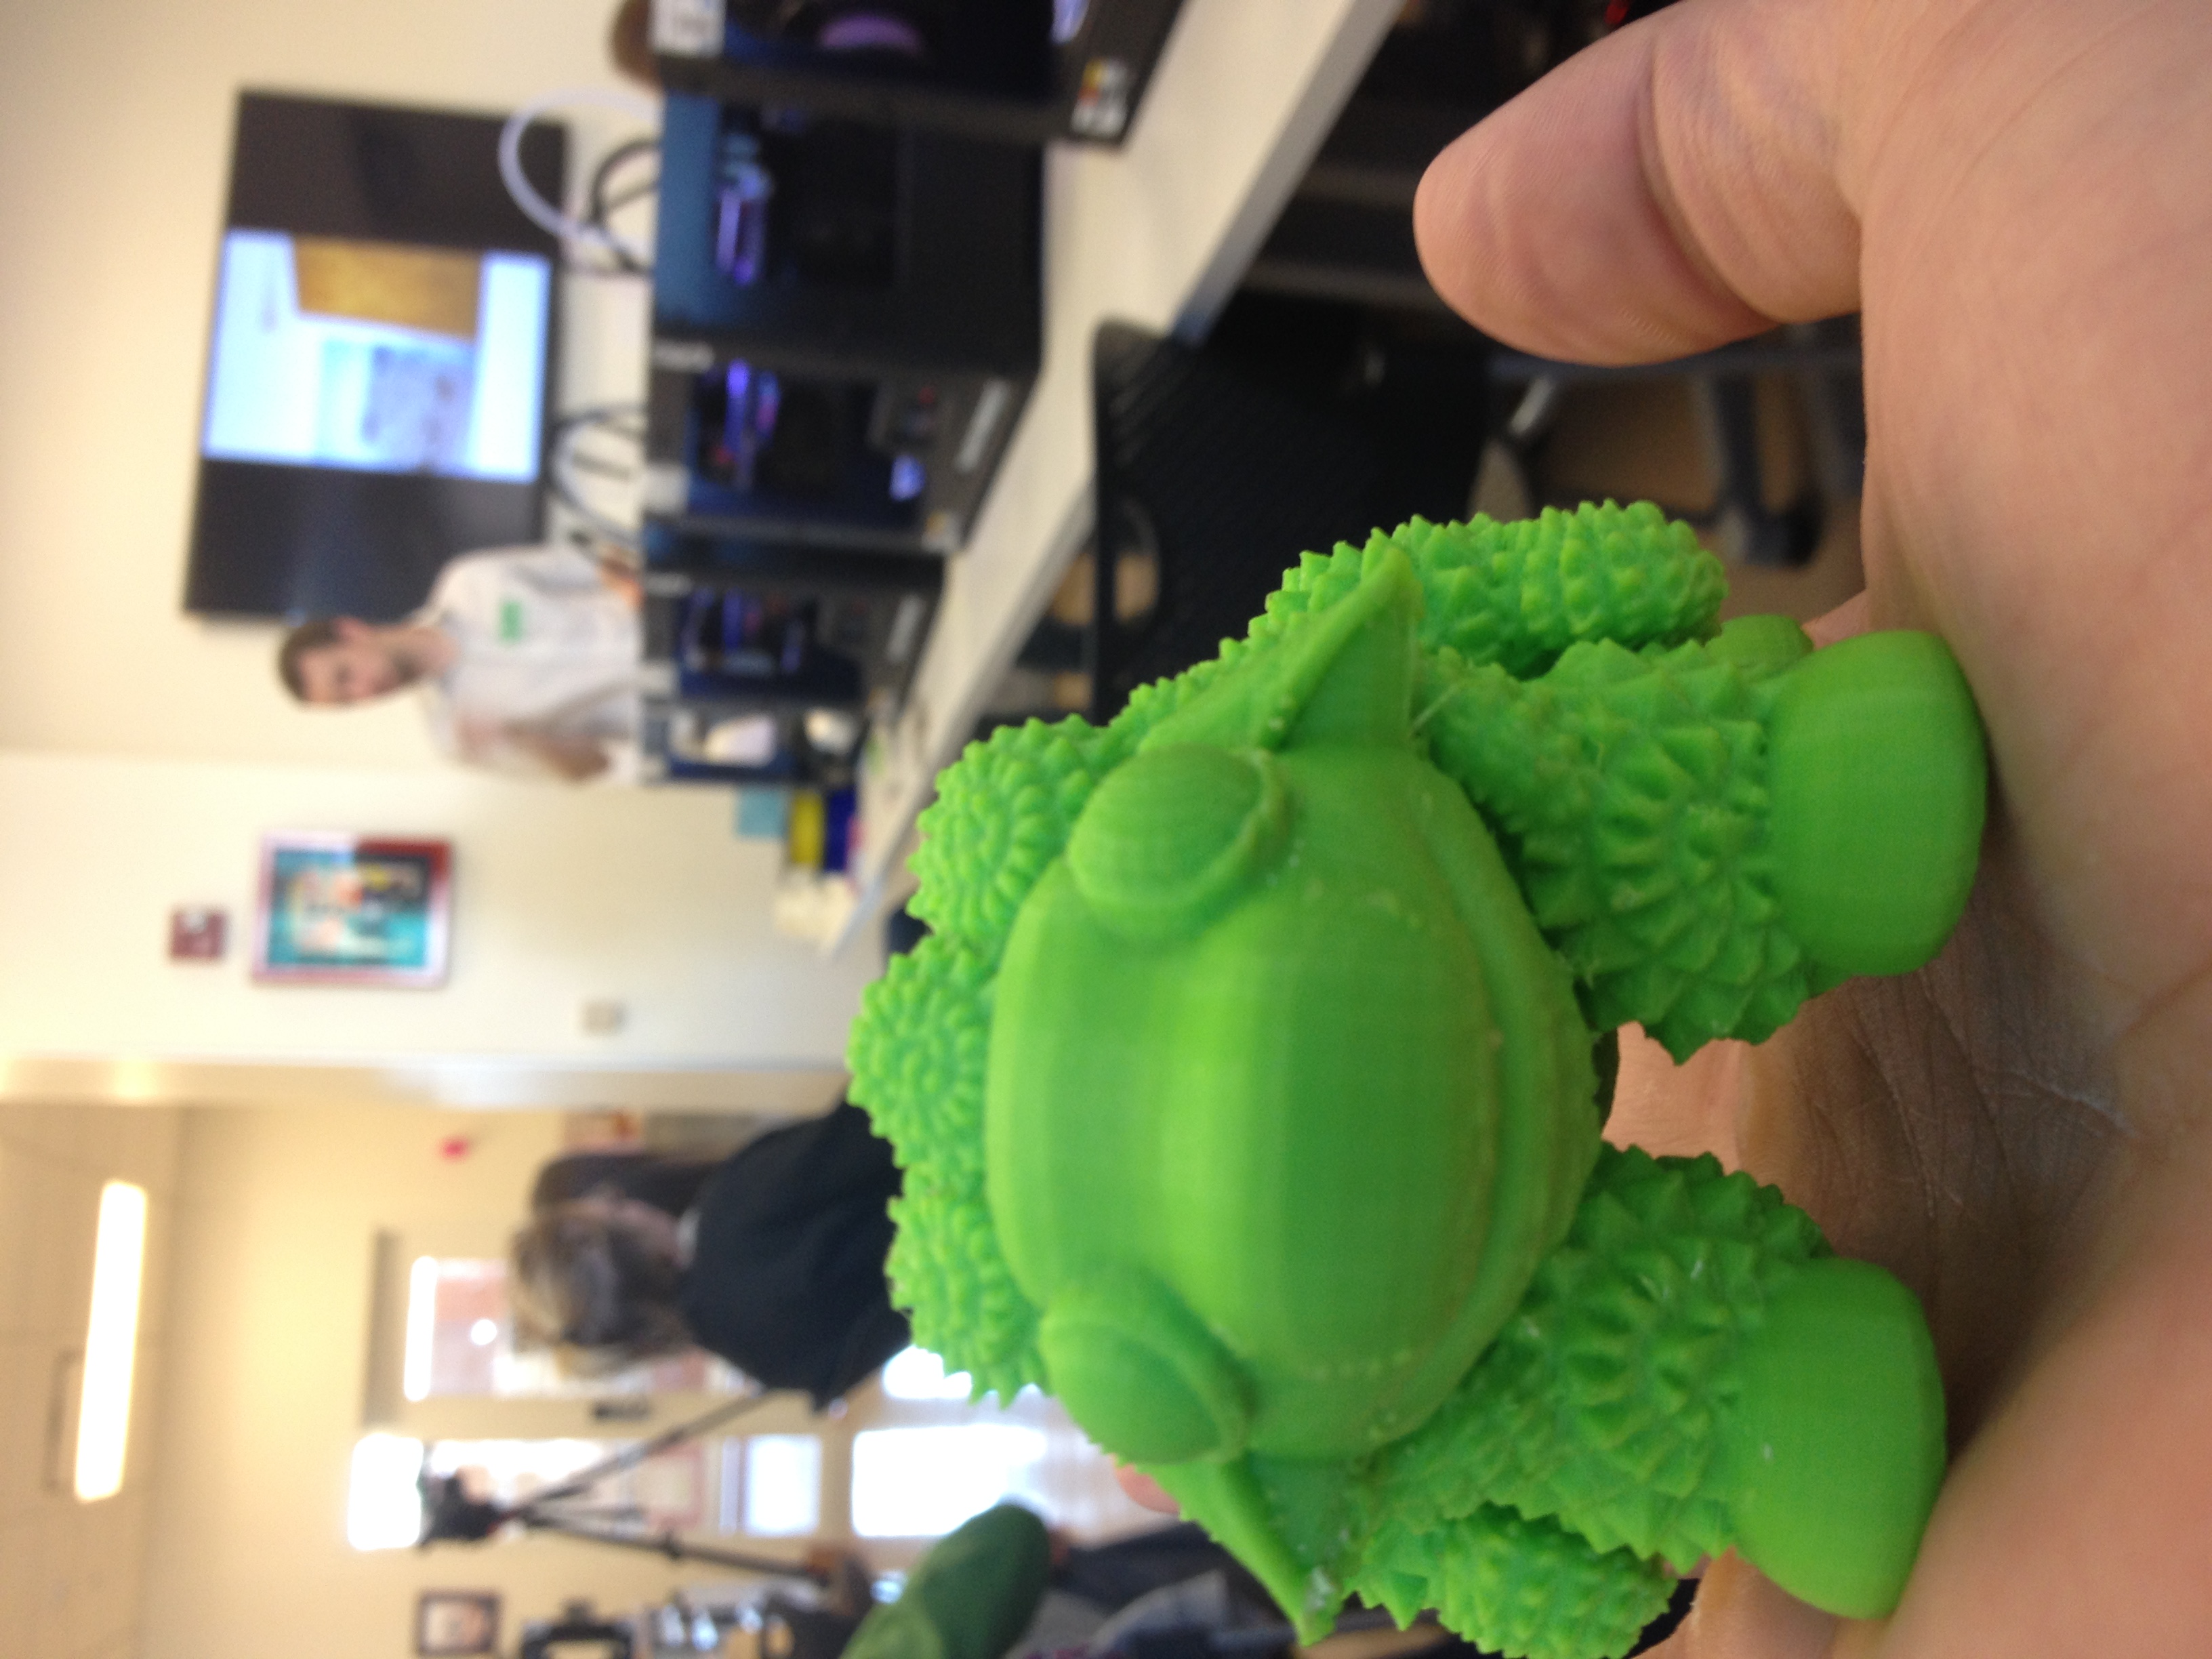
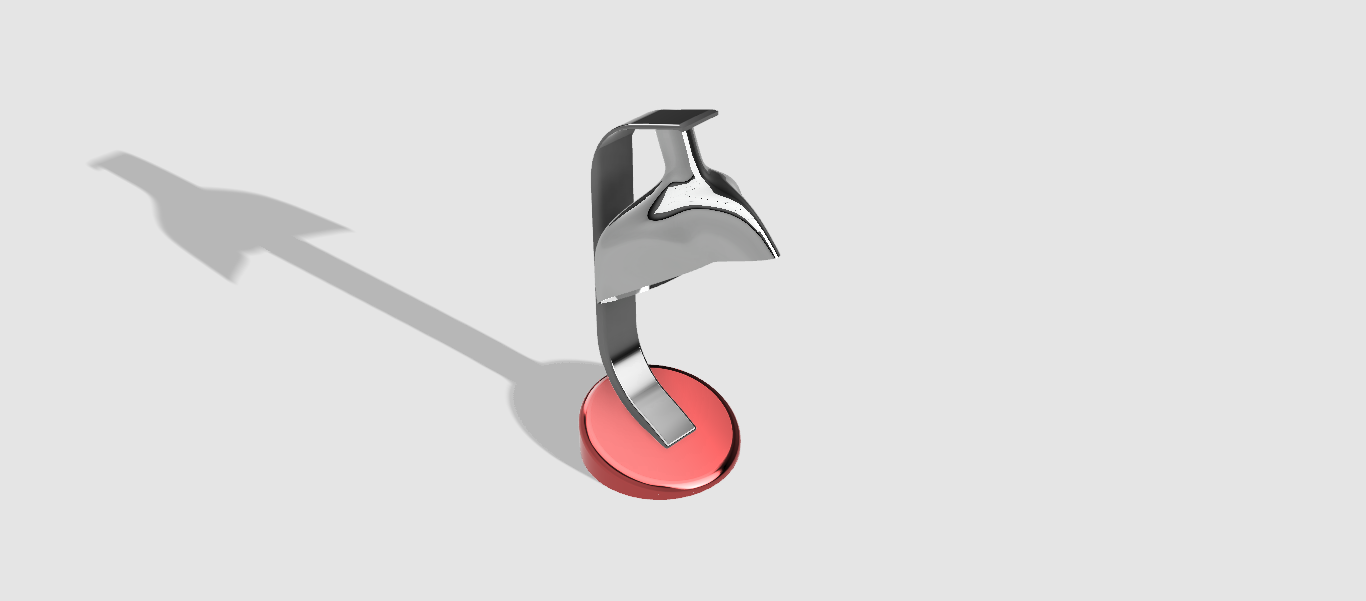
Messing around with TinkerCad (I already made a joke about “tinkering” with TinkerCad in an earlier post) opened so many doors for the me and the class right off the bat. It gave me a good concept of what CAD was and its importance to the modeling and printing processes. By significance, I learned the processes wouldn’t be possible without it. Soon After we were riding the Fusion 360 train. This time, rather than taking an existing file and manipulating it (AKA taking my face and putting a hole in it), we learned to create something out of nothing. This was awesome because it gave me a taste of what industrial designers do and how their work is now being impacted by the icnreasingly accesible world of digital making. After a session with the AutoDesk rep, I created a design of a lamp from pure imagination. The implications of this? Fast prototyping with 3D printing. Create anything with a digital model and in seconds you have the ability to print the object. I can think of a lot of employers (I am interested in Tech Consulting) who would be interested to hear that I have hands on experience with just that.

IMG_0481

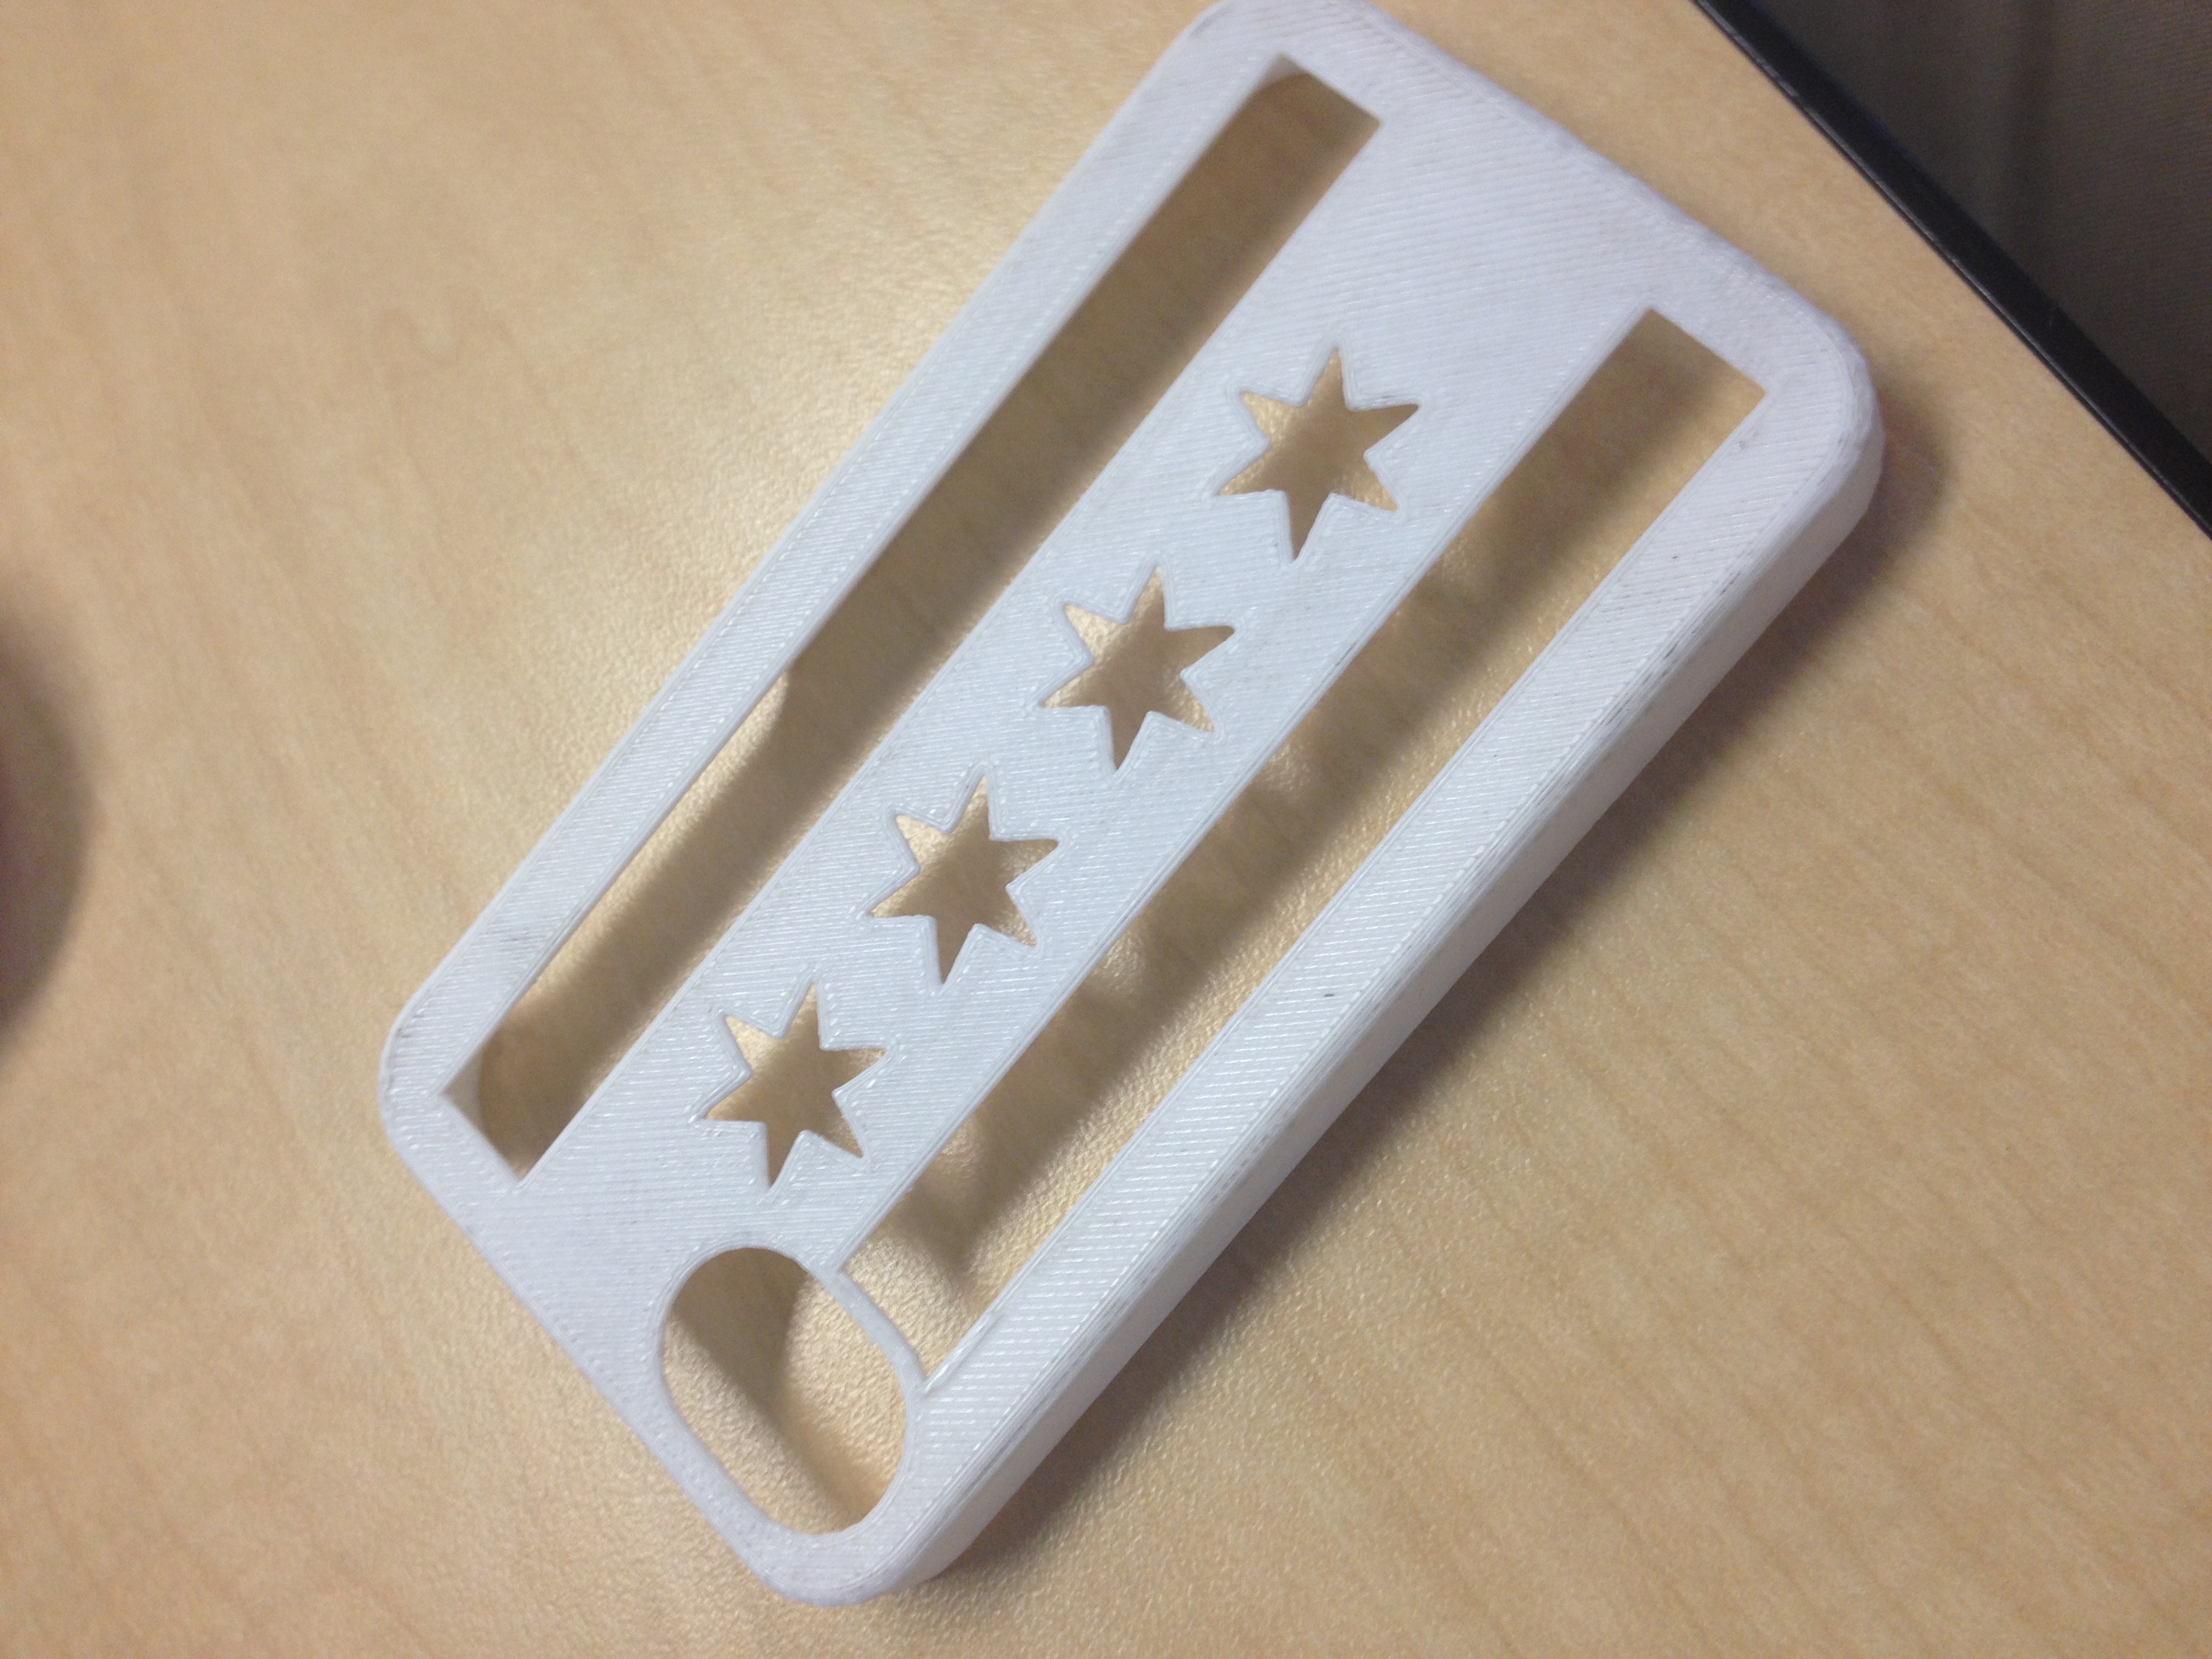
A Chicago themed phone case I printed for my iPhone

3D Scanning

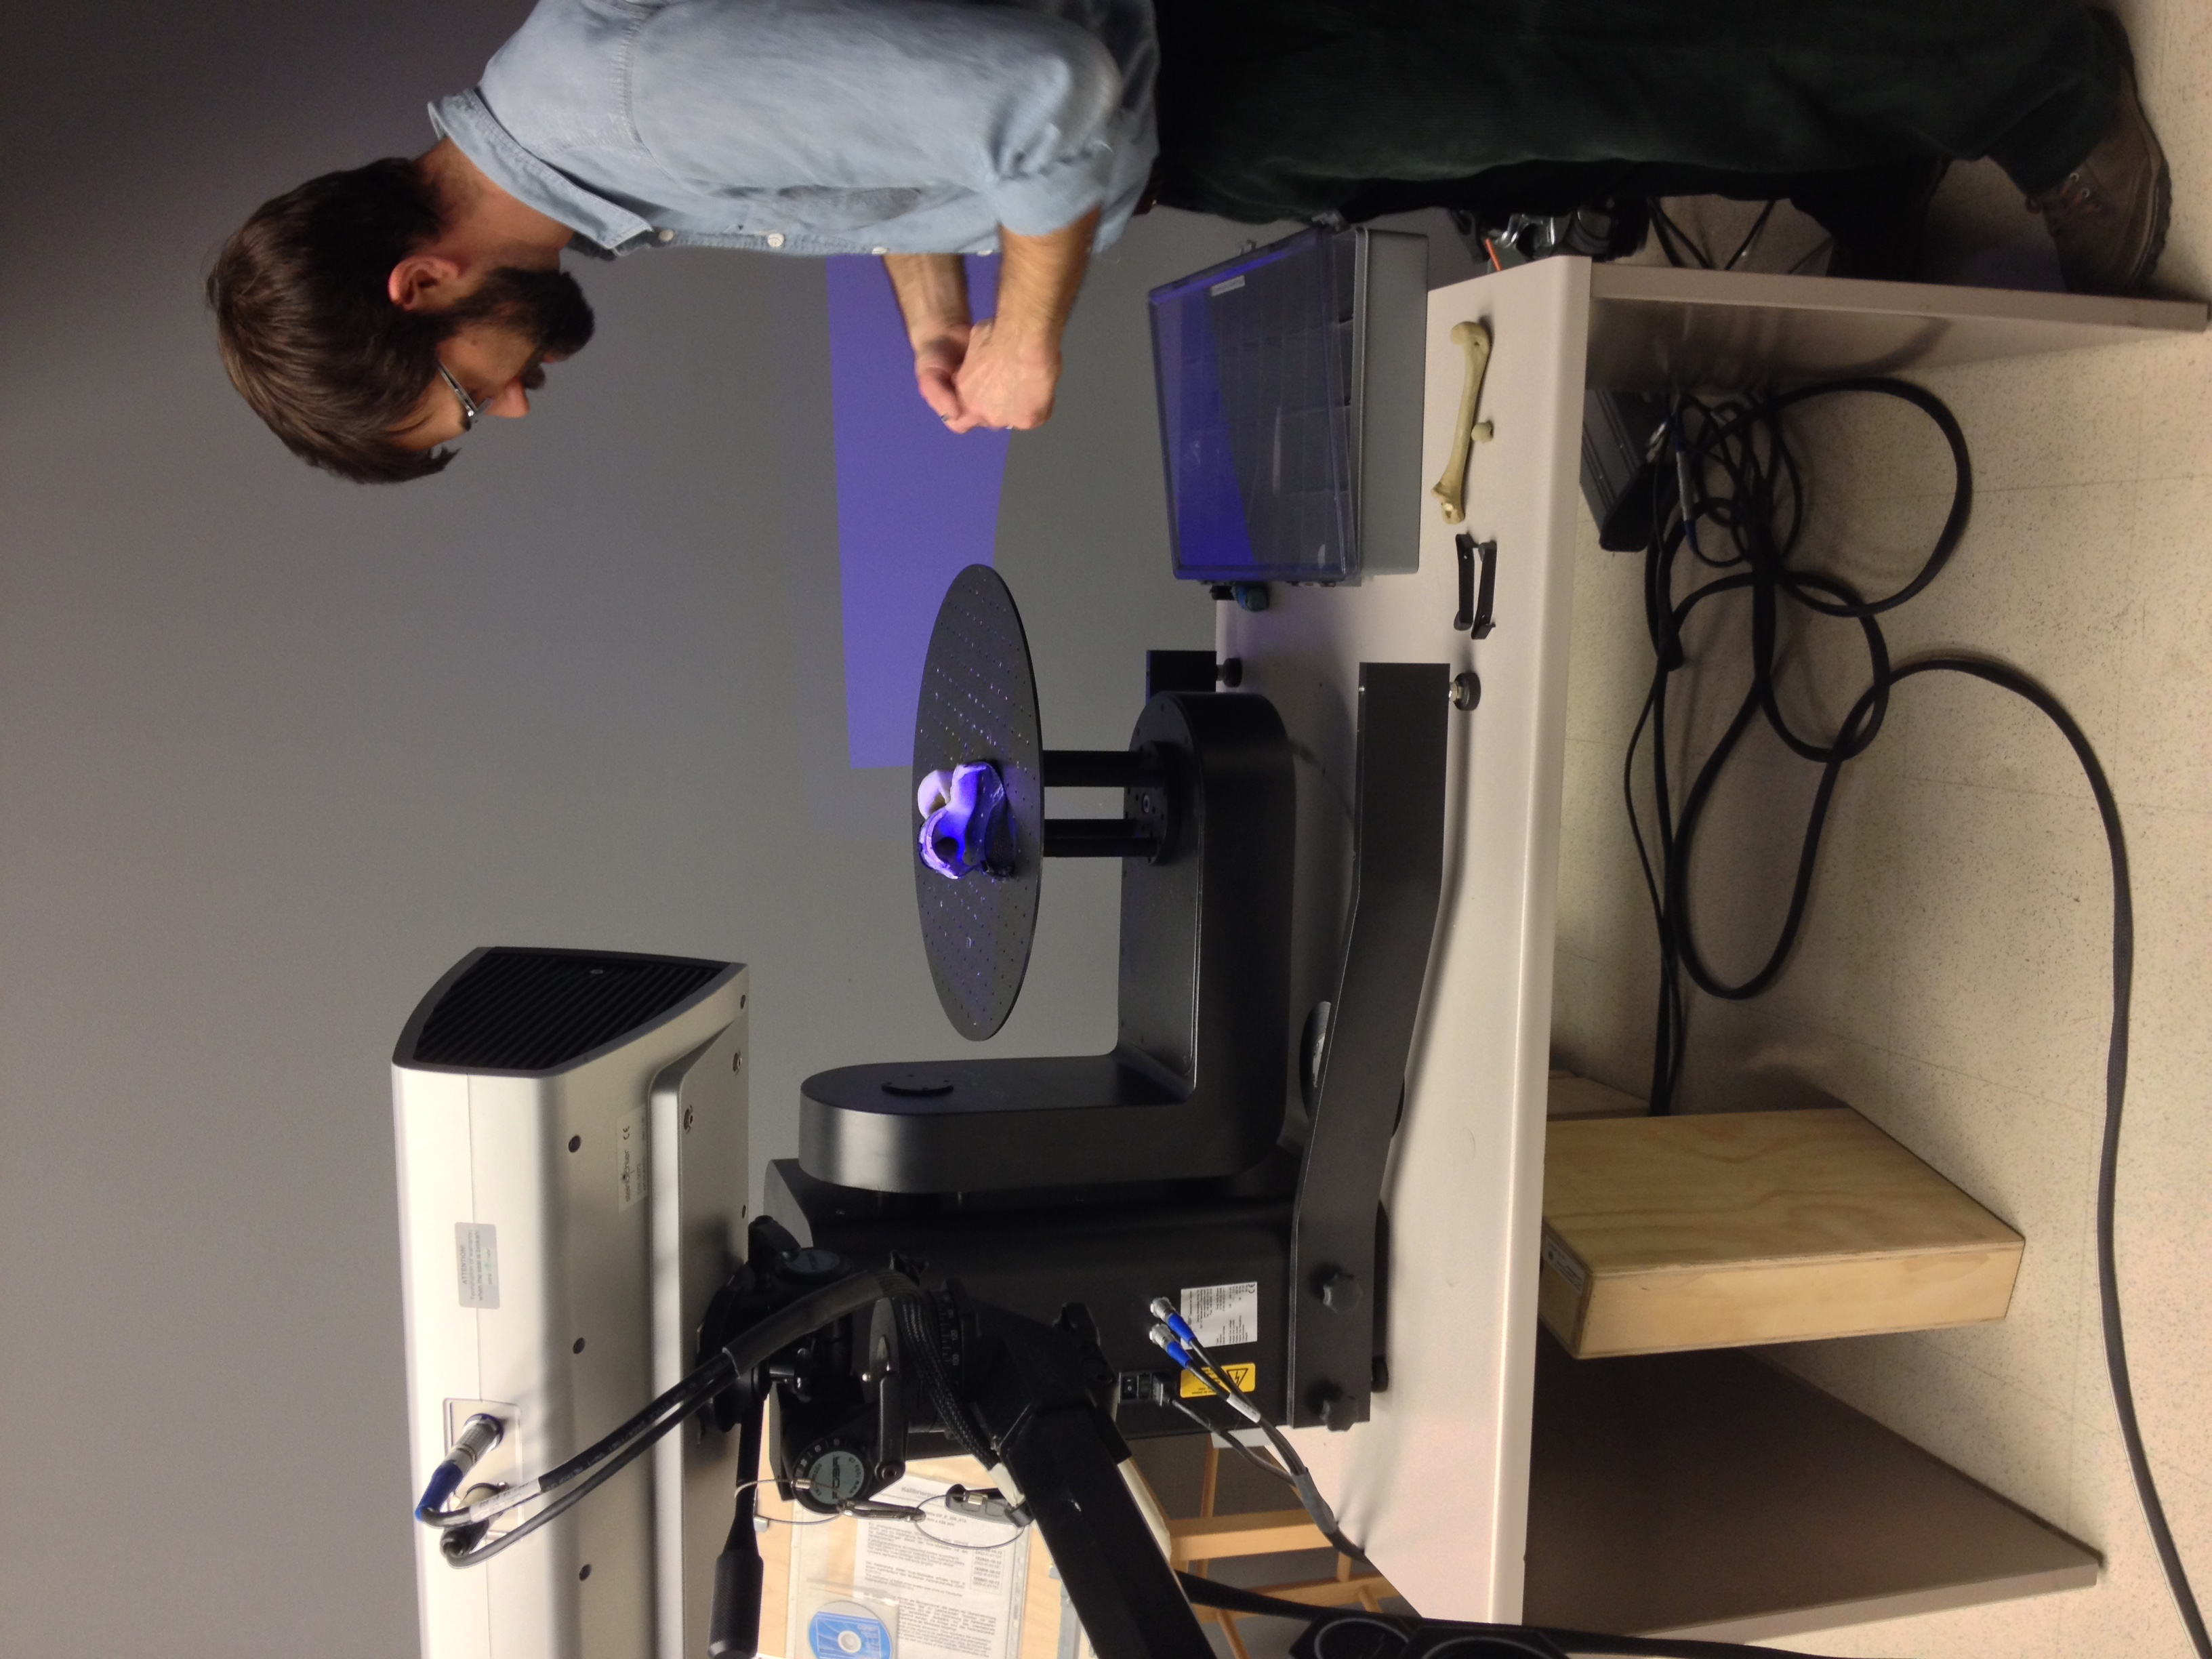
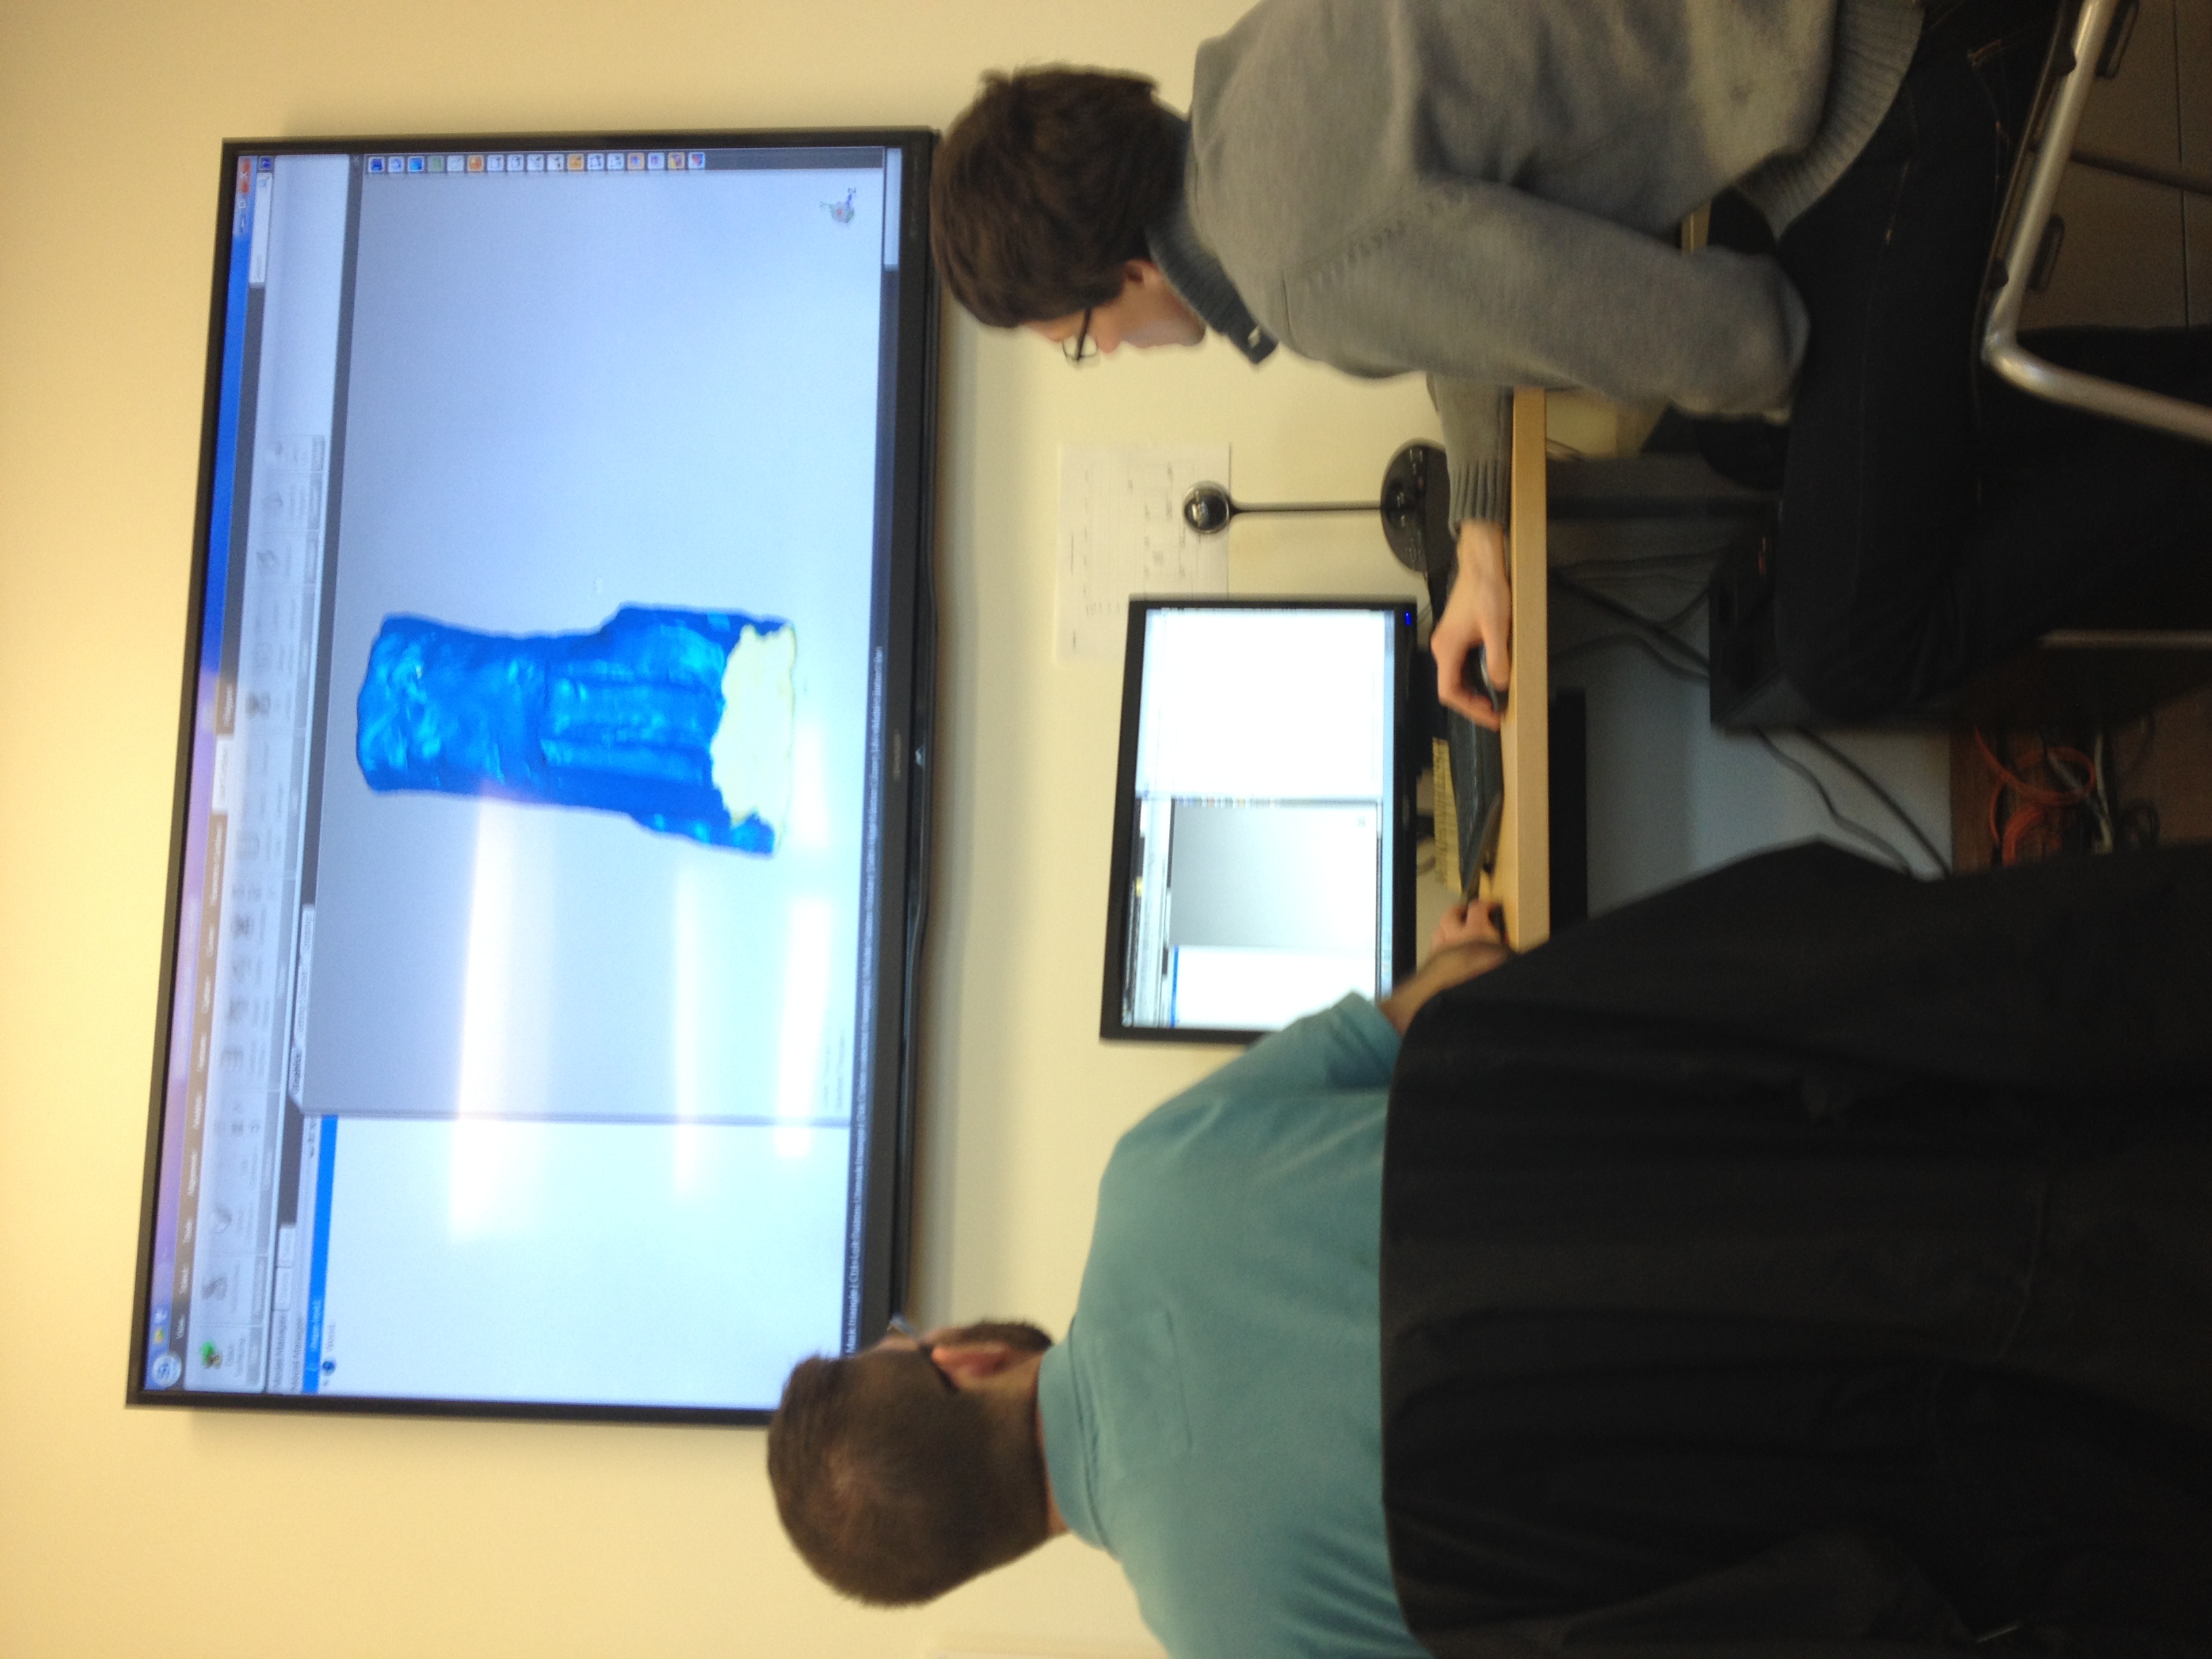
Other than briefly getting in touch with 3D scanning the first two weeks with the iPad scanning app, I really got the deep dive into 3D scanning during our time at the Beckman Institute.

2015-03-03 3D Scanning - 5784

Scanning Arielle’s Racing Glove!

No joke, last summer I had a startup idea that involved scanning objects with cameras and turning them into digital objects. WOW I was late to the party. Other than the supply chain effects that 3D printing will have on the business world, learning about object scanning was definitely the highlight of the course in terms of getting an idea of what businesses are using the technology for. The process is amazing and the majority of the work lies in rendering and tinkering with the object on software like GeoMagic.

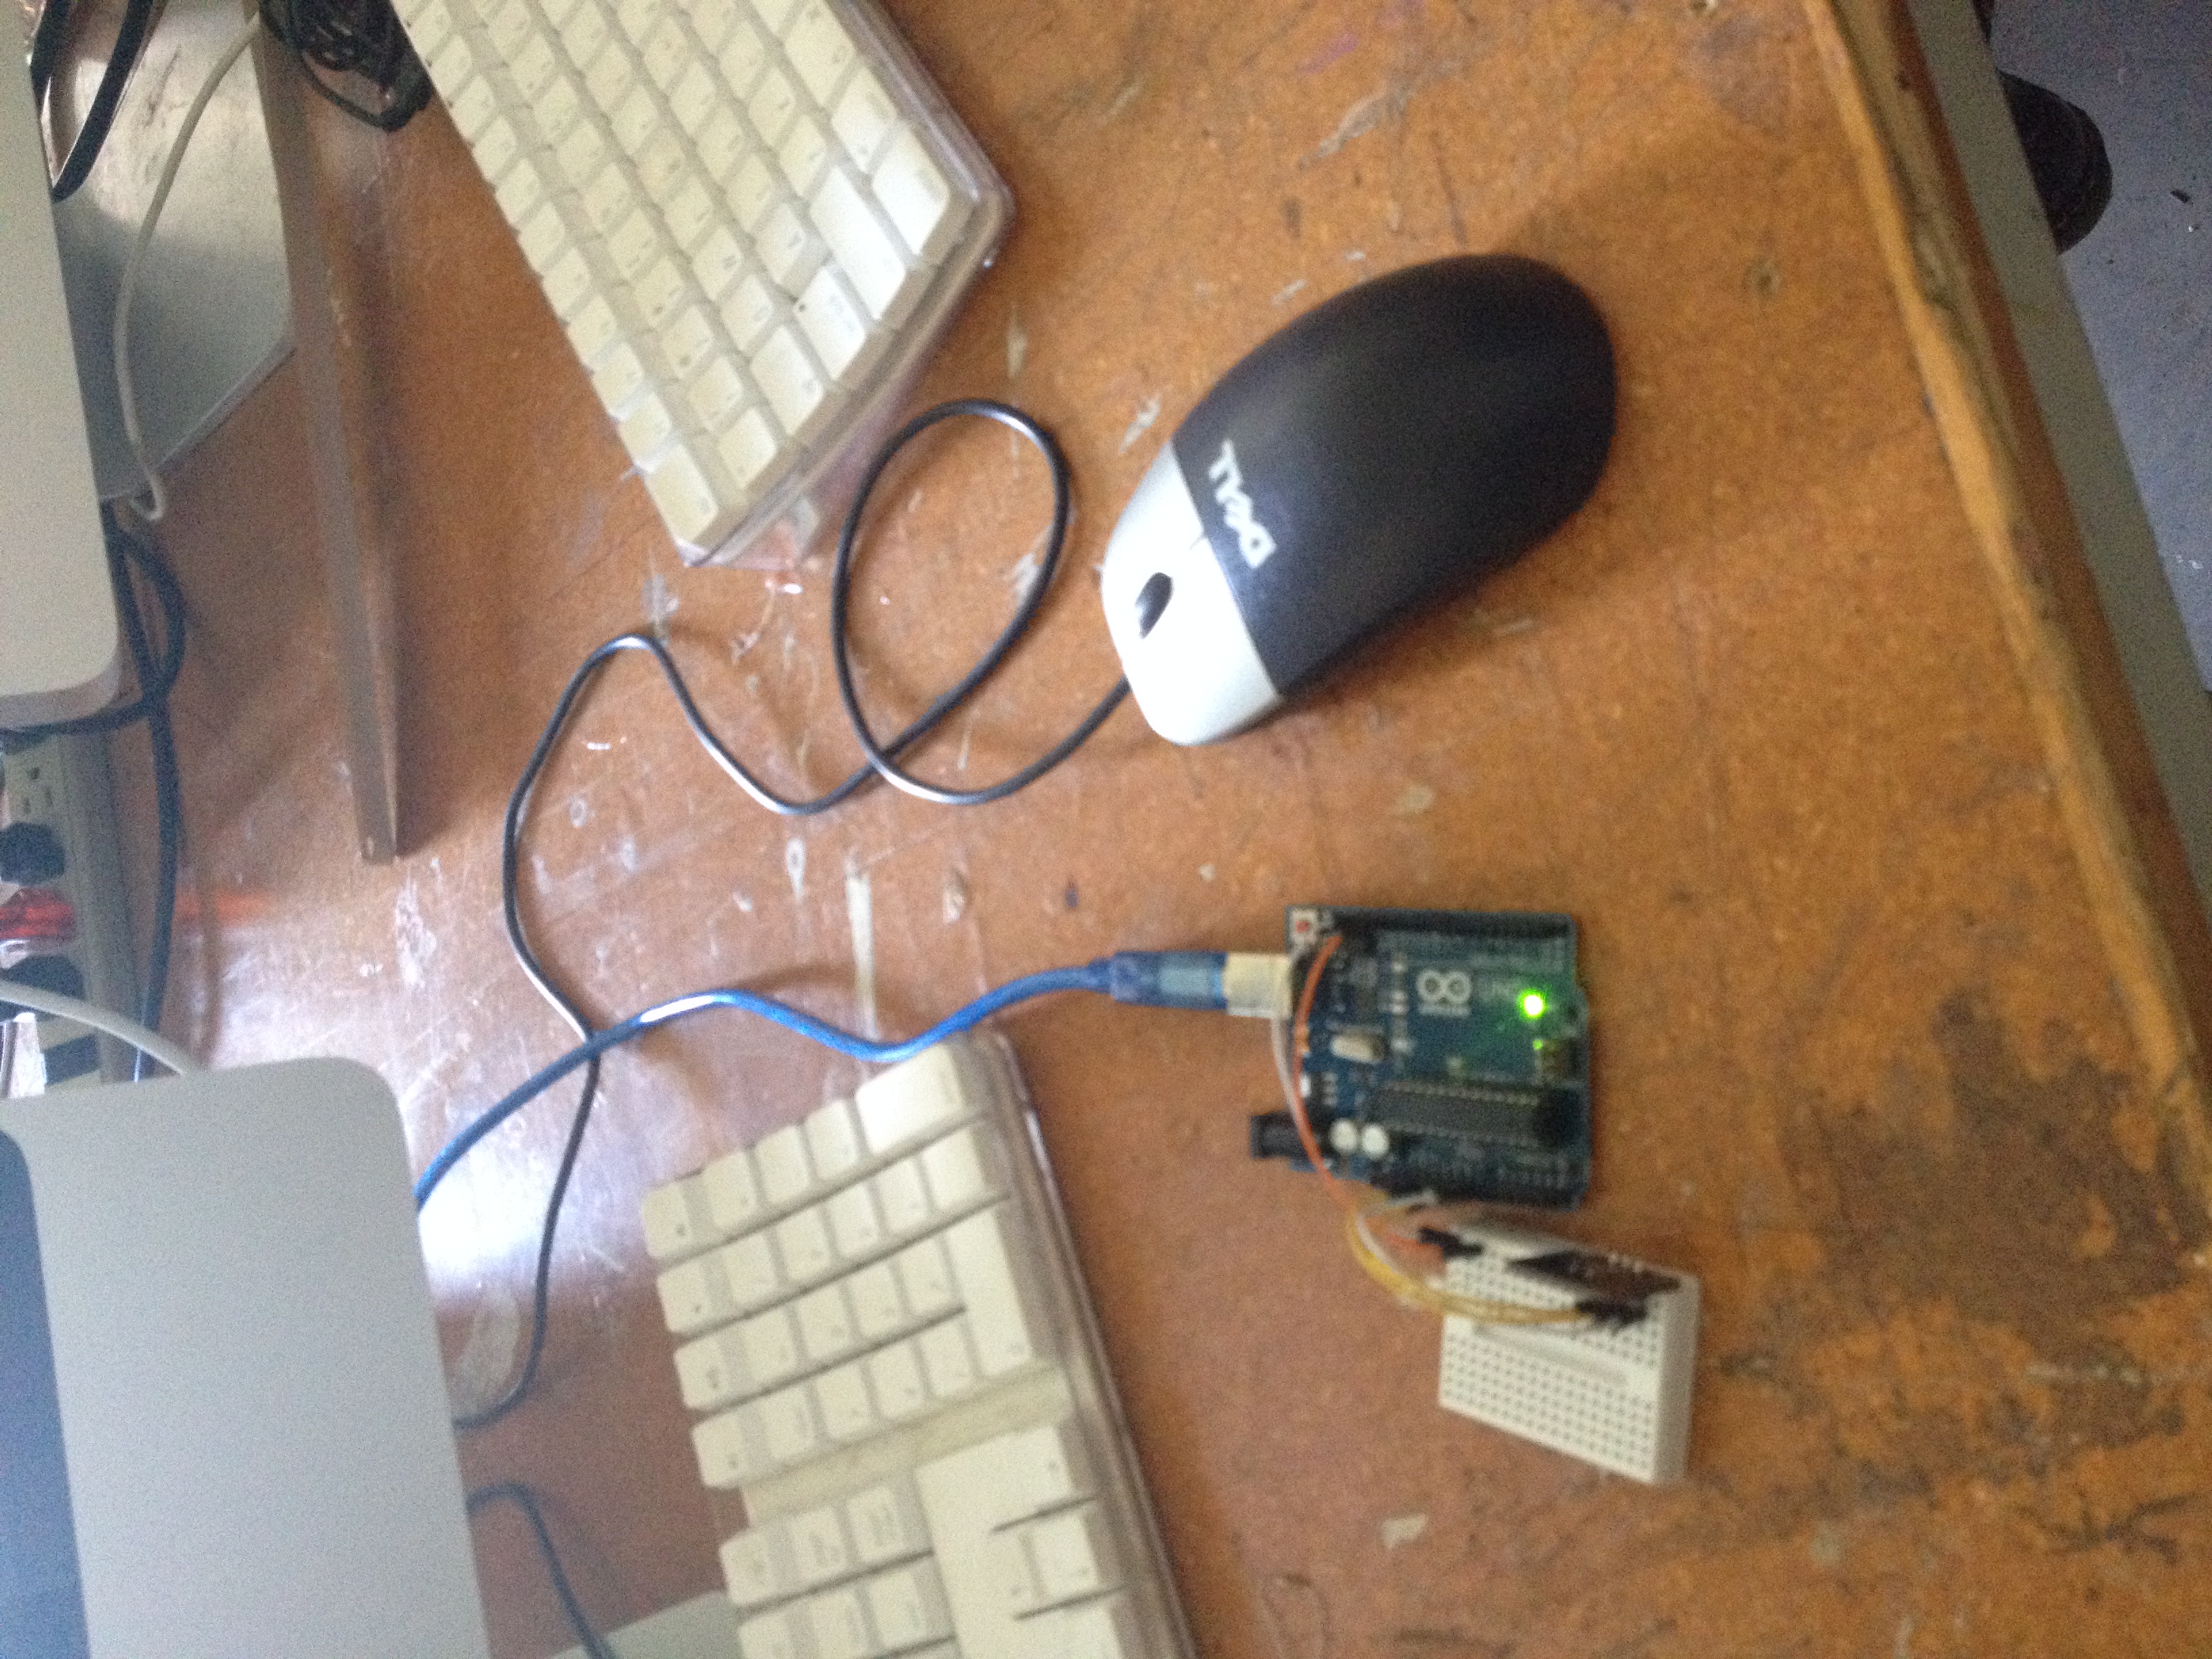
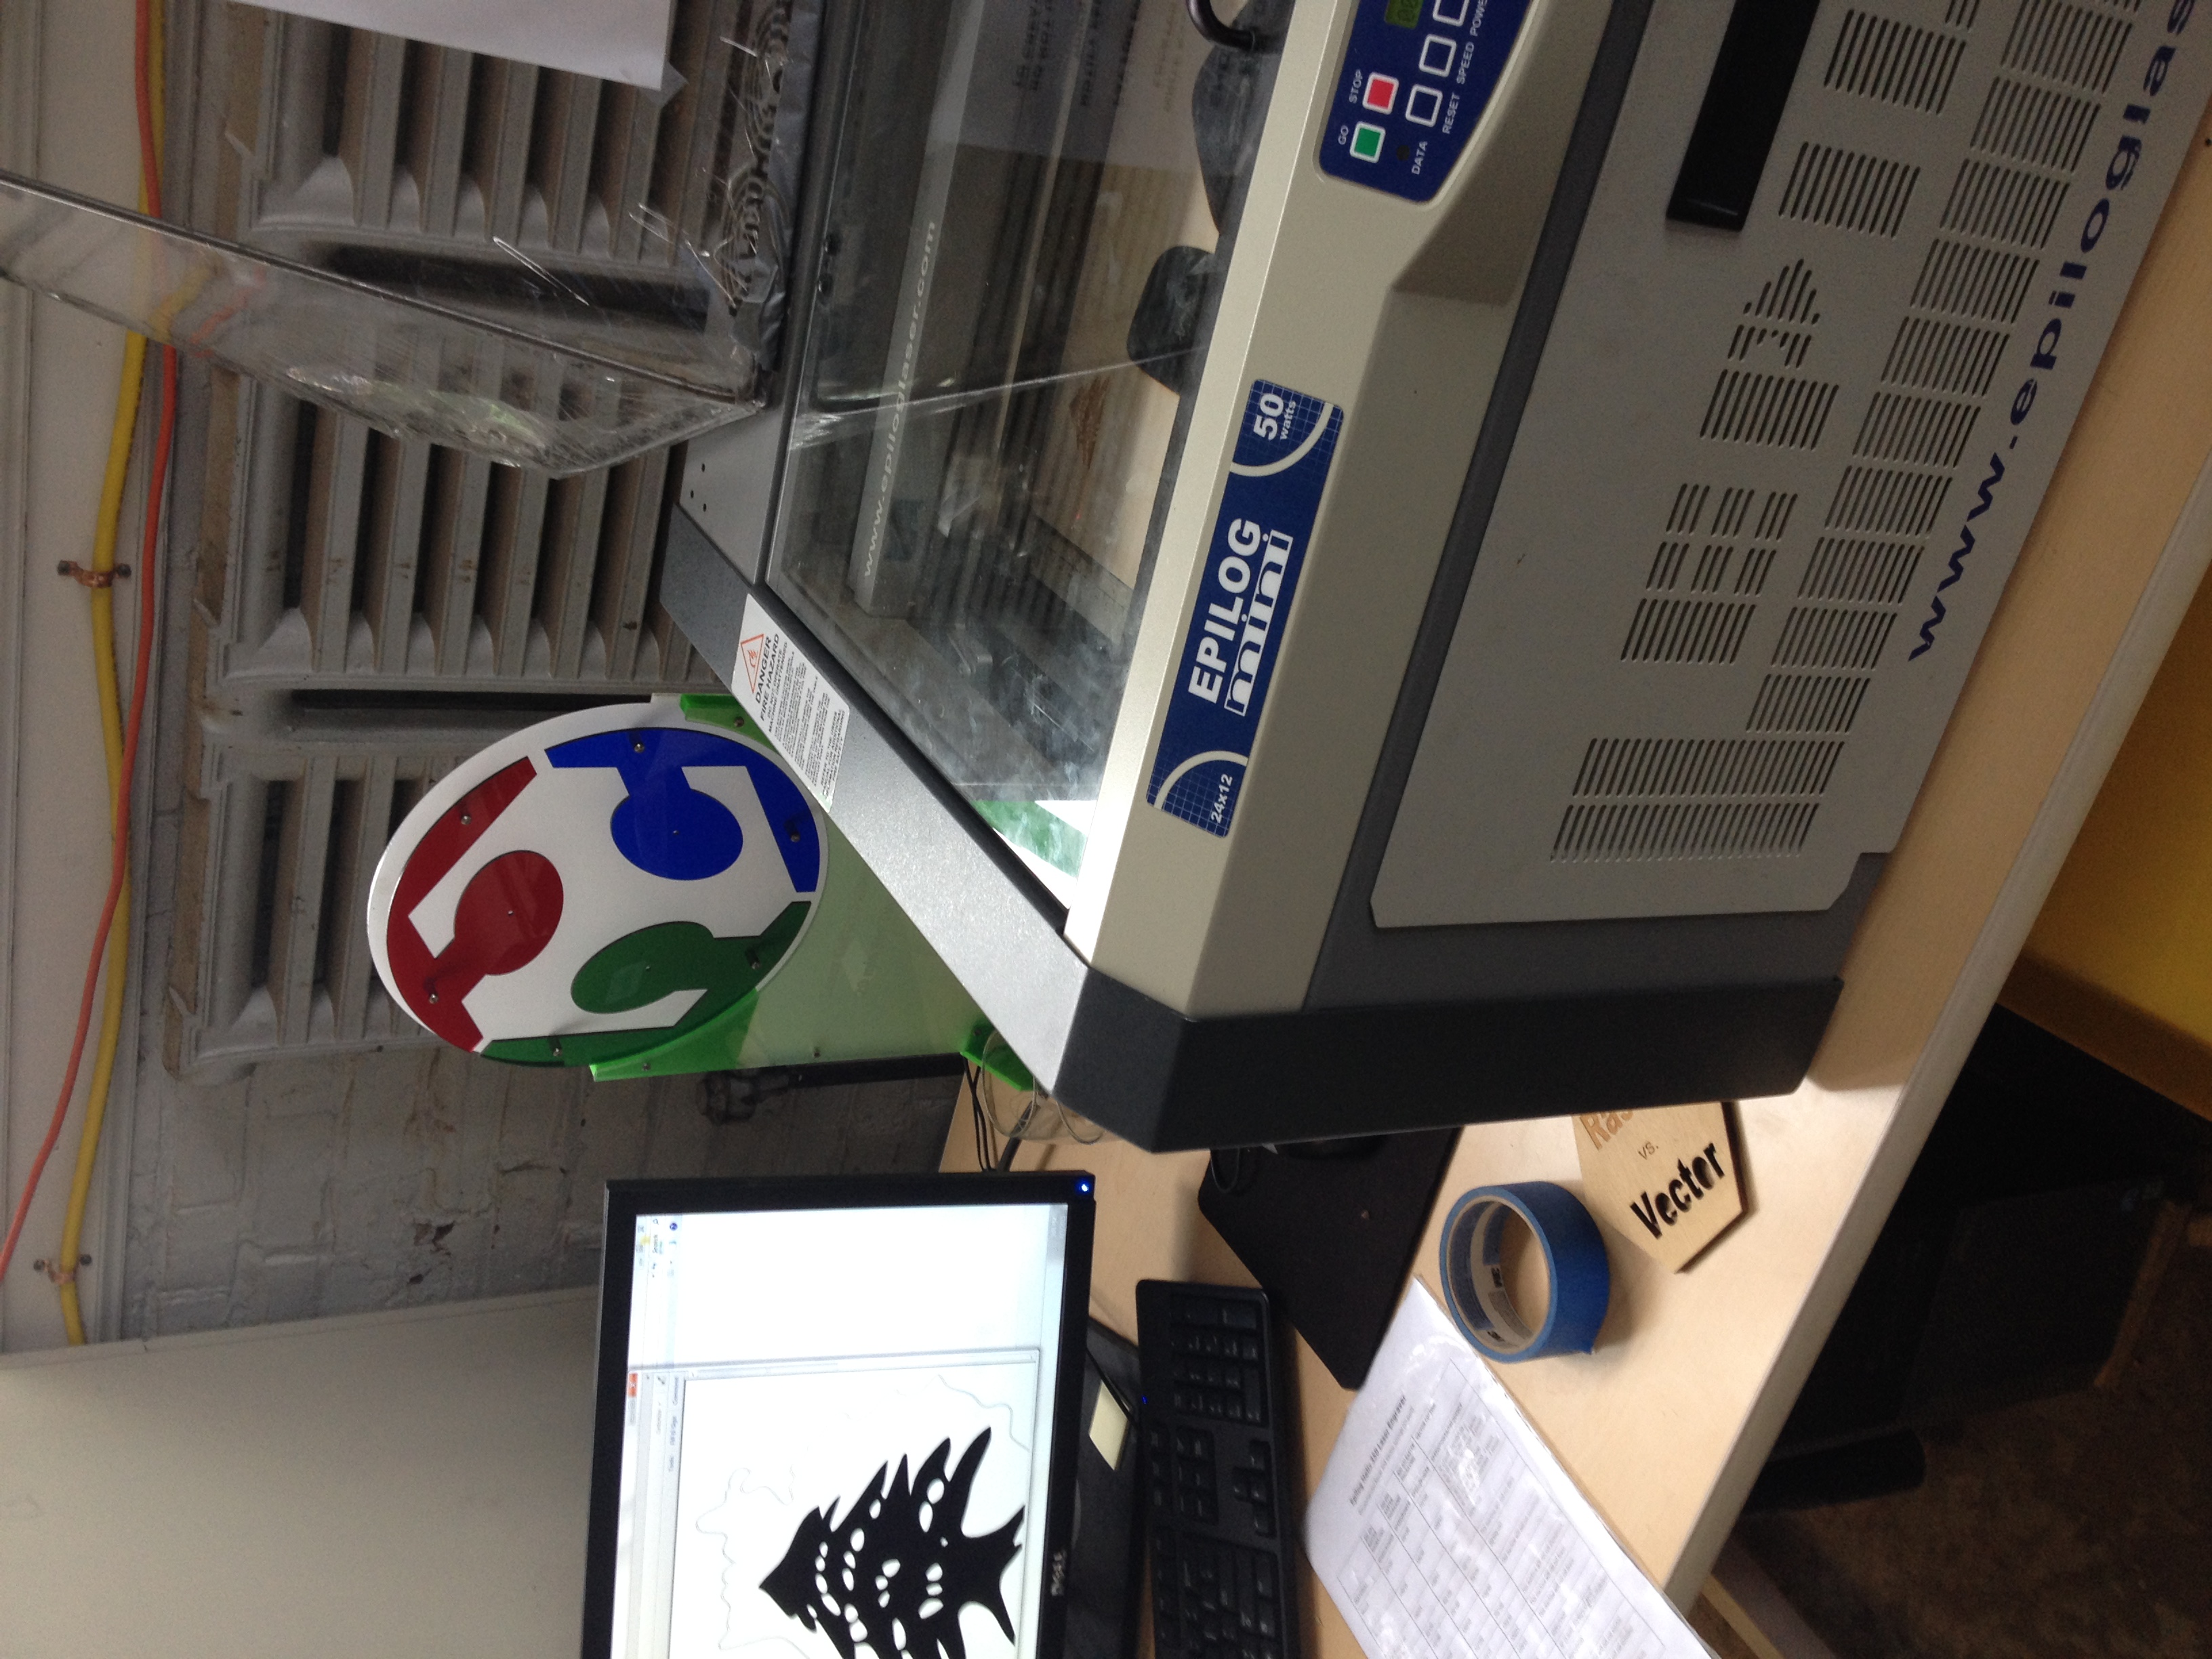
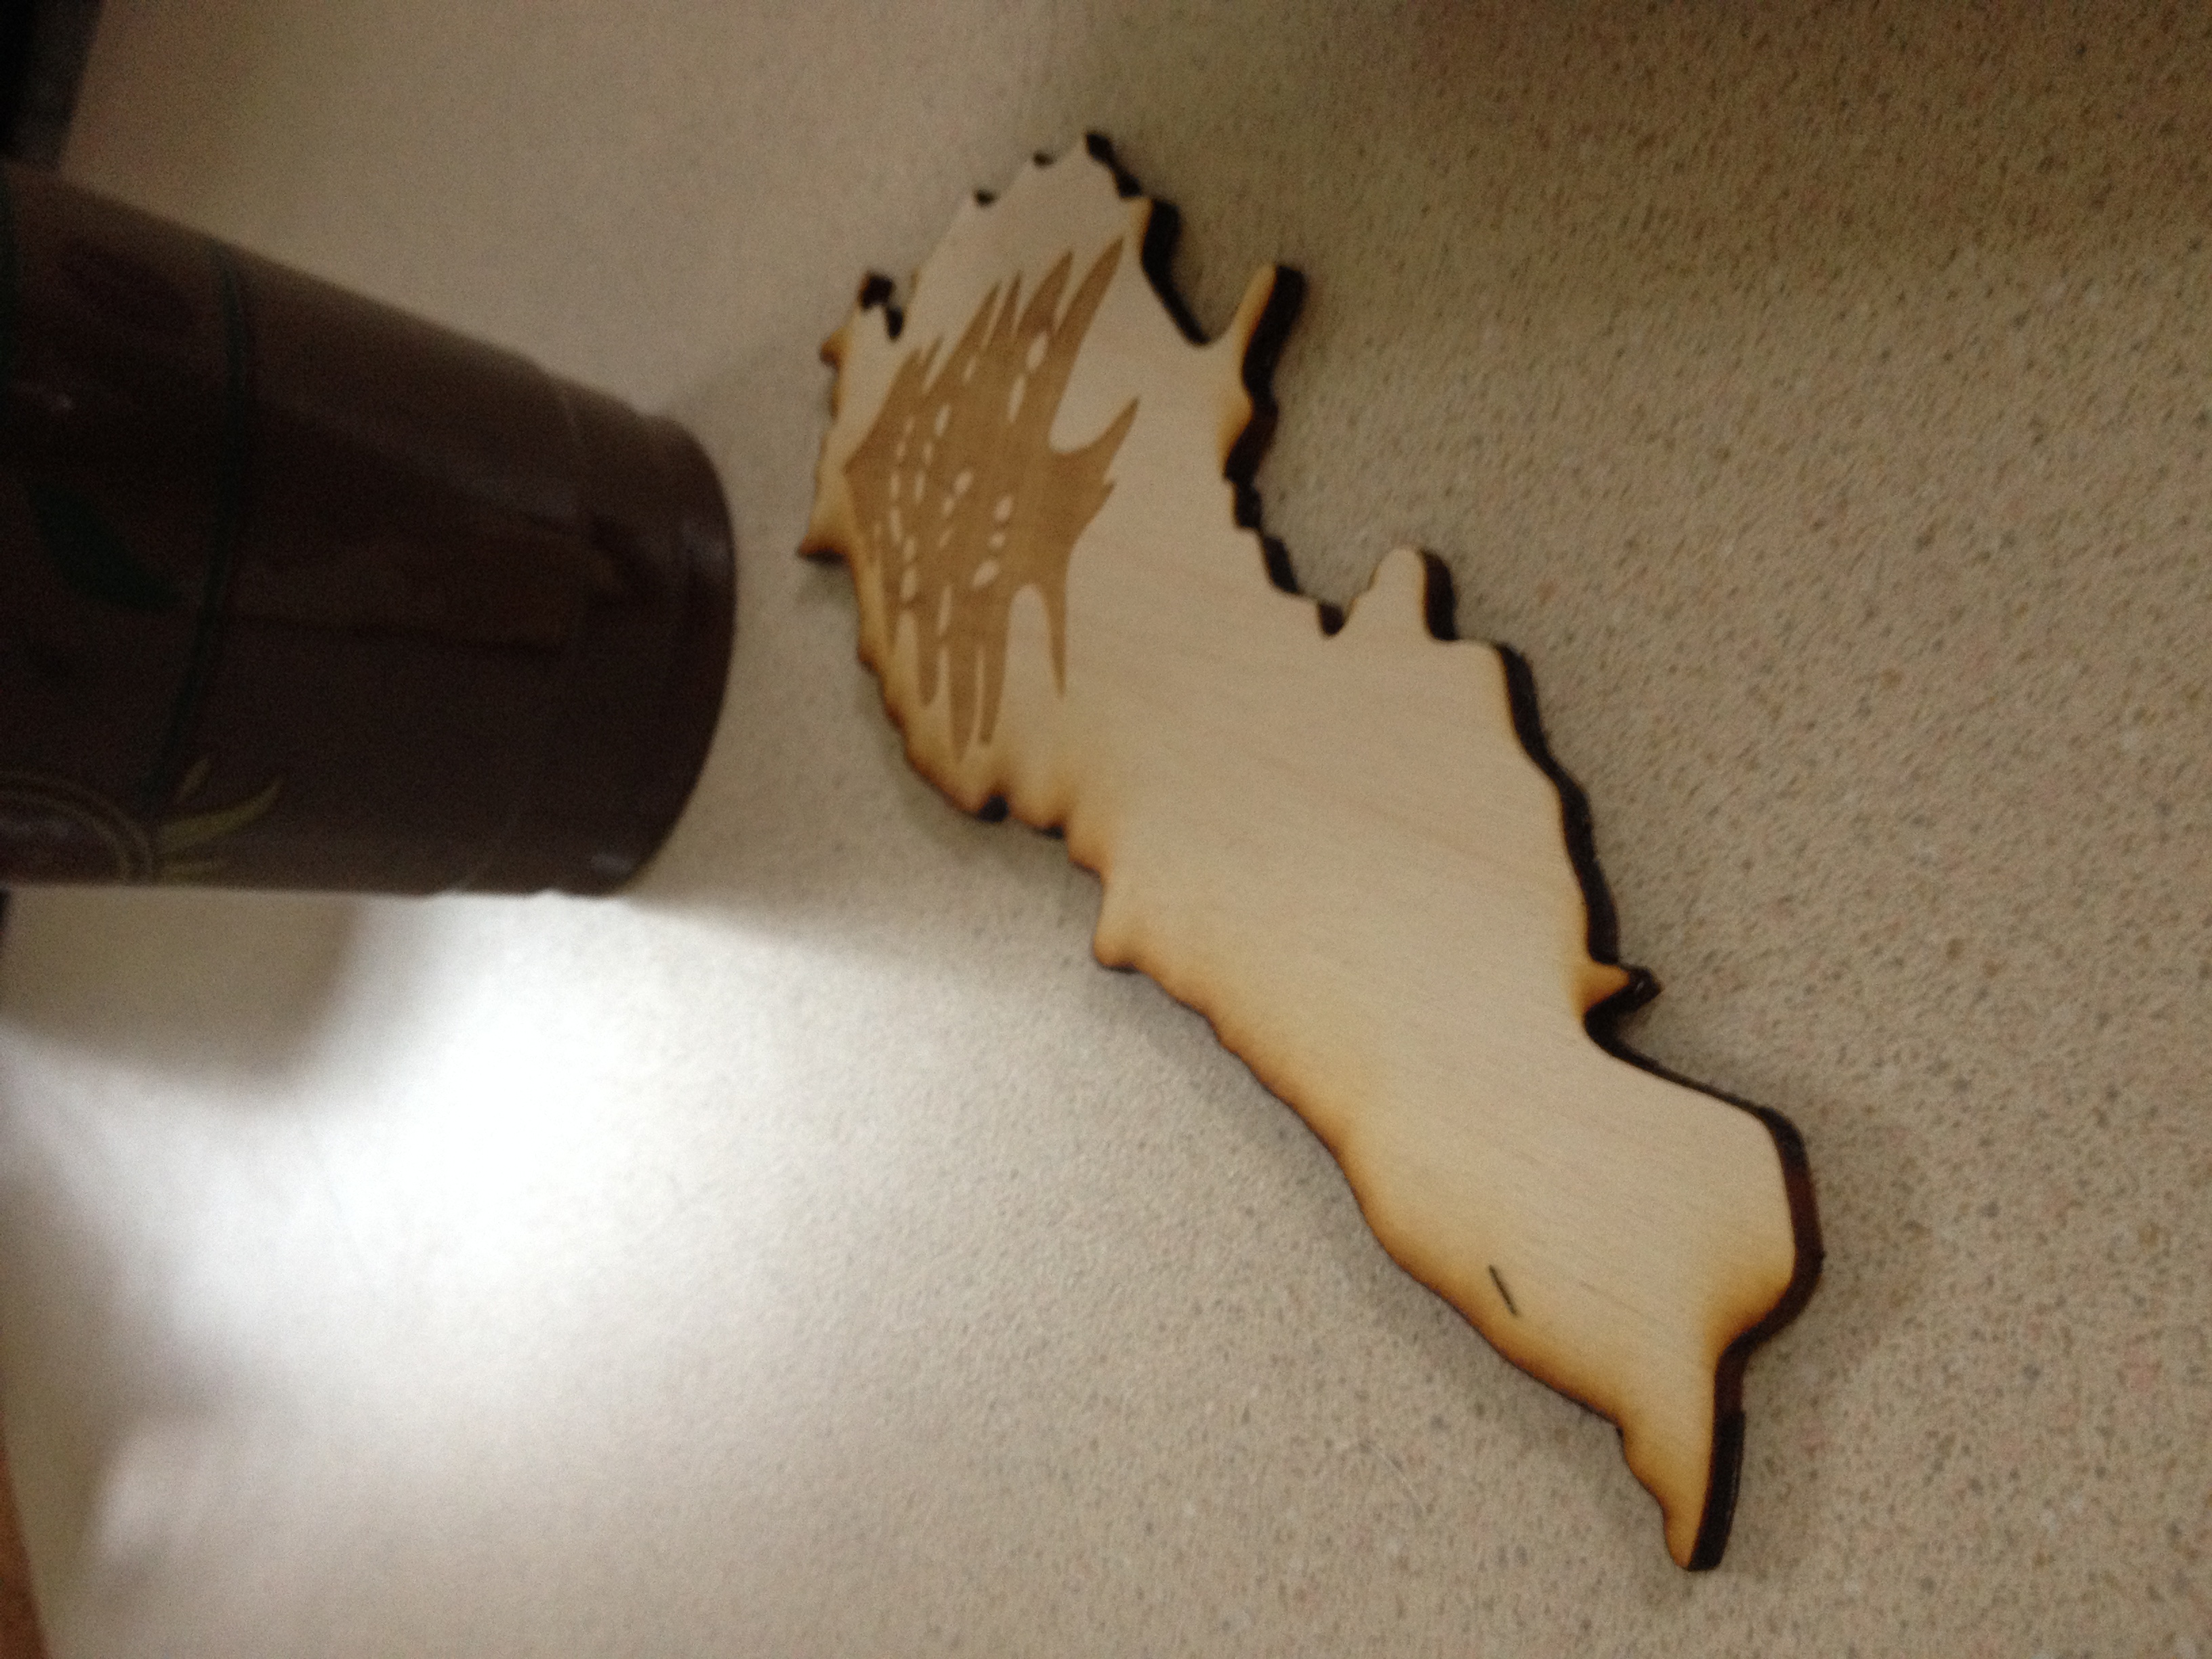
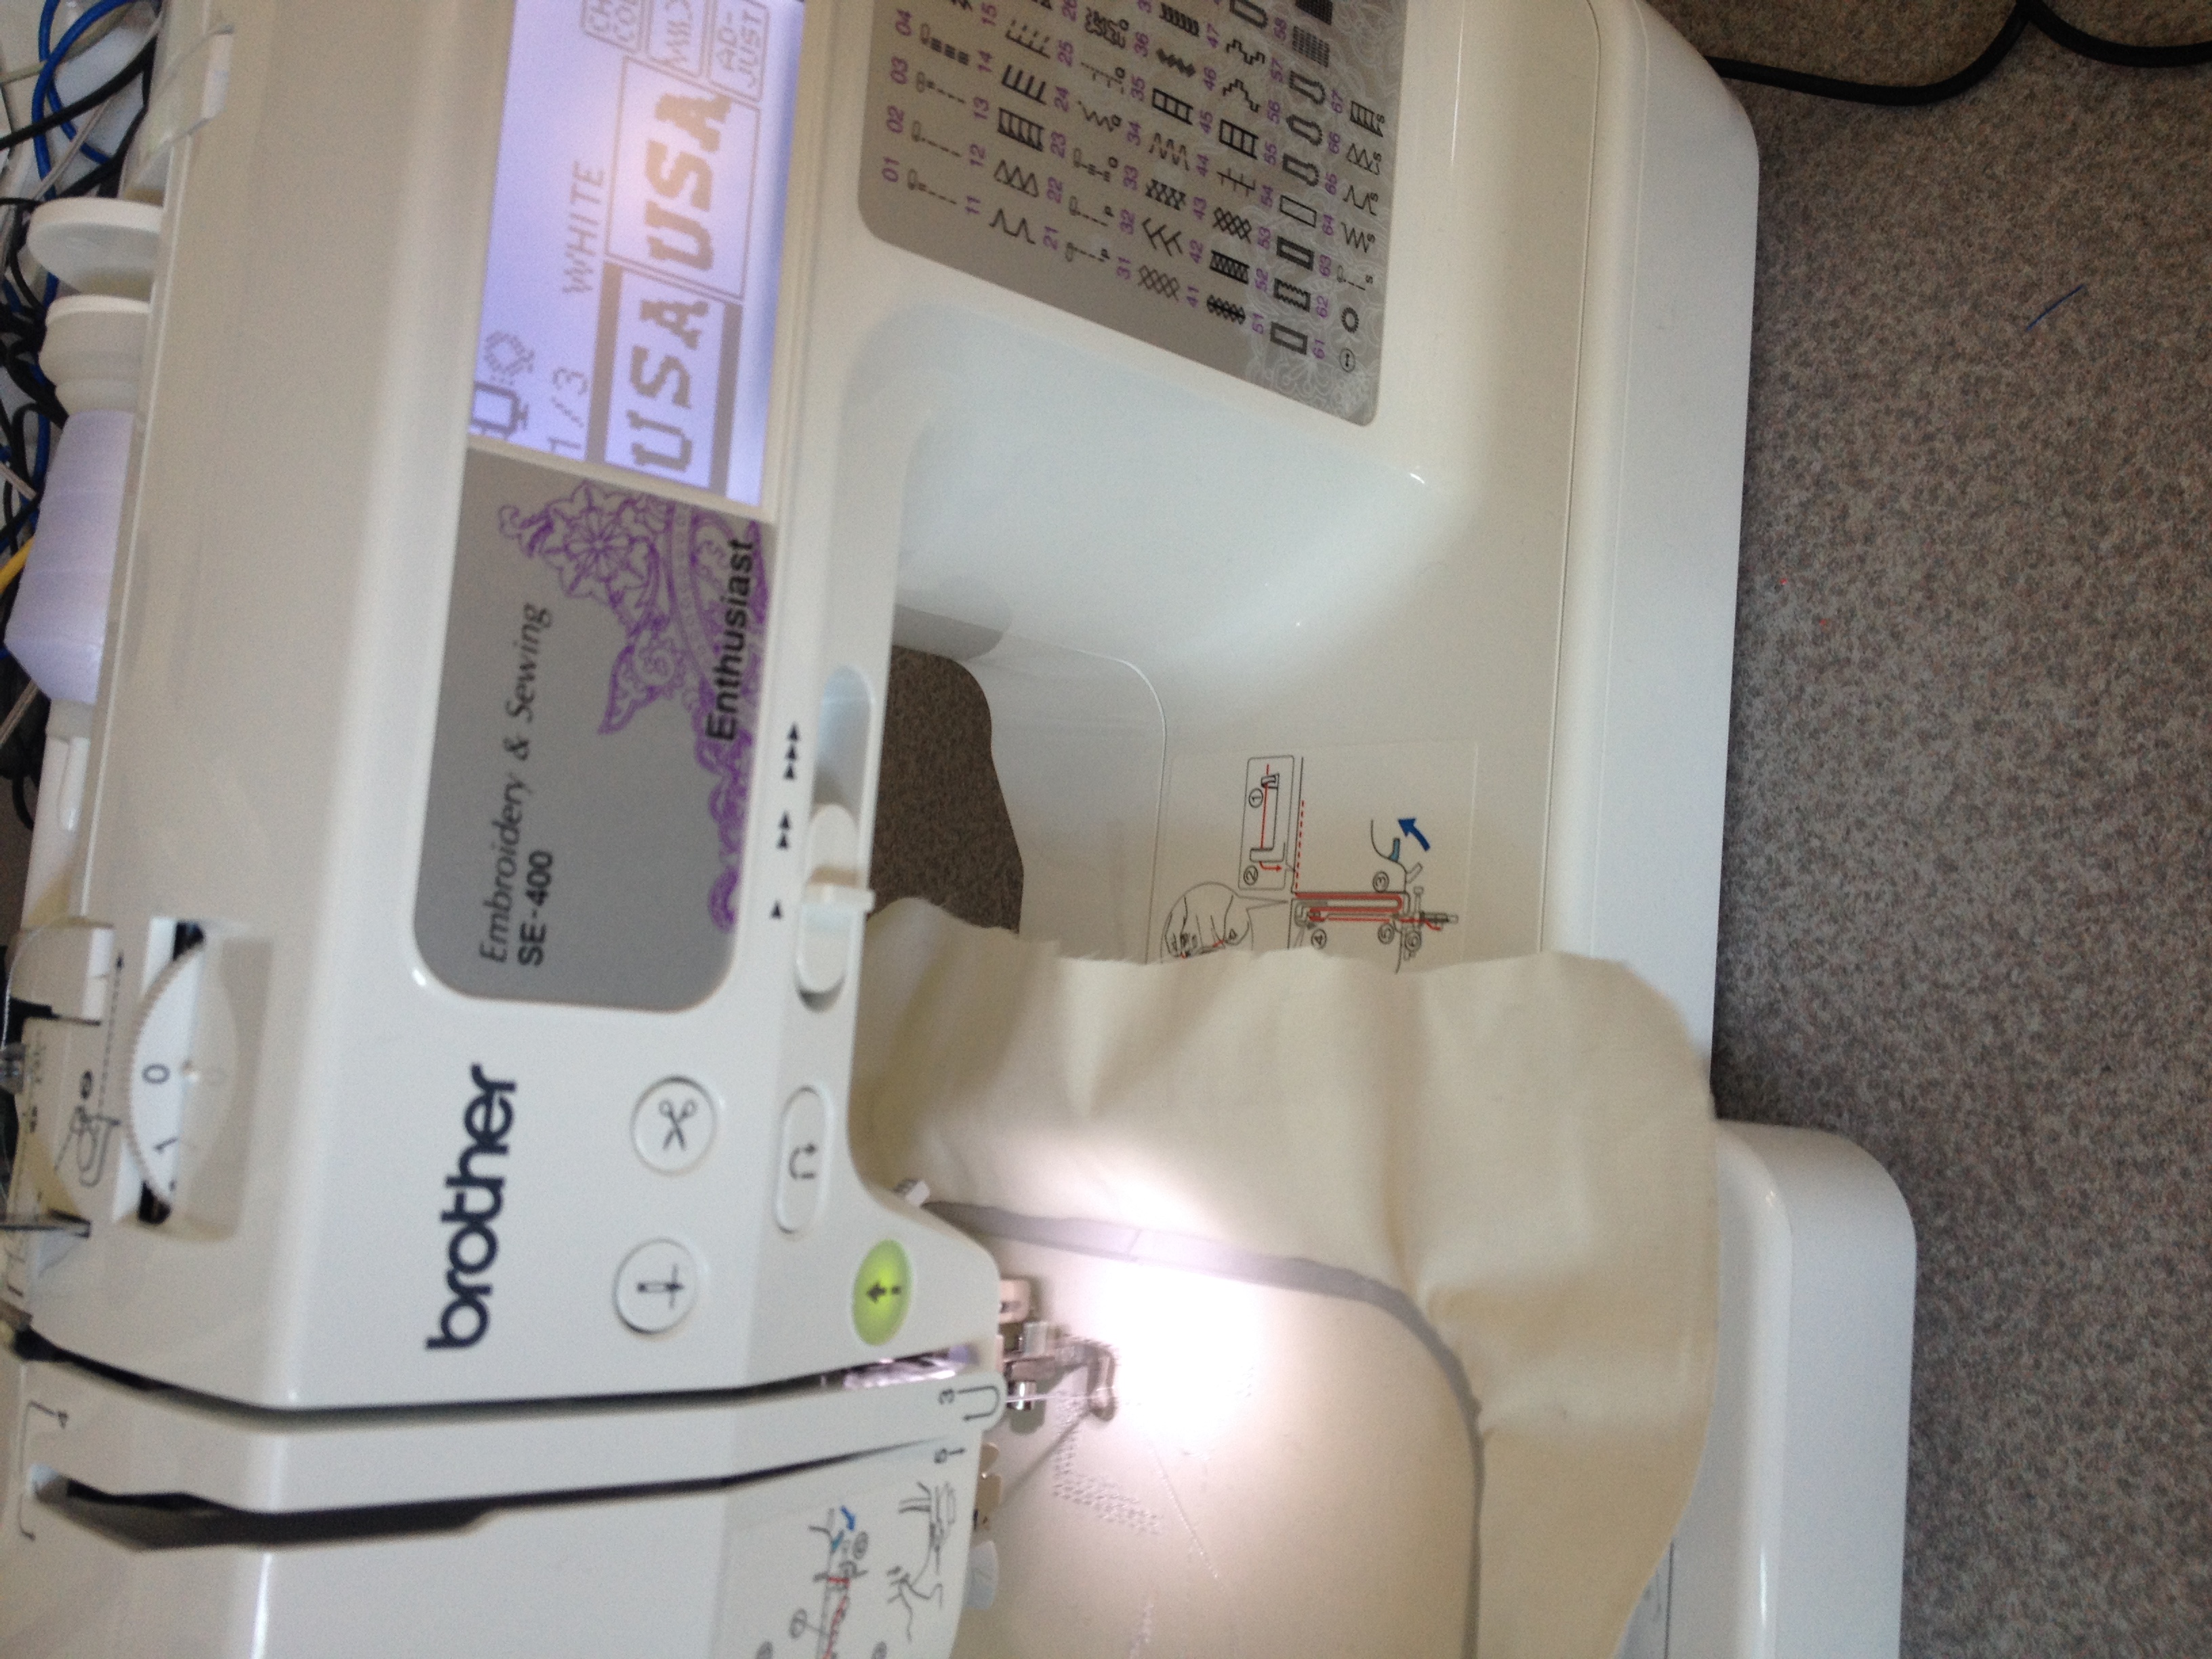
The FabLab (Embroidery, lasers and arduinos)

FabLab functions as a workshop for the community to do computer-focused innovation, design and fabrication. The idea behind the FabLab is to get people excited about the DIY (do it yourself) movement and and fabrication. Their labs have 3D printers, scanners, engraving tools, a woodshop, small robotics and more. It was awesome to get a hands on sessions with the tools available in the FabLab.

IMG_0297The sessions going through digital emrboridery, laser cutting and arduinos were all incredibly interesting. On top of that, I walked away with four things that I created. Without getting into too much detail, I can lay out three takeways from the FabLab. First off, the world is our oyster. In three sessions at the FabLab I learned how to be a functional user of three unique technologies. The learning curve is there, but it is incredibly small. Secondly, the barriers to entry are low and getting lower. What I mean is that the cost to buy a lot of these technologies are through the floor. With the exception of a laser cutter 3D printers, arduinos and digitial embroidery sewing machines can all be purchased for under $200 dollars depending on the models. That is incredibly empowering for the maker movement because it means that it costs that much less to start making. Lastly, the implications of my last two points are HUGE for getting kids excited about STEAM (the A is for art, learned that in the FabLab)!

Champaign Fab Lab

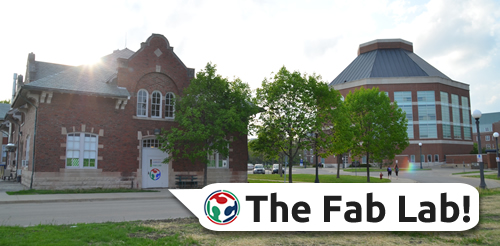
The Champaign Fab Lab

Beyond the classroom (or the laboratory)

So I’m not in Digital Making Seminar anymore. As for the Maker Movement, there is a lot of momentum for the MakerLab and its impact on this university.

The first week of class I learned about how interested tech companies are in the skills that we would be learning in this course. This got me especially excited because at the time I was still exploring the options ahead of me in terms of my professional life. Although for the most part my time in BADM 395 felt more like play than it did like work, I now know that taking a class like this can be incredibly useful for students in any curriculum.

My semester project involved taking an interactive course online through Deloitte University that explored the industry applications of additive manufacturing. This online class as well as my hands on tinkering in DMS have led me to explore an interest in technology consulting. The world is changing with digital making technologies, why shouldn’t I be the one who help people learn how to change as well?

My good friend Gian is working in the MakerLab so I am more than positive he’ll drag me back to the lab at some point (not that I’ll need to be coerced)!

10986736_10152958425636084_4402187420705788378_o

Me, driving a fake car, looking dumb

Reflection Week 15

What a semester!

Tuesday we will be having our big show and tell event to share the variety of our learning in Digital Making Seminar with special guests from the University and the community. I think the visitors to the MakerLab will be quite impressed with our work and excited to watch the programming at the MakerLab grow in the coming semesters.

The unique thing about DMS this semester is the variety of learning that has taken place. Though we were all in the same place on a weekly basis, we all had our own tracks in terms of our semester projects and direction we would go with for each lesson. I personally found myself exploring the industrial applications of 3D printing when I took Deloitte University’s “3D Opportunity” course that broke down the different ways that additive manufacturing is effecting the business world. It was neat to be able ot juxtapose the business savvy I picked up in that course with the activities I participated in with DMS. In particular, I got a strong feeling as to how these technologies are empowering and enabling the everyday maker when I got to use tools like 3D printers, 3D scanners on iPads, lazer cutters and electronic stitching machines. These technologies are becoming increasingly cheap, easy to use and are decentralizing the very nature of manufacturing.

The best  part about this course is that I’ve been able to learn from the projects and tracks of others too! Anyways, here is a video I made for the course. Figured it’d be a good way to get other people on board for future semesters 🙂


Arduino Practice – Week 13

Our last week at the FabLab! I have already been introduced to lazer cutting and stitch printing. This week it was time for arduino work. Fortunately, I have already practiced using adruinos in the MakerLab earlier in the semester so I was able to skip some of the beginner work (making a light blink at different frequencies, to be specific) and go to use some of  the cooler arduino addons.

IMG_0364

My arduino and its brightness sensor.

The lab expert in arduinos had a few different activities for us depending on where we each were at in terms of our abilities. Since I had already gone through the arduino equivalent of the classic programming “Hello World”, I jumped right into using some addons. It was a bit daunting at first because arduinos do require code commands if they are to do anything and I had zero idea how to code on the arduino-one terminal to make a piece of hardware such as an echolocation sensor work. Fortunately for me, my instructor encouraged cheating! By cheating I am referring to using Google to jack other people’s code. If I learned anything from my CS major roommate, the best programmers steal. So I have no shame! Using some code found on the internet and some tinkering with the wiring between my arduino and the bread board, I was able to work a sensor that recorded the distance of the object in front of it using echolocation and a sensor that recorded the relative brightness of the object in front of it. With both of those sensors I went a step up and took recordings that followed certain parameters. For instance, I set it where a light would only blink if the distance from the sensor was under a certain distance. It really gave me a good concept of how these electronics imbedded in things that I use all the time (idk a coffee maker, for instance) have motherboards that respond to commands. And now I was using it on my own!

Week 11 – Dabbling with Lasers

Lasers, baby. First time ever using a laser cutting tool this past week at the MakerLab and I couldn’t be more pleased with my work. I can honestly say this was the first time I had produced something that I was especially proud of in terms of the aesthetic look of my creation. I’ll explain why later.

IMG_0296

The machinery that printed followed the same trend of other printers. That is, it used x-y coordinates to accurately vector cut and burn into the material. This technology isn’t new but I am getting the sense that it is becoming more and more available to the amateur maker in the same way 3D printers and the smart stitching machines. The fact that these machines are becoming more and more available to makers all over have great implications for the maker movement. Namely, the paradigm of making power is continuing to shift in the direction of the small guy.

IMG_0299

Daenerys Targaryen is my love

So what did I use the laser cutter for and why am I so proud? So in honor of tonight’s season premier of Game of Thrones, I decided to print out a graphic that I made of my favorite character (and crush) form the show, Daenerys Targaryen. The process was extremely simple but it did take some toying with in terms of saving the file and setting up the printer up correctly. It took me two tries to get the above piece 100% correct. I made a slight error and didn’t vector cut a square so the art was just burned into a large plane. Isn’t she a beaut?

IMG_0297

Birthday gifts are always a hassle, at least for me. This is why I am stoked about the above cut that I made using the laser cutter. I printed a cut of the country Lebanon with the focal piece of the national flag right on top. My dad is from Lebanon and even though this piece isn’t exactly useful for much or easy to display, I thought the wood and the burnt edges made the cut be especially meaningful considering the country is known for her great cedar trees. Look at me, trying to be deep!

I’m looking forward to returning to the maker lab two classes from now!

Week 10 – Stitching @ the FabLab

IMG_0263

3D Printing except with textiles! Also I guess it’s technically 2D printing. Anyways, that’s what I worked with at my premier FabLab experience last week. A few of us had already messed around with Arduinos so we were moved to the sewing machine stations. We were explained that the machines were purchased late last year after they saw how they could be powerful making tools that could enable just about anyone no matter what sewing aptitude. Here are some of my biggest takeaways/observations:

  • The sewing machine was operated like a 3D/standard ink printer in that it put design onto the canvas based of off coordinates
  • The process is accurate, but not 100% accurate
    • volunteers showed examples of hand stitched embroidery by professionals which showed how the machine could only be so detailed
  • The process was fast!
  • Colors add a painless complexity to the process (takes more time, have to switch out string)
  • Possibilities are endless
    • In terms of patches, this empowers students to make whatever they want. For instance, I have the idea to make a team USA soccer patch. Besides ordering one online, I would have never believed I could make one for myself for $5
  • Could make for a great present!
    • The cost to make a patch is a couple of bucks. I’ve already brainstormed possible gift ideas (mostly sports patches for my younger brother’s backpack)

Fab(ulous) Introduction

IMG_0202

THIS WEEK ON #DIGITALMAKING SEMINAR (TV drama intro voice) we had a rep from the Champaign-Urbana Community FabLab come in to talk about the magical things they do over there.

We learned that the FabLab functions as a workshop for the community to do computer-focused innovation, design and fabrication. I had only a week or two ago learned that there were FabLabs across the country and the world that all did similar work. They aren’t everywhere obviously. Only places that are hubs of creativity and technology. So UIUC is probably a prime location. The idea behind the FabLab is to get people excited about DIY and fabrication. Their labs have 3D printers, scanners, engraving tools, a woodshop, small robotics and more. It was awesome to get a hands on feel for the all the objects made in the FabLab. The above picture shows a “broccoli sheep” that was 3D printed from a digital animal created in the game Spore. The creators of a lot of these items are young K-12 students from community. This is HUGE for getting kids excited about STEAM (the A is for art).

Best part of all? It’s not just for kids! College kids are allowed too (we’re just large children anyways). Though our introduction to the FabLab was done via powerpoint in the MakerLab at the BIF, I feel like I have a pretty good concept of what I’ll be seeing once we get to the workshop. I am particularly interested in working with engraving tools and Minecraft. From what I understand, I can build on Mindcraft and actually 3D print my creations. An example of that was passed around the class and I was in awe of how detailed the architecture was able to be for something made by blocks on Minecraft. Knowing myself though, I’ll likely find something else that catches my eye that I’ll want to try. This whole thing reminds me of going to the field museum as a kid.


Week 7 + 8 – @BeckmanInst

This past week our class was generously offered a chance to visit the Beckman Institute to gain access to object scanners that can be used to create digital representations of physical objects. The generous offer did entail a relatively large fee but education is priceless! Though it better be considering the price-tag to attend Illinois… The workshop was really interesting but it was especially useful for me since I got the lucky side of the coin and was in the half of the class that got to check out the scanner first and got the most facetime with the technology.

IMG_0128

Starting Off

Travis, the coordinator of the visualization lab at Beckman, kicked our session off by giving a brief history of the lab and some of the cool projects they work on, including the digitization of the Alma Mater. The scanner itself is a behemoth and only cost around $75,000, a steal according to Travis! After familiarizing ourself with the facifilities, we all collectively chose an object to try out. Arielle offered up her racing glove (a plastic glove meant for propelling a racing wheelchair) as the object to scan. On a side note, the plastic glove is custom made and extremely difficult to replicate for racers. Having a digital copy of a good glove means the ability for a user to create multiple copies using 3D printing! Our coordinator soon got things on its way by starting the scan. We were able to watch the object materialize digitally on a monitor and everything looked great. Travis on the other hand did not seem too happy with the process and soon announced he would have to shut it down.

Troubles and Troubleshooting

So there were some issues. It was soon explained to us that the scanner requires a near opaque object in order to have a high fidelity result. The scanner shoots out beams and the beams are meant to bounce off and return to the computer. An object that is even slightly translucent, like the racing glove, doesn’t allow for the lasers to bounce off correctly. Travis stopped the whole process and decided to start from scratch. Funny enough, the way to fix the problem with the translucent glove was to spray it with talcum powder. This would make the object completely opaque for the scan and easily be washed off. The scan began again and we were at square one. By the time we had to leave we had only finished one rotation of the glove on the scanner plate.

Fixed Up

IMG_0143

Travis and Sebastian working on GeoMagic

Fast forward a week and now we’ve got the object to mess around with on GeoMagic. Pretty friggin sweet. Well not so sweet when I messed around with GeoMagic, but sweet to see what Travis, a seasoned veteran, was able to get done with it. The glove was beautifully fixed up and ready to be saved as a standard CAD file. Watching him play around with the $7,000 dollar software (that’s with a student discount, apparently) made me day dream about the kind of work the visualization lab at Beckman did on the Alma Mater. I’ll be attending EOH this Friday and will get a chance to see the digital version of Alma in all of her glory! As for my future use of scanning and GeoMagic? I may have to stick with the cheaper options..

Week Six – Create. Print. Regret

I’ve made it. By ‘it’ I’m obviously talking about my first Fusion360 created object, a massive plastic screw. This time around, the process was relatively painless! Mess around with the file on Fusion360, export for 3D print, throw it on Makerbot and get printing.

I put a hole in the object in an attempt to turn it into a pencil grip. The hole ended up being slightly too small to fit a standard pencil. I though I had the mm. measurement down where the pencil would fit the hole but something must’ve been off. Rather than measuring the hole itself, I estimated it’s size based off the size of the entire object. If I could have figured out how, it would have been much smarter to have measured the hole itself. Hindsight’s 20/20 I guess.

[I know, I know. Need pictures. Media to come soon!]

I must admit a regret of mine. We were given a lot of time in class to tinker around with Fusion360 in advance of printing our object. The task of the day was to print an object made on Fusion360 by the end of class. For whatever reason, I chose to take the easy way out and print the simple object that I created outside of class with hardly any modification. It wasn’t because I wanted to be lazy or take the easy way out, I just supposed that in order to complete the task it was a better idea to keep things simple. In the back of my mind I worried that trying anything new or different would have been too complicated and might have stopped from being able to get a print off that day.

Looking back, its clear that I was flawed in my logic. I ended up with a decent amount of free time that I could have been spent tinkering with Fusion360 designs to print off. Looking at some of the other cool objects created by my peers that day other than the simple tutorial objects we were assigned made me disappointed in my choice to keep it simple. I still learned a lot last Tuesday, but I definitely could have maximized my learning by challenging myself more rather than trying to complete the task going the route of the bare minimum. As stated above, hindsight is 20/20! I’ll try to be a little more daring in the upcoming weeks!

Week Five – I can do CAD (kind of)!

The idea of having digital models of products isn’t exactly exciting. It’s the 21st century, of course you can design things on a computer. Why wouldn’t you be able to? This is the mindset I have for a lot of technology. That is, I know that certain technologies exist that allow me to have a great standard of living, its just that I don’t always have the greatest appreciation for certain technologies existence’s. This isn’t to say I’m a bad person, but I can only be passionate and appreciate the things I have experienced. Learning about CAD in this class has opened up a new world of appreciation and interest for me in that I now understand the process and means that digital 3d design uses. Autodesk’s presentation did just that for me.

finallamp

My lamp. I made this (with some help)

Researching Fusion 360 before our in class presentation gave me a good idea of what the tool was capable of. Downloading it was kind of a hassle but after a bit of Googling I was able to optimize my computer to run this behemoth of a program. Fusion 360, as described by NAME has a noticeably lower learning curve than other similar caliber programs. THANK GOODNESS. The program is pretty intuitive (I was messing around with things after just minutes of tutorial) but I found myself bumping into problems left and right. I’d likely blame this to my lack of experience as well as my not so well trained CAD ability to this rather than on Fusion 360 itself.

For a novice like myself, this is the level of complexity that may be best. TinkerCAD was great to display the idea of computer-aided design but Fusion seems to be a great introduction to a program that can create real projects. Introducing CAD, perhaps with a software like Fusion360, to High Schoolers would be HUGE. I’ve always been and advocate of programming classes in Jr. High and High School to get kids more interested in STEM. Seeing how Fusion360 could maybe strike a passion for Industrial Design or the like makes me think it would be a great class or seminar to be taught in the pre-college years. I’ll be referring TinkerCAD to my freshman in H.S younger brother (I’ve been pushing him to take programming because I regret not doing so).

The great thing about this class is being able to dip my feet into so many different maker tools. Exploratory learning is not only more enjoyable, but more fruitful. Why? Trial and error. Playing around with many different tools forces me to find out what I may or may not be interested in. When else would I have gotten to use CAD?

Week 4 – 3rd time’s a charm!

I printed my face!

That’s what I texted my mom after, you guessed it, I printed my own face using additive manufacturing. Last Tuesday’s seminar equipped me with everything I needed to move from scanning my face to creating a scaled model of myself. This project was my first 3d printing experience that I was responsible for from start to finish. I printed a name tag that my group and I designed on Tinkercad but I was completely uninvolved with the use of the actual printer itself. Though I can say that I did in fact successfully print my face, it wasn’t the smoothest of processes for me.

Attempt #1

I didn’t have time to print in class so I ended up coming to the lab Wednesday to complete the assignment. I had all the time in the world because my work and class for the day had been completed. After loading my ready-for-print file onto the Replicator, I had a guru assist me in prepping the machine. Minutes into the print I could tell something was wrong. It was obvious that the printer filament was being excreted just above the platform. The lab guru explained to me that my print must not have been completely touching the platform. After canceling the print I ran back to my computer to fix my file.

Attempt #2

After a quick observation I could tell that my base wasn’t completely making contact with the virtual platform. Easy fix. I moved down the object so that the base was actually below the platform. I figured that would simply cut out the bottom and have everything not cropped out be touching the base. Fast forward 10 minutes and I find that this isn’t an actual fix to my problem. The guru couldn’t completely explain why my fix didn’t work, but suggested instead I go back to the basics and fix the original design on Tinkercad.

Attempt #3

Frustrated with my lack of success and waste of time, I rushed onto Tinkercad to fix this once and for all. I wasted no time playing around. I used a “hole” box and completely cropped anything on the bottom the wasn’t even. Exported the file to Autodesk, brought it to platform and set it on its base just to be sure that I wouldn’t mess up yet again. This time around, after a wasted 45 minutes, I successfully was able to print my face object. Well, I know the base looked good, I haven’t actually seen my object as I left early once printing began. I bet its good. I’ll keep you all posted on my twitter @MatarDMS!

Takeaways

Learning can be frustrating… but rewarding! This was my first time working with the machines on my own and I really wasn’t surprised that things went wrong. This isn’t to say I would have much rather it worked on the first try but an admission that that’s how my learning usually is. A little bit of trial and error. Not always being the most careful with instructions. This isn’t the worst thing in the world as I feel it solidifies the lessons especially well with me. Learning is learning at the end of the day, no matter how many attempts it takes.