Fab Lab – Week 2

This week in the Fab Lab I learned about arduinos. I was a little nervous at first because I didn’t know anything about them or where to begin in order to code them. I have taken an introductory computer science class, but it was awhile ago and I assumed the coding for arduinos was going to be harder.

I was completely wrong! Arduinos were nothing to be afraid of. They are very beginner friendly and a lot of the coding is available online.

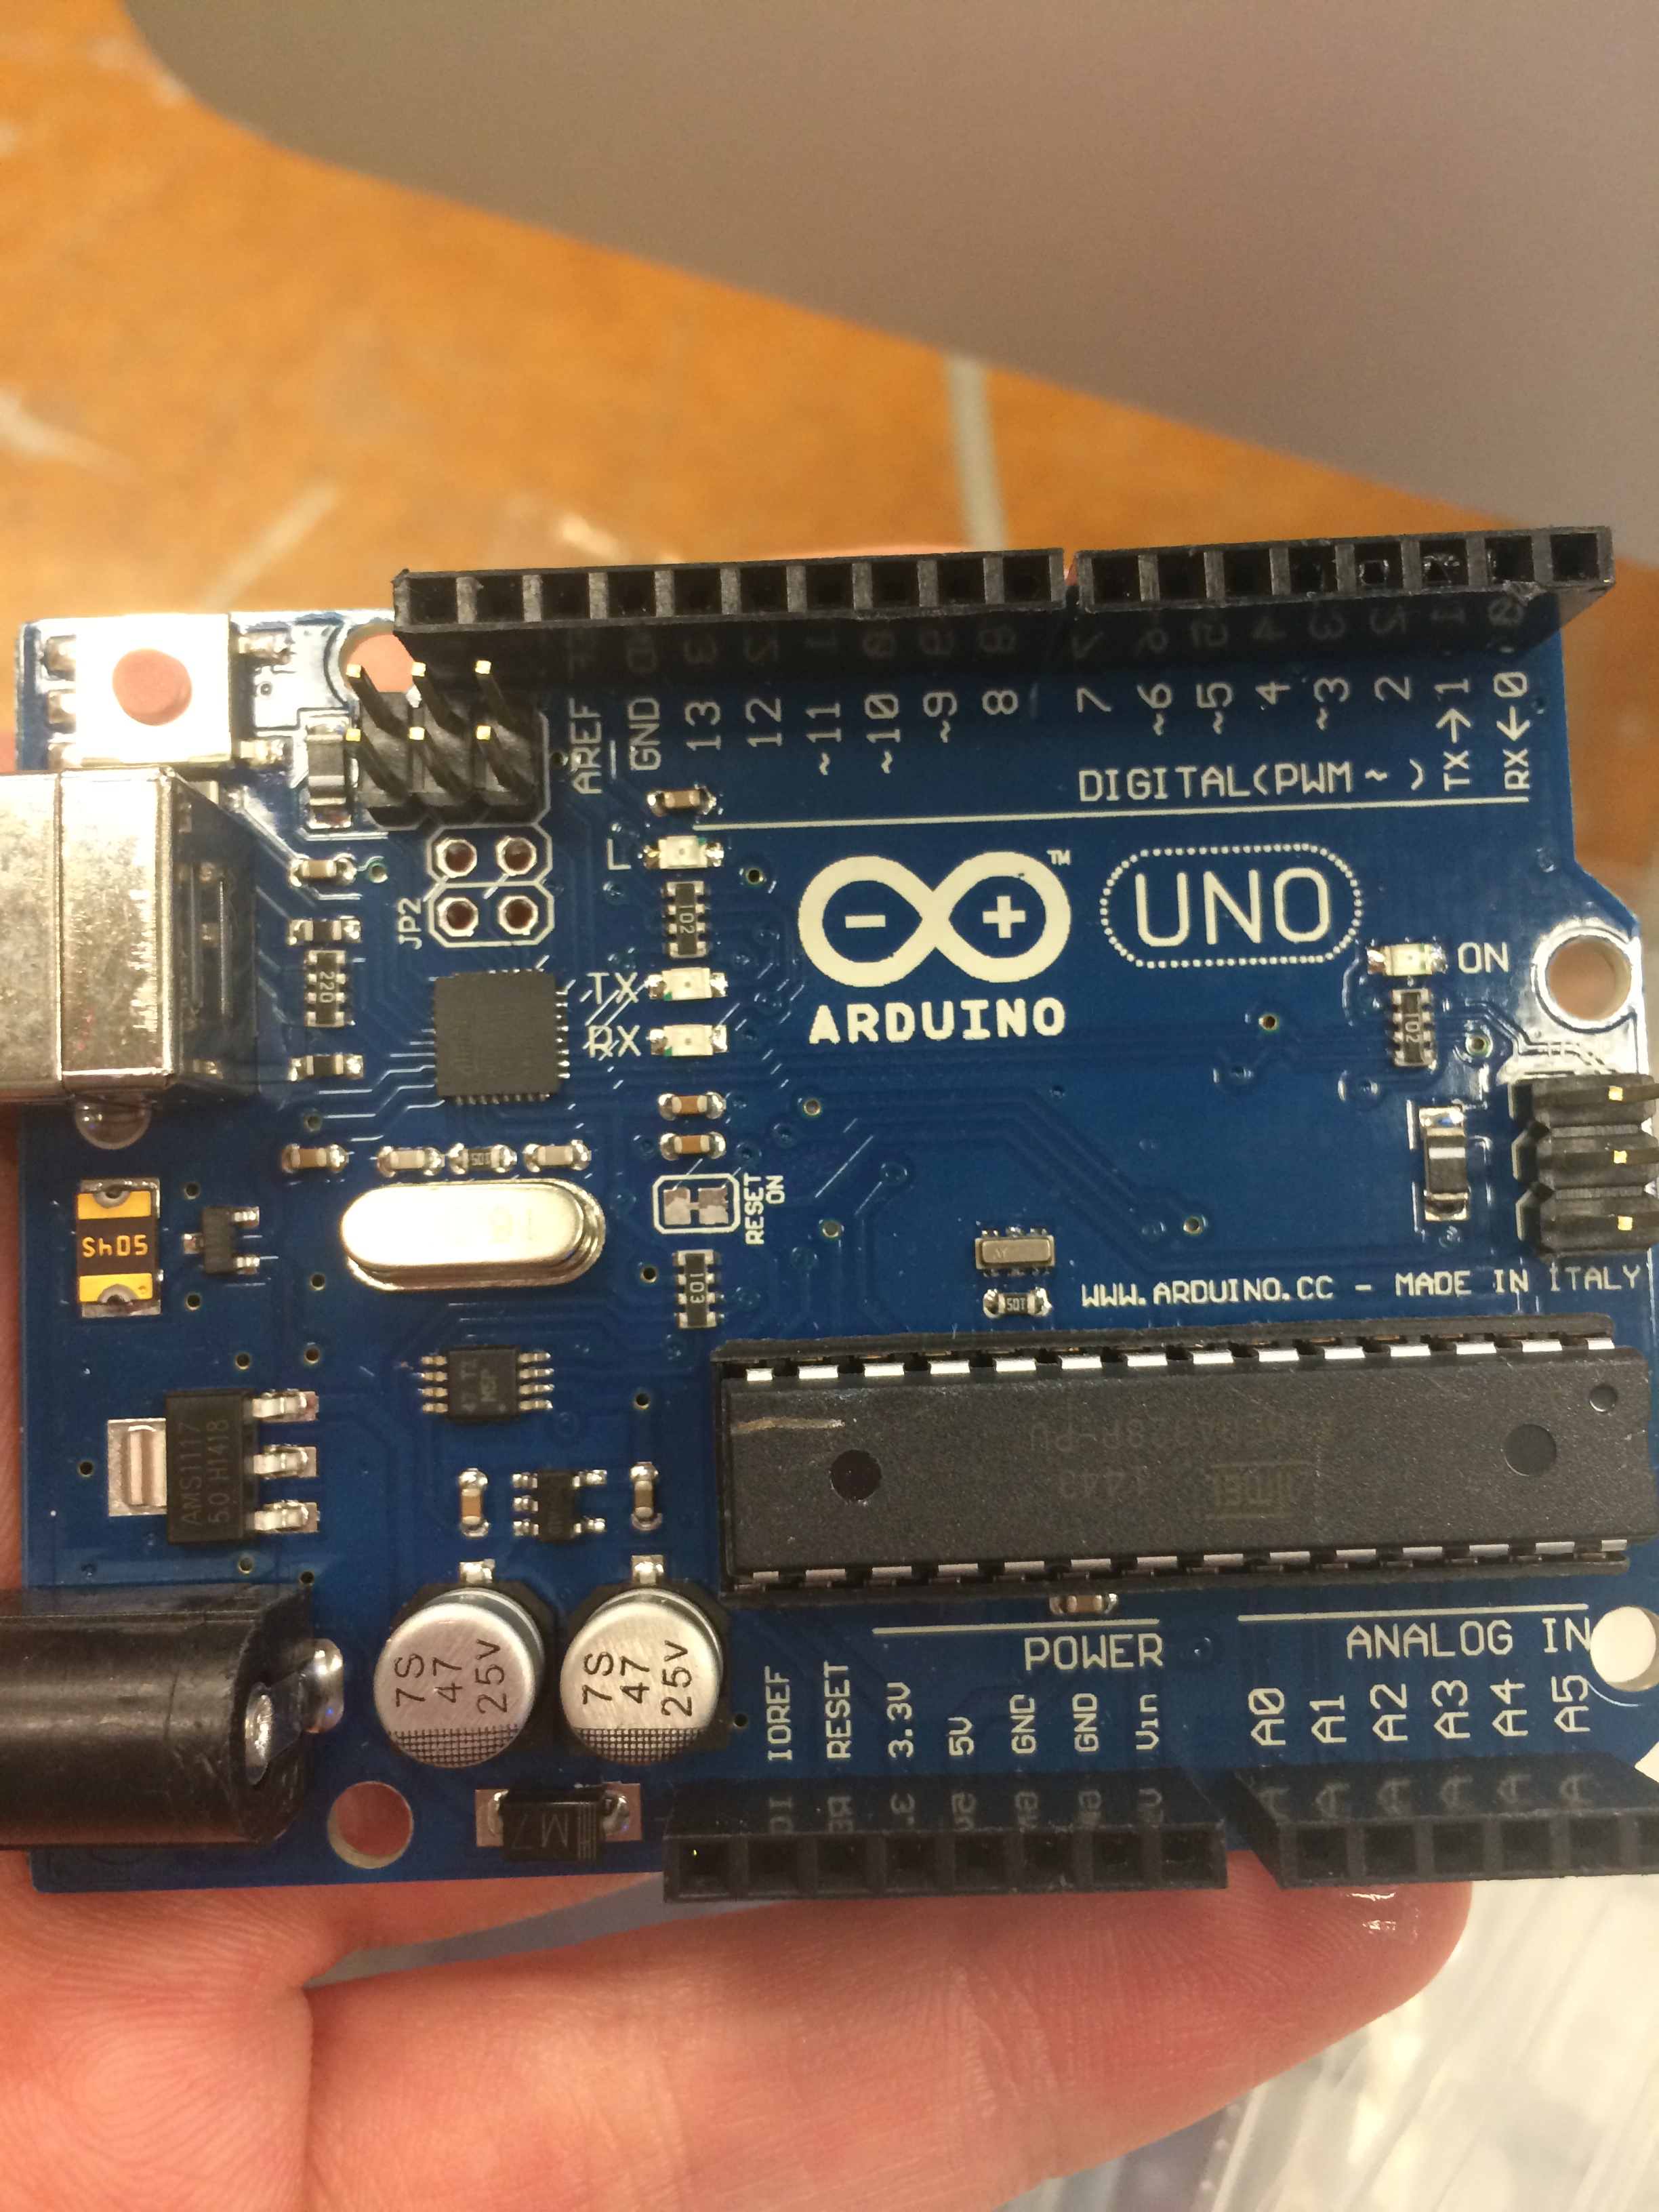
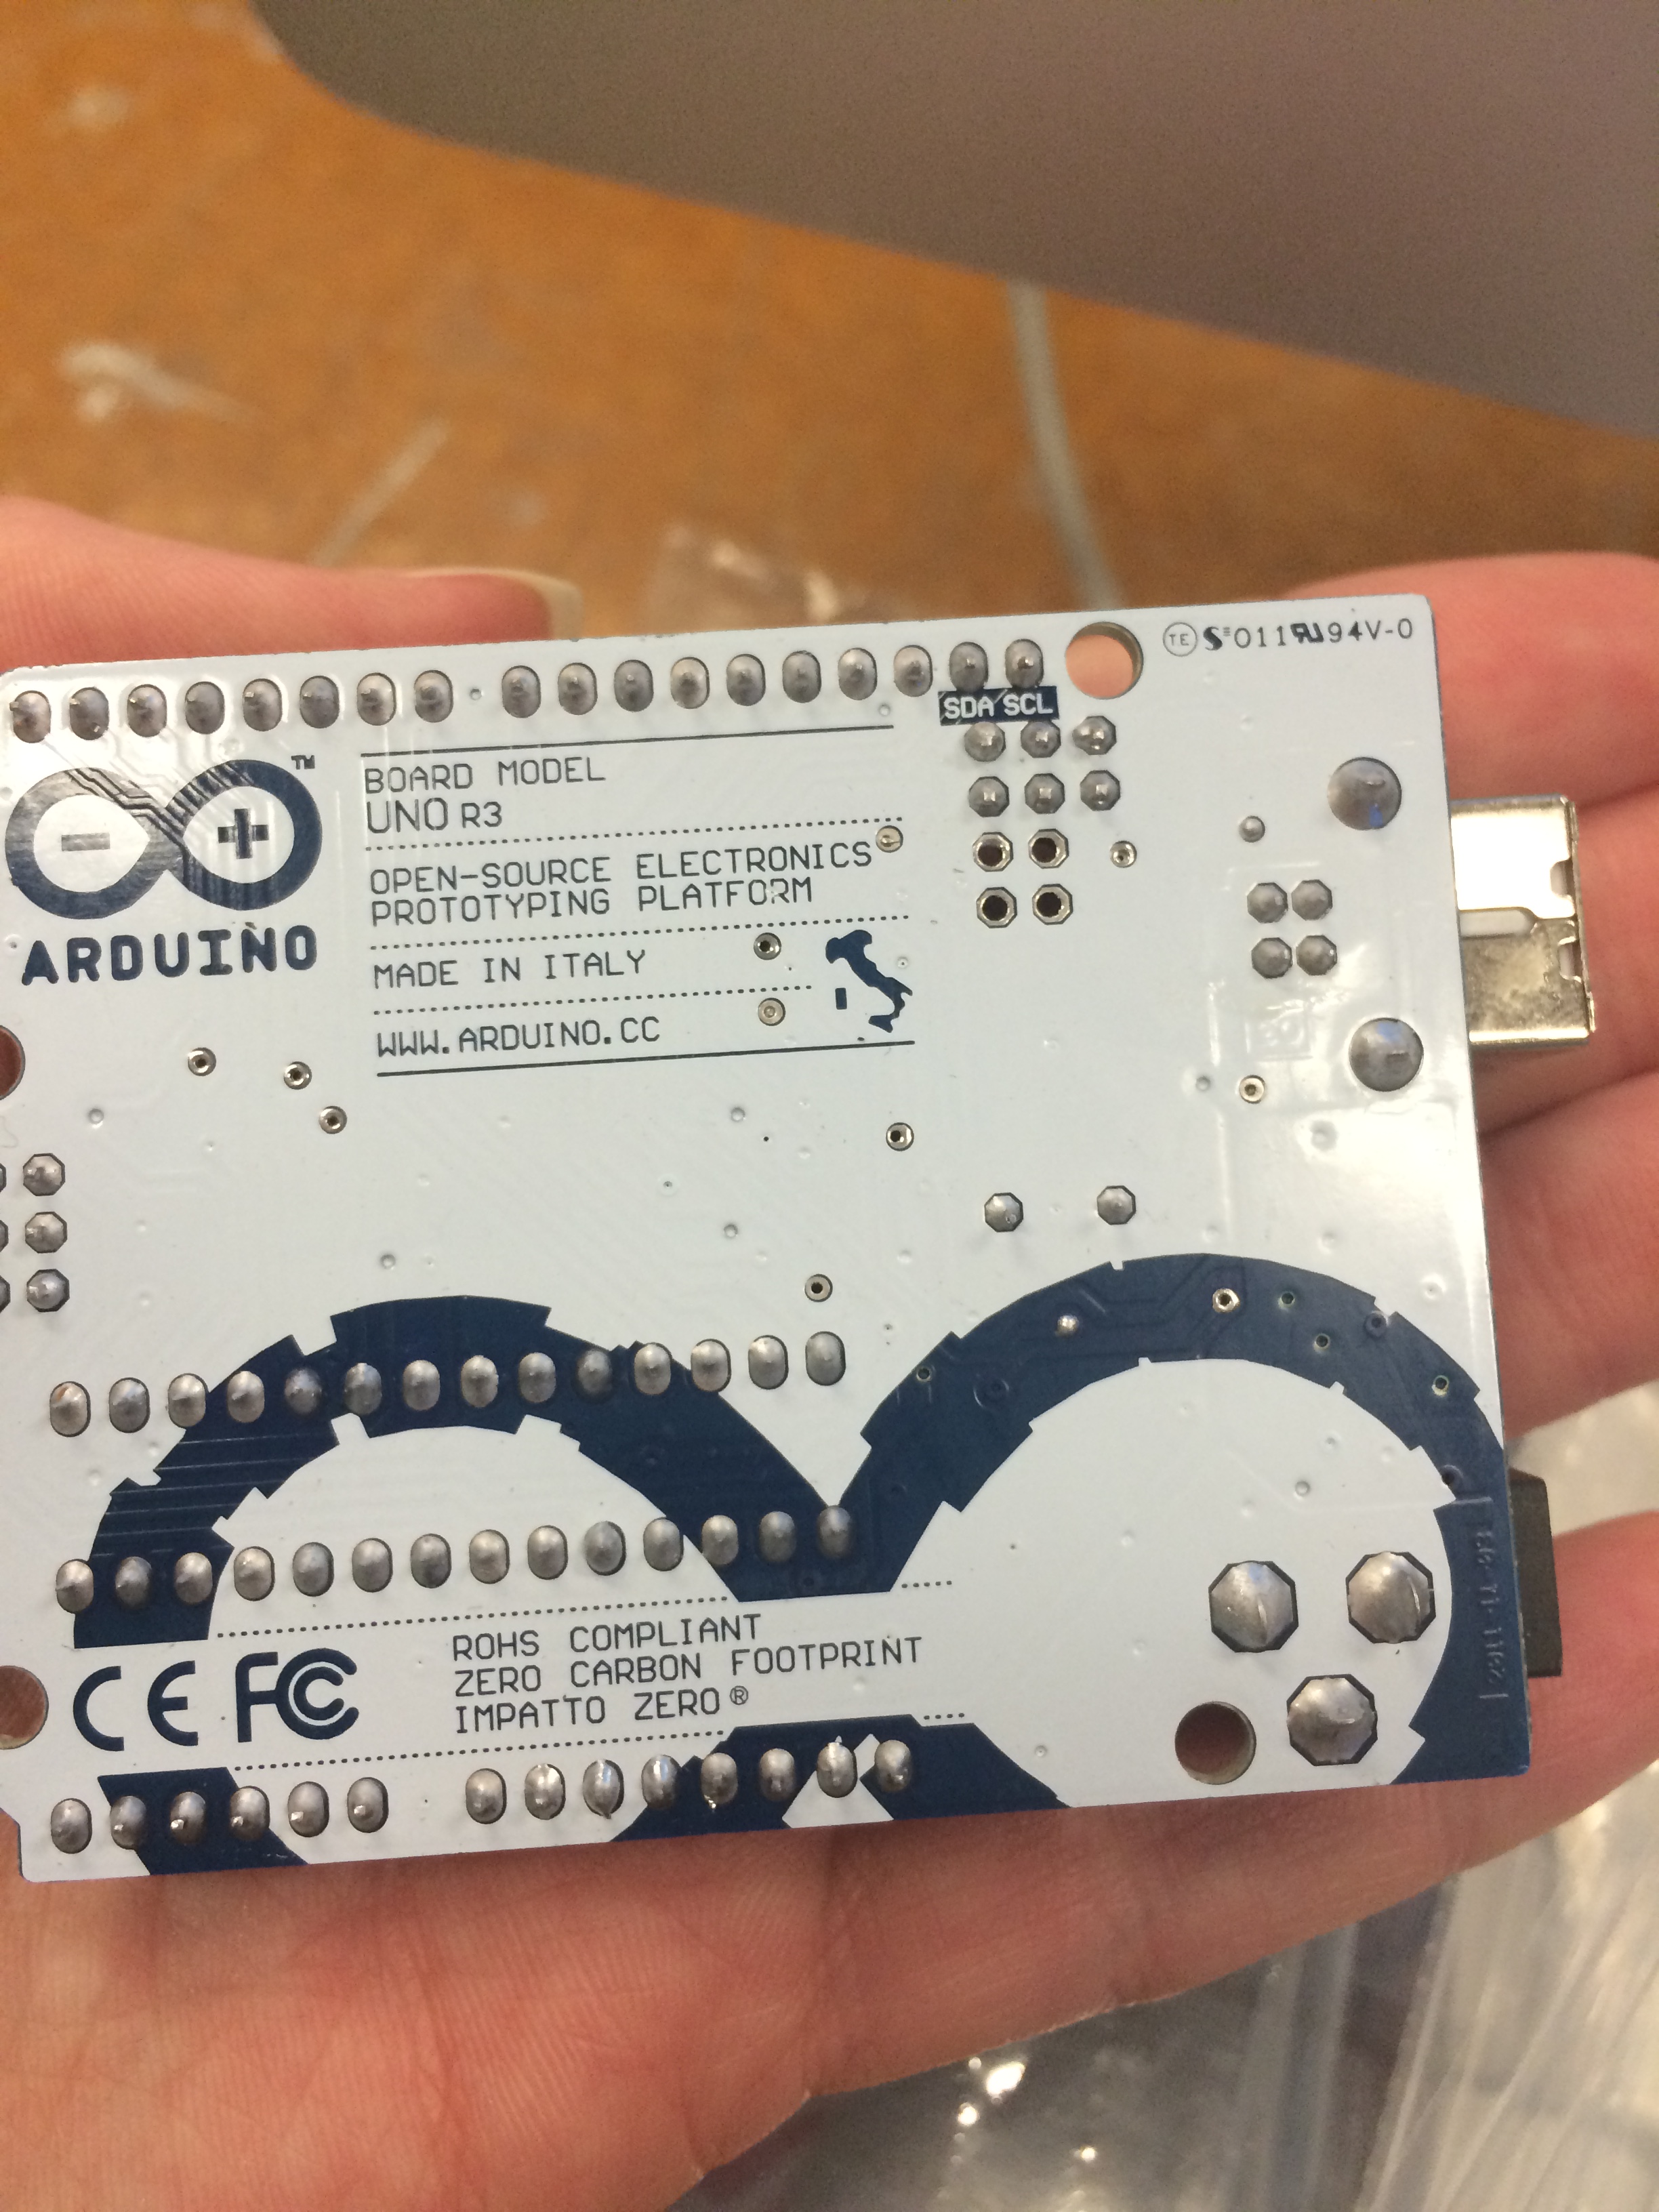
Here’s an arduino for anyone who hasn’t seen one before:

2015-04-07 14.16.35 2015-04-07 14.16.45


We started with the simple blink program. As you can probably guess, a small light on the arduino blinks when you run the program.

It wasn’t too exciting, but it was a way to learn the basic steps of uploading a few lines of code to the arduino to make it do something. We also ran the fade code to see the same light fade on and off.

The next step was to connect it to a led light and run a similar code sequence to make it blink or fade. We used a breadboard to connect all the wiring and the led.

Here’s the completed sequence:

2015-04-07 15.16.09

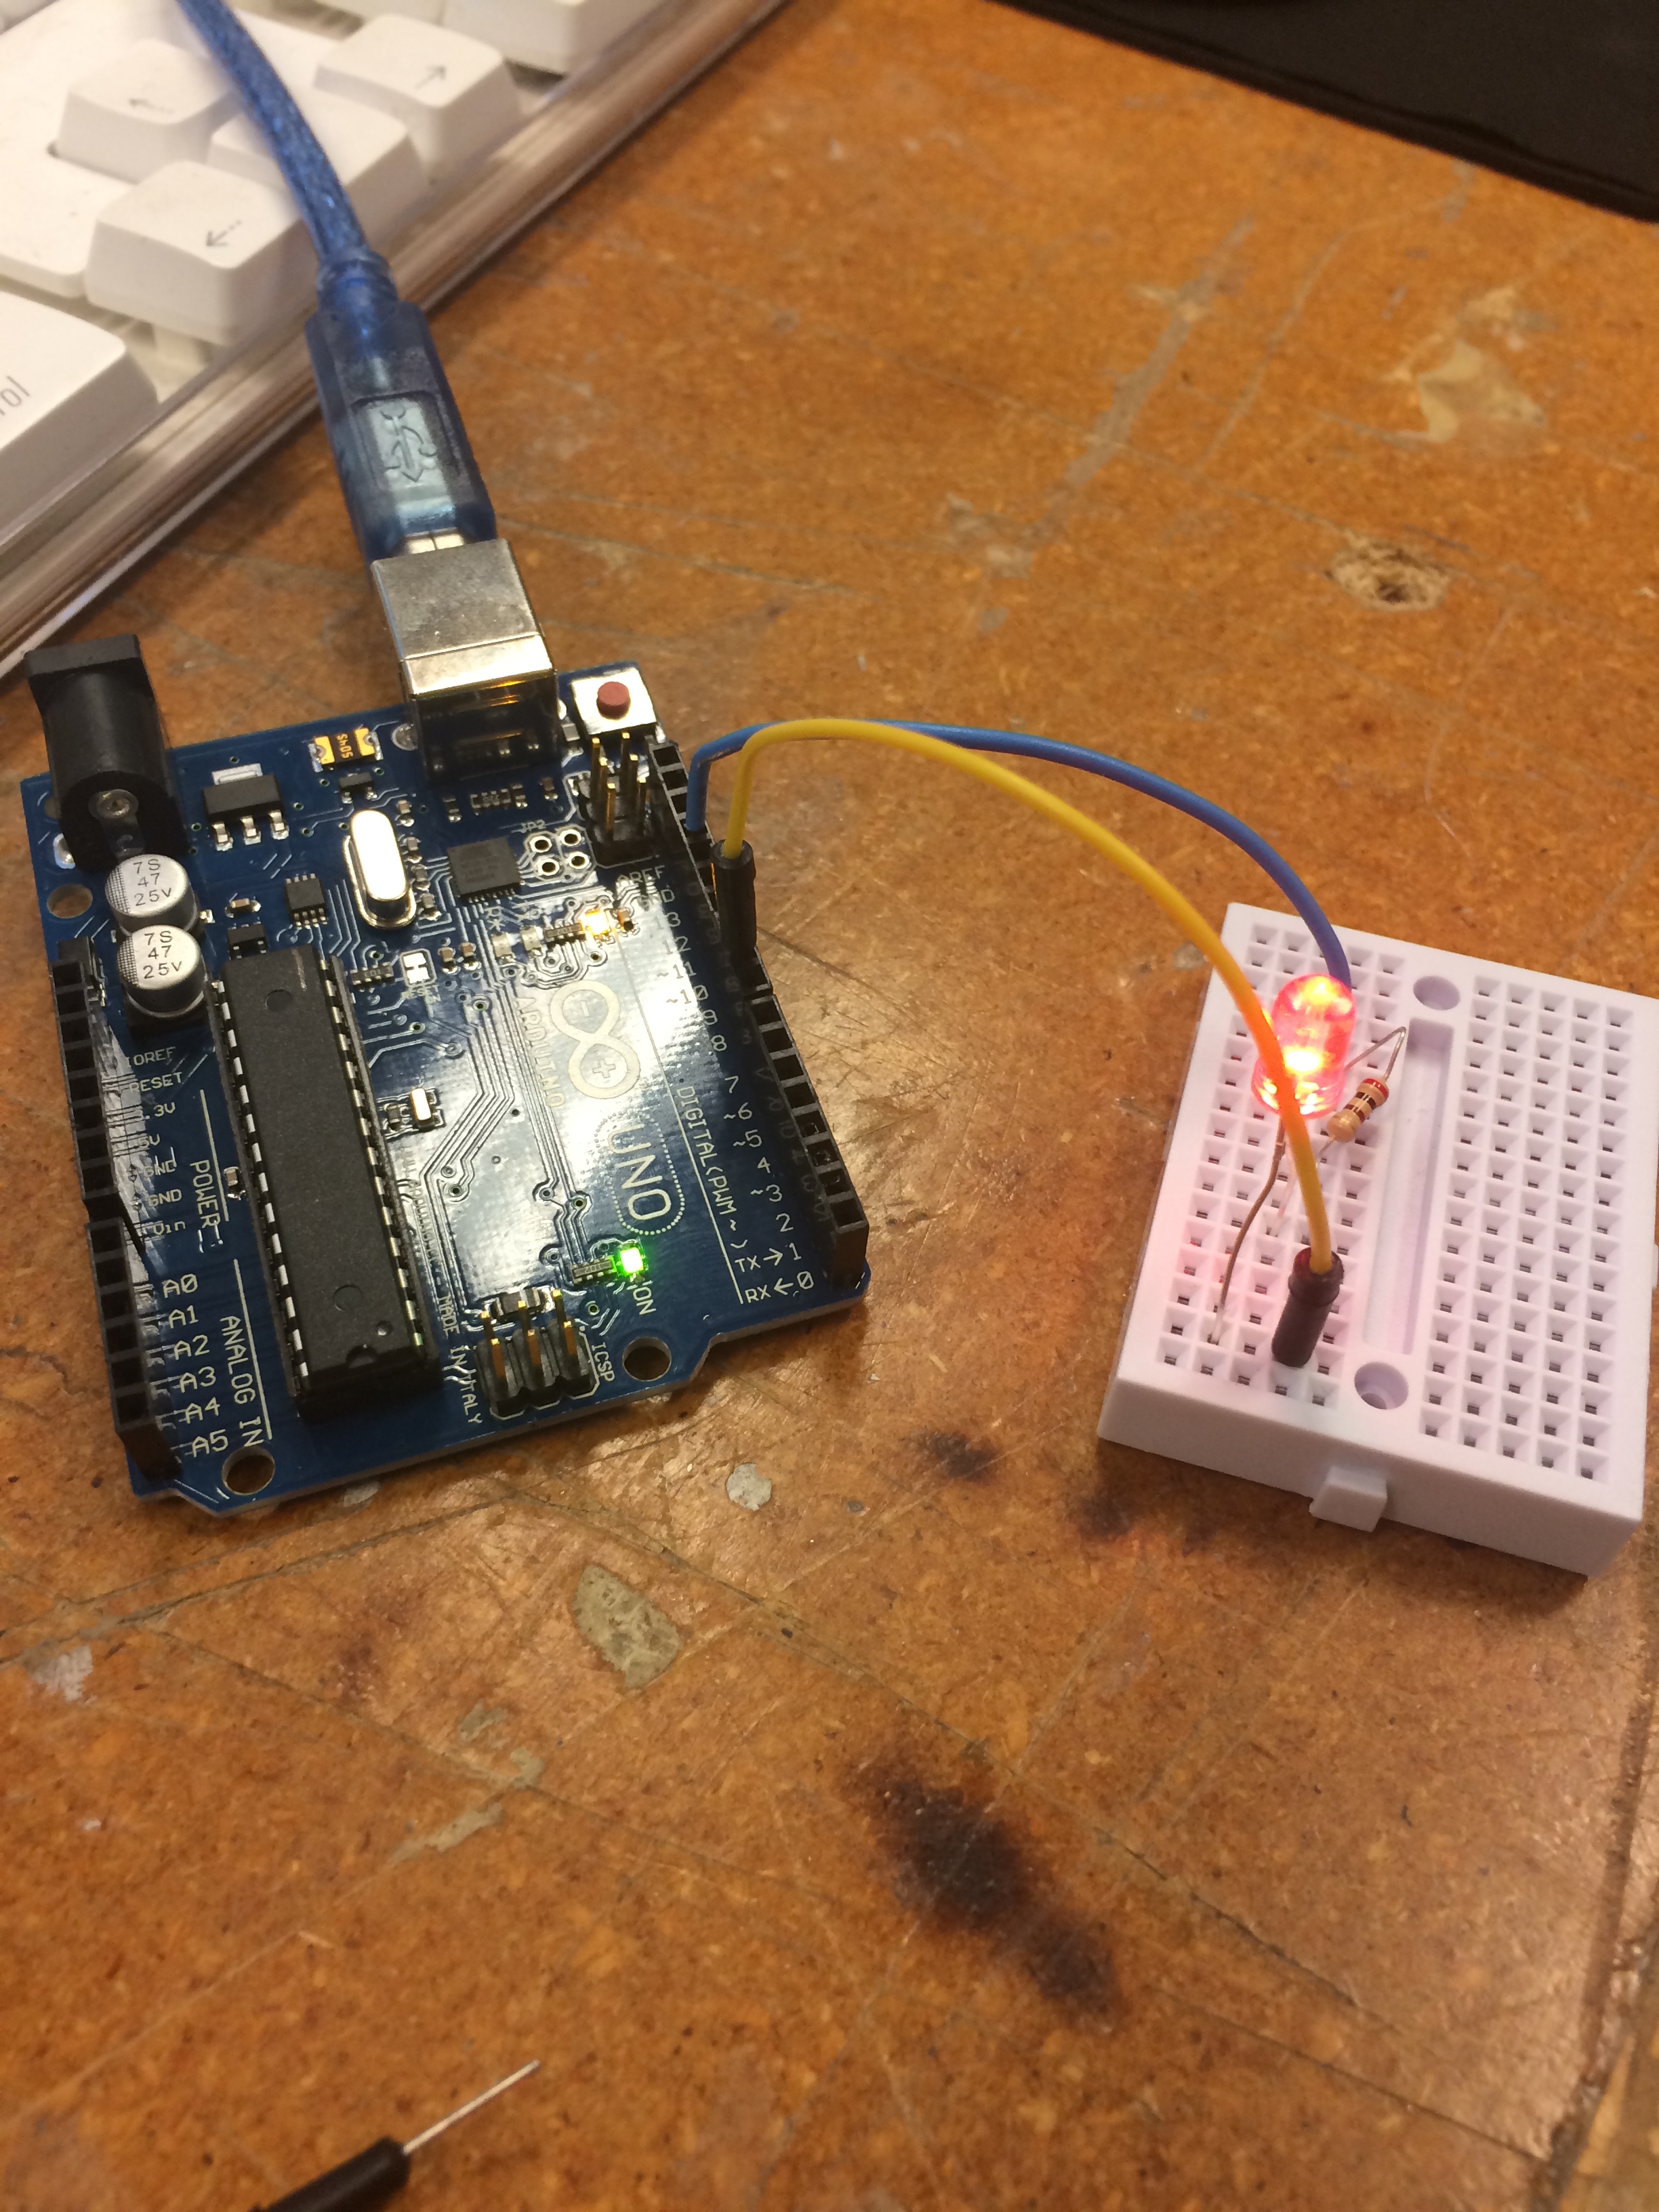
Not too complicated. It kind of reminded me of taking physics in high school. The arduino was like a power source and the wiring connected to the light to complete the circuit. Of course there was no blinking or fading in basic physics circuits.

Next we learned how to use a light sensor. It is a very similar process as hooking up the led, but the output isn’t a light, it’s a bunch readings that show up on the arduino software.

Here’s the setup for it:

2015-04-07 15.54.13

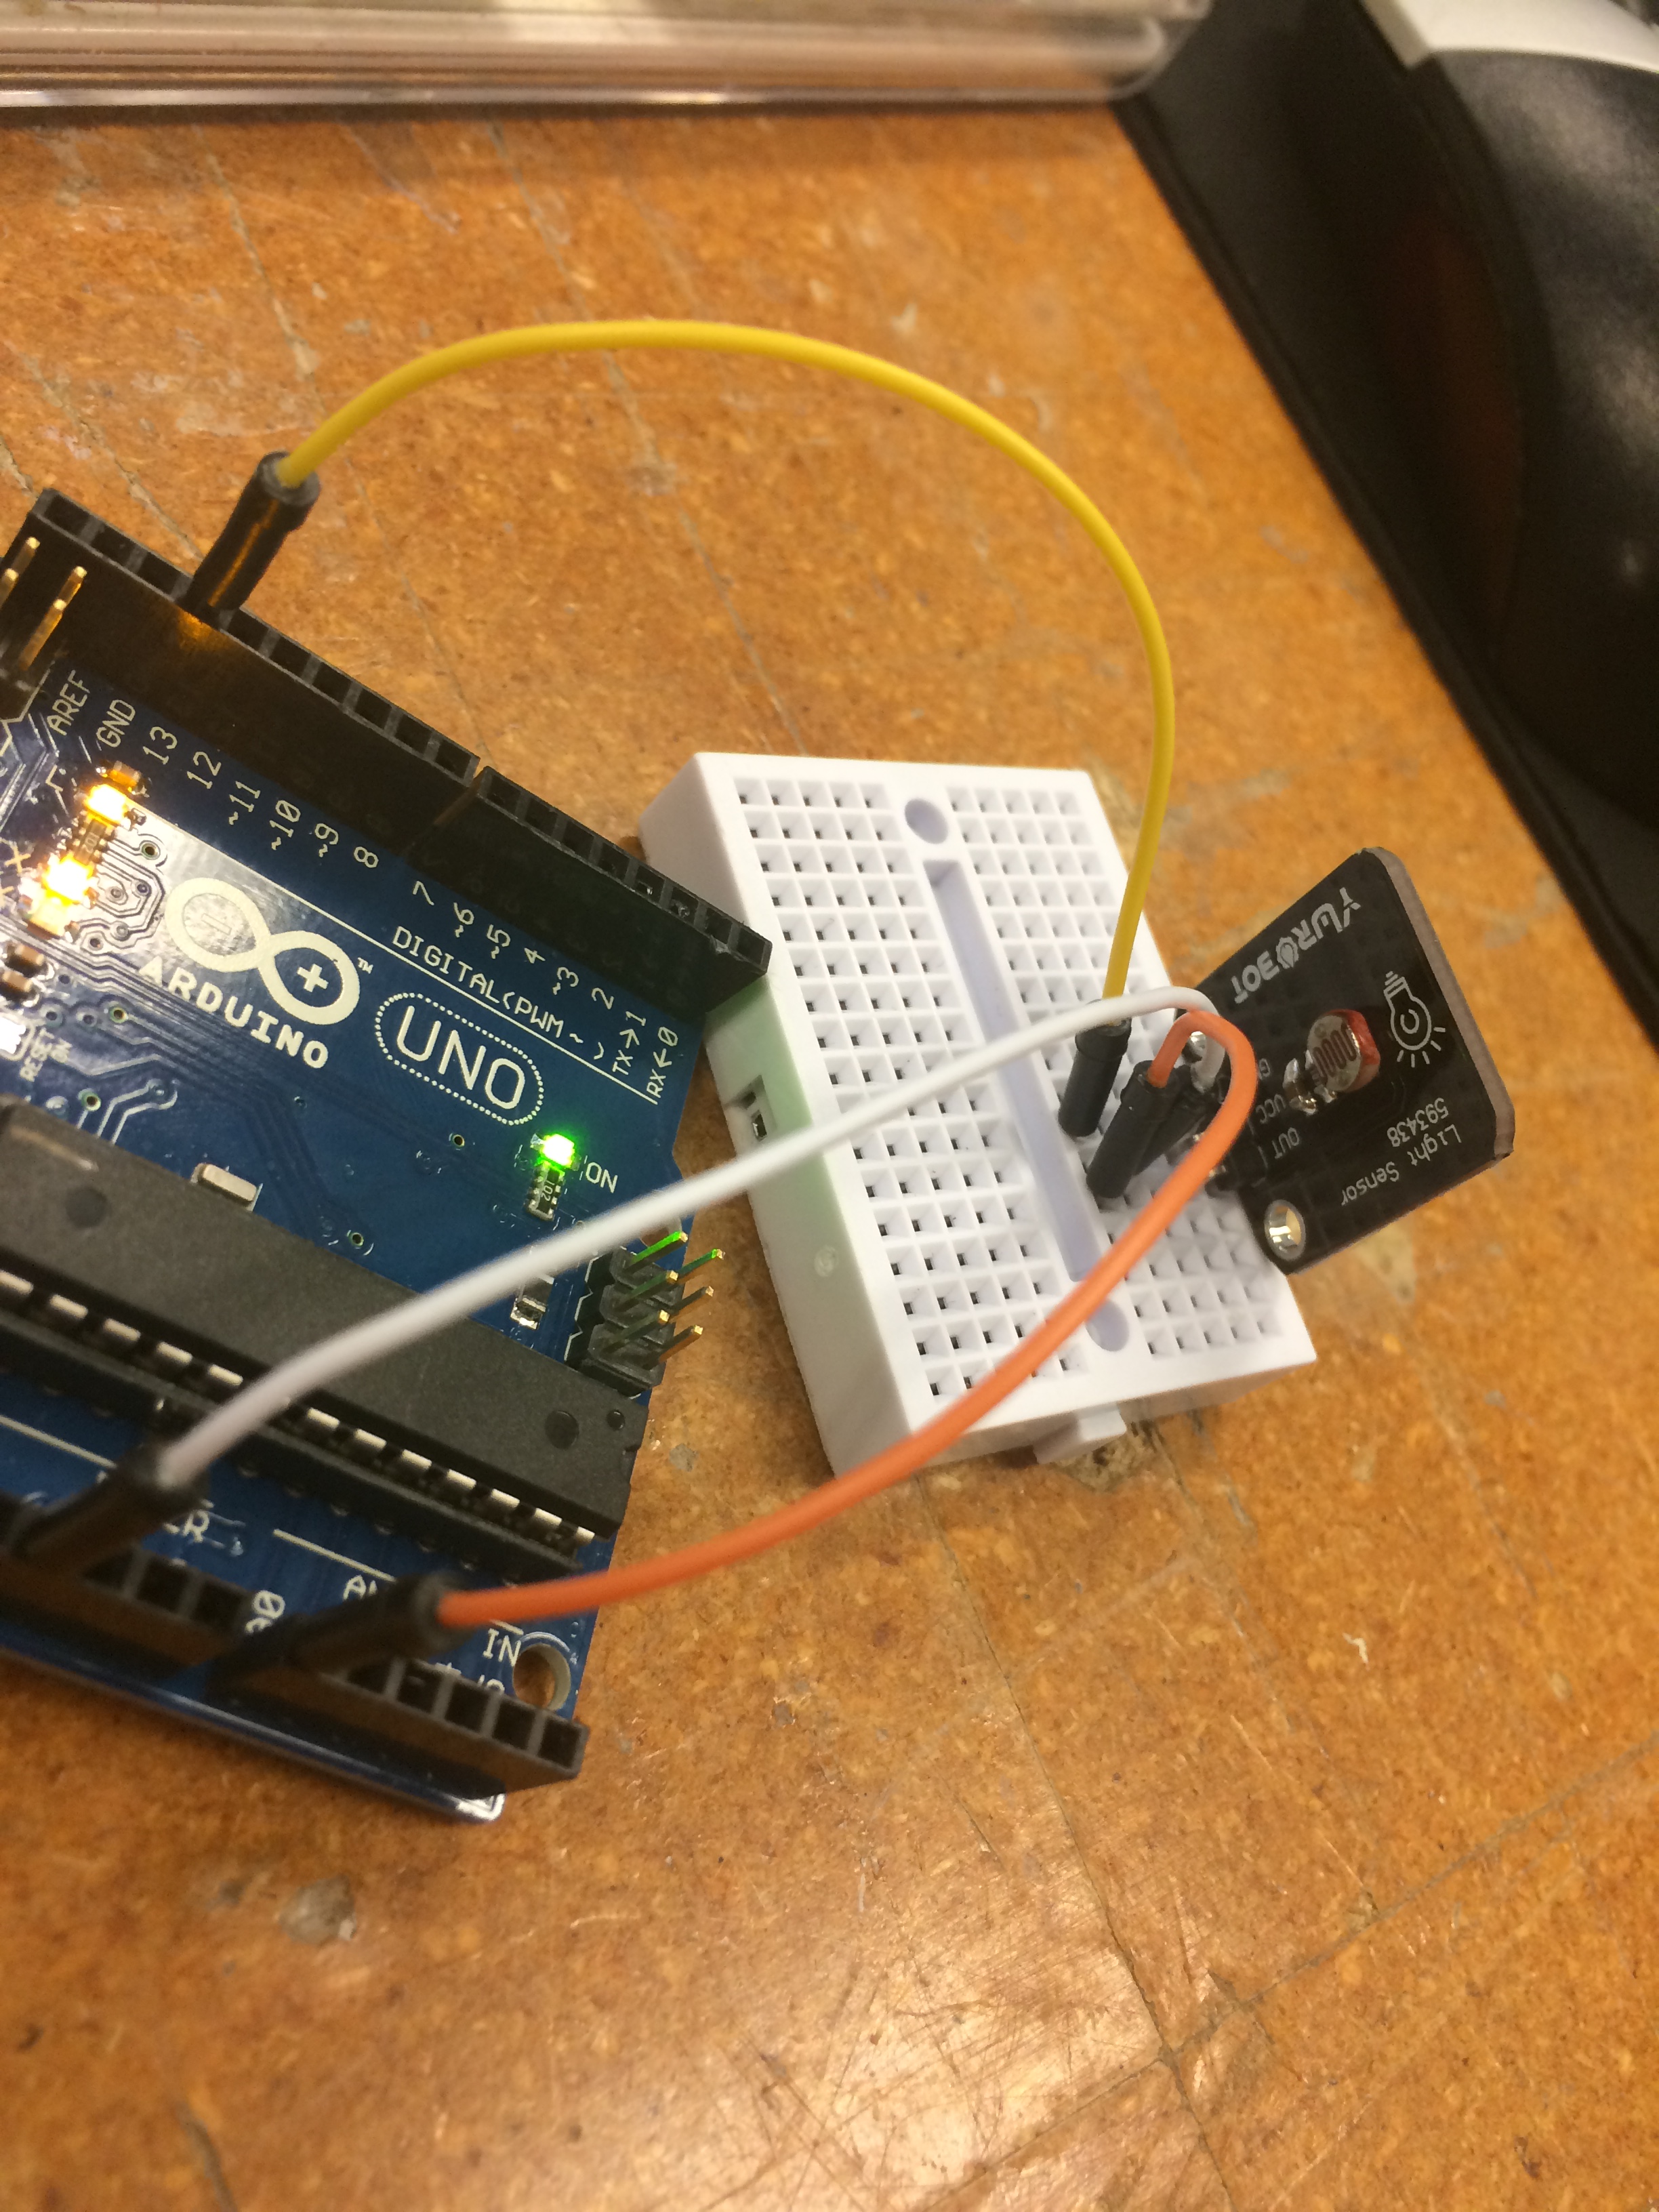
I messed around with different light levels to see how high and how low I could get it. A reading of 0 means no light, so I covered the sensor completely so no light can reach it. And I was able to get a reading of just over 1000 when I flashed a light directly on the sensor. The room lighting read between 500 and 700 depending on the angle of the sensor to the room lighting.

We also were able to connect a led to the light sensor and told it to turn the light on or off depending on the light level (sorry I don’t have a picture of that setup – basically, imagine the last two setups on the same breadboard).

Overall, the main thing I learned about arduinos is that there is a lot of trial and error!

Just with the coding part, a lot of things can go wrong. I didn’t do much coding myself because a lot of it was online and easy to understand. But when I tried to add things in or change parts of the code, I ran into some difficulties.

Also, the arduino setups take a lot of trial and error as well. The good thing is wiring an arduino incorrectly doesn’t hurt the device in any way. I was very glad that I couldn’t break the device by running crazy programs on it because it meant that I can play around with it. Messing up was frustrating, but also expected.

I learned a lot in this class session and even incorporated some of it in my semester project, which will be posted soon!

Fab Lab – Week 1

These next couple weeks we are venturing away from the Maker Lab and get to learn a bit about the variety of things that the Fab Lab has to offer. We split into three groups for the different sessions, and my group got to start in the front area of the lab. This area has computers available to design products using any of the available software they have installed, multiple 3D printers (that we won’t be using at all since we have access to them in the Maker Lab), a laser engraver, and multiple electronic cutters.

Laser Engraver

We first focused on the laser engraver, a hot spot in the lab. We were given small journals that we got to design a cover for. After a brief introduction to the Inkscape software, we were off to designing. Our instructor for the session, Jeff Ginger, set up the laser engraver and showed us the safety precautions that were in place to prevent fires.

Here’s what I designed on Inkscape and my completed journal cover:

2015-03-31 15.11.572015-03-31 15.11.39 I am very happy with how my journal turned out, and I am so glad I got to watch it be made. We learned the difference between raster and vector as we watched. Raster takes off a layer of the material, which is what we did to the journal cover, and vector cuts right through the material. I hope in the next couple weeks we can see the machine vector something.

Electronic Cutter

Next we learned about the the electronic cutters. We continued using Inkscape to learn a few more of its functions as we designed our next project. This project was to cut out stickers from sheets of vinyl. We chose two animals and learned how to morph them together to create one creature. Unfortunately, I wasn’t too creative in my choices and went with an elephant and a giraffe. The next step was to bring our design into the Silhouette Studio program. We learned how to set our designs up to send it to the cutter.

Here is my design and cut out sticker:

2015-03-31 16.03.00 2015-03-31 16.03.15


I wasn’t too pleased with my design, and I never even peeled the sticker off. (It was pretty lame compared to some of the other creatures that my classmates created.) But I decided with the remaining time left of the session that I would print out a better design that I would be proud to show off. I went with a school spirit filled design. It took two tries to cut properly because I did not set up the machine correct the first try, but I am very pleased with the results!

Here is my design and sticker:

2015-03-31 16.36.392015-03-31 17.08.44

I placed my sticker in my journal so I could keep them together. I am so glad that I got the chance to use the laser engraver and electronic cutter this week. I learned a lot and had a great time in the lab. I can’t wait to see what next week will bring!

Week 7 & 8: 3D Scanning at Beckman & Geomagic

During these two weeks we learned all about 3D scanning and an editing software called Geomagic. We had already done a bit of 3D scanning a few weeks ago when we made our busts, but this was a completely different process.

First off, Travis Ross, our tour guide and guest speaker led our session in Beckman and taught us how the basics of Geomagic. We split up into groups because of room size constraints in the lab with the 3D scanner we were working with. I was in the second round group.

I started on the 4th floor of Beckman and got to see a bunch of 3D printed objects using a variety of materials not used in the Maker Lab. We got to compare the materials and really see what other 3D printers could do. My personal favorite was the heart print.

2015-03-03 14.43.03


The heart looked so realistic and opened up my eyes to the capabilities of 3D printing.

I’m working on a project right now about medical uses for 3D printing, and this heart may come up again so look out for that post in the coming weeks.


During my time on the 4th floor, I also got to watch a small scale 3D laser scanner in action. It was extremely slow, but it gave us a good idea of the larger scale one we were going to see in the basement. Also, we were told that the smaller scanner could be more useful for certain scans do to limitation on the larger one. The main limitation was surface type. The larger scanner could not process shiny material very well, but the smaller one could.

Moving down to the basement where the main purpose for the trip was intended we got to hear all about the larger scanner. The main component to the scanning process was the platform that the object sits that is being scanned. It was on a rotating disk to reach all side angles, and was capable of tilting up or down to see any missing spots.

When I got down to the basement, there was an object already being worked on that I’m sure the owner (Arielle) will write about in her post. We ended up focusing on that scan the whole time I was in the basement. This is where we were first introduced to the editing software, Geomagic. Once the object was successfully scanned in at many different angles, Geomagic is used to cut out unwanted parts of the scan (like the table it rests on and any components holding the object into place). Side note: every individual scan that is taken must be edited, so the goal is to get the whole object in one scan.

After editing the unwanted parts of the scan, there were some holes that needed to be filled. Most of the time, the holes were minor and could me manually filled without any issues. But sometimes, depending on the object being scanned, there are areas that the scan cannot reach and must be estimated. Travis ran into this issue with the object he was scanning, so he attempted to rotate the platform to a specific angle to try to reach a bit more of the object.

The next time we saw Travis was in our home, the Maker Lab. During this time we were directly using Geomagic on the lab computers (also the main reason why I don’t have any pictures for you this week, sorry). Travis taught us how to trim or fill parts, how to smooth a surface, and how to divide the object into pieces for further editing. Surprising most of his instructions were pretty easy to follow and I was able to do a lot of the things he was showing us how to do. The hardest for me was the dividing up the object because I got a bit behind and missed a step and didn’t get a chance to catch up. But overall, I can say I know how to use some basic functions of Geomagic after this experience.

Again, stay tuned for more with the 3D heart! And apologies for the lack of pictures.

Week 5 & 6: Fusion 360

I’ve learned so much in the past two weeks. Week 5 was an introduction to Fusion 360, a super cool software that can be quite complex even with step-by-step instructions.

The workshop I participated in to learn Fusion 360 was great. Our main task was to create a model of a lamp.

Here’s a progression of that process:

Screen Shot 2015-02-17 at 3.45.48 PM Screen Shot 2015-02-17 at 4.24.11 PM Screen Shot 2015-02-17 at 4.44.22 PM Screen Shot 2015-02-17 at 4.52.55 PM


My lamp turned out pretty well in the end. It took some time for me to figure out a lot of the steps, but after a lot of trial and error I managed to get to the final product. I definitely struggled through it and got frustrated a few times, but I never gave up.

After that workshop, we were assigned to try to create a new design on our own by following a tutorial on youtube. I chose to try out some headphones.

Here’s the headphones I ended up creating:

Screen Shot 2015-02-21 at 6.28.54 PM

I ran into some major problems with this design even though I was following a pretty straight forward tutorial. I messed up one little step without realizing it would cause problems later, and I didn’t know how to fix it without undoing all the progress I had made after that step.

Basically, the best way to explain the mistake was that there were two faces merging together and they were somewhat overlapped, which is not good. Here’s what it looked like after I “fixed” it:

Screen Shot 2015-02-21 at 6.26.39 PM

Yeah, there’s a lot of extra faces there. I had to mess around with that for a long time until they weren’t overlapping anymore. I did try to use some functions like smoothing and merging faces, but I couldn’t get it quite right so I mostly stuck with the simpler steps until it looked decent and wasn’t overlapping.

After going through that mess I was very frustrated with Fusion 360 and just wanted to move on. But then week 6 came and we were supposed to 3D print our design. I did not want to print my headphones, so I decided to try to make a custom design with no tutorial.

I chose to try to make a candle holder since I had recently purchased a couple candles. Well, Fusion 360 didn’t get any easier for me. This is how far I got after a long hour of attempts:

Screen Shot 2015-02-24 at 4.11.28 PM


I hated it. And I really wanted to print something, so I moved over to the simpler modeling option, tinkercad. I made this in about 30 minutes with no issues at all:

Screen Shot 2015-02-24 at 4.09.49 PM

But then I thought why not try to use a function in Fusion 360 where I import what I made in tinkercad and edit it more in Fusion 360.

This is what happened as soon as I uploaded it:

Screen Shot 2015-02-24 at 4.10.13 PM

Yeah…there was way too much going on and I just wanted a simple candle holder. So I took the original tinkercad version and printed the design just like in week 4 with the bust I made of myself.

Screen Shot 2015-02-24 at 4.09.30 PMAnd here’s the final product:

2015-02-24 18.58.19


My lesson over the past two weeks was a big one. I learned that I am not good at Fusion 360. I need a lot more practice! It is so fulfilling when something I designed is printed, so taking it to the next level by printing something designed in Fusion 360 would be incredible.


Struggling Against the Grain: Fusion 360

I am an extremely inexperienced designer. My world is in finance and accounting; money, not models. Due to this, I had never worked with such a power CAD or really any software even remotely close to the power of Fusion 360. Because of this, I ran into several issues along the way to creating my design.

With power comes complexity, and most of this CAD’s functions were beyond my simple design capabilities. With that being said, I could tell even from a beginners point of view that this program could be used to create extremely intricate designs. However, all I wanted to do was create a lamp.

NHB Lamp

Here’s my lamp. It’s rudimentary and doesn’t look great. Yet, this design showed me the power of the program that we were using. If you scroll down this page, you will see many other lamps that look similar to this one. This is because we all followed the same basic design frame work in order to create this project. Yet, Fusion 360’s “Create Form” function allowed us all to personalize our projects to our individual whims, showing that relative beginners can use this tool to create vastly differentiated designs.

As I continue to work with Fusion 360, I am learning how to control and shortcut my way through this CAD. This program has had a faster learning curve than other new software I have tried in any regard. While I may struggle now, I know that as I continue working with this software, it will begin working for me.

Update: It gets better, I swear!

After messing around with Fusion 360, I am becoming more comfortable with the software. By using the basic shapes and functions within the program, I am able to create simple designs that I can use.

Keys Holder

Here is my first print using Fusion 360. I was able to make it by drawing planes and then extruding out the heights. Finally, I was able to add the nodule at the top by using the create shape function and then thickening it out.

Demo

As you can see, its purpose is to be a hub to hold my wallet and keys in my apartment when its not in my pocket. One downside is that in order to print, the nodule required supports. This causes the backside to be rough without the supports. In the future I will learn to design to not need that measure.

In conclusion, I now feel comfortable using Fusion 360 in order to create basic designs. Some of the more intricate tools are still beyond me, but I know that now I will be able to learn to create more complex models.

Week 4

This week’s class was my favorite so far. I got to directly use a 3D printer! I’ve watched things being printed in the lab before and recently learned how to make designs, but this week I did the whole process in a few hours.

We started with learning about scanning objects. And then we found out the project for the day was to 3D print our own heads! I was excited to get started.

Scanning people turned out to be quite difficult. For example, my nose would not properly scan in unit about the 5th try, but then my chin wouldn’t process, then the top of my head. Basically, scanning requires a lot of patience.

It was fun to see how this technology worked. I never realized that it was possible to digitalize an object with one device. Plus, it was relatively easy to use in terms of the editing process. Once I finally had a scan that had all of my face in it, the flyaway hairs could be virtually cut off in seconds.

The next step was to take the file from the scan and edit it a bit more in tinkercad. This was quick and easy for me because after we were first introduced to the website a few weeks ago I played around with it until it a lot. I put a base under my scanned head to create a bust of myself that could now be printed.

This is where I got really excited. I even took pictures! So once the editing in tinkercad was finalized, the file was imported into the makerware program that directly translates to the makerbots in the lab.

Here is my bust in the MakerBot program (sorry for the poor quality):

2015-02-10 15.37.54-1I was so excited to print my head that I went straight for the first available machine while others stayed in tinkercad to edit fun things onto their bust. While I waited for it to print, I went crazy and posted this poor quality picture from my phone taken of my laptop’s screen to every social media platform. (Don’t ask why I didn’t think to take a screenshot.)

Finally, after what seemed like hours even though it was probably only 30 or so minutes, my head was printed!

Here it is:

2015-02-10 16.40.23-2

I was thrilled! And, again, posted this picture on every social media platform. Including snapchat which is how I communicate with my roommate who’s abroad in London right now. (So my print was seen by people across the world!)

The rest of class I helped out others with their editing in tinkercad and got to admire my completed project. Later I sent a picture of me with my bust to my parents and directly to my friends who I was most excited to share it with.

Here’s the pic of me with my mini-me:

2015-02-10 17.27.40

As you can tell by the picture, my print was very tiny. But I’m so happy with how it turned out and it made me even more excited for what projects are coming next in this class.

As Professor Rindfleisch (the guest speaker of the week) mentioned, there’s a sense of pride in making things with your own hands. I agree that after this experience I feel much more accomplished now that I have gone through the whole scanning and 3D printing process.


Week 4 – Reflections

This week was primarily occupied by creating our first 3D print. We spent the majority of the period scanning our faces, cleaning up the scans, and printing the resulting model. This was our first real experience working with the MakerBots and it wasn’t without a hitch. Leveling the platform, something that should have proved a relatively simple process, turned out to be more difficult for me than anticipated. Despite these minor hiccups, I was able to successfully begin my print by the end of class and be able to pick it up the next day.

The first thing I learnt from this experience with the MakerBot is some of the devices drawbacks. While 3D printing is a wonderful tool, the physical limitations of the device can get in the way of the printing of the object. When printing, the plastic outlining my chin and nose drooped slightly. This shows how in order to accurately print objects with that sharp of oblique angles, the MakerBot would need adequate supports in order to allow the MakerBot to accurately corner and support these objects.

I also learnt a valuable lesson in the beginnings of 3D design. In order to learn best of how to work with a thing, its best to work with something you already know fairly well. And what do people know better than their own face? By working with a familiar object, a person can familiarize themselves with the software they are working in, as well as the limitations of the hardware themselves. This learning experience can help inform on how to better improve objects that someone may not be as comfortable working with, such as an object that may only exist in the designers mind.

Going into the future, I will keep this experience in mind with designing my own objects. The complexity of the model is no impediment to the physical manifestation to the object. However, there are some aspects of design that the printer cannot handle. I think going into the future, I will focus on working from objects that I have experience with objects on Thingiverse that others have designed.

By working with other objects, I can find how I can put my own personal spin on these ideas and make them work for me.


–Noah Baird

Week 3

This week’s class was run by Design for America (DFA) a group that promotes designing to create an impact. I had never heard of this organization before and I had no clue what to expect from a Design Thinking Workshop.

As soon as we formed groups we were given various art supplies including modeling clay, pipe cleaners, popsicle sticks, sharpies, and plenty of post-its. Everyone was excited to relive their childhood through these items to hopefully create something fun.

At the start of DFA’s presentation almost everyone had molded their modeling clay into some funky shape and was anxious to know what was coming next. I know I was.

Our first activity was a warm up to get our minds ready to be creative. We played a fun game that was very difficult to explain but quite easy once we got the hang of it. Basically you had to shout out random things and act it out. The point was to create a scene and then later recreate that scene, but we pretty much failed because we couldn’t remember past the first one.

Later on we were given a scenario that included a variety of distracted drivers and we used this for the rest of the workshop. We started by interviewing members of our group regarding distracted driving. Then we finally got to put some of our supplies to use for the next task. We took all of the information we collected from our interviews and wrote down all the important ideas onto post-its.

Here’s some of the post-its from another group:

10835324_10152958424506084_2076016294675823301_o

At first I had no idea where this was going and where the post-its were going to lead us. I went along with it and tried my best to use the tools and examples they provided us to come up with my own ideas.

Next we talked with our groups and tried to organize all of the things we wrote down onto one sheet of giant post-it paper. Pretty soon our papers were filled and a little chaotic.

Here’s what ours looked like at the end:

2015-02-04 01.01.37


Yeah, we know, too many arrows and lines. Trust me, we knew what it meant.

Eventually we went through a process of adding more post-its onto more giant post-it papers that eventually led us to a solution to the over problem of distracting driving.

Oh, and in the middle of all the post-its we played a little game that was supposed to get our creative juices flowing even more. The premise was to have one person have a treasure box and the other person asks what’s in the box. This led to a lot of strange discussions and was a lot of fun. Since I am not a particularly creative person I built off of my partner’s ideas to try to push myself a bit.

The last task, and the most anticipated part of the day, was the prototype designing of our solutions. For my group this was a lot more discussion about how realistic our idea was, but we were eventually directed to just build something even if it’s not feasible cause that’s not the point. We need to have bad ideas in order to eventually have good ideas that lead to real products.

This was probably the hardest part for me because I like to be realistic about things, not just make a bunch of failed prototypes. But let’s be honest, no one could have come up with a 100% successful idea in a workshop that’s only 3 hours long. And even if we did have a good idea, there were always going to be flaws with it.

I learned a lesson a valuable lesson that day about designing. It’s not easy!

Having gone through the process of designing following the guidelines that DFA directed us through, I will take the tools they offered and transfer the skills I learned into future projects in the course and beyond.

My first 3d printed object

I was quite excited about my first class of DigitalMaking! I’ve never been to a 3d printing lab before, so even the atmosphere with all these MakerBots around was a new for me! But why do I have missed the first class, the week before? I’m an exchange student from Austria and was not aware that this course even exist until Vishal announced it in another BADM class!

I haven’t heard about Tinkercad before. I did not expect that it is that easy to create 3d object. Within 30 minutes I created the first prototype of our team logo. Following major steps were made

  1. The cube is a predefined object in Tinkercad. Just the size must be adjusted
  2. The number 3 and the letter D were placed on the top. Angle and size were adjusted. The letters should be “outside” of the printed cube.
  3. On the five sides remaining I placed the letters of our team named SENOL. These letters should be “inside” of the printed cube.
  4. Finally, I wanted to have a “adapter” to make the cube a key fob. This was quite tricky, because of the angle of this detail. I designed it out of two cylinders. One for the printed object, and one for the hole inside.

One the printed object I recognized a few mistakes, that I’ve designed wrong.

  • There are different depths inside the cube of the letters SENOL
  • The letter L is mirrored.

3d

SE___

__NO_

____L

What’s next?

While you are sitting in front of your computer designing new objects or sitting in front of a makerbot when it is printing new objects, one can really get addicted to 3D printing! There are a bunch of sites online where you can view and download objects other users have designed and shared. I started to think, what the next object I print could look like. Here are a few ideas:

  • A wall cleat to place a cable when it is not in use! I like the idea, to replace the normal cover with a one that has a function. I think about a “function” like a mobile phone mounting while charging.
  • Eggcups are a good idea for making nice gifts for anyone. However, I think that this object would need a bigger base to stand stable and there must be different sizes for different eggs.
  • This Pen&Card Stand is a good example of useful 3d objects for daily usage on your own desk. When I was looking at similar objects I thought about making a bigger object to put in kitchen knives.
  • When you have a OnePlus One, like I do, you do might also have the problem, that there are not many accessories available to buy. You can not buy a docking station, but you can print it! This object has been published on Nov 23, 2014 but it has been modified a few times. I’m sorry to say, that there nothing I see to improve. I just want to print my own “copy”!

Week 2

This week was all about sharing. But not just sharing the way you would split up a pizza between all of your friends. We explored the world of sharing ideas.

We first learned how to do a basic design on tinkercad.com. With this new knowledge we all went into design-mode to create the best nameplate for our assigned group. This was a chance to share ideas of how to take advantage of the 3D printers to make a unique design.

After finally agreeing on a design and color, we were then given a new task that was a chance to dive into the many different sharing websites. My group was assigned grabcad.com, gitfab.org, and pinshape.com to start off.

My favorite of these three sharing sites was by far pinshape.com for many reasons. The biggest factor was the design of the website. It looked exactly like etsy.com and had some of the same features.

Pinshape.com is a place to buy 3D design downloads or pre-printed 3D objects. There is a huge range of products from toys and gadgets to jewelry and art. But any category you looked at had creative designs.

Here are a few of my favorites and how I would use or change them:

container_butterfly-pendant-3d-printing-310

This simple butterfly pendant is an original work of art. It would normally be tedious to make by hand or to create a mold for such a small item, but 3D printing allows for such a intricate design to come to life.

I would most likely buy this design to be able to acquire all the different colors possible. It is simple enough to not be limited to just a black, plastic butterfly. I could potentially print enough to turn it into a decoration in my room or just have a different colored necklace for any outfit. The possibilities are endless.

container_sg-tulip-2-paper-towel-holder-3d-printing-7958

These paper towel holders are an extremely practical design. They would add something to any kitchen and be a great conversation starter. It is quite simple in terms of the idea, but it would be so easy to produce with a 3D printer.

I will unfortunately not be purchasing this item anytime soon because the design is not available for download and the printed object price is too high for me.

container_t-rex-cake-topper-3d-printing-6632


This product is unusual and I would never even think to make this. However, imagine you were in charge of a birthday party for a little boy that loves dinosaurs, but you don’t want to buy the cheap cupcakes at the store with unpersonalized toppers. This is the best solution to make a homemade dessert decoration for that party.

Of course the dinosaur part is not important, but the concept of creating a personalized cake topper can lead to much more. Maybe your local bakery would be interested in having you design a variety of cake toppers to sell at their store.

container_Dock


This charging and amplifying dock has potential to be sold in Apple stores across the nation. I’m not sure why Apple hasn’t already started producing 3D printed docks. It’s genius!

Not only is it a great product that would be easy to market, but it’s cheap to produce. Right now it is free to download the design, so here’s your chance to create a useful product before Apple realizes what it’s missing

-Amanda Kowalski