Digital Making Log: Week 12

Last week was our last week at Fab Lab in Champaign, and for me, it was the most helpful workshop because I learned something that is easily transferable to my semester long project, the spaceship.

We learned how to program arduinos to do something simple, like blink an s.o.s., or turn on LEDs when a sensor detects darkness. It gave me an idea to apply clusters of LEDs to the “radiation bays” on my ship.

I would carve out enough space in the inside so that someone can put in a nano arduino and program the lights to do whatever they want. It plays further into letting my readers personalize their ships.

I also found out about the plethora of other sensors that are available outside of light sensors, including motion sensors. These will help if I design a different, bigger ship that has a giant rotating ball for gravity.

I also went with the class to Deloitte in Chicago to visit the Greenhouse they have there. I was really interested in the process of business consulting and it helped me learn more about it.

As the semester moves forward, I intend to finish my ship and update it on thingiverse.

Update!

This week was a work week for everyone. We spent our time making some progress on the many individual and group projects going on for the end of the semester.

Group Semester Project

I talked with my group formed from an event called the Make-a-thon that happened last weekend. We are planning to continue the project past the scope of the event. Here is an explanation of where we are at this point:

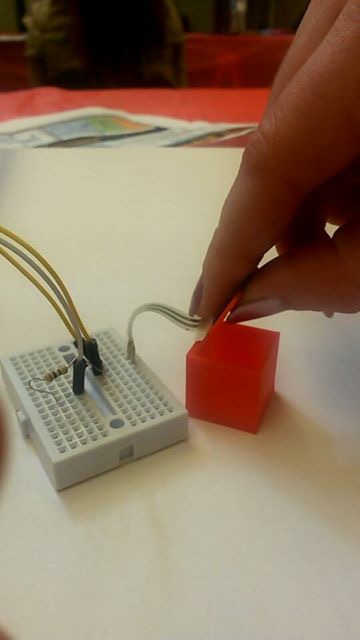
During the Make-a-thon we came up with the idea to have a pill box hooked up to an arduino that could sense when you take the pills out. The goals was to set up some kind of alarm system that would alert the user when to take their pills.

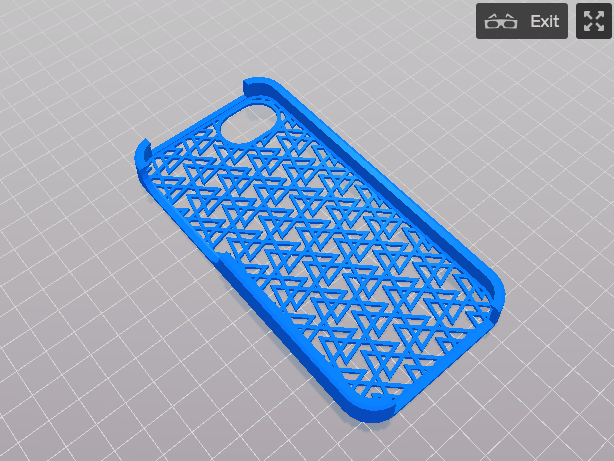
We ended up with a semi-working prototype that included a pressure sensor. We had the sensor working perfectly with some simple coding. And we decided to quickly 3D print a small box to represent one of the days of a 7-day pill box.

Here’s what our prototype looked like:

2015-04-11 16.38.18Not too fancy, but we liked the idea and learned a lot during the event.

Since we didn’t stay overnight at the Make-a-thon we didn’t go into detail how the alarm system would be hooked up. We had the readings from the pressure sensor coming in, but we didn’t know how to send that information anywhere to make an alarm.

We are looking to update our prototype in the coming weeks by making a complete 7-day pill box and trying out multiple light sensors since we were limited to only the one pressure sensor. We may even laser cut a press fit pill box, but we are faced with a bit of a challenge with the lid. Watch out for future posts to see where we end up with our idea!

Individual Semester Activity

This week I also worked a bit on my individual semester activity. Over the past few weeks I have been learning about converting medical data such as CT scans or MRIs into a 3D printed object. I have run into a lot of problems, but I have learned so much.

The coolest thing I learned was that there is a community of people out there that do this already. It’s a small community, but what they have done so far is amazing. Here is a website I found where they share their files, write blog posts, and answer questions in a forum regarding anything to do with biomedical 3D printing: http://www.embodi3d.com

Something I have noticed from my research is that the files I need are very rare. Medical data is not readily available to the public. I have asked around and searched all around the depths of the internet, but everything I have stumbled across is too complex or just not what I’m looking for.

Also, I was hoping to work with a human heart scan, but every file I have tried to edit has been impossible to get to a printable state. Here’s the closest I got:

Screen Shot 2015-04-14 at 9.32.18 PM

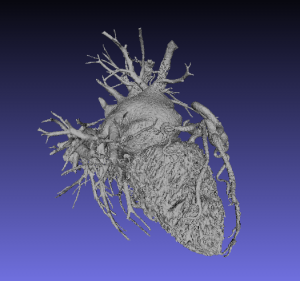
And this was after a long process of cleaning! So, you can tell that this is not an easy task.

At this point I am either going to print one of the ready-to-print files from the biomedical website or switch over to another body part…basically anything but a heart.

When I first was learning how to edit files I tried out a skull, which was super easy and probably was printable with a bit more editing. Here’s that file:

Screen Shot 2015-02-26 at 2.08.30 PM

Bones are much easier to work with! I knew that a heart would be a challenge, but it was way more than that. It was a nightmare!

I’m going to play around with files from a friend’s MRI scan later this week and see if I can work with her data. I am super excited that she is allowing me to use her MRI and I hope I can print her something! She’s a medical student, so she would love to have a 3D print of her brain. We’re both super excited to see what I can do! So be sure to keep an eye out for any progress with this project.


Week 12&13

In the past two weeks I have done stitching at the FabLab, participated in Make-a-thon and continued working on my final project.

So, first it was an interesting experience using “3D” sewing machines at the Fablab. I decided to make a bear. I first downloaded a black and white picture from the web and then edited it a little bit and added a brown color to the bear. And it was ready to go to the sewing machine.

IMG-20150407-WA0000

It’s kind of cool that it shows a picture of the bear on its small screen. By putting a string in the right place on the machine (there are 7 steps to do it) it was ready to start stitching.

IMG-20150407-WA0002

That is how it looked in the beginning….the bear had legs and the head was to come soon. Essentially, the machine did everything for me, I just had to wait for it to be done.

IMG-20150407-WA0004 (1)

Here is the ready bear….but something else had to be done. I cut off the extra white material around the bear and put a sticky paper on the back side of the bear. Then I ironed it so some strings in the back wouldn’t stand out. And this is how the final product looked like.

IMG_20150419_215602 IMG_20150419_215610

Then, on April 12th my teammates and I participated in Make-a-thon. It was a great event that allowed many people to try their skills in creating/making something new. The topic of the event was a “Senior accessibility”, which meant to create something that would help elder people in their day to day activities. We created a sensor on a pill box which elder people would use to keep track when they need to take their medication. Then we also wanted to create a wristband that would receive notification of when to take the medication. However, our project is not complete, and we are still working on finalizing it.

Here is Amanda Kowalski working with arduino to make the sensor functioning.

IMG_20150411_144742


Digital Making Log: Week 12

The semester is coming to a close, and now I find myself scrambling to put together my final project. It looks like I’m not alone, judging my by my classmates vote on a recent Facebook poll.

We were originally planning to show off our projects last week in a mini maker show, but now we’ve pushed it back to give ourselves more time to finish things up. Which I’m thankful for.

You see, I’ve been grappling with how to split my spaceship model for printing and I only really found out a way to do it Tuesday. Prior to that, I used tinkercad to apply holes to my model – the only downside was that the model had to be exported in low resolution so that it could be loaded into the online-based modeler.

Now I’m splitting the model up in Fusion 360, and then exporting each part individually. It’s not as easy to do as it is in tinkercad, but I’ll get there, eventually. Right now I have a running Thingiverse page for my model, check it out! I’ll be updating it with high res imports by the end of the semester.


Week 11 &12 Summary: Fab Lab Continued + Make-A-Thon

During the past two weeks, the class had been working different projects at Fab Lab. There were three assigned topics: Arduino, Digital Embroidery, and Laser Cutting. By the second week in the lab, the class switched to a new program and continued working with amazing staffs at the lab. My group transferred from using SewArt app to create patterns on fabric to design silhouette on materials like plastic, glass, and wood with Inkscape computer software.

Here is an example of making process of laser cutter.

IMG_5900

This is the final look of a design on Inkscape. The piece combines both characters and graphics. The entire designing stage begins from drawing patterns or using existing ones. Then, people may edit dimension, shape, background and so on with the software. Once the design has been set, it was ready to cut.

 IMG_5901

This shows how the piece was cut with eplloglaser. Before having the machine started, the class were told to turn on fans and gas in order to prevent fire. Laser begins moving and cutting from the left upper corner and it can be adjusted to other places when it is necessary. While laser machine is warming up, we may put materials at the original starting point.

IMG_5902

And, this is the completed piece. There was a hole on letter “A”, which was caused at the design stage.

IMG_5820

At my fist visit to Fab Lab, it took me a while to find out this entry.


During the weekends, there were two groups of students from our class attended Make-A-Thon event held by CU Maker. Jill and Kavin teamed up with me. We named the team JKLOL? Our project is a bean-like silicon grab helper that aimed to make life easier for the elder with weak  arm muscles. It took us a good amount of time to design, research, collect data, ask professional’s opinion, and finally have it printed. During the process, Jill first came out the idea and did both hand-drawing and computer modeling for the conceptual graphs. Kavin and I joined to the discuss and helped to solve problems. Moreover, Kavin visited Fab Lab back and forth several times to make sure that our model was printed and ready.

Following are photos I took during the Make-A-Thon activity.

IMG_5927

This is an inside look of one of the studios at Architecture Annex, which is next to Fab Lab.

IMG_5934IMG_5933

The above two are Jill’s hand drawing. It looks even better on the paper.

IMG_5929 IMG_5935

These two show the way we decided the measurement of our item. We started from collecting the size of each others’ hands. Then, we average the total. The results became the dimension of our first printout.

IMG_5924

The last photo from left to right are Kavin, Jill and Dorothy. Dorothy is an expert of project design and materials choosing. Thanks for patiently listened to our presentation and answered our questions.

Overall, it seems like a week full of excitement, creativity, and work for everyone in the class.


Week 12: Raptor Round 2

This week we were originally be going to do a collaborative showcase of our work with the Making Things class in the BIF, but last minute we decided to push our portion of the showcase back so we could have more time to prepare and show off more of what we’ve worked on in class by holding it at the end of the semester.   Instead of scrambling to get everything done for the showcase then, we had “free time” in the lab to work on our semester projects. Sam and I worked on assembling our second Raptor hand (an all white one this time) and looking for places we could source the materials from instead of having to buy a full kit each time.  Putting the hand together this time was a bit faster than the last since we knew what we were doing and had the tricks figured out for the tougher parts (file down the pieces if you can’t fit them together, use a safety pin to get the elastic through the holes, etc.)

Since its hard to have two people work on the hand at once, Sam mostly worked on assembly, while I looked for places to buy the materials for future hands from. Most of the stuff was pretty easy to find on Amazon, except for the screws which I will probably look for at a local hardware store.  Since finding materials didn’t take too long, I had some time at the end of class to check out Thingiverse play around with 3D modeling and ended up using the MakerBot Customizer tool to design and print a new case for my iPhone. I printed it out in white plastic on the Generator and I’ve been enjoying showing it off to my friends the past few days.

Screen Shot 2015-04-15 at 9.19.03 PM

Week 12 Reflection

This was the second week at Fab Lab. The class got chance to switch to different projects. My new object was using laser machine to carve patterns on hard materials, like plastic, glass, wood and so on. I copied a pattern which combines word “Chicago” and several of its famous buildings as the background on a piece of wood. The following are pictures of the view of the piece on computer, during working, and after completed.

IMG_5900 IMG_5901 IMG_5902


The last picture showed the first piece of my project. It has a little hole on letter “A” that it is a little blemish. I fixed with the software and came out a perfect one. The reason I picked up this design is because I used to live in Chicago for years before I came to Champaign for college. It is like souvenir reminding me of the days back then. The two holes are for hang up on high places. I haven’t decided where to put it. But, it seems to fit into any place.