Week 14 Reflection

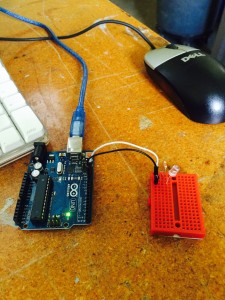
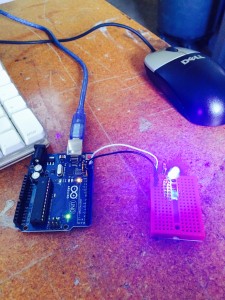
This is the last week for us to have class at Fab Lab. Each group of students are able to accomplish arduino, lasers, and digital embroidery routine. My last task was learning to use arduino and relative software to create inductive sensor. There is a list of items needed to make things work: a USB wire, an arduino board, one or more bread boards, a sensor chip, several jumper wires, one or more resistor, and a LED light. First of all, I an auduino board to a computer monitor with USB wire. Then, opening up the arduino software to create codes or choose from examples. I tried a bunch of existing basic codes, such as blink, bareminimum, and fade, Following are pictures of blink:

IMG_6059 IMG_6060

This is the one of the most basics. Sensors are not needed. There was a resistor to prevent the LED light from overloading. The ground end of LED light had to be matched with the GND on the arduido board, otherwise it would not work. Arduino is quite fun, but I enjoyed learning and playing with Laser and digital Embroidery better.

Not another FAB Lab Post!

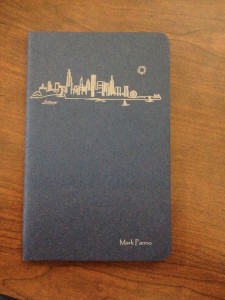
Tuesday April 21st was another day of class filled with new adventures into the “making things” world.  For the final session at the Urbana-Champaign Community Fab Lab, I set out on using a laser to etch the front and back covers of a notepad.  The first step to the process was getting familiar with InkScape, where the images would be laid out.  In order to produce a high quality laser etch, I used a silhouette of the Chicago skyline to start.  Our instructor for the day, Judy, walked us through how to take the image we found online, and create a path of the image used by the laser.  After creating the path, you have to delete the original image, and finalized your path for printing.  When I finalized my skyline path, I sought a better picture, and added a few special touches.  First, I took away a sailboat from the skyline silhouette, and added a yacht type looking boat (a better depiction of Chicago boating scene and a more stylish compliment to the skyscrapers).  Next, I added the sun in the upper right corner, because why not.  The final touch to the front cover of the notepad is my name in the bottom right. The final product can be seen below:

image1 (1)

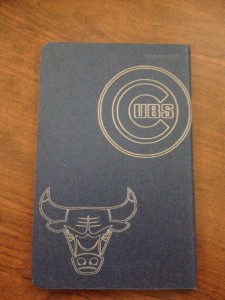
After completing the front of the notepad, I decided to keep the Chicago theme, and added some of my favorite Chicago sports team’s logos to the back cover. Chicago Cubs and Chicago Bulls.

image3

Here is link to a video of the laser etching the Chicago Bulls logon onto the notepad: Video

Below is a picture of the Laser Printer:

image1

Overall, I was surprised at how well the printer was able to etch detail of the skyscrapers. I look forward to using my notepad all the time and showing off my newly acquired maker skills to all my friends!

-Mark Panno

FabLab: Laser Engraving

I’ve always been a minimalist when it comes to designing objects for my personal use. This week, while laser engraving at the FabLab, I was able to fulfill this desire.

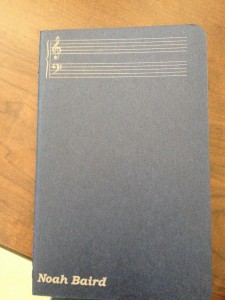
For the laser engraving demonstration that was given to us, we created the cover for a small journal. I’ve never kept a journal and have never found much need for one, but I began to think of uses I could use for something incredibly portable and pocket sized. The best idea that came to mind was a place to jot down any musical ideas I had to remember later. With laser engraving, I was able to create a simple design that marked the journal as my own as well as show its purpose.

Journal

This design, while simple to make, shows off how powerful and detailed laser cutting can be. I hope to use this technology in the future to create other projects that I could get use out of.

Learning Pathways in #DigitalMaking

Importance of Creating Learning Pathways

This past week, we spent time in class working on our individual projects and getting our progress caught up to speed with our group members. My particular project is focused on creating online learning resources to help individuals interested in learning more about 3D printing, 3D scanning, and 3D design. Additionally, our team is tasked with creating these resources in a way that enables users to access these resources through somewhat of a ‘profiled’ gateway that would help users understand what resources they want. To elaborate, our plan is to construct a compilation of many different learning pathways that users could go through based upon their interests and background. For example, if you are a supply chain manager interested in learning more about how additive manufacturing is decreasing product lead times, our resources would direct you to a sequence of links and information pages that would help you to navigate your own path of learning. We are excited to leverage a platform like the MakerLab to help outpour these resources to much greater communities that expand beyond Champaign-Urbana borders.

africa-technology

What Kinds of Learning Pathways Are We Creating?

Below are some examples of the different learning pathways we are creating for the MakerLab that we feel will benefit individuals wanting to learn more about making from any background or skill level:

Entrepreneurship: Individuals looking to start their own businesses or leverage technology like 3D printing to innovate on existing products will be able to access links, individuals, and learning resources to use a place like the MakerLab to explore new ideas. This area will also explore the concept of rapid prototyping that  will aid the new product development process.

Education: Individuals seeking to learn more about how the maker movement is transforming education at various levels and wanting to acquire resources to help introduce themselves and others will find this learning path very beneficial. We hope to craft some great connections to communities around the United States that are talking about ways to integrate the ‘making’ process into our school curriculums.

Management: This path of resources will help individuals in management or other business process-related roles learn how to leverage areas like 3D printing, scanning, and design to improve their supply chains, enhance product development, or help their employees become literate in emerging technologies. We feel that this resource will also be very useful to students interested in business that want to learn more about how 3D printing is changing the business landscape and how additive manufacturing processes are impacting the value chain of a business.

Update!

This week was a work week for everyone. We spent our time making some progress on the many individual and group projects going on for the end of the semester.

Group Semester Project

I talked with my group formed from an event called the Make-a-thon that happened last weekend. We are planning to continue the project past the scope of the event. Here is an explanation of where we are at this point:

During the Make-a-thon we came up with the idea to have a pill box hooked up to an arduino that could sense when you take the pills out. The goals was to set up some kind of alarm system that would alert the user when to take their pills.

We ended up with a semi-working prototype that included a pressure sensor. We had the sensor working perfectly with some simple coding. And we decided to quickly 3D print a small box to represent one of the days of a 7-day pill box.

Here’s what our prototype looked like:
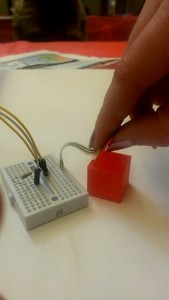
2015-04-11 16.38.18Not too fancy, but we liked the idea and learned a lot during the event.

Since we didn’t stay overnight at the Make-a-thon we didn’t go into detail how the alarm system would be hooked up. We had the readings from the pressure sensor coming in, but we didn’t know how to send that information anywhere to make an alarm.

We are looking to update our prototype in the coming weeks by making a complete 7-day pill box and trying out multiple light sensors since we were limited to only the one pressure sensor. We may even laser cut a press fit pill box, but we are faced with a bit of a challenge with the lid. Watch out for future posts to see where we end up with our idea!

Individual Semester Activity

This week I also worked a bit on my individual semester activity. Over the past few weeks I have been learning about converting medical data such as CT scans or MRIs into a 3D printed object. I have run into a lot of problems, but I have learned so much.

The coolest thing I learned was that there is a community of people out there that do this already. It’s a small community, but what they have done so far is amazing. Here is a website I found where they share their files, write blog posts, and answer questions in a forum regarding anything to do with biomedical 3D printing: http://www.embodi3d.com

Something I have noticed from my research is that the files I need are very rare. Medical data is not readily available to the public. I have asked around and searched all around the depths of the internet, but everything I have stumbled across is too complex or just not what I’m looking for.

Also, I was hoping to work with a human heart scan, but every file I have tried to edit has been impossible to get to a printable state. Here’s the closest I got:
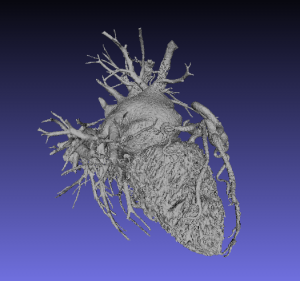
Screen Shot 2015-04-14 at 9.32.18 PM

And this was after a long process of cleaning! So, you can tell that this is not an easy task.

At this point I am either going to print one of the ready-to-print files from the biomedical website or switch over to another body part…basically anything but a heart.

When I first was learning how to edit files I tried out a skull, which was super easy and probably was printable with a bit more editing. Here’s that file:
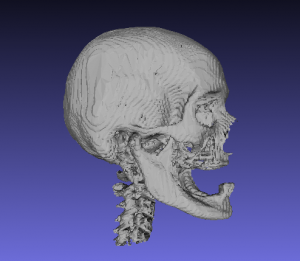
Screen Shot 2015-02-26 at 2.08.30 PM

Bones are much easier to work with! I knew that a heart would be a challenge, but it was way more than that. It was a nightmare!

I’m going to play around with files from a friend’s MRI scan later this week and see if I can work with her data. I am super excited that she is allowing me to use her MRI and I hope I can print her something! She’s a medical student, so she would love to have a 3D print of her brain. We’re both super excited to see what I can do! So be sure to keep an eye out for any progress with this project.


Week 12&13

In the past two weeks I have done stitching at the FabLab, participated in Make-a-thon and continued working on my final project.

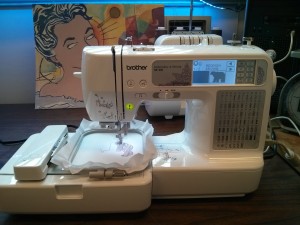
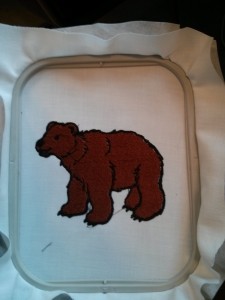
So, first it was an interesting experience using “3D” sewing machines at the Fablab. I decided to make a bear. I first downloaded a black and white picture from the web and then edited it a little bit and added a brown color to the bear. And it was ready to go to the sewing machine.

IMG-20150407-WA0000

It’s kind of cool that it shows a picture of the bear on its small screen. By putting a string in the right place on the machine (there are 7 steps to do it) it was ready to start stitching.

IMG-20150407-WA0002

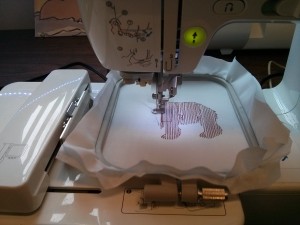
That is how it looked in the beginning….the bear had legs and the head was to come soon. Essentially, the machine did everything for me, I just had to wait for it to be done.

IMG-20150407-WA0004 (1)

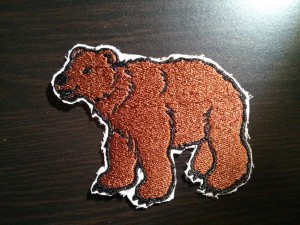
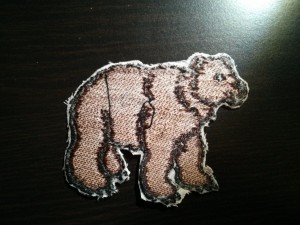
Here is the ready bear….but something else had to be done. I cut off the extra white material around the bear and put a sticky paper on the back side of the bear. Then I ironed it so some strings in the back wouldn’t stand out. And this is how the final product looked like.

IMG_20150419_215602 IMG_20150419_215610

Then, on April 12th my teammates and I participated in Make-a-thon. It was a great event that allowed many people to try their skills in creating/making something new. The topic of the event was a “Senior accessibility”, which meant to create something that would help elder people in their day to day activities. We created a sensor on a pill box which elder people would use to keep track when they need to take their medication. Then we also wanted to create a wristband that would receive notification of when to take the medication. However, our project is not complete, and we are still working on finalizing it.

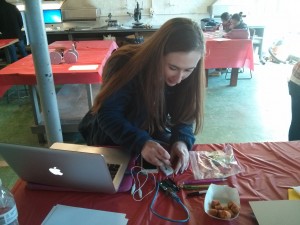
Here is Amanda Kowalski working with arduino to make the sensor functioning.

IMG_20150411_144742


Get a Grip on the Grip

So our GrippingBean came out a little bit massive. Kavin pointed out that it actually totally defeated the purpose of creating a comfortable grip experience for the user. So we put our heads together, and came up with a new sketch, and MUCH more ideal dimensions. After re-cadding it, we threw that bad boy on the printer in a bright yellow filament to create another rapid prototype. After fighting with Makerware for an embarrassing amount of time, hopefully we’re on the right track to a better print.

IF this one works, Vishal showed us two different types of flexible filament that in the end would be super perfect for what we’re trying to accomplish. We want a material that contrives enough friction to get a firm grip on a variety of products. He had me do some research on these flexible filaments, as they need a bit more “TLC” when putting them through a printer.

This week, we’re headed to the FabLab again, in which as we work with new technologies, we’ll also be able to put our print through. In the end, if we decide that the design is ideal, we’re looking to get it cast in silicon. If that works, Boom. We’ve made a product that would aid the elderly or those afflicted with tremors in a ton of everyday activities.

Make-a-thon and Week 13

The biggest issue of the CU Make-a-thon last weekend for our team was solved before we even met up! Jill had a product idea and a hand-drawn 3D render of the product, which, after some discussions with the team, would ultimately come to be known as the GrippingBean. It draws on the functions of ‘Fat-Gripz’, a pair of cylindrical sleeves that thicken the diameter of a barbell or a dumbbell so as to recruit more muscle fibers when using them. We like to think of the Gripping Bean as a grip-thickener that would aid people with hand-tremors or severe arthritis as their hands are bound to be shaky and are prone to dropping items with thin handles, like a spoon or a toothbrush, or even the handle of a teacup! The benefits of having an industrial design major on the team were countless, as Jill also created an initial CAD model of the bean though Fusion 360.

Displaying The Gripping Bean 2.png  Displaying The Gripping Bean 3.png

We realized that our prototype was thick enough o defeat the purpose of a comfortable grip, so the following class, we printed out a smaller version with lesser curve around the edges to make for a more compact feel, although none of us were in class to get a glimpse of the finished 2.0 prototype. Vishal was kind enough to give us some flexible filament, which we hope to use through some of the bigger printers in the FabLab and we are totally looking forward to our next session.

Displaying IMG_20150412_101551.jpg

Our initial model

Week 13 Reflection

In this week, we were given time to continue working on individual’s final projects during class.Some of my classmates worked on their own, others cooperated with group members. Our group decided to refine the BeanGrap and reprint it, since the previous module was a little oversized. Near the end of the class, Jill accomplished editing and started printing the new model with Maker Bot. Based up this version, we will mimic a silicon one, which is close to the texture we meant to have on the real product. There was an exhibition from another section of the course during the class time. Some of classmates went to see and learn from the show. This week’s class doest not have something special, but everyone was as productive as usual.

Digital Making Log: Week 12

The semester is coming to a close, and now I find myself scrambling to put together my final project. It looks like I’m not alone, judging my by my classmates vote on a recent Facebook poll.

We were originally planning to show off our projects last week in a mini maker show, but now we’ve pushed it back to give ourselves more time to finish things up. Which I’m thankful for.

You see, I’ve been grappling with how to split my spaceship model for printing and I only really found out a way to do it Tuesday. Prior to that, I used tinkercad to apply holes to my model – the only downside was that the model had to be exported in low resolution so that it could be loaded into the online-based modeler.

Now I’m splitting the model up in Fusion 360, and then exporting each part individually. It’s not as easy to do as it is in tinkercad, but I’ll get there, eventually. Right now I have a running Thingiverse page for my model, check it out! I’ll be updating it with high res imports by the end of the semester.