How This Semester Made Me Into a Maker

I remember when I first saw the Digital Making Seminar course flyer, I imagined this course would be radically different than courses I had taken in the past. Now that I am writing my semester’s reflection, I can safely say that this course greatly surpassed my expectations. I did not simply learn in this course; this course transformed the way that I think.

The Maker Movement and Learning to Become a Maker

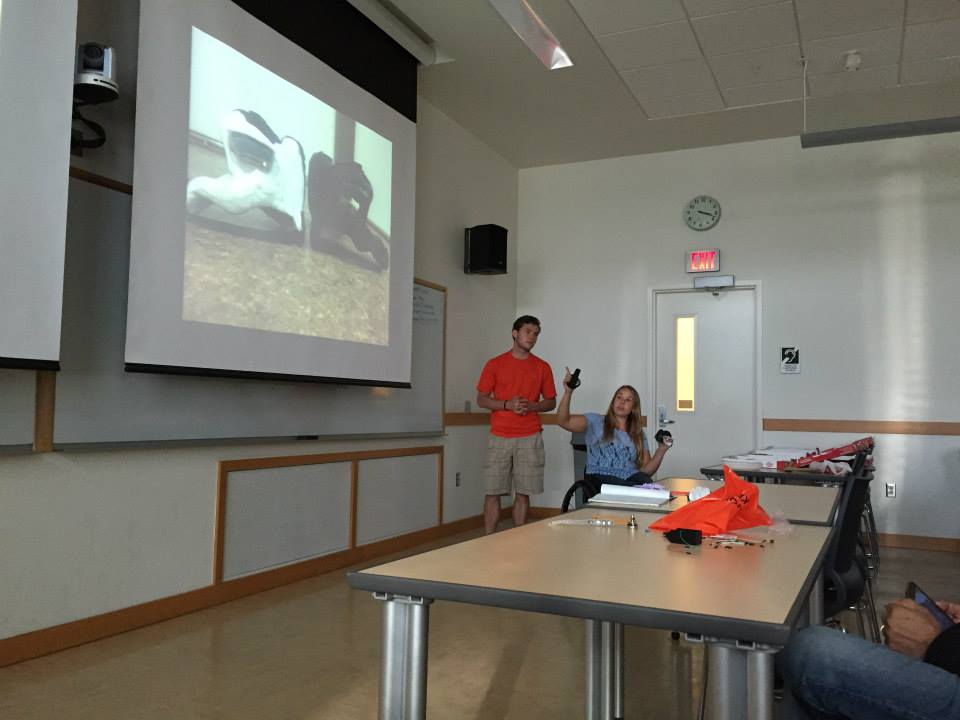
When I first heard about the Maker Movement, I was fascinated because I have always had great interest in exploring ways that people can learn most optimally. Professor Kylie Peppler from Indiana University spoke to us at the beginning of the semester in great detail regarding the Maker Movement and I was inspired to truly understand what ‘making’ could mean in my own learning experience. This course gave me the opportunity to experience firsthand what it means to learn by making and how tangibly creating something can challenge your mind in ways that traditional teaching methods simply can’t. By getting to experience a workshop put on by Design for AmericaI saw just how significant this movement was and that I was sitting at the forefront of it. Not every student gets the change to take a course like this, so being able to witness testimonies from many guest speakers throughout the semester showed me just how significant this whole ‘making’ ordeal really is.

Moving forward, the importance of the Maker Movement and everything I’ve learned about making digitally has motivated me to be involved with this community and continue expanding my knowledge in the areas of disruptive making technology. I have most formally pursued this by taking on employment at the MakerLab! I began working here very recently and I could not be more excited to continue being immersed in a place where I’ve learned that creativity and innovation are the fuel to the continuing technological development of society.

Technology and All The Ways I Learned to Make

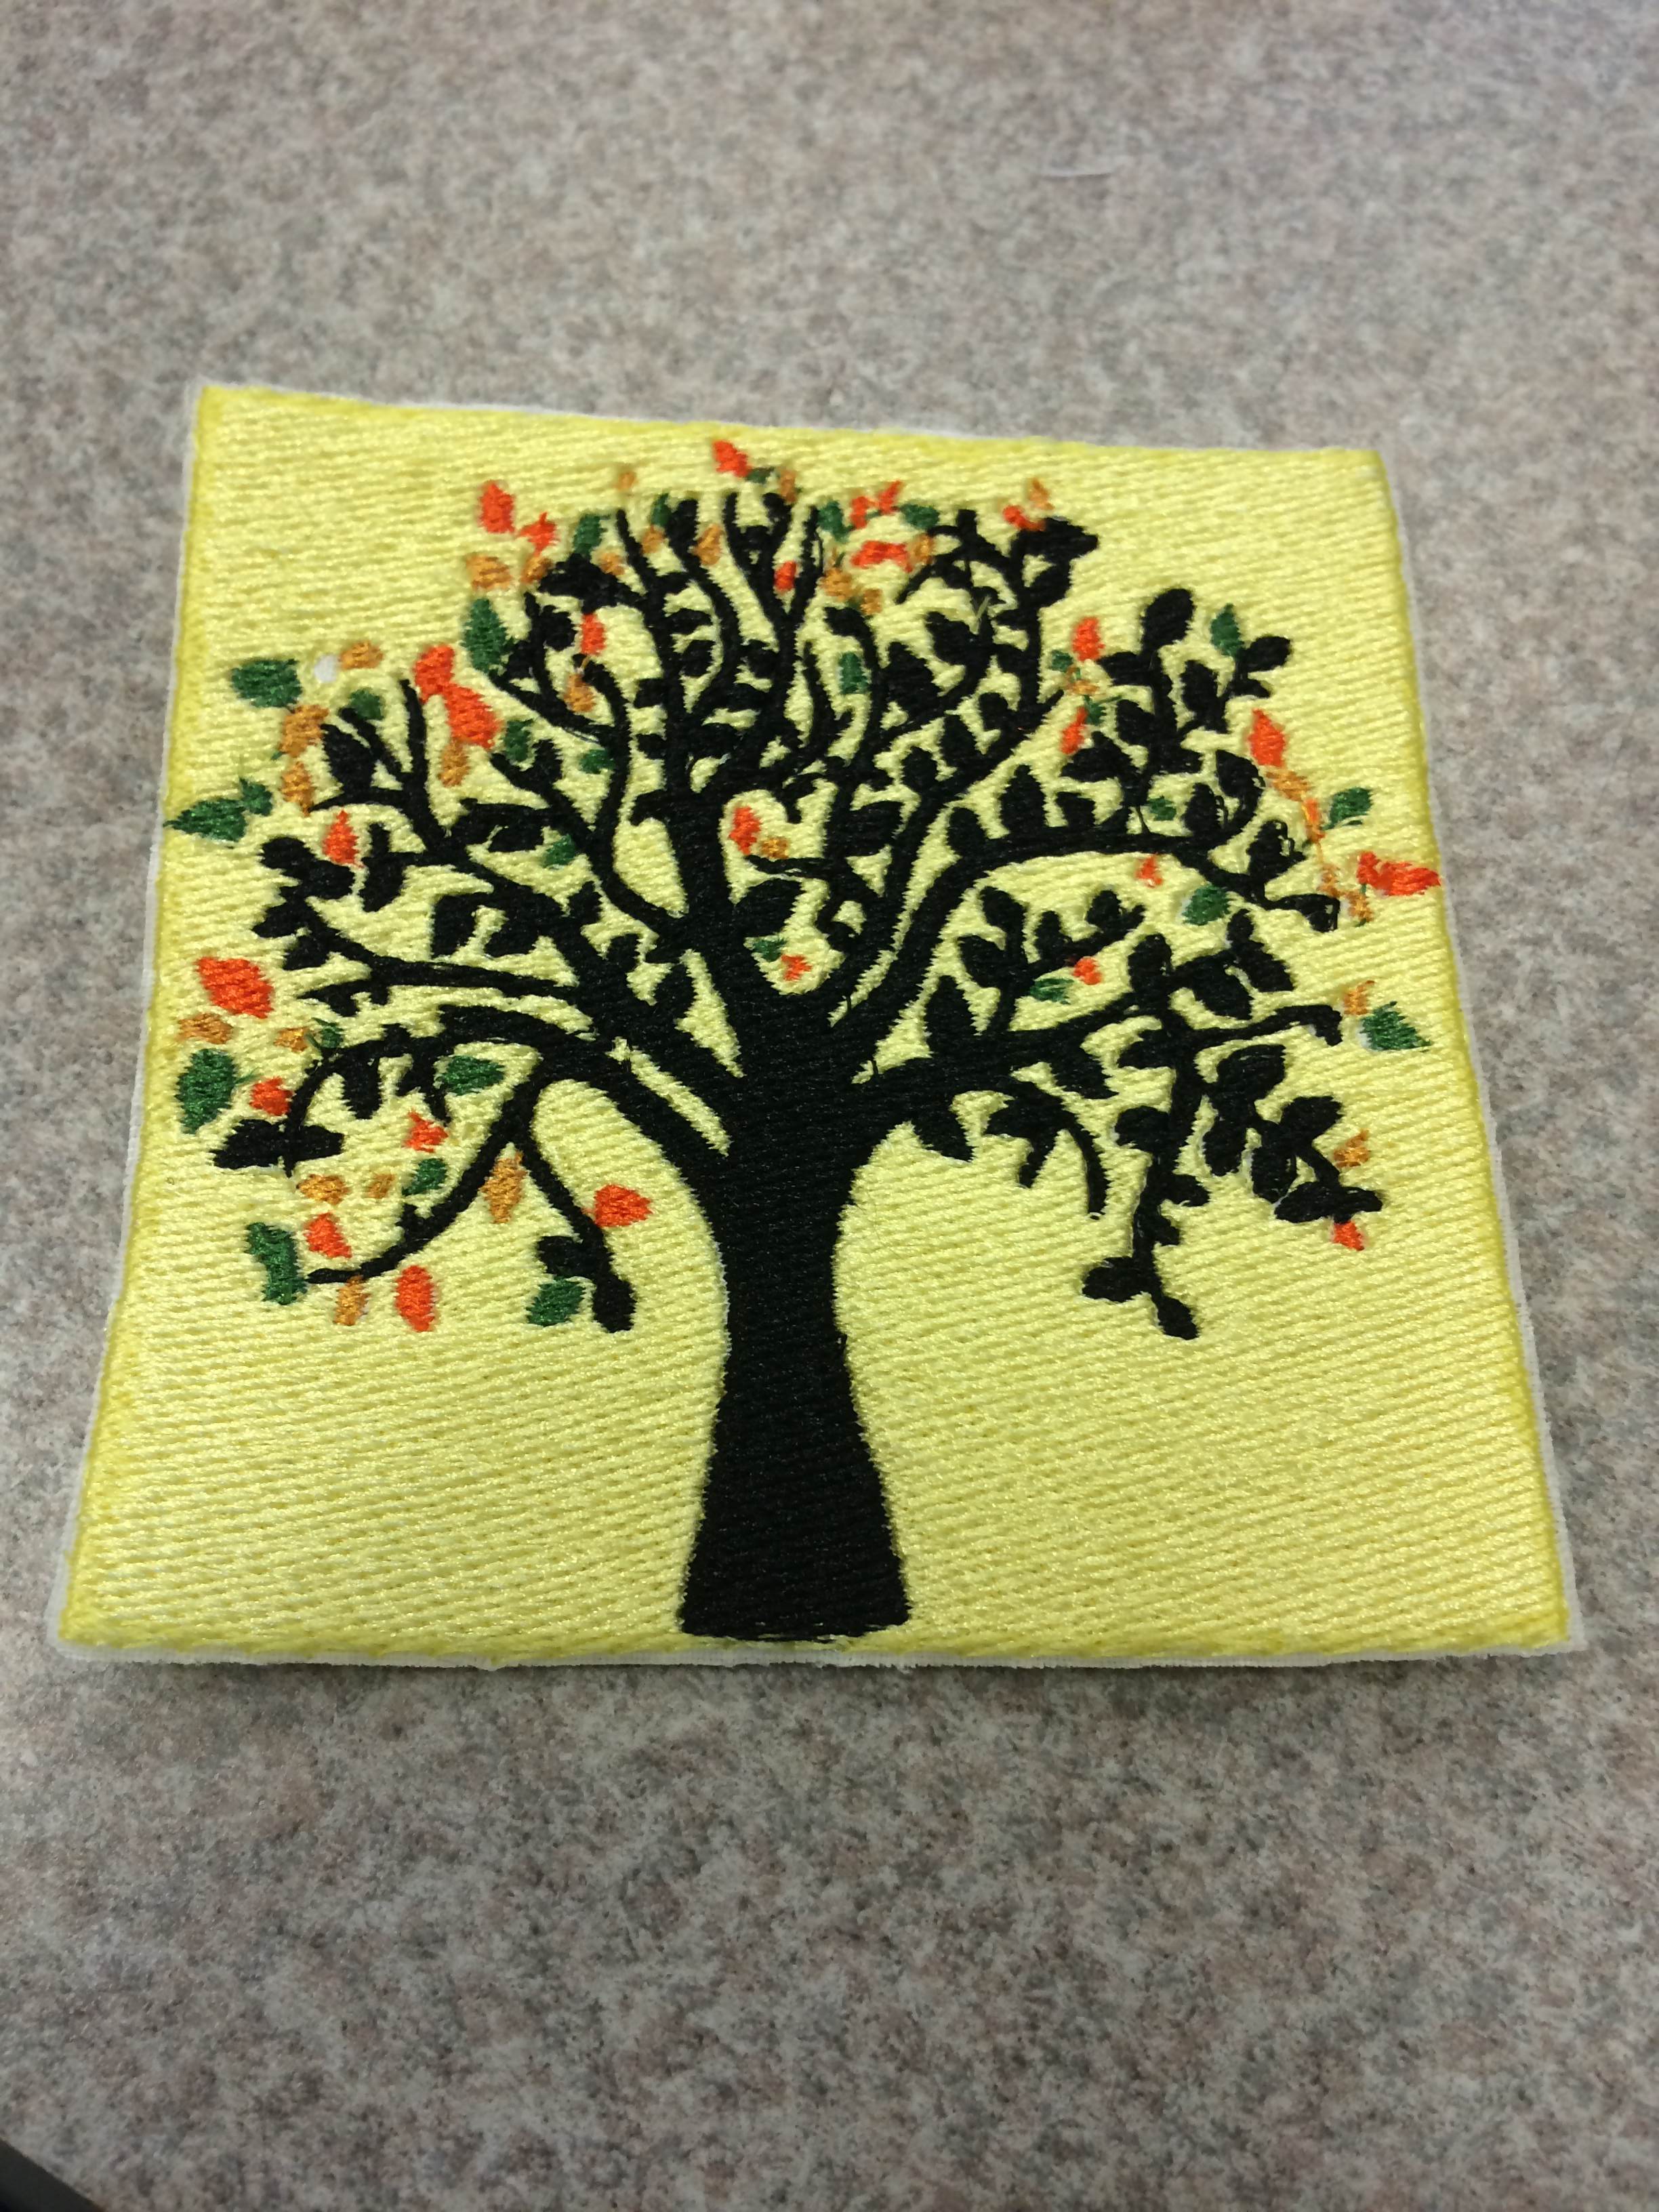
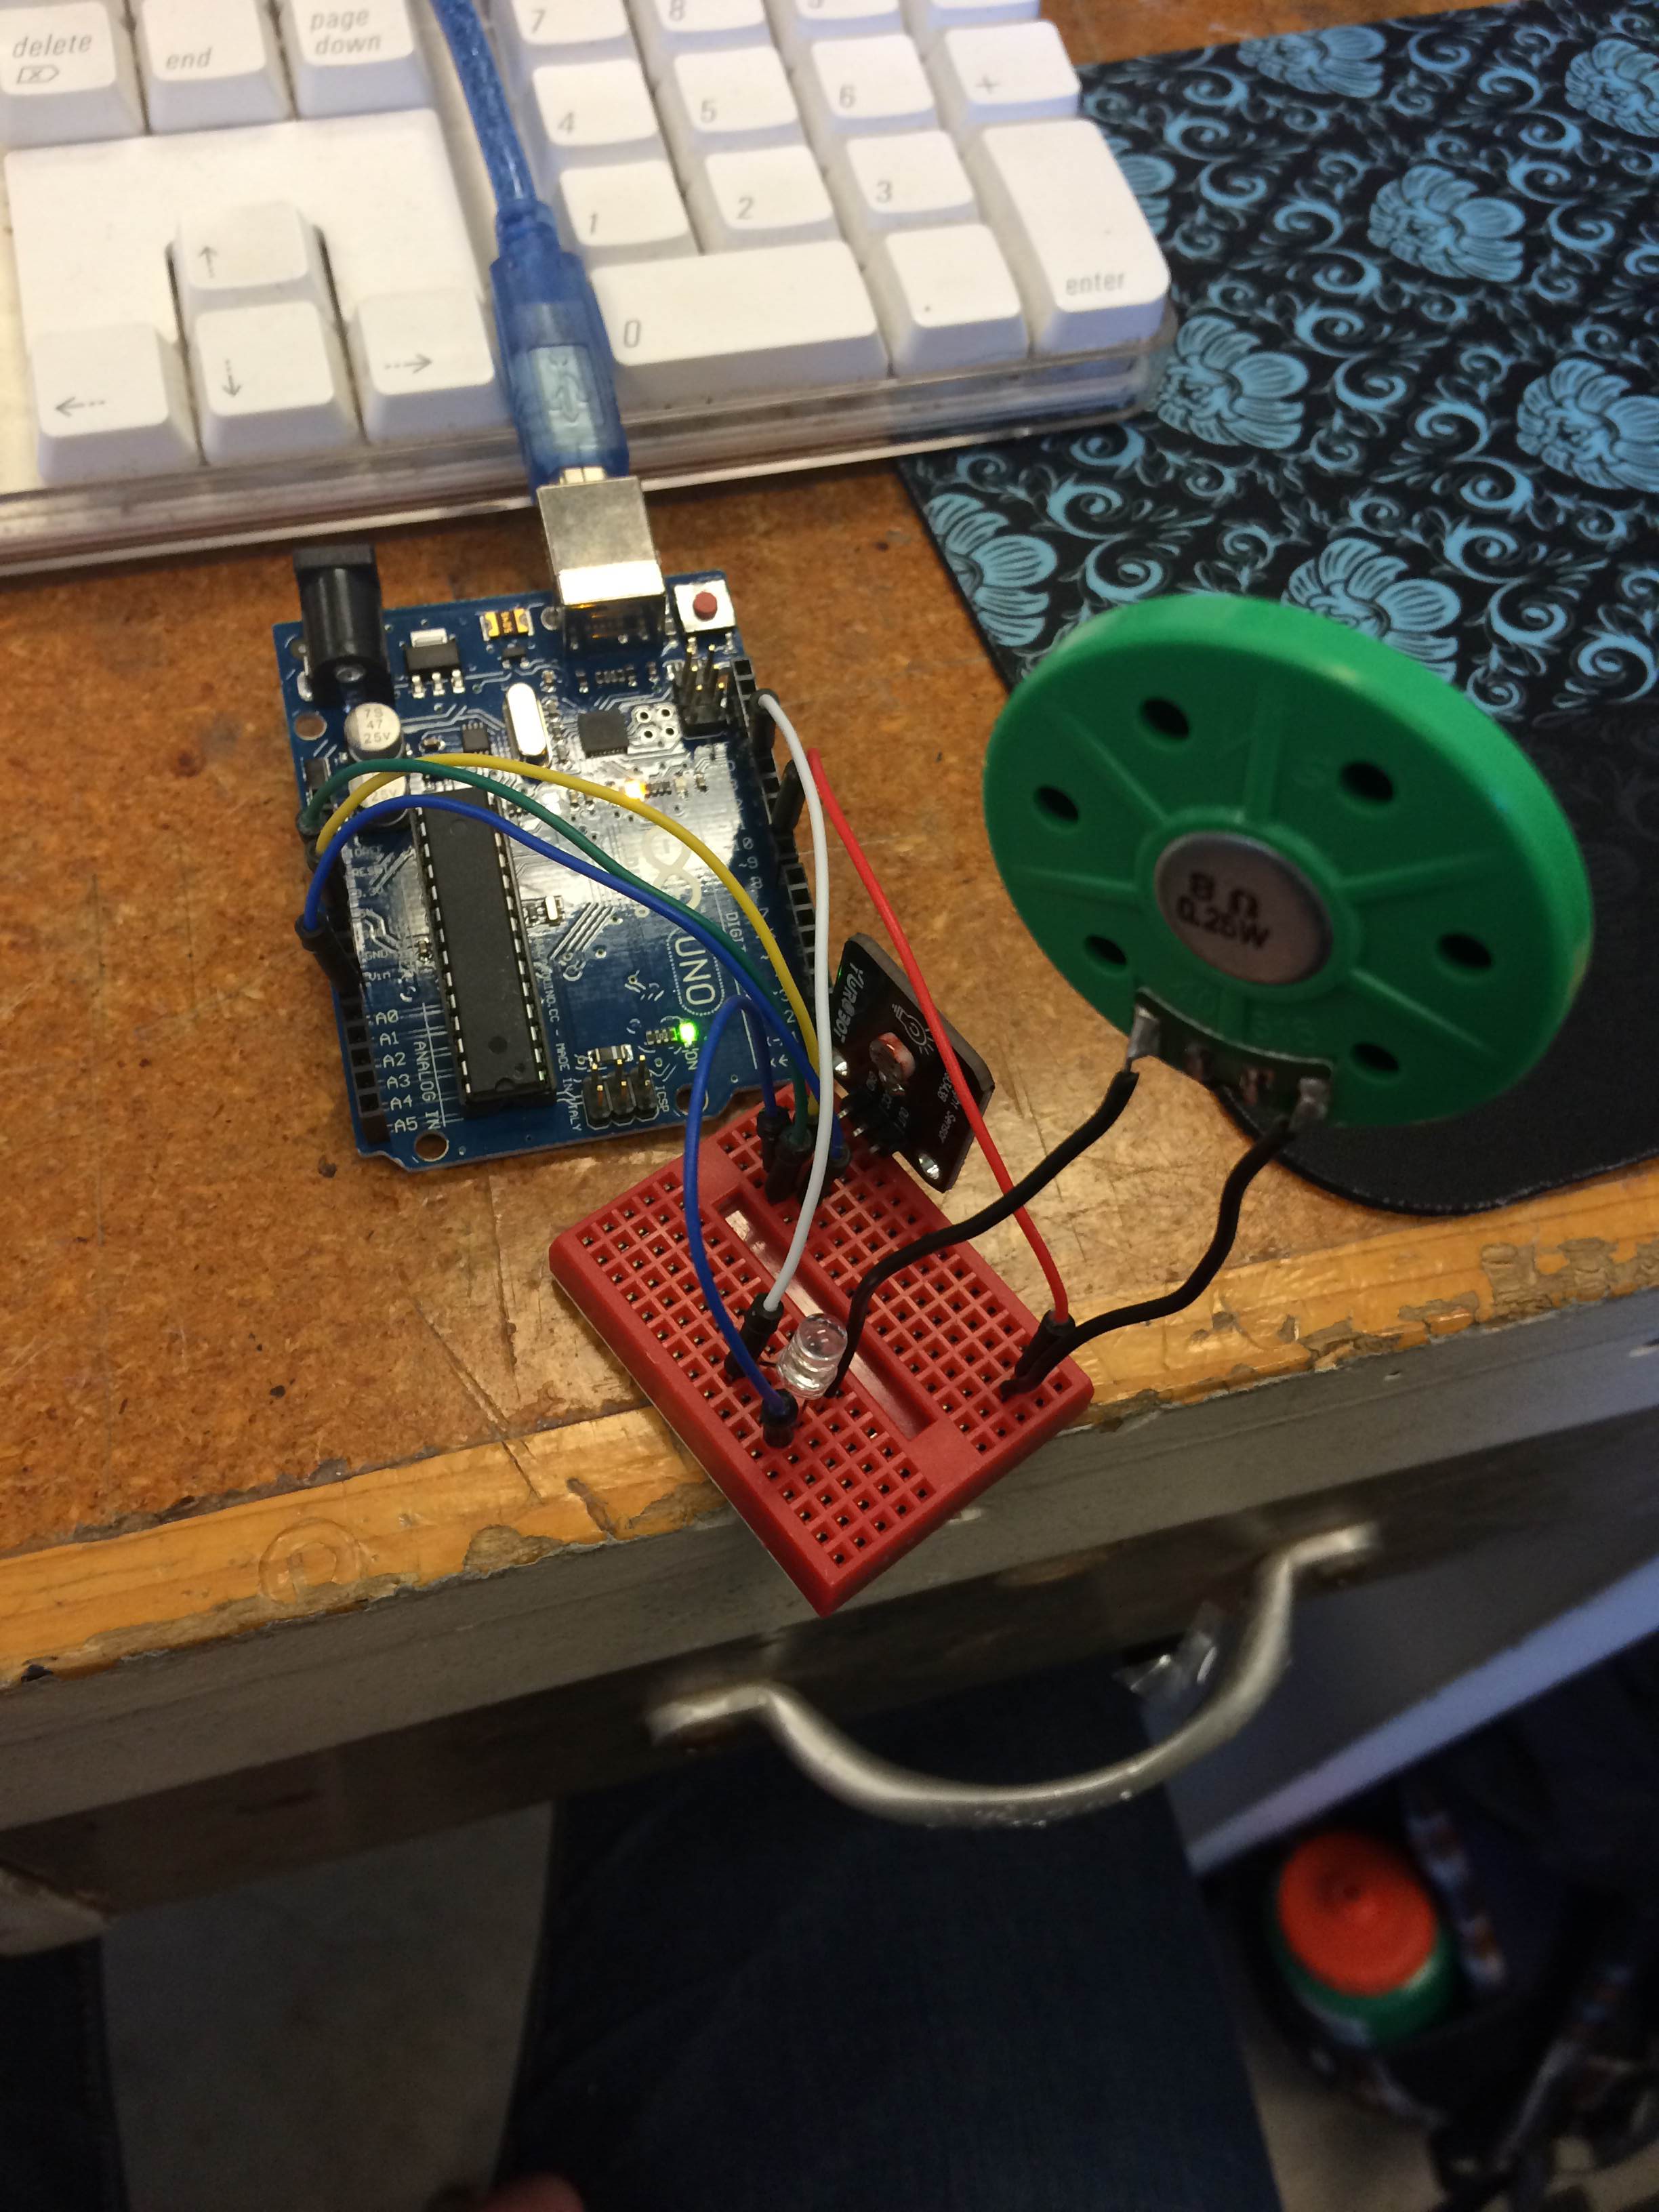
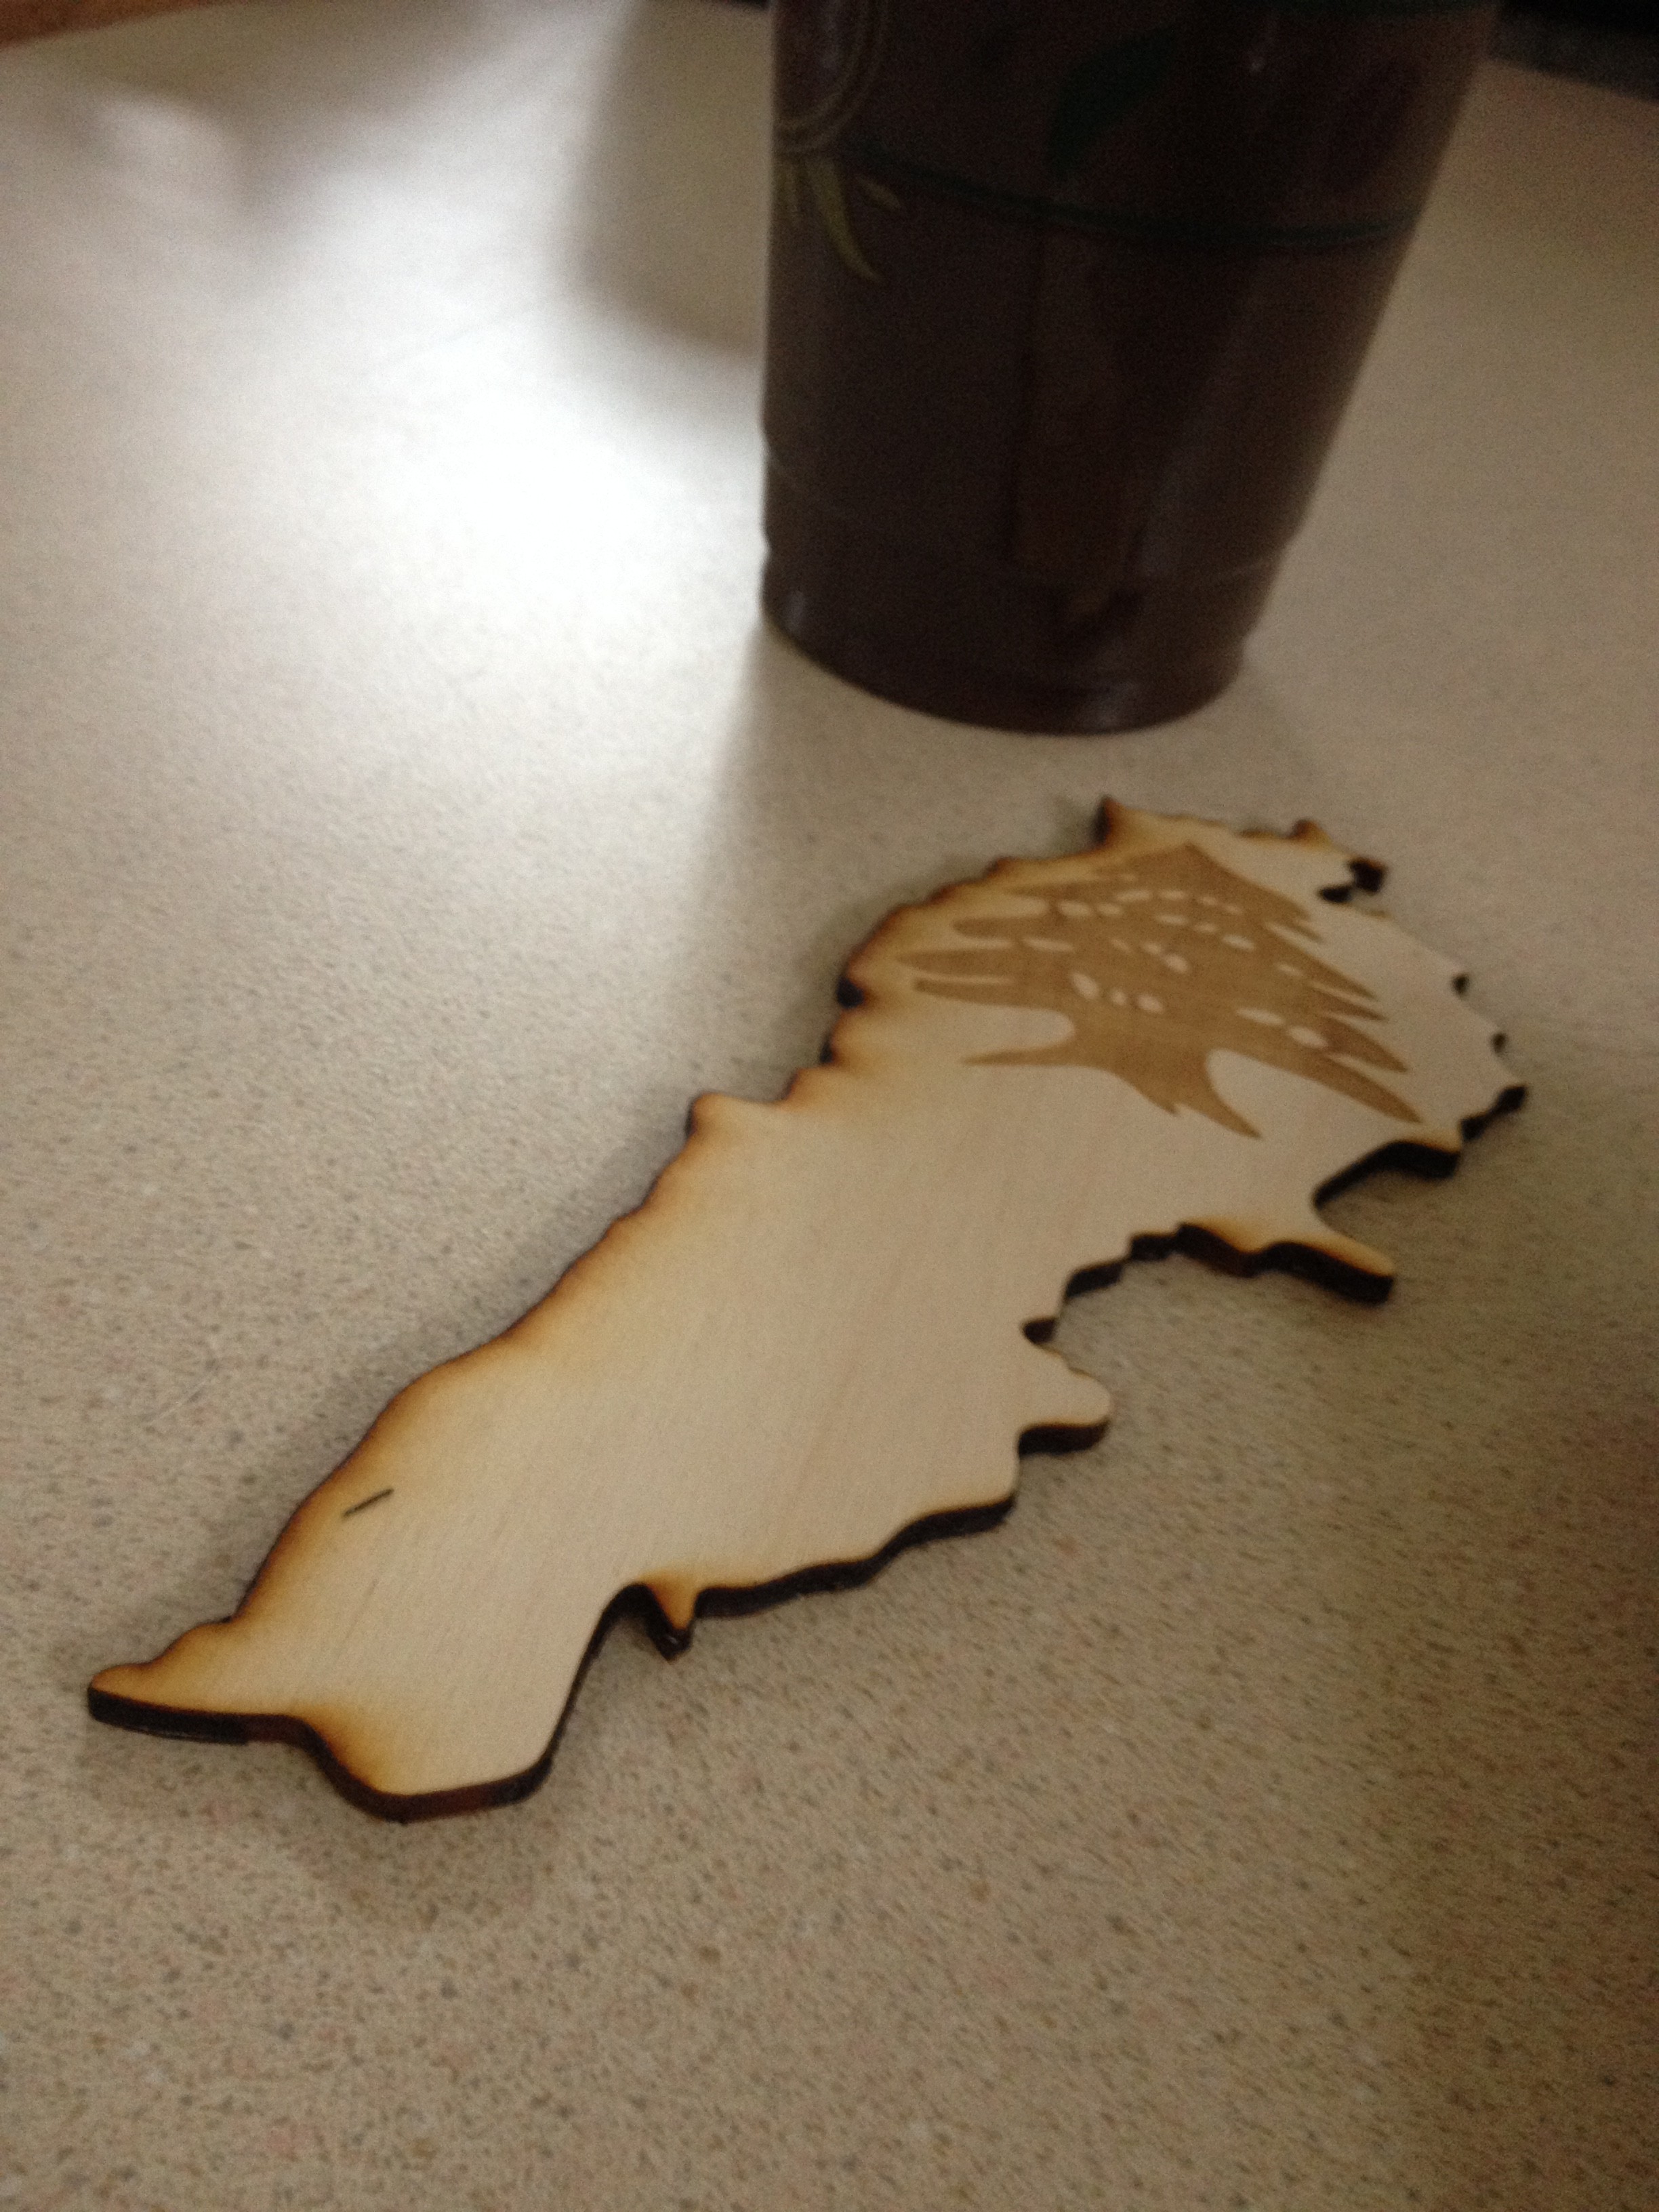
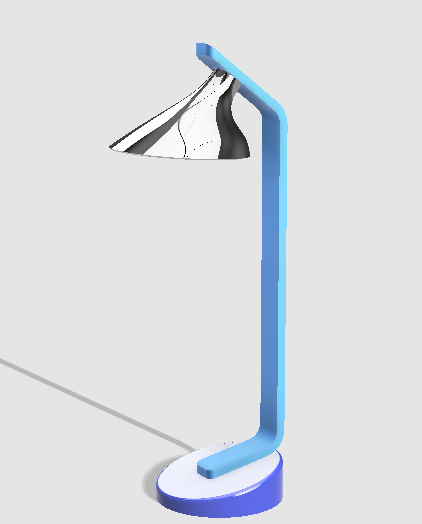
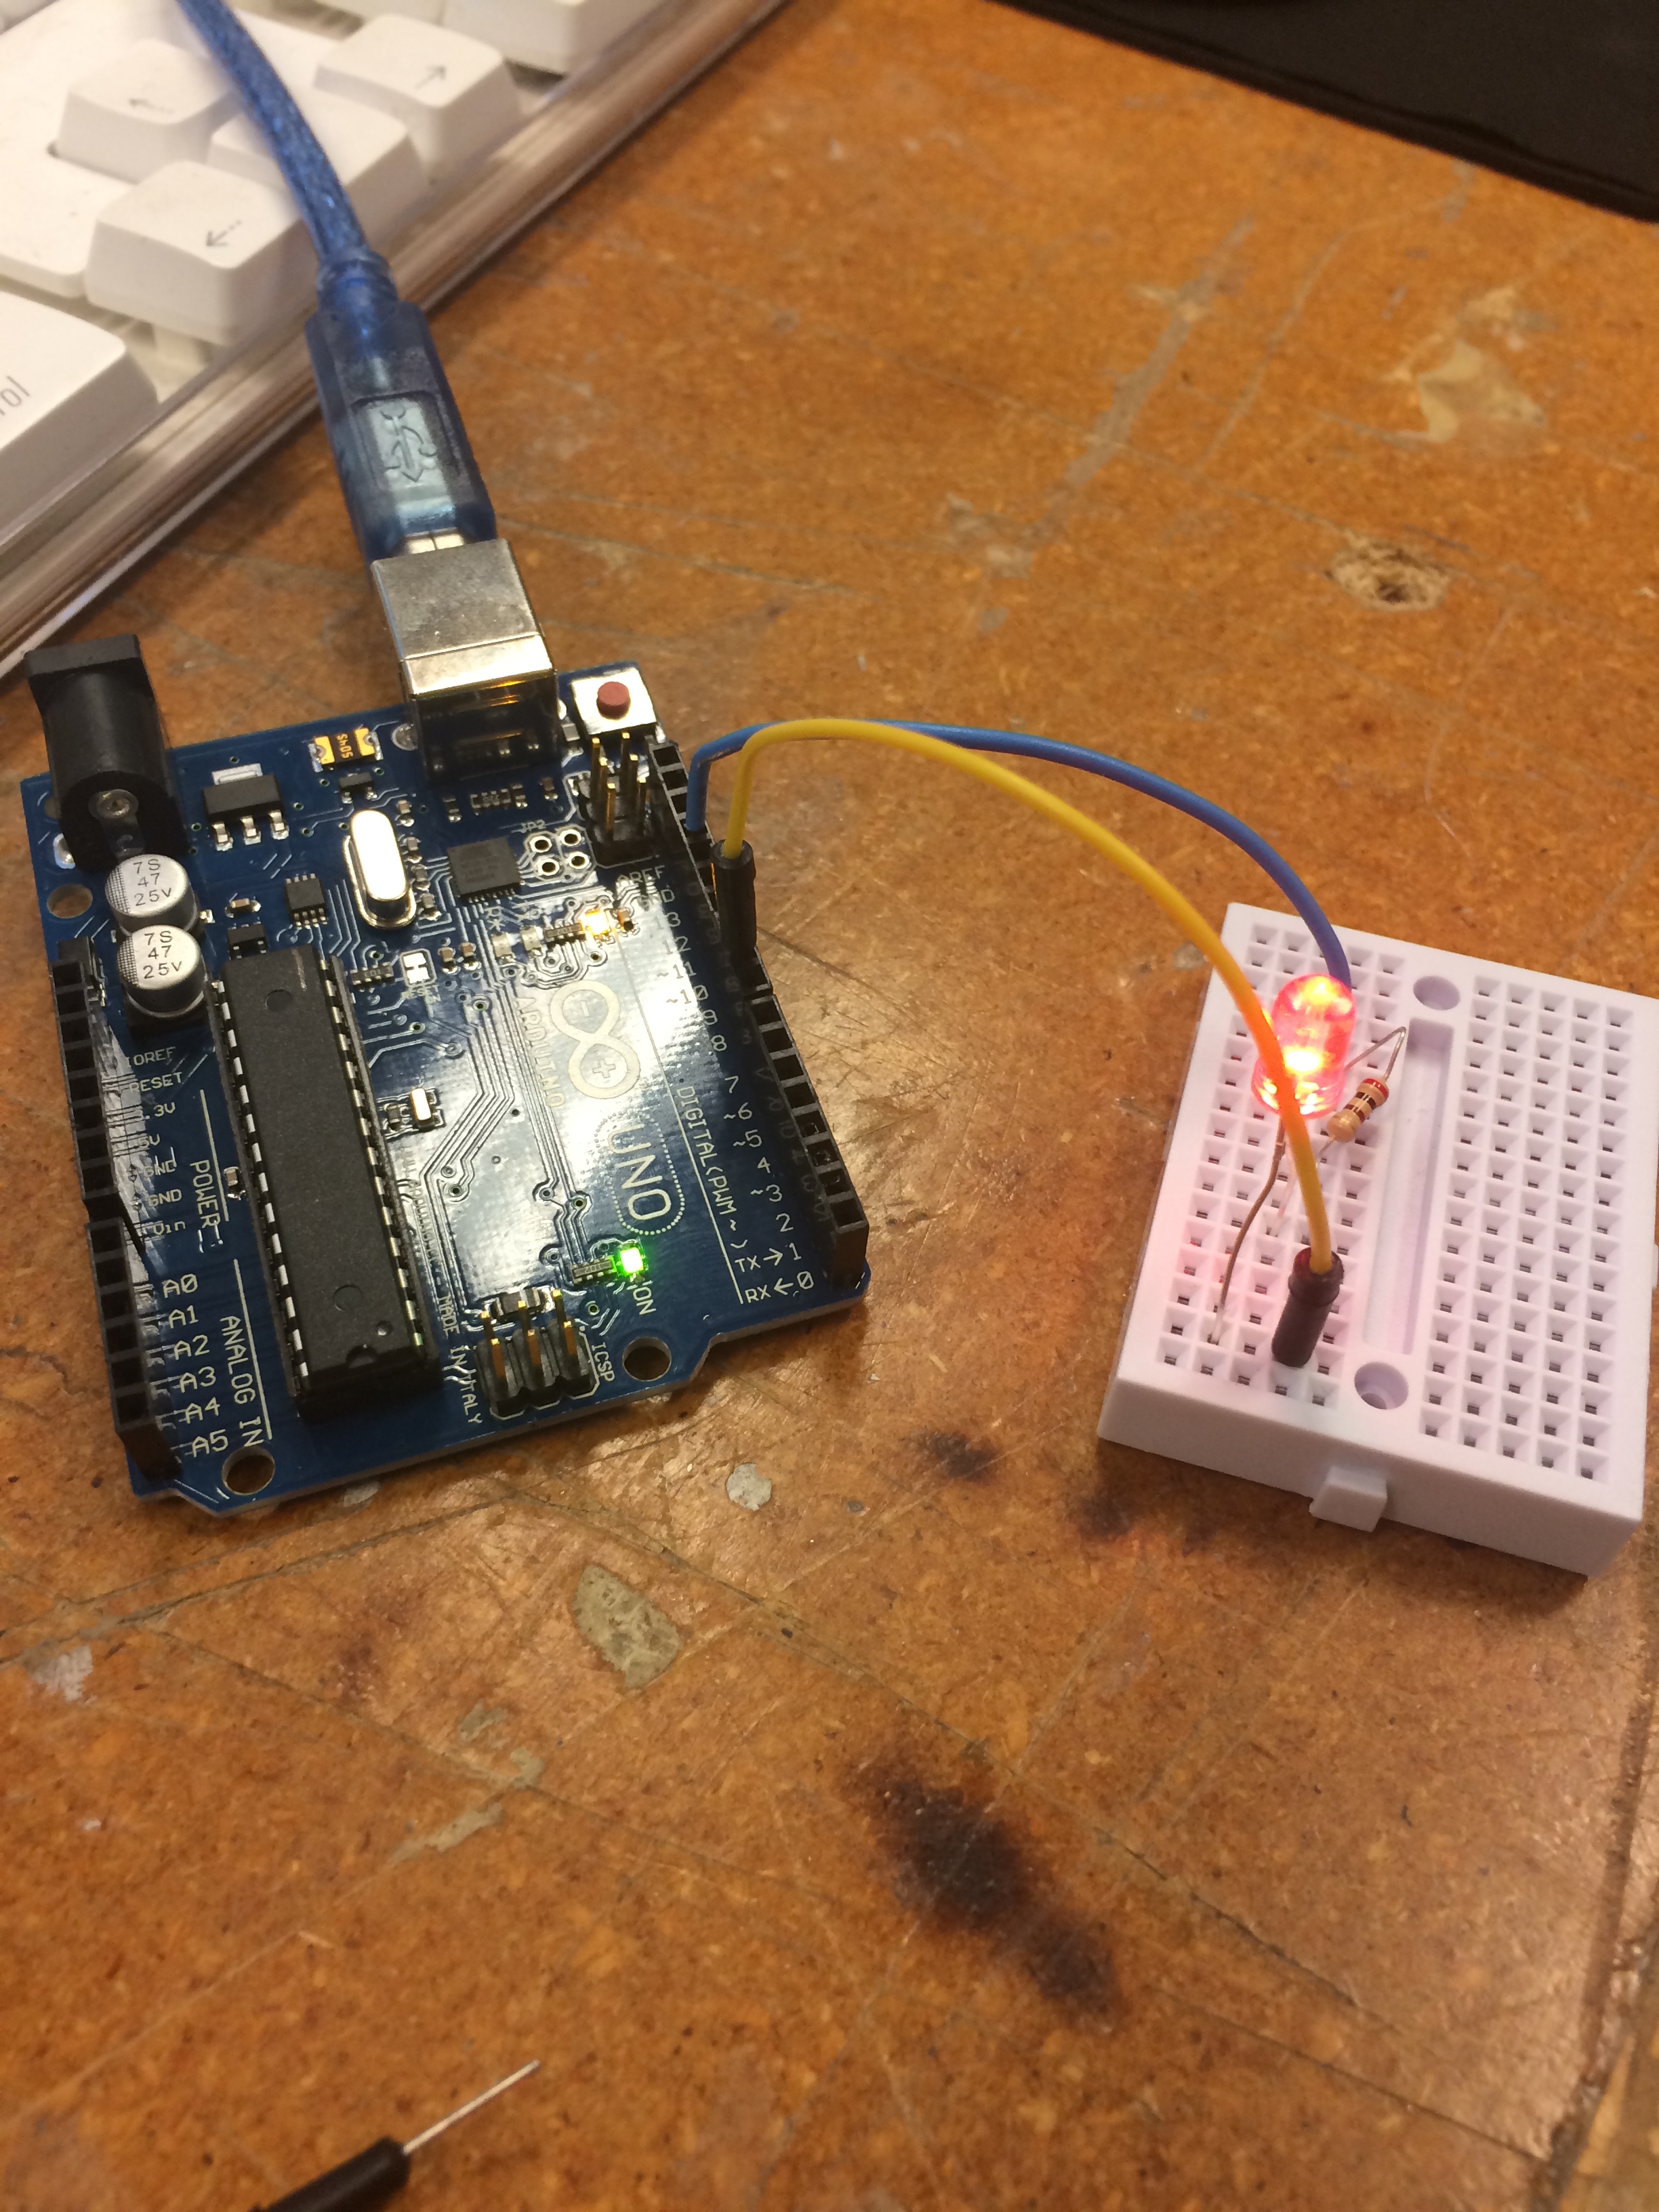
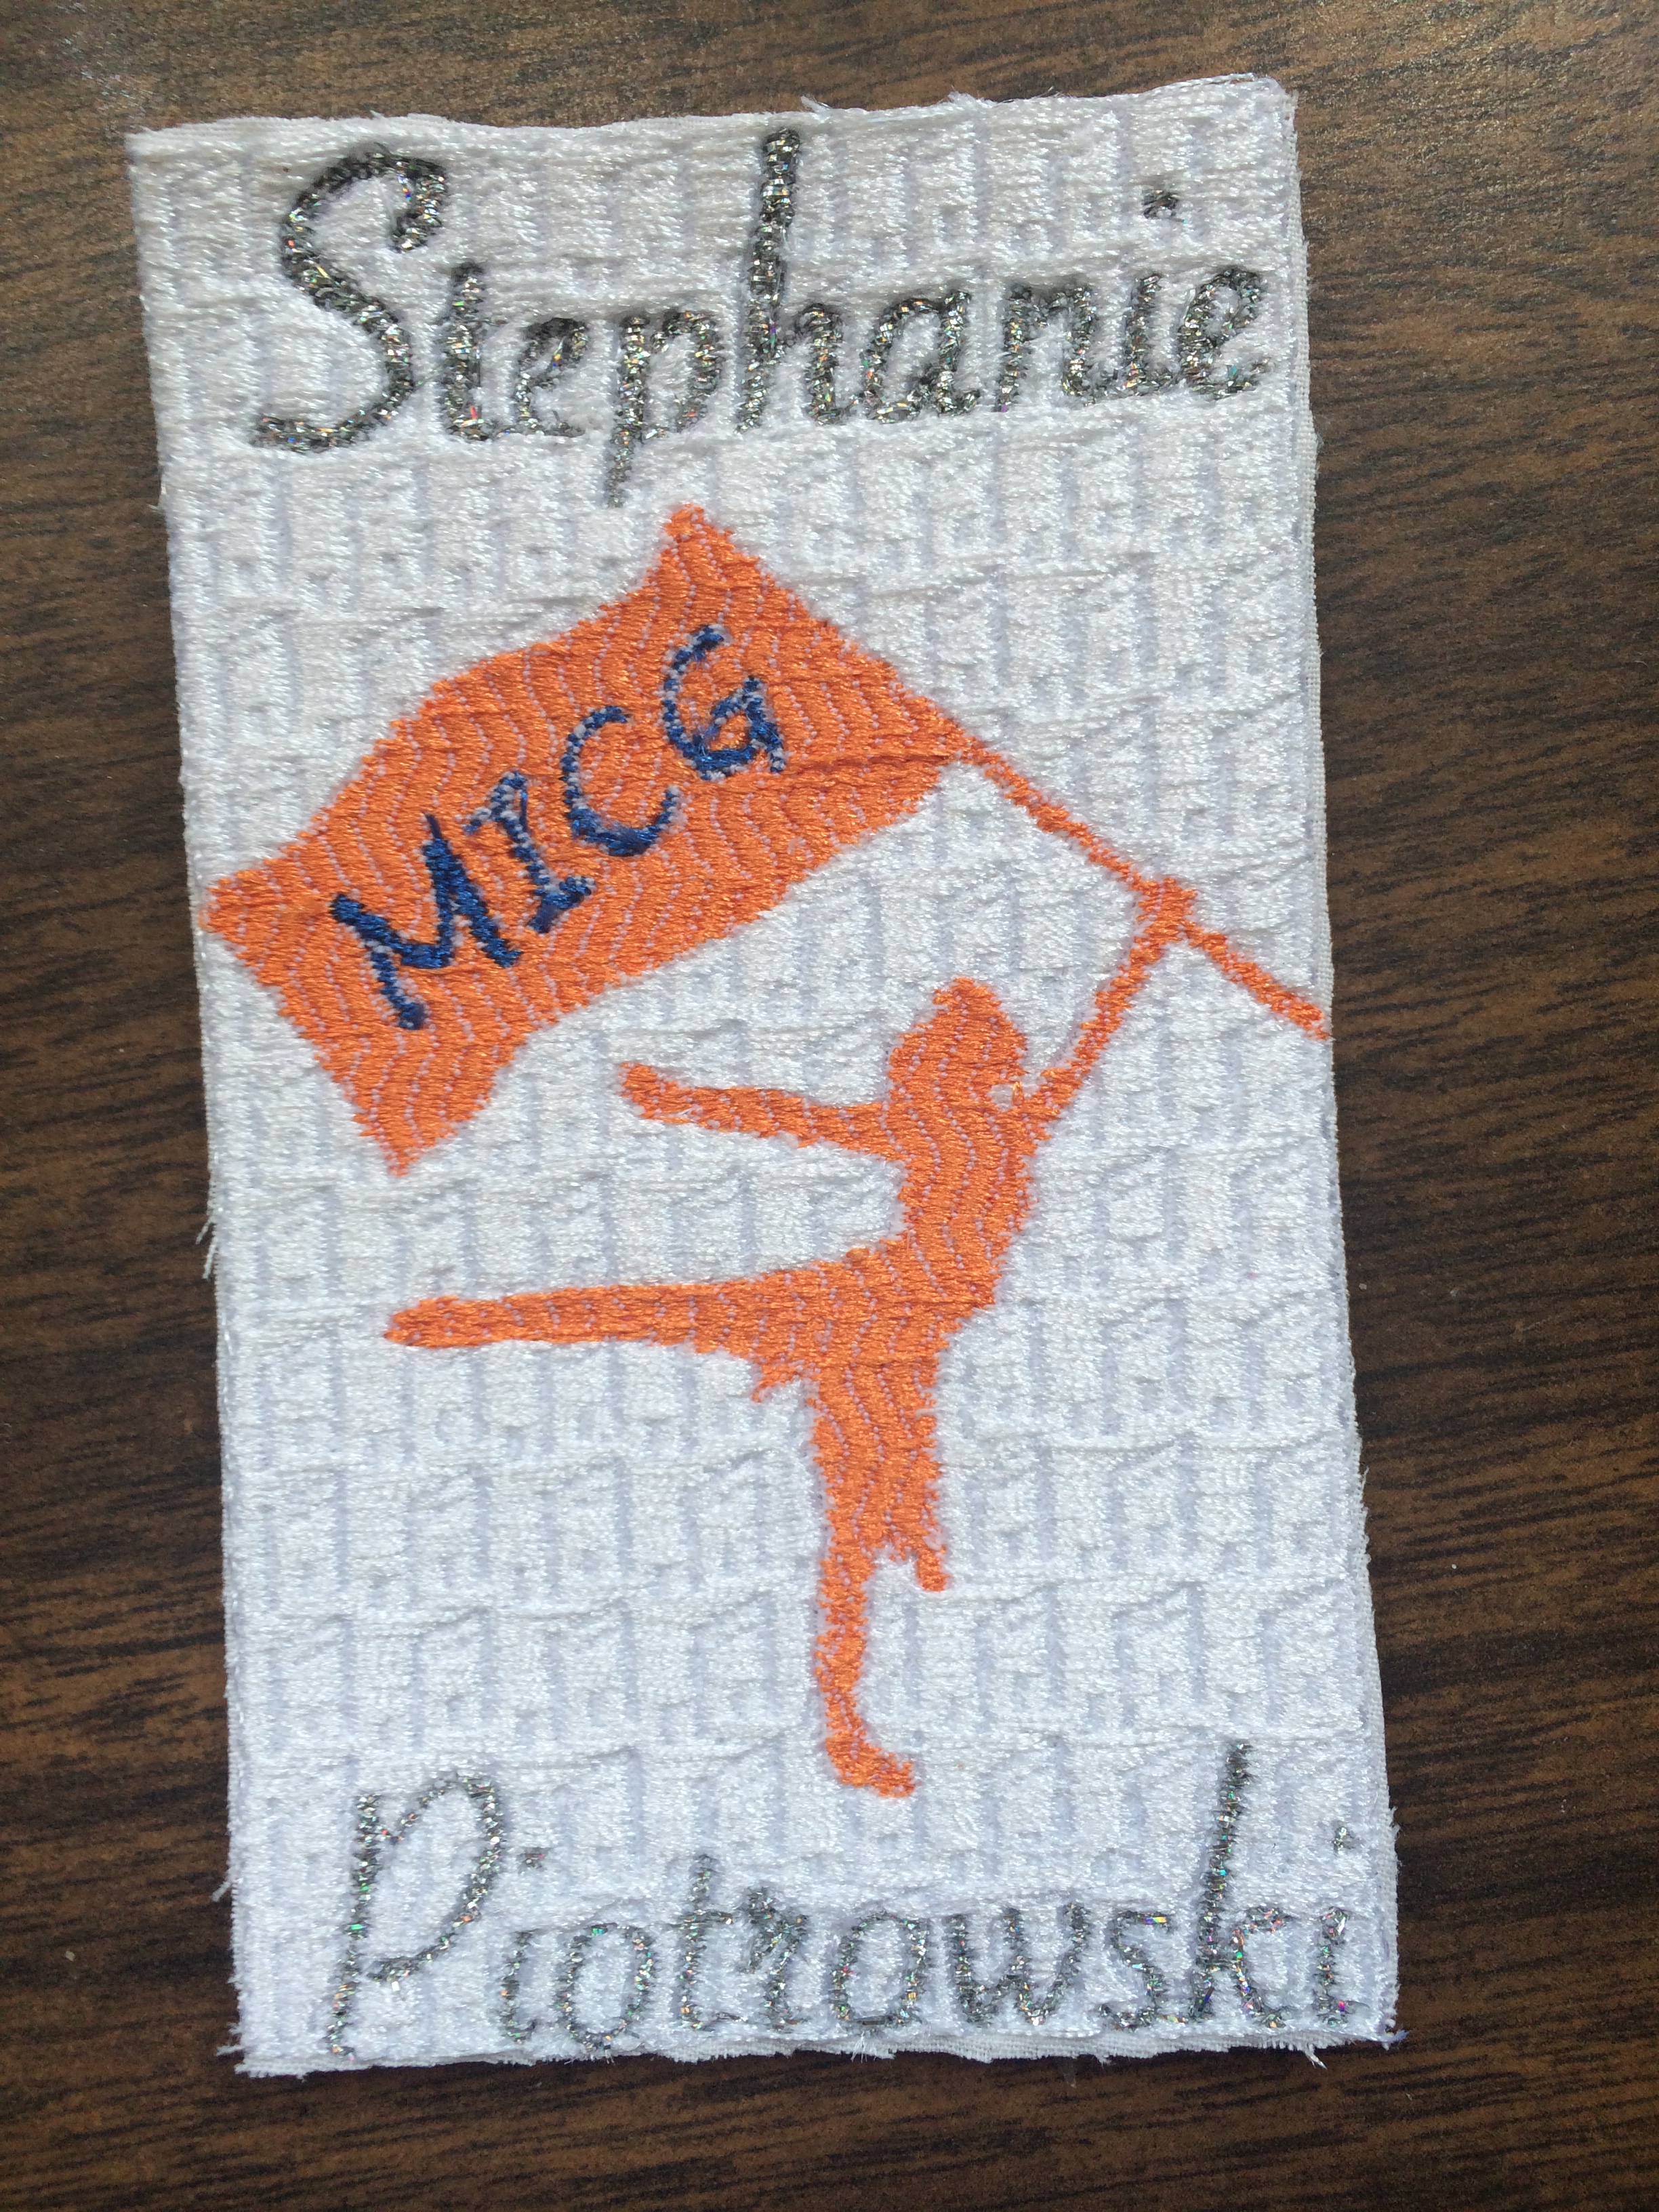
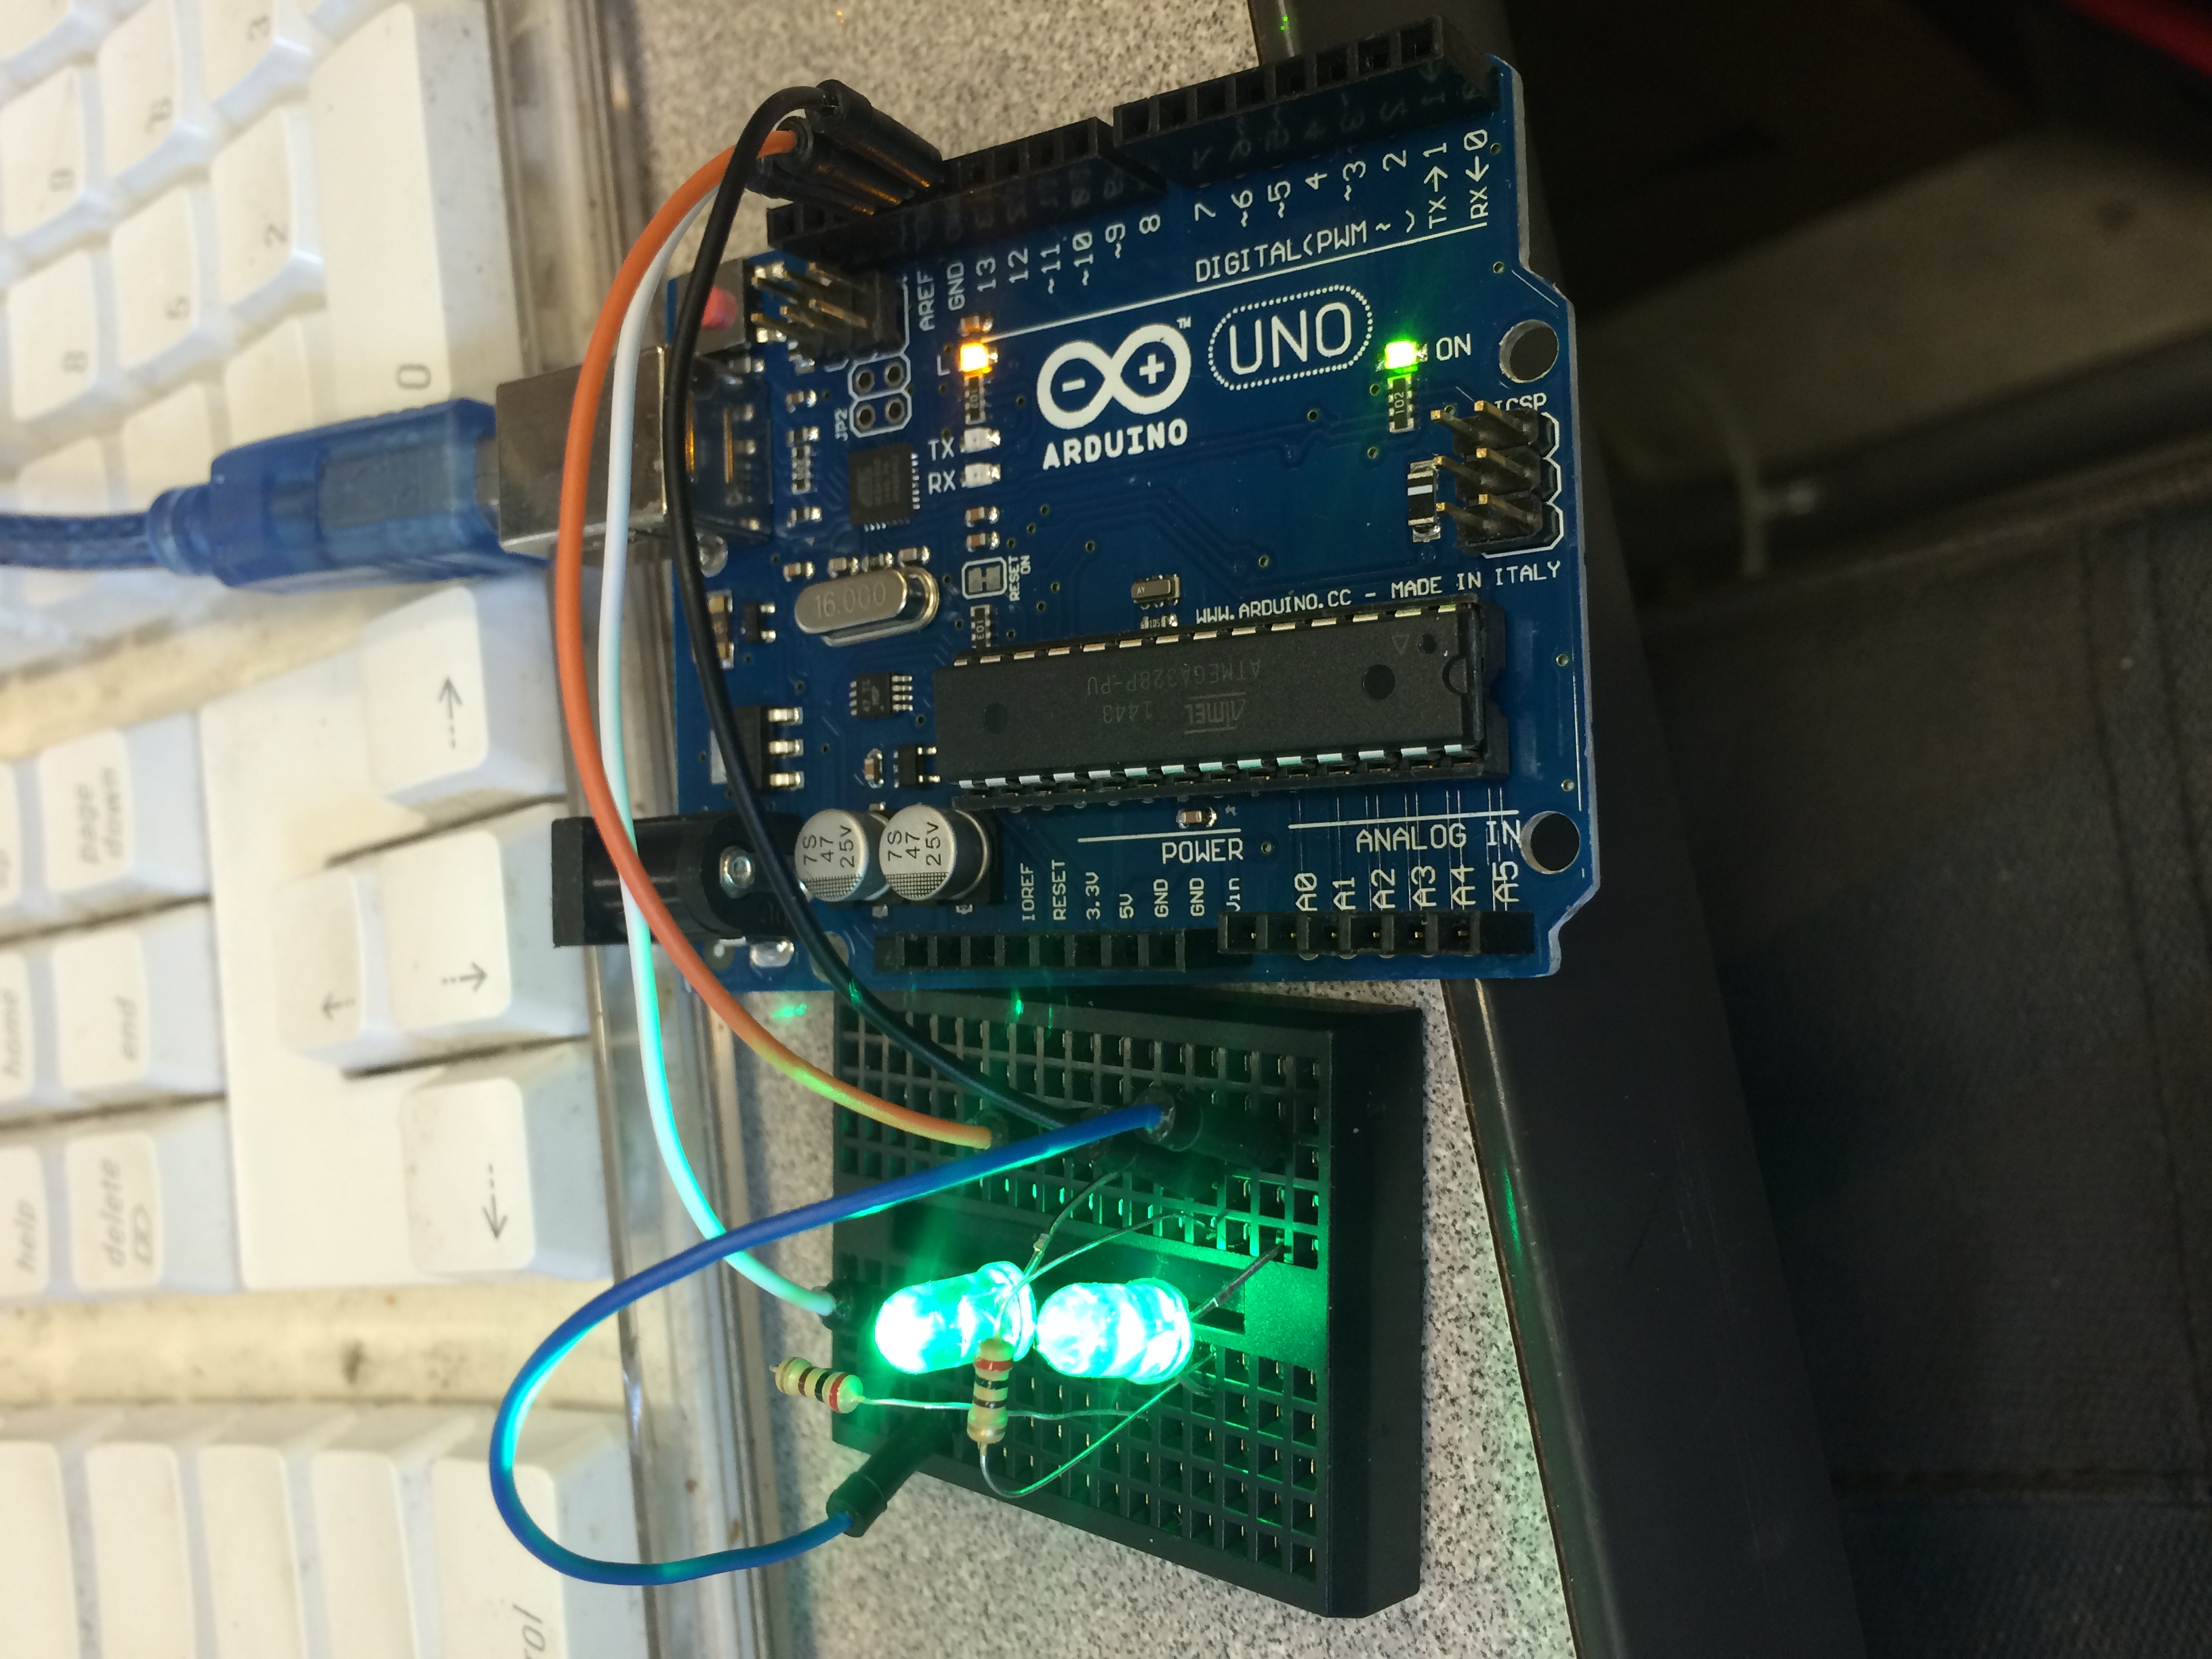
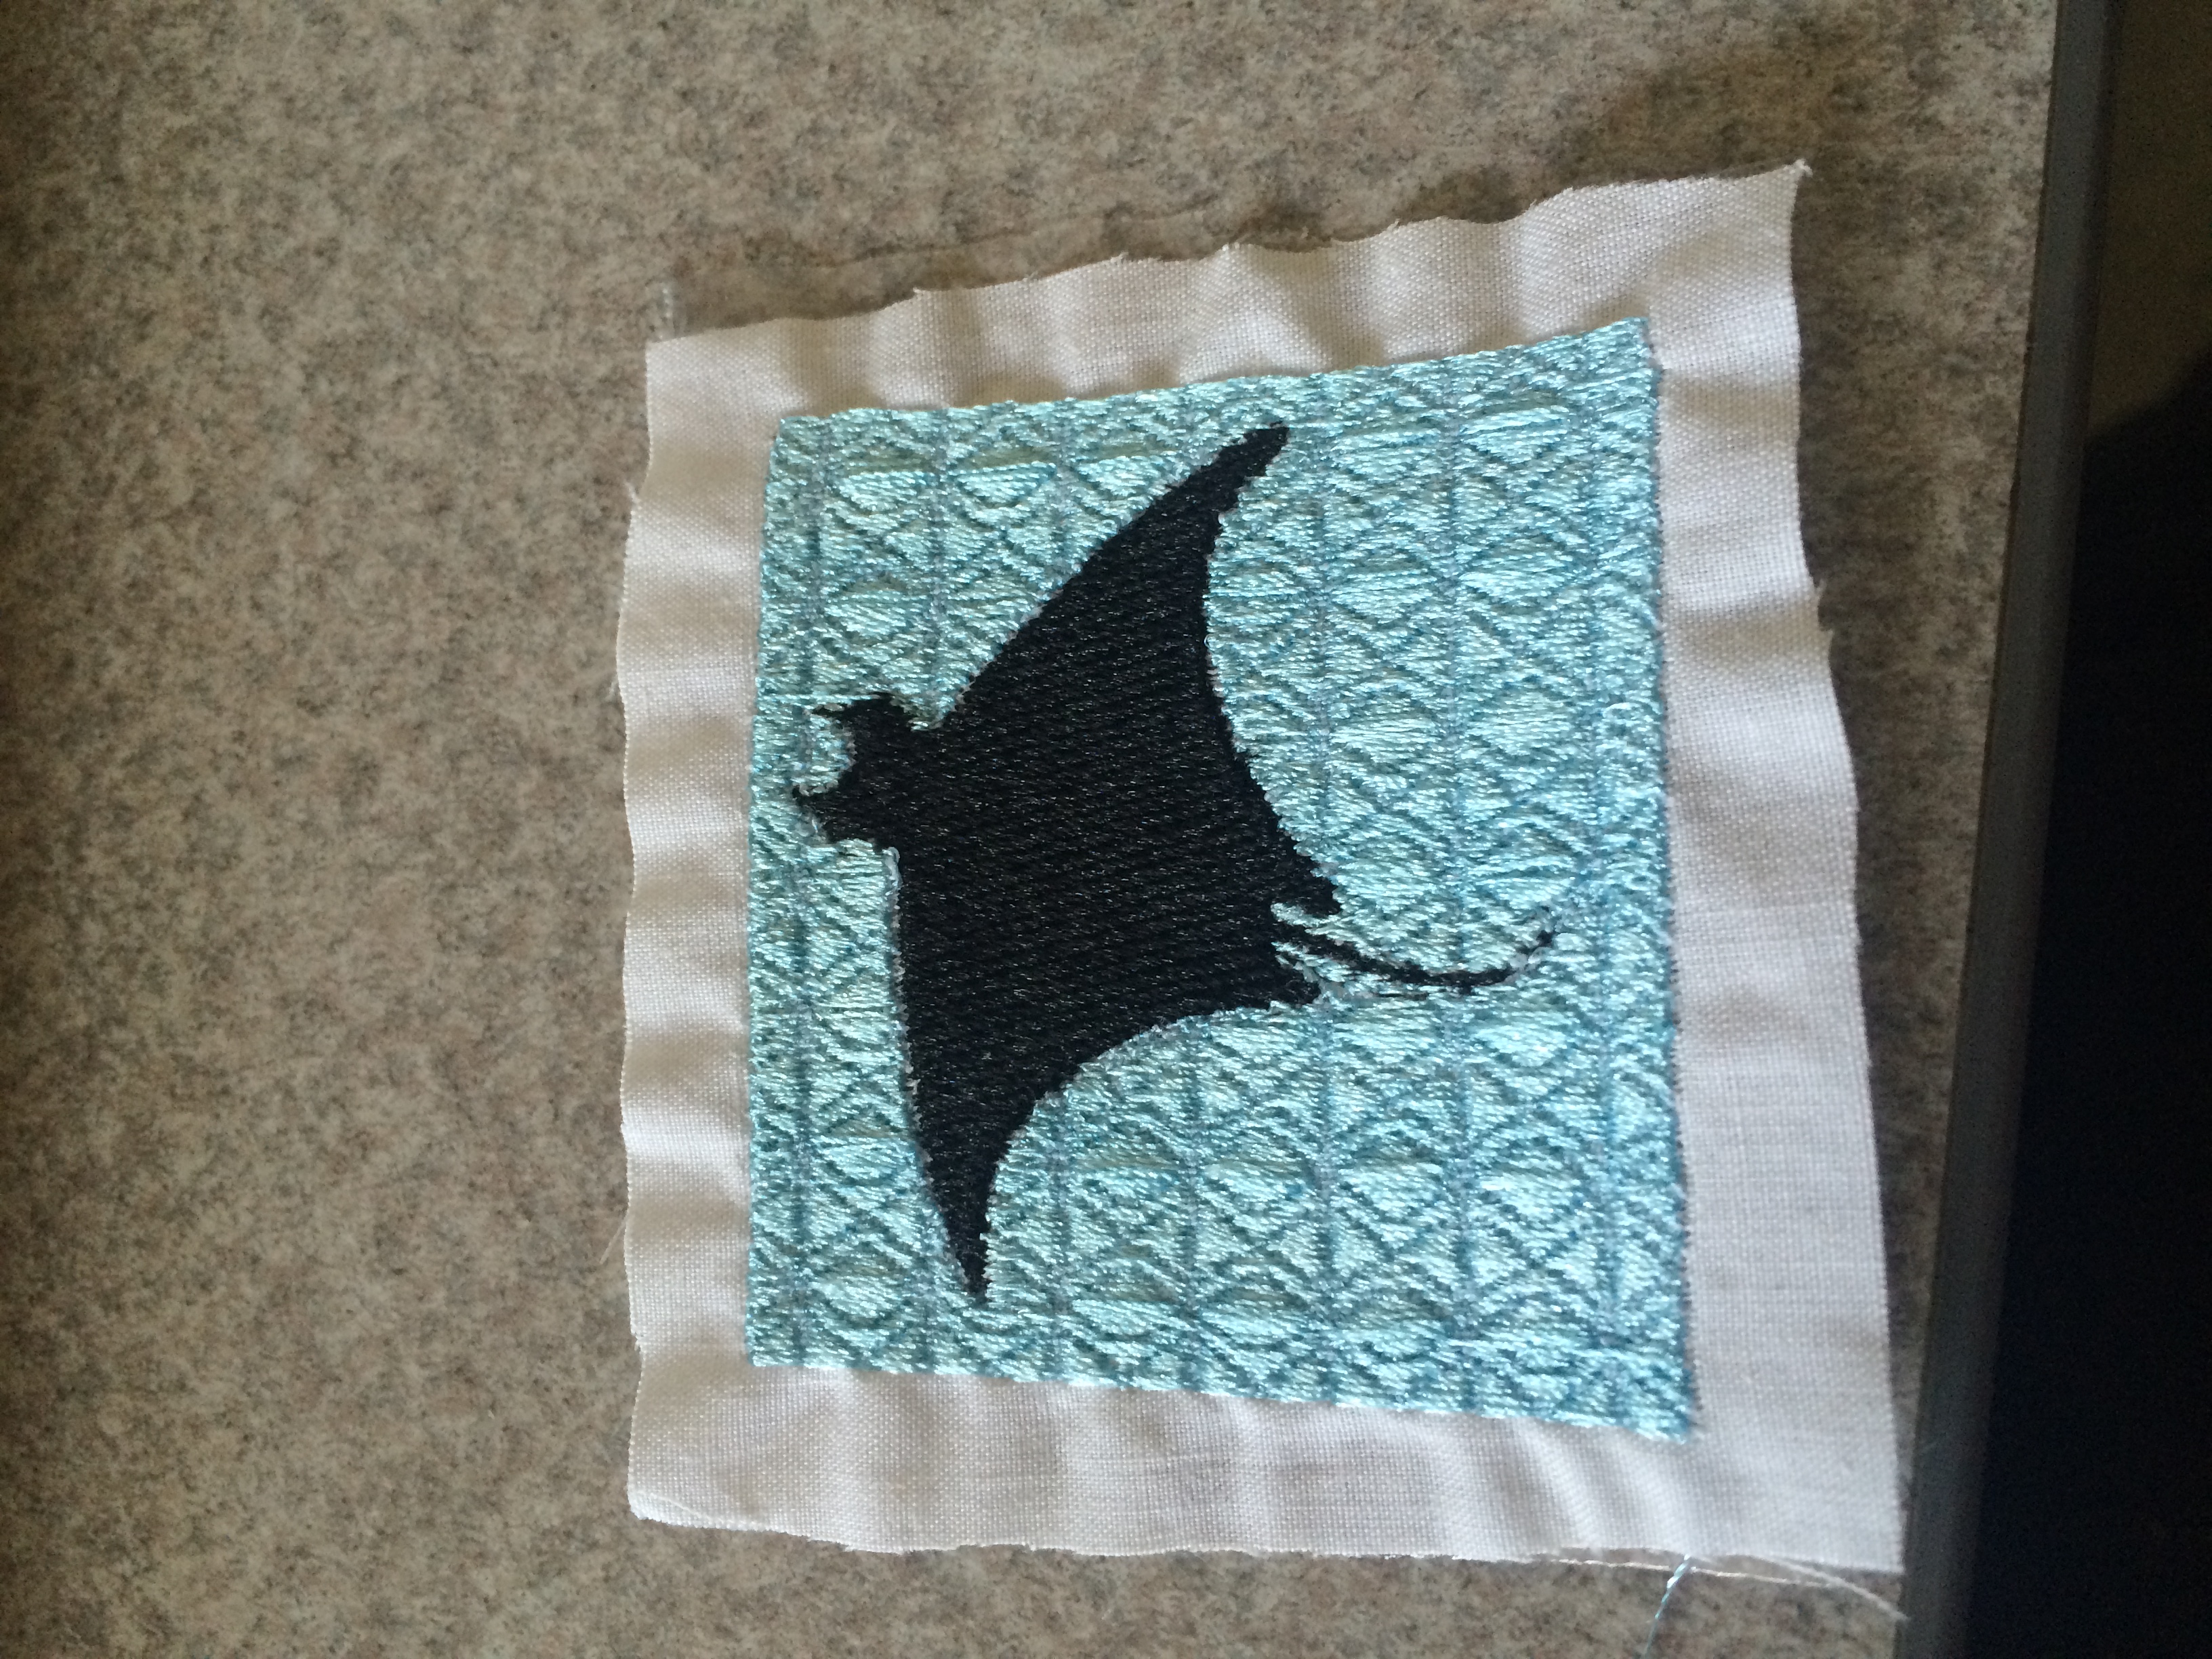
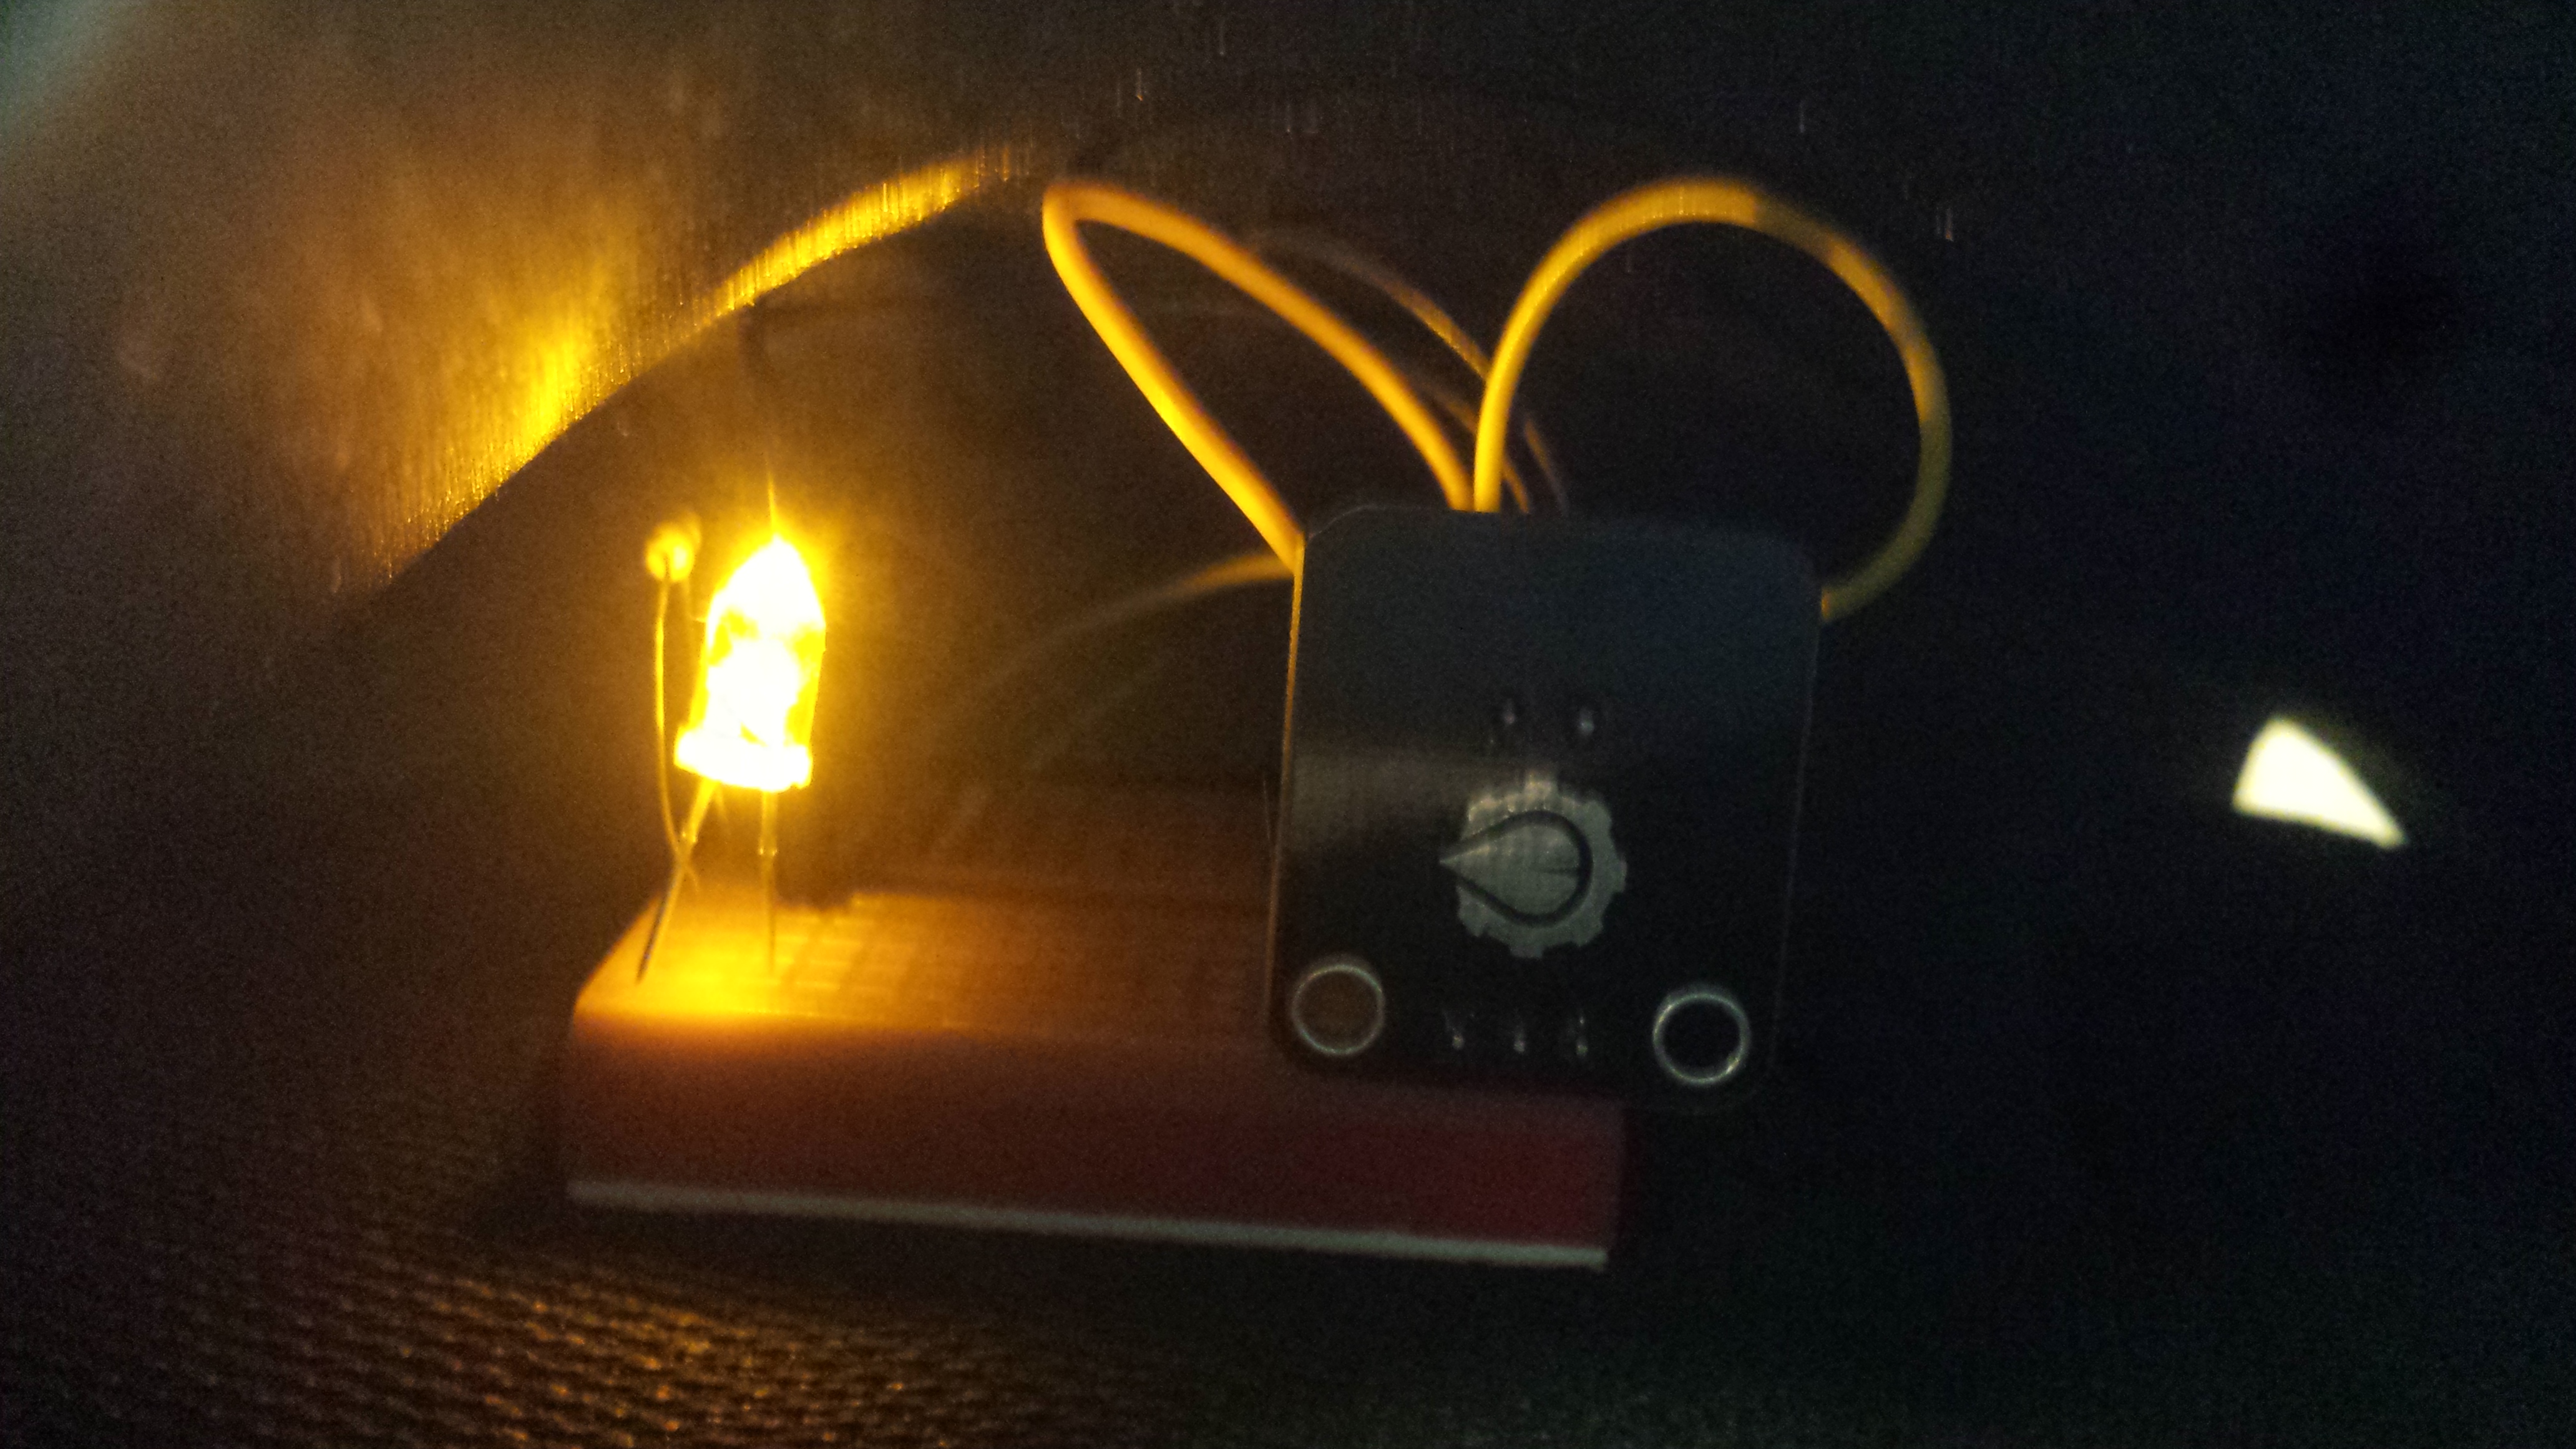
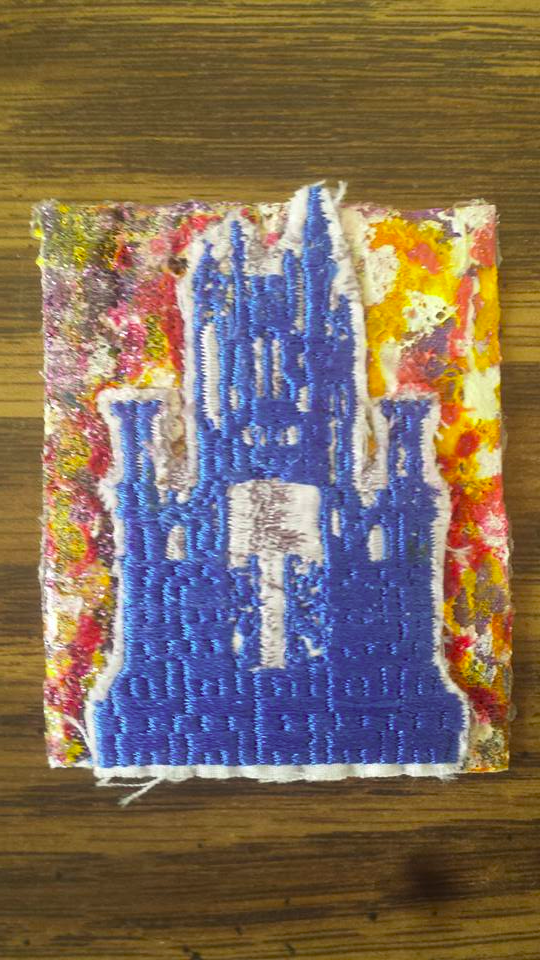
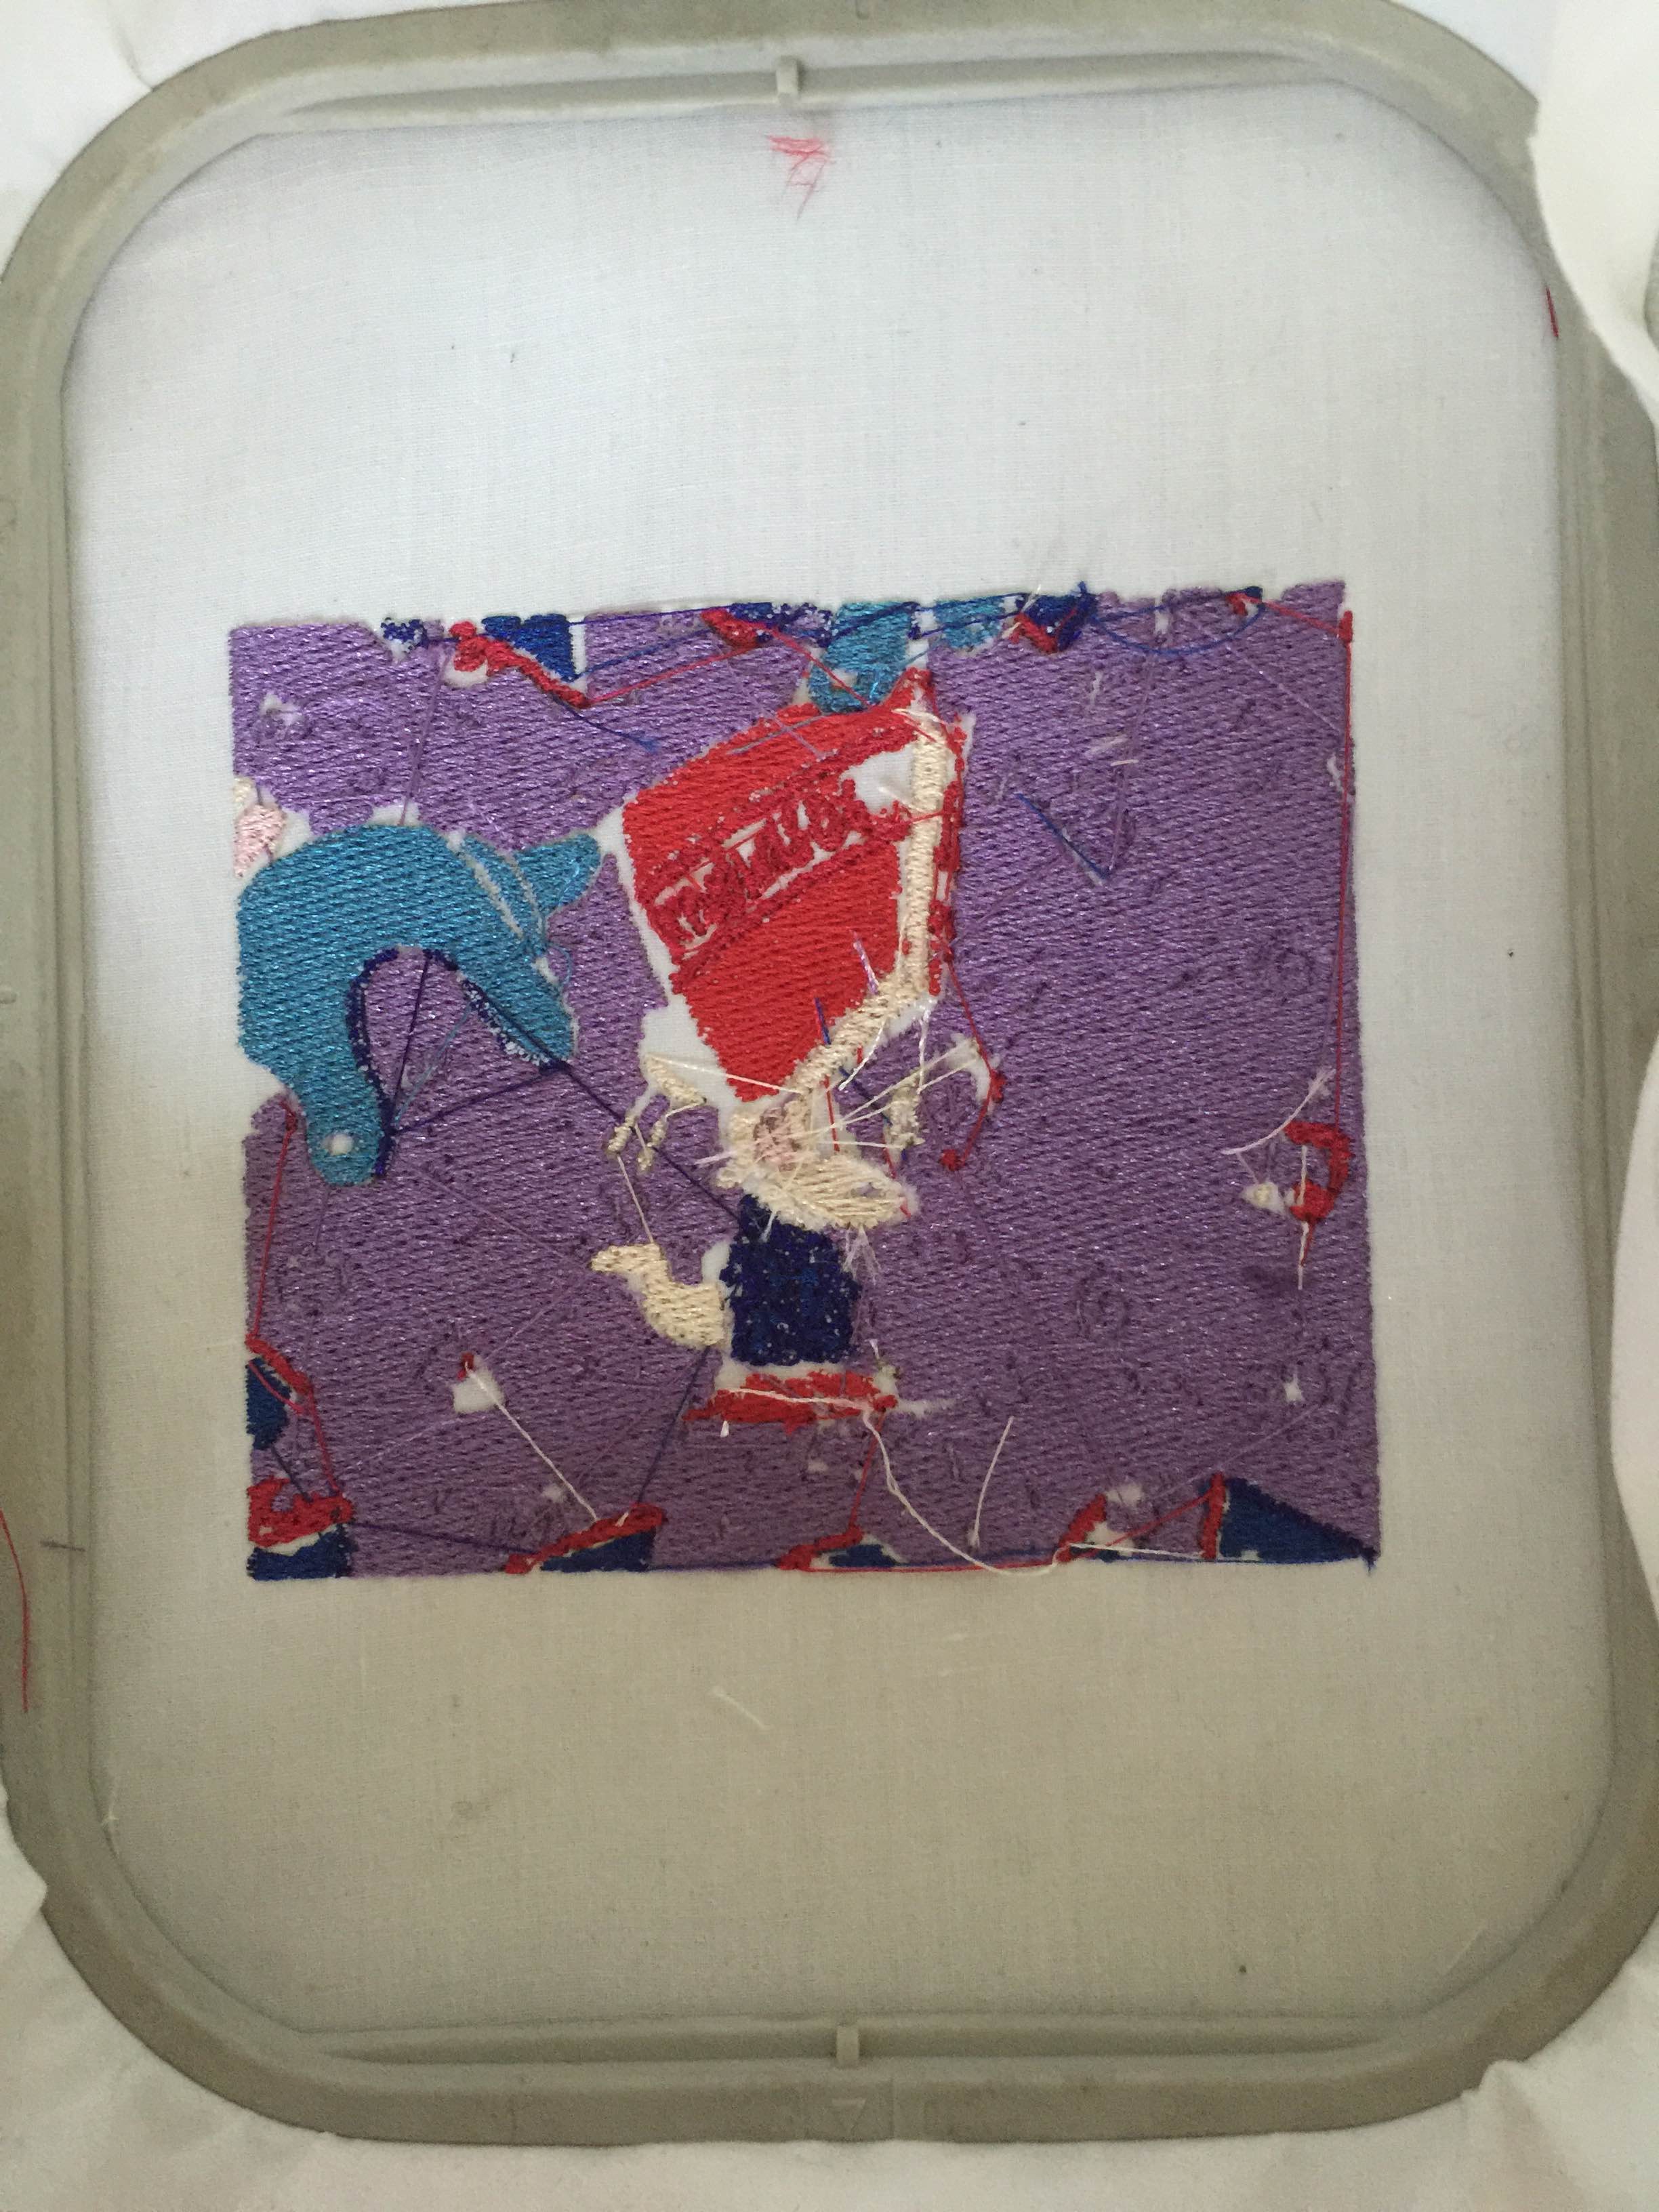
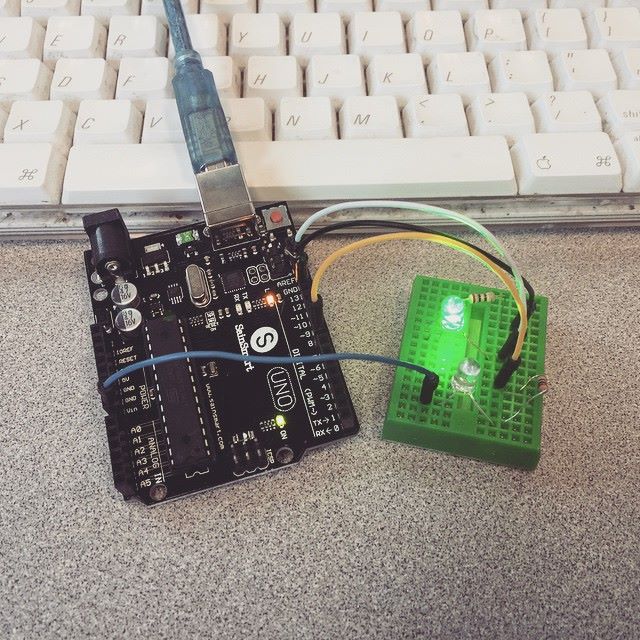
This semester, our class was exposed to a myriad of different tools and technologies that become our instruments for making. From our sessions at the Champaign Fab Lab to our field trip to the Beckman Institute for Advanced Science & Technology, I feel like I discovered so many different ways to create things that I did not even know existed. Some of my personal favorites were learning how to digitally embroider and create objects in Fusion 360I think what I enjoyed most about creating through these mediums was my ability to allow my thoughts to flow freely from one to the next. One of the biggest takeaways I have from learning how to tinker with things like arduinos and different softwares is that the digital making space is not a confining one. I am able to create something digitally and do 1 million+ things to it on a variety of different platforms. Digital making allows us to bring ideas to fruition in ways that were not possible before and simply because of that, I can see that this course brought me immense value.

LampMy patch!

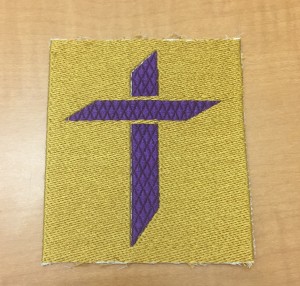
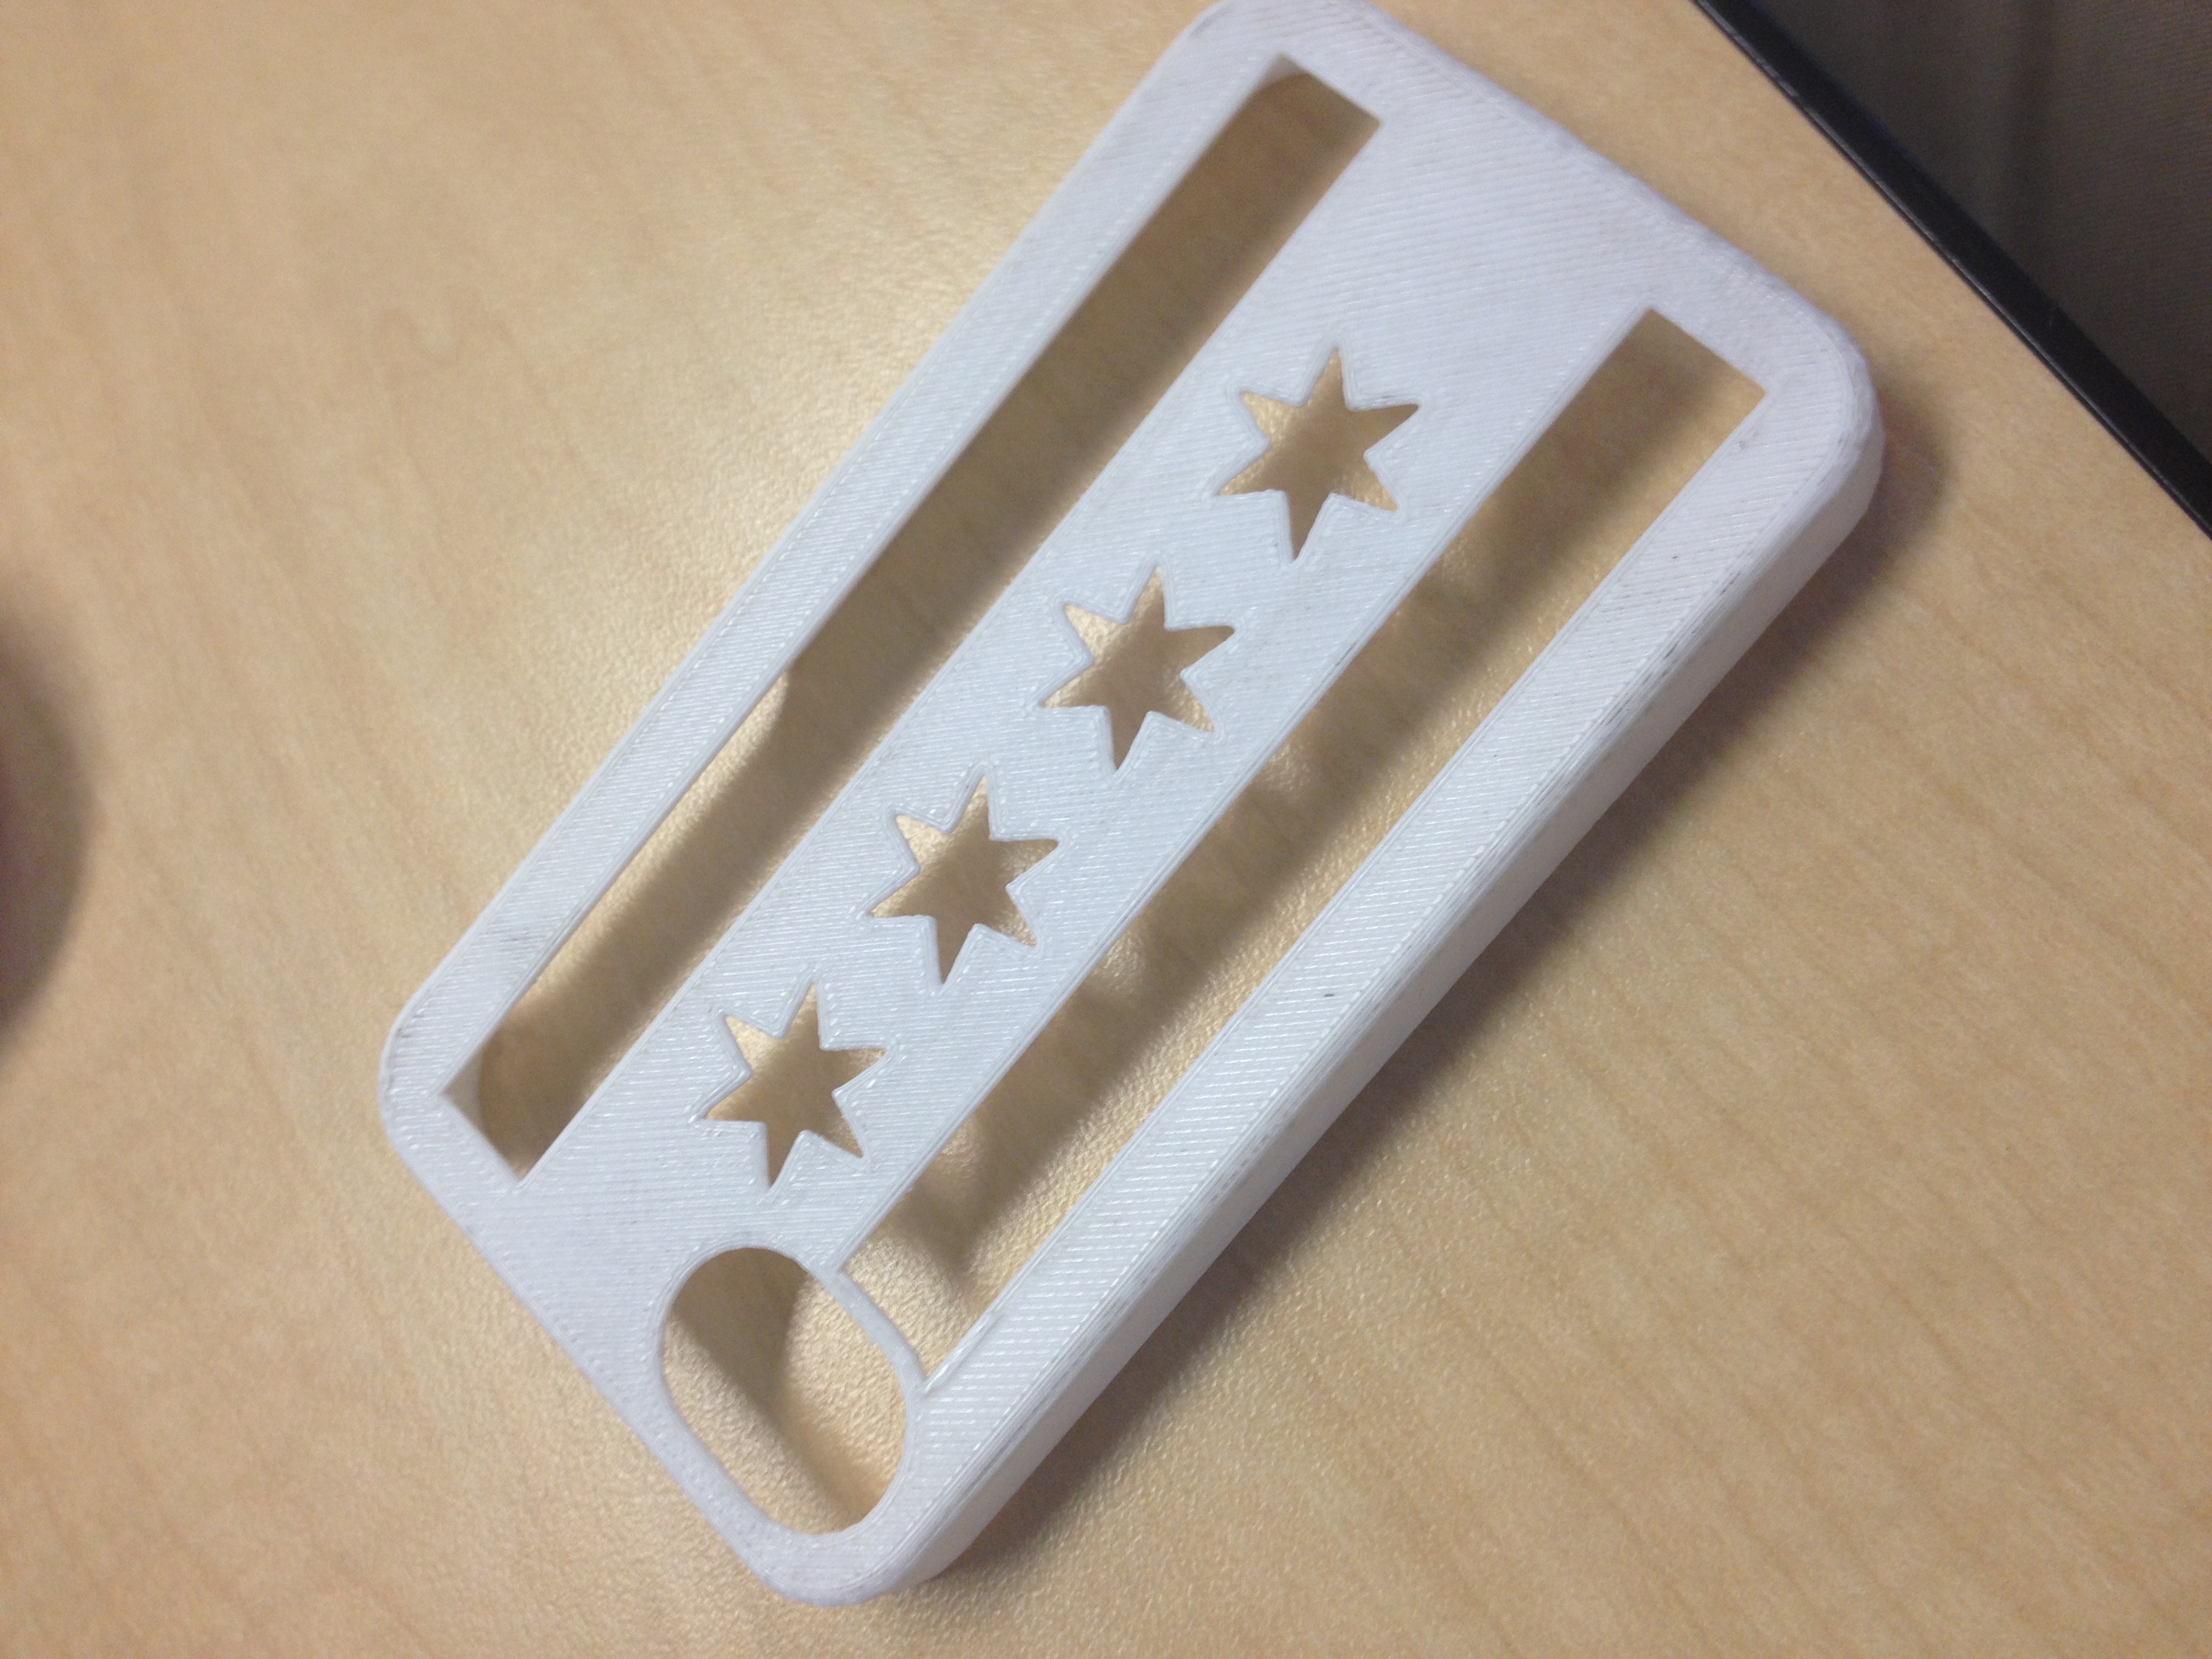
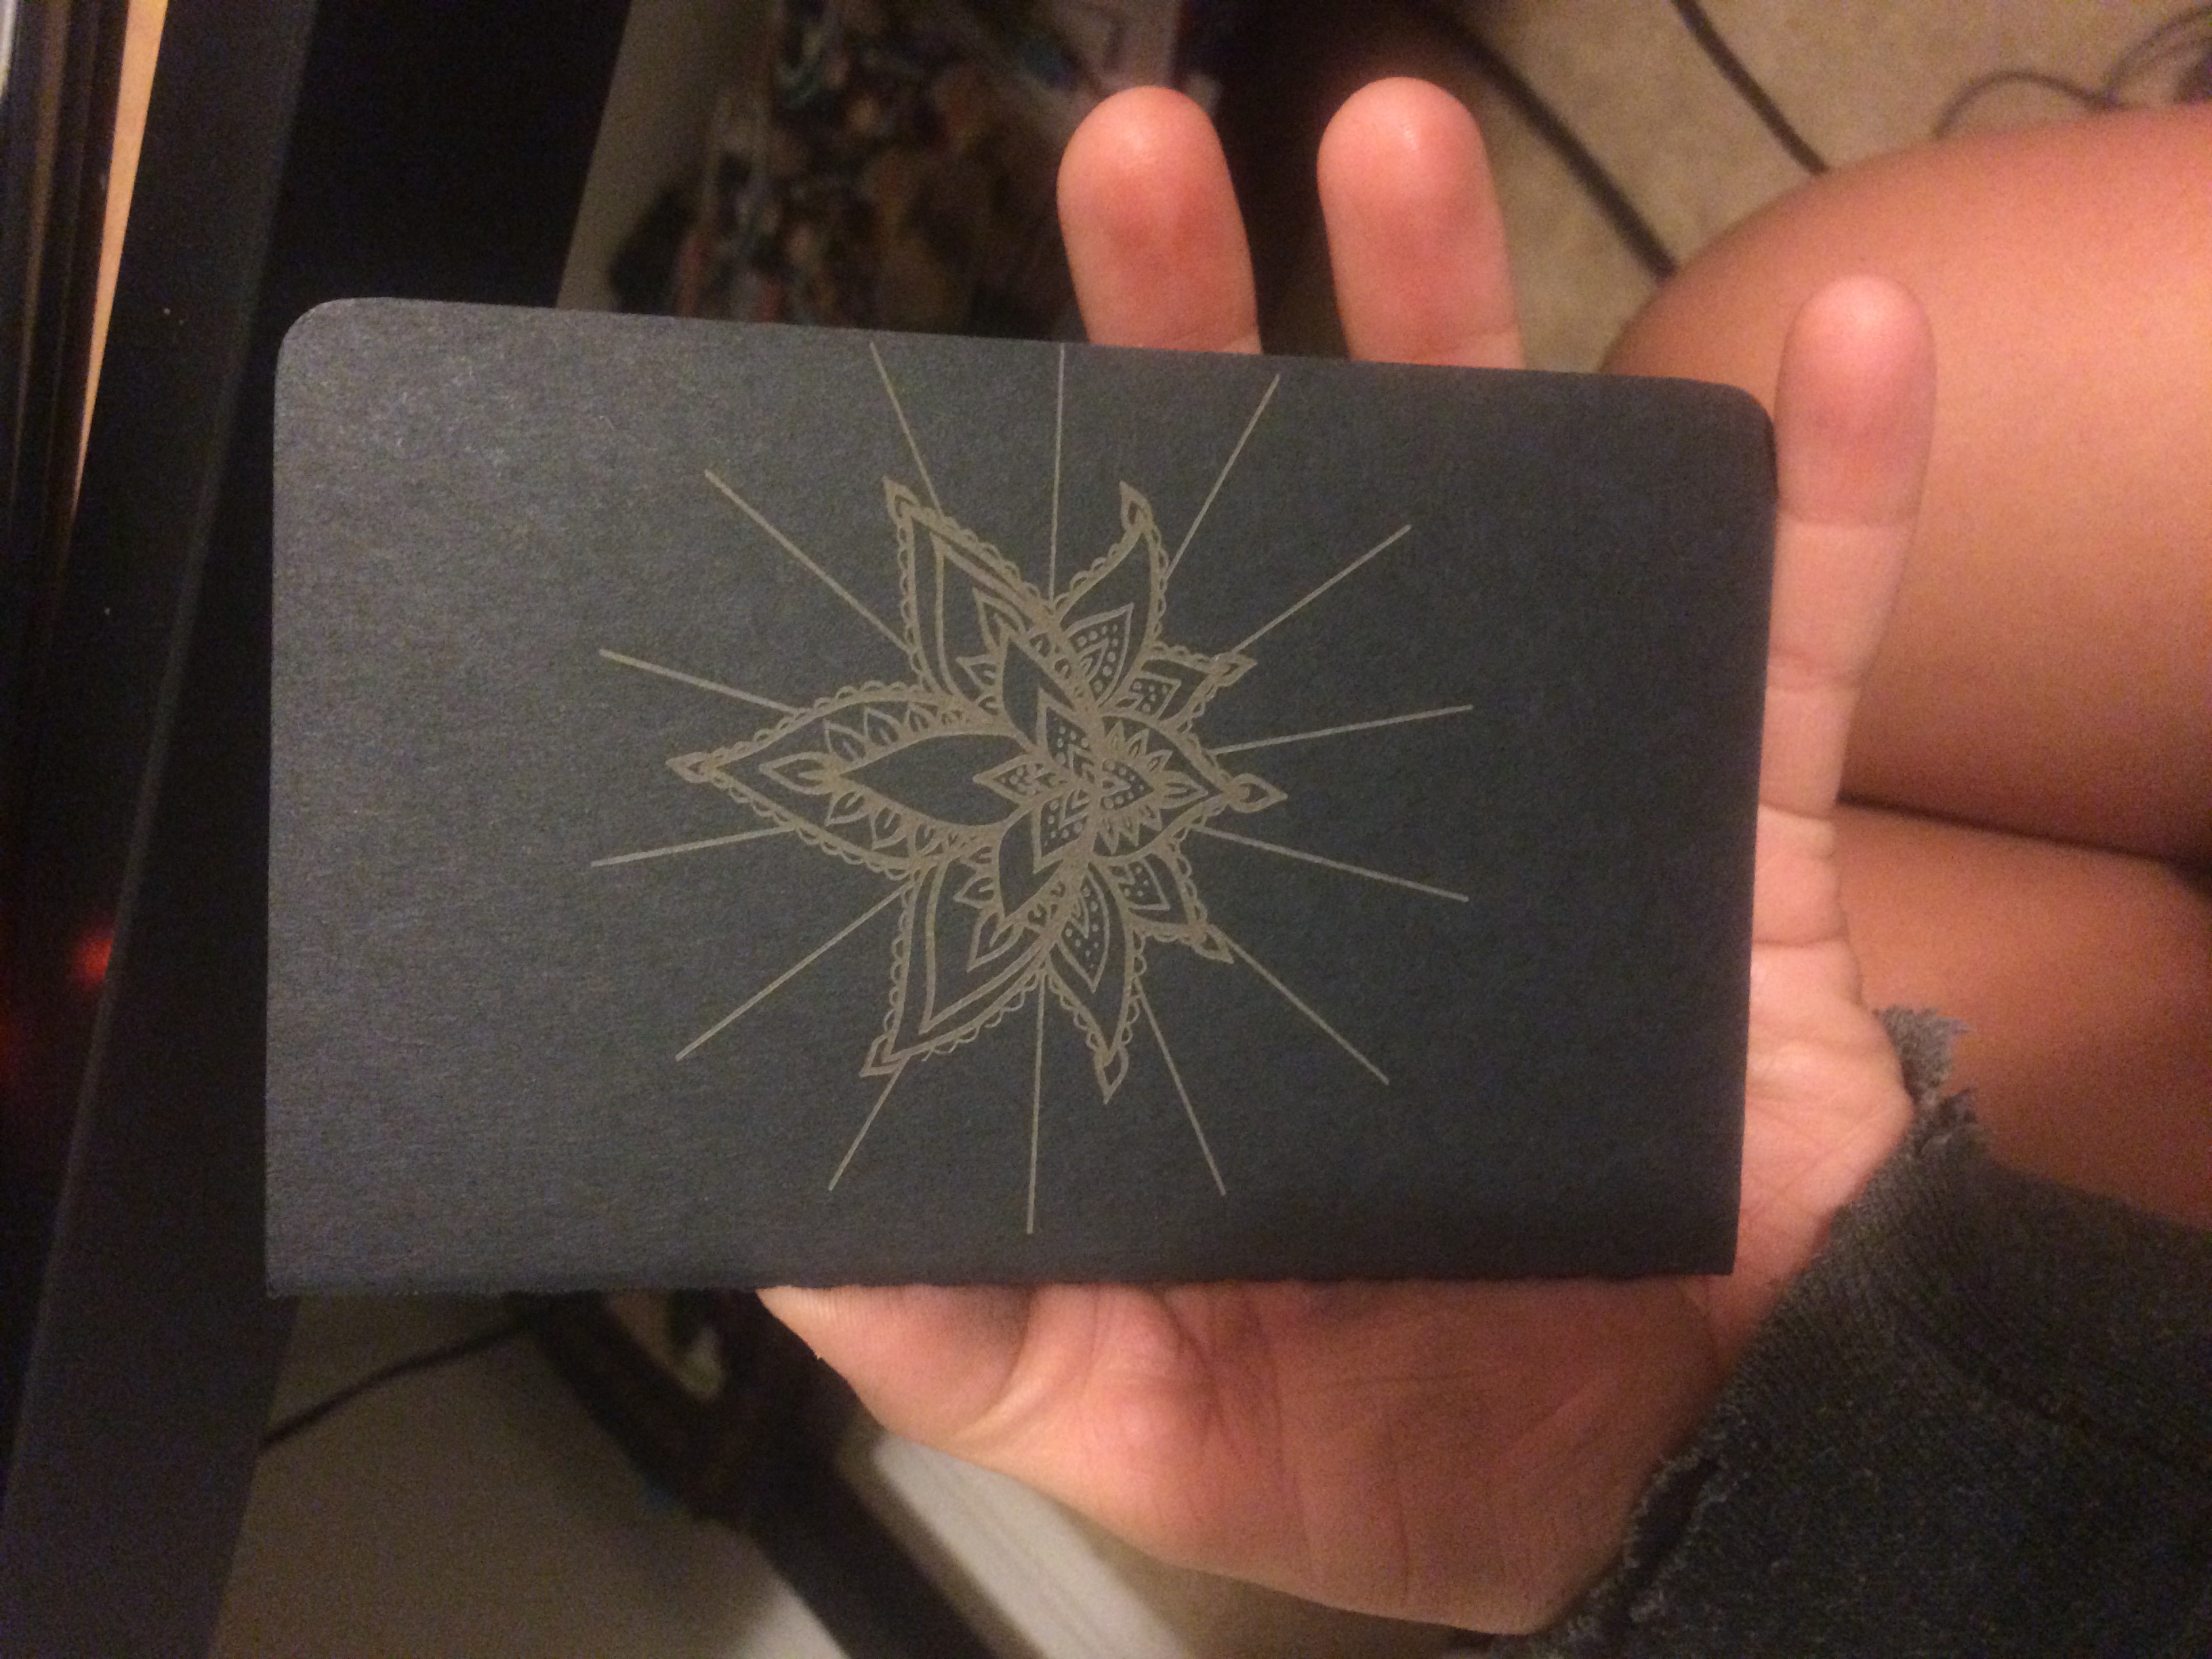
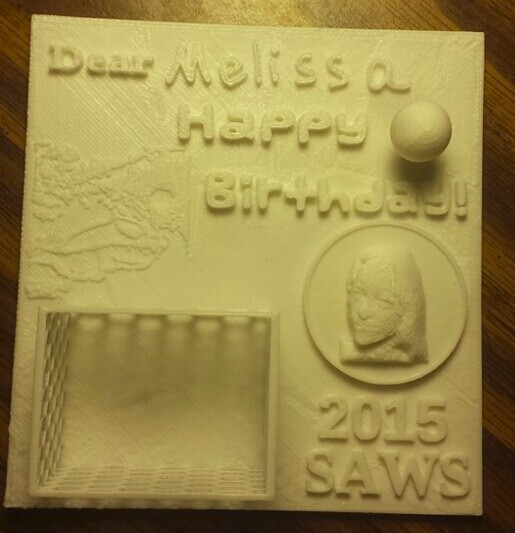
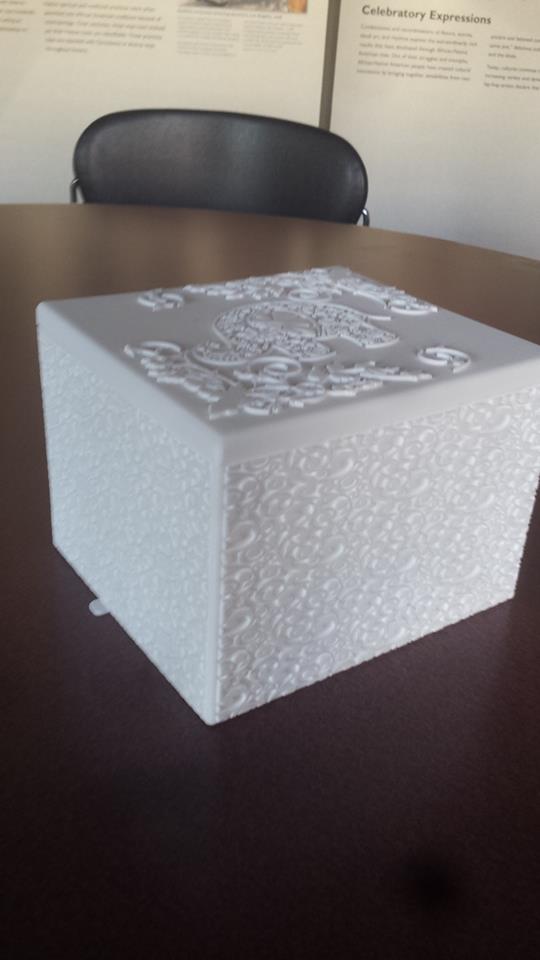
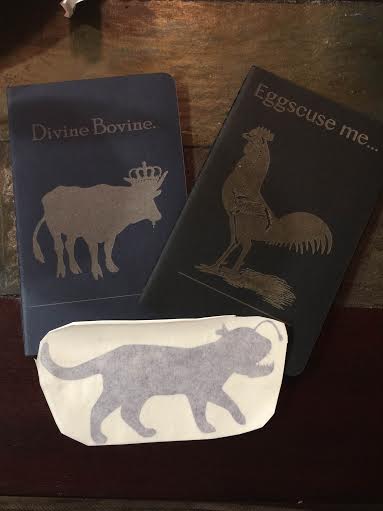
One of the aspects that I loved about this course was also learning that the technologies we used can be leveraged for so many different uses, including ones that many people may never even have thought about. For example, I am involved in different religious communities and I was so pleased to find that I could leverage our digital making platforms to create things that I could use in the realm of my faith. A religious application is probably one of the last things people would think of when talking about things like 3D printers or digital embroidery, but the endless possibilities of digital making are what makes it so incredible! 

Digital Making is Whimsical, Unpredictable, and an Unending Exploration

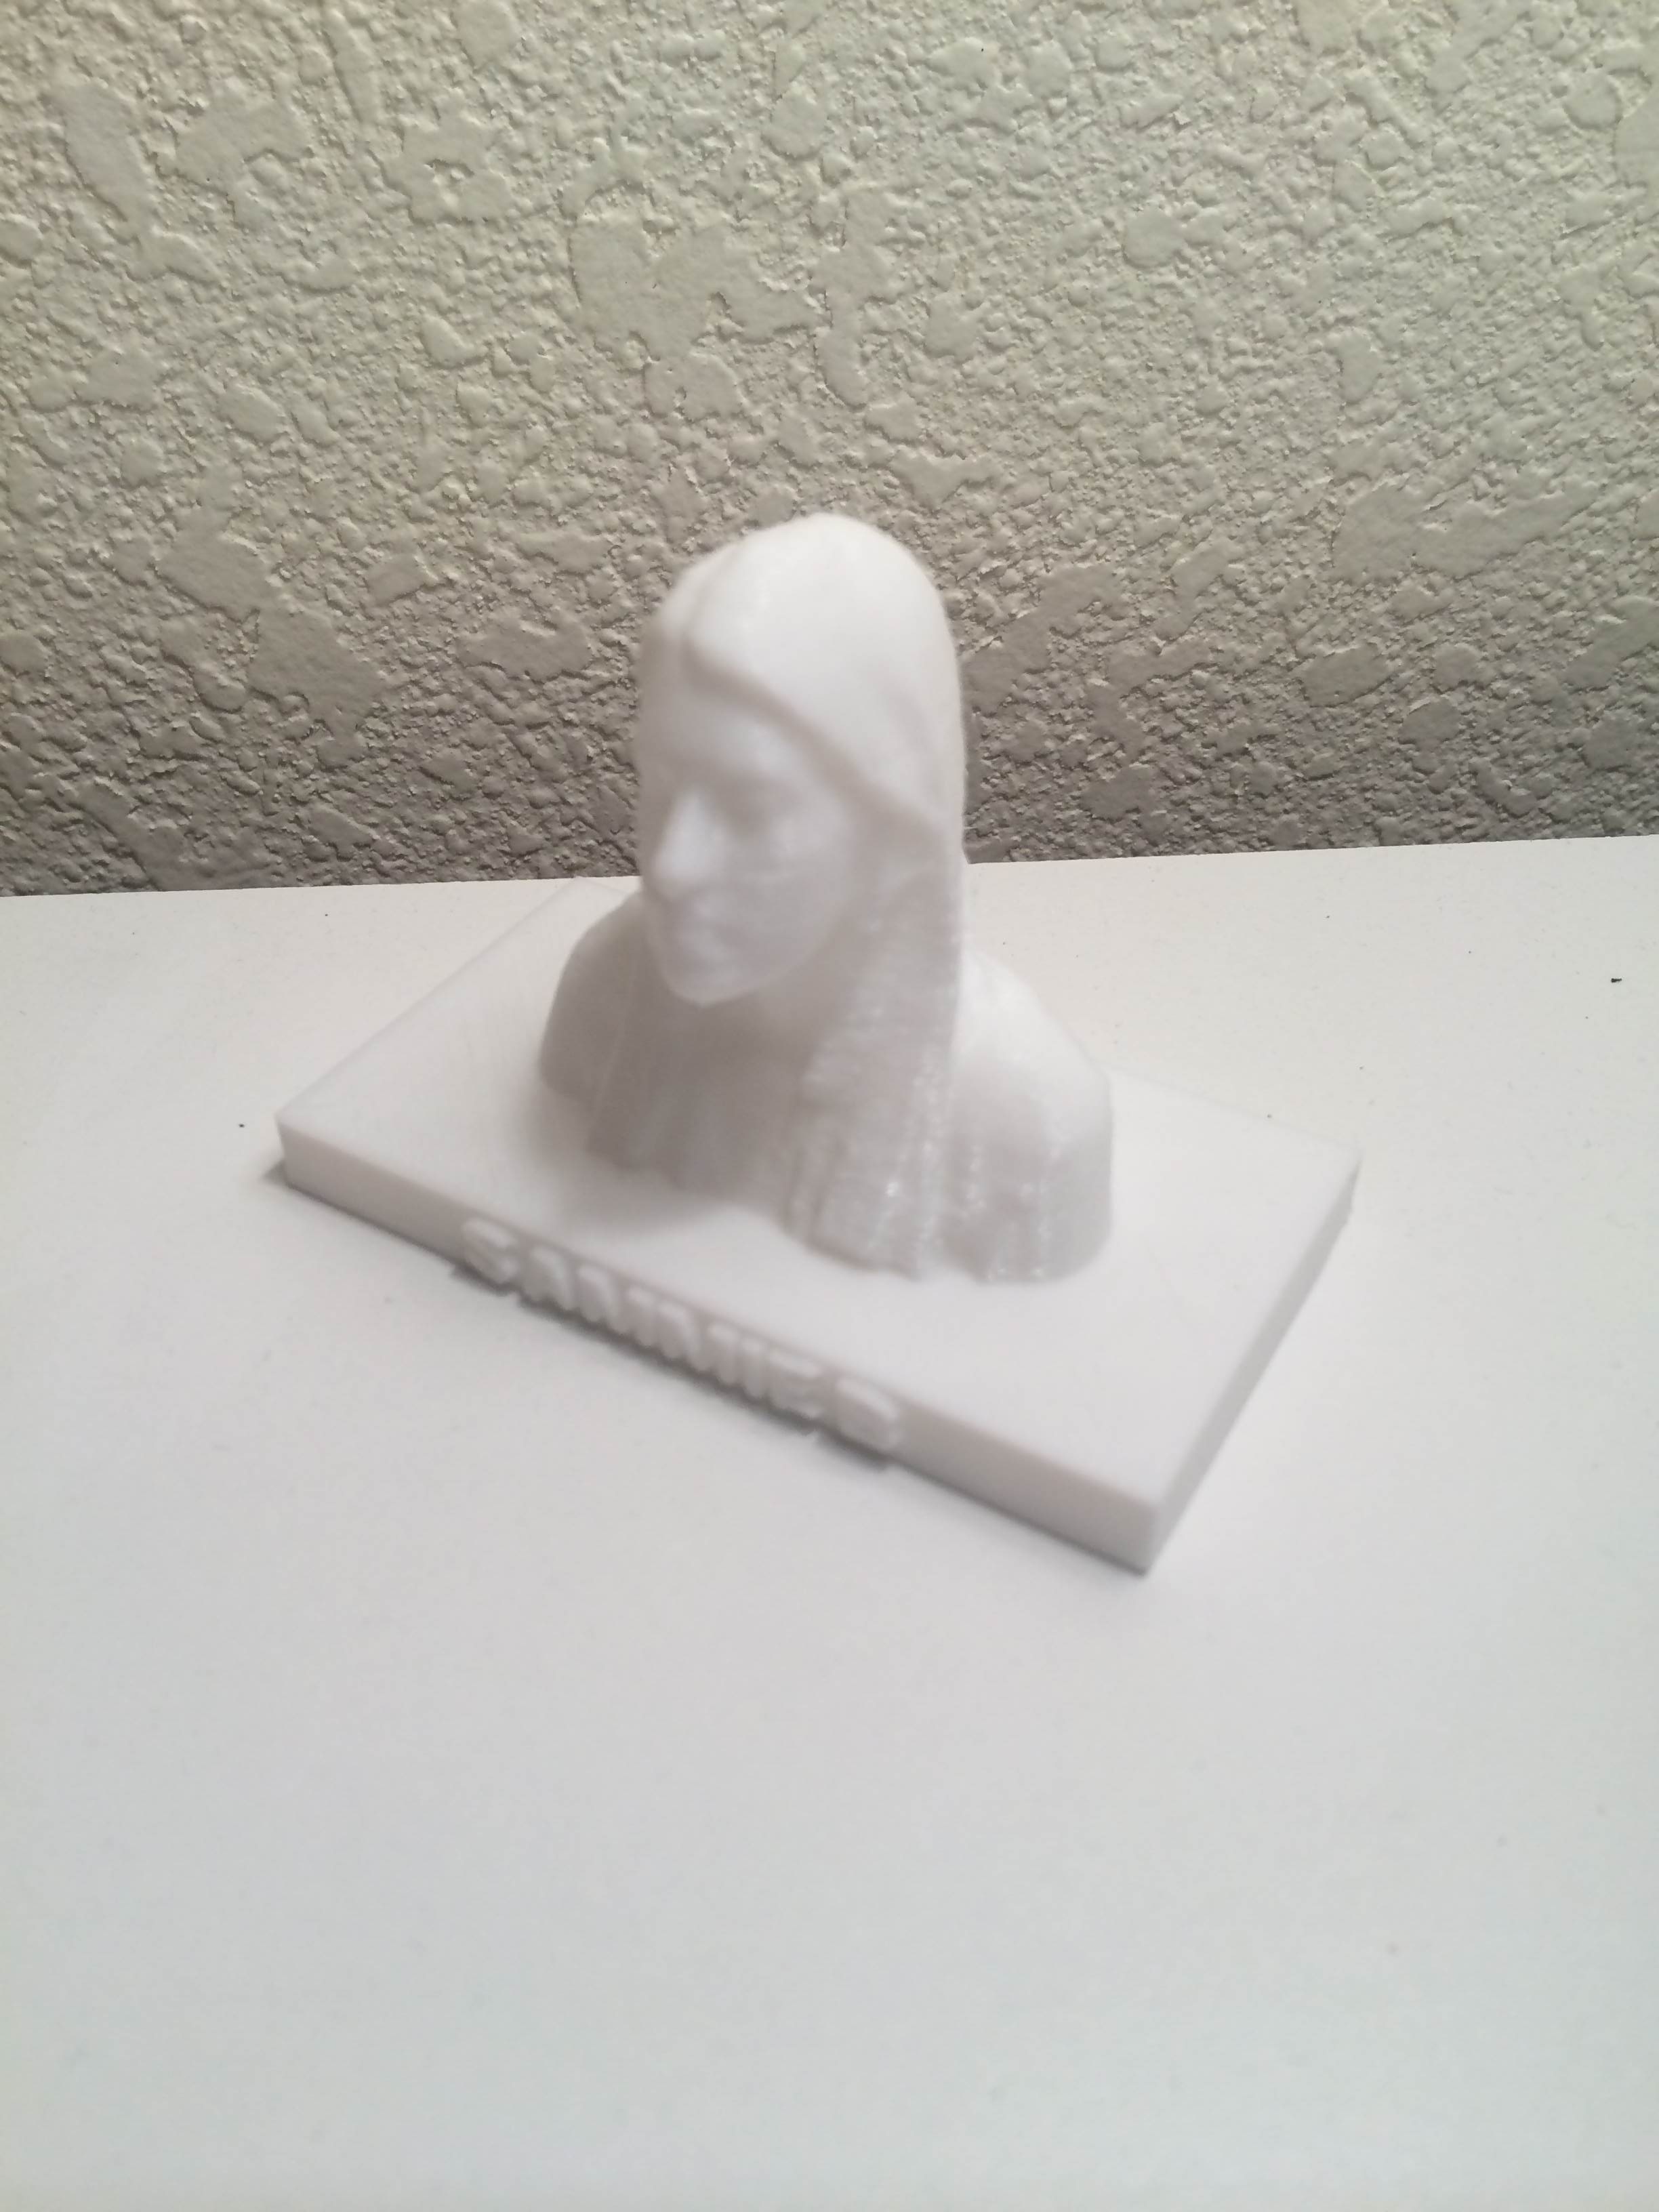
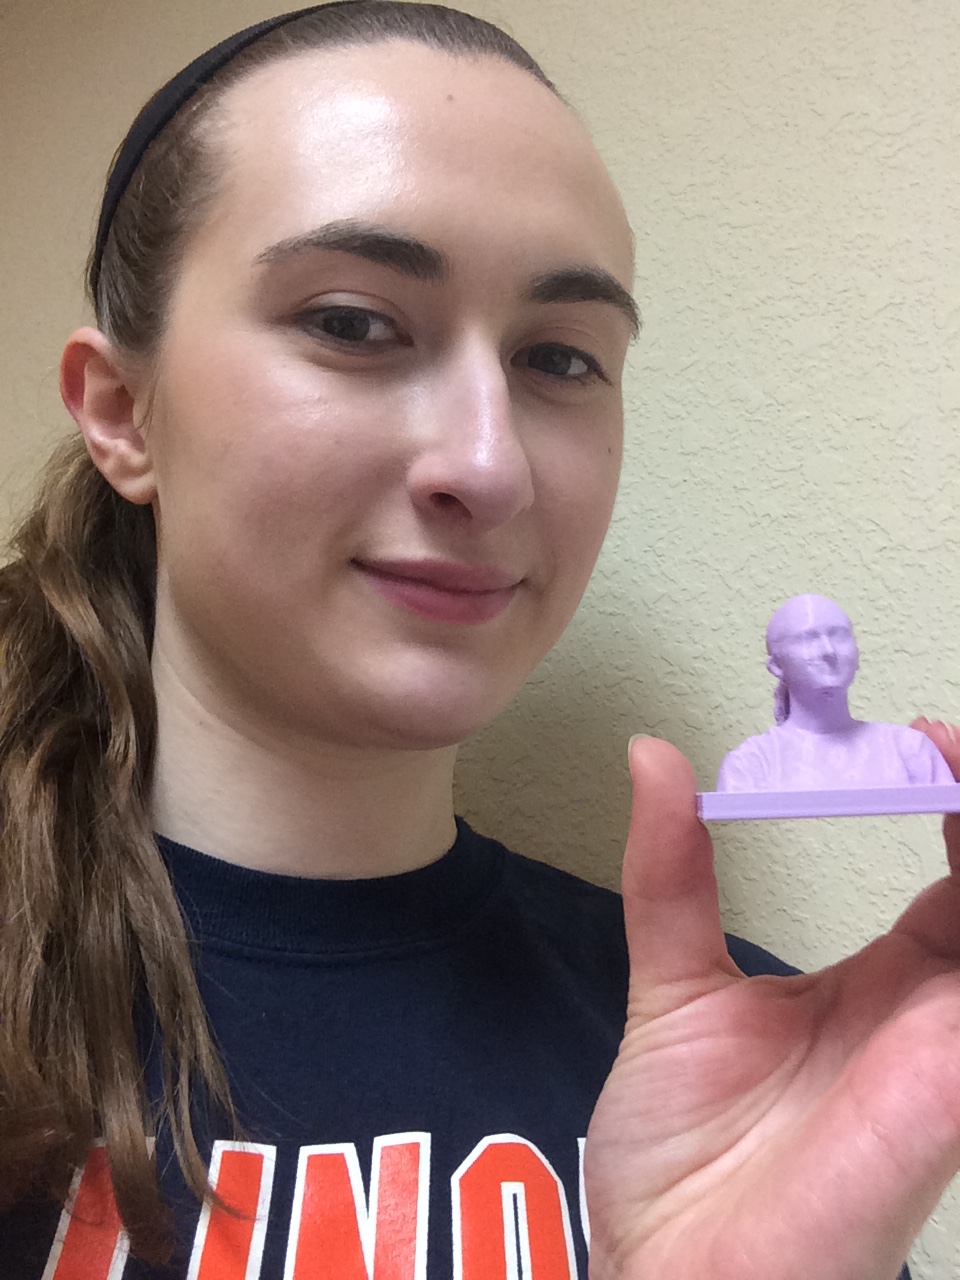
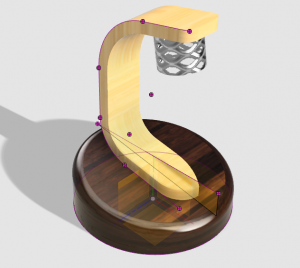
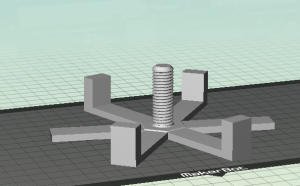
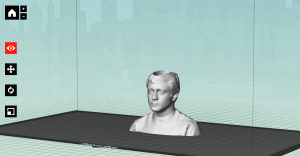
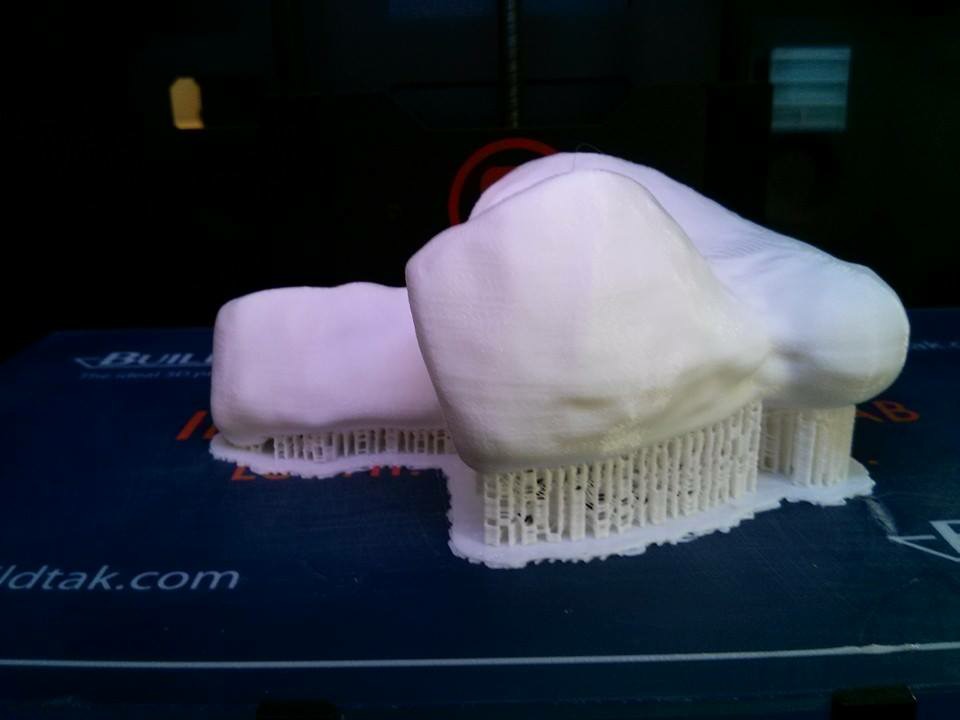
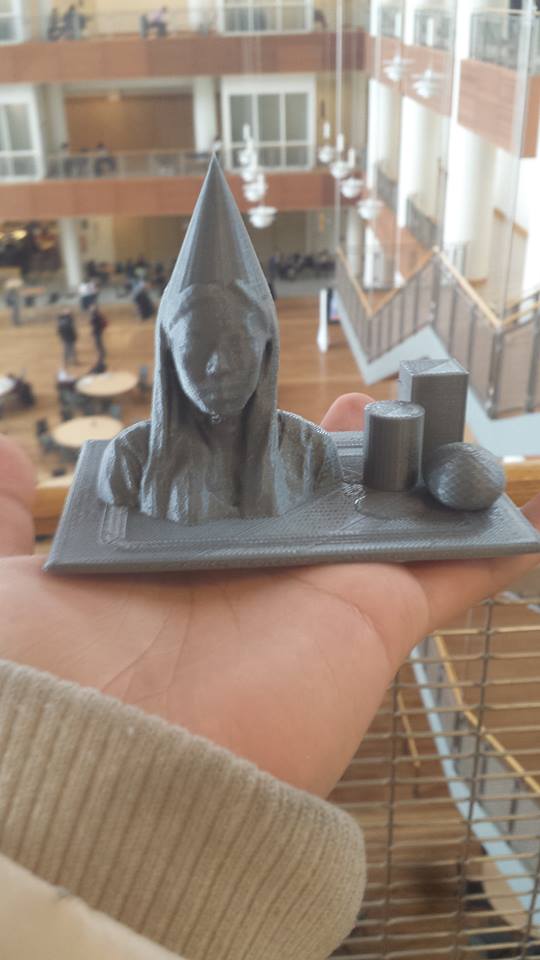
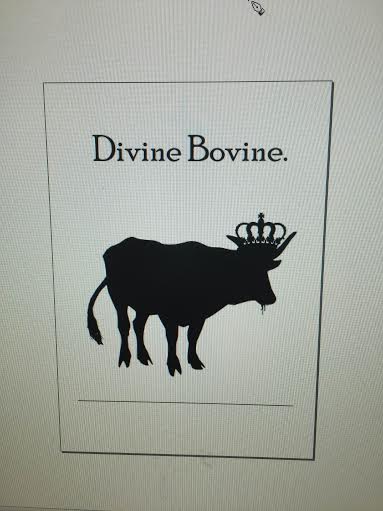
I also have to note that while I intentionally made some pretty cool stuff, I also ended up accidentally creating things. I tried to print a grocery-bag hanger that was formulated from the base of a bolt and I also tried to print a digital scan of myself as a shot glass. Neither print accomplished the purposes of what I had for them individually, but together I created an interesting art piece! The grocery-bag-bolt-hanger spins in the hole I created in the digital scan of myself. This to me, represents the beauty of digital making: even when you think you’re done, you’re probably not! 

This course has taught me that a singular object can be viewed from multiple perspectives, which consequently derive multiple purposes for the object. I firmly believe that this is an important way of thinking that our generation needs to develop in order to become leaders within the global economy. By exploring concepts in something like Digital Making, we learn how to be empathetic, dynamic, and technically capable leaders capable of succeeding on any terrain. For this reason alone, I could not be more grateful to have taken this class and I am extremely excited for all the ways that my experiences in this class will enable me to help others see the value in creating digitally.

Screen Shot 2015-03-01 at 11.28.57 PM

Me in 3D

BADM 395: Reflecting Back

glove presentation

Our final presentation

At the beginning of the semester, I was feeling a little lost. Many students in the College of Business know exactly want they want to do by their junior year. Accountancy at Deloitte, marketing at Caterpillar, consulting for Ernst and Young, but majoring in Management with a focus in Entrepreneurship, I wasn’t sure where I wanted to go, I hadn’t quite found exactly where I fit in. But then I took BADM 395 Making Things. The course is about as broad as the name makes it sound, but the skills that I developed over the past 16 weeks have helped me immensely while planning for the future.

Every week was something new. At the beginning of the course, we mostly focused on developing our understanding of 3D printing and the software we would be working with throughout the rest of the course. I am certainly no expert, but now I find I am comfortable working with Autodesk Fusion 360 and Geomagic, to create and manipulate my own 3D objects from scratch. It started with learning to make something as simple as a tiny hat, to eventually printing a complex wheelchair racing glove after merging and cleaning many files after an extremely precise 3D scan. I also know my way around the lab at BIF, so I can complete the printing process from start to finish by myself.

IMG_7050

First object created from scratch!

IMG_7192

World’s first 3D printed glove!

IMG_0384

Finished glove

Aside from those kind of technical skills, we also took a couple weeks to build our creative thinking and teamwork skills. Usually when a professors says there is going to be a group project, red flags go off in my mind, but the diversity of majors in this class made our group projects incredibly interesting and very productive. Students from all colleges took the course, there were engineers, industrial designers, journalists, IS/IT majors, and everything in between. Not only did I meet a bunch of awesome people, I was also exposed to the very unique ways each type of student thinks. So many ideas were thrown out that never would have occurred to me as a business major, and becoming friends and teammates with these people broadened my capacity to see things in a different light.

Learning about the technical process of 3D printing was definitely my favorite aspect of the course, but we also did tons of other workshops at the Fabrication Lab that were a lot of fun, and helped to give me more ideas of what is possible when it comes to the things you can build and create right here on campus. I really enjoyed learning to use the laser cutter to create our own personal leather bound journals and vinyl stickers, and working with the digital embroidery machines was cool as well. It’s amazing to me that someone in the lab was able to create their very own hand bag that can capture solar power and use it to charge a cell phone! The possibilities are endless and whenever there was class time in the lab, it was always so informational and inspiring! We also got to play with Arduinos in the lab, and just learning about what an Arduino is and how it works was an opportunity that not many students in the College of Business have. The fact that a team in class was able to use that knowledge to create a device that could help the elderly remember to take their medication shows the kind of real world applications all of the demonstrations in class have.

IMG_7414

First experience with Arduinos

IMG_7507

Digital Embroidery

IMG_7373

Vinyl sticker made by laser cutter

IMG_7370

Personalized journal made using laser cutter

What I gained the most from this course was the simple ability to be imaginative and think outside the box. Because I’m studying entrepreneurship, I am very interested in starting my own business someday. After taking this course, I see all of the potential in 3D scanning and printing, and hope to pursue that as a career. Having heard presentations from my classmates about how you can print prosthetic hands, or an actual three dimensional CT scan of a human brain, I have been inspired. This technology could make a huge impact on the world, it already is, and taking this class has helped me realize that I want to be a part of it. Everyone at this university wants to make a difference, everyone here wants to save the world, and with 3D printing, I think I have found my niche. My little place where I can maybe make a change and help someone in need.

From here I plan to continue working on my group project for the duration of the summer, and see where that takes me. I have met some amazing people in the field that have graciously offered to help me increase my knowledge on scanning and printing- so my journey into the world of 3D printing continues. As I learn more and more I see myself one day developing a product and starting my own business using the skills I’ve gained from this class, but as for now I will keep experimenting on my own until that lightning bolt of an idea strikes me.

I would encourage any student- no matter what major- to give this class a try. Having access to so many kinds of equipment and the professionals who know how to use it is a distinct opportunity that you will likely only come across during your undergraduate years at university. Now that I have been exposed to all that is possible, with 3D printing and “making things” in general, I have become motivated to put that knowledge to good use and make something that matters.

My Fun Journey in Digital Making (Semester Learning Experience)

I guess I am a girl who could easily be amazed at something, and curious all the time. I remember a year ago, when I was a freshman, I visited the engineering quad because of the annual engineering expo in the university, and saw some small things, made by 3D printing and laser cutting, showing on the table. I was immediately intrigued by them, partially because of the beautiful patterns of the laser cutting cards and the creative shapes of the 3D printed objects, and I viewed them as applications of new technologies on art and design at the time. However, as a Finance major student, I never thought I would be able to do this one day… until when I got to know the BADM 395 Making Things class! After knowing this opportunity to get hands on experience of 3D printing, I was so excited and immediately emailed Professor Vishal asking to enroll in the class… and he said “Yes!” ☺☀☺ And now comes my journey that’s filled with tons of fun…


This class is not just about 3D printing. I would like to describe it like this:

1. It serves as a start pointing that introduce different kinds of new technologies to students, regardless of what majors students are in;

2. It is a place more about learning and sharing, and a place where students can enjoy enough freedom in their own creativity and project design, which makes it a very fun class;

3. It is a class that encourage initiative, exploration and self-learning. As a student in the class, I was motivated to explore things that interest me, to do research on the topic and lean new things, to try different ways to make ideas come true.

4. It introduces so much more than 3D printing. Students got to have lots of resources allowed to use on campus because of the class, and learn things by experiencing them. A list of things that this class has to offer:                                                                                       BIF(MakerLab):  3D Printing, Fusion 360                                                                               Beckman Institute Visit: Advanced 3D scanning & printing machines                                 CU Community FabLab: InkScape, Laser Cutting, Making Stickers, Arduino, Electrical Embroidery                                                                                                                                   Chicago Deloitte “Green House” Visit: Technology consulting, how technology is changing manufacturing, operating and the ways businesses work, the importance to embrace new technologies in business to maintain comparative advantages.


Learning Experience

Here are selected works I made that represent different phases of my leaning experience in the class.

A. 3D Printing Introductory

1610874_321505618038219_4027455329613899883_n

Photo Description: Scanning & Printing

Experience: I was able to scan myself and had myself printed out.                                                                Scanner: Sense Scanner  @MakerLab-BIF              Editing: TinkerCad   @https://www.tinkercad.com/              Printer: MakerBot Replicator 2 @MakerLab-BIF


B. Research & Exploring & Polishing Self-Learning Skills

QQ图片20150310021832

Photo Description: Wish Card (Semester Activity)

Experience: For my semester activity, I decided to make a birthday wish card for my friend from my volunteering trip SAWS. It includes the extruding of images/ handwriting, the modeling of people’s face based on photos. I also made a presentation on these techniques I explored in the class to share my knowledge. I also posted a detailed journal that tells this experience and shares the knowledge.

My Knowledge Sharing Journal                                                                                       Extruding: InkScape  @https://inkscape.org/en/                                                                                        Blender  @http://www.blender.org/                                                                        Face Modeling: FaceMaker  @http://facemaker.software.informer.com/6.0/                                                    Faceworx  @http://www.looxis.de/looxis-faceworx-tool/


C. Other Technologies Introductory @CU FAB LAB

11048723_338693786319402_3733693521406471463_n 11112717_338693859652728_836764989826327096_n 20150407_152133(0) 20150407_163643

Photo Description: Laser Cutting & Making stickers

Experience: We learned to design and make our own stickers and customized notebook using InkScape and other softwares.                  @CU FabLab


Photo Description: Arduino

Experience: I learned to use Arduino and light sensor to make the LED light automatically light up in darkness. Arduino was very fun to play with, and I also integrated it as part of my final project.

图片1


Photo Description: Electrical Embroidery             

Experience: I learned to make electrical embroidery in the FabLab. I downloaded this castle picture online and chose the color I wanted, and made this. You may notice that the background looks a little bit different- Because the machine somehow messed the background up, so I actually painted the background with nail polish of different colors to cover it up!


D. Integrating Semester Learning 

22590_350157275173053_6320667156423899742_n

 Photo Description: Surprise Box (Final Project)

Experience: I made a box as my final project. It basically includes different things that I learned in the semester that gave me inspirations. I kept journals of it, and you can view them here:

Also, if you want to make a box like mine, you can download the parts to print from my thingiverse page:  http://www.thingiverse.com/thing:811267


This basically summarizes my experience in the class of this semester. I also created my own portfolio because of the class: http://jlu227.wix.com/kay-lu (Please feel free to view it and let me know if you have any thoughts of helping me to improve it! -Thank you.)


My “Surprise Box”Final Project – Journal 4: Project Meaning & Reflection

This is an overall summary and reflection of my final project. I “categorized” it into several parts, which I thought would make it more clear and easier to read.
Also, if you are interested, please visit the following website:
http://jlu227.wix.com/kay-lu      (My portfolio)
http://www.thingiverse.com/thing:811267   (Where you can download the parts and make the box)
The idea to create this: 
I like science and math; I like art and design; I like volunteering. These characteristics of myself kind of lead me to this project. I wanted to make something that integrates the beauty of math, some kind of “Math Art”, and I want to make something that’s beautiful and meaningful. Also, I enjoy making presents to my friends, so I want to make something that can surprise people or make people happy as well. 
And as this semester, I went on an environmental volunteering trip to Southern Appalachian in North Carolina, I was surprised by how ignorant people could be regarding the protection of the environment and how people may not realize that our actions actually can have influence on the environment. Therefore, I came up with the idea of making this box.  

The designing process & Meaning behind: 
The heart, flowers, and butterfly parts are modeled in Mathematica. This came from the idea of “Art Math”, showing the beauty of symmetry and pattern a function could give us.
The box is designed in such a way that I could hide the Arduino in the lower layer, and put the LED light in the heart. Also, the inside space that is created by a wall of hexagons is used to plant small plants, like grass or moss. 
The idea behind these designs is that: 
> The moss as background, which surrounds the heart, convey my idea that personally, I think plants have “hearts”, or their feelings as well. So when human hurt a tree, like cutting it, it can feel the pain as well. Also, the butterfly and the flowers on the heart symbolize the beauty that nature provides to all the livings in the world. They are beautiful and fragile, and they are something that while we human are enjoying, need to treasure and protect as well. 
> The Arduino part ( including a PIR sensor and a LED light) could make people surprised. When people open the box, the heart will be light up and looks pretty.
> The box is created using Fusion 360. However, the outside patterns of the box were not my work- I didn’t draw those images. I found them(the elephant, flower patterns) on google and use InkScape and Blender to extrude them and integrate them with my box. I wish I could have given credits to whoever designed those images, but I was not able to find the author names.
The box works like this: 
So you open the box, and the heart will be light up, surrounded by green moss, and you will be surprised.
The plant part is not finished yet though, as I am not very familiar with plants and am not able to find suitable plants yet. Therefore, right now I just put in some dry pine tree leaves instead.
Some afterthoughts:
This box symbolizes my idea about protecting the environment. And I also enjoyed myself a lot while doing it, because I love making people happy and I love 3D printing and different technologies. And this box is a combination of different things (3D printing, Arduino, “plants” idea) And as I am actually a Finance and Accountancy sophomore in the University of Illinois, I didn’t have as many chances to access high tech as engineering students, this project really give me the chance to try different ways possible to make an idea come true. 
I had a lot of crazy ideas when I was a kid. They were “crazy” at the time because I didn’t know how to realize them, in other words, I didn’t know the existing technologies possible to make them come true. The biggest afterthought of this project is that, how can the society make these new technologies more accessible to normal people, or more specifically, to children? I believe that if kids are able to have the chance to be introduced to different high technologies, they can really let their imagination fly and have fun and explore and learn a lot while making their “crazy” ideas come true.


My “Surprise Box”Final Project – Journal 3: Box Modeling & Arduino

11229411_349641835224597_4988407589898695507_n


Box Design


After finishing the most technical part of modeling the heart in Mathematica, I start to make my box.

I used Fusion 360 to model the box, as I was then able to control exactly what I want for different dimensions of the box.

The box also has a lower layer. It is used to hide Arduino and battery. I also make a hold at the bottom of the heart, in order for a LED light to go in.
The Arduino part of my project, I used a PIR sensor, so when people approach the box or when people open it, the heart will be light up.

Another thing is the “fence” that’s built inside the box by a wall of hexagons, which created an empty space inside, was supposed to be used for planting. My original idea was to plant some moss in the box as a background. However, I haven’t found moss to plant there yet, so I used some dry pine tree leaves instead.

After this, I put them all together and my project is done!

22590_350157275173053_6320667156423899742_n

To print out the parts and make this box, you can go to my thingiverse page here:      http://www.thingiverse.com/thing:811267

The Perfect Prototype

The Digital Making course of Spring 2015 was somewhat of a prototype in its own way. It made its appearance, and it was our job as a class to work out the kinks and create a final product that works for many semesters to come. What miraculously occurred, which never happens, was the perfect prototype.

It started with a group of students. All of us coming from different backgrounds- journalism, business, accounting, art, supply chain, you name it. All of us with goals to “make”. We were thrown into a room full of software, supplies, and 3D printers, and the craziest thing happened- we learned how to use them. We came together with Beckman, the FabLab, the AutoDesk crew, and the MakerLab to learn everything we could about what’s available. We learned about using Fusion 360, the laser cutter, and everything in between.

I felt like I had a solid understanding of most of these things, such as CAD programs and digital making devices, but the digital making course taught me to apply them.

Fusion 360: 

I fell in love with this program. It was so easy to use and create shapes that would be nearly impossibleScreen Shot 2015-05-13 at 3.25.13 PM 
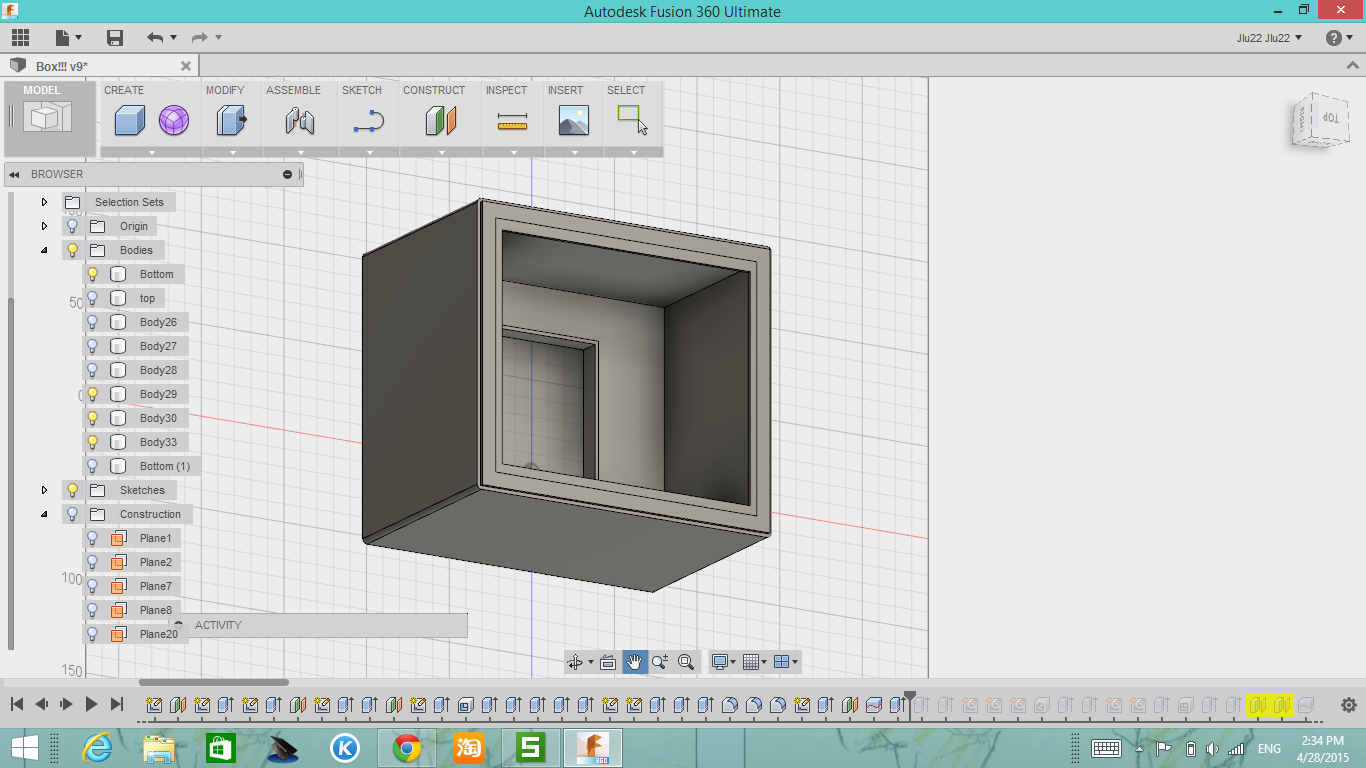
on programs like SolidWorks. After really playing with it, I found myself telling more and more of my classmates in the industrial design program how great Fusion was (as we all had to suffer through learning SolidWorks this semester) and I picked up a huge interest in creating a program to teach newcomers how to use Fusion.

Originally, I planned to work with the MakerLab for this program. Throughout the semester, this sort of fell through. However, I was put in contact with the MakerGirl group on campus. This summer they’ve presented me with the opportunity to work with their program. After speaking with Julia, the leader and commander of the group, I pitched my Fusion workshop idea to her and it sounds like something that may get integrated into this summer’s program!

My workshop will teach girls that have been through the MakerGirl programs to use Fusion, and create a gummy bear. Where’d this idea come from, you ask? I was eating gummy bears. The gummy bear is a very basic shape to create that integrateGummy BearGummy Bear 2
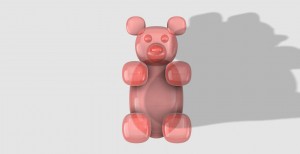
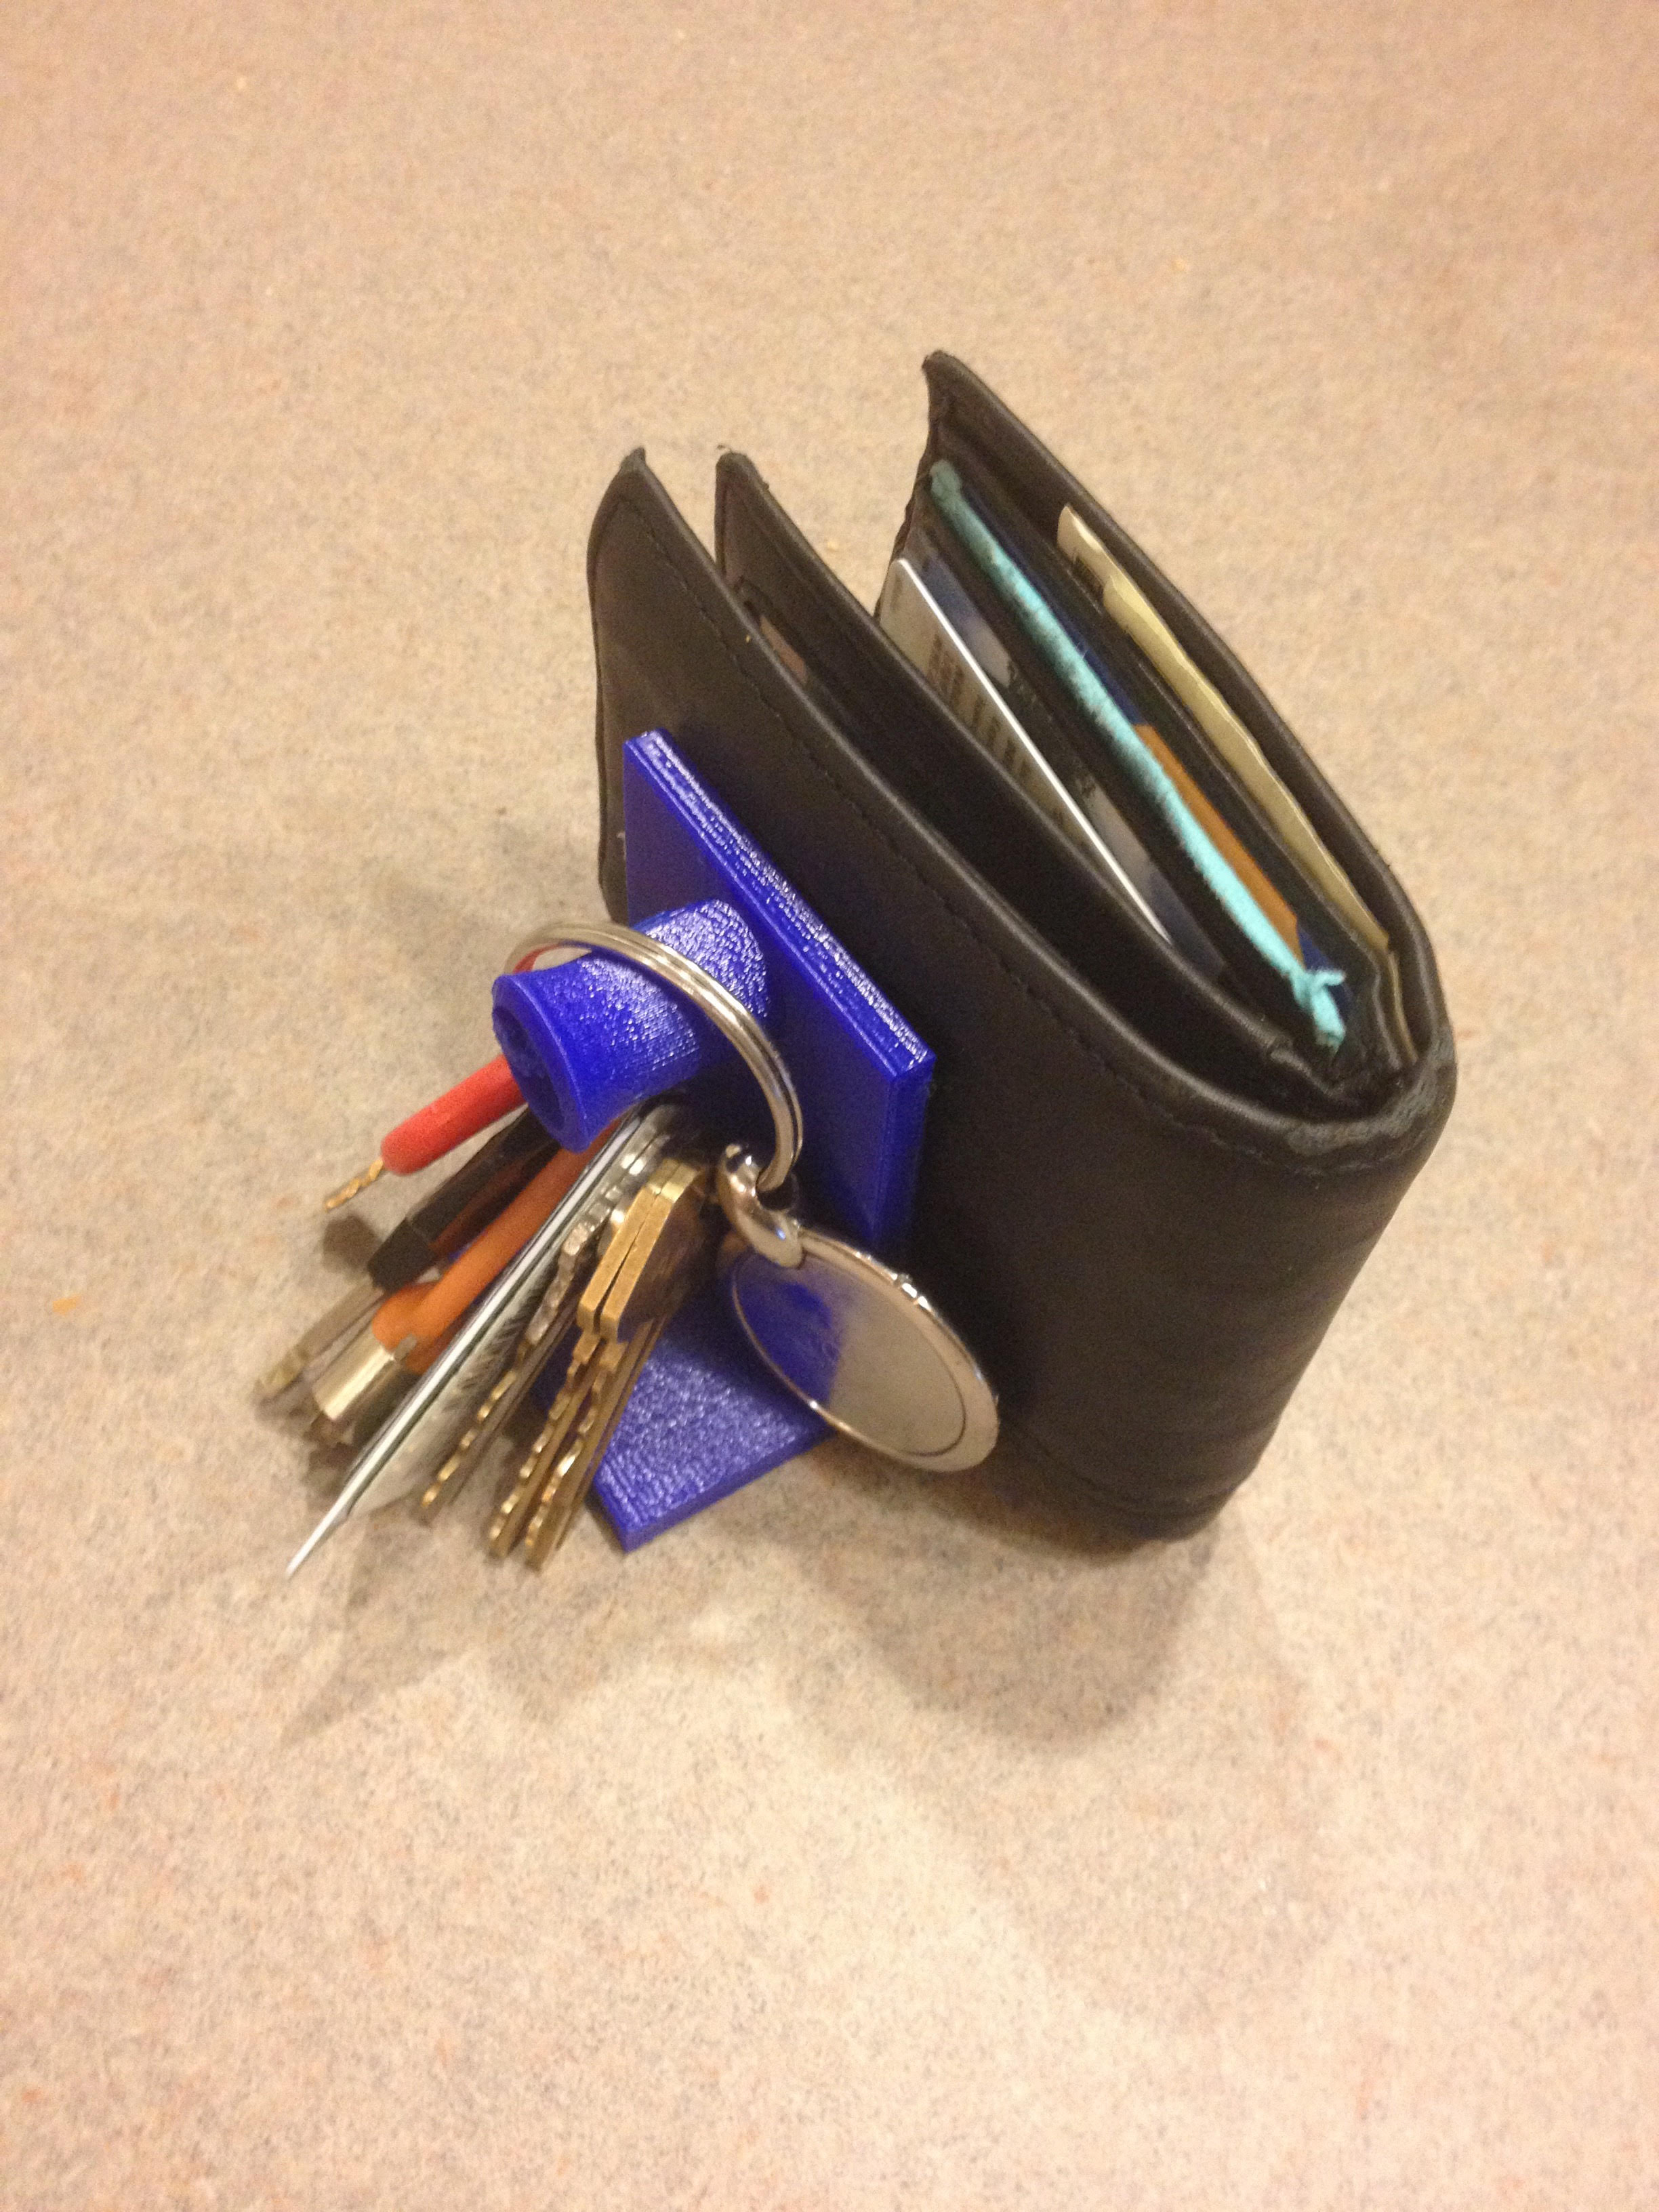
s the use of basic tools, and highlights the organic capacity of the program. In the end, they’d be able to print their creation, add a loop to the top, and put their bears on a keychain. If this proves to be a success, I would love to go forth next year and continue to develop the workshop for students coming into the MakerLab.

I will continue to work with MakerGirl over the summer to develop and create new ideas for programs that integrate what I’ve learned from my background in design, as well as Digital Making to teach girls ages 9-14 about digital creation.

The Make-a-thon:

We created the LimaGrip! This process was a lesson on patience that’s for sure. Filaments were a struggle, sizing was obnoxious, and I had to CAD this thing like a jillion times to get it right, but the idea was that we created something. The whole premise behind this Lima Gripper
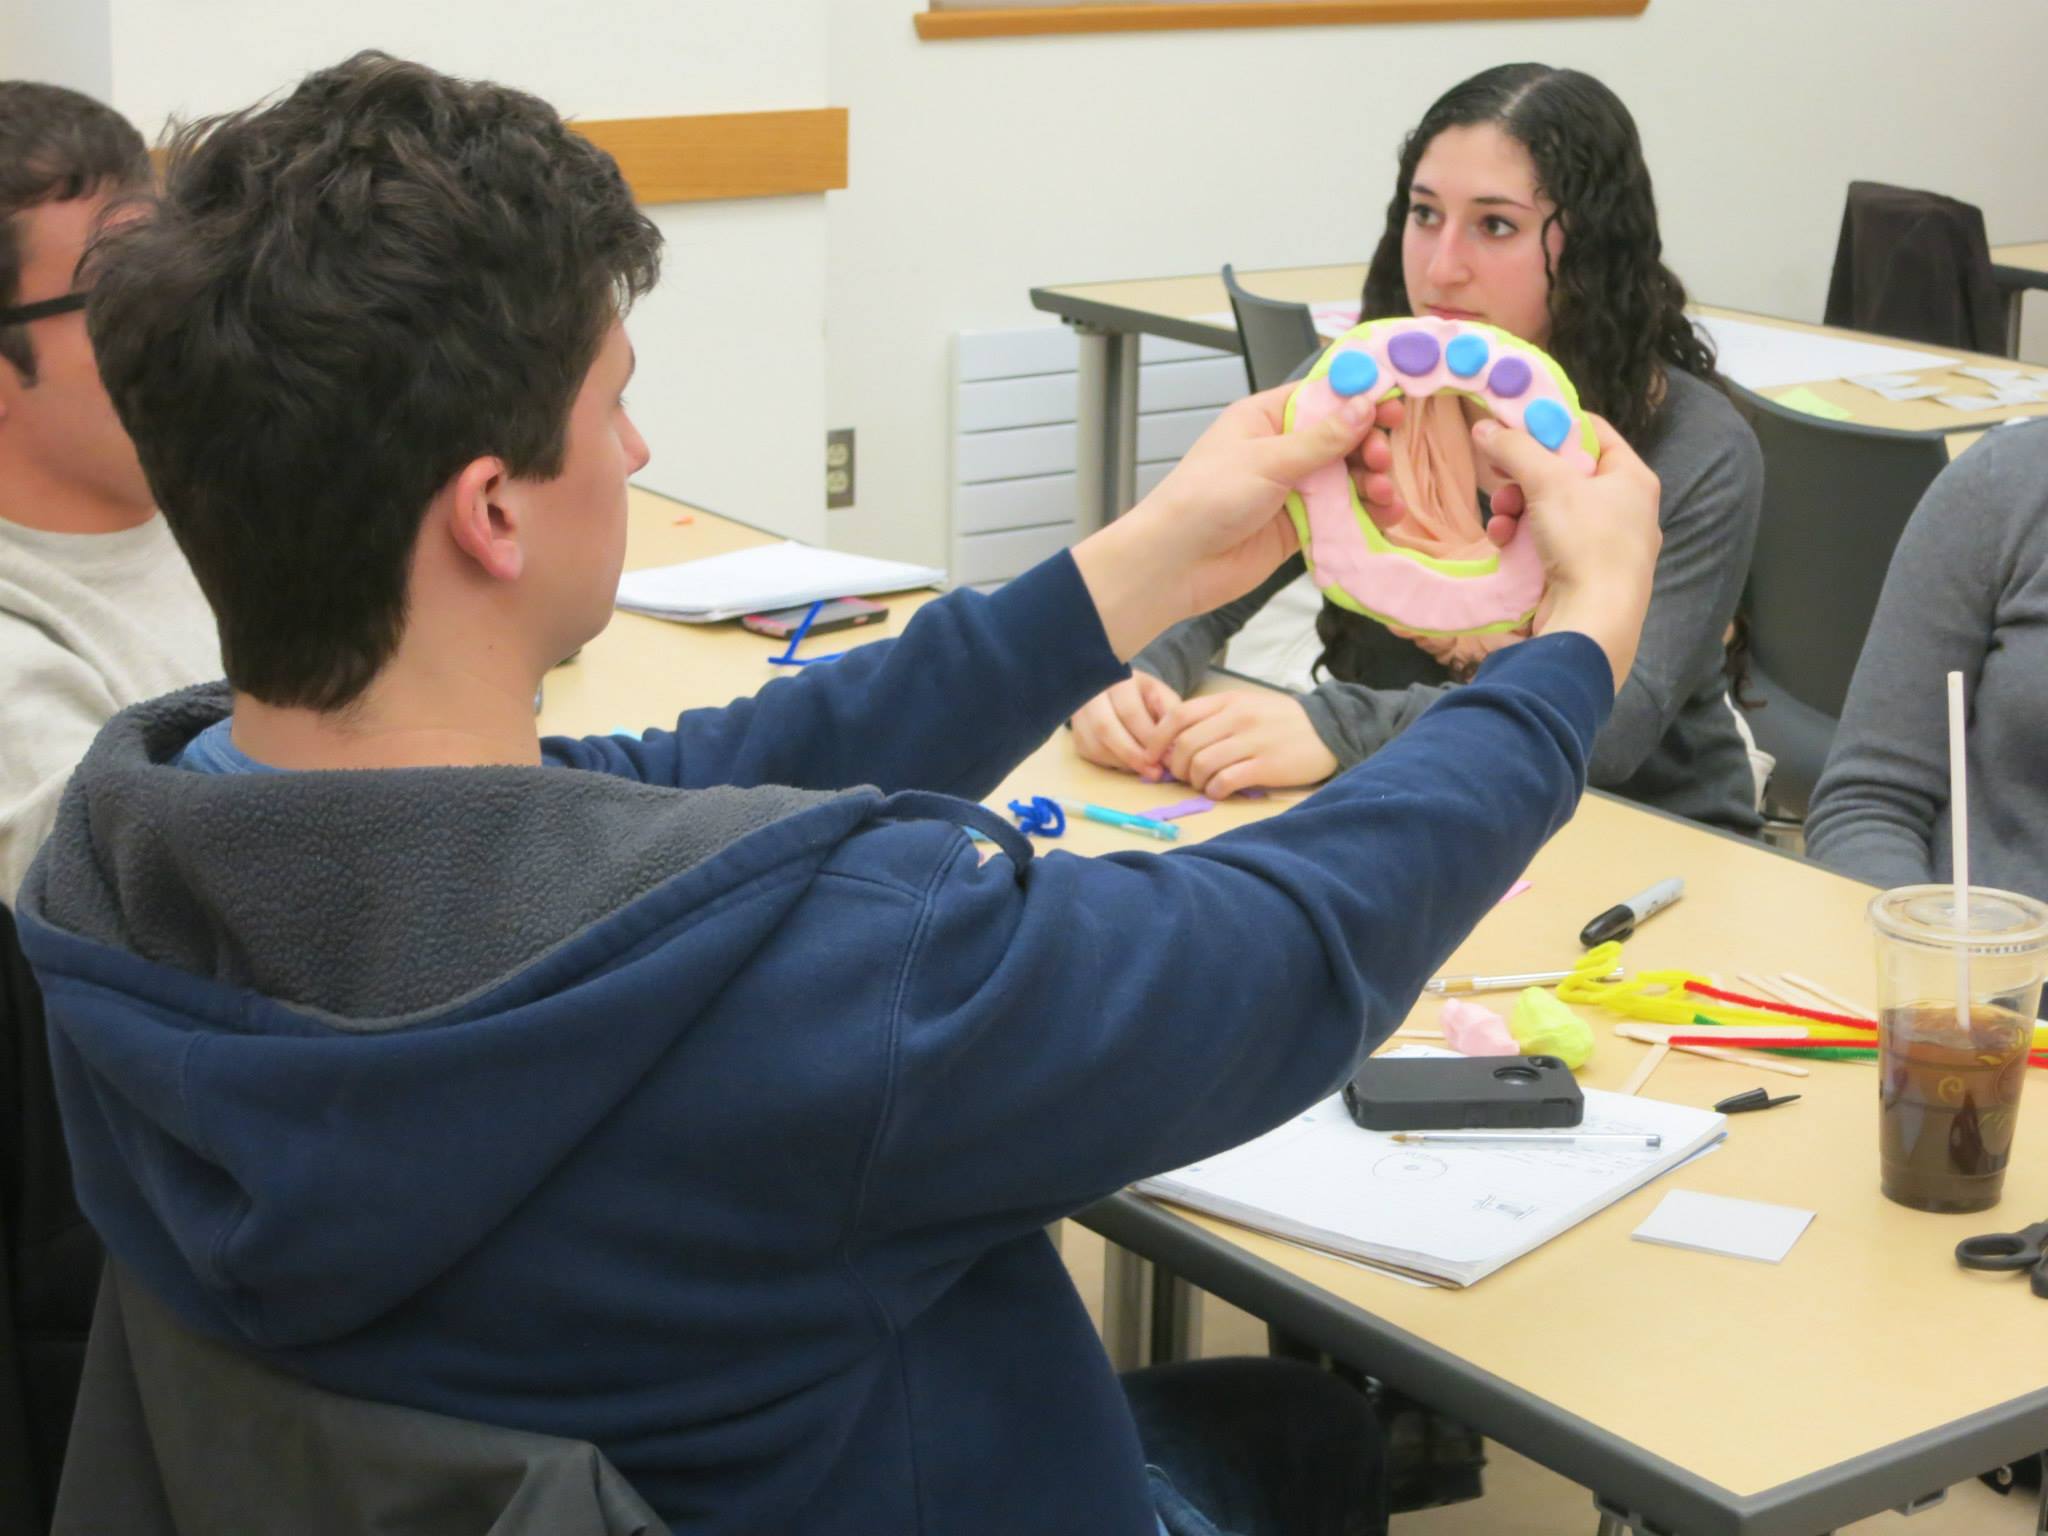
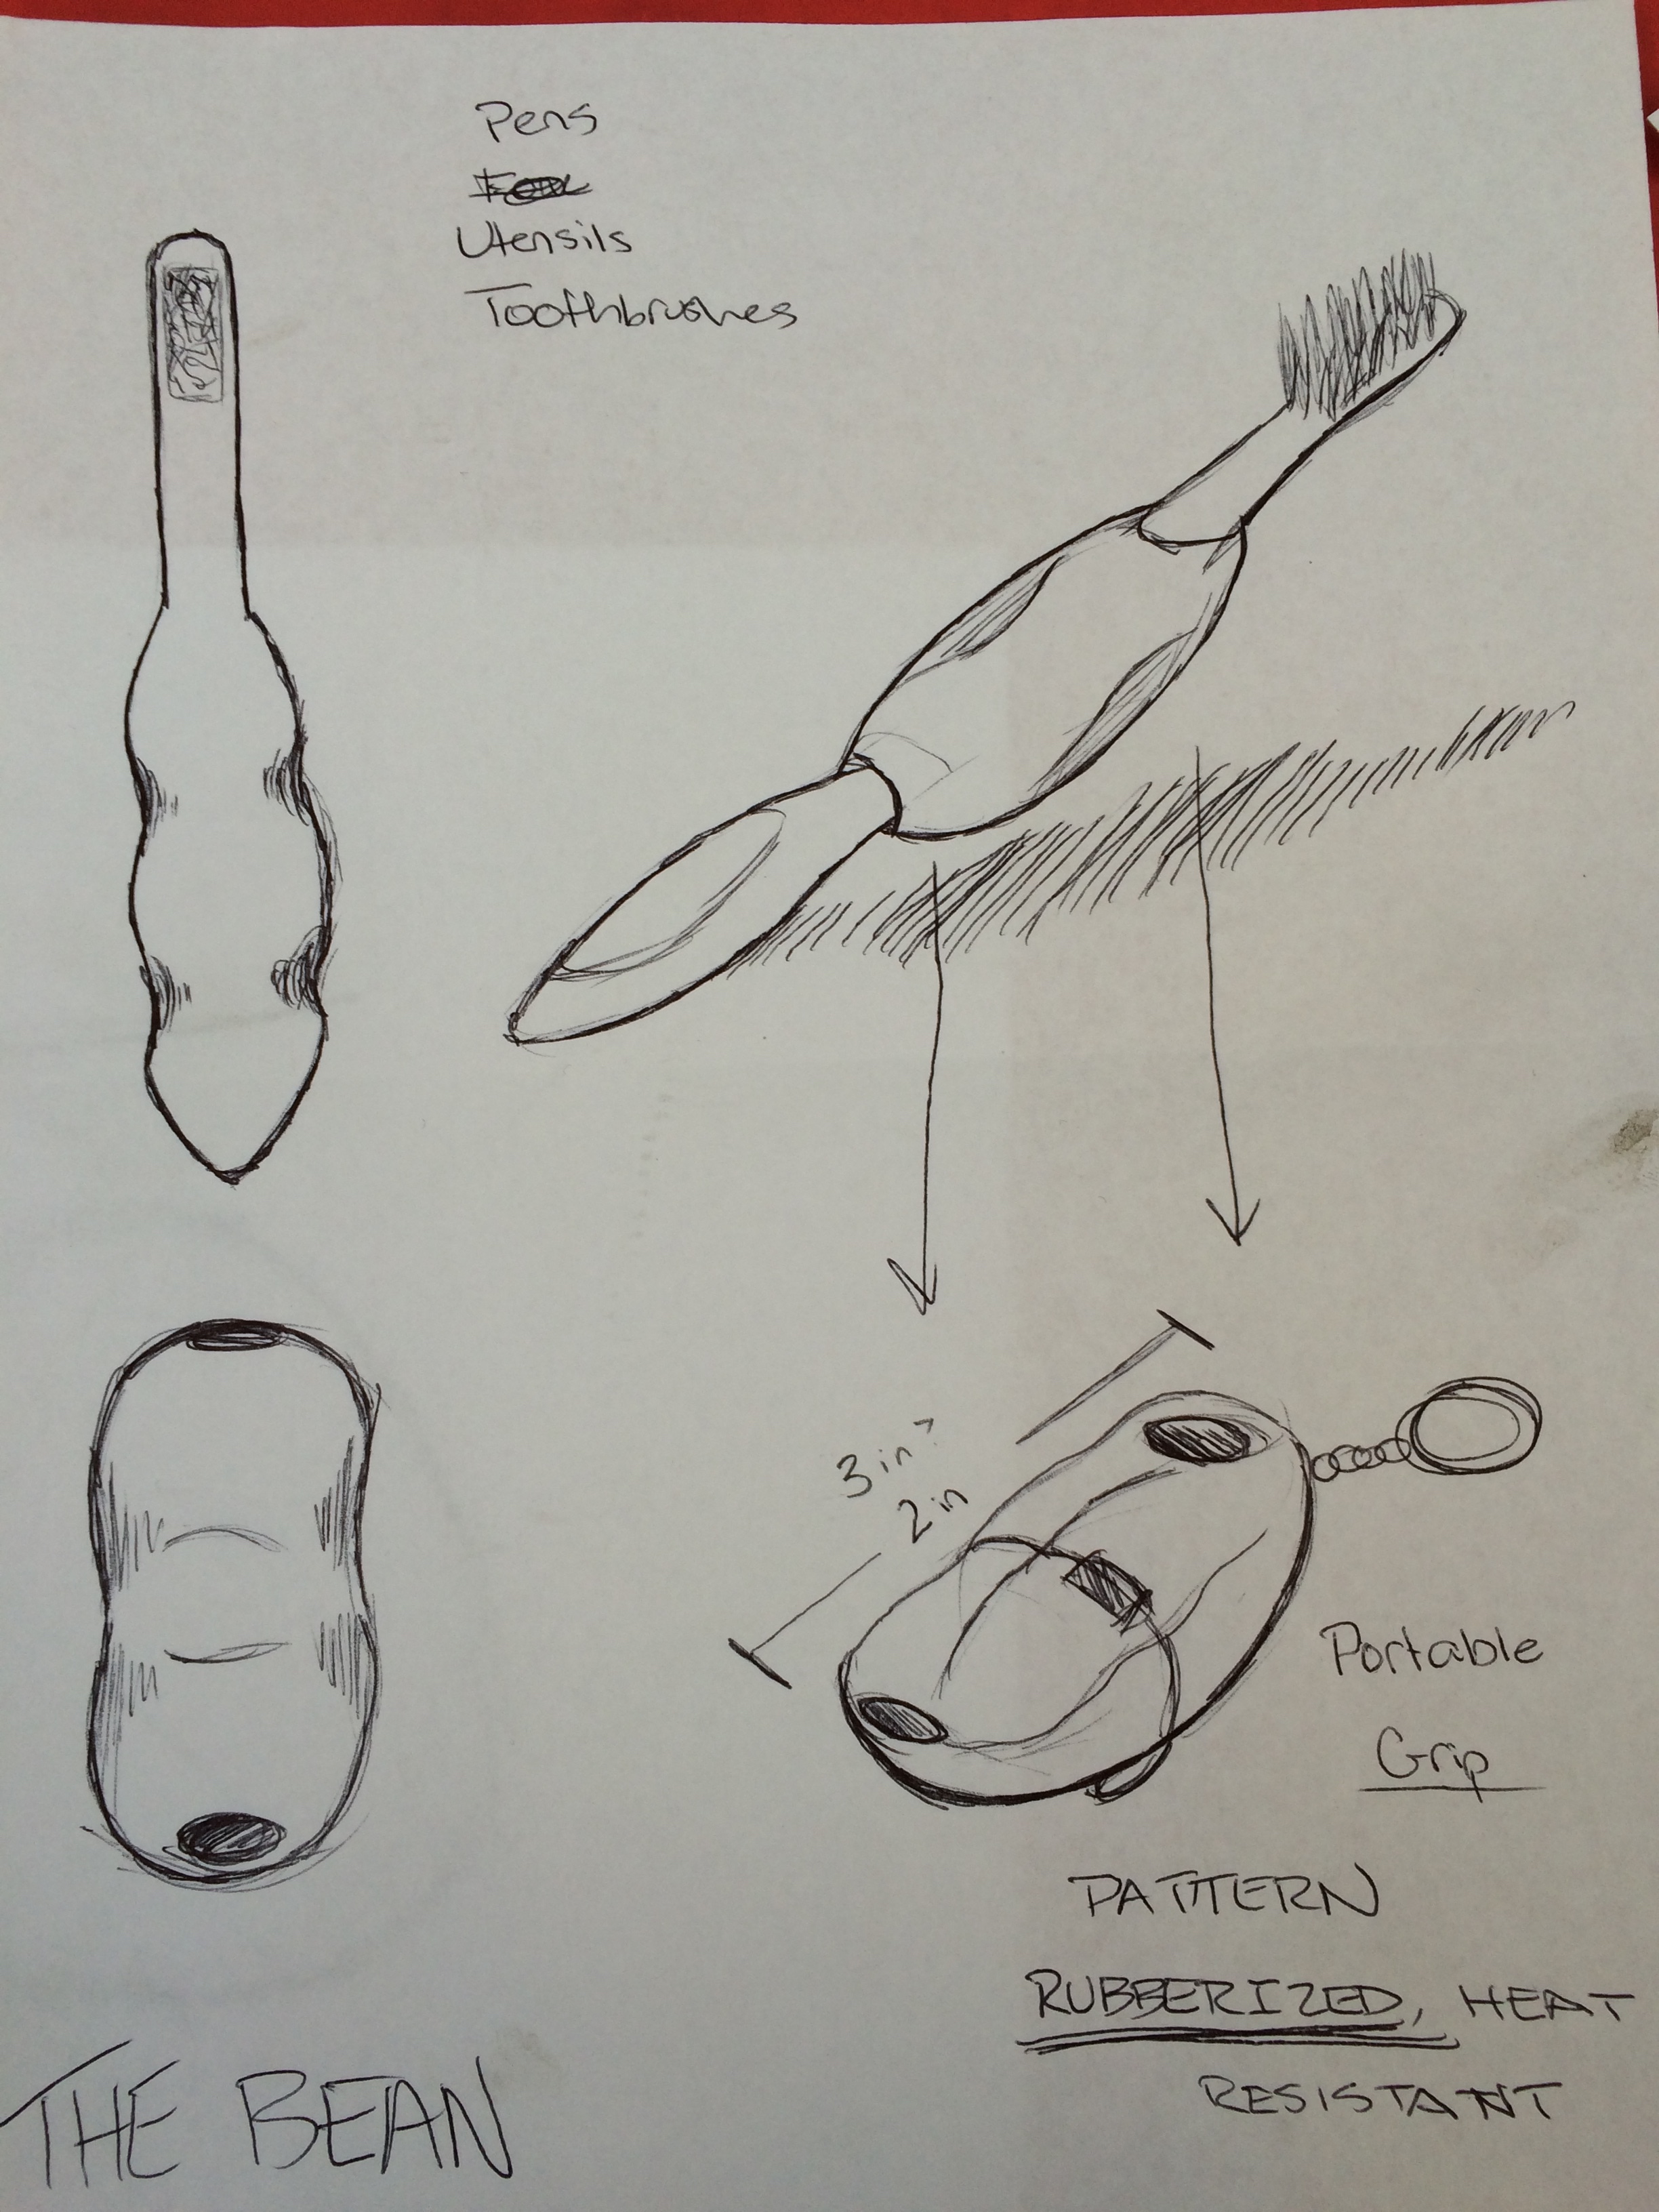
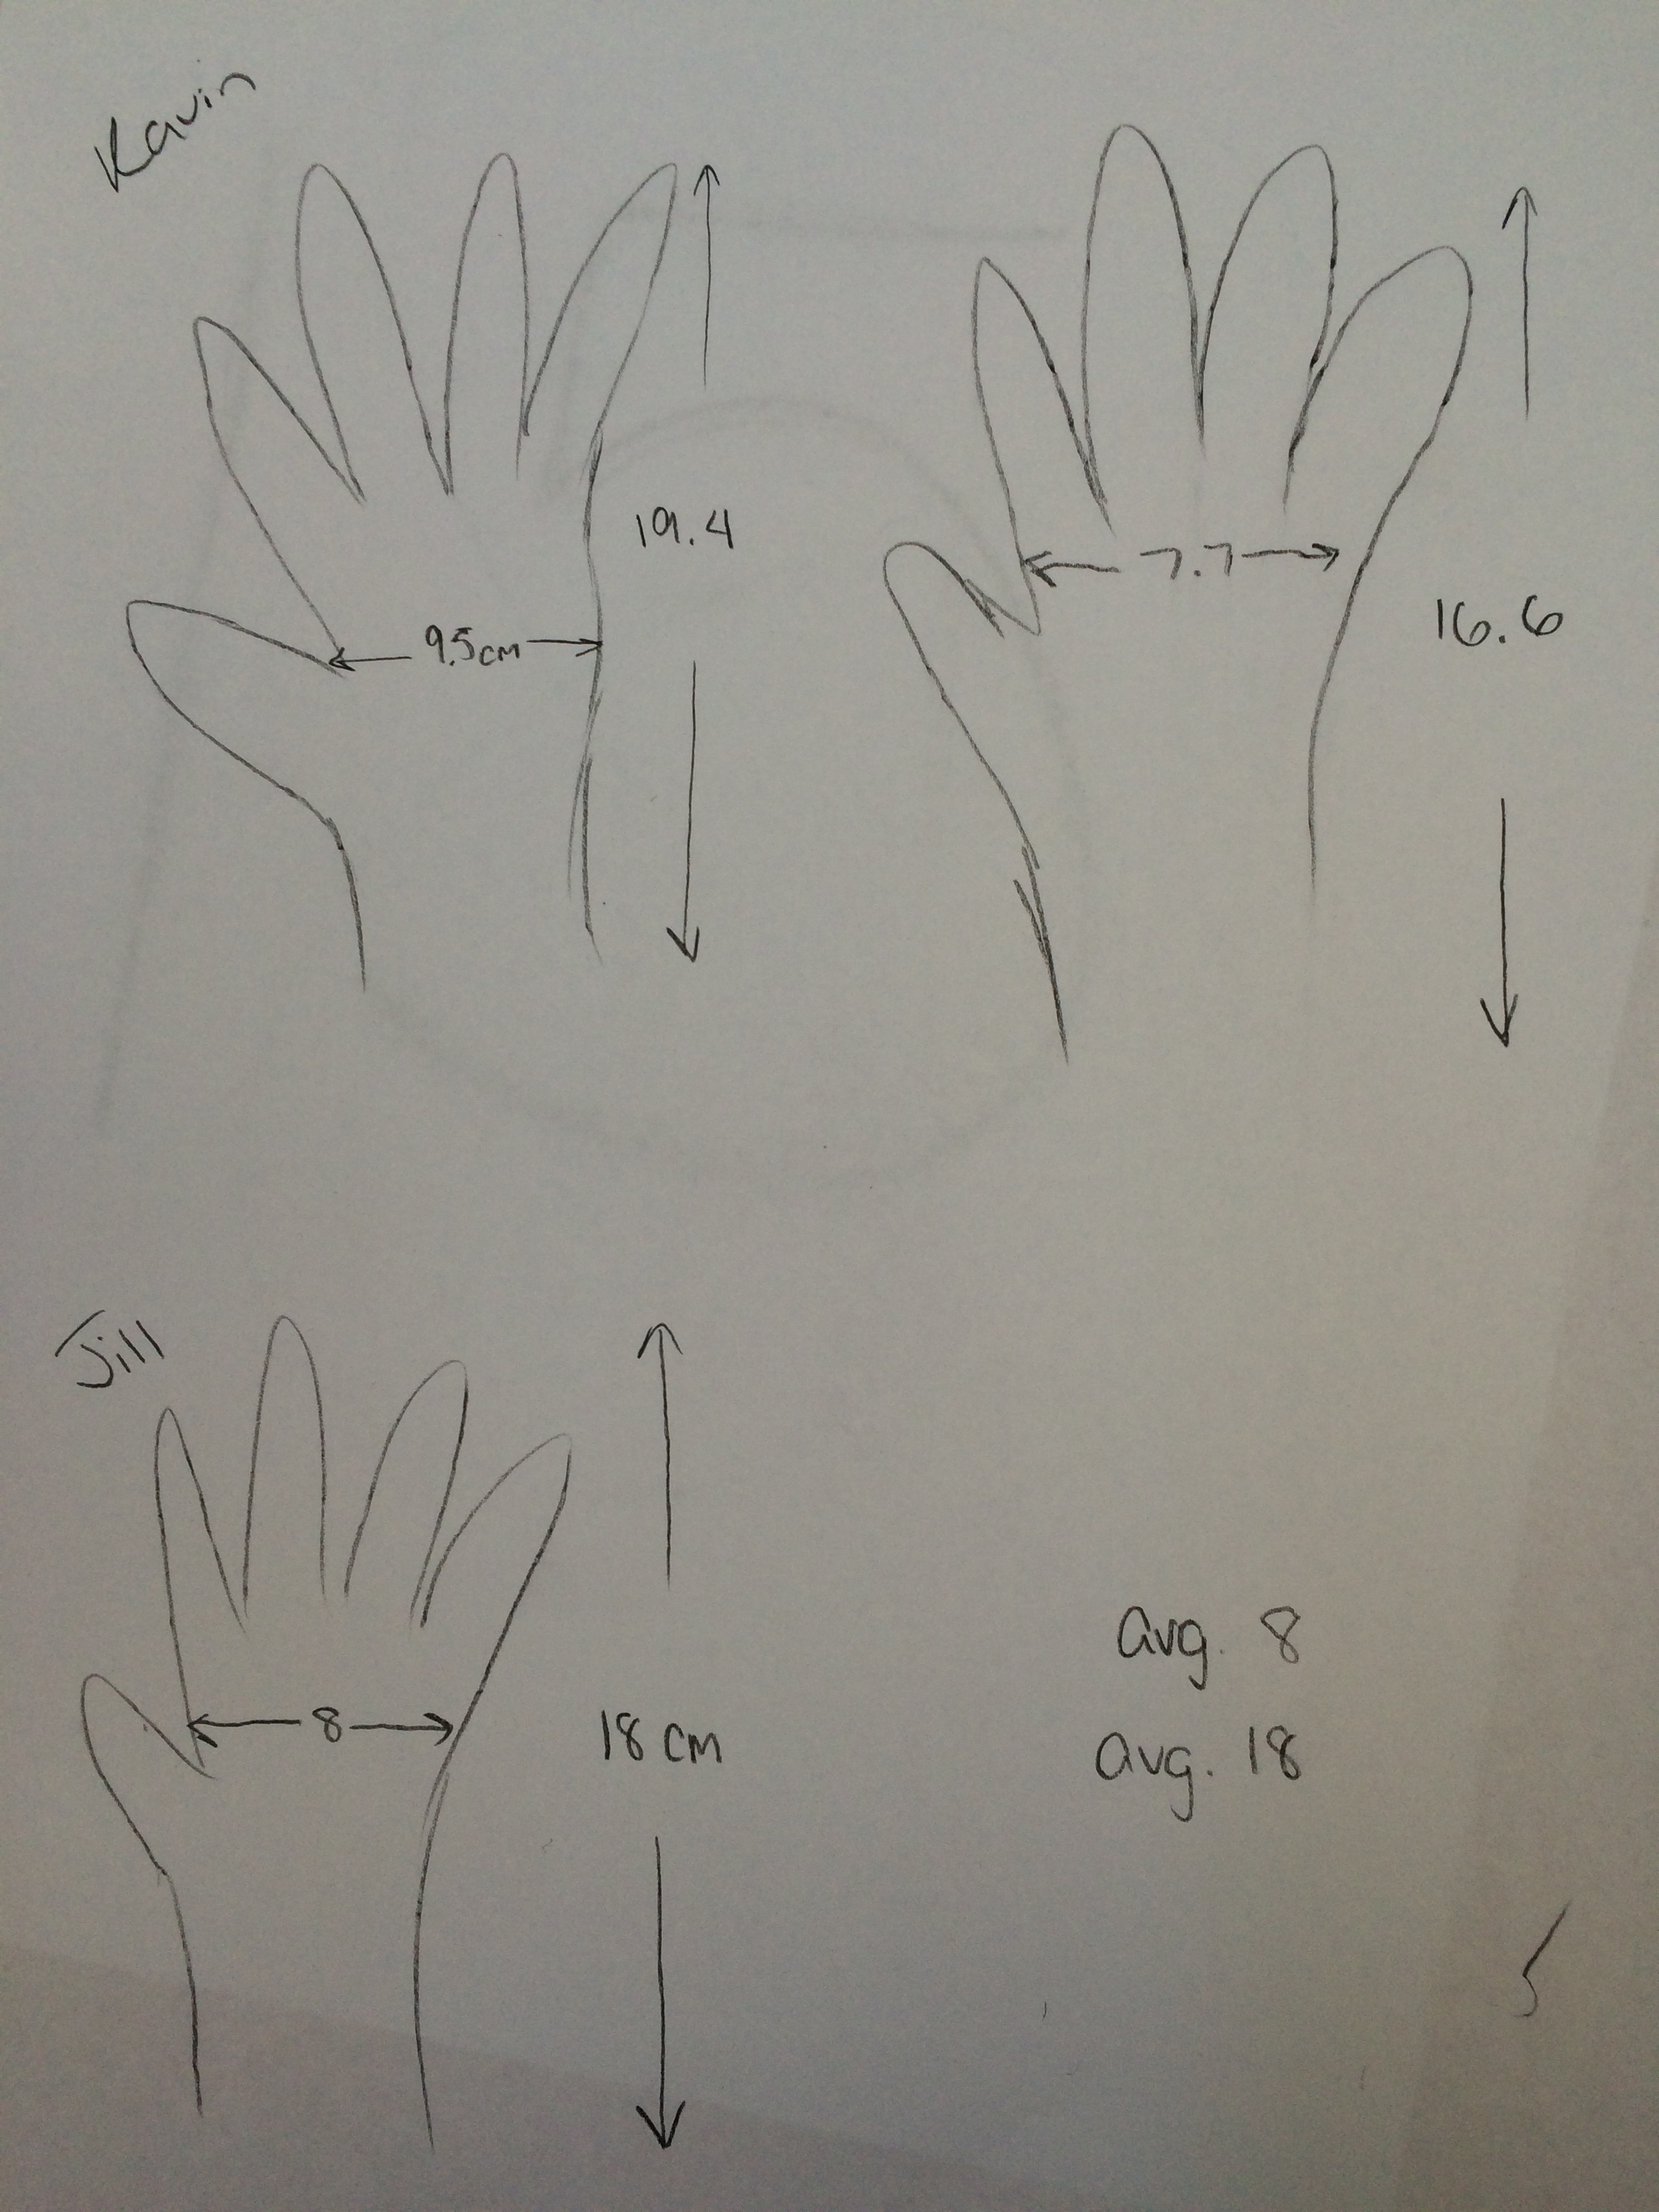
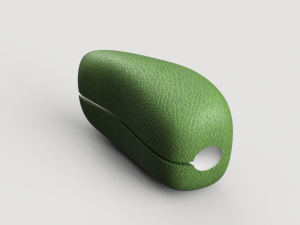
course was to ideate something new and learn our resources to create it. We teamed up with the FabLab to make a bean that would improve grip in the elderly, and those affected with Parkinsons or tremors.

Thus, the bean was born. Kavin and Lin and I worked together to bring in knowledge from all aspects of life to create a product that made a difference. Kavin even pulled influenceIMG_20150412_101551 
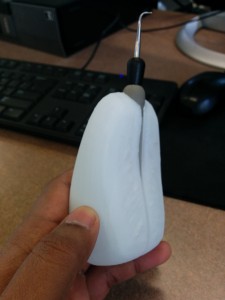
from body-building for the materials used in the bean. This experience in itself was a massive lesson on product creation and everything in between and that’s extremely applicable to what I intend to do with my career. GroupIMG_5933IMG_5935

The FabLab: 

We created all sorts of cool things here. I engraved journals, made stickers, (tried) digital embroidery, and learned how to code. Those basic tools can be now applied to all sorts of things through laser engraving, basic coding, and embroidery. All leading to my grand plans of making it big on Etsy.

IMG_4221Lights

BovineFab Lab


This course was different than anything I’ve experienced. I learned in a way that was unstructured, yet provided me with any opportunity to explore all sorts of avenues that I had never considered. Vishal was an incredible instructor who was able to bring us all together, teach us how to use our Kavinresources and what he didn’t know, he worked hard to find out for us and point us in the right direction. There were tons of laughs and frustrations, but all of us came together to create some pretty cool stuff.

I highly recommend opportunities similar to this for anyone who is presented with the chance to get involved. Maker Spaces are on the rise as is digital creation and it’s imperative to get your foot in the door because this is the future, and it’s important to know how to use it.

Semester of Making and Learning

This past semester has been a truly engaging and rewarding experience all due to the Digital Making course. I first enrolled in the class because I had an interest in 3D printing; little did I know that the class was so much more than that. Throughout the course we were able to work with 3D printing and scanning, Fusion 360, digital embroidery, and Arduinos. We also went on a few field trips to the Beckman Institute and the Fab Lab. Some of the students also took the opportunity to go to Deloitte in Chicago. It’s been such an exciting time being in this class and it’s opened my eyes to the maker world.

IMG_1117

3D printed model of myself

As mentioned, over the semester, we worked on a variety of projects including making a print of ourselves! The entire process was completely new to me. We used a portable scanner that took a rough scan of our heads and uploaded it where we could make any additions or changes to the model. I chose to personalize it with my name and soon we had our own 3D print! Diving deeper into the 3D printing and modeling realm, we started learning about Autodesk Fusion 360 which is a software that enables users to start from a 3D box and from there model anything imaginable. One of my classmates, Austin, designed an entire spaceship, very cool. Fusion 360 taught me that it takes time and lots of practice to get used to such advanced software, but if you put in the effort then it really does pay off.

Working with Fusion 360

headphones

Making headphones in Fusion 360


The trip to Beckman was interesting as well. While there we saw Travis work on scanning Arielle’s racing glove with the very high-tech and expensive scanner. I learned that there is a lot of editing and cleaning up that has to be done when scanning so it’s very tedious work. What was also interesting was that the scanner couldn’t pick up certain types of material or surfaces. In this case, talcum powder is best used to help the scanner pick up the object. I would have loved to spend more time watching Travis at work and possibly to some more proactive activities at Beckman.

IMG_0128

Travis with the Beckman scanner

The Fab Lab, on the other hand, was very much so hands-on. Here the staff led us through all different types of making activities such as embroidery, Arduinos, and laser cutting. Everyone there is super friendly and always willing to lend a helping hand if need be. For the digital embroidery, I started out by choosing a design on Google and with some editing it was ready to be uploaded to the machine. My design took a while to color in all of the leaves, but it turned out great. The Arduinos are very small in size, but they can be applied to many different things. We were able to install a light, a sensor, and a speaker. While in the Arduino lab, some of us worked on soldering wire to speakers which was a lot of fun!

IMG_1273

Digital embroidery

IMG_1257

Playing with Arduinos


This class has given me a strong foundation to further strengthen my skills in the making community. I’d like to learn more about Arduinos and their application because there are so many possibilities out there.  From taking this course, I’ve also looked at things differently, especially products. Recently, when I was at my parent’s house I noticed a specific product that was very clever life hack and could easily be 3D printed. We were very lucky to have such amazing opportunities and professionals that helped us through the semester to develop our skills as makers. As a graduating senior, Digital Making was one of the most fascinating, hands-on classes I’ve taken.

A semester of #DigitalMaking

Before we get started, watch this video I made for the course! I think it is cool. Maybe you might too.

I am a member of the maker movement. Starting this semester, my experience with making went from zero to sixty in just a matter of days. After months of working in the hands on environments of the MakerLab and FabLab, I feel comfortable calling myself a maker!

I have always been artistically and creatively inclined. Naturally, I went into studying Information Technology! The sarcasm that might have used to exist in that last sentence has really diminished since taking this course. I’ve gotten my feet wet with software and hardware that puts the power of creation in my hands. I’ll go into detail about the skills I have been exposed to and their implications.

CAD (Computer Aided Design) and 3D Printing.

Upon entering the MakerLab for the first day, I felt like I had a good idea of what 3D printing was. I guess I always knew that the printed object had to come from some digital location, but I had never really reflected on the process itself. Then comes TinkerCad!

IMG_0093

My mom always suggested I had a whole in my head

Messing around with TinkerCad (I already made a joke about “tinkering” with TinkerCad in an earlier post) opened so many doors for the me and the class right off the bat. It gave me a good concept of what CAD was and its importance to the modeling and printing processes. By significance, I learned the processes wouldn’t be possible without it. Soon After we were riding the Fusion 360 train. This time, rather than taking an existing file and manipulating it (AKA taking my face and putting a hole in it), we learned to create something out of nothing. This was awesome because it gave me a taste of what industrial designers do and how their work is now being impacted by the icnreasingly accesible world of digital making. After a session with the AutoDesk rep, I created a design of a lamp from pure imagination. The implications of this? Fast prototyping with 3D printing. Create anything with a digital model and in seconds you have the ability to print the object. I can think of a lot of employers (I am interested in Tech Consulting) who would be interested to hear that I have hands on experience with just that.

IMG_0481

A Chicago themed phone case I printed for my iPhone

3D Scanning

Other than briefly getting in touch with 3D scanning the first two weeks with the iPad scanning app, I really got the deep dive into 3D scanning during our time at the Beckman Institute.

2015-03-03 3D Scanning - 5784

Scanning Arielle’s Racing Glove!

No joke, last summer I had a startup idea that involved scanning objects with cameras and turning them into digital objects. WOW I was late to the party. Other than the supply chain effects that 3D printing will have on the business world, learning about object scanning was definitely the highlight of the course in terms of getting an idea of what businesses are using the technology for. The process is amazing and the majority of the work lies in rendering and tinkering with the object on software like GeoMagic.

The FabLab (Embroidery, lasers and arduinos)

FabLab functions as a workshop for the community to do computer-focused innovation, design and fabrication. The idea behind the FabLab is to get people excited about the DIY (do it yourself) movement and and fabrication. Their labs have 3D printers, scanners, engraving tools, a woodshop, small robotics and more. It was awesome to get a hands on sessions with the tools available in the FabLab.

IMG_0297The sessions going through digital emrboridery, laser cutting and arduinos were all incredibly interesting. On top of that, I walked away with four things that I created. Without getting into too much detail, I can lay out three takeways from the FabLab. First off, the world is our oyster. In three sessions at the FabLab I learned how to be a functional user of three unique technologies. The learning curve is there, but it is incredibly small. Secondly, the barriers to entry are low and getting lower. What I mean is that the cost to buy a lot of these technologies are through the floor. With the exception of a laser cutter 3D printers, arduinos and digitial embroidery sewing machines can all be purchased for under $200 dollars depending on the models. That is incredibly empowering for the maker movement because it means that it costs that much less to start making. Lastly, the implications of my last two points are HUGE for getting kids excited about STEAM (the A is for art, learned that in the FabLab)!

Champaign Fab Lab

The Champaign Fab Lab

Beyond the classroom (or the laboratory)

So I’m not in Digital Making Seminar anymore. As for the Maker Movement, there is a lot of momentum for the MakerLab and its impact on this university.

The first week of class I learned about how interested tech companies are in the skills that we would be learning in this course. This got me especially excited because at the time I was still exploring the options ahead of me in terms of my professional life. Although for the most part my time in BADM 395 felt more like play than it did like work, I now know that taking a class like this can be incredibly useful for students in any curriculum.

My semester project involved taking an interactive course online through Deloitte University that explored the industry applications of additive manufacturing. This online class as well as my hands on tinkering in DMS have led me to explore an interest in technology consulting. The world is changing with digital making technologies, why shouldn’t I be the one who help people learn how to change as well?

My good friend Gian is working in the MakerLab so I am more than positive he’ll drag me back to the lab at some point (not that I’ll need to be coerced)!

10986736_10152958425636084_4402187420705788378_o

Me, driving a fake car, looking dumb

My Semester of Digital Making

I have learned so much about digital making this semester! I’m going to break down some of the main things I learned, then talk about what this experience means to me as well as what I plan to use this knowledge for in the future.

What I Learned:

3D Printing and Scanning
2015-02-10 17.27.40

One of the first things I learned this semester was 3D printing and scanning, which makes sense since our class was held in the Maker Lab. We were introduced to the many sources to find 3D printable files, the software to edit files, and then how to print the files.

The first thing I edited and printed myself…was myself! We learned how to use a scanner that was very easy to use, then got to edit it however we liked. I went with a simple stand to create a bust of myself.

I later printed many objects including detailed jewelry, a candle holder, and a brain.

Fusion 360
Screen Shot 2015-02-17 at 4.52.55 PM

The next thing I learned about in class was how to create 3D objects in a software called Fusion 360. It is a way to make 3D designs into almost anything imaginable. It is quite complicated to learn, but once you understand some of the basic functions the possibilities are endless.

I followed the in-class tutorial to create a lamp and also tried to make some other objects outside of class including headphones. I’m not sure I will be using Fusion 360 beyond this semester, but I know it is available to me if I have a use for it.

InkScape (for laser engraving and vinyl cutting)

2015-03-31 17.45.49The first week in the Fab Lab I was introduced to InkScape and learned how to edit images in order to create amazing things. I first used a laser cutter to engrave a journal. I also used an electronic cutter to cut out a vinyl sticker.

I had a lot of fun making both of these items. I was able to use InkScape in other projects as well this semester including the digital embroidery patch below.

Arduino
2015-04-07 15.16.09

The second week in the Fab Lab I got to learn about Arduinos. I used the Arduino Uno and we were given basic items to get started on our learning. I followed online tutorials to run programs like the basic blink and fade, then added in an LED.

I also got to learn about different types of sensors that can be used with Arduinos. I was able to use this in the CU Make-a-thon in my group project for the semester to create a pillbox for the elderly that senses when you take a pill out of the container.

Digital Embroidery

2015-04-21 17.16.24

The last week in the Fab Lab I learned about digital embroidery. I had created a design in InkScape in preparation for class because I wanted to make a gift for my roommate’s birthday, so I got to focus on learning how the process works rather than designing.

I chose different patterns for each part of the design then threaded the sewing machine and watched the magic happen. I was amazed by how accurate the stitches were.

This project, as well as all of the others mentioned above, can be found with more details on my previous blog posts: http://publish.illinois.edu/digitalmaking/author/arkowal2illinois-edu/

Take Aways:

This class taught me so much about the world of digital making. I am very grateful for the experience and I wish I could take this class again next semester.

I started in the class having no idea what I was getting myself into. I didn’t know anything about 3D printing or other digital making technologies. Also, I didn’t know about the other digital making spaces that are around campus. I was amazed from all of the information I learned in the first few class sessions. The scope of the technology that exists is so far beyond what I initially imagined.

Now that I have completed the course I can say that I am much more aware of what is available to me and have a better insight into the digital making world. And I have loved sharing my learning with my friends and family.

I plan to return to the Maker Lab and the Fab Lab next semester to teach my sister (an incoming Freshman) all about what I have learned this semester. Hopefully we can learn even more together. I look forward to exploring deeper into the technologies I learned about and beyond. I can’t wait to see all the projects that can come out of it!

I encourage everyone to try out digital making in any or all of its forms because the technology is useful to anyone no matter the age, gender, ethnicity, or interests. The digital making world welcomes all makers, no experience necessary!

Any questions about my projects or experiences in this class can be directed to my email arkowal2@illinois.edu or message me on twitter @ARoseK10.

Digital Making: A Semester of Creativity

This semester provided numerous experiences in expanding my horizons of how I can create products. My education thus far, while extremely valuable, has prepared me for continuing the operations large institutions. While this is a valuable skill set, it does not focus on creativity or creation of products.

Learning to Make

I entered this class with a rudimentary understanding of what 3D printing was and how it could be used to make custom iPhone cases. However, I had little knowledge of the broader maker movement or its implications beyond 3D printing. This course has taught me a broader appreciation of all things related to this phenomenon.

Demo

The beginning of this course explored the materials that we had in the MakerLab. Using TinkerCad, handheld scanners, and eventually Fusion 360, we were able to design products and bring them into the physical space. The process of creating something from scratch provided a pleasant refreshment from the other tasks of my education.

Later in the course, we broadened our learning to other technologies in the Maker Movement. With help from the Beckmen Institute and the CU FabLab, our class was exposed to 3D scanning, laser engraving, digital embroidery, and arduinos. These technologies only increased our classes capabilities and knowledge to create incredible works of art and engineering.

Changing Thinking

Learning these skills only gave me a taste of what the Maker Movement provides. Knowing some of the skills taught by this phenomena will better equip me to understand these people  who work in fields where the democratization of manufacturing would be applicable. As I talked about previously, my education is focused existing industry and preparing me to work in that world. However, this class exposed me to an entirely new industry and its thinking. If I chose to work in this field, I would be more poised to succeed due to my prior knowledge.

This class has also changed the way I think about preexisting products in my day to day life. Now, when I look at a cup or a phone case, I don’t think about where I need to buy one if I replace it. Instead, I think if it would be better to make one myself, or if there was something I could improve upon. I could go on thingiverse, download a file for a replacement product, edit it if I desire, and print one off. Instead of accepting what is in front of me, I can now question what exists and seek to improve it.

Beyond the Classroom

This class has come to an end, however, the Maker Movement is still going strong. For my professional path, I am not yet sure if I will pursue a career in this field. However, in my chosen field of consulting, it is likely that I will encounter some businesses in the additive manufacturing field. With this class, I will better be able understand these individuals and work towards solving their problems.

I also don’t believe that I will stop honing my skills after this course has ended. While I have gained some skills with CAD, I wish to further work with Fusion 360 to create more sophisticated designs. I also hope to keep using the FabLab to continue to make artwork for my own enjoyment.

All in all, this course has vastly improved both my interest and ability in Digital Making. The concepts taught in this course have shown me a new world of business and my own personal projects.